On Windows 11, Microsoft has more to offer than simply being a gateway to access your favorite websites and services. Despite its robust capabilities, many users may not fully exploit its potential, missing out on tools that could improve their browsing experience.
For example, the Edge browser has a built-in VPN feature that you can use for free to hide your IP address to increase privacy and security. You can also install your favorite web pages as apps on Windows 11 and turn on the Performance mode to save battery and system resources.
Microsoft Edge also includes a variety of tools that you’re likely not using, such as Split screen, Vertical tabs, Collections, Immersive Reader, Screenshot, Drop, Workspaces, and more.
In this how-to guide, I’ll walk you through some of the less-known features you should use on Microsoft Edge.
Microsoft Edge feature you have to try on Windows 11
These are the 11 features that can improve your experience using the Microsoft Edge browser on Windows 11.
1. VPN
Microsoft Edge has a built-in virtual private network (VPN) feature that can add an extra layer of security while browsing the internet. Connecting to a VPN allows you to redirect traffic through a remote network, hiding your public IP address, increasing protection, and minimizing online tracking.
The service is a collaboration between Microsoft and Cloudflare. It’s free, but only provides 5GB of data each month.
Although this option isn’t suited to streaming Netflix from another country, it is enough for web browsing.
To get started with the VPN feature on Microsoft Edge, use these steps:
- Open Microsoft Edge.
- Click the “Settings and more” button from the top right corner and choose the Settings option.
- Click on Privacy, search, and services from the left navigation side.
- Turn on the “Microsoft Edge Secure Network” toggle switch to enable the VPN feature under the “Security” section.
- Click the “Get VPN for free” button (if applicable).
- Choose the “Optimized” option since it’s the best setting.
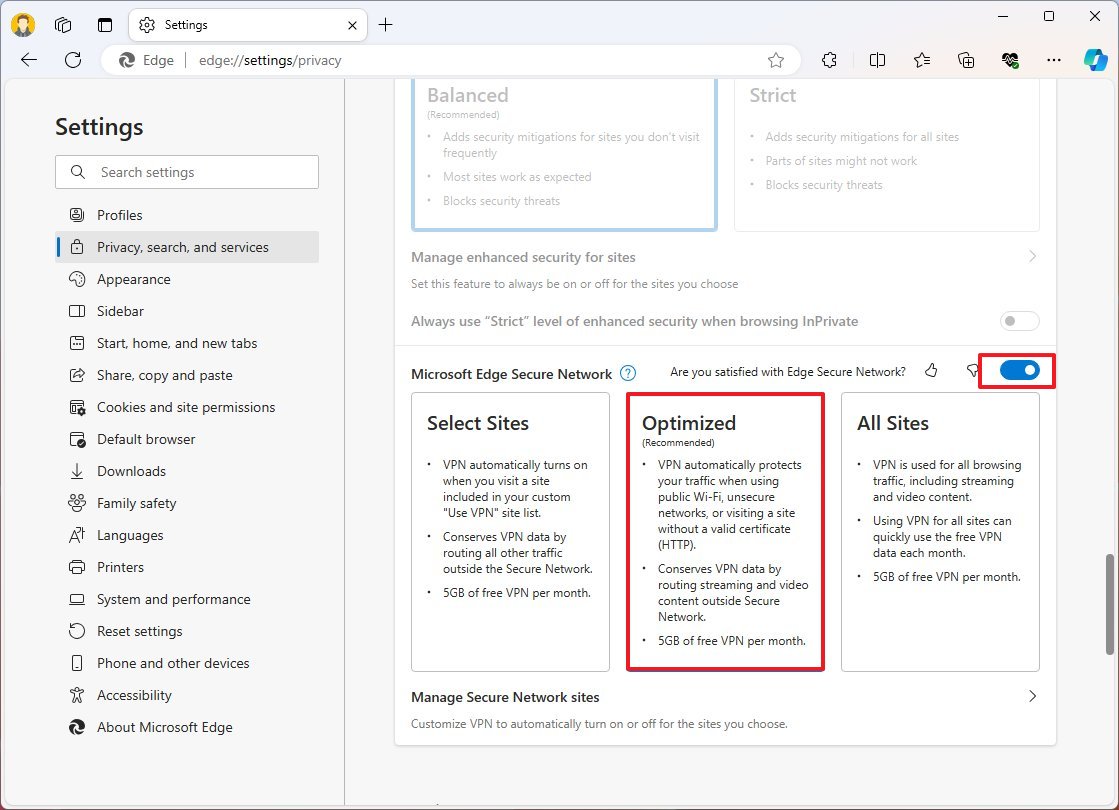
Once you complete the steps, the built-in VPN will run automatically on public wireless networks, unsecured networks, and when opening a site that doesn’t include a valid web certificate.
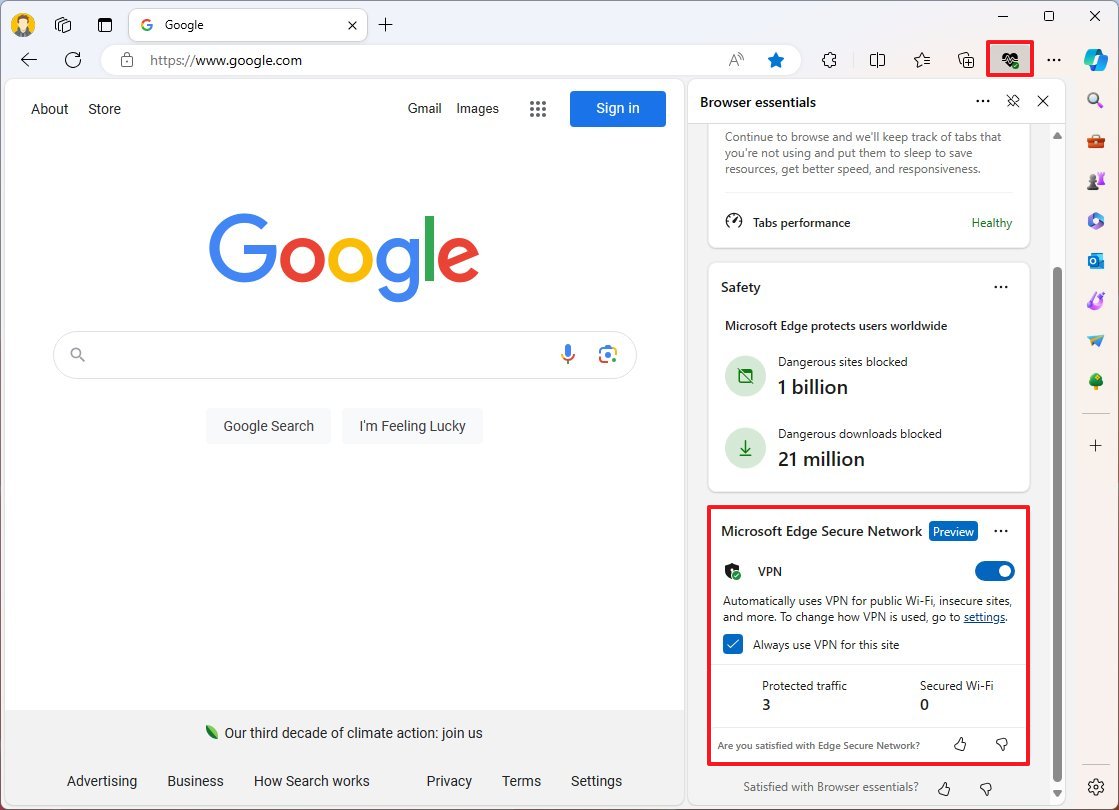
If you want to ensure a website always loads through the VPN, then open the site, open the “Browser Essentials” menu from the top-right, and check the “Always use VPN for this site” option.
2. Progressive Web Apps
On Windows 11 (and 10), you can use Microsoft Edge to install web apps on your computer. Progressive Web App (PWA) is the technology that allows you to install a website (usually a site that offers some sort of functionality or entertainment) similar to a native application. These apps are easy to install, can work offline, and can provide notifications.
The only caveat is that not all apps include the same functionalities since it’s up to the developer to implement them.
To install a website as a Progressive Web App, use these steps:
- Open Microsoft Edge.
- Open the website to install.
- Click the Settings and more (three-dotted) button in the top-right corner.
- Select the Apps submenu.
- Click the Install option.
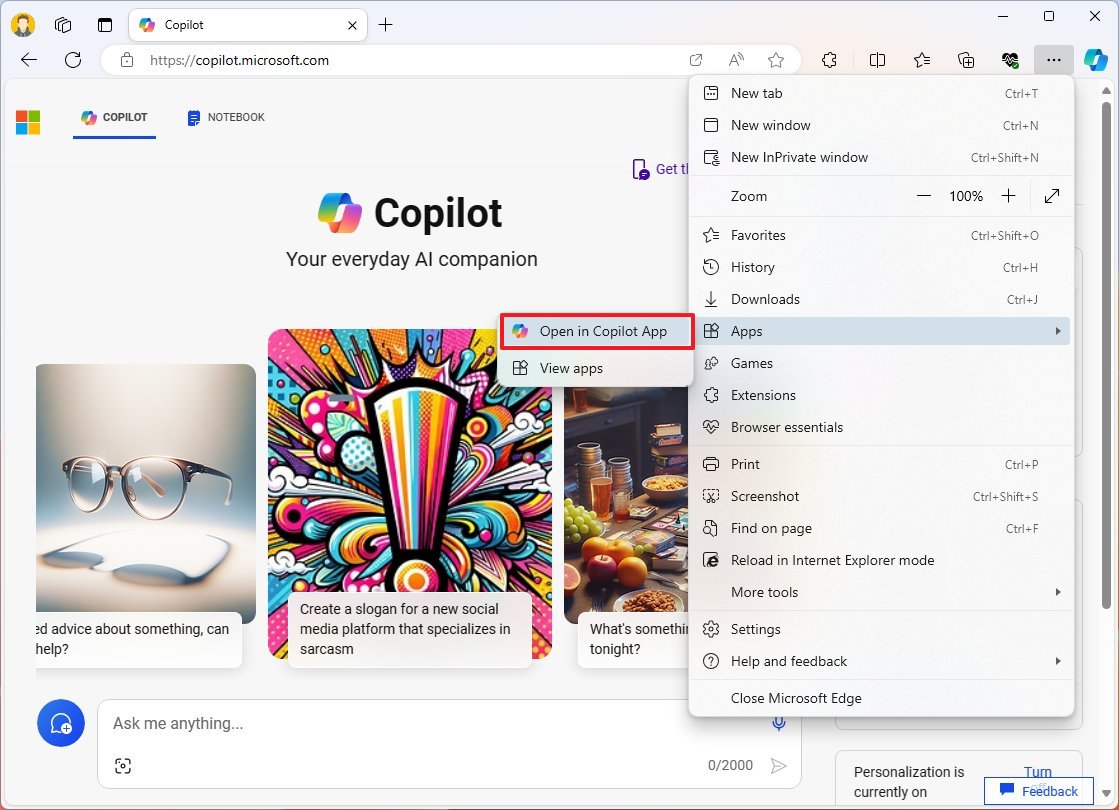
After you complete the steps, the app will be available through the Start menu. You can pin it to the Taskbar and even uninstall it from the Settings app.
3. Split screen
Splits screen is a feature that allows you to open up a second page in the same tab, similar to snapping two windows together on the desktop. This feature is particularly useful for comparing web pages, search results from different search engines, research, and more.
To use the split screen feature on Edge, use these steps:
- Open Microsoft Edge.
- Open the first website.
- Click the Split screen button in the top-right.
- Quick note: If the button isn’t available, open the “edge://settings/appearance” page and turn on the “Split screen button” toggle switch under the “Select which buttons to show on the toolbar” section.
- Use the search as the address bar to open the second website in split-screen mode.
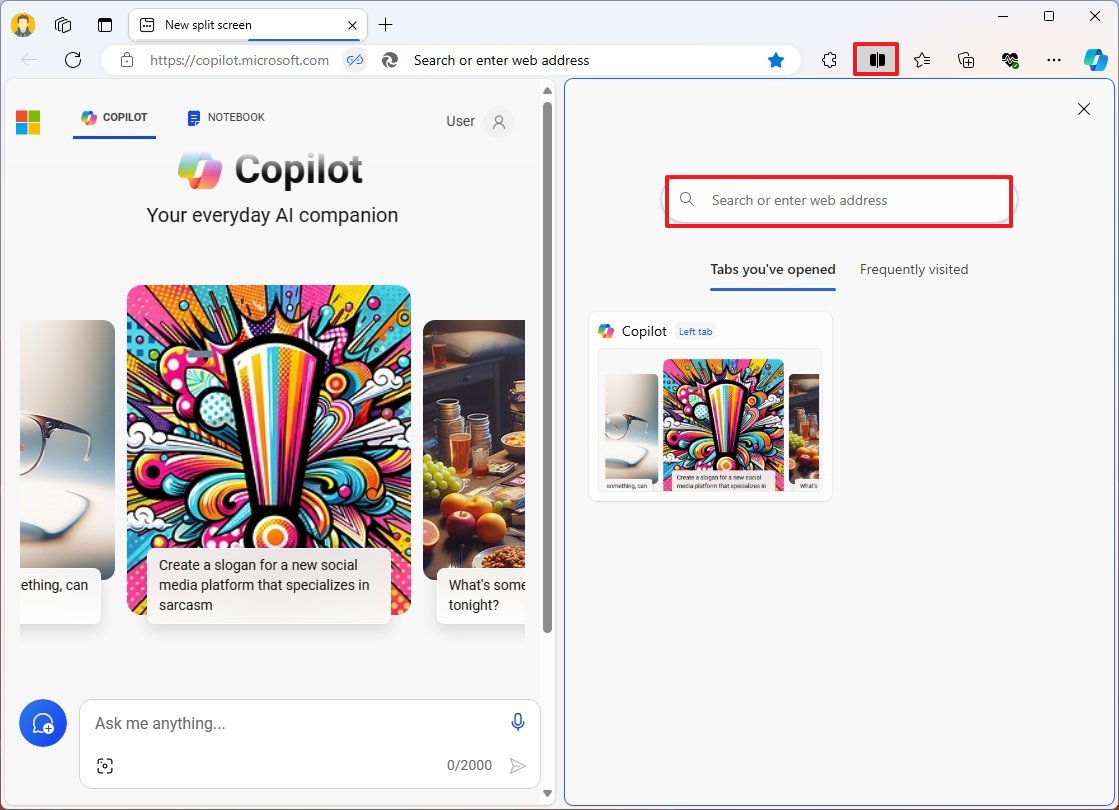
- Quick note: The page will also show you a list of open tabs, and you have the option to view frequently visited sites.
When you have two pages side-by-side, click the “More options” button in the top-right and choose one of the available options, including the option to open the page on a new tab, exit the view, swap places, and you can even change the split view from vertical to horizontal.
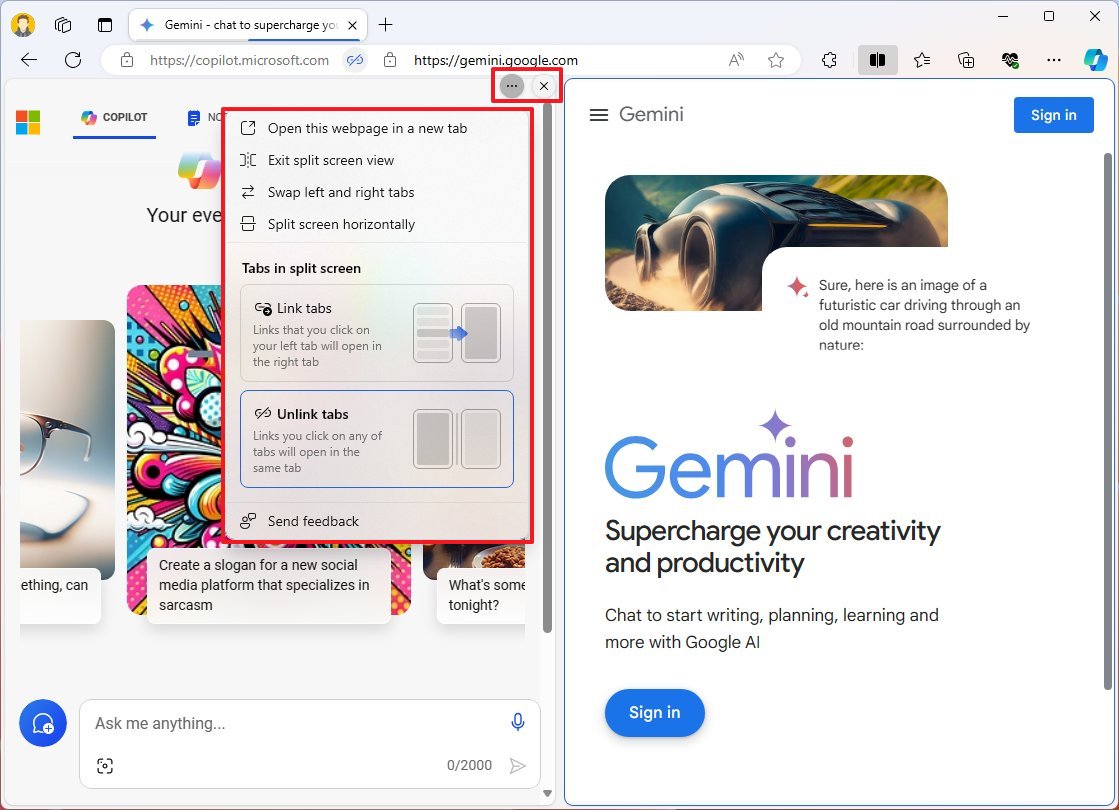
If you’re doing research, for example, you can also choose the “Links tabs” option to open the links you click on the left on the right side.
You can always click the “Split screen” button again to exit from the view.
4. Vertical tabs
The new vertical navigation allows users to stack tabs on the left side rather than piling them up at the top of the browser. This view makes it a little bit easier to move between your open tabs and access some control features, such as close and mute.
To use vertical tabs on Microsoft Edge, use these steps:
- Open Microsoft Edge.
- Open one or more tabs.
- Click the “Tab actions menu” button in the top-left.
- Quick note: If the button isn’t available, open the “edge://settings/appearance” page and turn on the “Show tab actions menu” toggle switch under the “Customize toolbar” section.
- Choose the “Turn on vertical tabs” option.
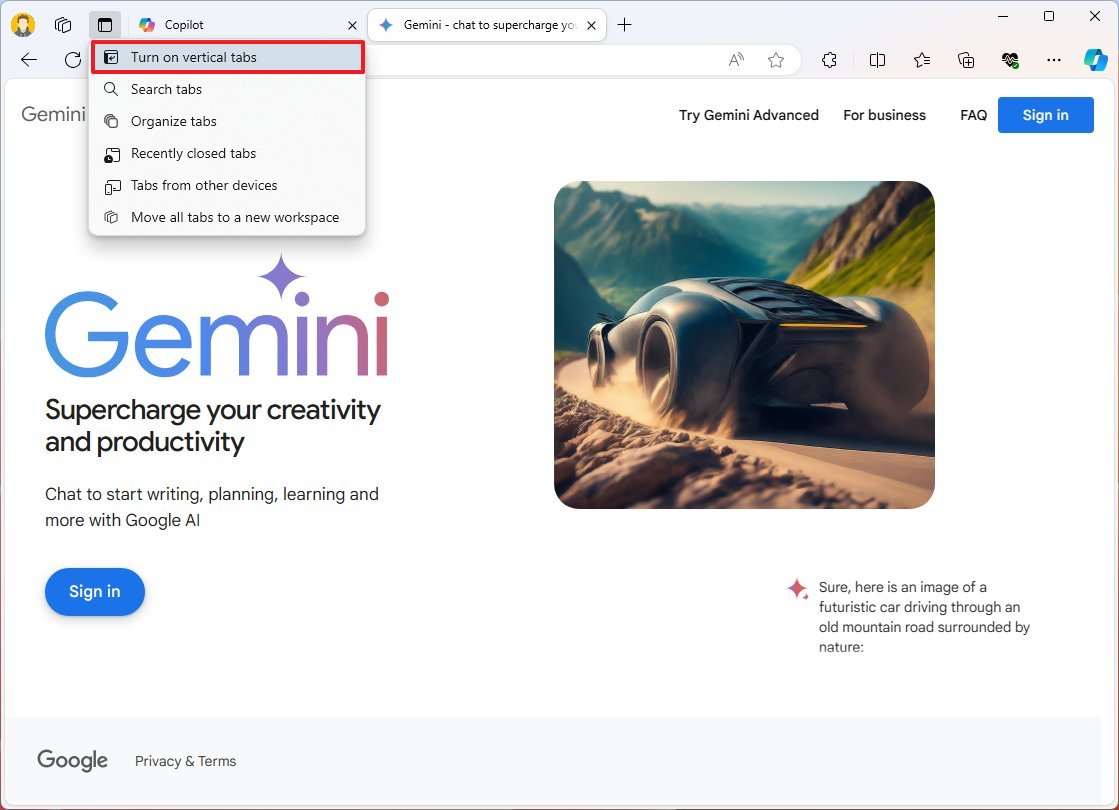
Once you complete the steps, tabs will now align to the left side.
You can always disable this view by clicking the “Tab actions menu” button and selecting the “Turning off vertical tabs” option.
5. Workspaces
On Microsoft Edge, Workspaces is a feature designed to improve collaboration. Using this feature, you can share an Edge window with a bunch of open tabs with other users, similar to sharing the screen through a video chat (but it’s not).
This feature comes in handy not only for collaborating with others but also for presentations.
To use Workspaces on Edge, use these steps:
- Open Microsoft Edge.
- Click the Workspaces button from the top-left and choose the Create New button.
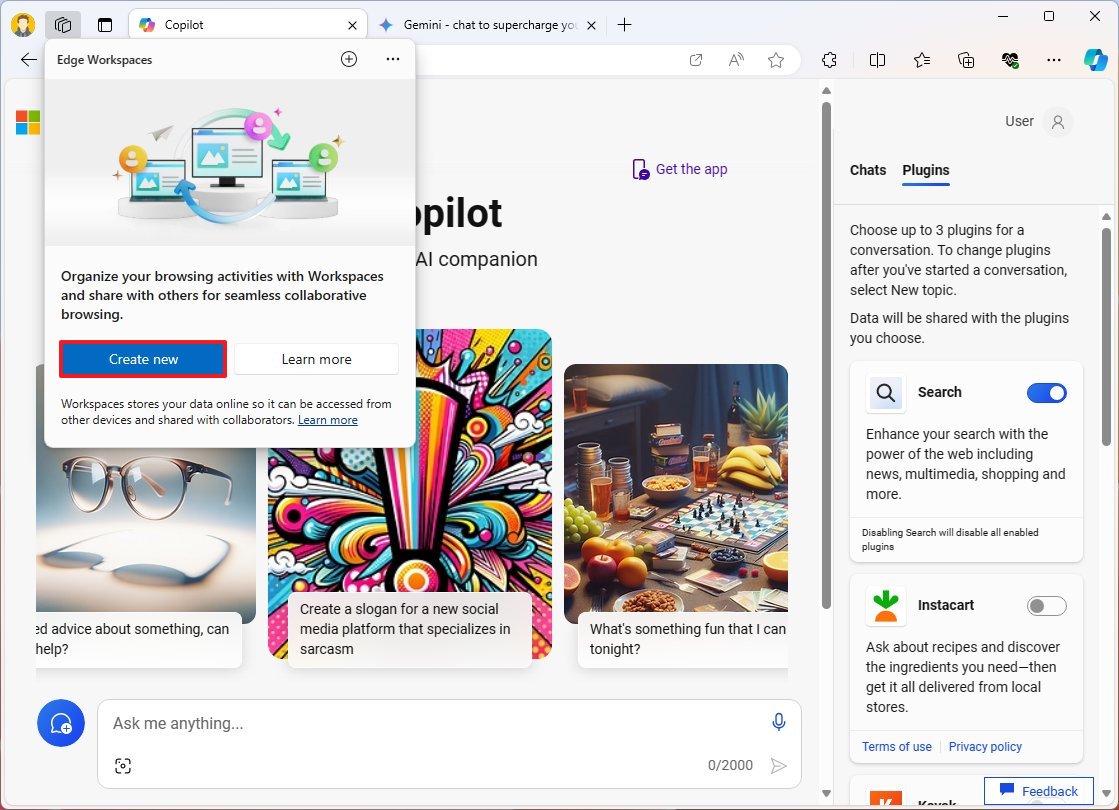
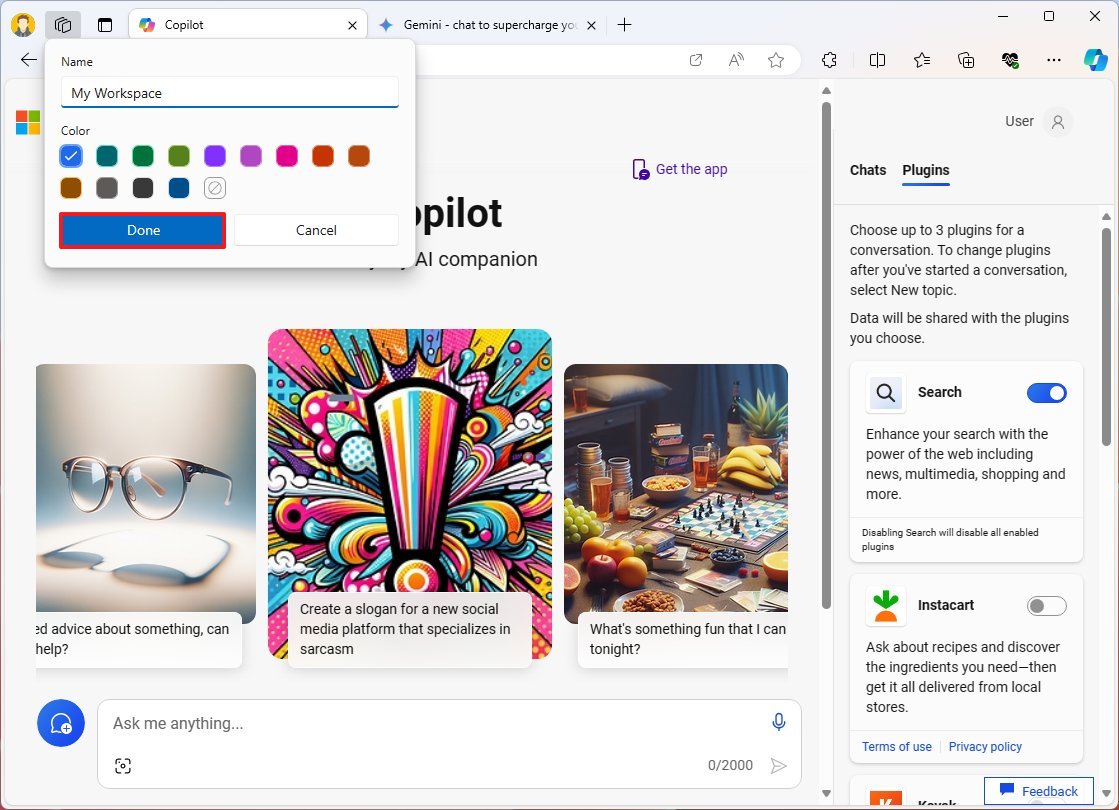
- Confirm a name for the space.
- (Optional) Choose a color.
- Click the Done button.
- Click the Invite button from the top-right.
- Click the Copy link button.
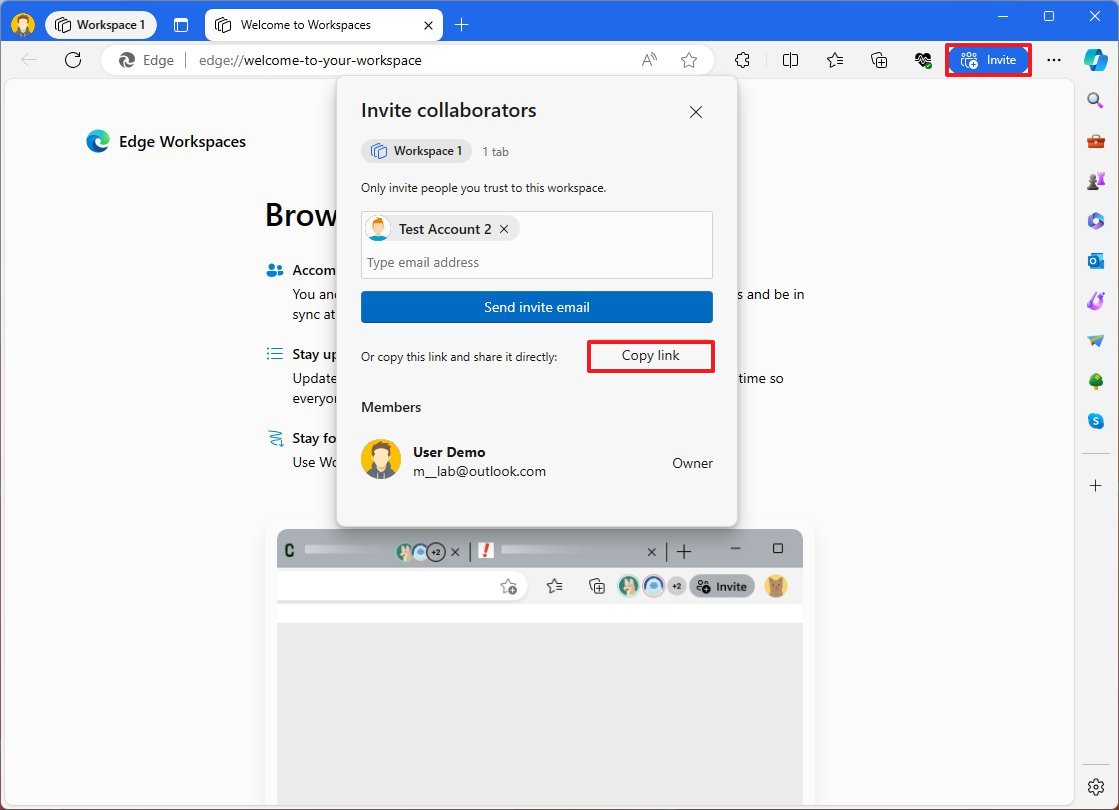
- Send the link to the participants via email, text, or another medium.
After completing the steps, participants must sign in with their Microsoft account to see and interact with the workspace tabs.
It’s important to note that this feature doesn’t share your browsing data, and users will only be able to view the content they can access.
Once you close the workspace, click the Workspaces button, open the “More options” (three dots) menu, and choose the “Delete workspace” or “Leave workspace” option.
6. Performance mode
Microsoft Edge also includes a performance mode, which, when enabled, optimizes the browser to save battery while reducing the usage of processor and memory.
To enable the performance mode on Microsoft Edge, use these steps:
- Open Microsoft Edge.
- Click the “Settings and more” button from the top right corner and choose the Settings option.
- Click on “System and performance” from the left navigation side.
- Turn on the Efficiency mode toggle switch.
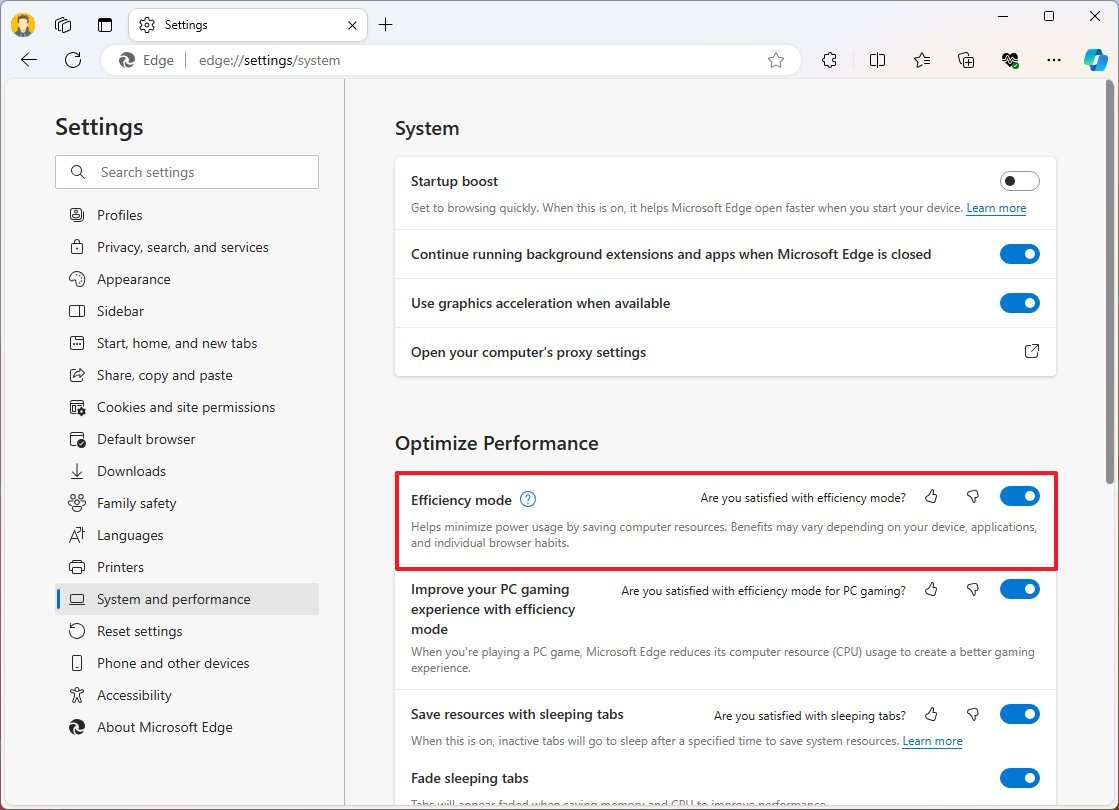
Alternatively, you can open the “Browser essentials” side panel and turn on the “Save power with efficiency mode” toggle switch.
You could ask why Microsoft didn’t enable this by default, right? The reason is that this feature is best suited for laptops running on battery, since it can impact video performance and interaction with the browser.
7. Collections
In Microsoft Edge, you also get Collections, a feature that makes it easy to collect images, text, videos, and virtually anything else from the web.
To create a collection on Microsoft Edge, use these steps:
- Open Microsoft Edge.
- Click the Collections button from the top-right (or use the “Ctrl + Shift + Y” keyboard shortcut).
- Quick note: If the button isn’t available, open the “edge://settings/appearance” page and turn on the “Collections button” toggle switch under the “Select which buttons to show on the toolbar” section.
- Click the “Create new collection” button.
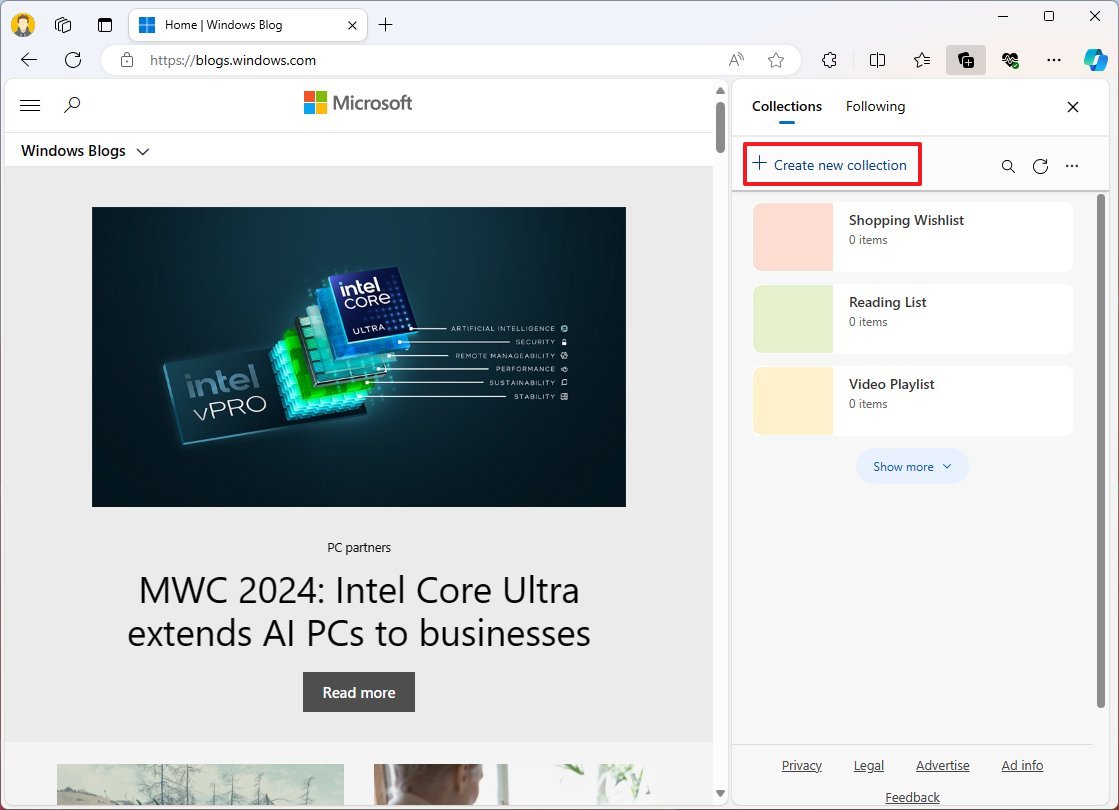
- Confirm a name for the list.
- Click the Save button.
- Click on the newly created collection to open it.
- Open a web page you want to add to the collection.
- Click the “Add current page” option from the right pane.
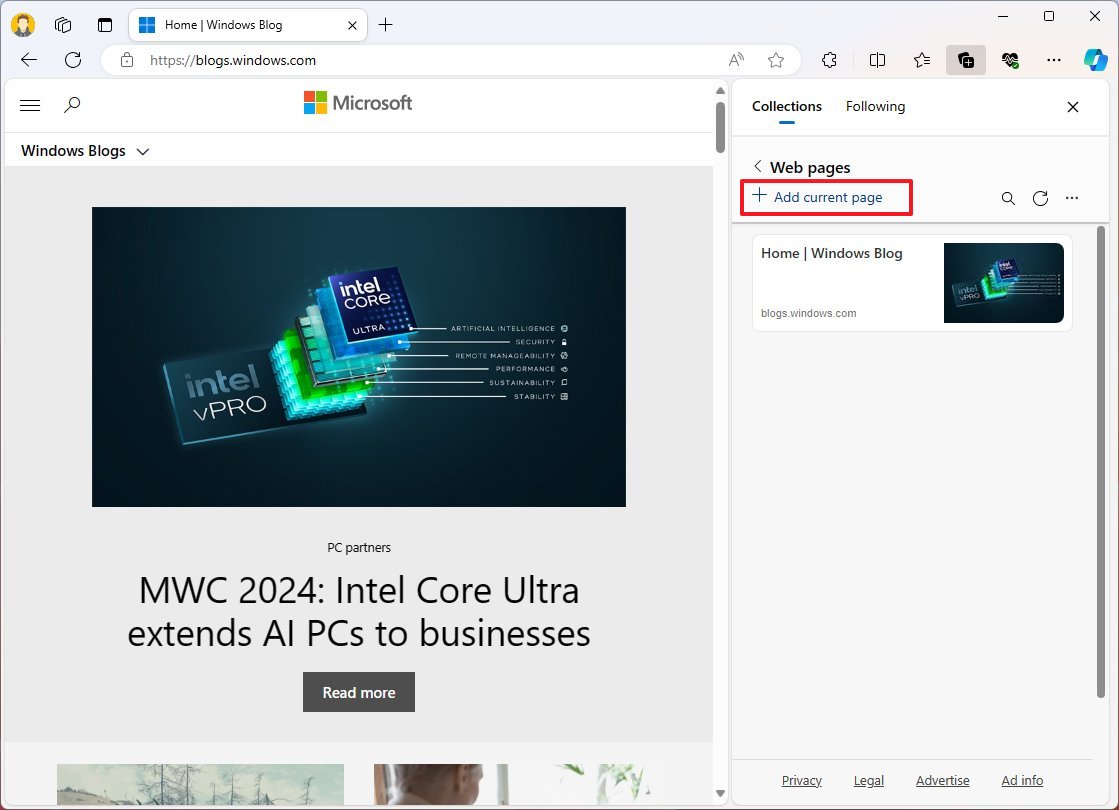
- Repeat steps 6 and 7 to add more items to the collection.
After you complete the steps, you can continue adding items to the collection.
You can also access the context menu for each of the items to delete, add notes, and organize the list.
8. Screenshot
If you use the default browser on Windows 11, you don’t need additional software to take screenshots from web pages since Microsoft Edge includes a capture tool that allows you to take screenshots from an area or an entire page.
To take screenshots on Microsoft Edge, use these steps:
- Open Microsoft Edge.
- Open a web page.
- Right-click on the page and choose the Screenshot option.
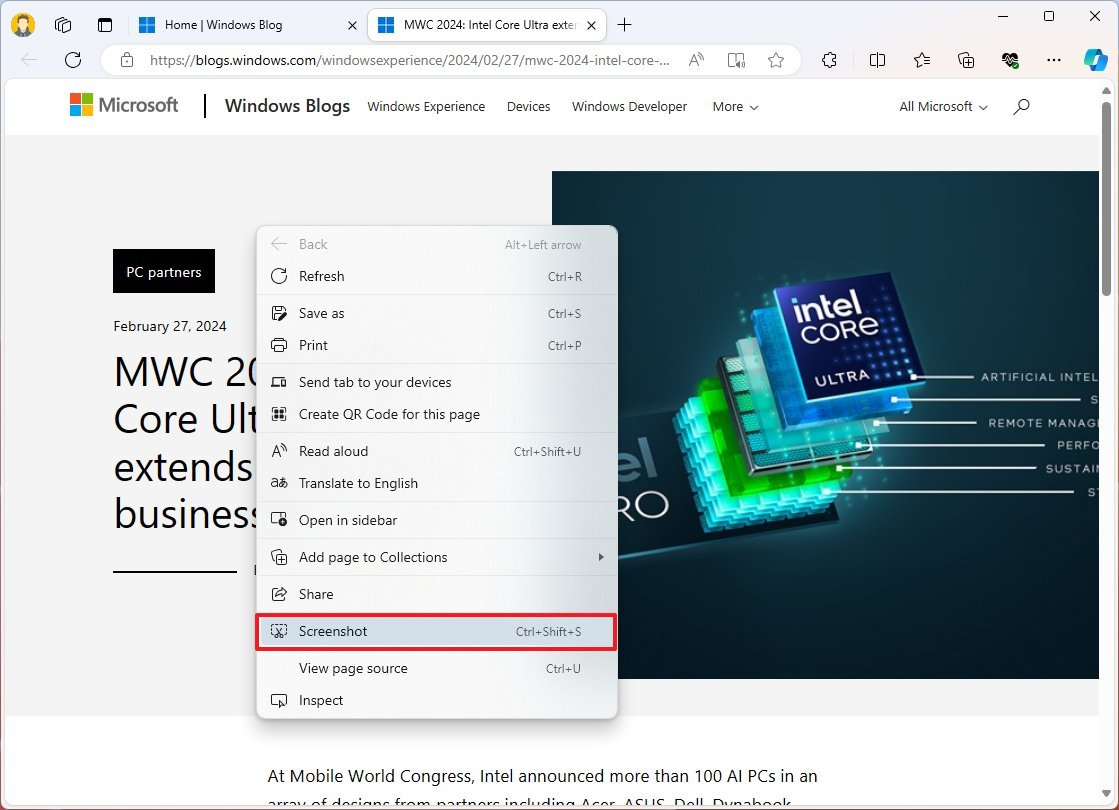
- Quick tip: You can also use the “Ctrl + Shift + S” keyboard shortcut.
- Click the “Capture” area or “Capture full page” button.
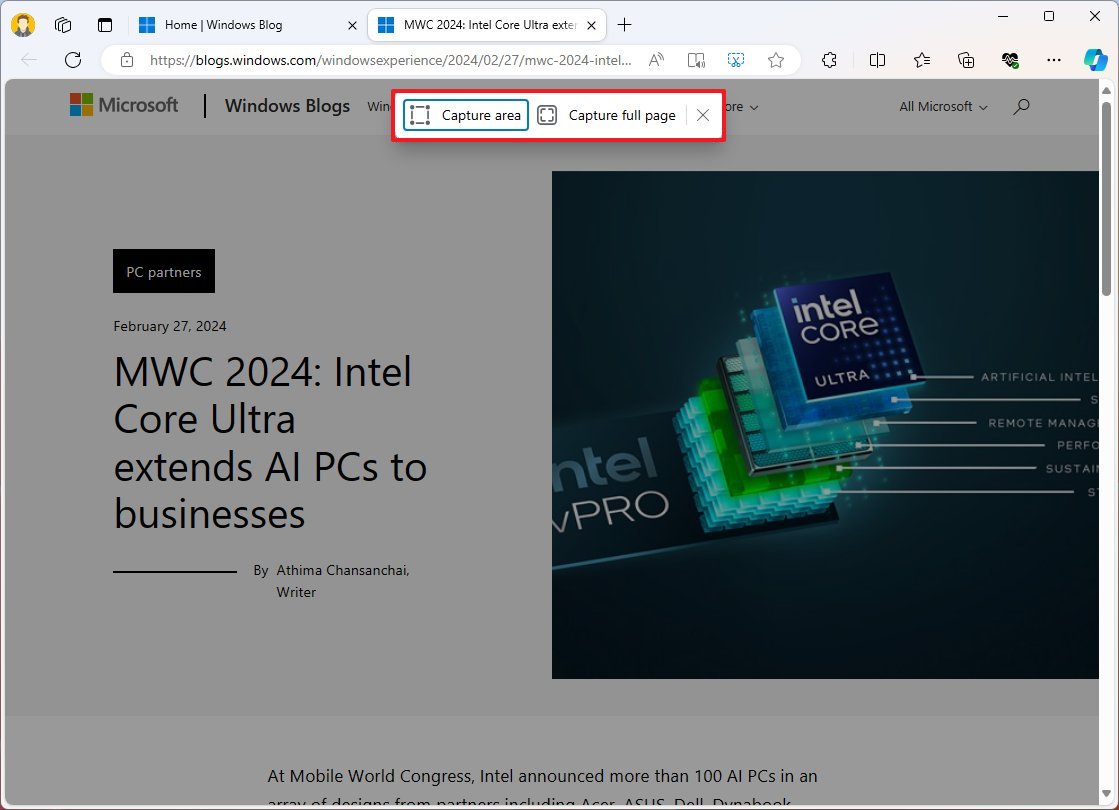
- Quick note: If you use the “Capture area” option, you will have the option to copy the image to the clipboard, markup the capture, or perform a visual search.
- (Optional) Use the available tools to annotate the image.
- Click the Save button.
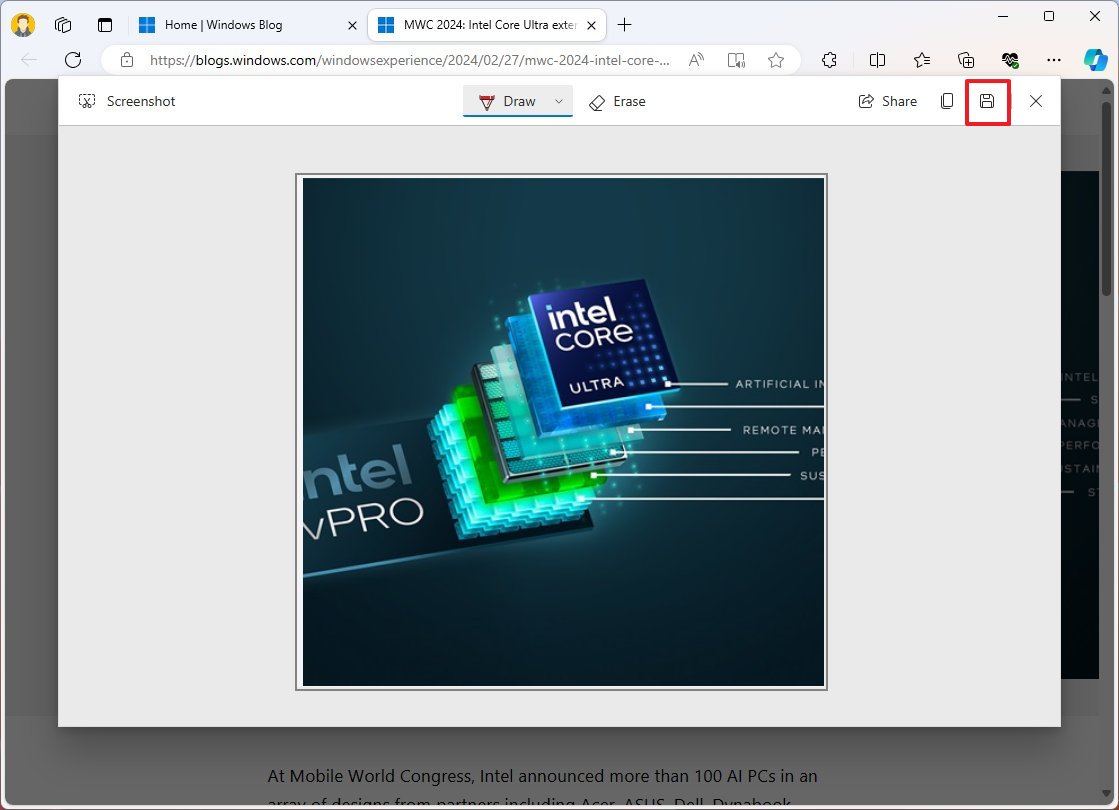
After you complete the steps, the web capture will be saved on your device.
9. Immersive Reader
When reading online articles, sometimes it’s impossible to concentrate because of all the clutter, ads, and links around the content. The Immersive Reader is a feature on Microsoft Edge that quickly cleans up the page, letting you focus on the content.
To use Immersive Reader on Edge, use these steps:
- Open Microsoft Edge.
- Open a web page.
- Click the Immersive Reader button in the address bar.

- (Optional) Open the “Text preferences” menu to change the text size, spacing, font, column style, and color scheme.
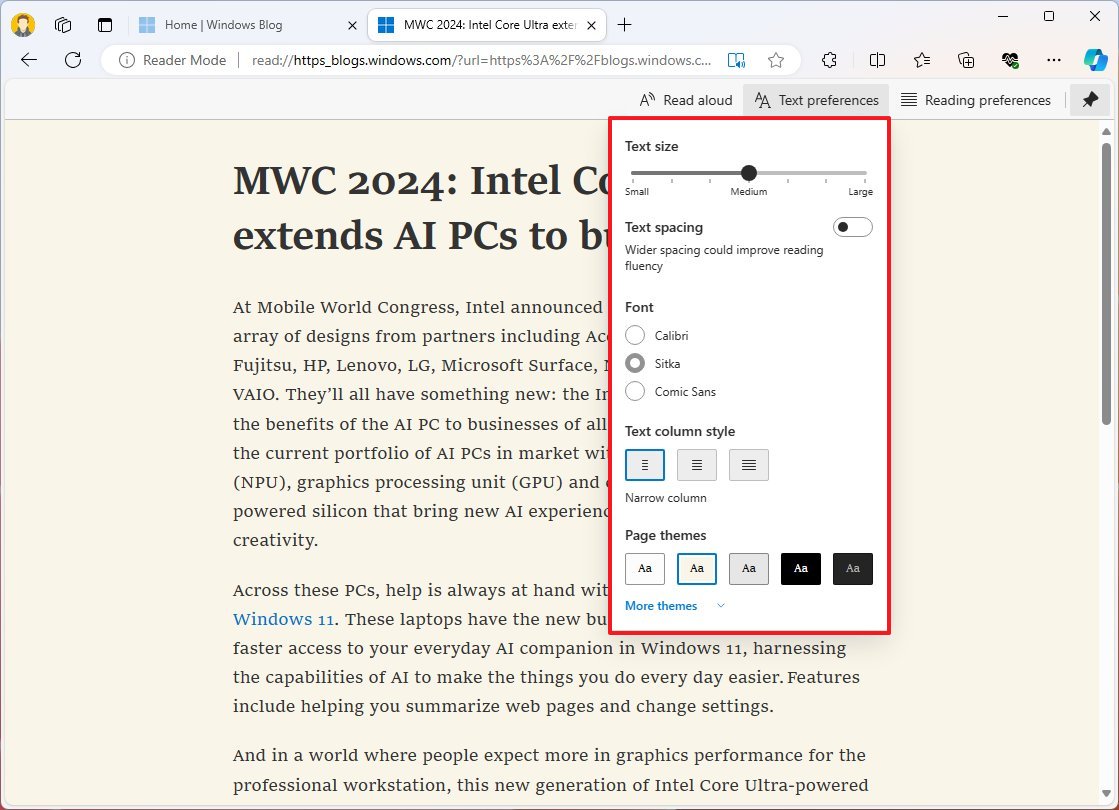
- Click the Immersive Reader button to exit the view.
The feature also has the option to read the content aloud, and the line focus option helps you to focus on reading by highlighting the lines you’re reading.
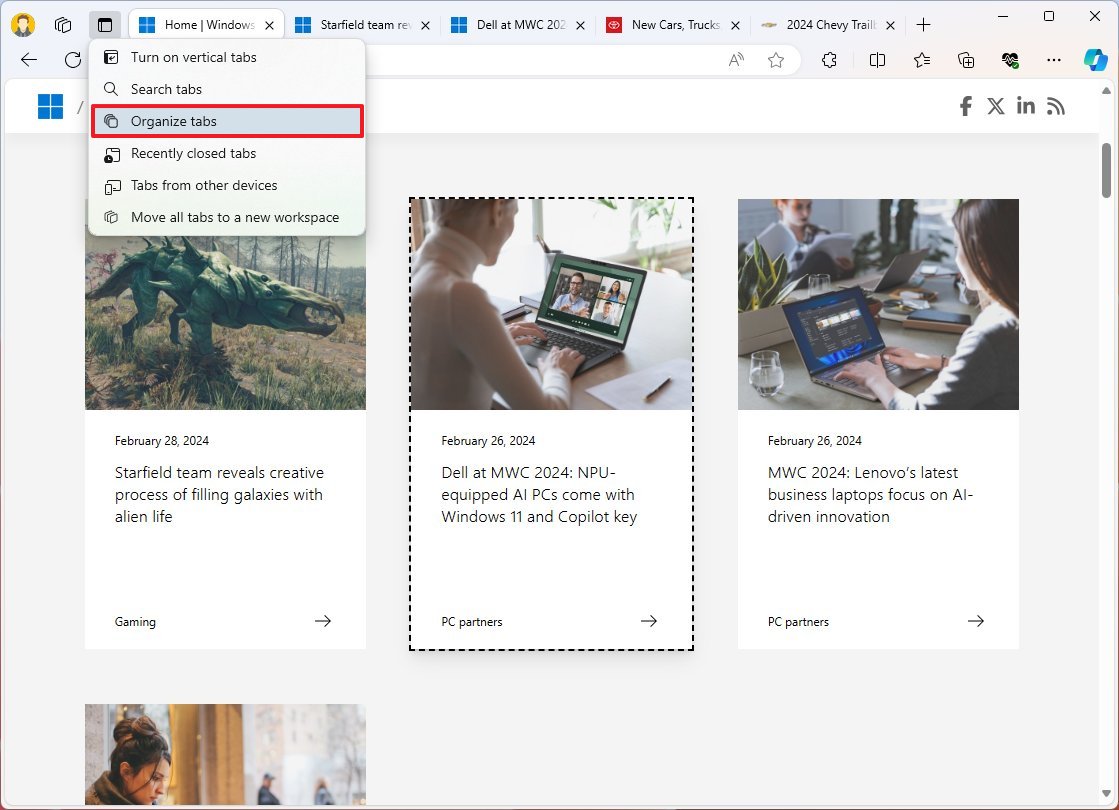
10. Organize tabs
Although you can always group tabs manually, the browser also includes an option that uses AI to organize your tabs automatically. Of course, you can always change the arrangement, color, and name.
To organize your tabs on a Microsoft Edge window, use these steps:
- Open Microsoft Edge.
- Open a bunch of websites on the same window.
- Click the “Tabs options menu” button from the top-left and choose the Organize tabs option.
- (Optional) Click the tab group button and change the name and color.
- (Optional) Rearrange the items by dragging and dropping the pages into the correct group.
- Click the Group tabs button.
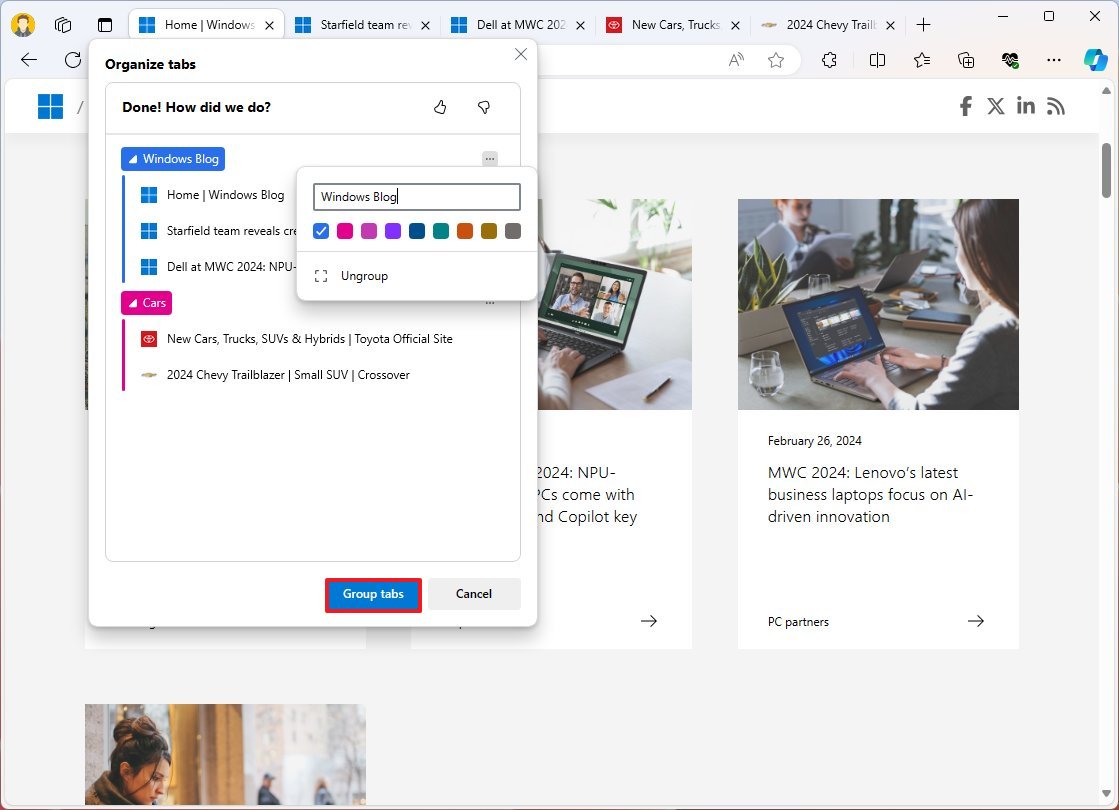
Once you complete the steps, the tabs will be organized into different groups.
You can even search between the open tabs using the “Ctrl + Shift + A” keyboard shortcut.
Alternatively, you can also use Copilot to organize your tabs automatically.
11. Drop
Finally, Drop is a feature available on Microsoft Edge designed to send files and notes to yourself from any computer through the web browser using OneDrive.
To use Drop on Microsoft Edge, use these steps:
- Open Microsoft Edge.
- Click the Drop button from the right pane.
- Quick note: If you don’t see the pane, click the “Copilot” button from the top right.
- Click the Start button.
- Drag and drop the file (such as an image, video, or document)
- Click the Send button.
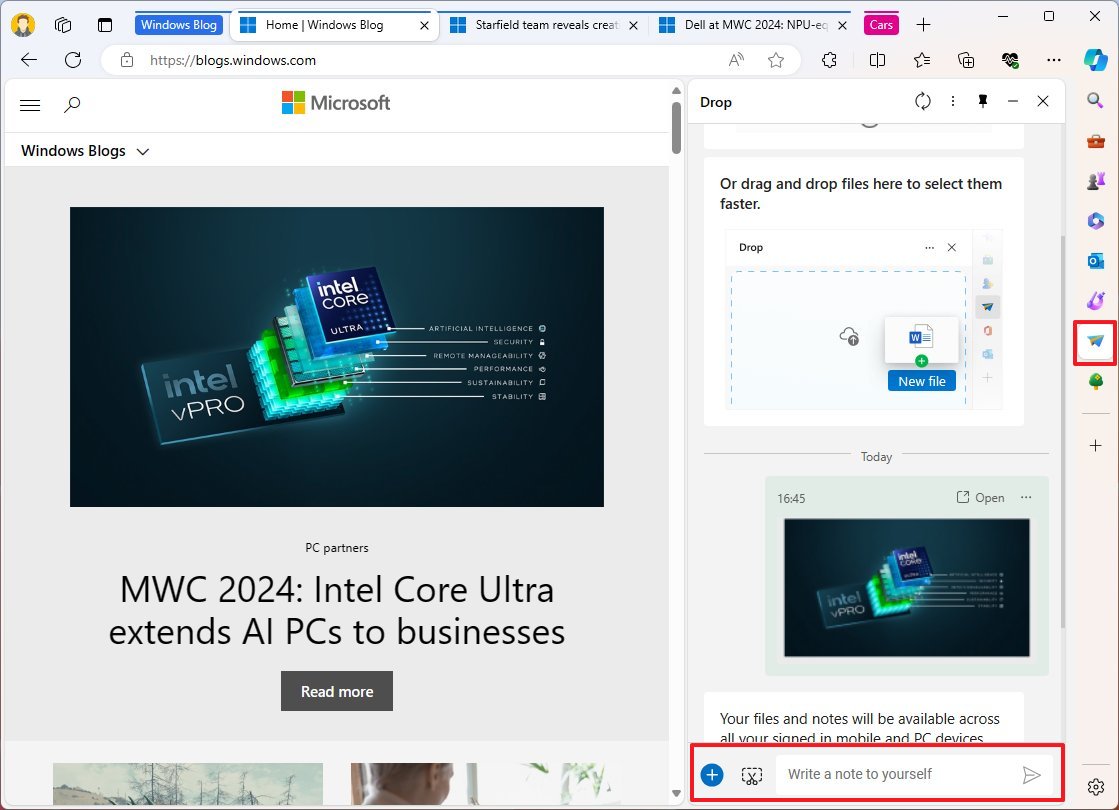
Once you complete the steps, the file will be available for download from any device you are signed in with a Microsoft account.
More resources
For more helpful articles, coverage, and answers to common questions about Windows 10 and Windows 11, visit the following resources:


