Linux is a great OS for networking. It’s a top system for servers for a reason. Linux distros come preinstalled with many networking tools, and you can install more from your package manager. Here are some of the Linux networking commands you should know.
1 ping
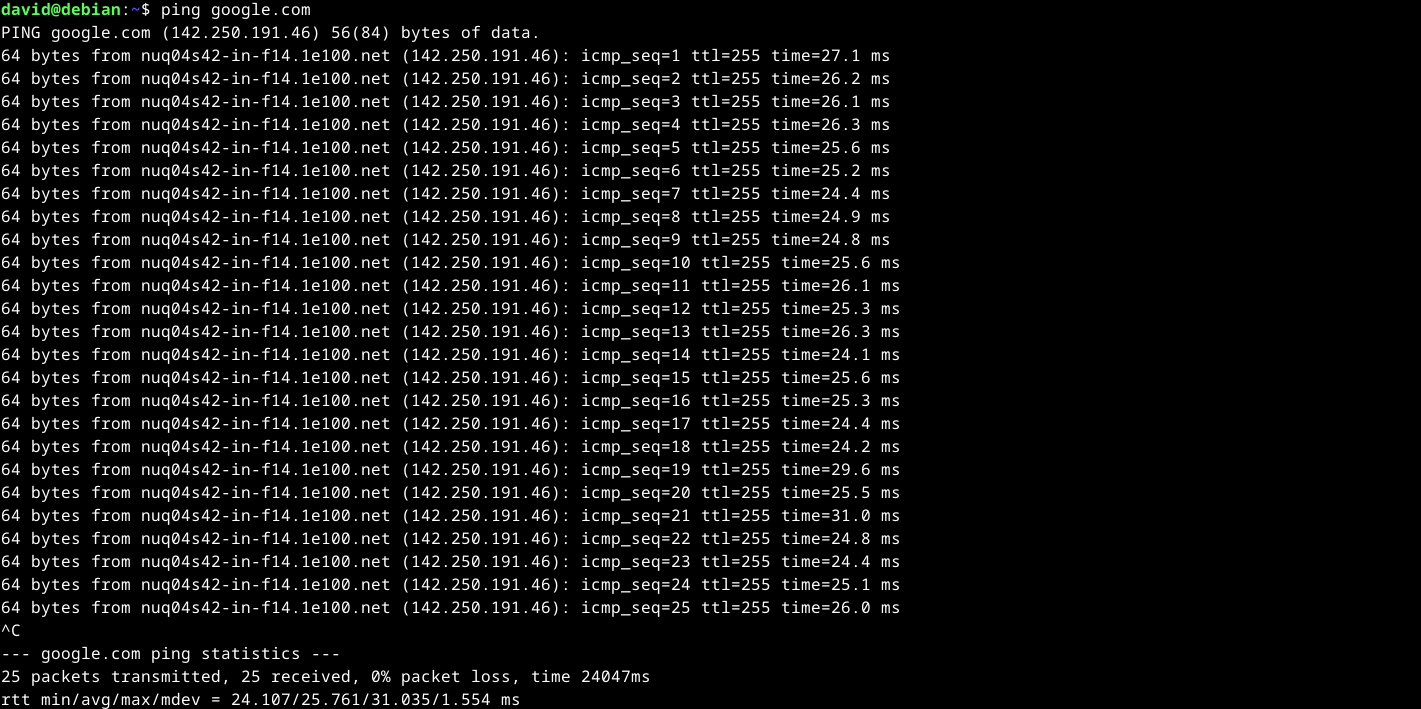
The most important networking command in Linux might be ping. This command lets you check if a remote machine is responding to your requests. You can see if your internet connection is up or if a server has gone down.
The basic usage is ping followed by an IP or DNS address:
ping howtogeek.com ping will run forever until you press Ctrl+C, and then give you some statistics. You can set a count with the -c option, followed by a number. ping will then only ping a machine that number of times:
For example, to ping howtogeek.com four times:
ping -c 4 howtogeek.com Don’t be alarmed if you don’t get a response. Many servers are set up to disregard ping requests for security. Try different machines if you want to make sure your internet connection is working.
Be careful about pinging some machines. Some administrators may interpret repeated pinging as break-in attempt.
2 traceroute
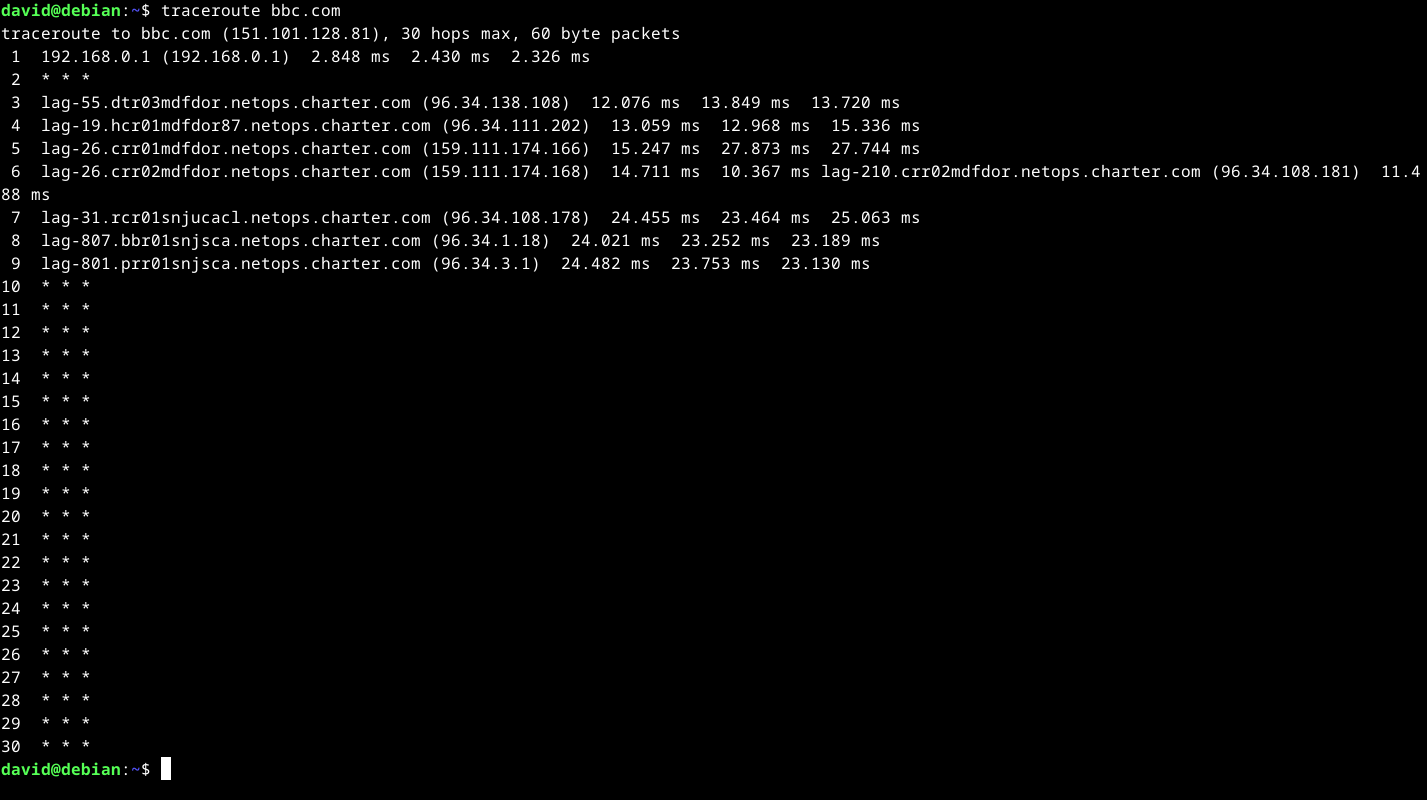
While ping will tell you if a server is up and listening to ping requests, traceroute will show you the possible paths that your packets will take from your machine to their destination.
For example, to find the path from your machine to HTG:
traceroute howtogeek.comYou’ll see a list of hops fill the terminal. You’ll probably see a lot of blank entries. This is also due to many machines not listening to ping commands. traceroute works by setting an internet packet’s TTL, or “Time To Live” in increasing amounts so that they fail and return the location of servers along a possible route. Routes may change each time you run traceroute.
3 mtr
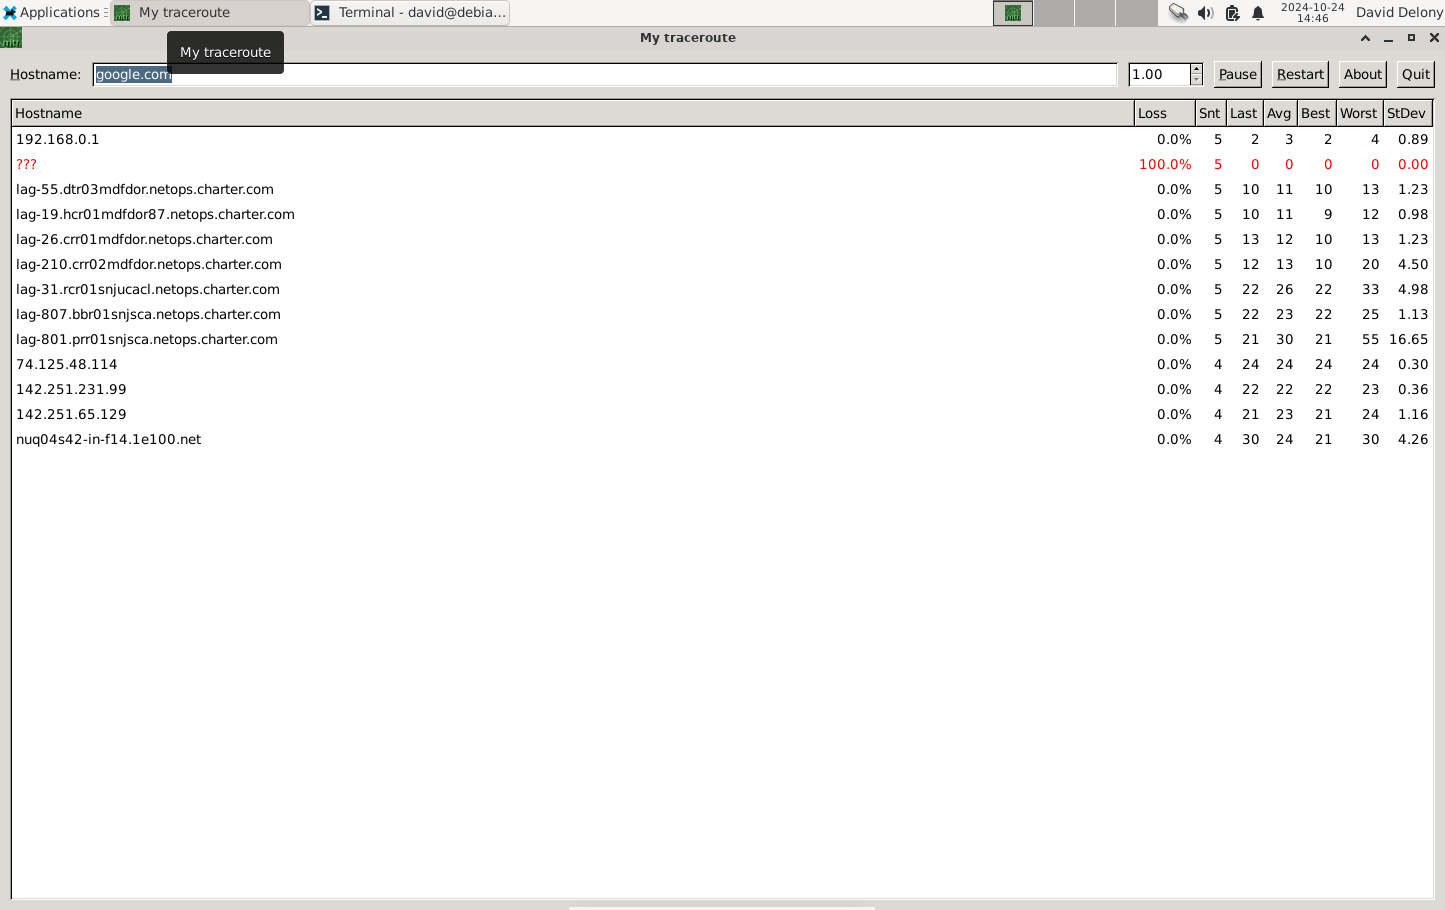
You might be confused whether to use ping or traceroute. Why not use both? That’s what mtr, or My Traceroute, does. mtr combines ping and traceroute into one program. You get the route your packets take while you can see statistics. mtr runs continually. It also runs as a full-screen or as a GUI window.
What’s fascinating is to watch the statistics continually update. mtr shows the highest and lowest as well as the average and standard deviation, or how spread out these values are around the average. You’ll often see one or two hops that are slower than the others along the way. This means that there’s a bottleneck holding up traffic along the way.
mtr can also illustrate how paths through the network between machines can change with each run.
4 ip
ip has replaced ifconfig as the internet configuration tool in most major Linux distributions. You won’t have to do much with it, as your distro will handle most network devices by itself. You can see some useful information with ip. For example, to show your current IP addresses on your network devices:
ip address You can also see the route where your packets will go:
ip routeRun by itself, ip will show the names of the network devices attached, their currently assigned IP addresses, as well as the subnet mask, the part that belongs to the network. Ethernet interfaces usually start with “en.”
5 netstat
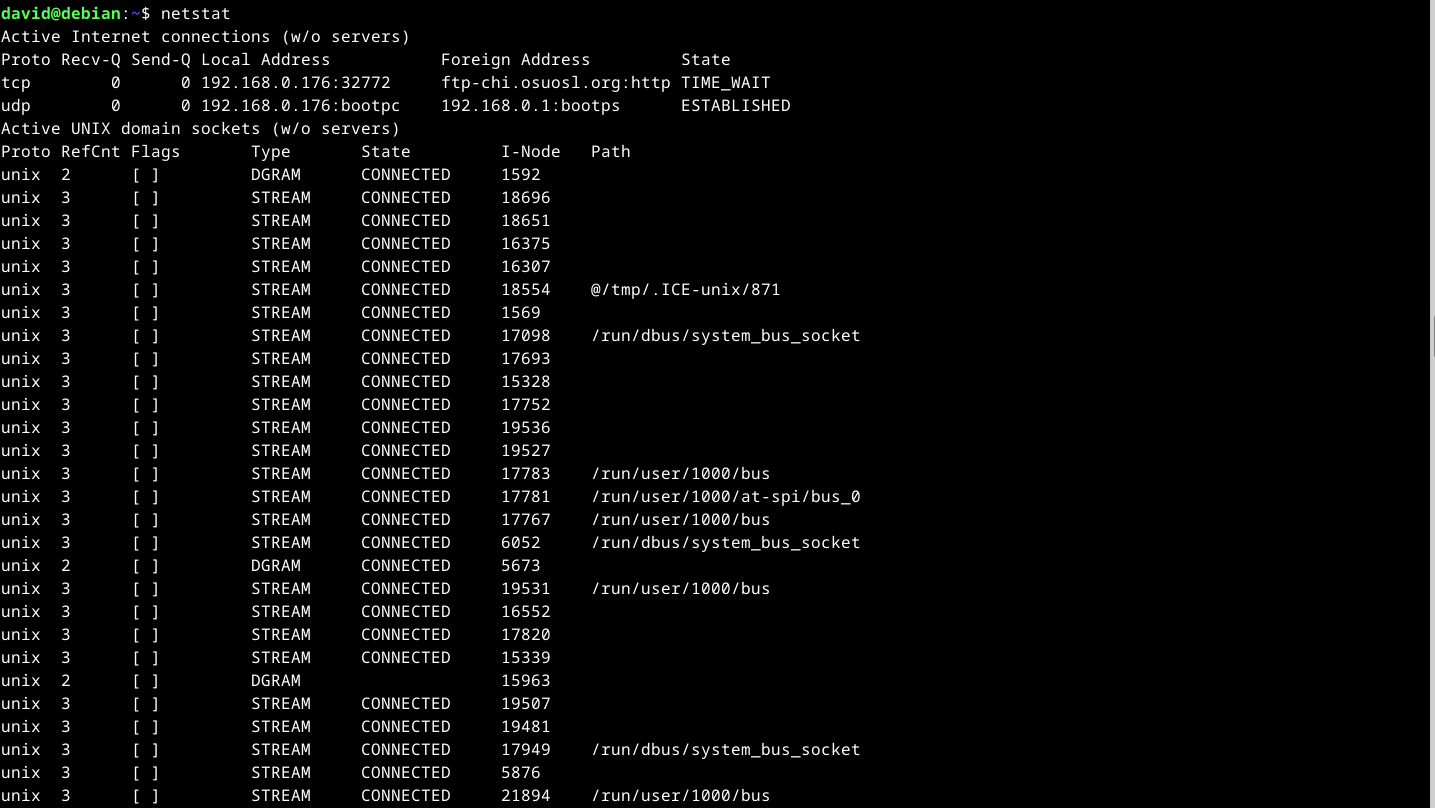
netstat will show the open connections on your machine without any arguments. The -r option will show the routing table.
You’ll most likely need to be root to run it for security:
sudo netstatnetstat will show the open sockets on your machine and which ones are listening. You can use this to monitor your connections and investigate anything that seems suspicious.
6 route
route, as the name implies, will show the routing table of any network interfaces on your machine. This will usually be the nearest router or switch. You can even add or delete routes manually, but you probably won’t need to under normal circumstances on a standard desktop machine.
The “default” line means the default route for network where requests will go. This is usually the nearest router or cable modem if it’s connected directly to your machine.
Most regular desktop systems will manage routing automatically, and there’s usually only one place for them to go anyway in residential networks, such as your Wi-Fi router.
7 ss
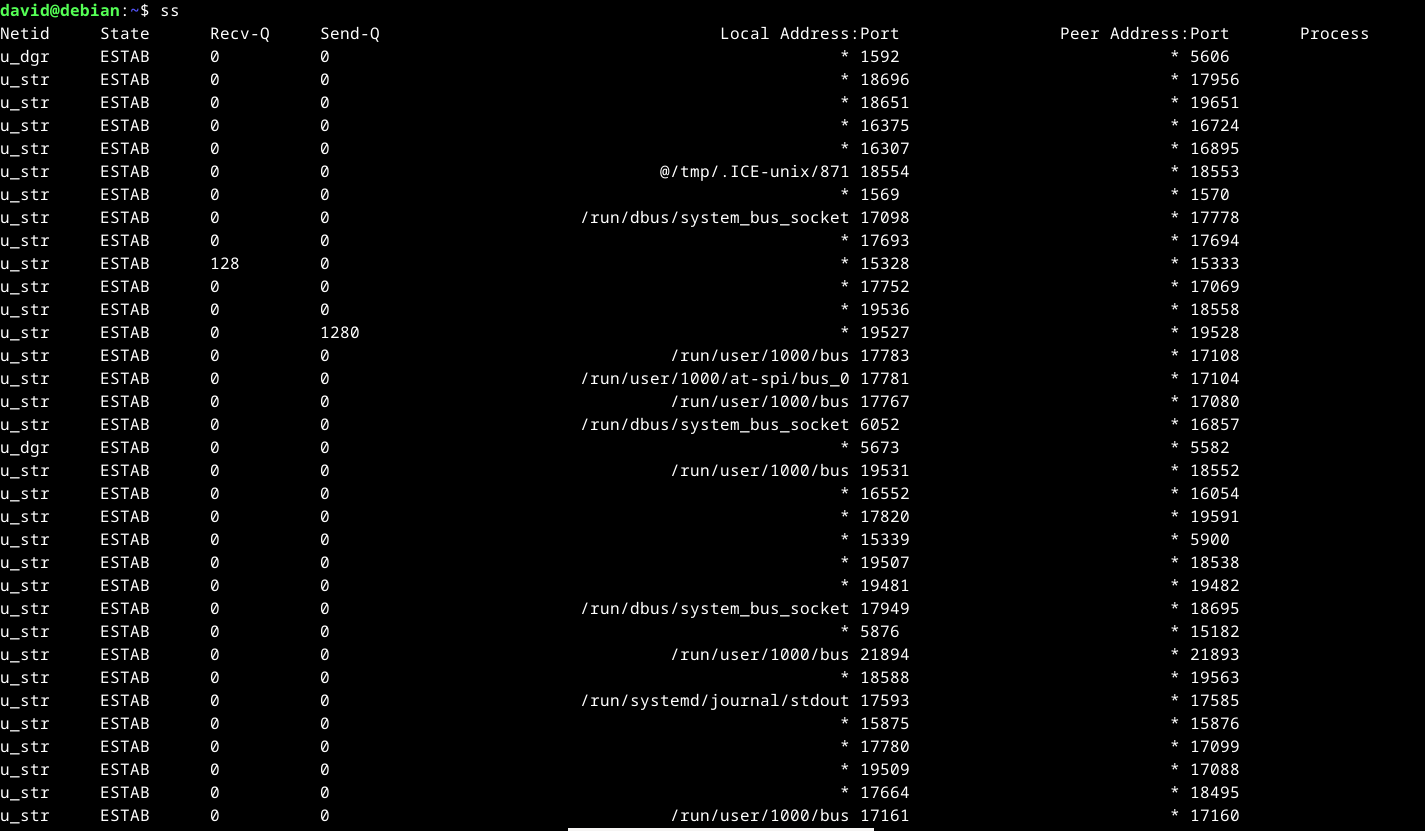
ss is a utility to dump statistics on any sockets on your machine to the terminal. This is helpful for finding any open network connections. As with netstat, it’s a useful tool to investigate your network connections and see if anything is connected to your machine that shouldn’t be. You can drill down your connections by protocol or socket.
ss and netstat are good ways to learn more about sockets or networking in general.
8 tcpdump
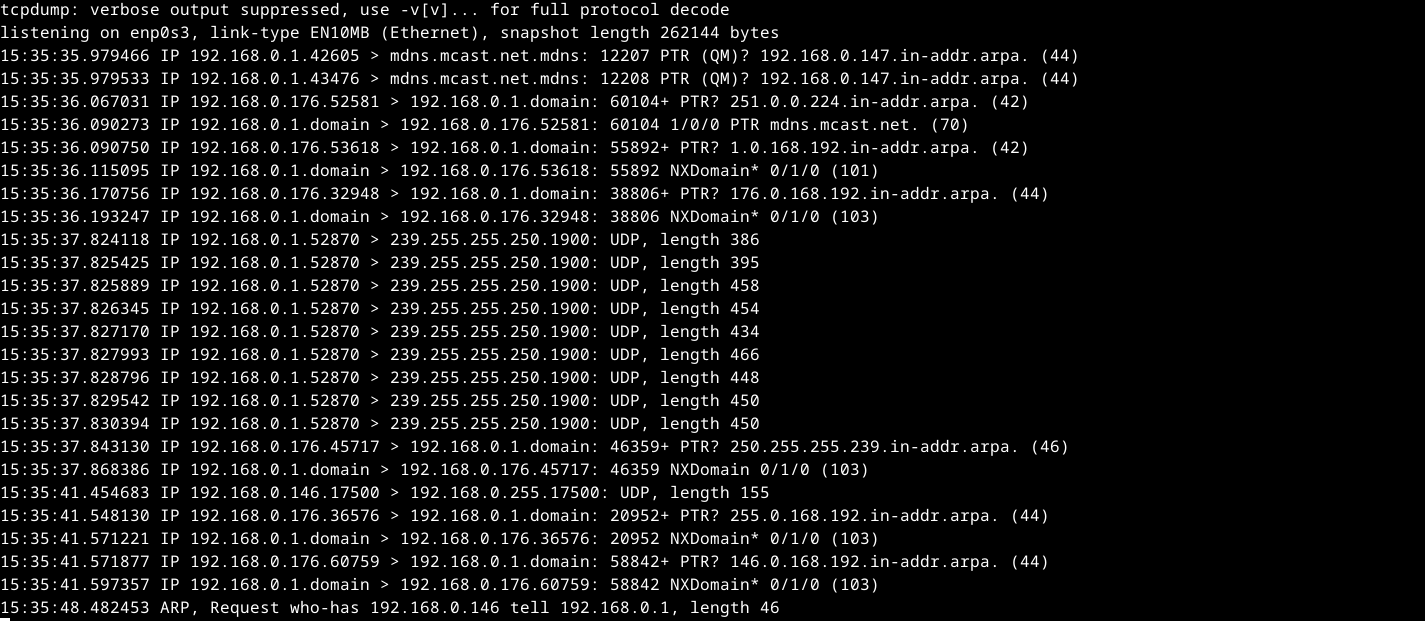
tcpdump is a packet sniffer that’s a terminal-based counterpart to the popular Wireshark program. With tcpdump, you can see the packets that your machine is sending out. Because this shows all the traffic on an interface, you usually need to be root to run it:
sudo tcpdump
This will show all packets being sent and received on the default network interface in real time. This is a useful diagnostic, but it can also be used to spy on internet traffic. Fortunately, it’s more common for internet traffic these days to be encrypted, so if someone got a hold of your transmissions, it would be useless unless they found a way to decode it.
9 dig
If you want to find out who is behind that domain name, you can use the dig command:
dig howtogeek.com When you enter a domain name, dig will query DNS servers and display the results. DNS is what connects domain names to IP address. The domain names will be “authoritative,” meaning it’s from the IP address of the requested domain, or “recursive,” meaning that a server asked another DNS server what the address was.
The dig will show the IP address associated with the domain in the “answer” section. It will also show when you made the request and how long it took for the DNS server to respond at the end of the output.
10 host
host will also give you more information on a domain name, such as which servers handle email. As with dig, it will tell you the IP address of the domain name as well as which servers will handle its email.
This tool is simpler to read than dig since it has less information. You’ll notice that a lot of sites have multiple mail servers, including HTG. The multiple mail servers typically correspond to subdomains, such as sales.example.com for the example.com sales team, and engineering.example.com for the engineering department, and so on.
What you’re most interested in likely is just the first line, which tells you which address responded to the DNS request.
11 whois
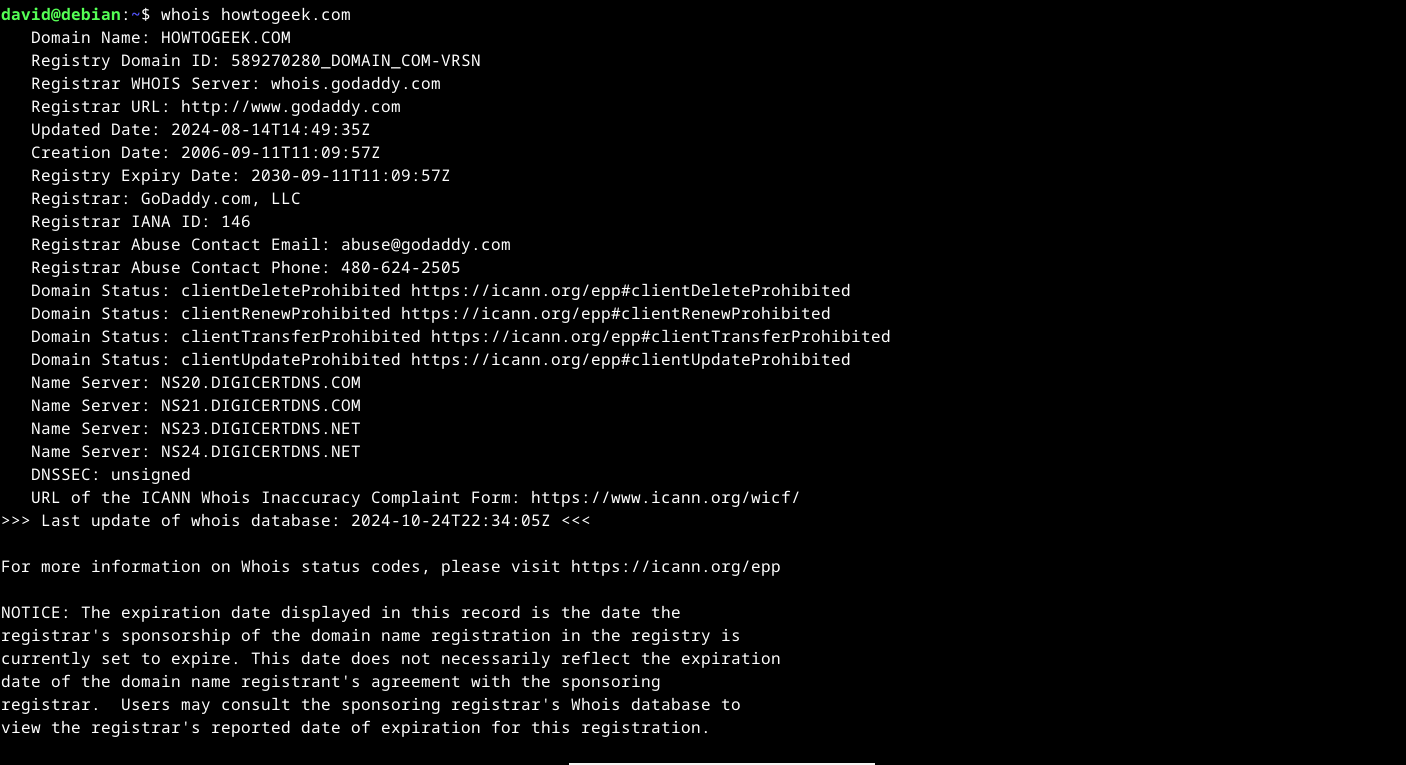
whois will return the official records of a domain name, which can be useful if you need to get in touch with an admin at a website to report a problem. It’s also possible to abuse this, which is why it’s possible to register a domain name anonymously.
You’ll see a lot of the same information in dig or host, but you’ll also see the contact information of whoever registered the domain name. If the site owner doesn’t want their name and address accessible to anyone who knows how to run a whois query, the domain name will often be registered by a corporation that sells domain names, such as GoDaddy. You’ll also see when the domain name was registered and when it expires.
12 curl or wget
curl and wget are popular utilities for downloading files from servers using the command line. wget will automatically follow redirects, but curl is popular for scripting. Some tools, like Oh My Zsh will have you use one of them as part of the installation process.
To use curl to download the home page from howtogeek.com:
curl howtogeek.comAnd for wget:
wget howtogeek.com If you use one of these utilities, be careful about crawling someone else’s site. It’s best to do extensive downloading from either a machine you own or otherwise have permission to do so. Otherwise, it might be interpreted as an attack on the site.
The main difference between the two is that curl is better suited to downloading individual files, while wget can follow links across a site to download other pages. You can even download a whole copy of a website using wget, which is useful for making a local backup if it ever goes down.


