

2. Free up space removing junk files with Storage Sense on Windows 10
Storage Sense is a feature that allows you to delete different types of junk files (including previous installation files after an upgrade and temporary files) to free up space on the primary and secondary drives to make room to store other files and improve drive efficiency.
Enable Storage Sense
Although you can use Storage Sense manually, it’s possible to enable the feature to run maintenance automatically to help avoid running out of space quickly.
To enable Storage Sense on Windows 10, use these steps:
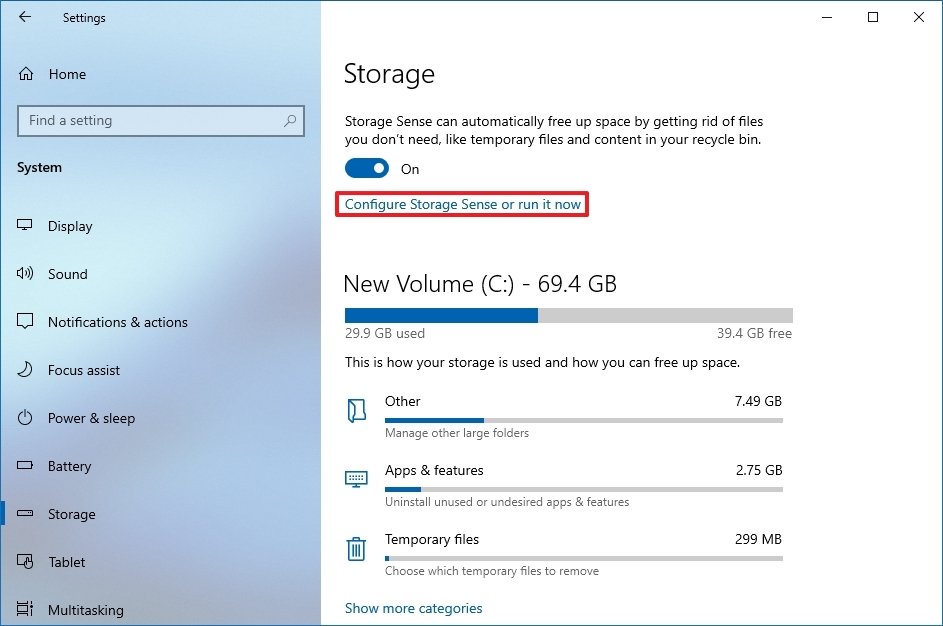
- Open Settings.
- Click on System.
- Click on Storage.
-
Under the “Storage” section, click the Configure Storage Sense or run it now option.

 Source: Windows Central
 - Turn on the Storage Sense toggle switch.
-
Use the “Run Storage Sense” drop-down menu and select the best option for your situation:
- Every day.
- Every week.
- Every month.
- During low free disk space (recommended).
 Source: Windows Central
Once you complete the steps, Storage Sense will run automatically at the schedule you specified to free up space and improve storage performance.
The option to enable the feature is also available from the “Storage” page. However, using this option only activates the default settings. Utilizing the Storage Sense settings page lets you configure how the feature should remove unnecessary content.
Delete unnecessary files with Storage Sense
To free up space using Storage Sense, use these steps:
- Open Settings.
- Click on System.
- Click on Storage.
-
Under the “Storage” section, click the Configure Storage Sense or run it now option.
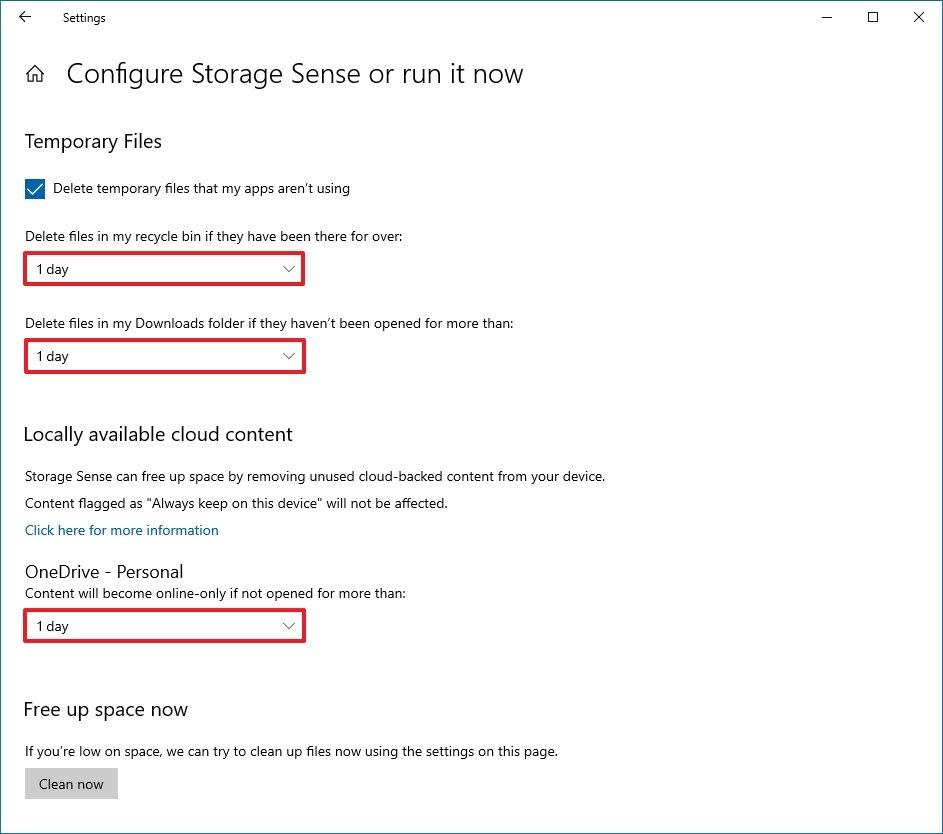
Source: Windows Central - Under the “Temporary Files” section, check the Delete temporary files that my apps aren’t using option.
- Use the Recycle Bin drop-down menu to specify how to clear already deleted files you do not need.
-
Use the Downloads drop-down menu to specify how to clean up downloaded files.
Quick tip: If you need to delete the most files, use the 1 day option. The Downloads folder may contain valuable files you may have downloaded from the internet, which means that it is recommended to backup those files manually before running the feature.
-
Under the “Locally available cloud content” section, use the drop-down menu to specify how long OneDrive content synced to the device becomes online-only.

 Source: Windows Central
Quick note: This option is part of OneDrive Files On-Demand that allows you to access your documents, pictures, videos, and other files using File Explorer without needing to sync them to reduce the space usage. When the device is running low on space, you can use it to make files only available in the cloud. You will still see your files, but their content will only download when you need them.
-
Under the “Free up space now” section, check the Delete previous versions of Windows option (if applicable).
Quick note: This option can free up close to 20GB of space, but the storage will vary from system to system.
- Click the Clean now button.
Storage Sense will run and delete unnecessary files from the computer to reclaim more space after completing the steps.
Delete temporary files with Storage Sense
Storage Sense also deletes temporary system and apps files that can help to reclaim several gigabytes of space on your Windows 10 device.
To delete temporary files from the device, use these steps:
- Open Settings.
- Click on System.
- Click on Storage.
-
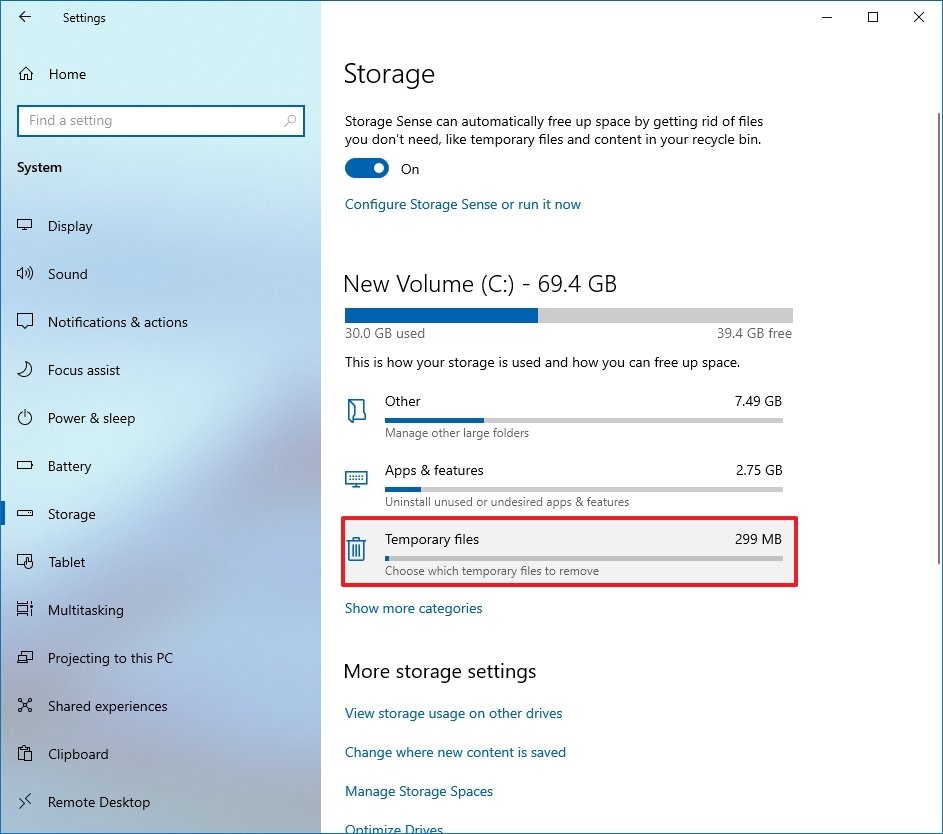
Under the “Local Disk (C:)” section, click the Temporary files item. (If the item is not available, click the Show more categories option.)
 Source: Windows Central
 -
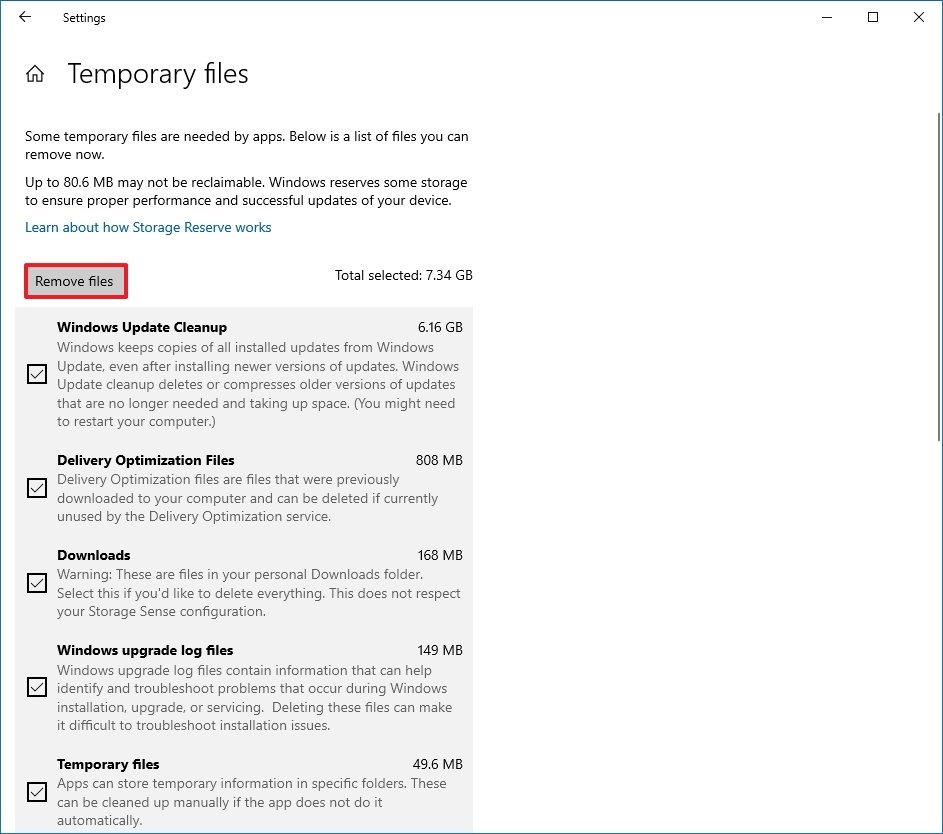
Check all the items you want to remove to optimize the space. For example:
- Downloads.
- Windows Update Cleanup.
- Recycle Bin.
- Delivery Optimization Files.
- Thumbnails.
- Microsoft Defender Antivirus.
- Temporary Internet Files.
- Temporary files.
- Windows error reports and feedback diagnostics.
- DirectX Shader Cache.
- Previous Windows installation(s).
- Temporary Windows installation files.
Quick tip: The available items may differ on your installation. If you want to select the Downloads item, before clearing these files, make sure to understand that this option will erase everything in that folder.
-
Click the Remove files button.
 Source: Windows Central
After you complete the steps, the selected files will be deleted permanently, freeing up space for more important files.
View storage usage on Windows 10
On Windows 11, Storage Sense is also a great tool to help you understand which files use the most space to determine the files you can clean up.
To view the storage usage on Windows 10, use these steps:
- Open Settings.
- Click on System.
- Click on Storage.
-
Under the “Local Disk C:” section, click the Show more categories option.

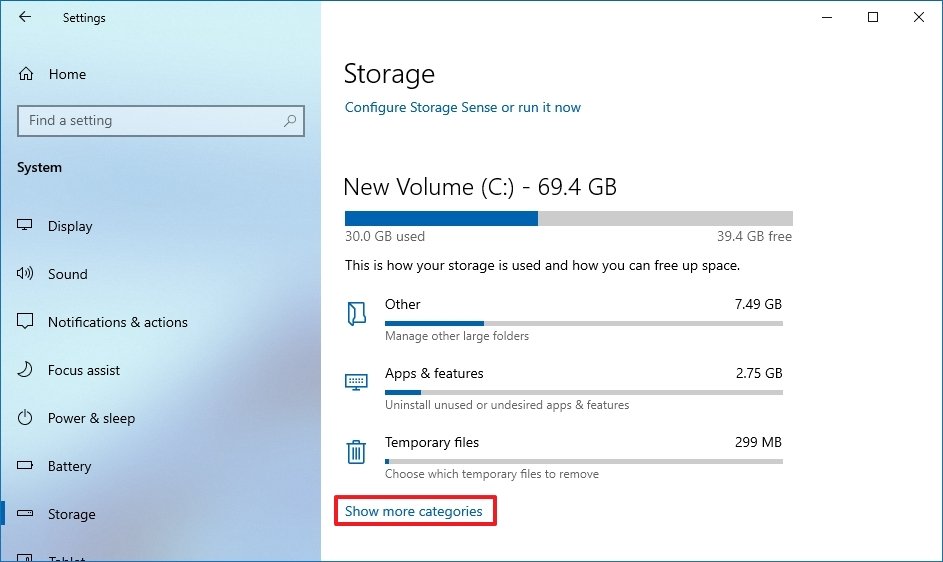 Source: Windows Central
 -
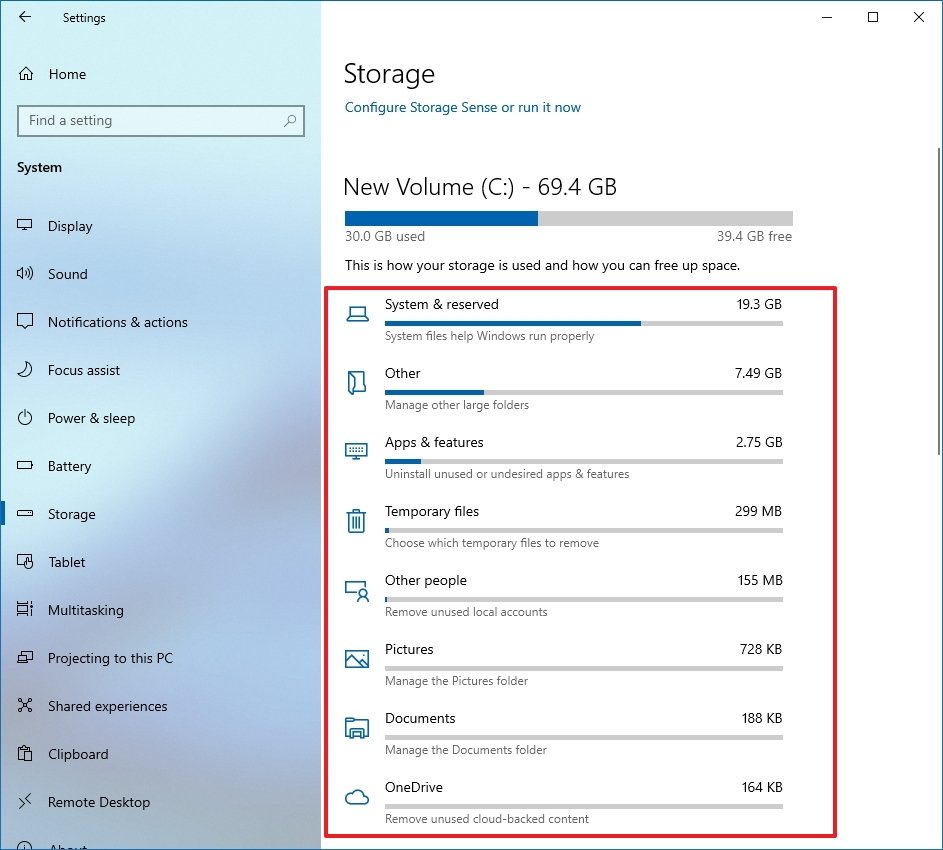
See how the storage is being utilized.

 Source: Windows Central
 - Select each category to see even more details and actions you can take to free up space on Windows 10.
Once you complete the steps, you will find out the storage usage and focus areas to free up space. For example, inside the System & reserved category, you will see how much space the installation, virtual memory, hibernation files, and system restore are using, and the amount of space the system is reserving for updates.
If you have multiple drives, under the “More storage settings” section, click the View storage usage on other drives option to open the page that lists all the drives on the device.


