I used to think I knew Windows pretty well—until I stumbled upon some features hidden in plain sight, which can make a big difference in how you use your device. Even if you’ve been using Windows for years, there’s a good chance you’ve missed a few of these. Here are some features worth checking out.
5
Make Use of Dynamic Lock
Imagine your PC locking itself when you walk away—no extra effort required. That’s precisely what Windows’ Dynamic Lock feature offers. It lets you pair your smartphone with your computer via Bluetooth, and when you step away with your phone, the weakened or lost Bluetooth connection tells Windows you’re no longer nearby—so it locks the device.
To set it up, enable Bluetooth on your device and smartphone and pair them like you usually would for file sharing. After that, open the Settings app, go to Accounts > Sign-In Options, scroll down to the “Dynamic Lock” section, and check the box that says “Allow Windows to lock your device automatically when you’re away.”
Once enabled, your PC will automatically lock itself when your phone moves out of range—usually about 30 feet—helping keep prying eyes away from your data.
4
Schedule the Do Not Disturb Mode
Do constant system and app notifications pull you out of focus while working on your laptop? If so, you likely use Do Not Disturb mode to silence them. But here’s something even more helpful—you can schedule this mode to turn on automatically during certain hours, like your work schedule or meeting times, and turn off once you’re done.
This way, you won’t have to remember to toggle it on and off every time. To set it up, open the Settings app and go to System > Notifications > Do Not Disturb. Expand the “Turn on do not disturb automatically” section, check “During These Times,” and define your preferred start and end times along with the repeat schedule.
Just below that, you’ll find “Set Priority Notifications.” Use it to select which apps or contacts can still send notifications, even when Do Not Disturb is active.
Related
3
Customize the Sound of Notifications
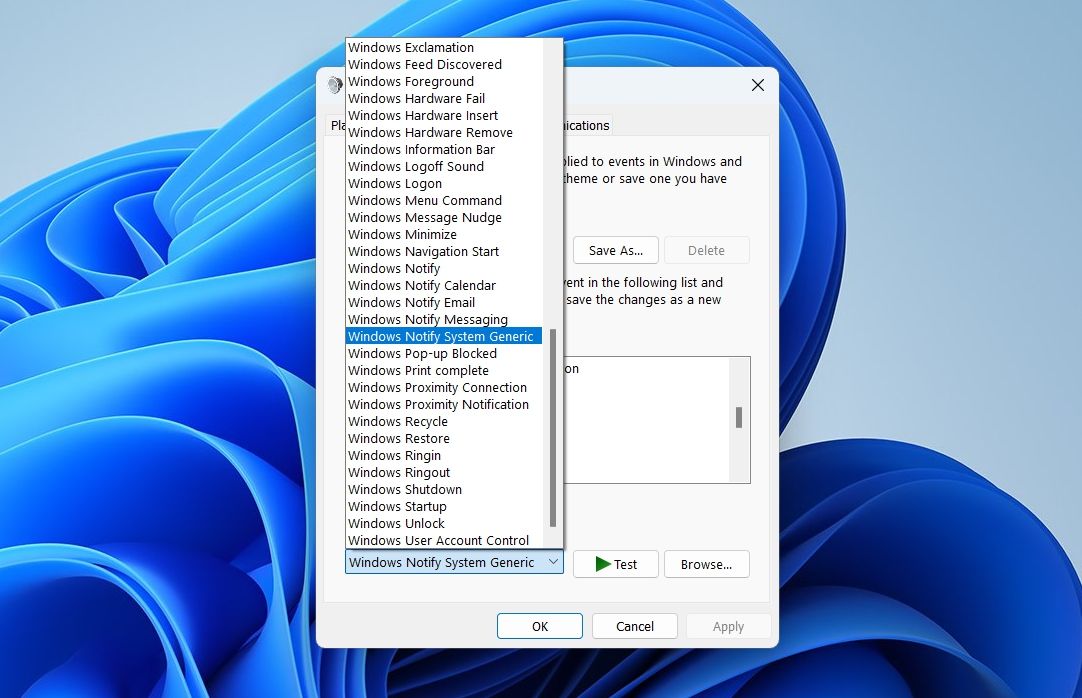
Windows has a default set of sounds for various system events—like a different ping when your battery hits a critical level, a new email arrives, or you put your laptop to sleep. While these default tones are easily recognizable, they might feel generic or not quite your style. The good news? You can easily customize them and use tones of your liking.
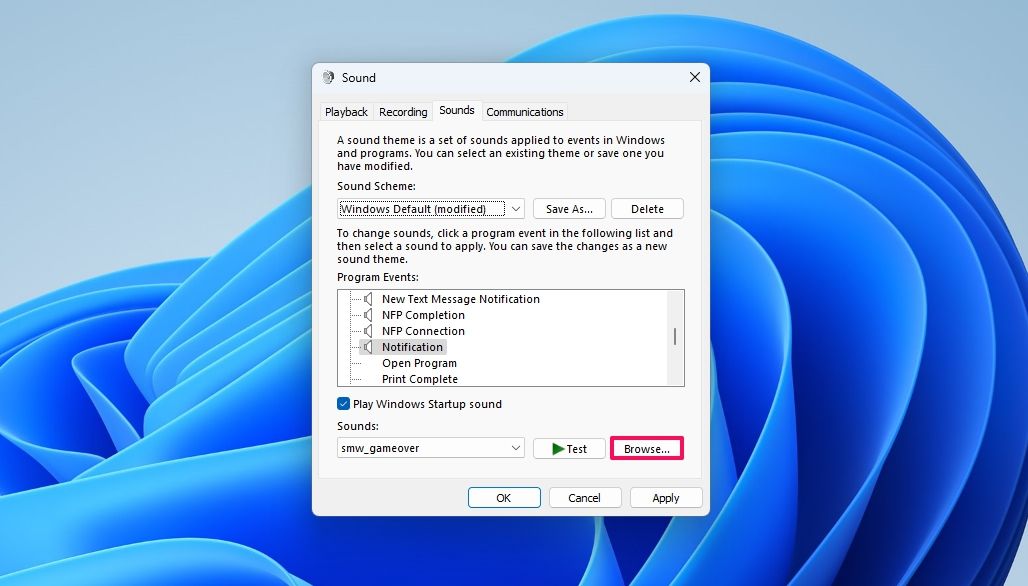
To change the sound for a specific event, open the Settings app, go to the “System” tab, and navigate to the “Sound” settings. Here, scroll down and click on “More Sound Settings.” In the Sound properties window, switch to the “Sounds” tab. From there, select the event you’d like to customize and choose a new sound from the dropdown list.
You can click the “Test” button to preview the sound. You can also use a downloaded sound file by clicking “Browse.” Once you’re happy with the selection, click “Apply” and “OK.”
2
Force Apps to Use Your Dedicated GPU
Have you ever noticed that some games and apps run smoothly while others—despite being less resource-intensive—struggle with performance? That happens because Windows often defaults to using the integrated graphics card for some apps instead of your more powerful dedicated GPU, which causes lag and slower performance for graphics-intensive tasks.
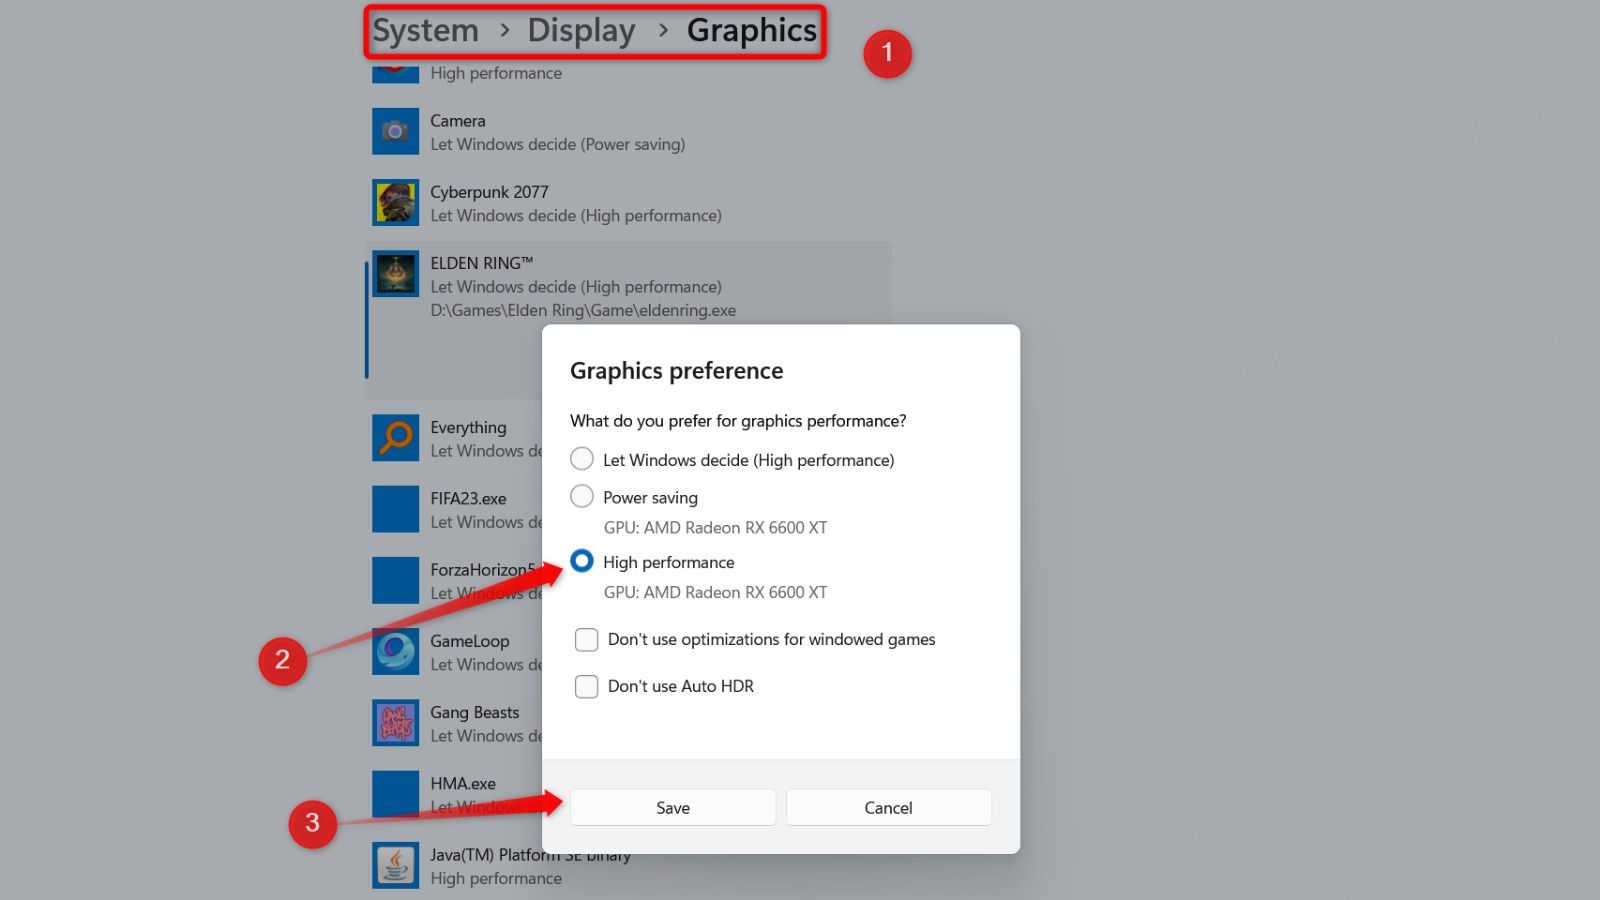
Fortunately, you can manually assign the dedicated GPU to specific apps that need better performance. Simply open Settings, go to System > Display > Graphics, click “Browse,” and choose the app for which you want to adjust the graphics preference. Once added, click the app, select “Options,” and choose “High Performance” to make it use the dedicated GPU.
You can repeat this for other apps and games, too. Remember that if you’re on a laptop, using the dedicated GPU more often can drain your battery quickly.
Related
How to Disable Your Integrated Graphics on Windows 11
When games and other graphics-intensive applications starts to lag, this is what you do!
1
Shake a Window to Minimize Others
One habit I dislike about myself is constantly opening new app windows without closing the old ones. It clutters my desktop, switching between windows becomes a chore, and makes it harder to focus on a single window. Thankfully, Windows has a nifty feature called Shake to Minimize that helps clean up the mess.
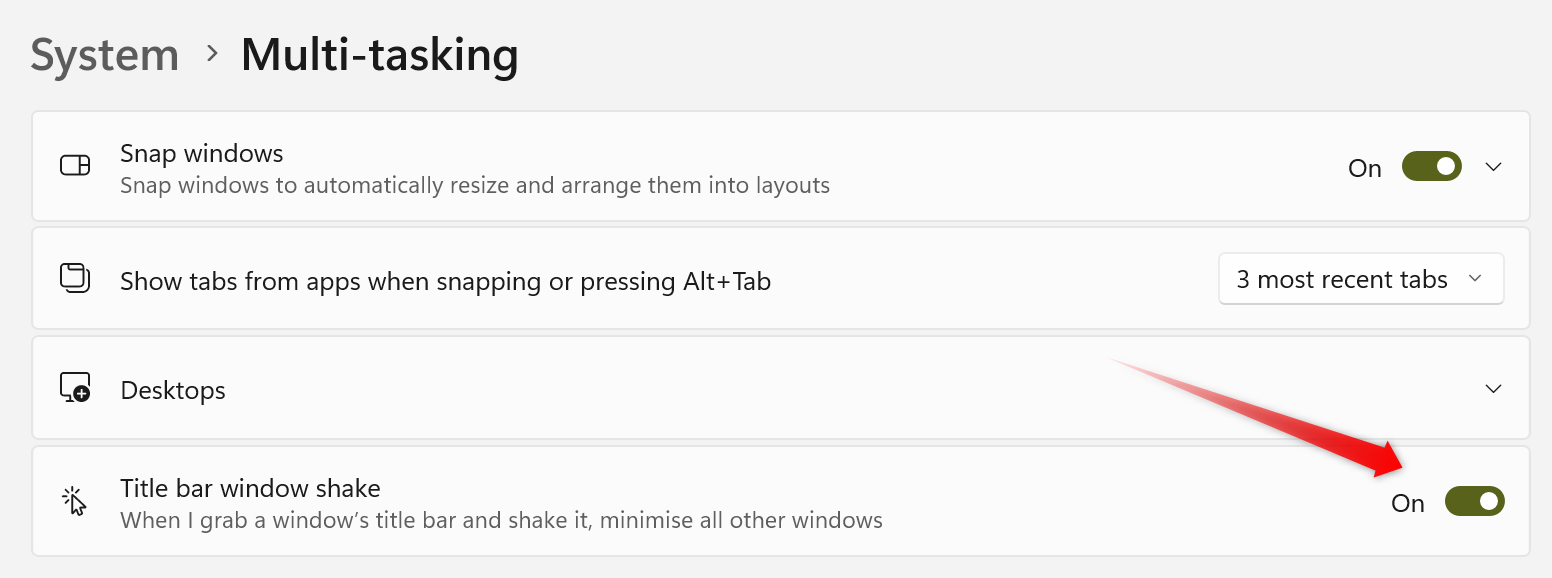
It’s not a flawless fix, but it does the job—grab the window you want to keep, give it a quick shake, and all other open windows will automatically minimize. This means I don’t have to manually minimize every other window to focus on one. Even better, shaking the same window again restores all the minimized ones.
To turn on this feature, open the Settings app, go to System > Mult-tasking, and ensure the toggle next to “Title Bar Window Shake” is turned on.
These underrated, lesser-known Windows features can seriously improve your overall experience. If you haven’t explored them yet, try them—they can help protect your privacy, boost app performance, automatically silence notifications during busy times, and let you fine-tune notification sounds to match your preferences.


