Keeping your computer free of digital clutter is an important part of maintenance, while also making sure you always have space for new files and programs. Here are some simple commands that will let you clean up your Ubuntu system from the terminal, no GUI required—well, with one exception.
Note that in most cases, these commands will work on any Debian-based system. I tested them on both an Ubuntu install as well as a Linux Mint machine. On both systems I gained a lot of space, a lot more than I expected, in fact.
1 Uninstall Programs
The first place to start when cleaning up your Ubuntu system is to check the programs you have installed and then remove them. To do so, you’ll need to get a list of everything installed on your system. There are two terminal commands for this, either:
dpkg --list
Or alternatively this one:
apt list --installed
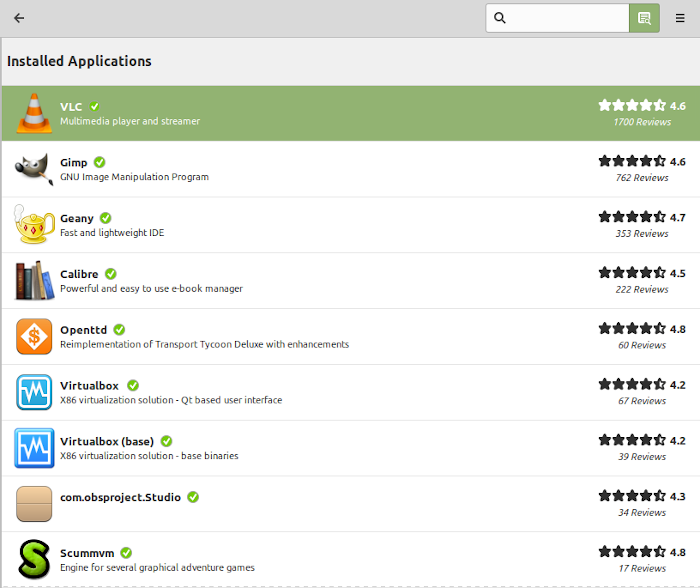
However, I’m not a fan of this approach as you’ll get massive lists you’ll need to scroll through manually, and they include dependencies you may not know the use of. Unless you really know what you’re doing, it’s better to go to your list of installed apps in your GUI. Depending on the system you’re rocking, there are different places for it, but it’s in your software center. Below is what it looks like in Linux Mint.
To remove programs, just either do so via the software center, or enter the following in the terminal:
sudo apt-get remove program-name
Note that you can string multiple programs together in one go, just add the names without any commas or anything. Check out our full article on how to uninstall software on Ubuntu if you’d like to know more details.
2 Clean Up the APT Cache
Most Debian-based distros, including Ubuntu, use APT to manage programs, something you can read more about in our article on how to use apt-get. However, APT keeps a cache of downloaded files and doesn’t clean it out. If you’ve been using your system a while, it can fill up a lot, so you’ll need to clean it out and get back some disk space.
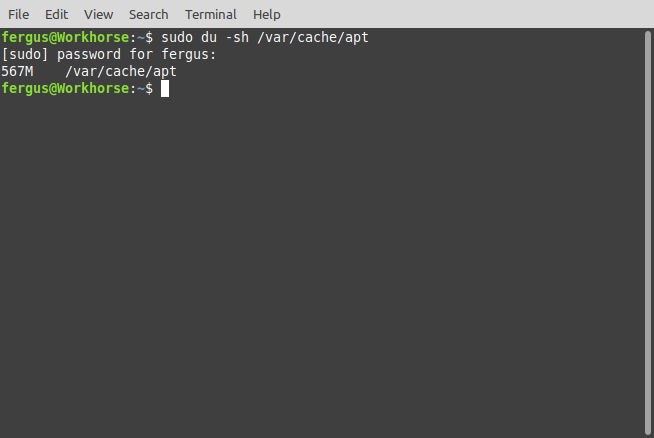
First, let’s figure out how much space the cache is using the “du” command (read more about this in our article on viewing free disk space in Linux). We also need to add the location of the cache, which is /var/cache/apt by default.
sudo du -sh /var/cache/apt
You’ll get a brief message displaying how much space the directory is taking up.
Almost 600MB in my case, which is worth cleaning up. To do so, enter the following command:
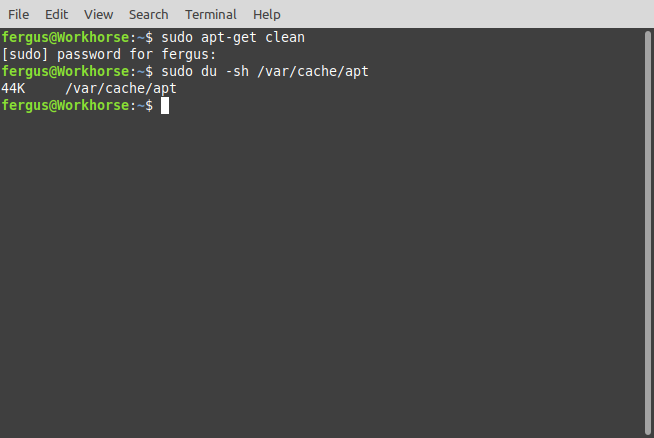
sudo apt-get clean
In my case, this left me with just 44KB of files left in the cache, which is a much better result.
If you want, you can also disable automatic package caching so you don’t have to deal with this issue again.
3 Remove Packages You No Longer Need
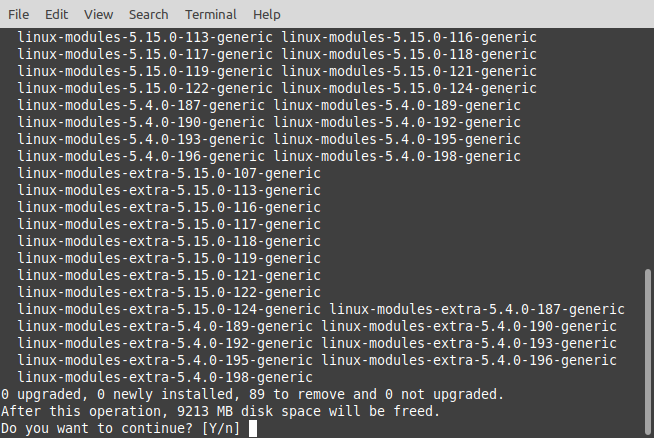
One of the biggest ways in which I was losing space was by not removing unneeded packages, remainders from when I installed a program and then didn’t get rid of the installer. Ubuntu offers a very simple command that cleans up all these unnecessary files:
sudo apt-get autoremove
This cleans up installers, as well as all kinds of package files. Some of these, like kernel updates, are massive, and if you haven’t cleaned up in a while this can save you several gigabytes of hard drive space. For example, I created almost 1GB of space on my Mint install.
4 Clean Up Journal Logs
Like any computer system, Ubuntu logs what happens on the system. All the actions you undertake, connections made, and stuff like that is stored in logs and then never deleted. These are mostly stored in simple text files, but because there are so many, the cumulative effect is impressive.
You can run the following command to find out how much space your logs are taking up:
journalctl --disk-usage
I did, and I saw mine took up over 3GB, which is too much. To remove this, the easiest command is the following, where the number denotes how many days back you want to go. For the sake of caution, I went with a week.
sudo journalctl --vacuum-time=7d
This cleaned up almost the full 3.3GB, leaving me with a much more manageable 24MB.
5 Clear Your Thumbnail Cache
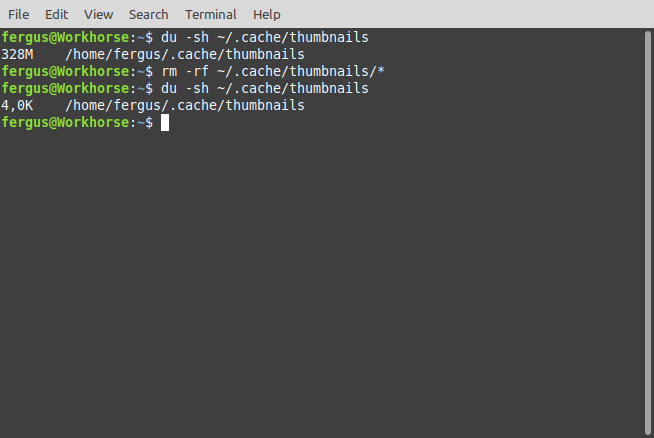
Any time you add a picture to Ubuntu, it creates a thumbnail for easy viewing in your file manager. However, these thumbnails survive even after the images they’re based on are removed, meaning they’re yet another useless class of files taking up space on your system. To find out exactly how much, run the following command, which like before features the “du” command.
du -sh ~/.cache/thumbnails
The dot before “cache” denotes this is a hidden directory, though that won’t affect the way you interact with it.
In my case, the directory had over 300MB worth of files in it, meaning it needed to be cleaned out. The best way to do this is with the following command.
rm -rf ~/.cache/thumbnails/*
I then rechecked the size of the directory and found it was a much more palatable 4KB.
6 Remove Duplicate Files
Finally, you also have the option of finding and deleting duplicate files. Sadly, though, Ubuntu doesn’t have built-in tools for this. Instead, I recommend you read our article on how to find and remove duplicate files on Linux, which has several ways in which you can do this.
I followed the instructions in our article and was able to remove almost 500MB of duplicate files which had taken up residence on my hard drive, which makes a huge difference.
Using any or all of these tips, you can easily free up several gigabytes of space on your Ubuntu system. If you specifically need more space to speed up booting your system, check out our guide on how to free up space on your Linux boot partition.


