If you use Zoom as your online meeting tool, you have various features at your disposal to use. From getting things done with keyboard shortcuts to sharing your screen, I’ll give you some useful Zoom tips.
Use Keyboard Shortcuts to Quickly Access Various Features
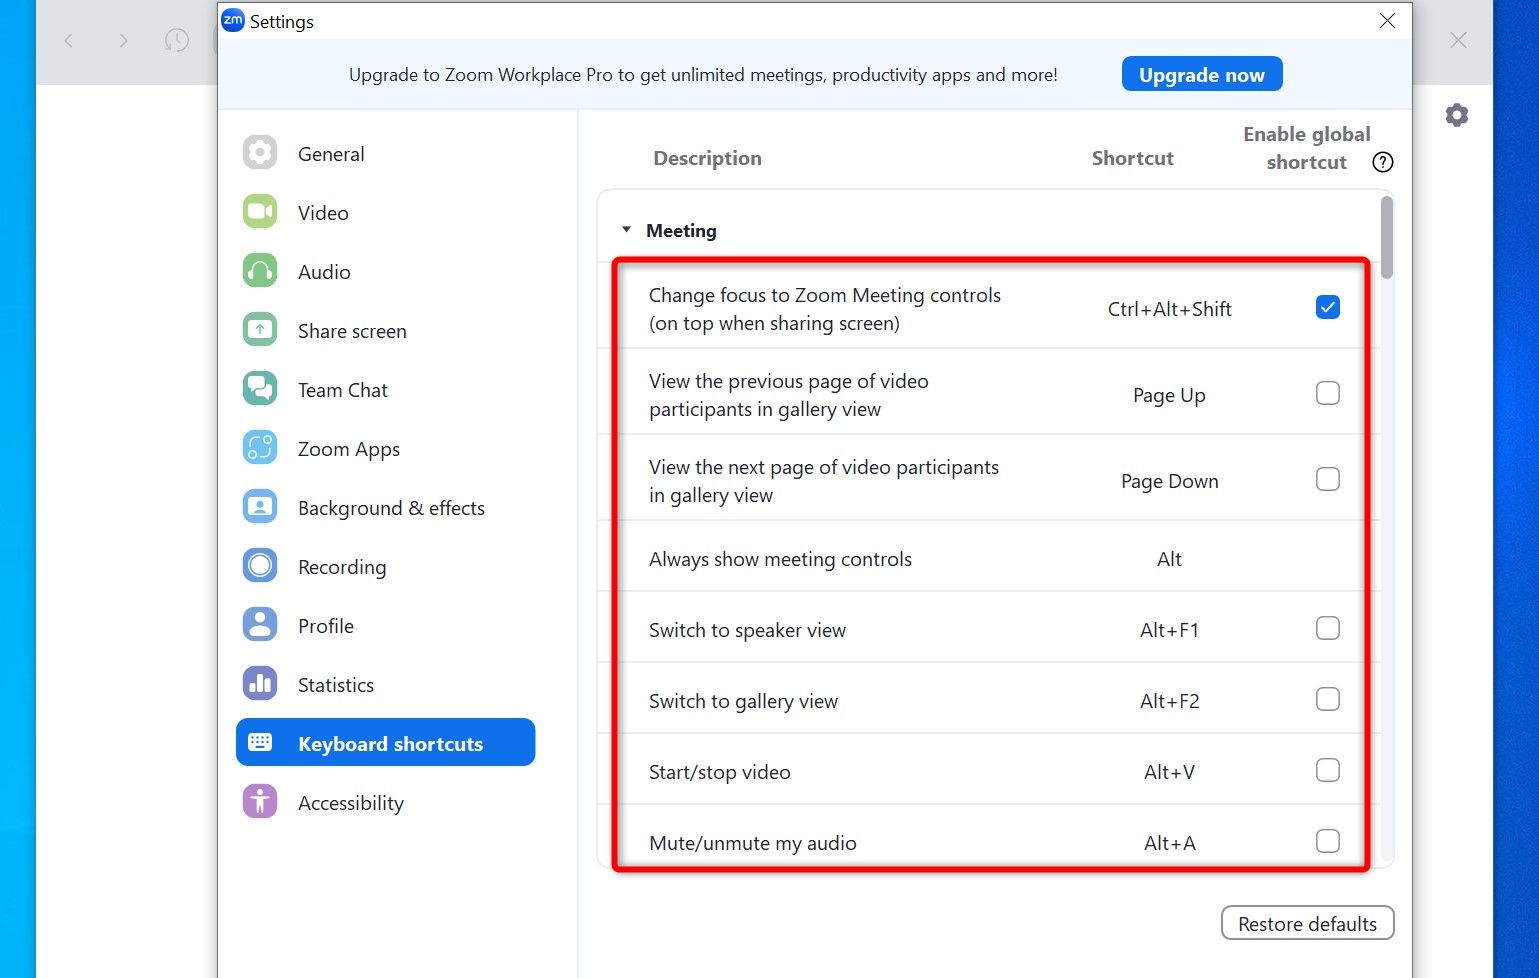
A quick way to get things done in Zoom is to use keyboard shortcuts. You press a key combination on your keyboard and a Zoom feature is invoked. Here are some useful keyboard shortcuts to use:
- Alt+A: Mute or unmute your microphone
- Alt+V: Start or stop your video
- Alt+S: Start or stop screen sharing
- Alt+H: Launch or quit the chat window
- Alt+Y: Raise or lower hand
To view all available shortcuts, launch the Zoom app, click your profile icon in the top-right corner, choose “Settings,” and select “Keyboard Shortcuts” in the left sidebar.
Enable HD Video to Look Sharper in Your Meetings
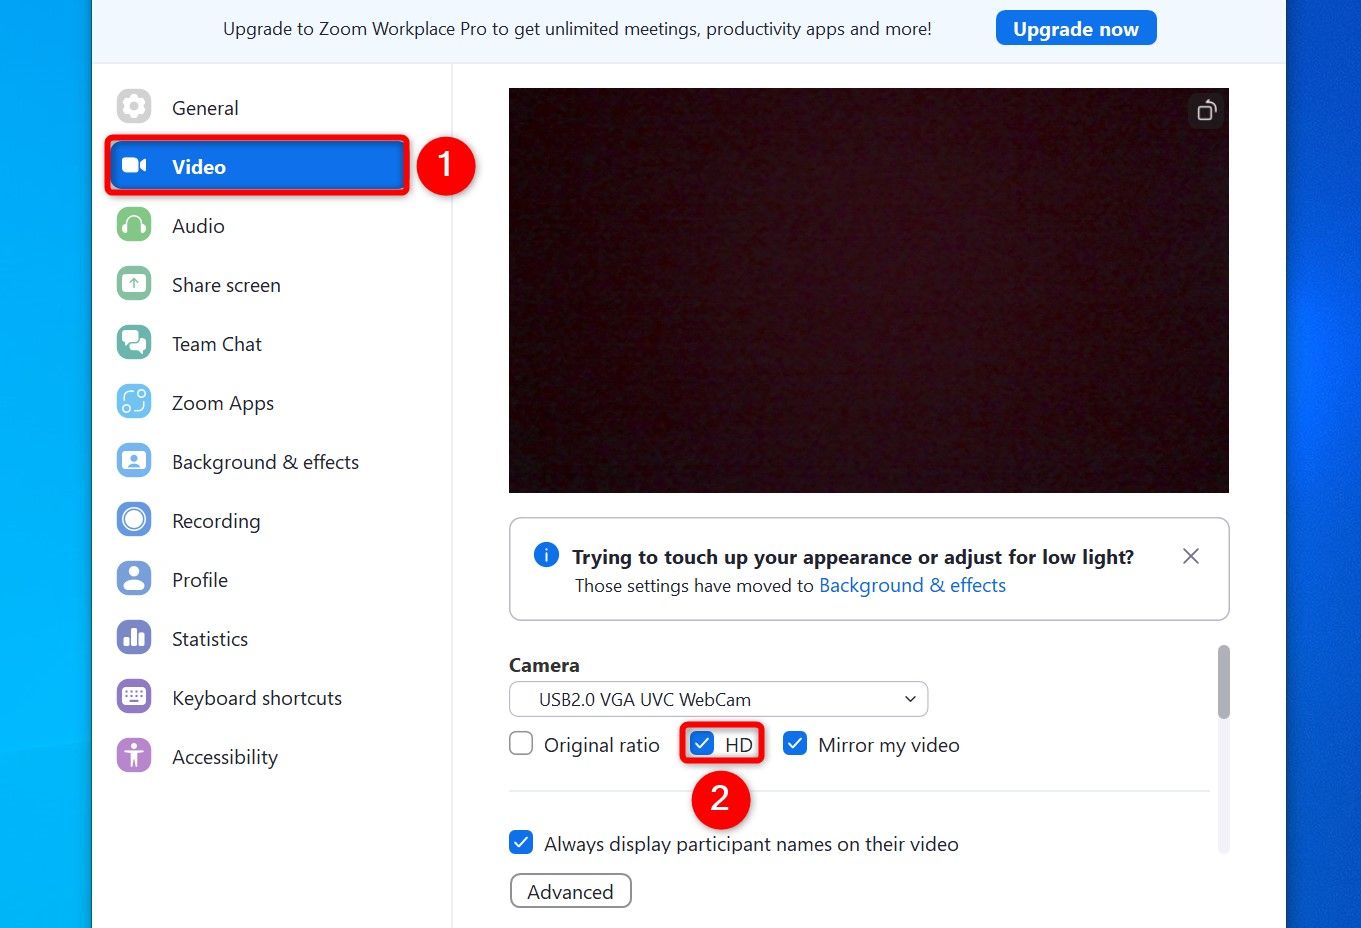
You can make yourself look sharper in your meetings by enabling Zoom’s HD video option. This option streams your webcam feed in HD resolution. Ensure you have a strong enough internet connection to handle this.

Related
Why It’s Time to Ditch Your Laptop’s Camera and Buy a Real Webcam
Cameras in most laptops are average at best; here’s why you should upgrade to a dedicated webcam.
To make that change, launch Zoom, click your profile icon in the top-right corner, and choose “Settings.” From the left sidebar, select “Video.” On the right pane, beneath the Camera drop-down menu, turn on the “HD” option.
Zoom has automatically saved your change, so you don’t have to click anything.
Blur or Replace Your Background to Hide Your Cat
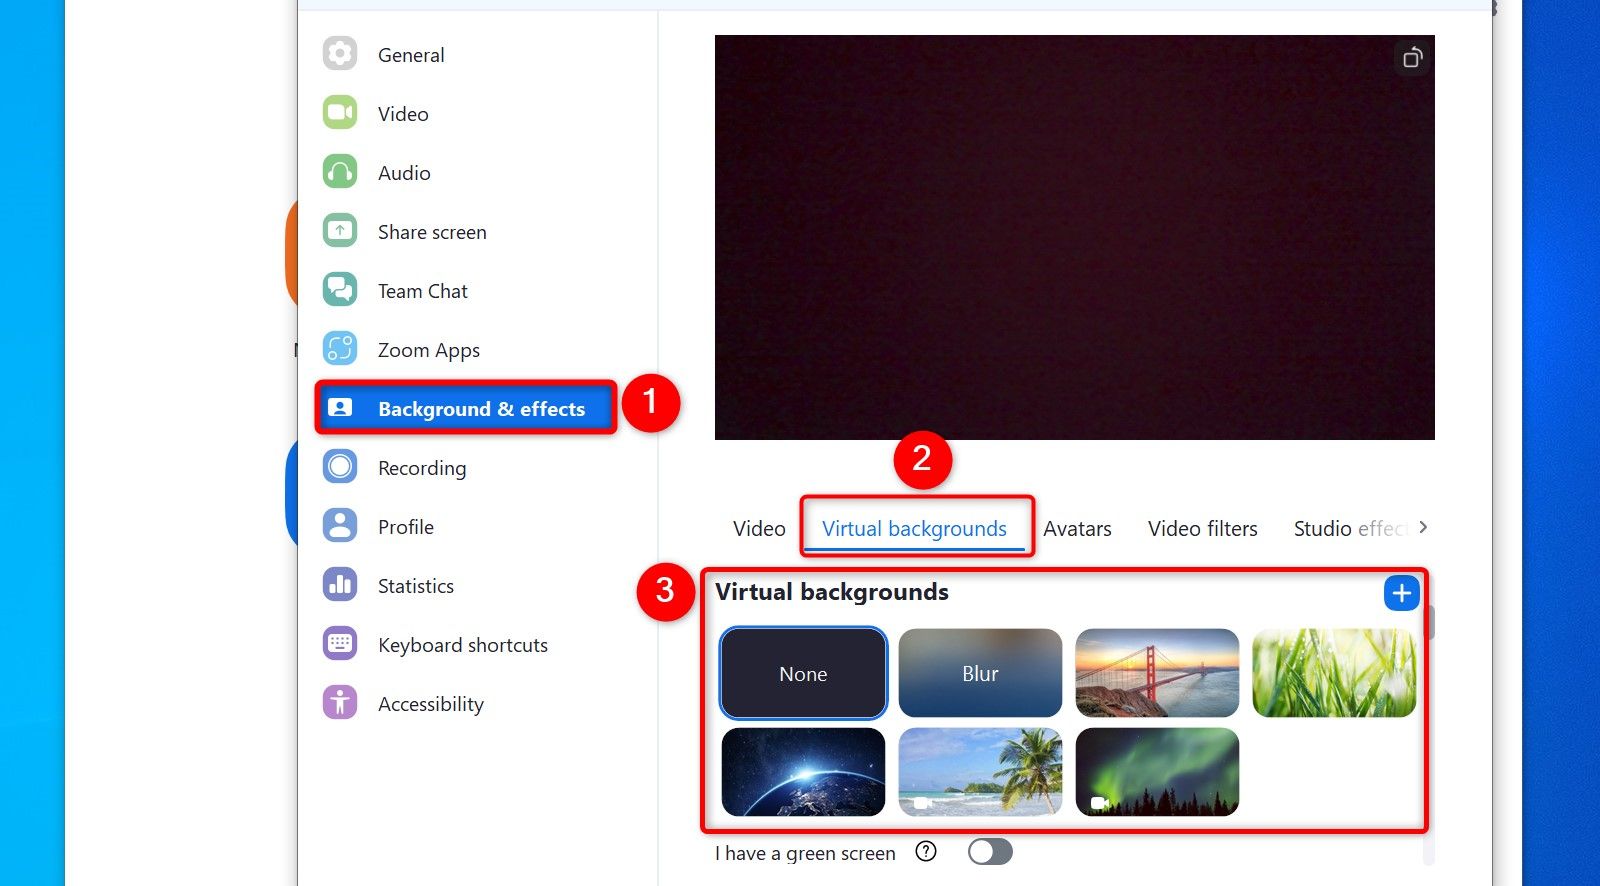
If you don’t want the meeting audience to see your messy bedroom, you can blur or replace your background. To do that, launch Zoom, click your profile icon in the top-right corner, and choose “Settings.”

Related
How to Create a Custom Zoom Background
Even if you have zero Photoshop skills, it’s simple to create your own custom Zoom background. Follow along while we do it!
From the left sidebar, select “Background & Effects.” On the right pane, in the Virtual Backgrounds section, you’ll see various options. If you want to blur your background, click “Blur.” To replace the background with the available images, select an image on the list. To add your own image or video to use as the background, click the plus sign and choose an appropriate option.
To change your background in the future, you can return to this screen.
Share Your Screen to Better Explain Yourself
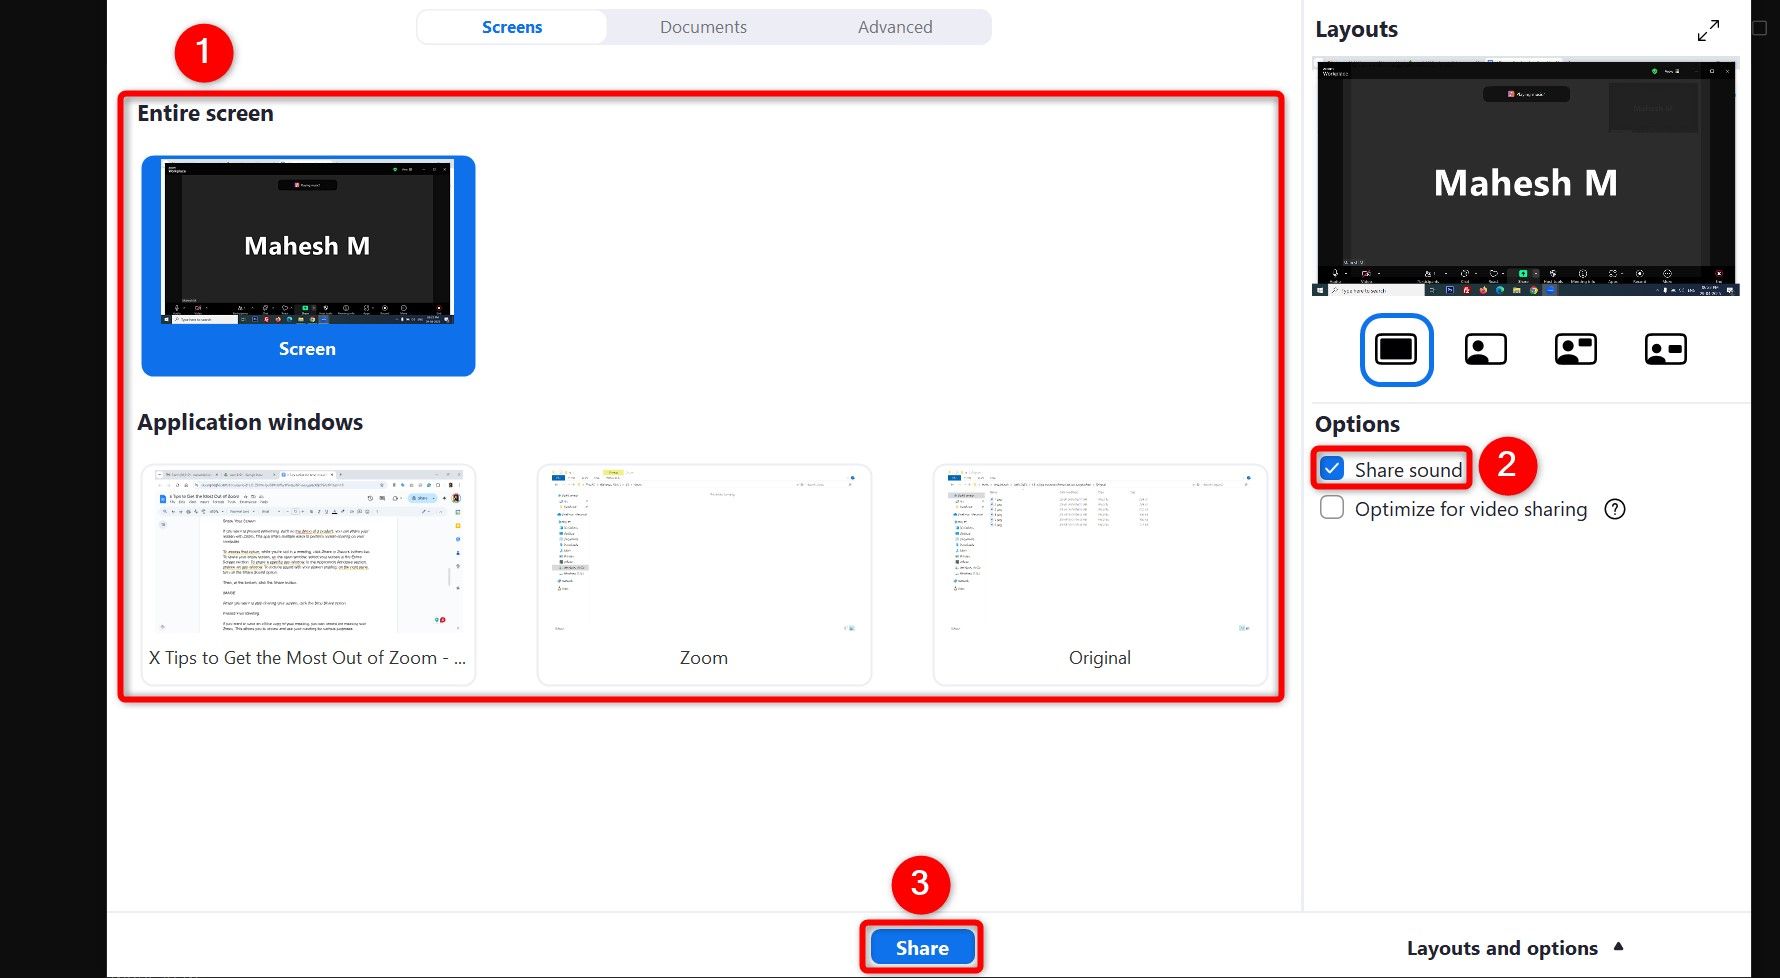
If you want to present something, such as the demo of a product, you can share your screen with Zoom. The app offers multiple ways to perform screen-sharing on your computer.
To access that option, while you’re still in a meeting, click “Share” in Zoom’s bottom bar. To share your entire screen, on the open window, select your screen in the Entire Screen section. To share a specific app window, in the Application Windows section, choose an app window. To include sound with your screen sharing, on the right pane, turn on the “Share Sound” option.
Then, at the bottom, click the “Share” button.
When you want to stop sharing your screen, click the “Stop Share” option.
Record Your Meeting for Later Use
If you want to save an offline copy of your meeting, you can record the meeting with Zoom. This allows you to review and use your meeting for various purposes.
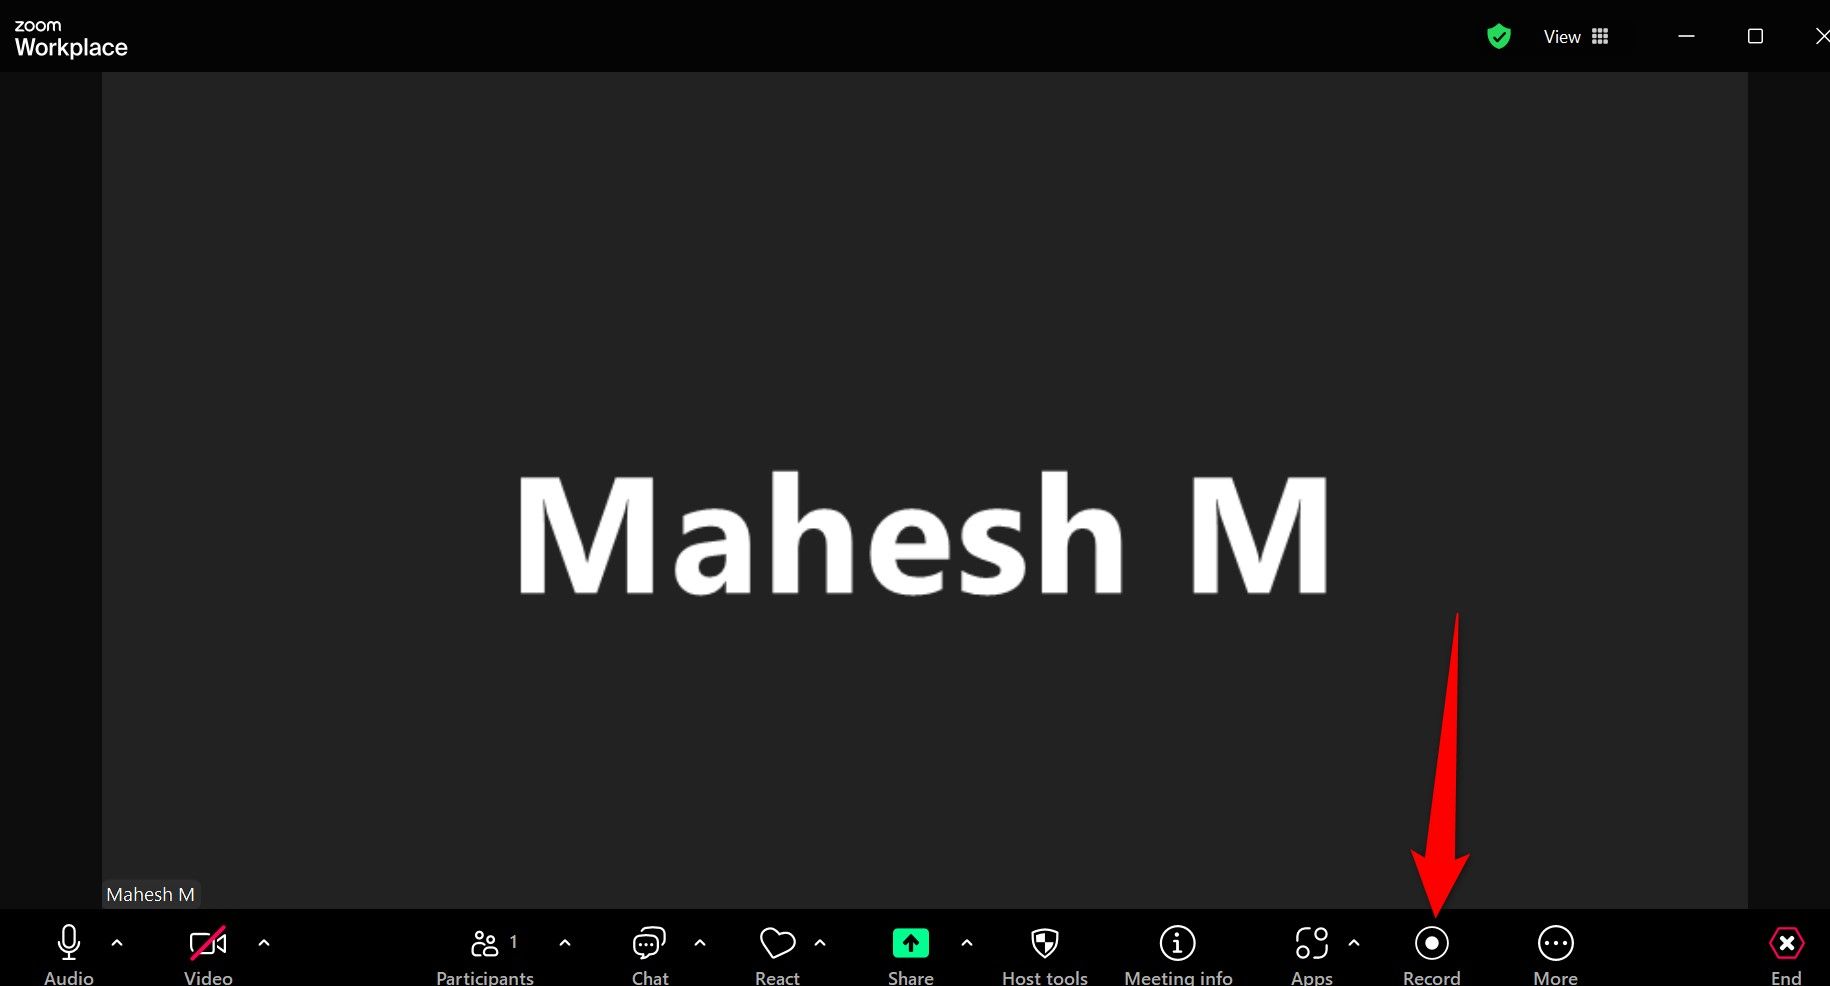
To do that, while in a meeting, click “Record” in Zoom’s bottom bar. If you don’t see this option, click “More” and choose “Record.” Zoom will announce that it’s recording the current meeting.
To stop recording the meeting, in Zoom’s bottom bar, click the Pause or the Stop button. Zoom will convert the recording and save the video file on your computer.

Related
Can Zoom Hosts Really See All Your Private Messages?
Zoom meeting hosts can’t see the private messages you send during meetings… but there are some ways your private messages could leak out. Here’s what you need to know.
Create Recurring Meetings
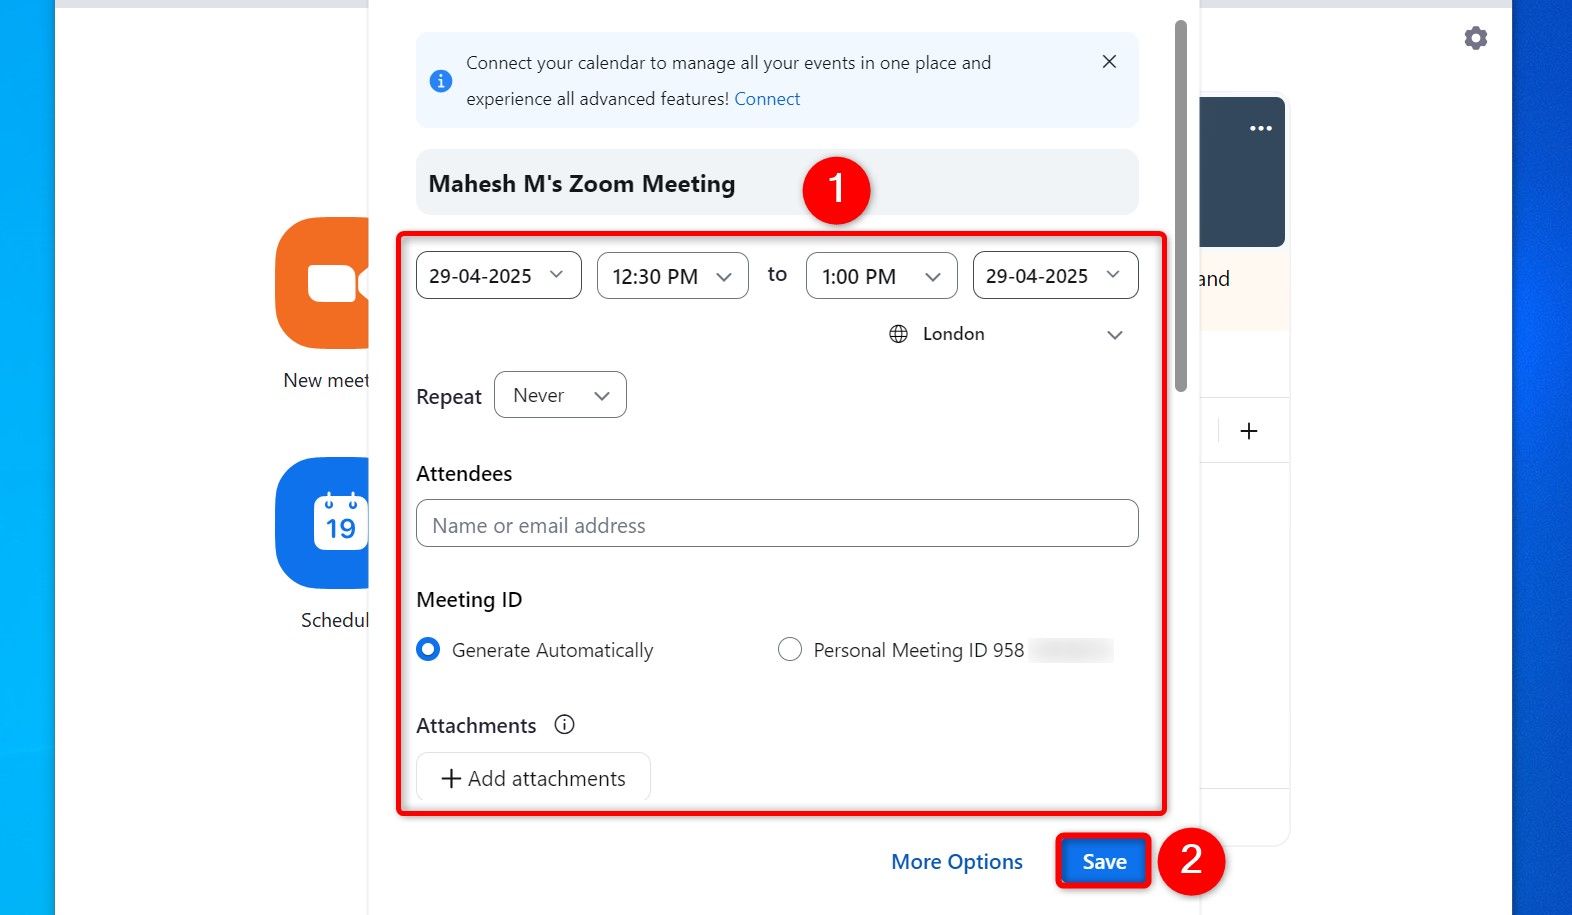
If you host recurring meetings, you don’t have to create a new meeting every time. Instead, create a recurring meeting with Zoom that occurs at the specified schedule.
To do that, open Zoom and click “Schedule” on the main interface. On the window that opens, enter your meeting details. This includes your meeting’s name, when the meeting starts and ends, how often the meeting occurs, and so on. After filling in the details, save the meeting by clicking the “Save” button.
You can use the same meeting link to join this meeting every time.
Enable Waiting Room to Selectively Admit People in Your Meetings
If you want to admit people into your meetings selectively, you can enable the Waiting Room feature. This way, when someone wants to join your meeting, they’ll first enter Waiting Room. After you approve their request to join, they’ll enter the actual meeting.

Related
What Is Zoombombing, and How Can You Stop It?
Are you using Zoom to video chat with co-workers, family, or friends? Here’s how you can protect yourself from “Zoombombing.”
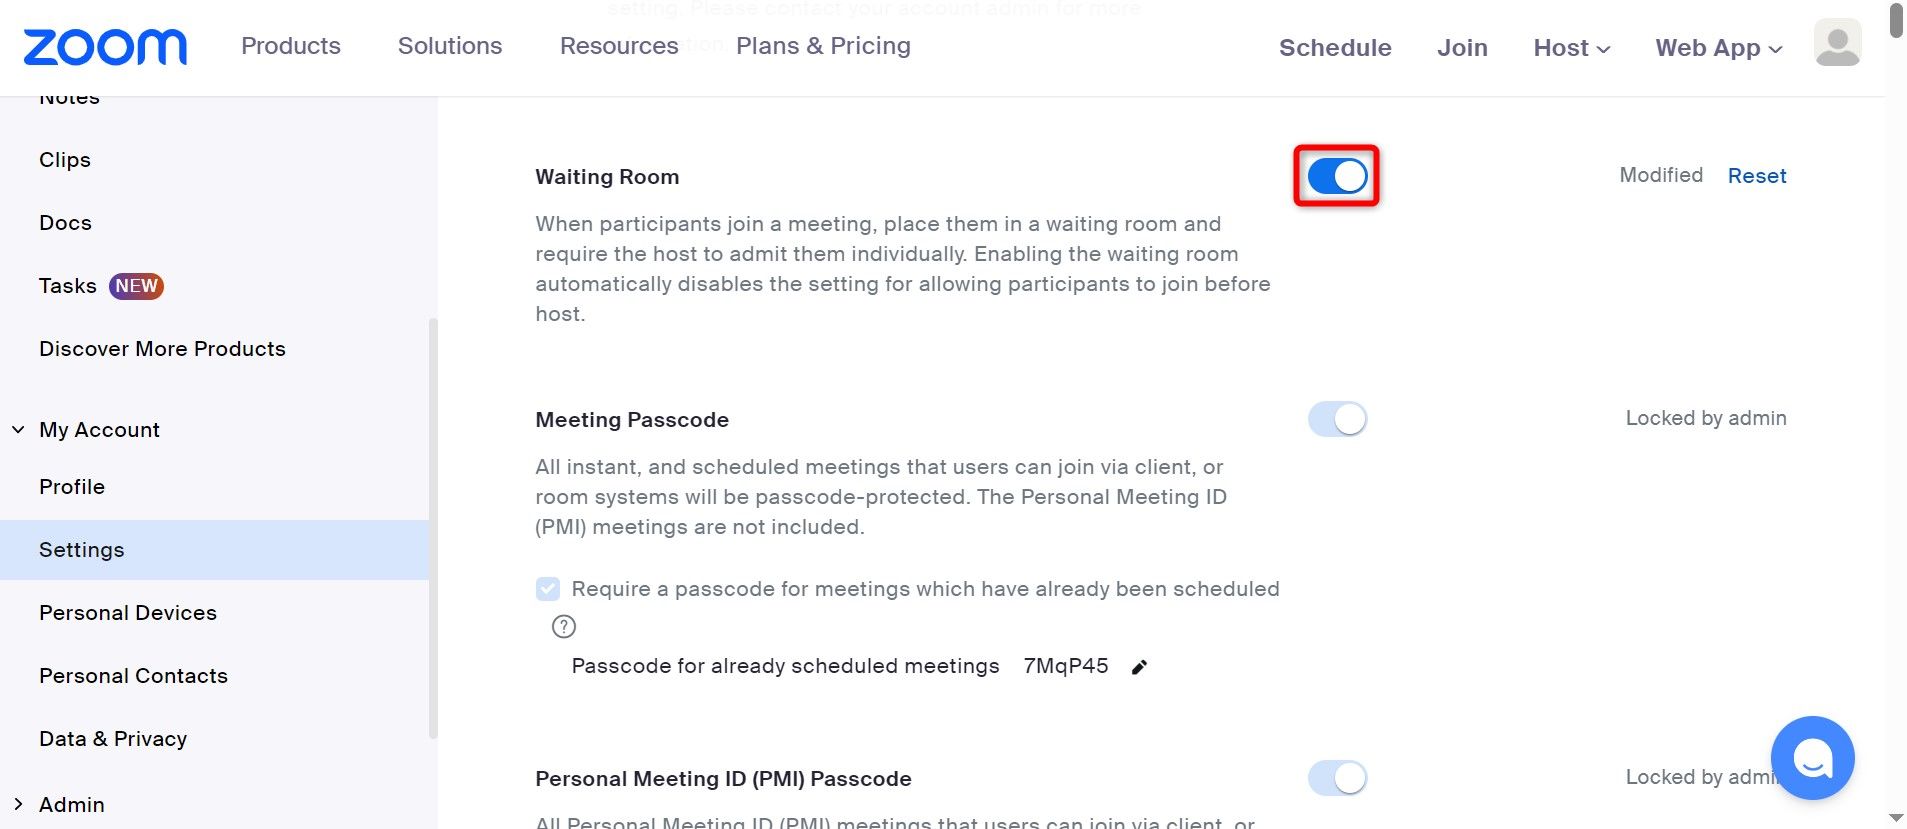
To do that, launch the Zoom site and sign in to your account. In the left sidebar, click My Account > Settings. On the right pane, at the top, click the “Meeting” tab. In this tab, scroll down and turn on the “Waiting Room” toggle.
In the future, you can turn off the feature by disabling the “Waiting Room” toggle.
And that’s how you use various built-in features to make the most of this online conference tool. While you’re at it, consider learning the differences between Zoom and Google Meet.


