One of the major (and majorly controversial) changes in macOS Ventura is a redesign of System Preferences. It’s now called System Settings and it’s designed to better resemble the iOS Settings app.
Apple’s desire to have more commonality between macOS and iOS is understandable, but the problem is that it’s now a chore to find the settings you need. The years of muscle memory developed by Mac users are out the window and it’s time to relearn where everything is.
You can find most of the frequently-access preferences up front (Apple ID, Battery, Bluetooth, and Sound, for example). Others have been renamed to match the corresponding iOS setting, such as Security & Privacy, which is now Privacy & Security. But most notably, System Settings now uses a lot of subsections and lists, so the setting you need often isn’t where you think it is. With that in mind, here’s a list of often-used and important system settings and where to find them.
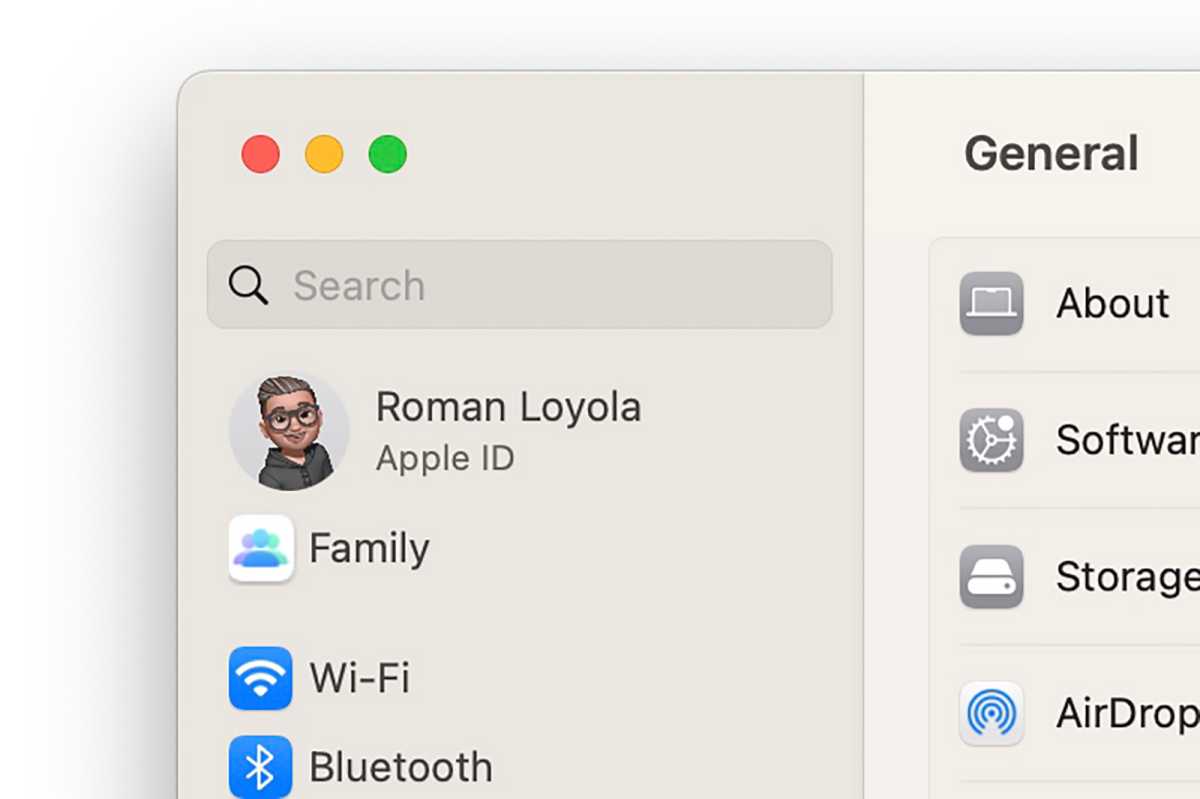
One important tip before we proceed: System Settings does have a search tool, located at the very top of the left column. It’s helpful, but sometimes the search terms you’re using don’t match what macOS thinks you’re looking for.
Foundry
Tools required: macOS Ventura
Storage
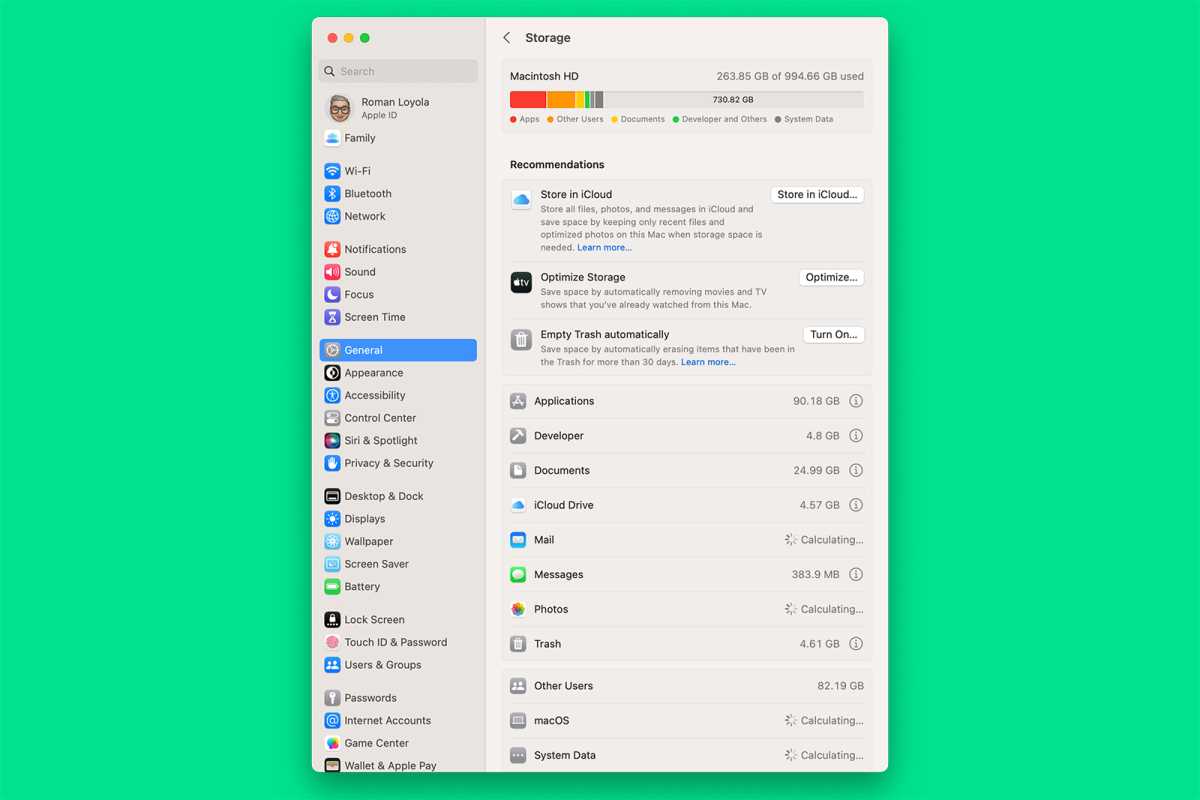
The storage management tools in macOS Ventura can still be found using About This Mac. But getting there is a little different.
Foundry
Before macOS Ventura, the About This Mac window (found in the Apple menu) had an obvious Storage section where you could manage your Mac’s storage. It’s a useful tool not just for clearing space, but to see how your storage is being used.
That tool is still in macOS Ventura, but if your muscle memory takes to you About This Mac, things are a little different.
- Click on the Apple menu and select About This Mac.
- Click on More Info.
- System Settings will open to the General tab. At the default window size, you won’t see the Storage section in the main part of the window. Scroll down to the bottom, where you’ll find the Storage section.
- Click on the Storage Settings button and you’ll find the storage management tools.
The faster way to get to these tools is to go to System Settings > General > Storage.
Hot Corners
Foundry
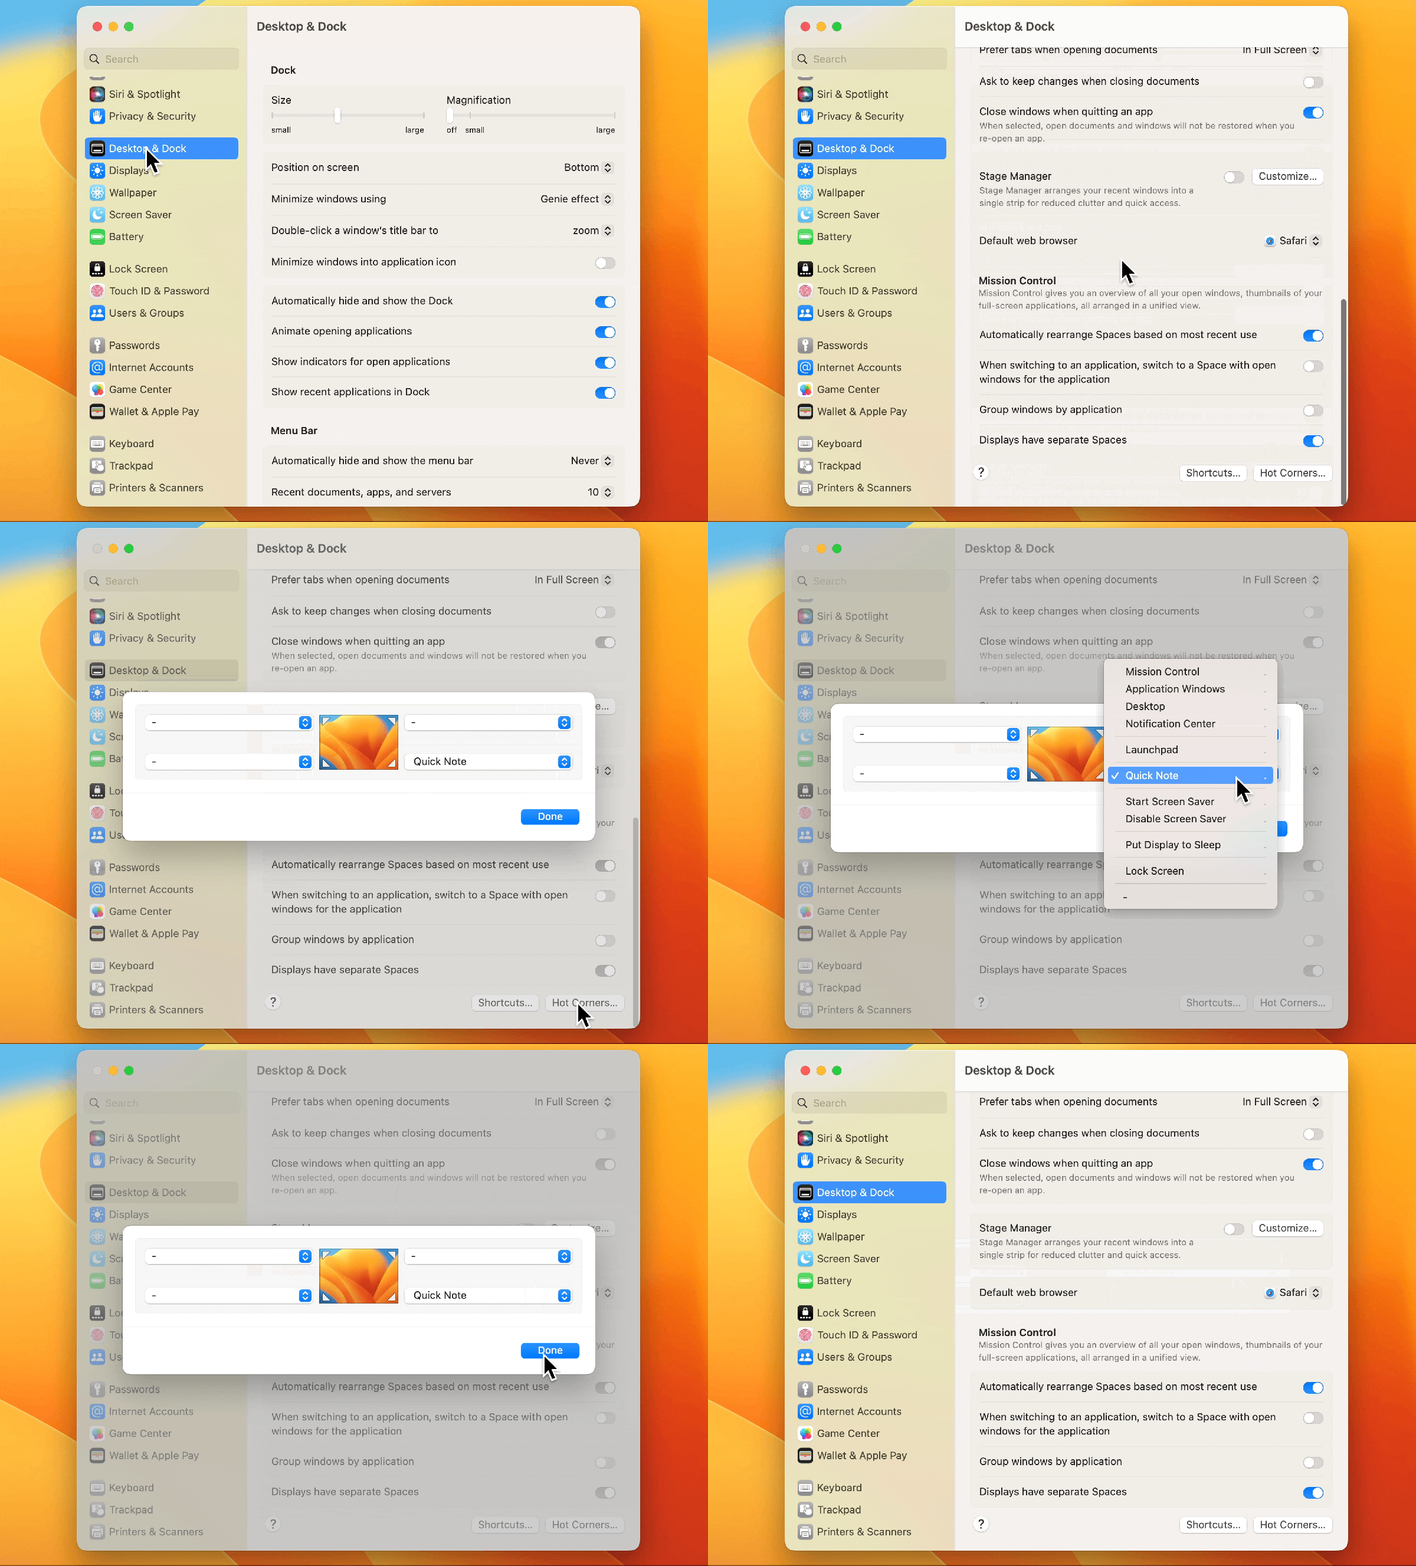
With Hot Corners, you can set macOS so that when you move the pointer to a corner of the screen, it triggers an action. For example, Quick Note, which was introduced in macOS Monterey, is set by default for the lower right corner. Move the pointer there, and you’ll see a white box appear, indicating that a Quick Note can be created by clicking.
You can change the Hot Corner for Quick Note, and you can set other Hot Corner actions in System Settings. Here’s how to access Hot Corners in macOS Ventura:
- Go to System Settings, then click on Desktop & Dock in the left column.
- In the main section of the window scroll down to the very bottom.
- Look for the Hot Corner button in the lower right and click it.
Extensions
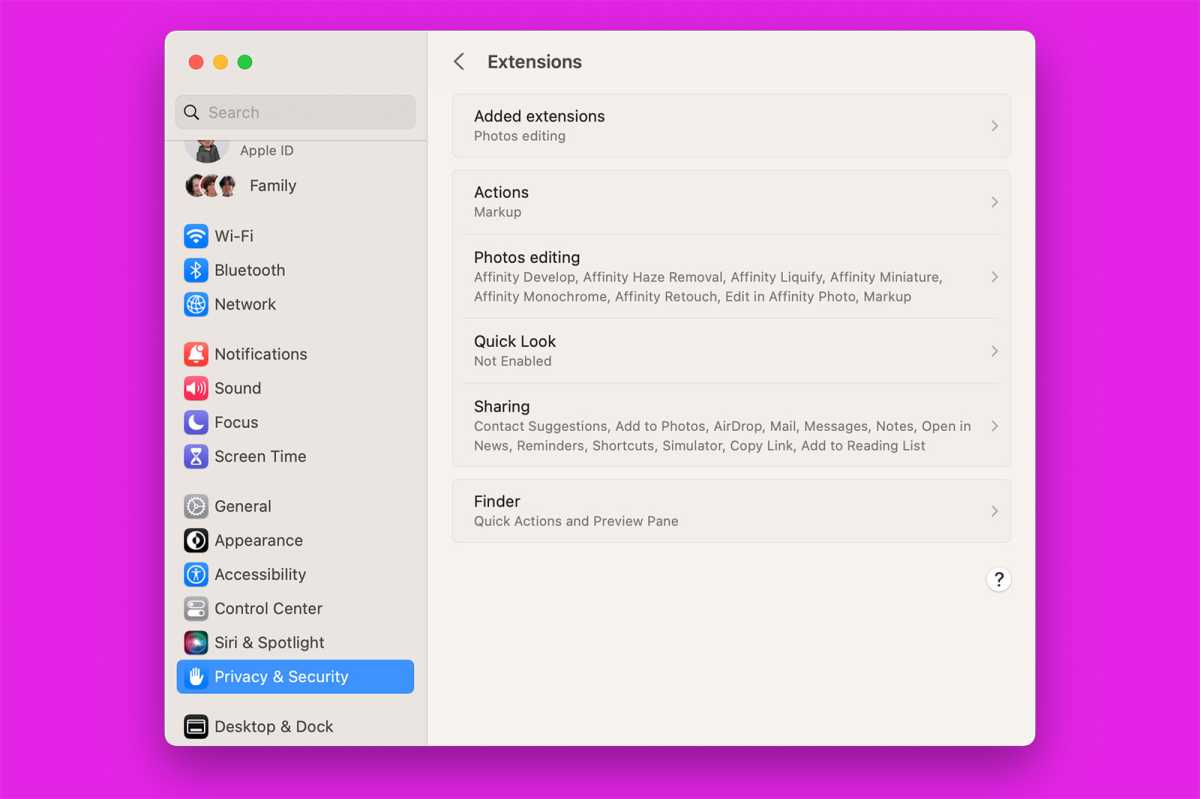
The Extensions system settings are found in Privacy & Security.
Foundry
You can add system-wide functionality to macOS through extensions, which are often put into place when you install an app. You can manage these extensions through the Extensions system preference in macOS Monterey and older. But in macOS Ventura, Apple moved this into the Privacy & Security system setting. Scroll to the bottom to find it.
Mission Control
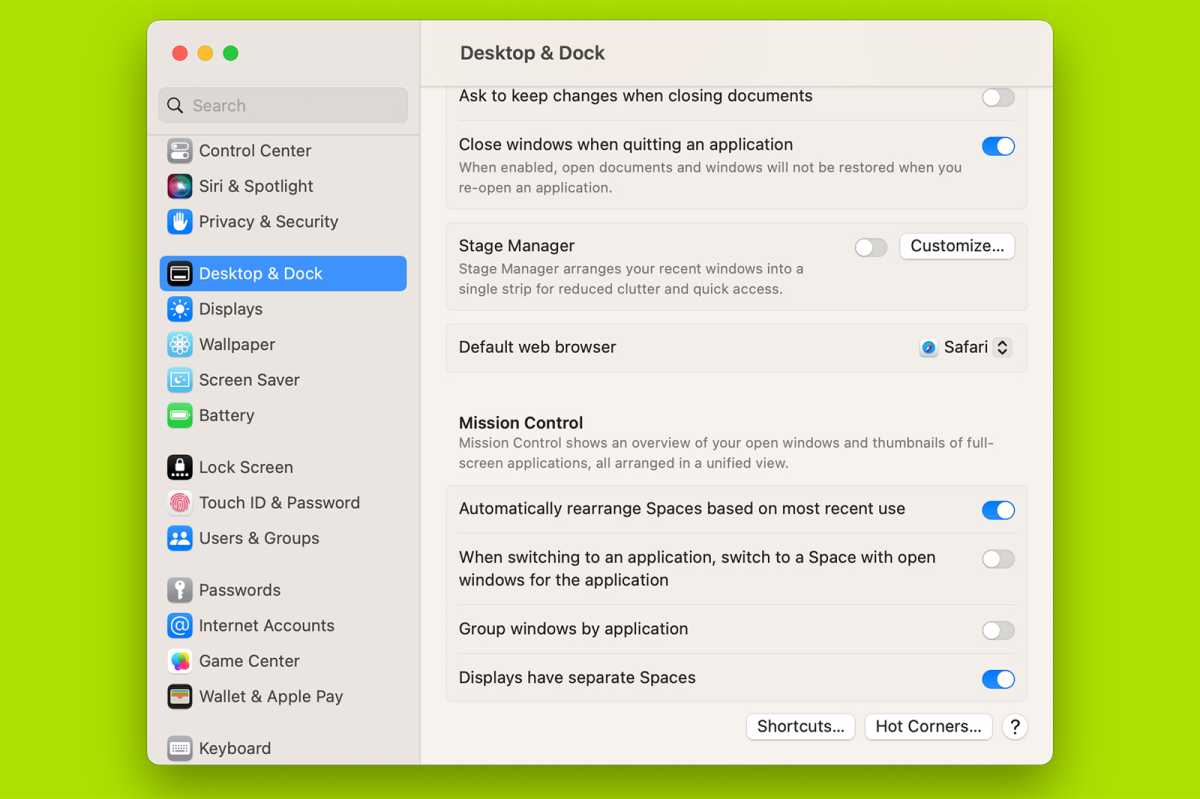
Mission Control’s settings are in the Desktop & Dock section of System Settings.
Foundry
Mission Control is very helpful for users who often have a lot of windows open at once. Before macOS Ventura, Mission Control had its own preference pane. But in Ventura, Mission Control is located near the bottom of the Desktop & Dock system setting.
Appearance
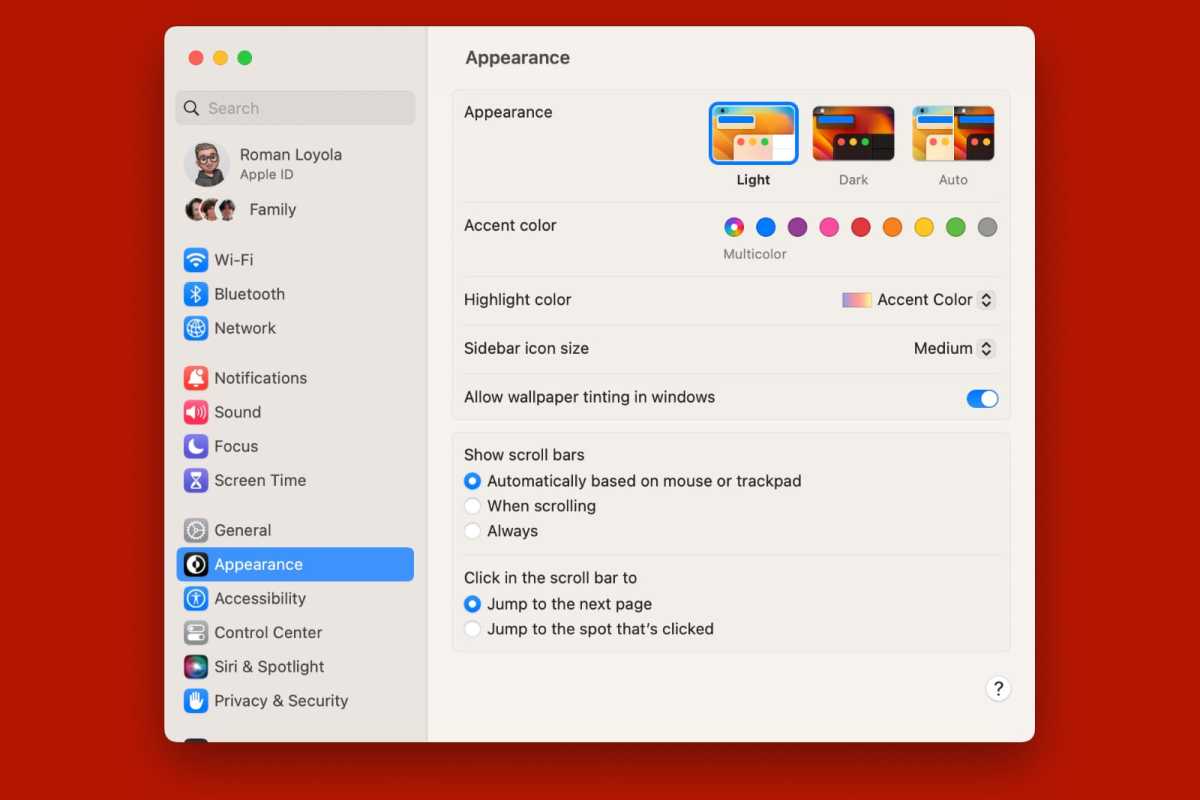
macOS Ventura has a new Appearance system setting for adjusting colors and scroll bars.
Foundry
In macOS Monterey and earlier, Appearance was a section of the General system preference, where you could switch between Light, Dark, and Auto modes, pick accent and highlight colors, adjust the sidebar icon size, activate wallpaper tinting in windows, and adjust scroll bar settings.
But don’t rely on your memory to get to these settings, because Apple decided to make Appearance its own system setting in macOS Ventura. It’s actually located below the General setting as if to make it obvious that Apple made this change.
Time Machine
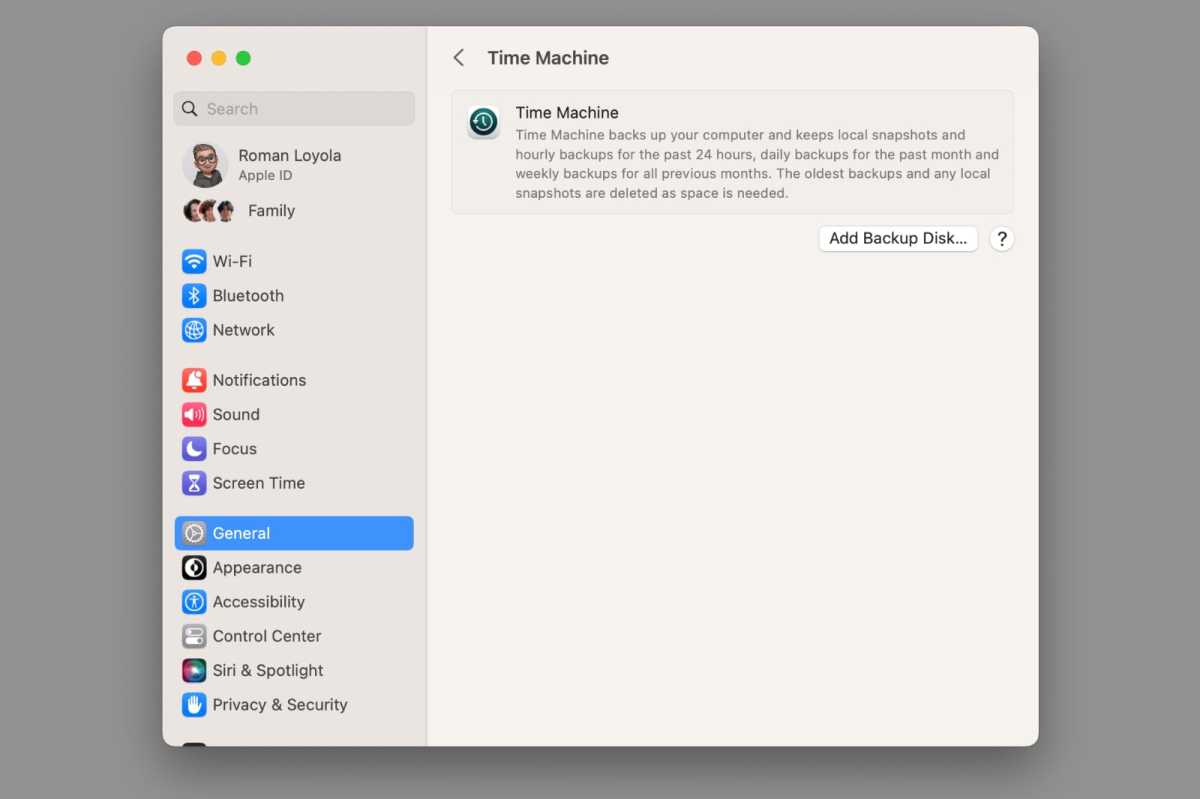
Time Machine settings are now found in the General section.
Foundry
The opposite of what happened to Appearance happened to Time Machine. Before, it was its own stand-alone system preference. In macOS Ventura, Time Machine is now located within the General system setting.
Warranty information
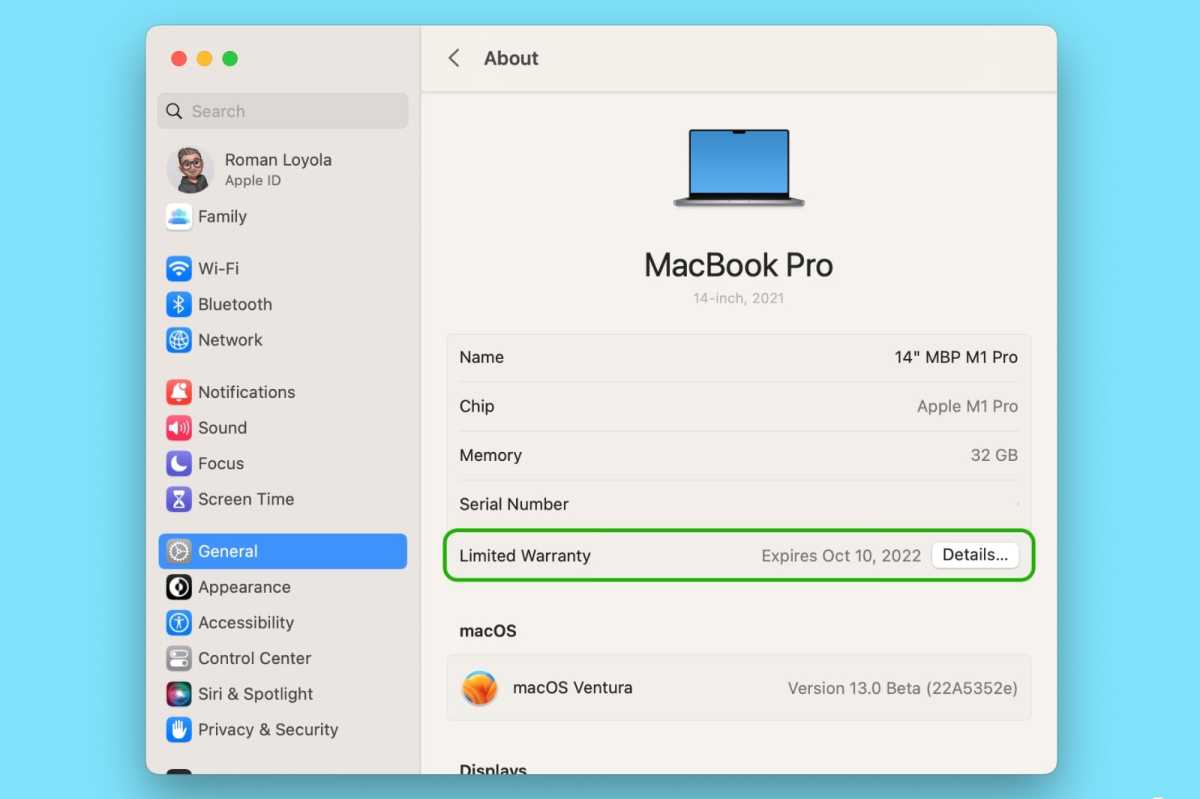
Information about your Mac’s warranty is found in the General system setting in macOS Ventura.
Foundry
In macOS Monterey and older, you can get information on your Mac’s warranty by clicking on the Apple menu and then selecting About This Mac > Support. In macOS Ventura, it’s still in About This Mac, but as with storage, it’s not as obvious.
After opening About This Mac in Ventura, click on More Info. That opens the About section of the General system setting. At the bottom of the first section is an entry for your warranty. Click on Details to get more info on what your warranty offers and access Apple’s support website.


