The first step in making a spreadsheet readable is to tidy up the cell formatting. By smartly using cell borders, shading, data validation, and other formatting techniques, you can improve the visual appeal of your Excel spreadsheet. Here are some tips to help you sharpen your Excel formatting skills.
1 Adjust Column Widths and Row Heights as Needed
To give a spreadsheet a more professional look, I start by adjusting the column widths and row heights to ensure the text isn’t cramped, and there’s adequate spacing between different sections of data. I ensure all text, numbers, and headings are fully visible without any part being cut off. This way, the recipient doesn’t have to excessively scroll or zoom.
I use Excel’s AutoFit feature, which allows me to quickly resize columns and rows to perfectly fit the content. This feature can be applied to specific columns and rows or the entire sheet.. Also, I ensure that formatting is consistent across all sections and every sheet in my workbook.
2 Add Cell Borders Where Necessary
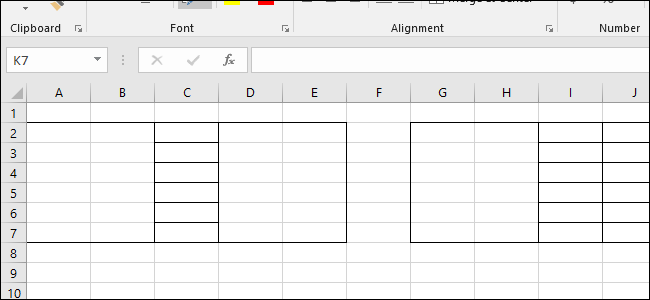
Without borders, a spreadsheet can look like a chaotic mix of numbers or text that is difficult to read. I add borders to separate sections to make it easier for the recipient to distinguish between data sets. I use thin borders within sections to prevent data from blending, and I prefer light gray borders for internal cell dividers.
For key cells or ranges, I apply thick or colored borders to highlight important data points. What I appreciate most about proper border use is how much it improves readability when the spreadsheet is printed. However, you should avoid overusing borders. Additionally, choose styles thoughtfully to maintain the document’s clarity and avoid visual clutter.
3 Merge Cells Where Appropriate
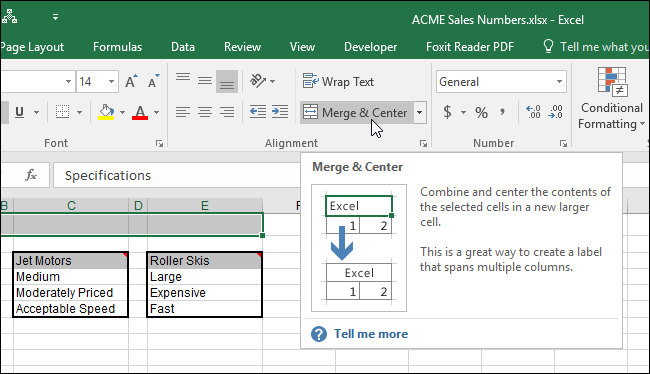
Cell merging is another feature that helps you declutter your spreadsheet. If a table has multiple columns of related data, I merge the top row cells to create a single, centered heading to label the entire dataset. I also merge cells when creating a spreadsheet’s cover page or summary section. If certain cells need to accommodate wider input, I merge them in advance.
Merging cells avoids adjusting cell width or height if it contains a multi-line title or lengthy text. However, while merging cells improves readability, it disrupts sorting functions. To prevent the recipient from facing problems sorting data, I only merge cells for header rows, titles, or sections that don’t require sorting. So, you should use this feature selectively.
4 Align Text for Improved Readability
Properly aligned data makes your spreadsheet easier to understand and gives it a more professional and polished appearance—something I always prioritize when preparing spreadsheets. No matter your personal preference, you must maintain a consistent text alignment throughout the spreadsheet.
I center text within cells for headings, titles, and key information, align other text to the left, and right-align numerical data. However, you can choose a different alignment style as long as you keep it consistent for similar types of data. And while you’re at it, don’t forget about vertical alignment. I always vertically center data within cells to avoid awkward spacing.
5 Highlight Key Sections With Cell Shading
Every Excel spreadsheet has summary rows, final outputs, or key performance indicators that need to stand out, and cell shading is an effective way to achieve this. I use different shading colors to visually distinguish various sections of a spreadsheet. For large tables, I apply alternating row or column shading.
I use different colors for complex data to categorize information within the same table. Also, tips, notes, or warnings in my spreadsheets are highlighted with eye-catching colors. However, like with borders, you should avoid overusing shading. Use subtle colors and maintain a consistent color scheme for similar data types or sections to maintain clarity.
6 Use Data Validation to Control Data Input
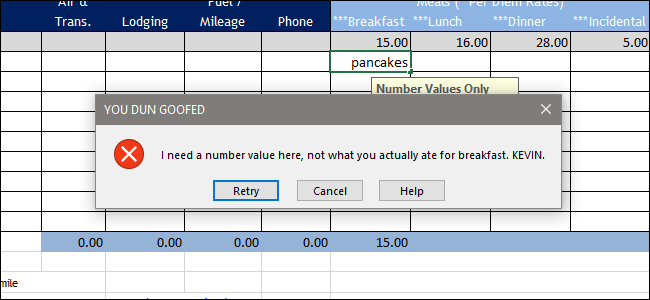
When sharing spreadsheets publicly or collaborating, I use data validation to control the type of data that can be entered into cells. For columns intended for numerical data, I set rules that allow only numbers to maintain consistent data formats. For fields with predefined options, I create dropdown menus.
I also set numerical limits to keep entered values within acceptable ranges. If someone inputs incorrect data, I configure error messages to prompt users to correct their entries. In essence, data validation helps maintain consistency across spreadsheets. Just be sure to set these rules carefully to avoid any issues for the recipient.
7 Use Conditional Formatting to Highlight Important Data
Using conditional formatting allows me to automatically apply formatting—such as colors, fonts, or borders—based on cell values. I use it to highlight data points that exceed certain thresholds or fall below targets. It also helps me automatically identify outliers or unusual figures, making it easier to spot calculation errors.
Also, I use icons like arrows, flags, or traffic lights to represent performance status, progress, or risk levels and keep formatting consistent for similar data types. Conditional formatting also lets me highlight duplicate entries in a list, helping to clean up the data. It’s also helpful in comparing datasets by highlighting differences or similarities.
8 Use the “Wrap Text” Feature for Large Text
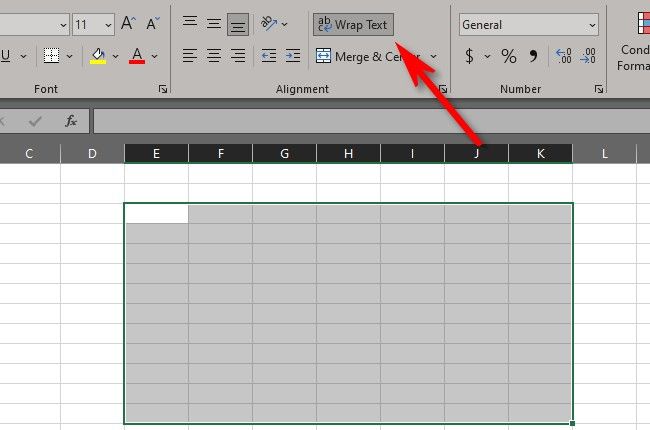
Sometimes, when text exceeds a cell’s width, it often gets cut off or spills over into adjacent cells. The Wrap Text feature is a valuable solution for this issue, as it breaks up long text into multiple lines within the same cell, making the content easier to read without having to scroll horizontally.
Wrapping text also helps with better alignment and organization within cells. I often use this feature for headers and labels to ensure text stays within the cell without affecting neighboring cells. For larger text blocks spanning multiple lines, you may need to adjust the cell’s height and width for the best results.
I hope you now understand how I use various cell formatting techniques to keep my spreadsheets clean and easy to read. If you haven’t focused much on cell formatting before, try applying these tips the next time you work in Excel. They’ll help make your spreadsheet visually appealing and likely earn you praise from your boss or colleagues.


