Your iPhone contains a lot of sensitive information, including your location, your personal photos, and more. There are several iPhone privacy features that you can use to help protect this information.
1 Locked or Hidden Apps
In iOS 18, Apple added the ability to lock and hide iPhone apps. To open a locked app, you need to authenticate using Face ID, Touch ID, or your passcode. This means anyone who gets access to your iPhone can’t open the apps you lock.
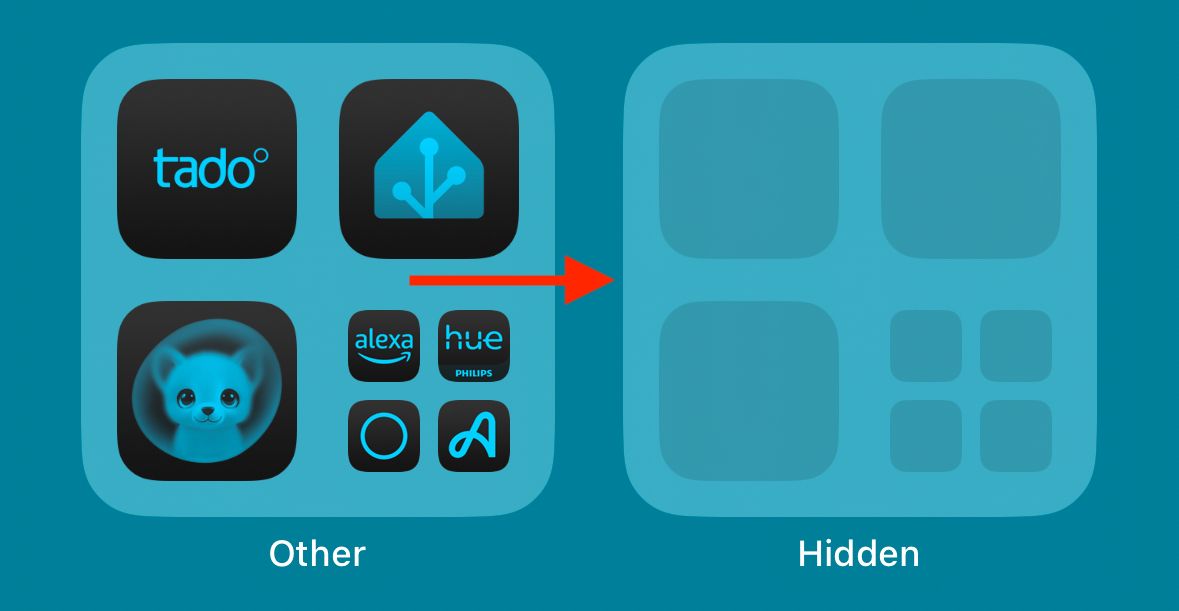
You can also hide apps completely. This places them in a “Hidden” folder under the App Library so they don’t appear elsewhere. You can only access the Hidden folder by authenticating with Face ID, Touch ID, or your passcode.
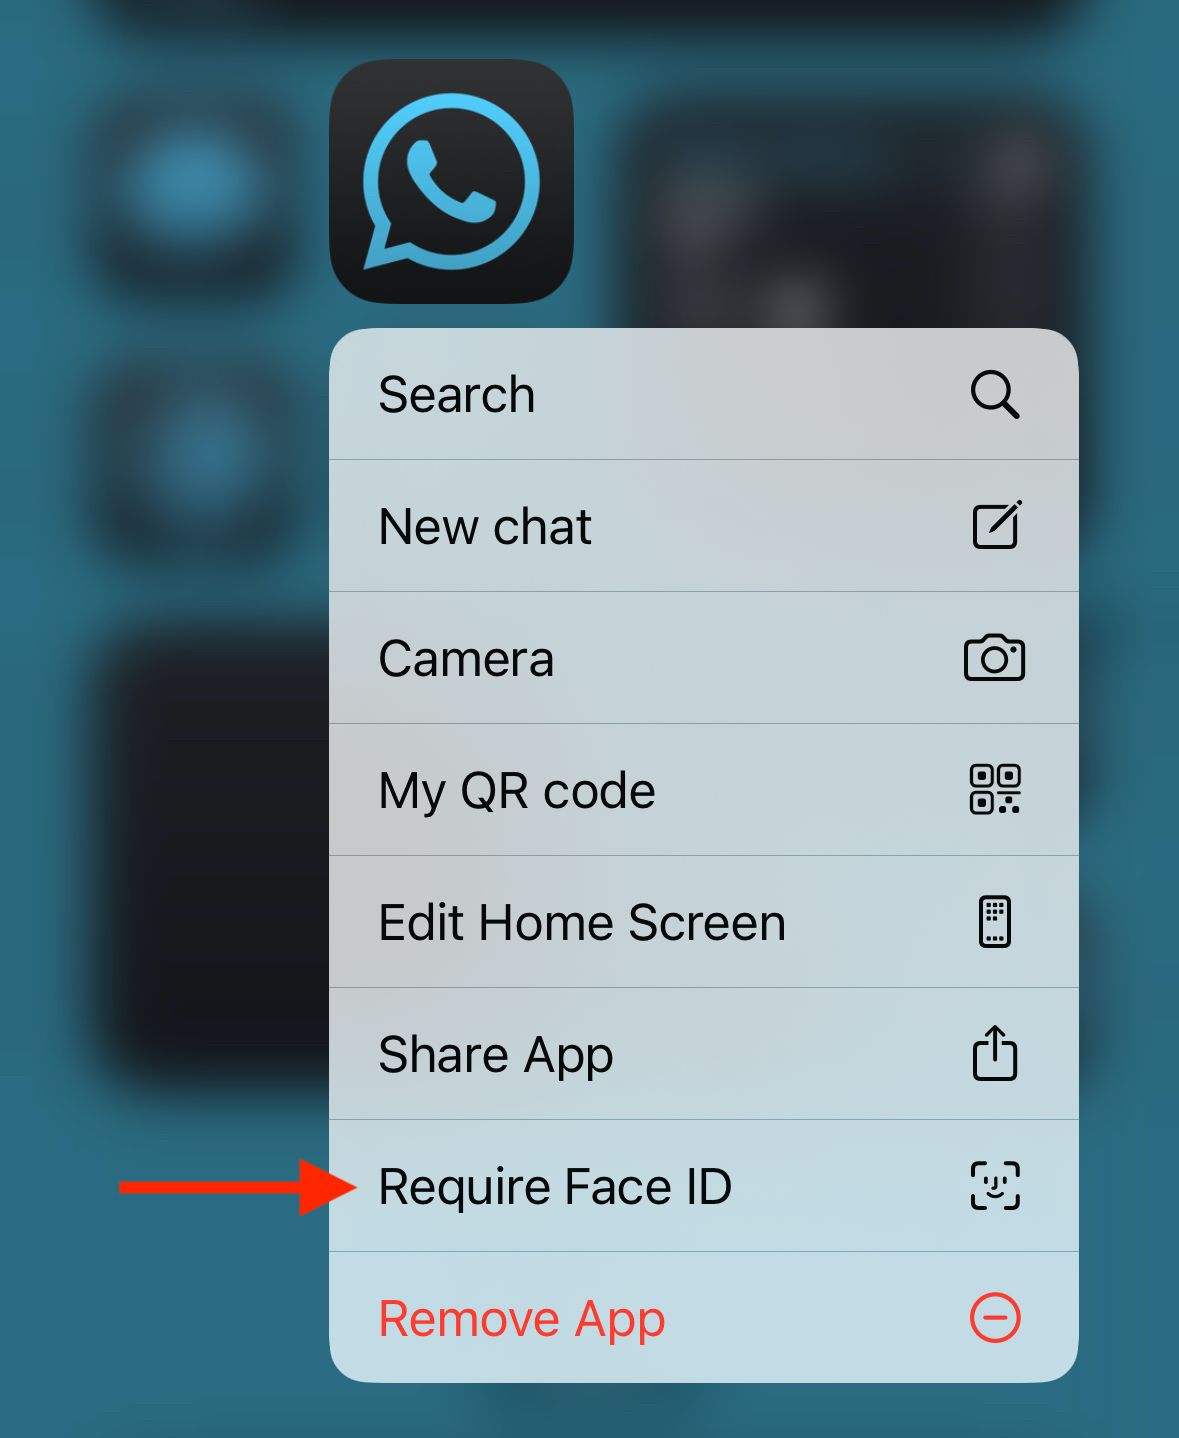
Tap and hold an app that you want to lock or hide. Select “Require Face ID” (or “Require Touch ID” if your iPhone has a Home button).
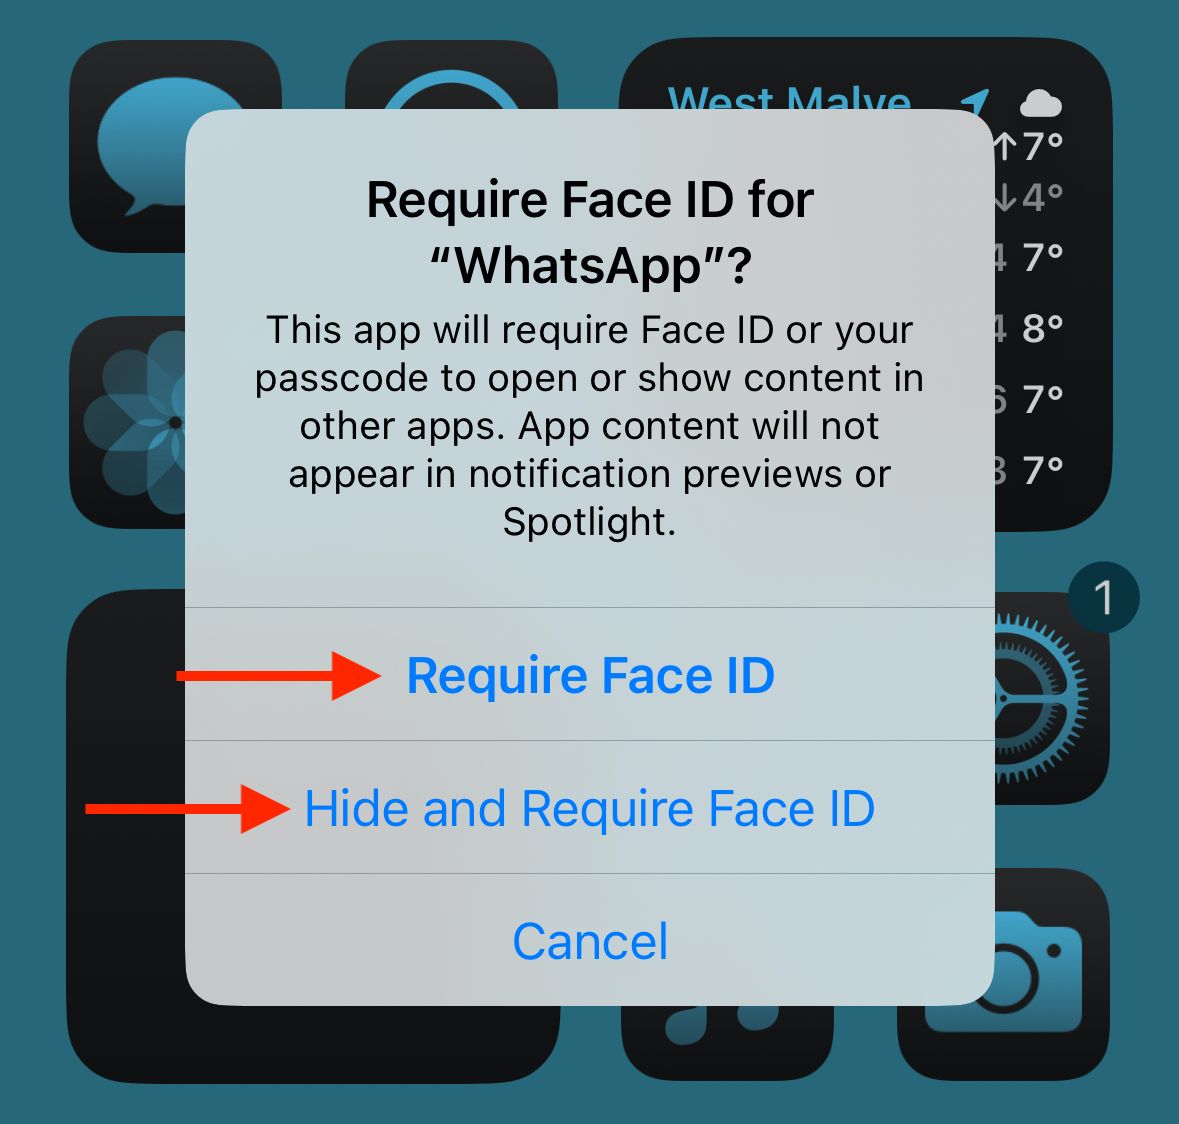
Select “Require Face ID” to lock the app, or “Hide and Require Face ID” to hide it.
To find hidden apps, swipe left until you reach the App Library. Scroll down and tap the “Hidden” folder and unlock it using Face ID.
2 Protect Mail Activity
Your inbox is probably full of marketing emails. Many of these emails include remote content that lets the sender gather information about you. For example, the sender can find out when you opened their email and how many times, as well as personal information such as your IP address, all of which is used to build a profile for further marketing.
The good news is that the iPhone Mail app includes a feature that can help to prevent this from happening. Protect Mail Activity downloads remote content automatically so the sender won’t know when it’s been opened. The content is also routed through two relays so that your IP address can’t be tracked.
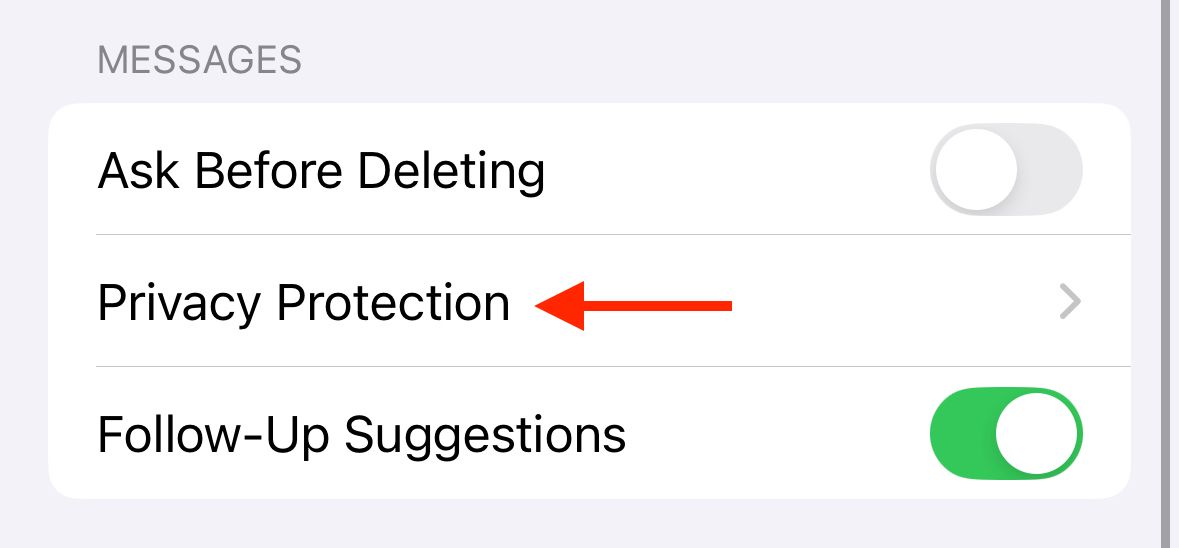
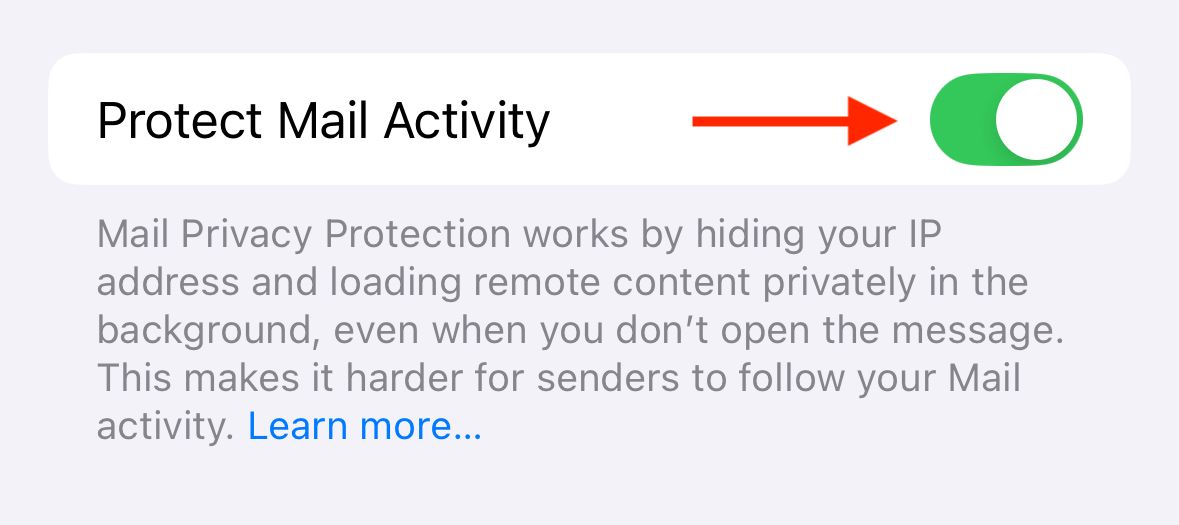
Protect Mail Activity is turned on by default, but it’s worth ensuring that you have it enabled. Go to Settings > Apps > Mail, scroll down to the Messages section, and tap “Privacy Protection.”
Ensure that “Protect Mail Activity” is turned on.
3 Local Network Access
Apps on your iPhone can ask for access to your local network. If granted, the app will be able to interact with devices on your home network, such as smart home devices or your smart TV. This can allow apps to gather information about devices in your home that are connected to your network.
For some apps, granting local network access is necessary for them to work. For example, a remote control app for your smart TV will need access to your smart TV to control it. However, there are plenty of apps that don’t require this access, but may still ask for it.
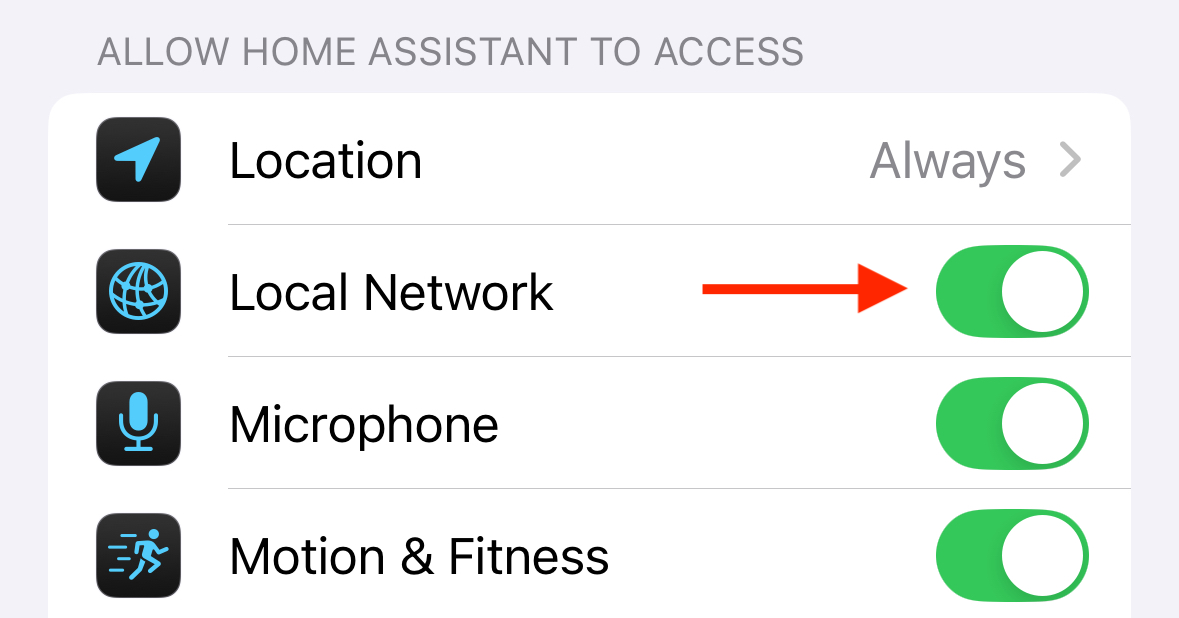
You can grant or deny local network access via Settings > Privacy & Security > Local Network. You can also do this on an app-by-app basis under Settings > Apps by tapping on the app in question then toggling “Local Network” on to grant access or toggle it off to deny access.
4 Location Sharing
Apps can also request access to your location. Once again, for some apps, such as Google Maps, access to your location is vital for the app to work. However, many apps can request location information when it isn’t necessary.
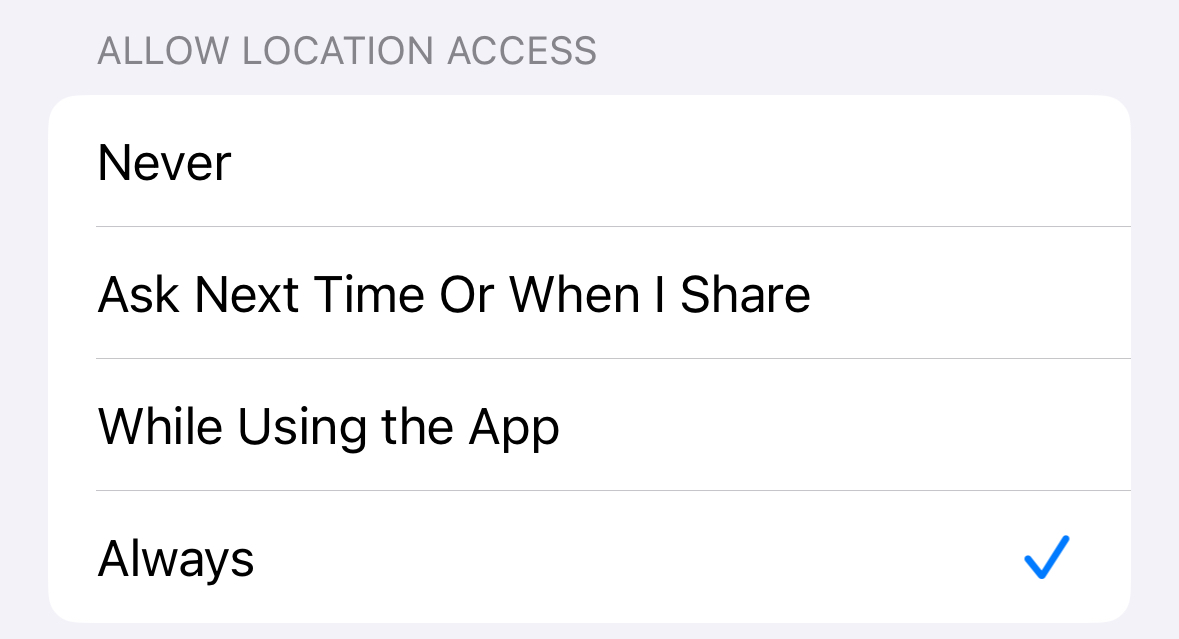
In the Settings app, you can deny access to your location for specific apps. You can also decide whether an app can have access to your location at all times, or only when using the app.
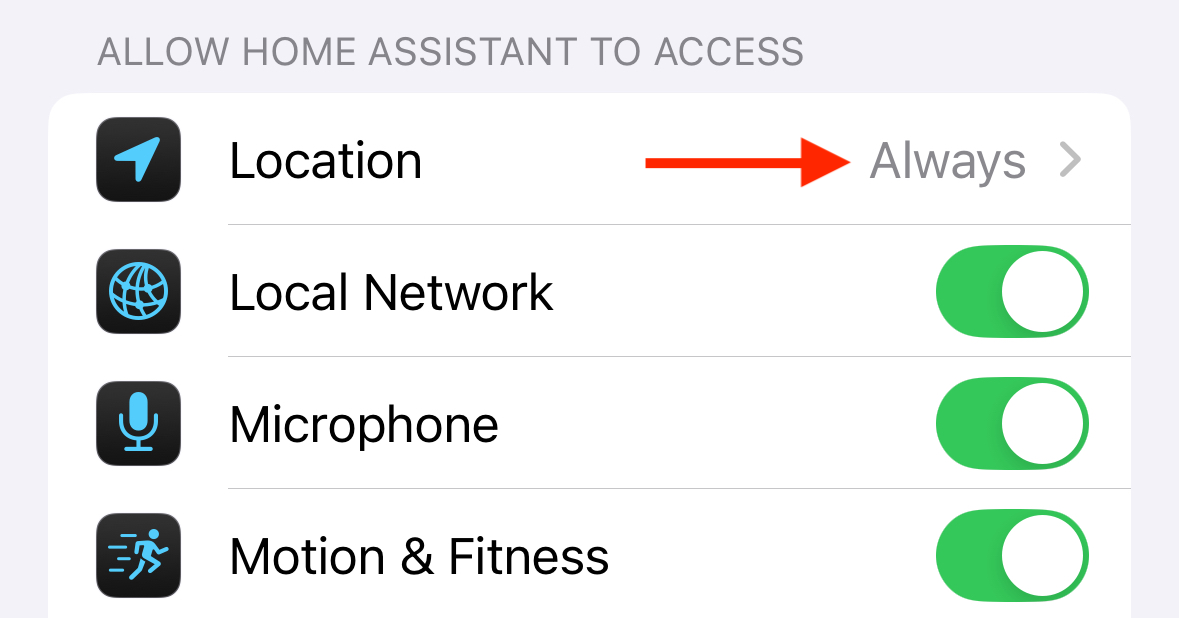
Go to Settings > Apps and select the app you want to change the location settings for. Tap “Location.”
Choose when the app is allowed to access your location.
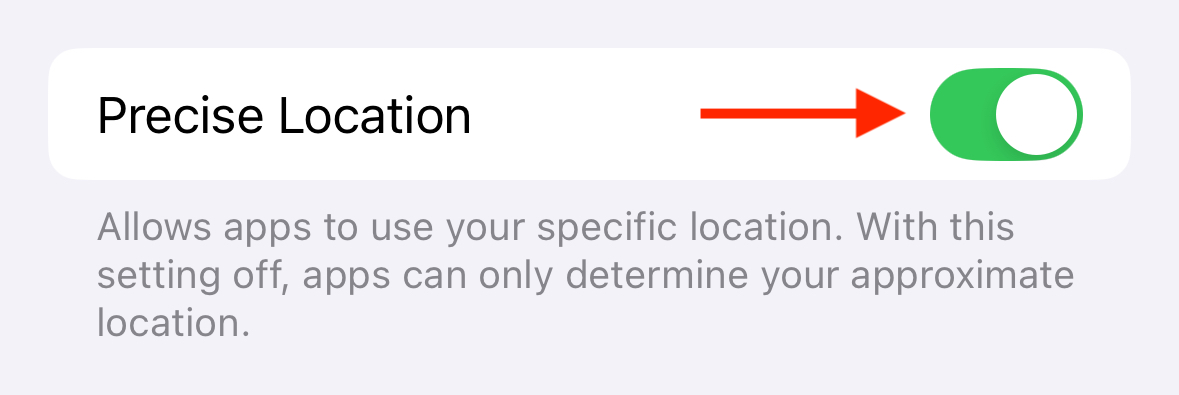
Toggle “Precise Location” on or off depending on whether you want the app to have access to your specific location.
You can also get a full list of apps that have requested this permission under Settings > Privacy & Security > Location Services.
5 Photo Library Access
Another request that apps frequently make is for access to your photo library. For some apps, granting full access to your photos may be necessary, but you may prefer that apps don’t have access to every photo on your device.
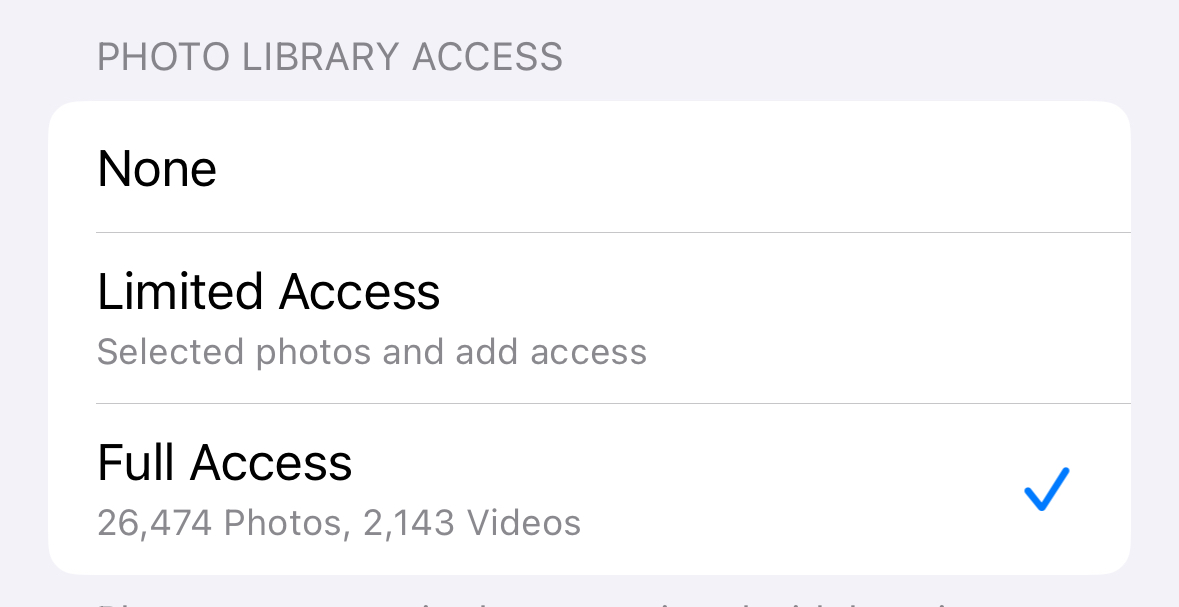
In the Settings app, you can deny access to your photos, grant full access, or give access to a limited selection of photos of your choosing.
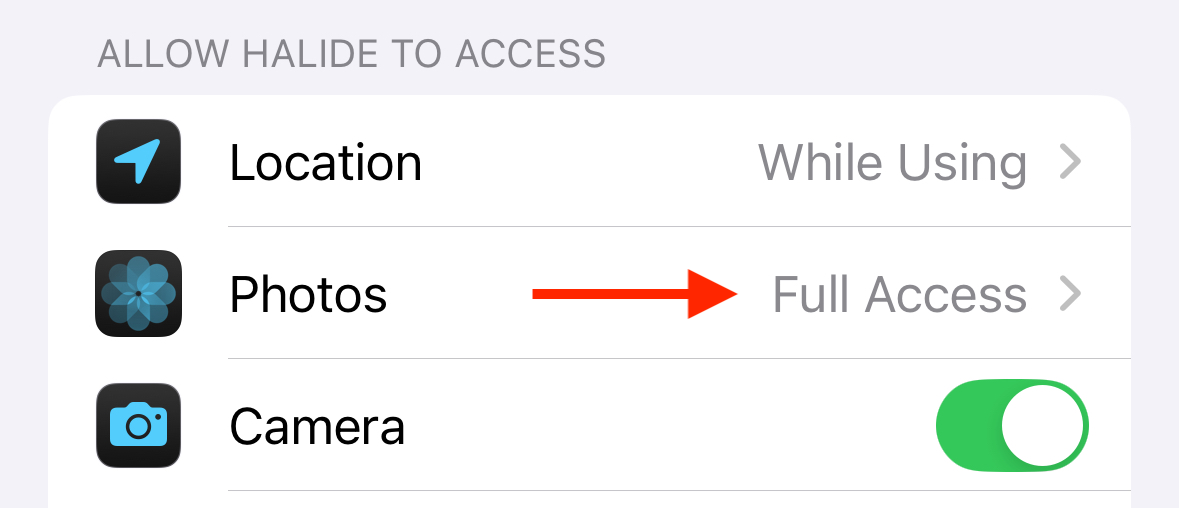
Go to Settings > Apps and select an app. Tap “Photos.”
Choose whether to grant “Full Access,” “Limited Access,” or “None.”
If you select “Limited Access,” tap “Edit Selected Photos” to choose which photos the app is allowed to access.
Once again, you’ll find a full list of apps that have requested this access under Settings > Privacy & Security > Photos.
6 Safety Check
If you have a lot of apps on your iPhone, you may have lost track of which permissions you’ve granted to which apps. You can go through them one by one changing the privacy settings, but this can be a time-consuming task.
Apple has made things easier by creating the Safety Check feature. You can use this to determine which apps and contacts have access to sensitive information on your iPhone and decide whether to continue to allow that access or turn it off. Safety Check also lets you make other changes, such as changing your Apple ID password and your iPhone passcode.
To use Safety Check, you must be running iOS 16 or later, and be signed into an Apple ID account that uses two-factor authentication.
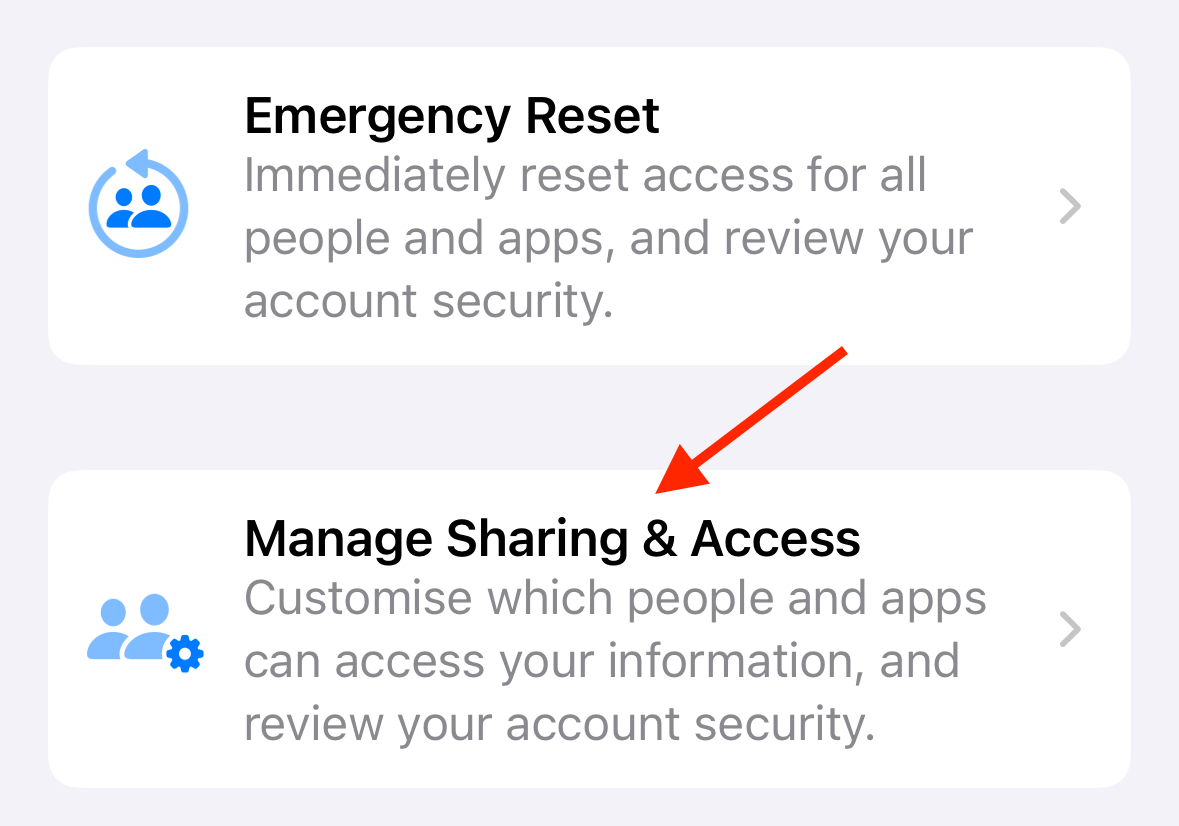
Go to Settings > Privacy & Safety > Safety Check. Select “Manage Sharing & Access.”
Follow the onscreen instructions to review any information shared with apps and contacts and make any changes as required.
7 Hide My Email
If you have an iCloud+ subscription, which comes for as little as $0.99 per month, you get access to some more useful privacy features on your iPhone. One of the most useful is Hide My Email.
As the name suggests, Hide My Email generates a burner email address that you can use when signing up for websites or other services. Each time you use Hide My Email, a new random email is generated, so the same email is never used twice. Any messages sent to the burner email address are automatically forwarded to your Apple ID email.
In Safari, when you’re signing up for accounts and are asked for an email address, the Hide My Email option will often appear above the keyboard. However, you can create a new Hide My Email address manually if you wish.
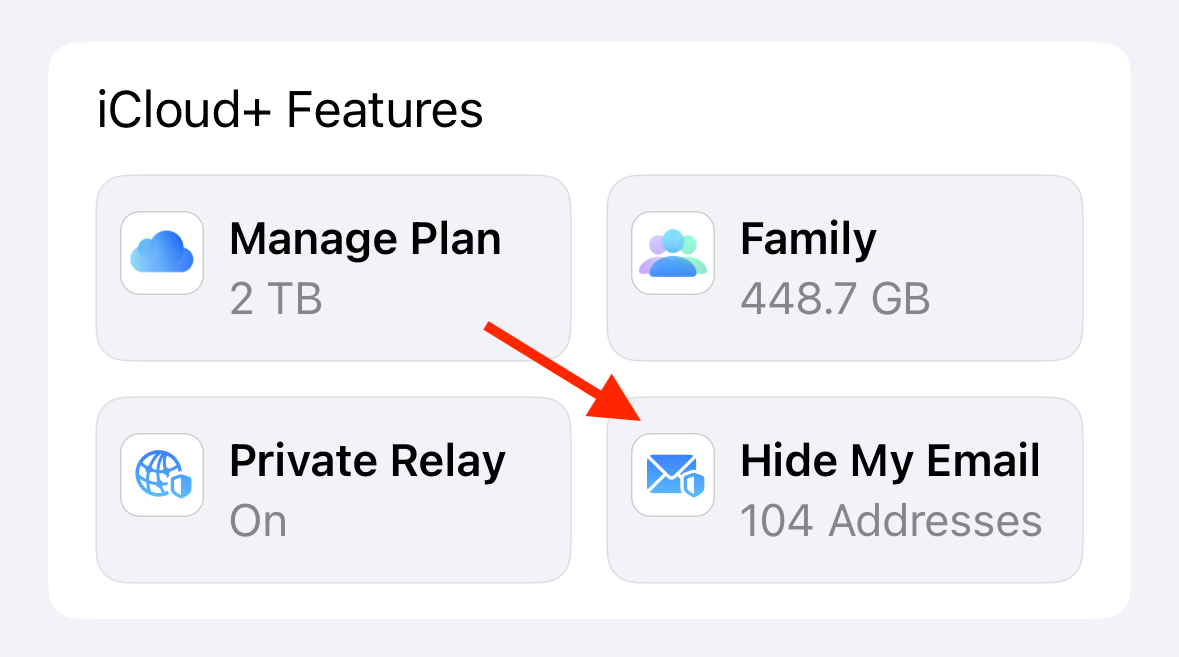
Go to Settings and tap on your Apple ID at the top of the screen. Select “iCloud”, scroll down to the “iCloud+ Features” section, and tap “Hide My Email.”
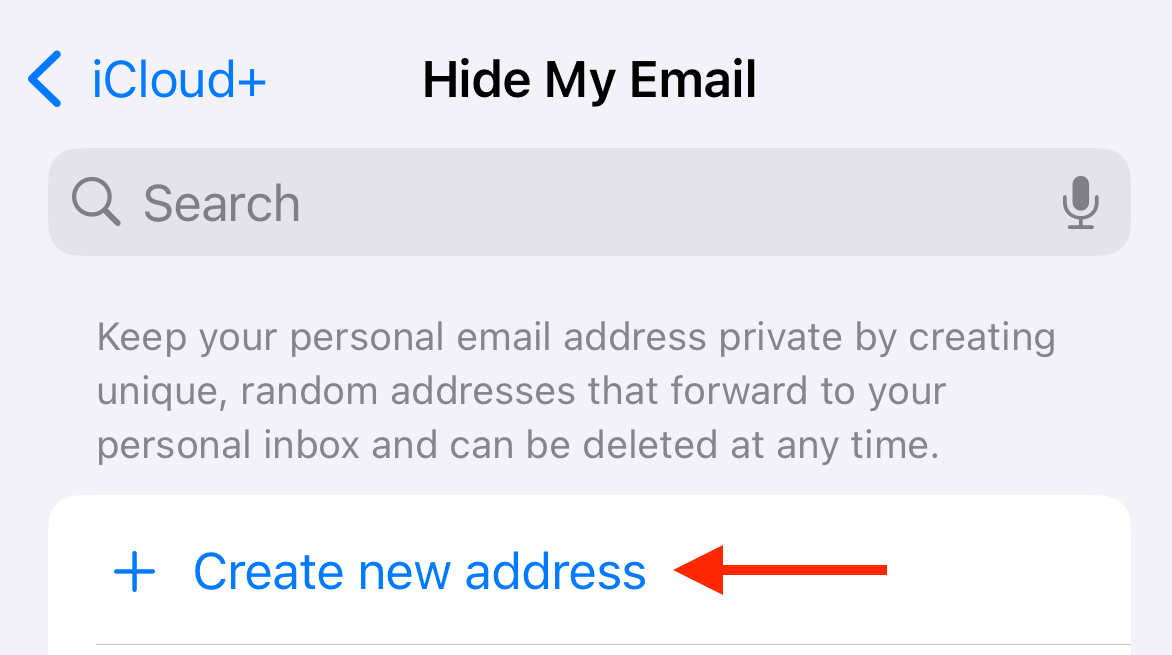
Tap “Create New Address.”
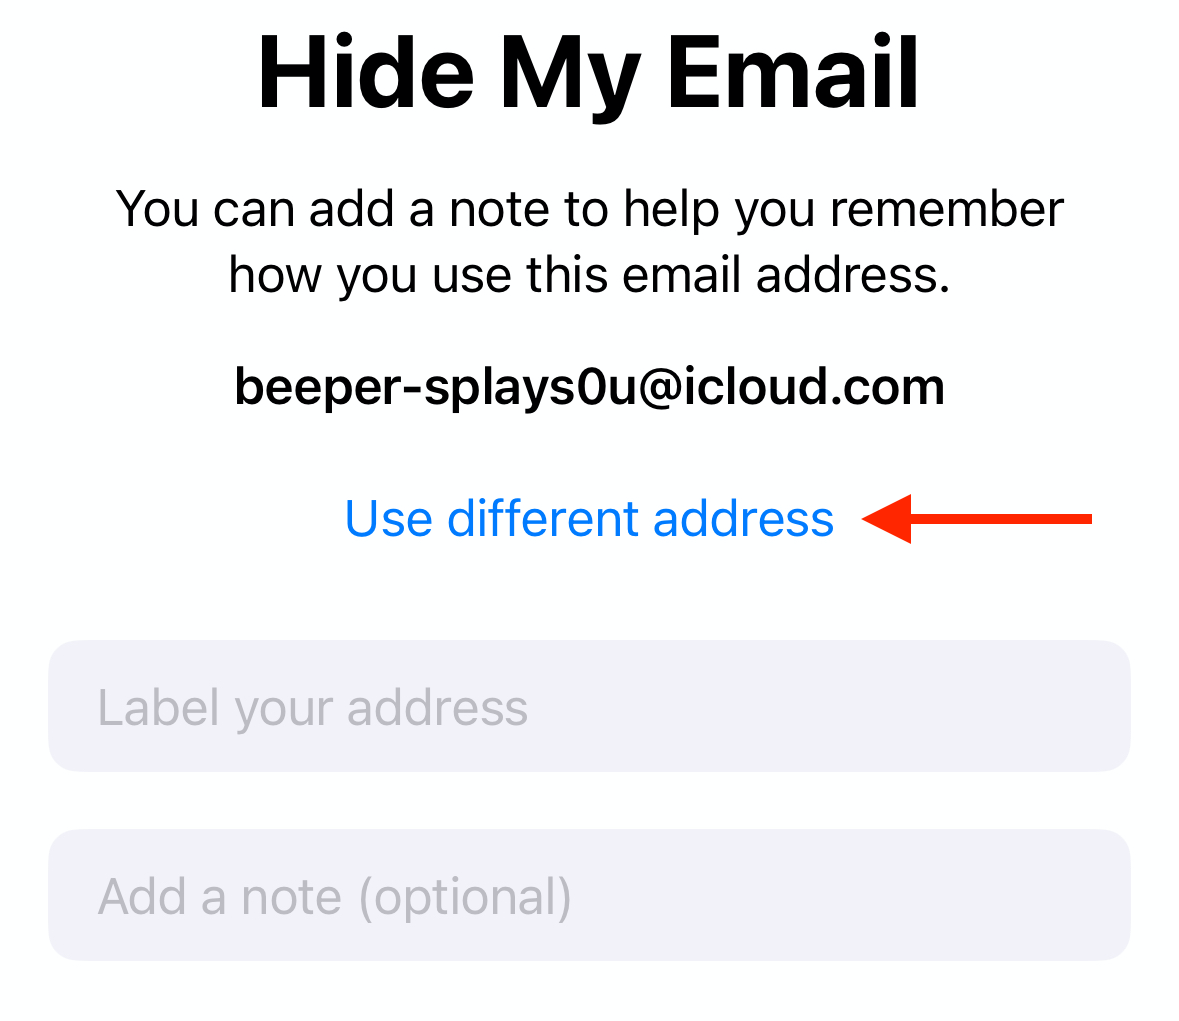
A new address is generated. Tap “Use Different Address” to generate a different one.
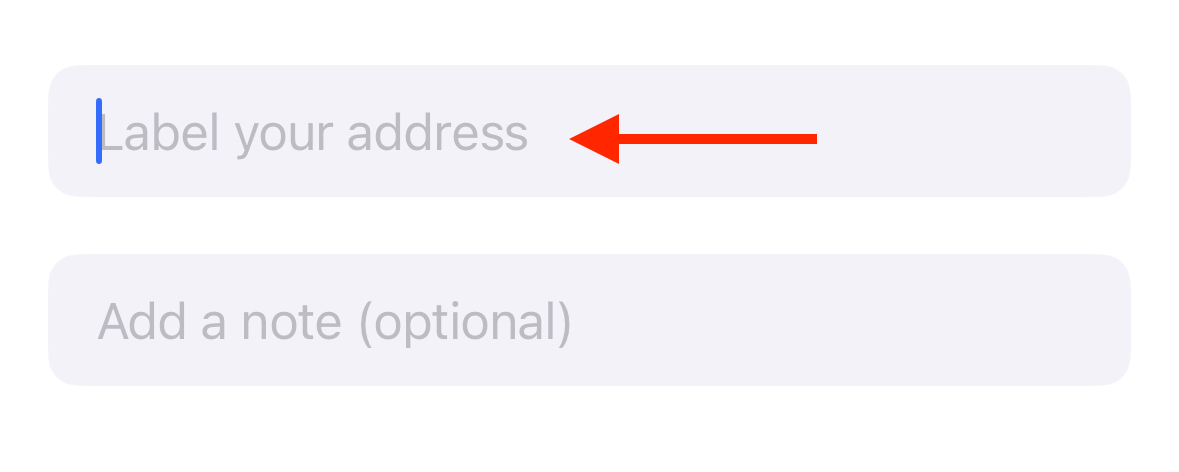
Label your address so you know which account it’s for and tap “Next” to save your new burner email.
You can deactivate these addresses at any point to avoid receiving spam messages, then turn them on again when you need them. Alternatively, you can delete them altogether.
8 Private Relay
Another very useful iCloud+ feature is Private Relay. This feature sends Safari web traffic through two different internet relays. The upshot is that your IP address is masked, and your internet service provider cannot see what websites you are accessing.
It’s similar to using a VPN, in that your web traffic is sent through different servers so that the original source of the browsing activity is hidden. Unlike a VPN, Private Relay will only work when using Safari.
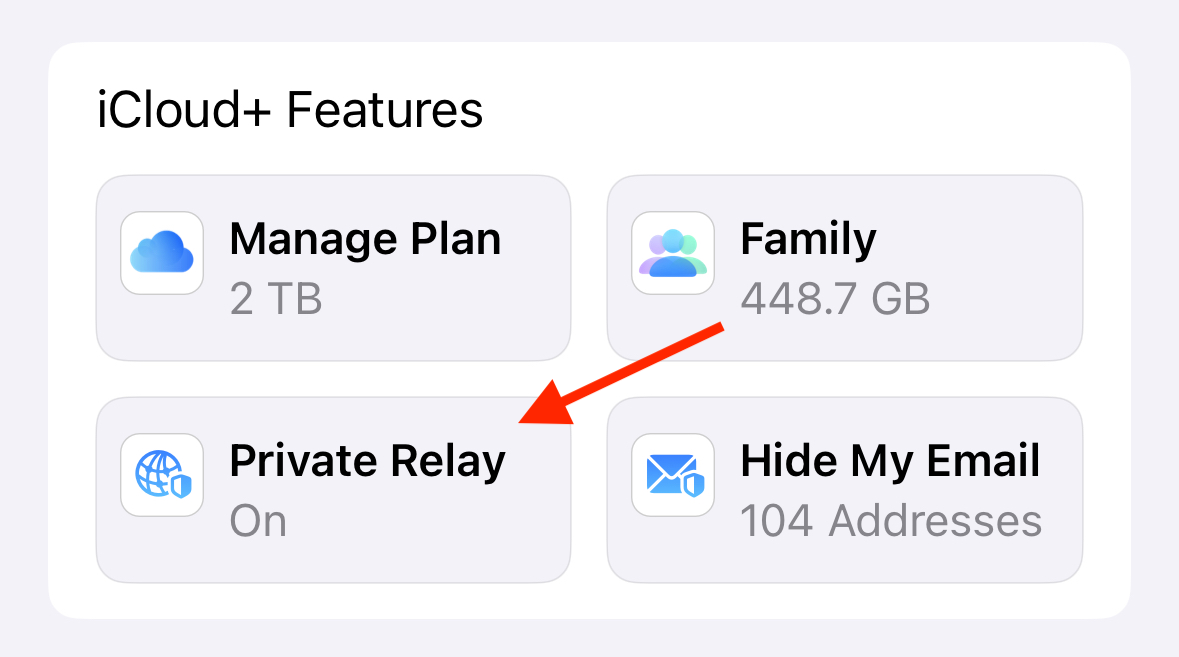
You can turn Private Relay on or off in the Settings app. Go to Settings and tap your Apple Account. Select iCloud, scroll down to the “iCloud+ Features” section, and select “Private Relay.”
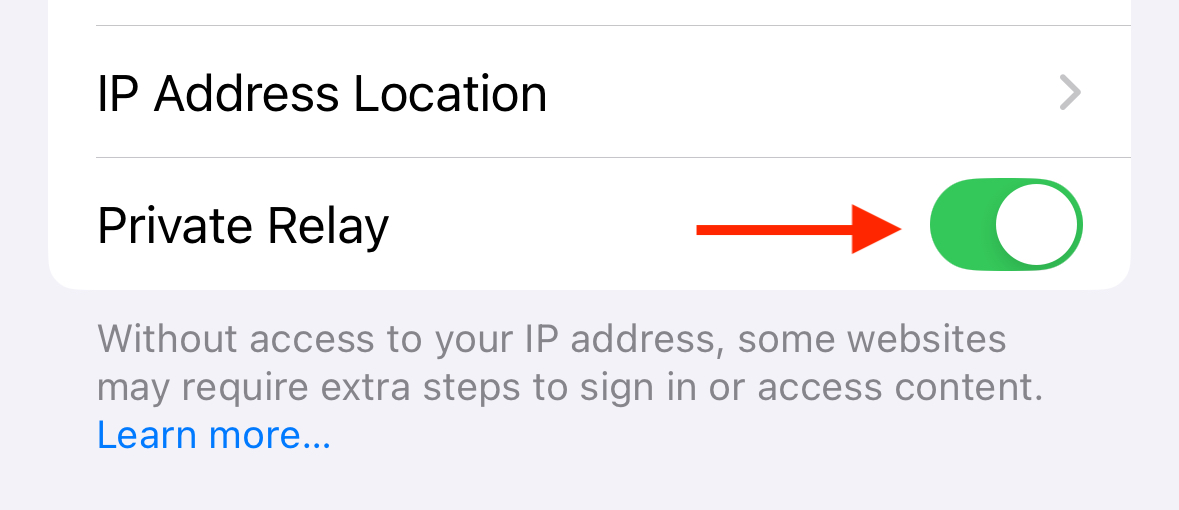
Toggle “Private Relay” on or off.
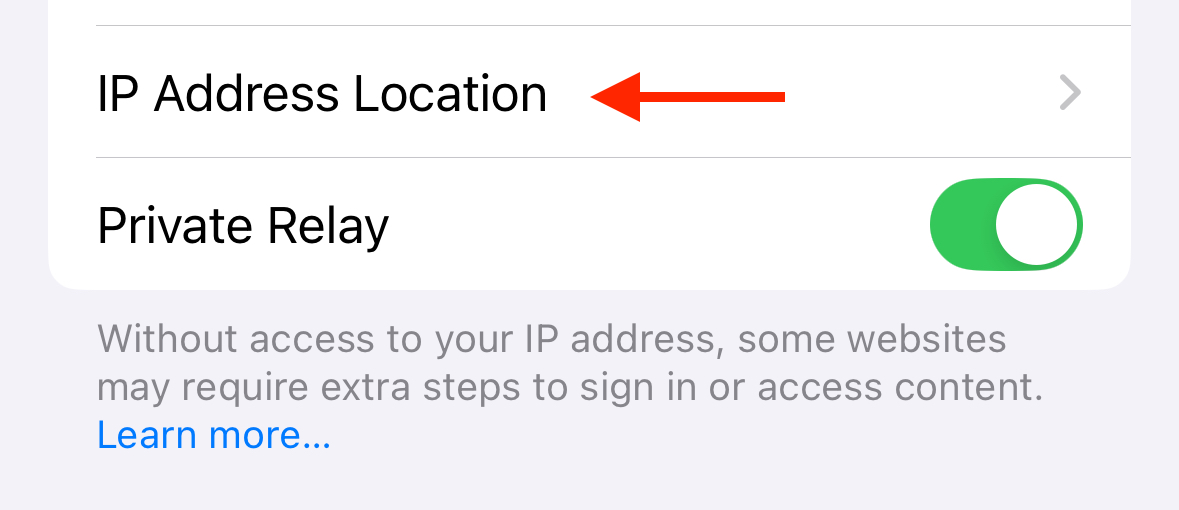
You can also tap “IP Address Location” to choose whether your masked IP address is for the same general location as your iPhone or a broader location based on your country and time zone.
Private relay won’t work alongside a VPN, you’ll need to turn the VPN off (or decide not to use Private Relay).
Maintaining your privacy in today’s connected world is becoming increasingly hard. Thankfully, your iPhone has several useful privacy features that can help you to protect your personal information. If you’re not sure where to begin, Safety Check is a good place to start, as you can see exactly what information you’re currently sharing.
Check out even more iPhone features you probably aren’t using, plus some iPhone features that can boost your productivity.


