

At long last, Kingdom Come: Deliverance 2 is out, and thousands of players jumping into it right now are finding out just how colossal of a game it is. Its medieval open world is as unfathomably large in size as it is ridiculously rich with content, but outside of some main story waymarkers, you’re given very little direction once you get through the prologue and start your adventure in earnest.
As a result of this, it’s difficult to know where to go or what to do first in this grand RPG, but don’t worry — I’m here to help with a series of beginner tips, tricks, and suggestions. Knowing about these earlier would have come in handy for the early game struggles of my own playthrough, but I’m happy to pass along what I’ve learned to my fellow Bohemian adventurers.
Get hired by the blacksmith and miller

The second you’ve gotten through Kingdom Come: Deliverance 2’s prologue and have spoken to Bara — the woman dressed in red that calls you over as soon as you’re free to start roaming the world — for some valuable tips, you should either head north of Troskowitz and visit the blacksmith in Tachov or south to speak to the miller at the Nebakov Mill. You’ll be directed to both by the main story, and there are some valuable benefits to going to see one or both of them right away before you being exploring the landscapes of Trosky.
In addition to the former teaching you how to blacksmith and the latter’s helpers showing you how to pickpocket and lockpick, both will also give you an owned bed to sleep and save your game with, a chest of your own to stash loot in (the contents will be accessible from any chest in a room you own), and some quest steps that lead to some decent gear. The beds in particular are extremely useful to get early since that way you won’t have to worry about paying for inn rooms or trying to sleep in hay bales without getting caught trespassing, but knowing some lucrative skills is nothing to scoff at, either.
You don’t technically need to work with both men for main quest progress, but I do recommend seeking both of them out. That way you’ll have a safe place to rest and recover to the north and south, which is sure to come in handy as you start progressing through your playthrough. If you only pick one, though, it should be the blacksmith, as you’ll often be going to him anyway since he’s one of the few vendors in Trosky that buys unwanted armor and weapons (these sell for quite a lot).
… And pick up this free bow, on the way
Image 1 of 3
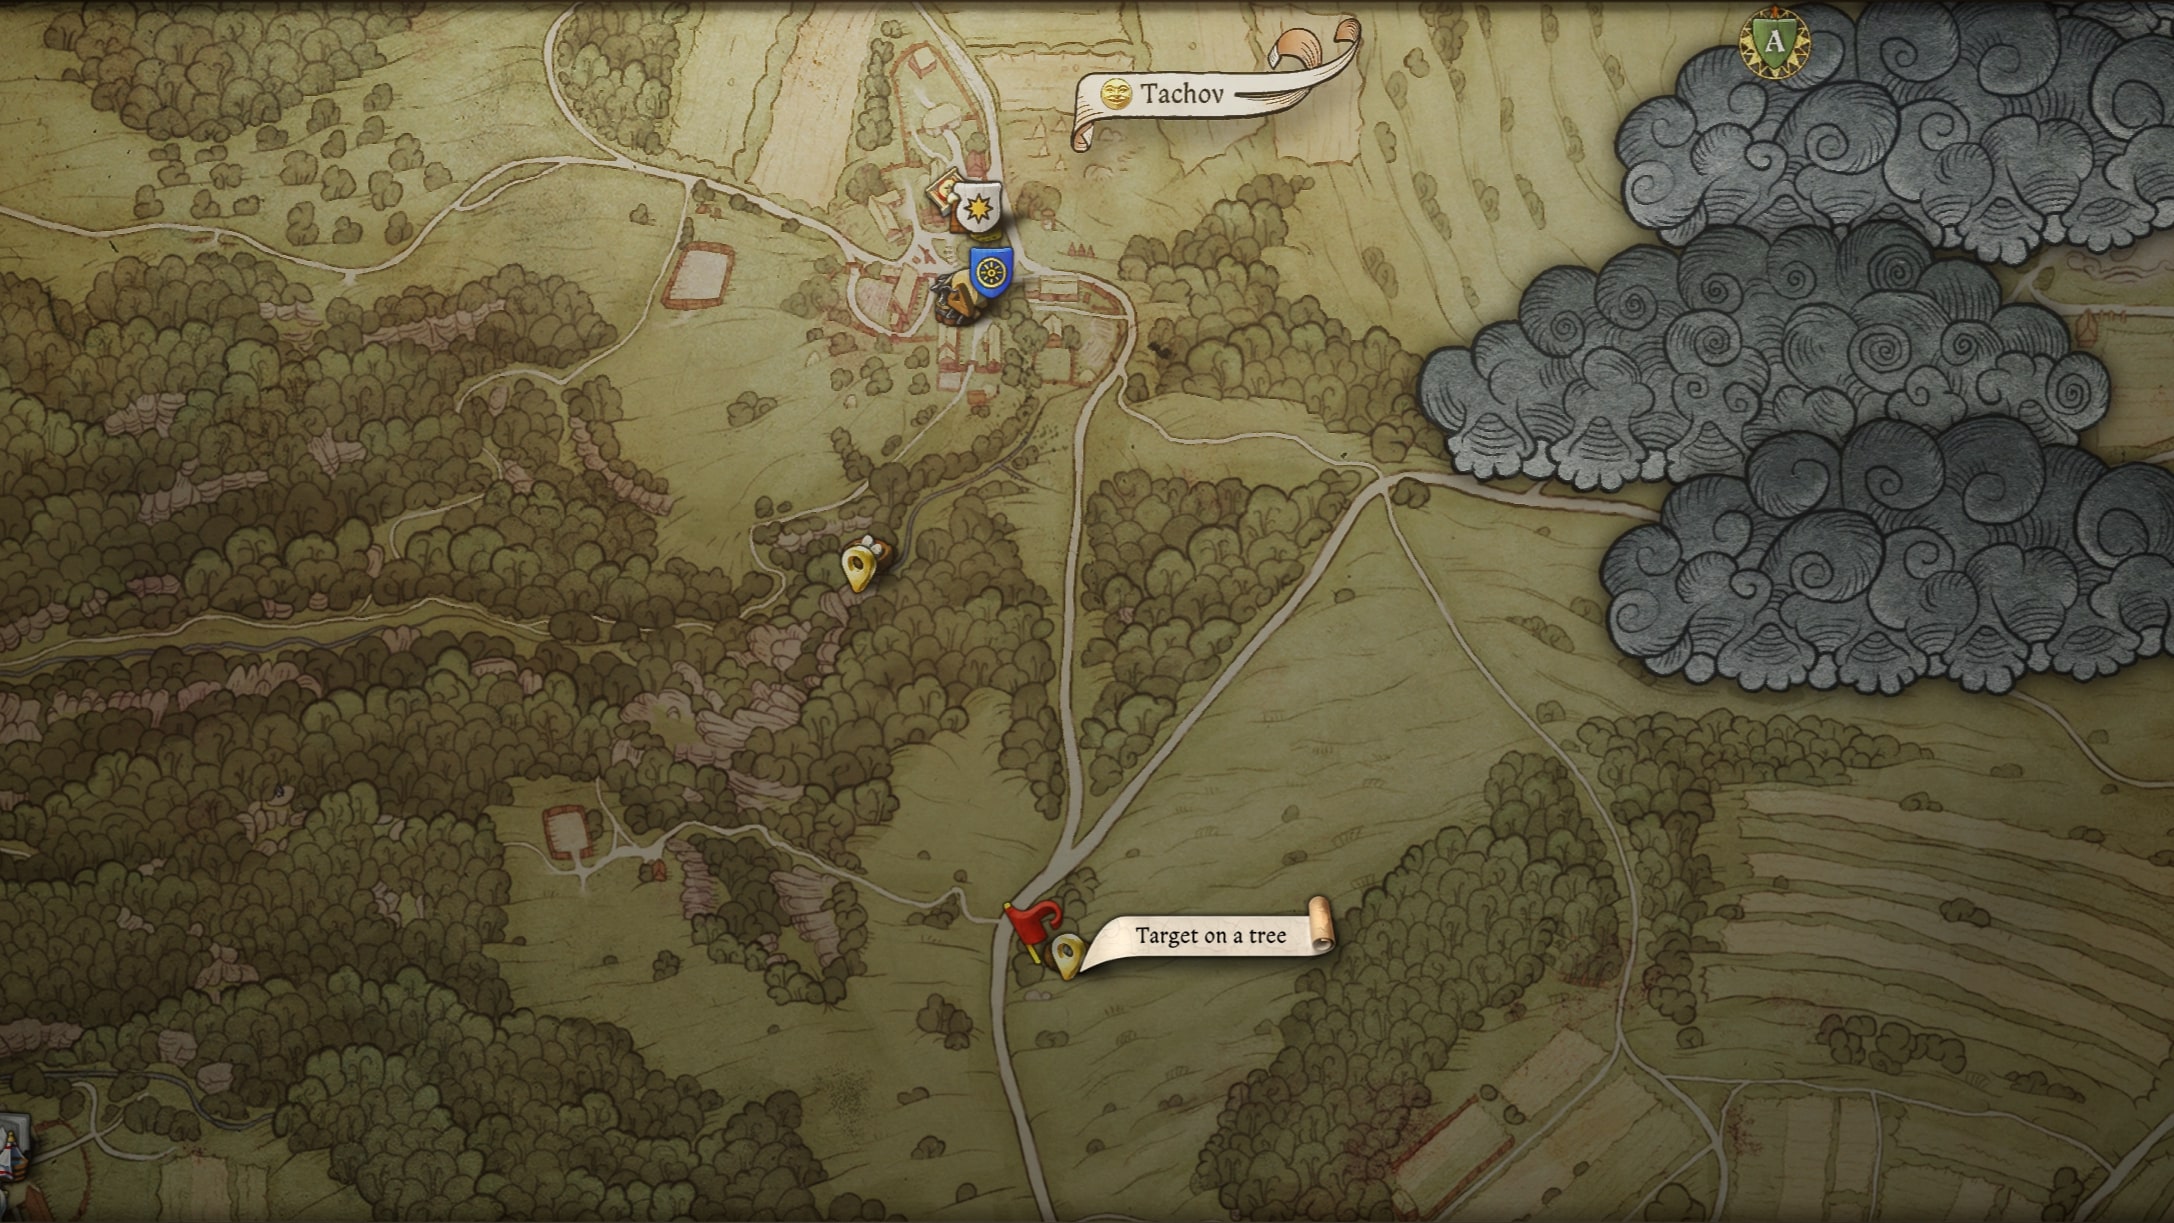
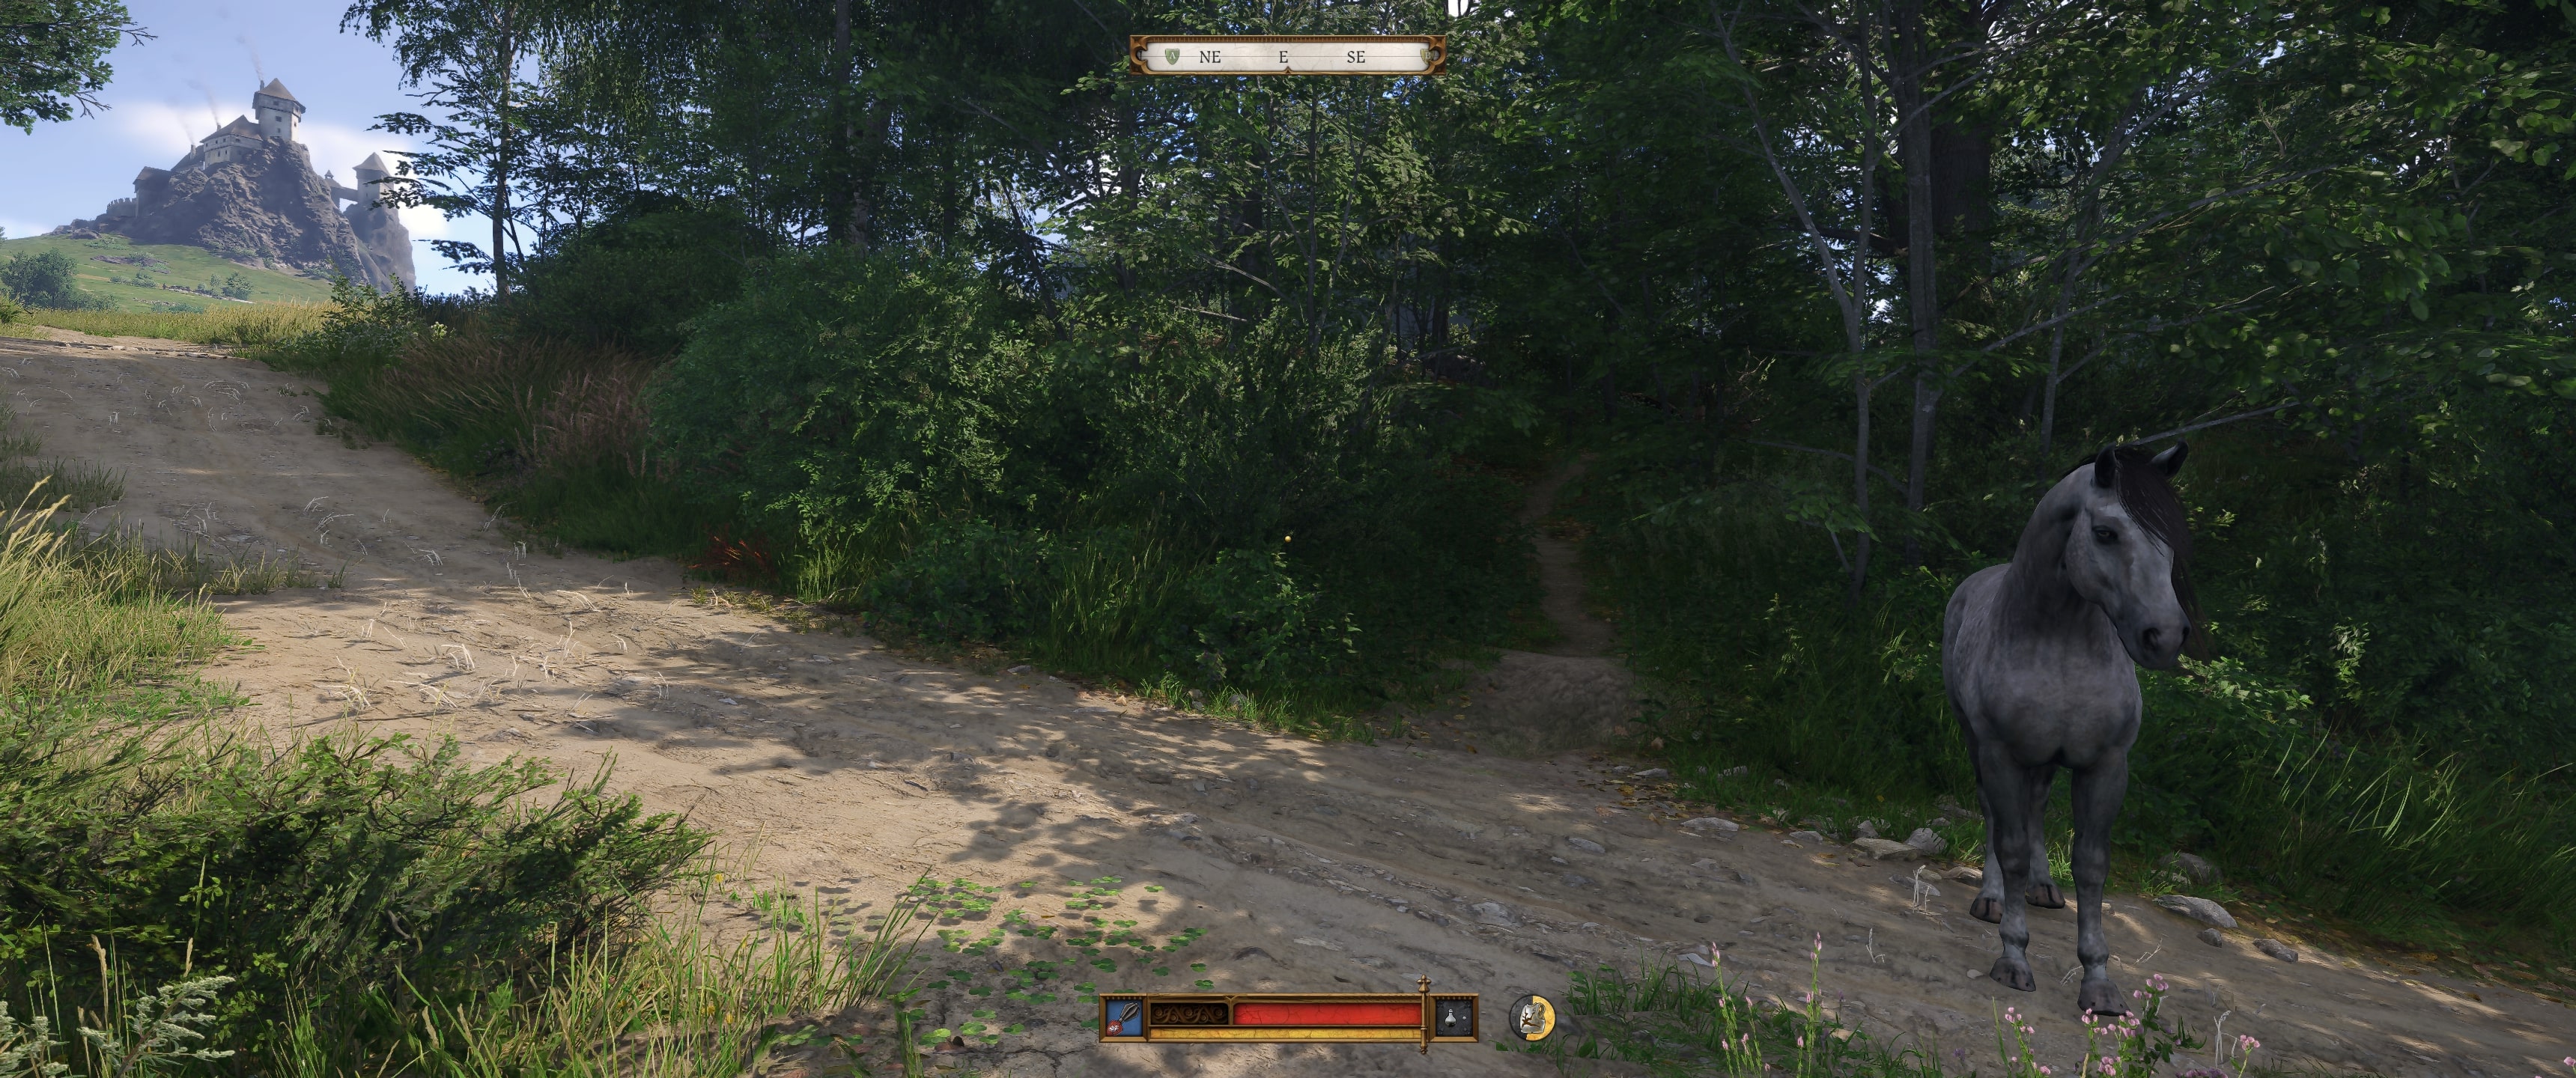
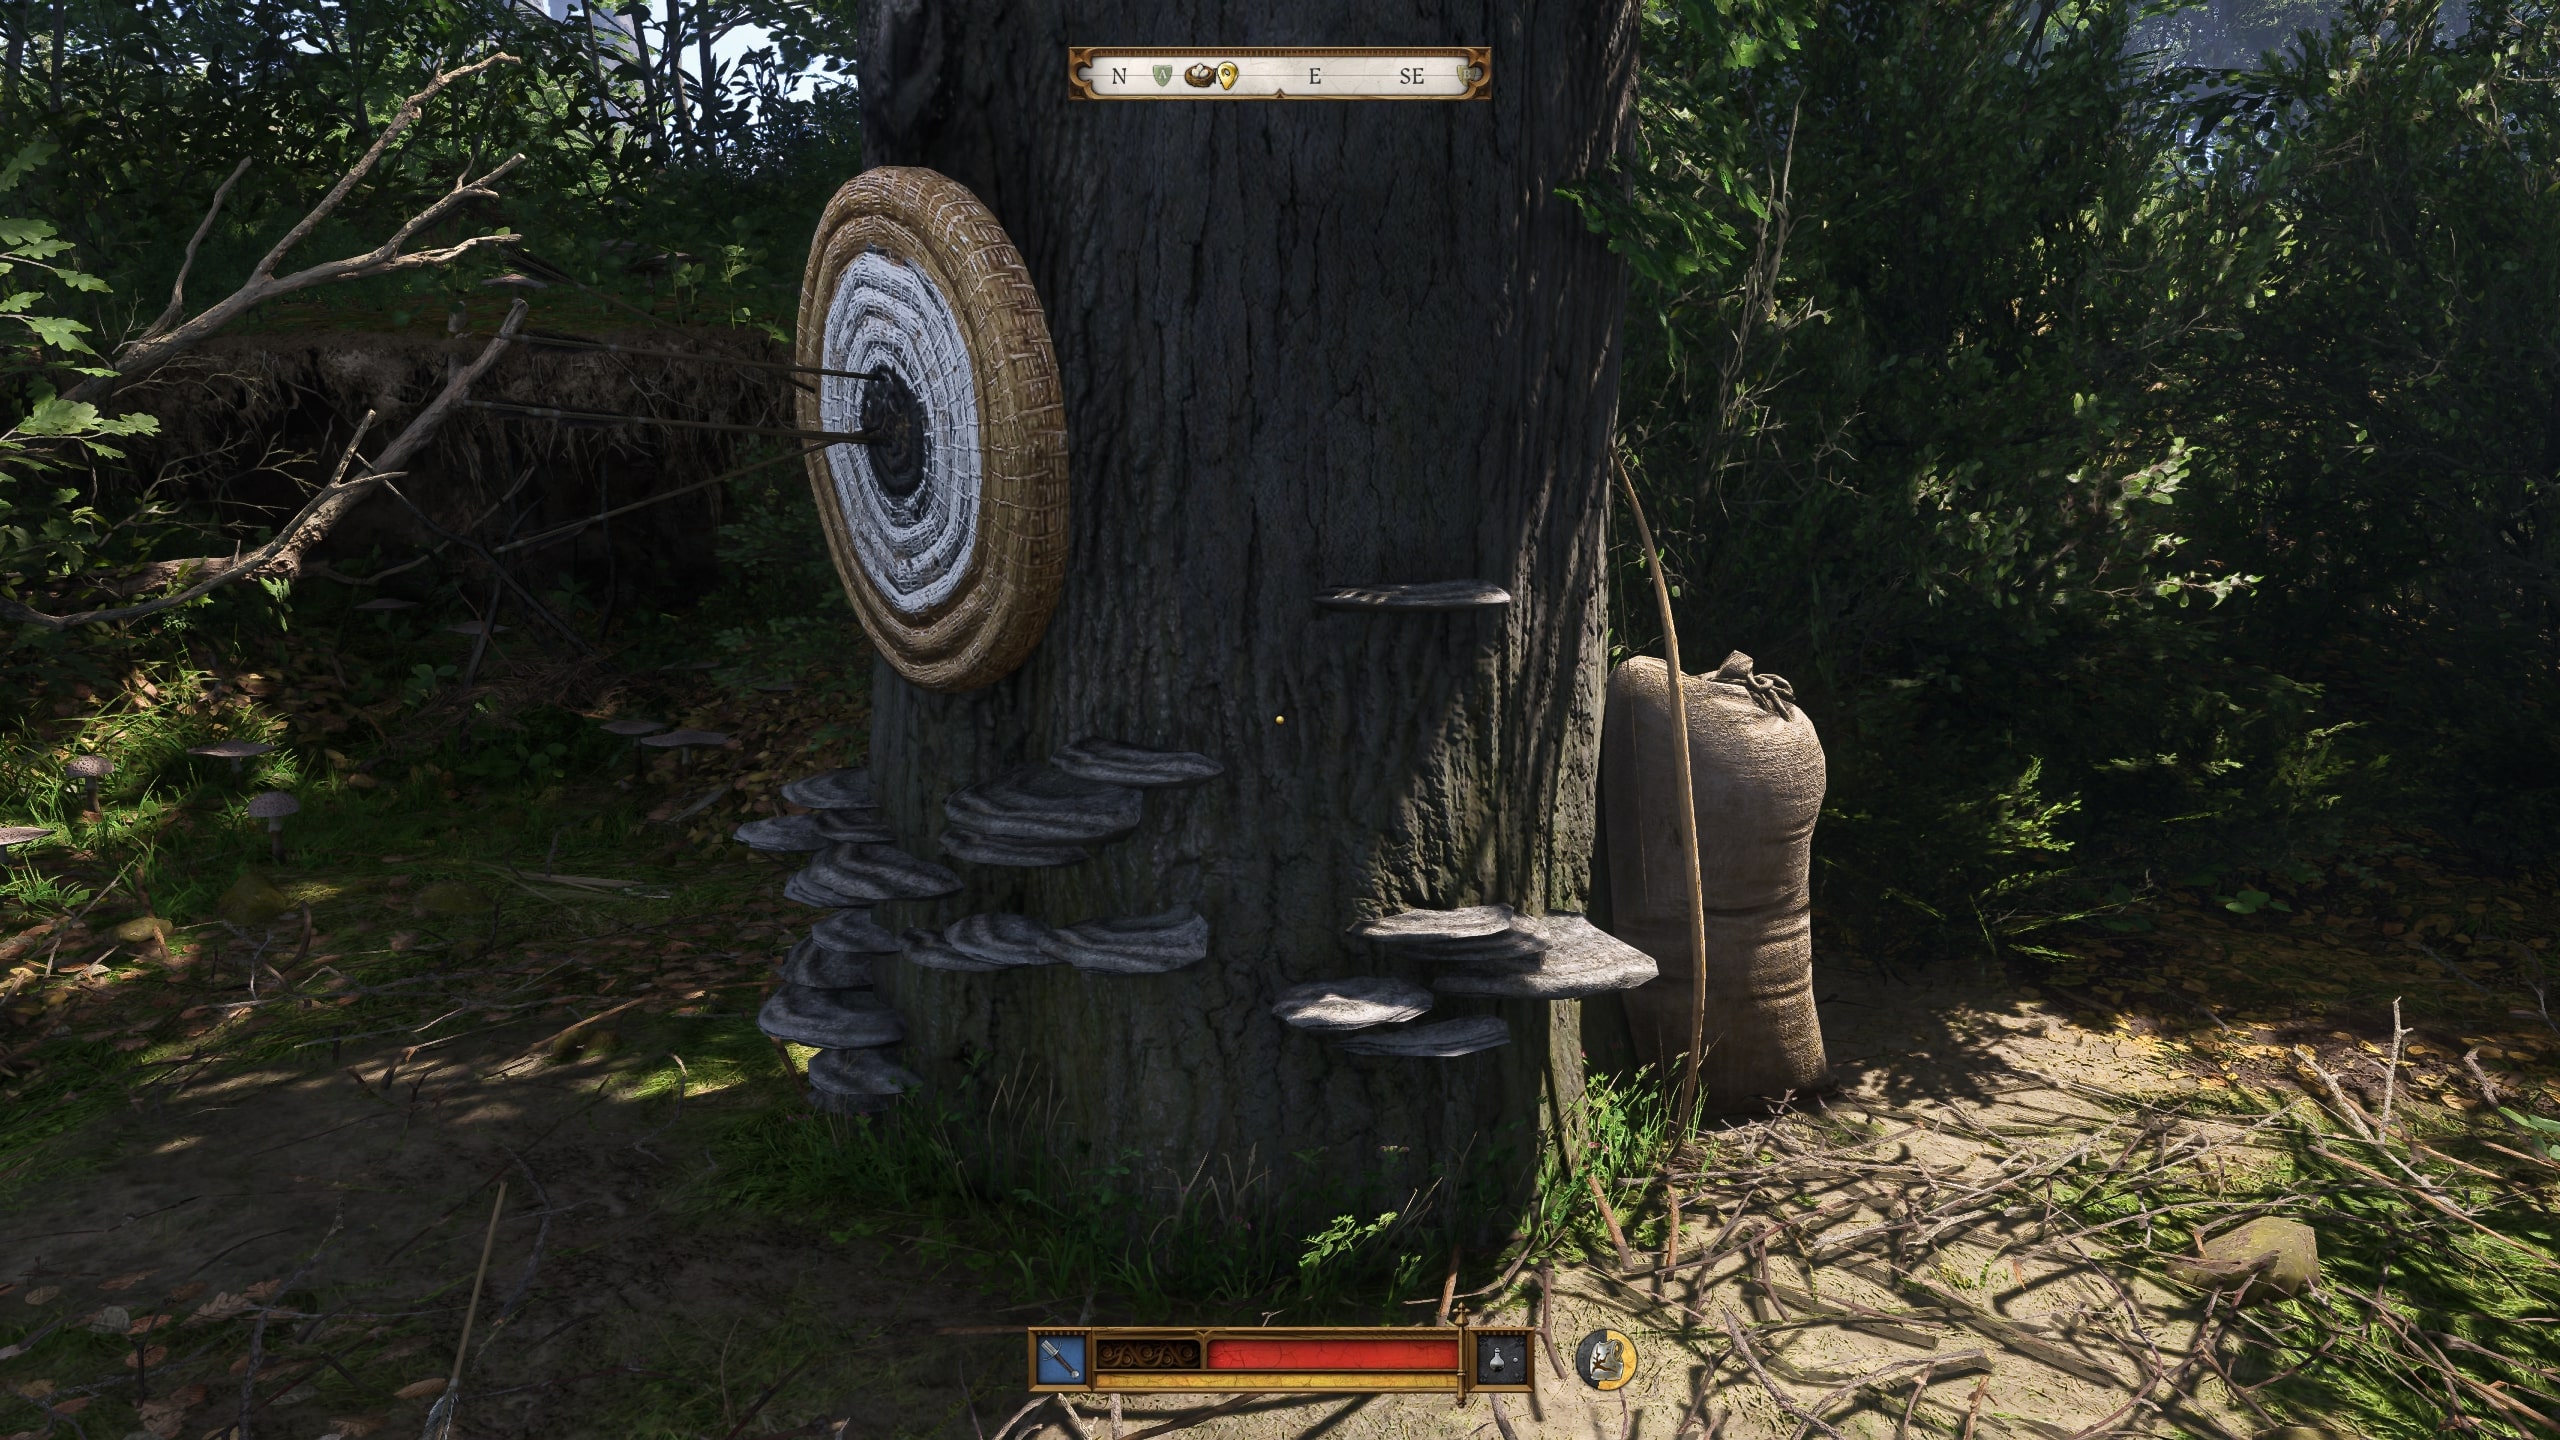
Something worth noting is that on your way to Tachov to talk to the blacksmith, you can get yourself a free bow and a good amount of arrows. Archery generally plays second fiddle to melee fighting in Kingdom Come, but there are still plenty of situations where having and being proficient with one comes in handy. In addition to picking foes off stealthily from afar, bows are also ideal for hunting the fauna of the forest to get meat for yourself and your dog to eat (I’ll go over finding him shortly).
Just before the fork in the road from Troskowitz that leads to Tachov, you’ll be able to spot a dirt path that leads east into some woods. Follow it, and you’ll come across a target on a tree with multiple arrows embedded in it (pictured above). Next to the target is a Dogwood village bow, and in the sack next to that are two dozen arrows, a Bowman’s brew potion that improves your Marksmanship skill temporarily, an archery skill book you can read to boost the skill permanently, and a Marksman’s kit that allows you to repair bows. The arrows in the target can be taken, too, so make sure you pick them up.
Get yourself a free horse, too — without stealing
Kingdom Come: Deliverance 2’s medieval Bohemian countryside is incredibly vast, and adventuring far from the starting town of Troskowitz will take a long time if you’re doing it on foot. Luckily, there’s an easy way to get a horse for free right from the start of the game — and no, it doesn’t involve stealing one!
From Troskowitz, following the southwest road will eventually take you to the large settlement of Semine. You’ll be coming here a lot later for the main story, but right now, your only concern is visiting the horse trader on the southwest side of the town’s fortress. Amongst the steeds he has for sale, there will be a gray mare you’ll get a prompt for Henry to recognize. This is none other than Pebbles, Henry’s loyal nag from the first game that he gets separated from in the prologue. Evidently, someone found her and sold her off to the horse trader here, not knowing that she was owned.
Talk to the horse trader, and you’ll find an option to tell him that Pebbles is already yours and to ask if he’d be willing to let you have her for free. This requires a pretty easy speech check — the trader didn’t pay much for her, so he’s not particularly attached — but even if you fail it, you can just buy Pebbles for a little over 100 groschen or so. Once you’ve either convinced or paid him, she’s yours.
Not only will Pebbles speed up your travels, but she’ll also be able to carry lots of loot like weapons and armor from slain foes that would weigh you down otherwise. Notably, compared to other “better” horses you can buy, Pebbles has a unique trait that improves her stats over time as you ride her.
Train your fighting skills with Tomcat
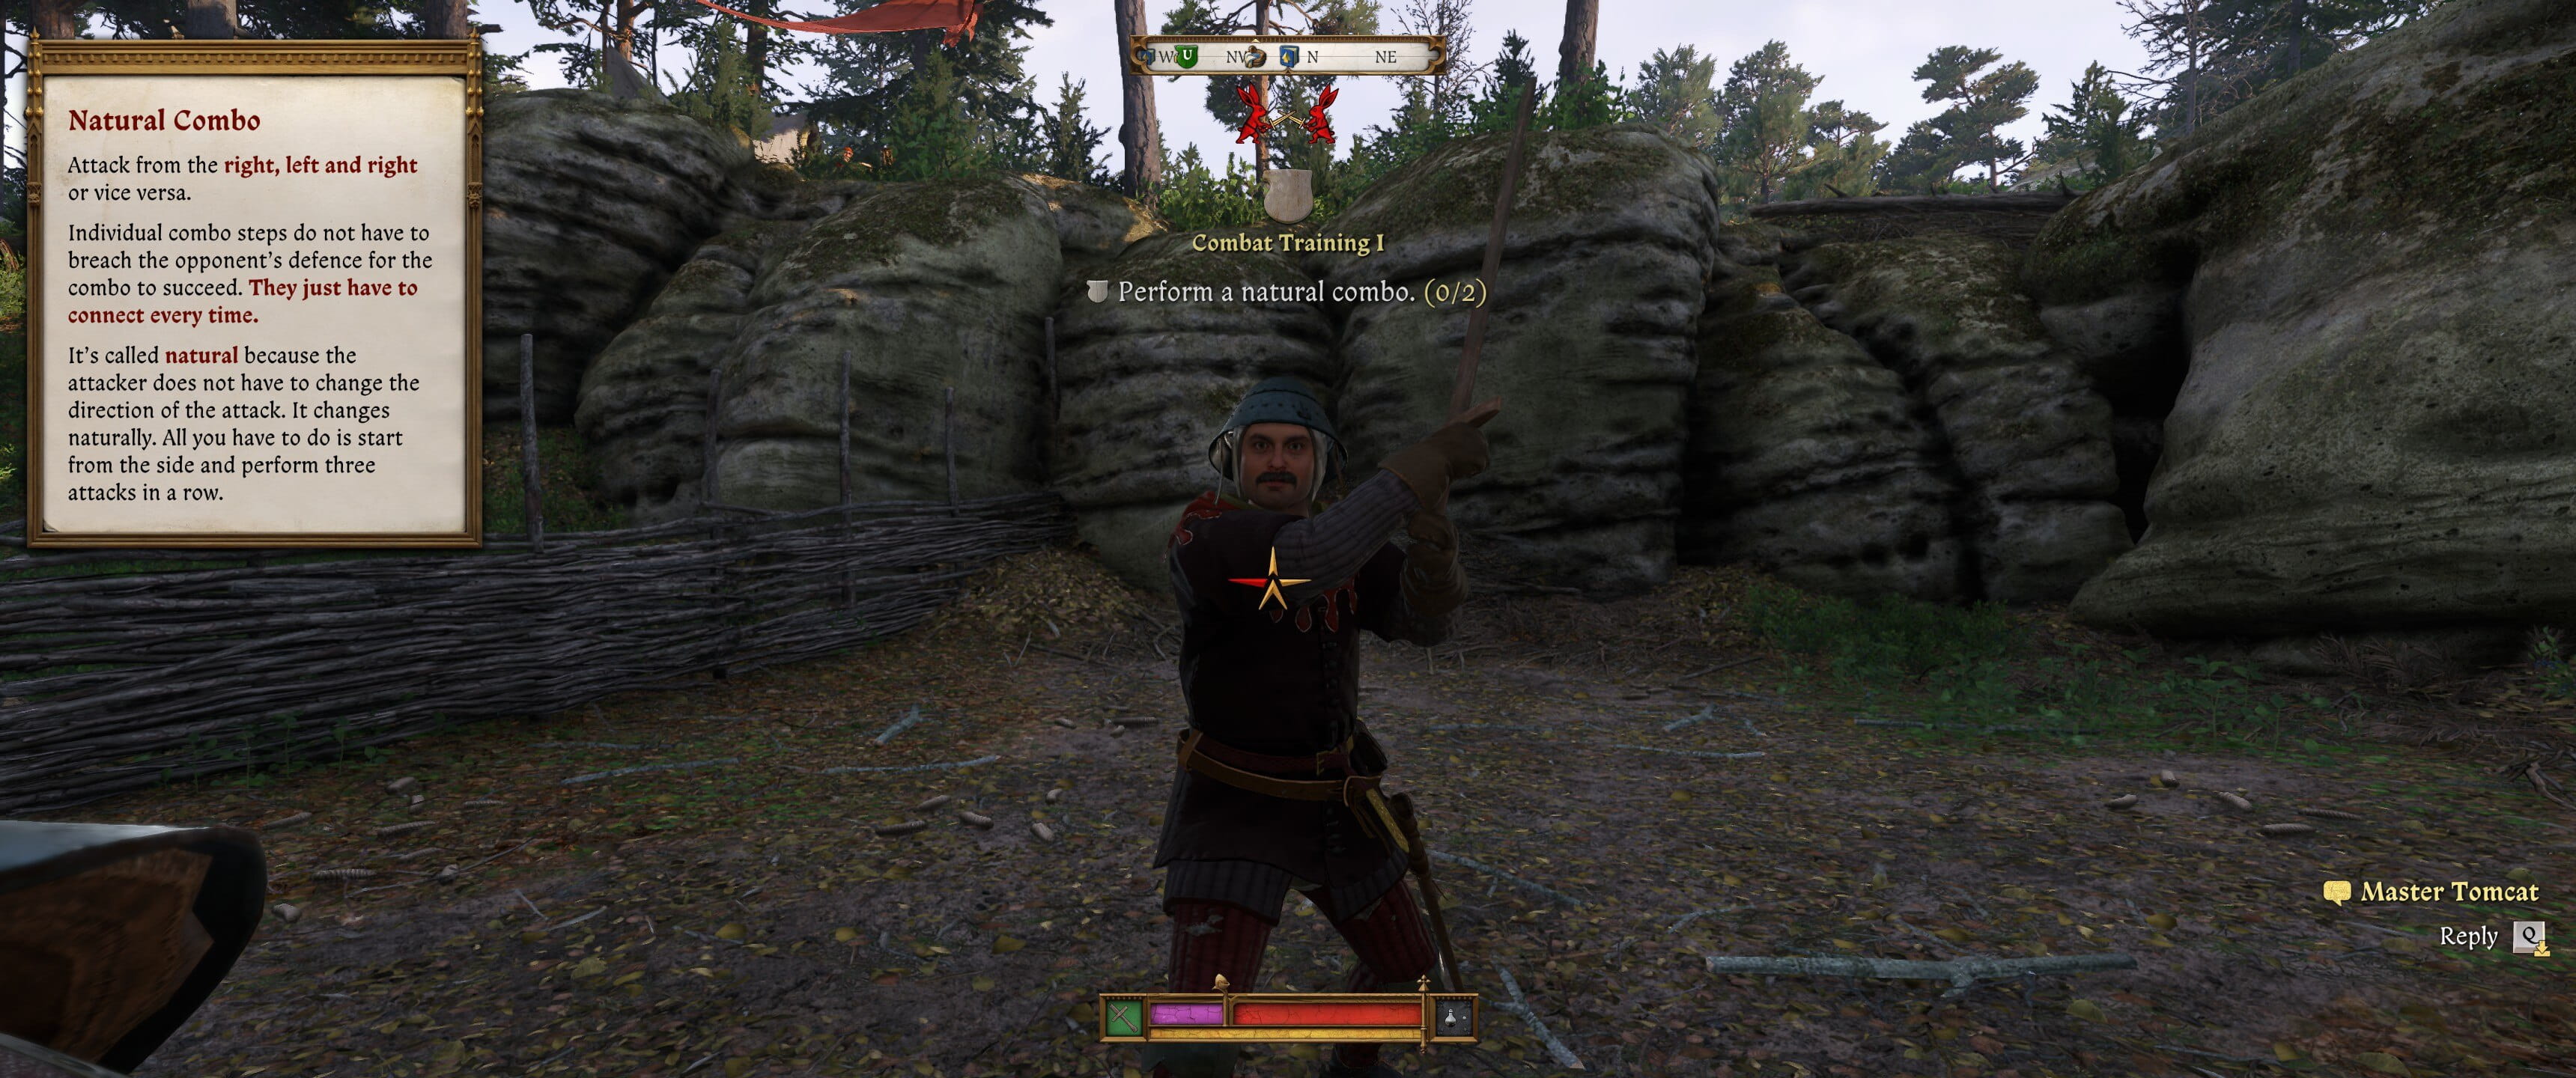
With a speedy method of travel secured, I recommend next following up on one of the best suggestions from the aforementioned tipster Bara: to go train your swordplay with a strongman called Tomcat for the Combat Training questline. He’s located quite a ways away to the west in a Nomad camp, but the journey to see him is very much worth your time; not only will he teach you some useful melee combos you’ll be using for the rest of the game, but training with him will also give you a huge boost to several combat-related skills like Warfare and Swords.
If you’re able to defeat him in a full duel, Tomcat will also teach you the almighty Master Strike, which is a deadly sword-exclusive maneuver in which you counterattack by attacking from the opposite direction of an enemy’s incoming strike. Though a bit difficult, Master Striking is very powerful, and getting access to it as soon as you’re able is worth doing. Note that the duel with Tomcat might be too tough at first, but you can always come back later once Henry has seen some more action.
… And while you’re there, find your dog Mutt
Image 1 of 2

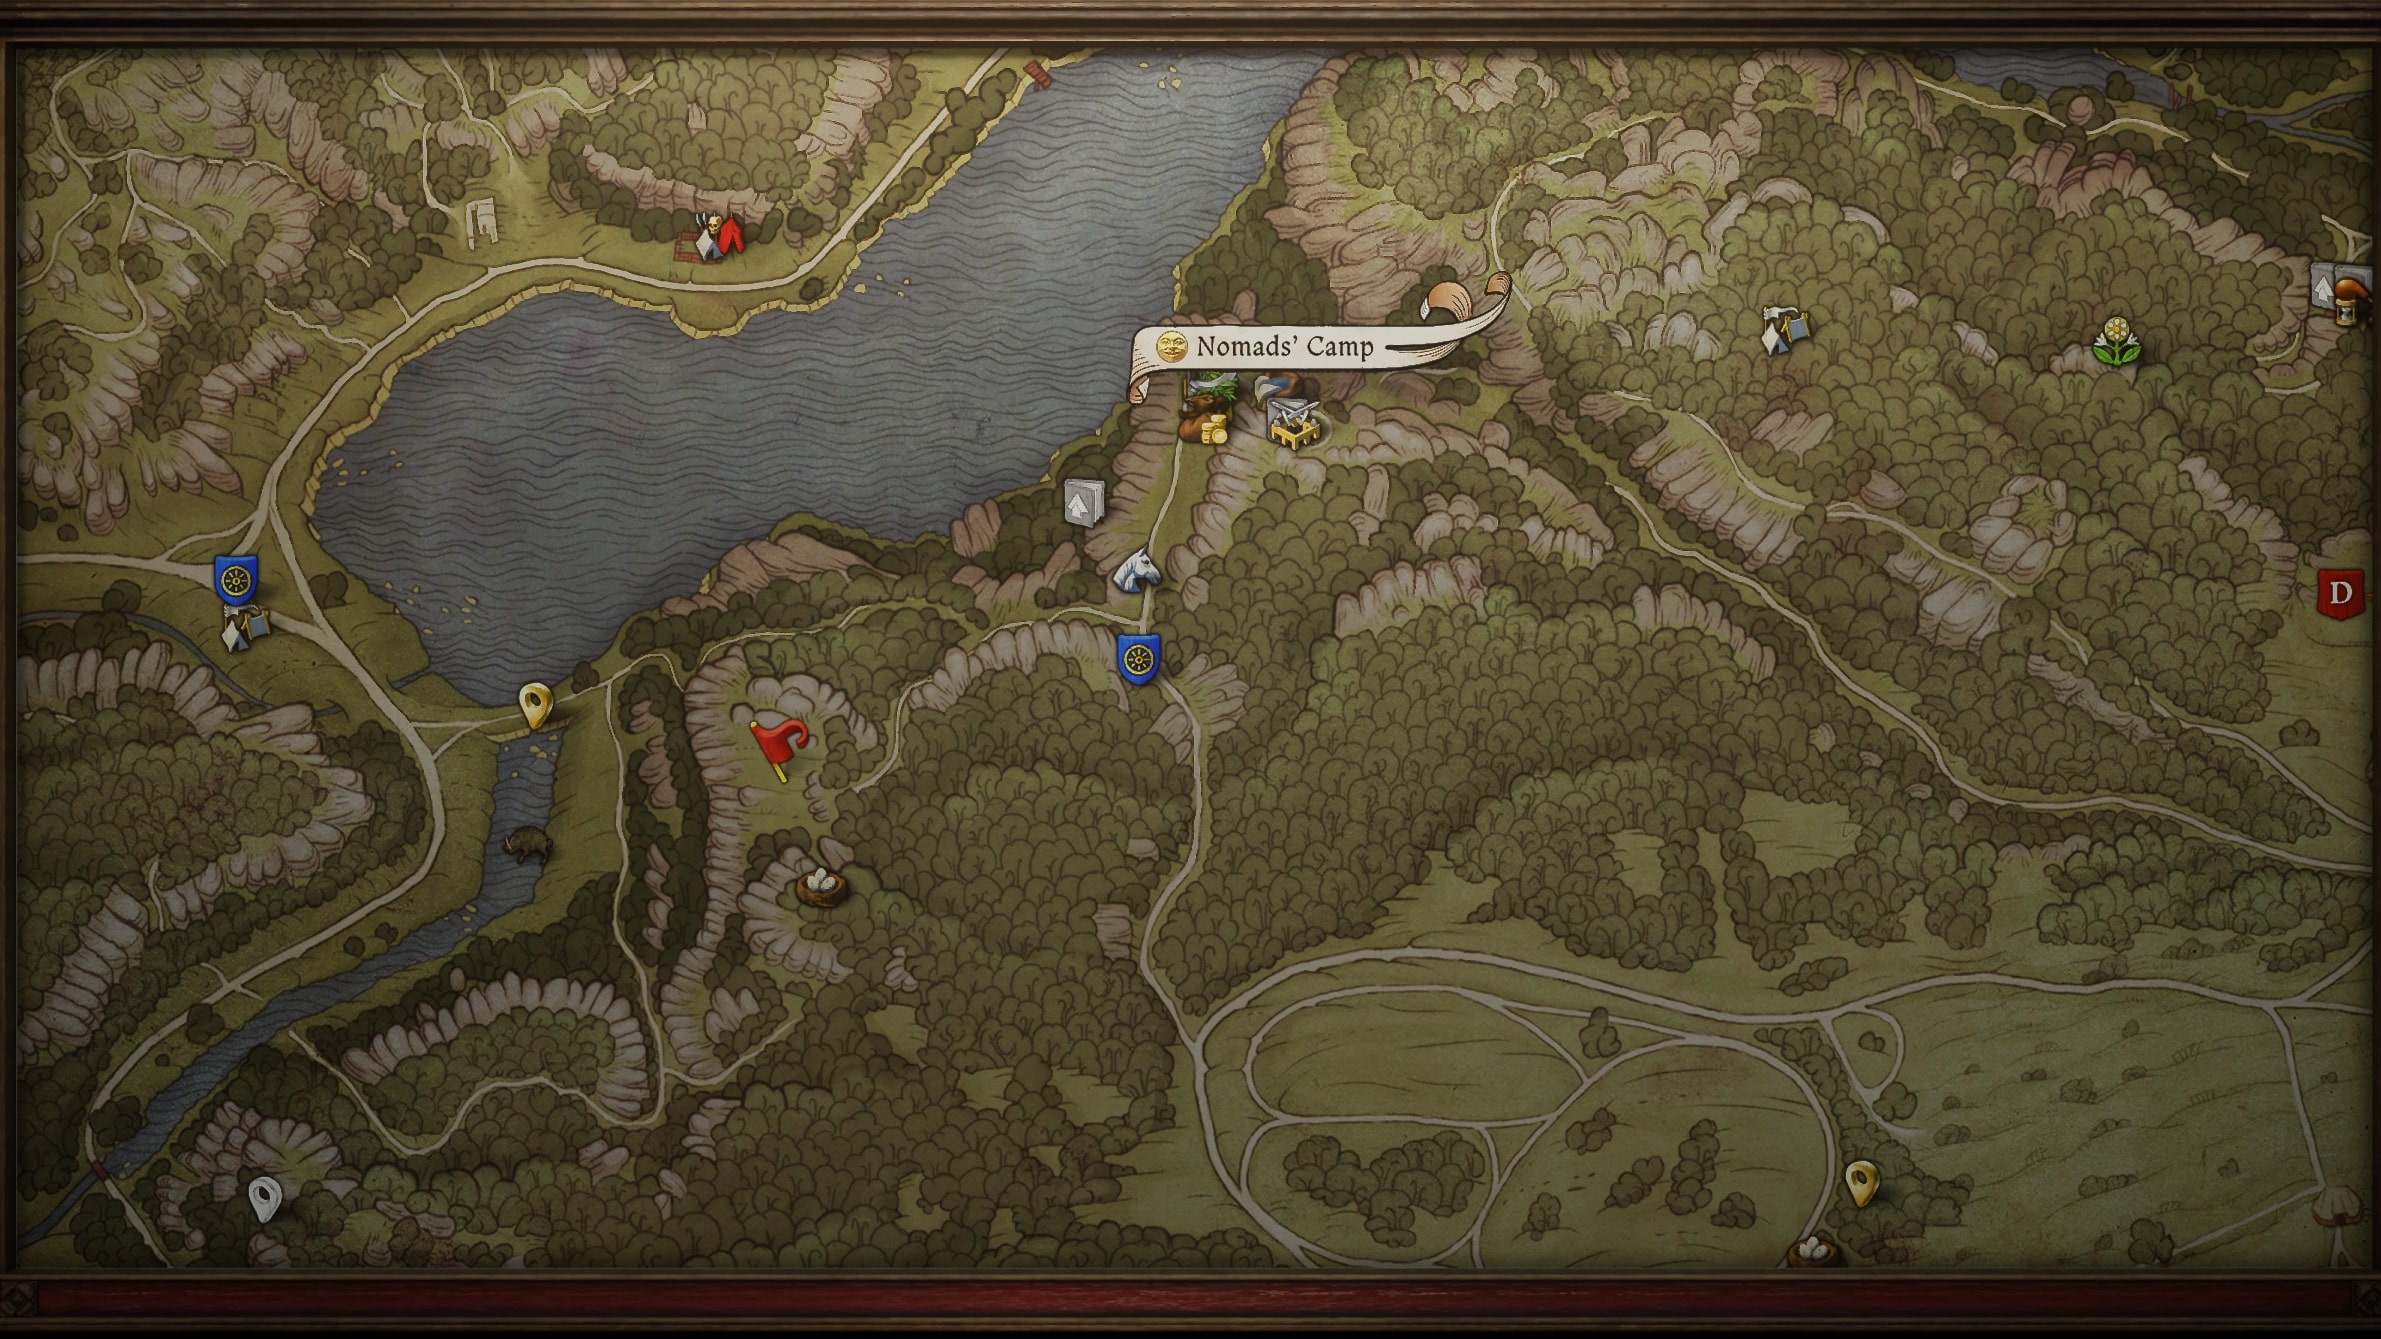
The quest to find your missing dog Mutt is a long and arduous one that sees you traveling all over the map and following any leads you can find — most of which don’t end up working out. Believe it or not, though, Mutt can actually be found just southwest of the Nomad’s camp in a clearing (shown in the above gallery with a red flag marker).
This spot is a bit of a wolf den, and once you reach it, you’ll get a cutscene in which a small pack attacks you and Mutt. This fight shouldn’t be too hard as long as you have good leg armor to protect from bites, but I do recommend playing defensively and only attacking after perfect blocking an incoming attack from the beasts since they’re too evasive to cut down outside of that window.
Once the wolves run away or are slain, you’ll unlock Mutt and can take advantage of his unique abilities. As your hound, he can be ordered to hunt animals. bite and distract enemies so you can get free hits in, and even track scents to help you find something or someone you’re looking for in certain side quests. Just make sure you regularly feed and pet him, as he’ll become disobedient otherwise.
By the way, don’t leave the wolf den just yet, as there’s some excellent loot to be found there. Specifically, the nearby alcove in the side of the short cliff has a Broadsword, a Patched cuirass, and a stash of jewelry worth roughly 850 groschen. This gear and money will be incredibly helpful early on, so don’t miss it.
Find the best early game weapon and armor
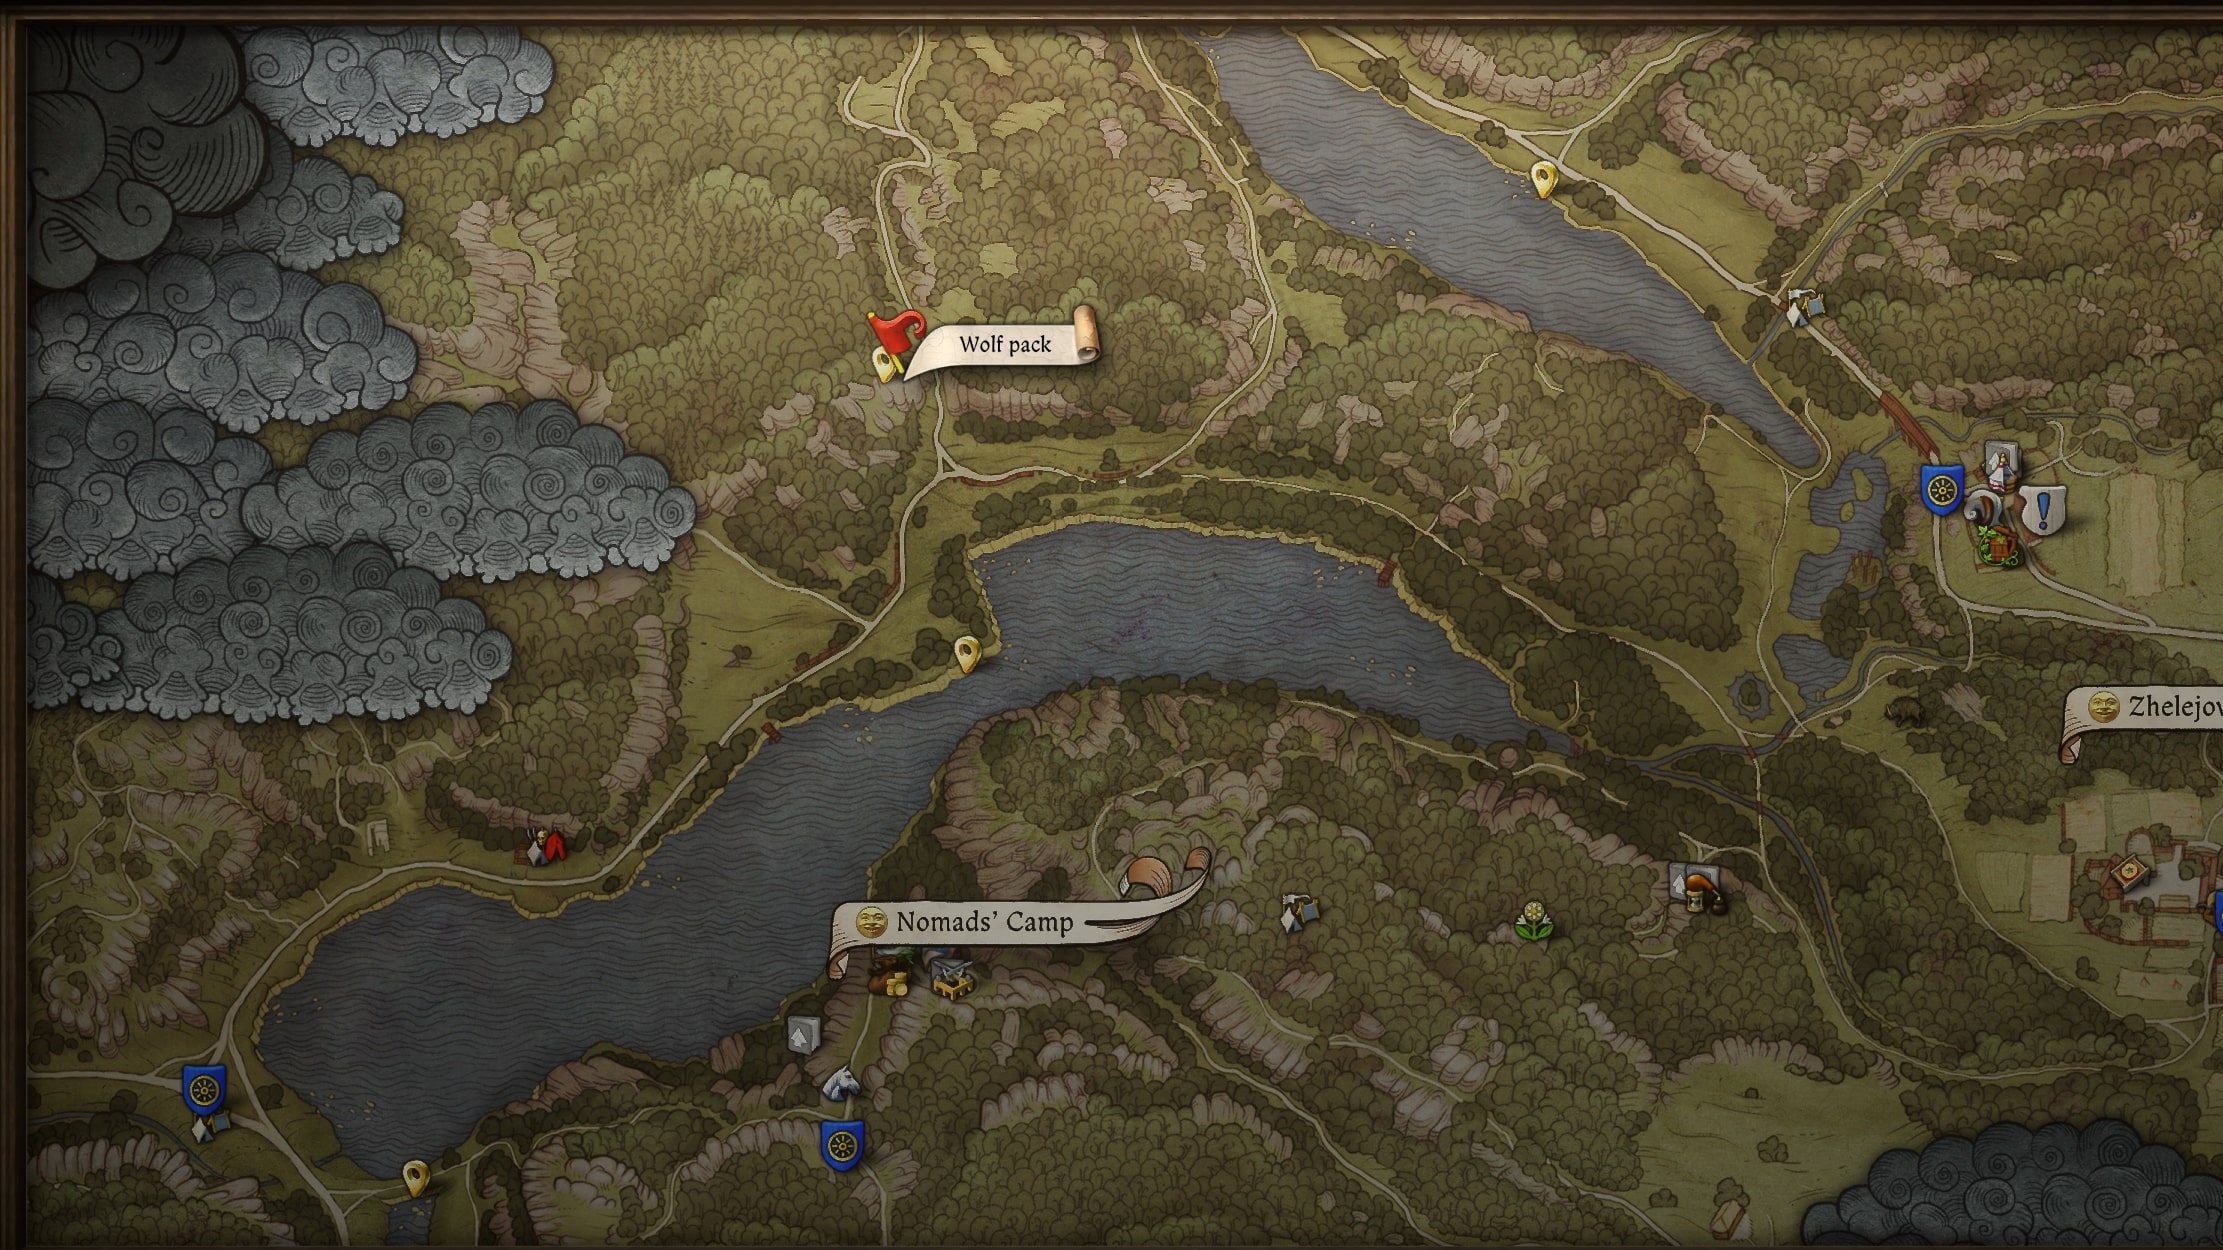
That Patched Cuirass from the wolf den is a fantastic piece of armor to snag early on, but there’s still more top tier loot to be found nearby. Heading around and north of Rockwater Pond — the body of water that the Nomad camp is south of — you can find another gathering of wolves around two dug up graves a short ways west of the road (shown in the image above with a red flag).
After dispatching the wolves, you’ll be able to loot a Battle longsword, Von Bergow shield, and a Saxon Bascinet with visor helmet from the graves. These represent some of the best gear you can get for nearly all of Kingdom Come: Deliverance 2’s first half, and together with the cuirass from the aforementioned wolf den, it’ll have you more than prepared for the challenges ahead.
Loot this lucrative treasure hunter’s camp
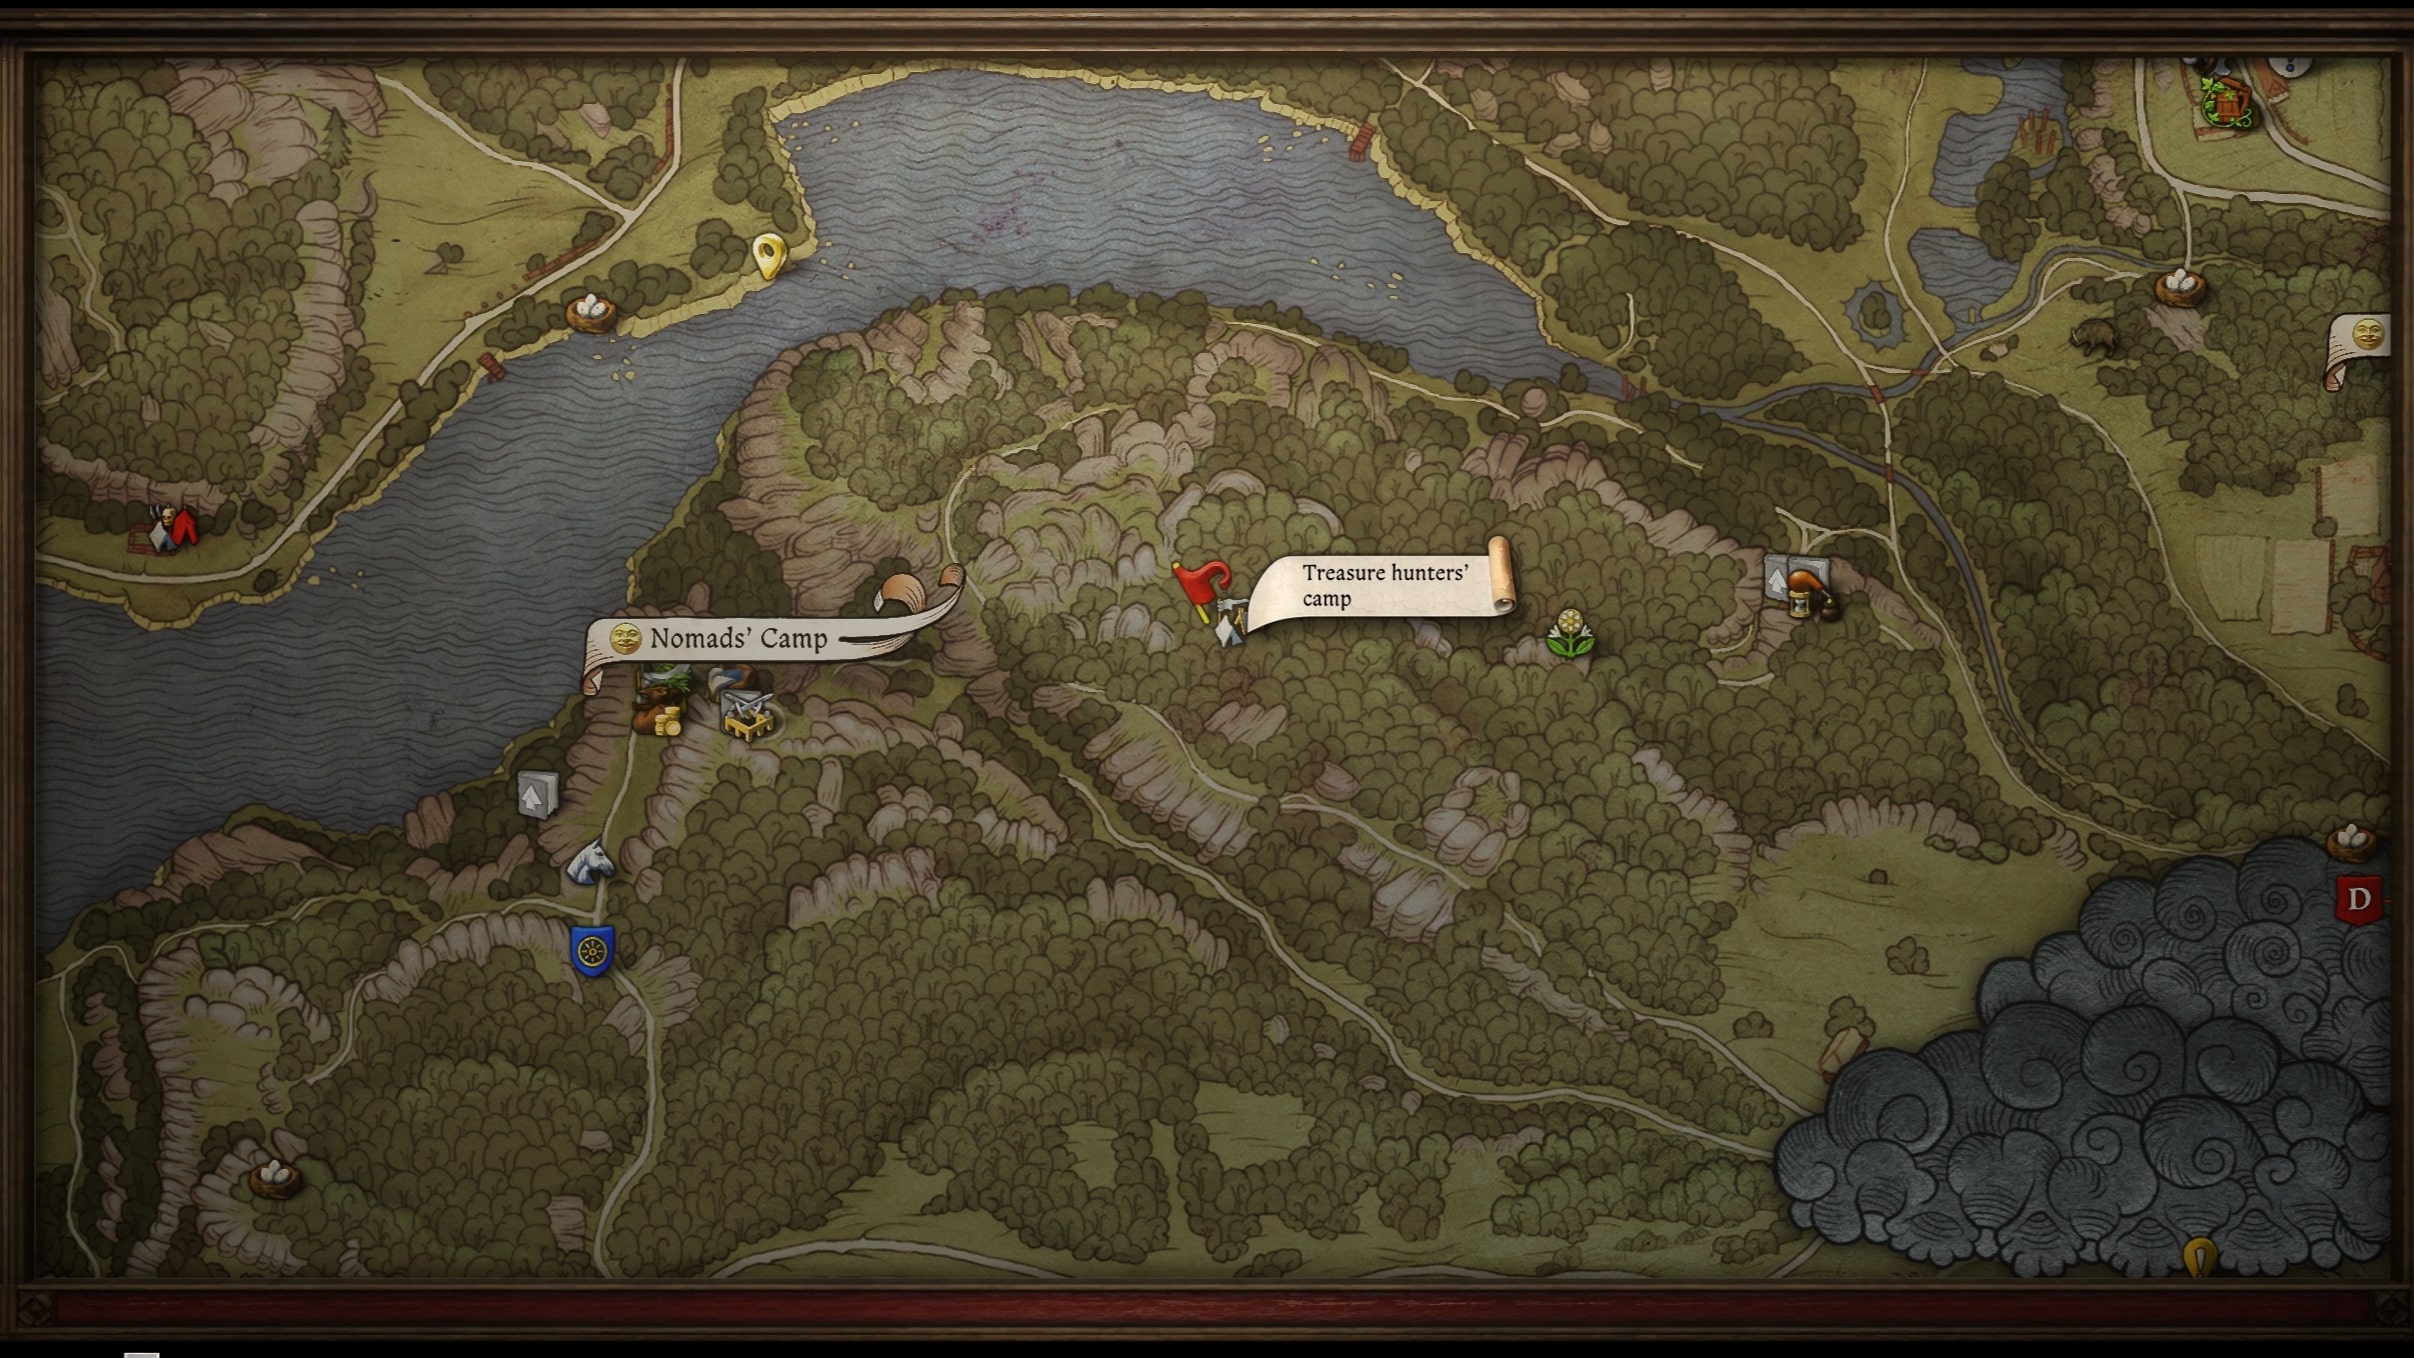
While we’re hunting for treasures in the open world, I’d be remiss not to mention the hidden treasure hunters’ camp to the east of the Nomad camp that’s atop the hills of the large forest west of Zhelejov (shown above with a red flag). Here, you’ll find three graverobbers camped out.
They attack on sight, so talking isn’t an option. With that said, they’re not terribly well-armored and don’t greatly outnumber you, so you shouldn’t have too much trouble taking them out. If you’re comfortable with a bow, you can try picking one or two of them off before they bear down on you.
There’s quite a bit of valuable loot here, including a Dagger in a sack near the cooking pot that’s used for stealthy assassinations from behind, a Spade you can use for your own graverobbing leaning on the tree next to a locked chest, and a pricey Golden cup in an open sack to the chest’s left. The chest itself — best unlocked with a key from one of the defeated bandits — contains a chainmail Saxon hauberk to wear under your recently acquired Patched cuirass and a piece of jewelry worth about 100 groschen or so, along with a Broadsword and a Grimey skullcap you can sell.
How you can get lots of Saviour Schnapps
Last but certainly not least, you’re going to want to stock up on Saviour Schnapps — the alcoholic beverage that manually saves your game. Using these is the only way to do so outside of sleeping in owned beds, and this is how Warhorse encourages players to play through the consequences of their actions instead of “save scumming” by frequently making saves to reload when things go wrong. Still, having a good amount of these on hand is important (just don’t drink too many too frequently, or else you’ll become severely intoxicated and will get some big stat nerfs).
There are two main ways to get Saviour Schnapps in Kingdom Come: Deliverance 2. The first is by brewing it with alchemy using the recipe given to you by Pavlena in the prologue; this requires a cauldron of Wine, one Nettle and two Belladona, and involves the following steps:
- Add the Nettle to the cauldron and boil for two hourglass turns.
- Grind the Belladonna.
- Add the Belladonna to the cauldron and boil for one hourglass turn.
- Finally, pour into a phial.
A well-brewed Saviour Schnapps will boost Strength, Vitality, and Agility on top of saving your game, while a poor brewing or the use of one less Belladonna will yield a Weak Saviour Schnapps that only saves your game. Nettle is all over the place, but the black berry bushes you get Belladonna from are somewhat rare, so making the weak version of the elixir is preferable if all you care about is getting as many game-saving Saviour Schnapps as possible. Do keep in mind that you can buy both herbs from apothecary vendors, though.
Don’t feel like making your own Saviour Schnapps? You also have the option of buying it directly from apothecaries, as well as some of the general traders throughout the game. Both the trader and apothecary in Troskowitz, for example, sell and regularly restock Saviour Schnapps. Getting the drinks this way is more expensive, but far less time consuming.
Kingdom Come: Deliverance 2 is out now on Xbox Series X|S, Windows PC (via Steam, the Epic Games Store, and GOG), and PS5. It’s undoubtedly one of the best Xbox games and best PC games of the year, so if you enjoy RPGs, definitely consider picking it up (it’s just $44.99 on CDKeys, which is an amazing deal).


