Summary
- Most software follows a 3-step process to build from source: ./configure && make && make install.
- The configure script checks dependencies, while make generates an executable; autoconf/automake help automate this.
- Installation is usually optional, and mainly a convenience, letting you run commands that are copied into a PATH directory.
Installing from source can seem a bit more intimidating than using your package manager. But three simple commands help ensure the process is still hassle-free.
What Is Building From Source?
Programs that you run on your computer are either interpreted or compiled. The former are text files containing the code that another program—an interpreter—will read and execute when you run them. The latter are standalone binary files that contain machine code and run directly.
Compiled executables are very common, especially for larger programs. When you build from source, you use a compiler—like gcc—to generate an executable from the application’s source code, which may be distributed across many individual files.
Because building from source can be a complex and lengthy process, it is usually automated via another program, most often Make. You can write makefiles to control how a project builds its final executable program.
In more complicated projects, makefiles themselves get large and unwieldy. This is especially true for portable apps that need to work across different architectures and environments. To cater to these situations, many projects generate their makefiles automatically using a tool called autoconf/automake.
The 3-Step Build Process: Configure, Make, Install
The upshot of all this is a common pattern that much software uses to build from source:
./configure && make && make install
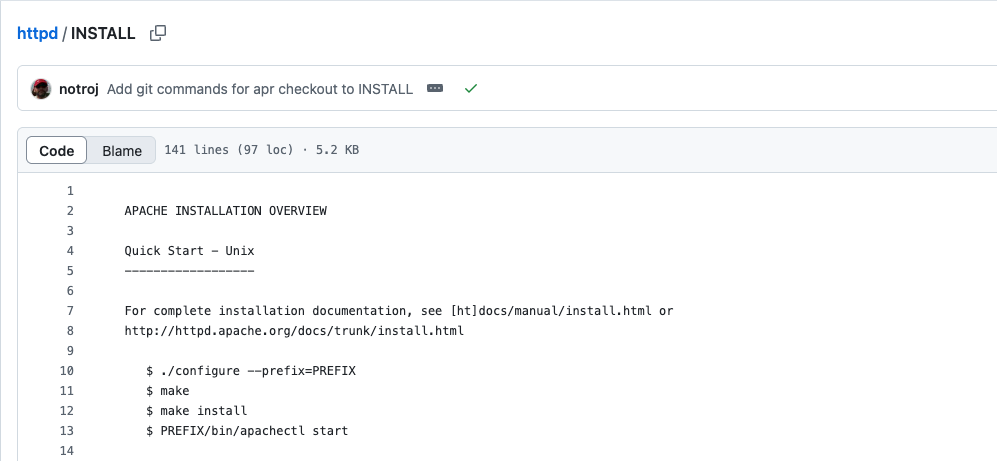
Many popular programs use this pattern—or a variant—including Apache, which explains the process in its INSTALL file:
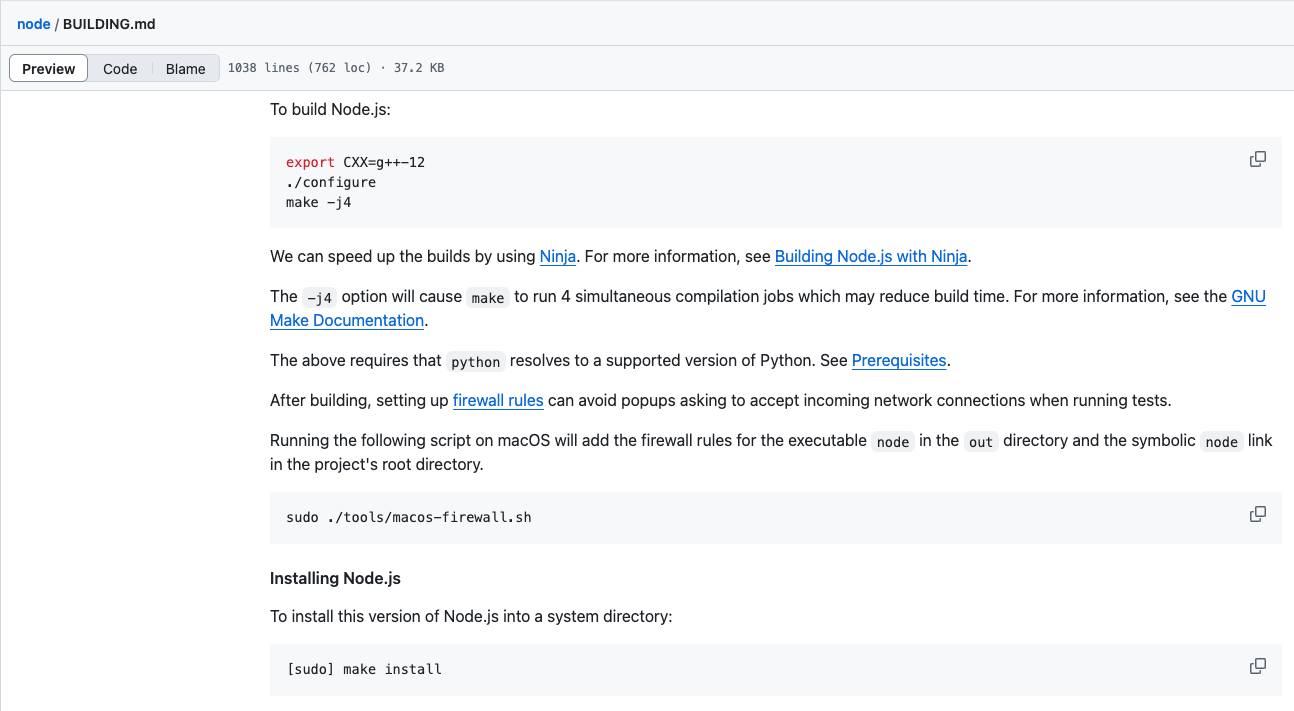
Node.js is another example of software that uses this pattern. Its BUILDING.md file contains relevant instructions:
Each project takes its own approach to building its source, even if it’s a simple variation of the three-step pattern. One important distinction is how you run the command chain. Running it with the logical AND operator (&&) will cause the chain to stop if one of its parts fails:
./configure && make && make install
Alternatively, you can run each command separately, but still use just a single line, with semicolons:
./configure; make; make install
This will cause each part to run, even if previous steps have failed. Your choice won’t always make much practical difference, and you can also run them as three separate commands instead:
        ./configure
make
make install
You may not want to fully install the software, preferring to run it directly from its own directory. This is perfectly OK to do; you’ll just need to drop the make install command.
Some repos contain a configure script, others (like grep) expect you to run another script that generates this configure file first. If you’re looking for the easiest option, always refer to the INSTALL or BUILD or README file and follow the project’s recommendation.
How ./configure Kicks Things Off
The configure shell script is usually the starting point of the build process. It sets up the rest of the process for your specific environment.
The script checks for various dependencies that the project requires. It ensures that all required elements are present and correct, at the appropriate versions. Run ./configure and you should end up with a file named Makefile which is used by the next stage.
The configure script is, itself, highly configurable, via command-line options. Run ./configure –help for a comprehensive description of them.
Both configure and make generate a lot of output. If you just want to run these commands and ignore what they do behind the scenes, you can use the –quiet option to suppress most output.
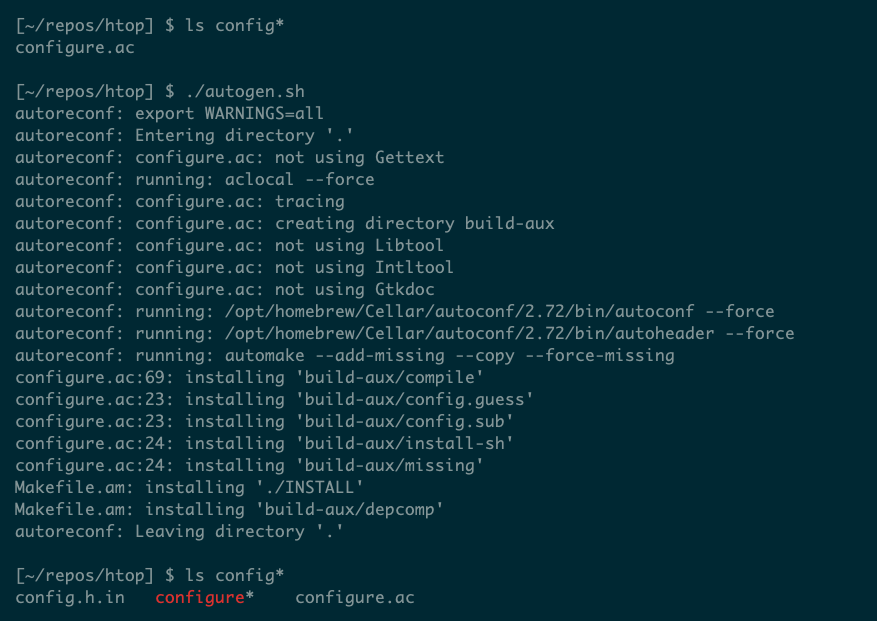
If there is no configure script, a project may provide a means of generating one. For example, the htop repository includes an autogen.sh script. Running this will generate a configure script:
Very simple projects, and those not written in the C language, may lack a configure script altogether. In this case, the three-step process becomes a two-step one: just run make && make install.
The configure script often controls what happens later during installation. In particular, the –prefix option is common. This defines the root directory under which the software will be installed. By default, this is /usr/local but you can provide an alternative if you like to organize your files differently.
make Does Most of the Work
Once configure has generated a makefile, you can begin the actual process of building the software. The make program reads in a makefile and checks a series of rules to decide what to build.
Makefiles written by hand are usually easy to read, once you are familiar with their syntax. In the simplest case, a makefile describes how to generate one file from another, when the latter is older. For example, this makefile describes the build process of a very simple program:
        program: program.c
    gcc -o program program.c
Here, the executable file program depends on the source file program.c. When make runs, it will check the file against its dependencies. If nothing has changed since the last build—i.e. program is newer than program.c—make will simply exit, safe in the assumption that nothing needs to be done. If program.c has changed, however, it will run gcc and compile the program.
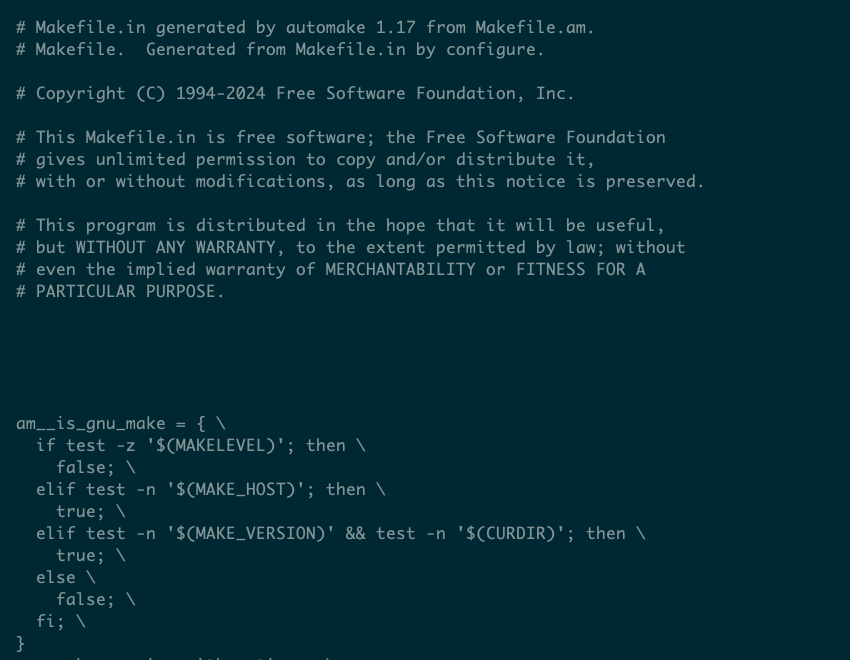
There’s a lot more to make beyond this simplest case, and generated makefiles tend to be much more complex. For example, this generated makefile for the htop program is 2,440 lines long:
But you don’t need to worry about this. Unless you’re hacking the source code—or writing your own—you can run make without really worrying about what’s happening under the hood.
The make step can take a long time to run, particularly for complex software that involves several components. Be patient, and don’t worry if make fails. The cause will usually be a missing dependency, and one of the benefits of make is that it will resume the build process without losing the work already carried out.
Wrapping Up With make install
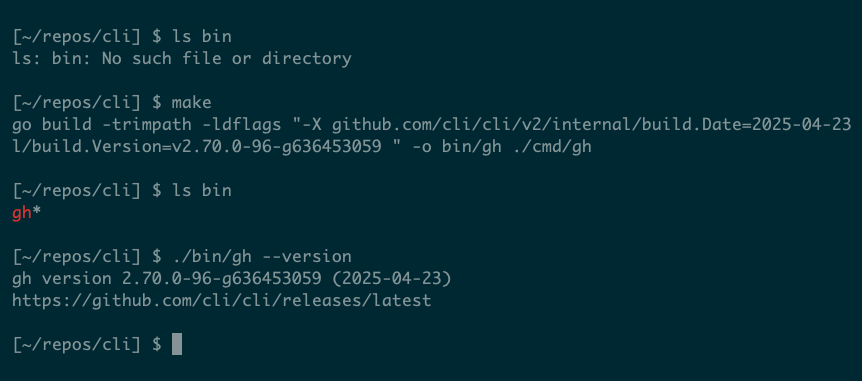
A typical build will generate a compiled executable, either in the root of the project or often in a subdirectory named bin. This is usually a standalone program that you can run via its full path:
This is fine for testing or working on your own software, but you’ll eventually want to install it in a more convenient location.
Most makefiles have an install target that make will check when you run make install. This will often use the install command to copy individual files and set appropriate permissions and ownership.
The install location will depend on how you ran configure. Remember that the default location for executables is /usr/local/bin, which you may not have permission to write to. If your user cannot write to the install location, you’ll need to run sudo make install and provide the root password to proceed.
Whatever the install location is, it should be in your PATH so that you can run the program just by typing its name on the command line, rather than its full path.
Related


