Summary
- Smart Folders are dynamic virtual folders that automatically update based on your search criteria, saving you time and frustration.
- They’re incredibly versatile, allowing you to filter files by date, type, content, or a combination of factors.
- Smart Folders can surface exactly the files you need, when you need them, without digging through directories.
I’ve been using macOS for years and consider myself an advanced user, yet I’ve ignored the Smart Folders feature in Finder until recently. It turns out they’re incredibly useful and have completely changed how I organize and manage files on my Mac.
What Are Smart Folders?
Even though every Mac user uses the Finder daily, it isn’t an app that invites exploration. This means that a lot of Finder’s most useful features remain well hidden. Smart Folders are among them. The feature only exists via the File menu, so if you don’t spot it, you’re unlikely ever to find it.
I overlooked Smart Folders for years, but it’s no exaggeration to describe them as a game changer. Gone are the days of manually trawling through folders to find the files I’m looking for. They help to do it instantly, and automatically.
A Smart Folder is a type of virtual folder based on a saved Finder search query. It looks and functions like a regular folder, but doesn’t contain any actual files.
You can create Smart Folders based on any number of criteria. The options range from the basics, like the date a file was made or edited, the file type, or what the file contains; to ultra-specific things like the bit rate of a video or the number of pages in a document.
The real strength of Smart Folders is that they’re dynamic. They update automatically whenever new files are created or edited to meet your search criteria. They also make your Mac so easy to manage because files can appear in more than one Smart Folder at a time. You don’t have to worry about duplicate files, even if they appear in multiple places.
How I Use Smart Folders to Stay Organized
I use Smart Folders to show files that I’ve accessed within the last week, to highlight files that contain certain words, and also to surface massive files, which I do because I’m always running out of storage on my Mac. There are loads of other ways you can use Smart Folders.
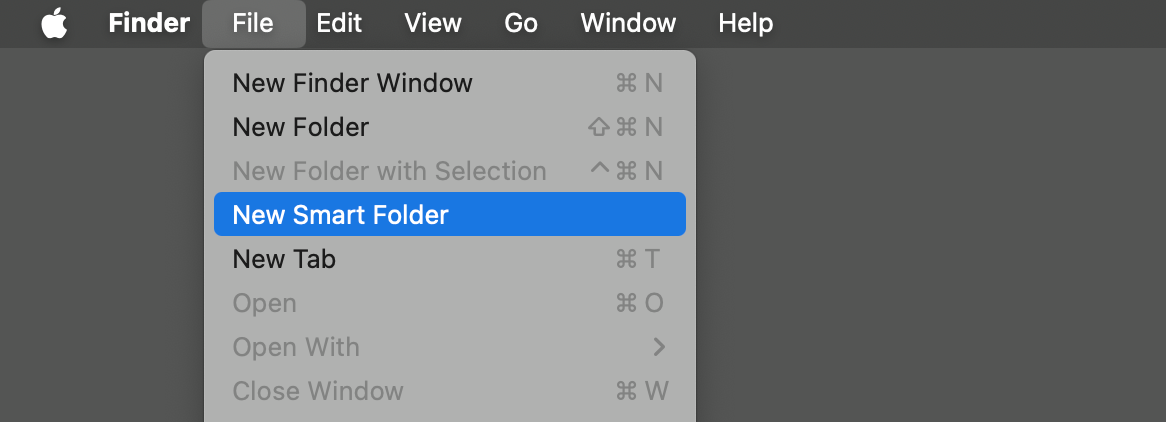
Setting up Smart Folders is easy. You start by going to the Finder, which you can do just by clicking the desktop or the Finder icon in the Dock. Then go to File > New Smart Folder.
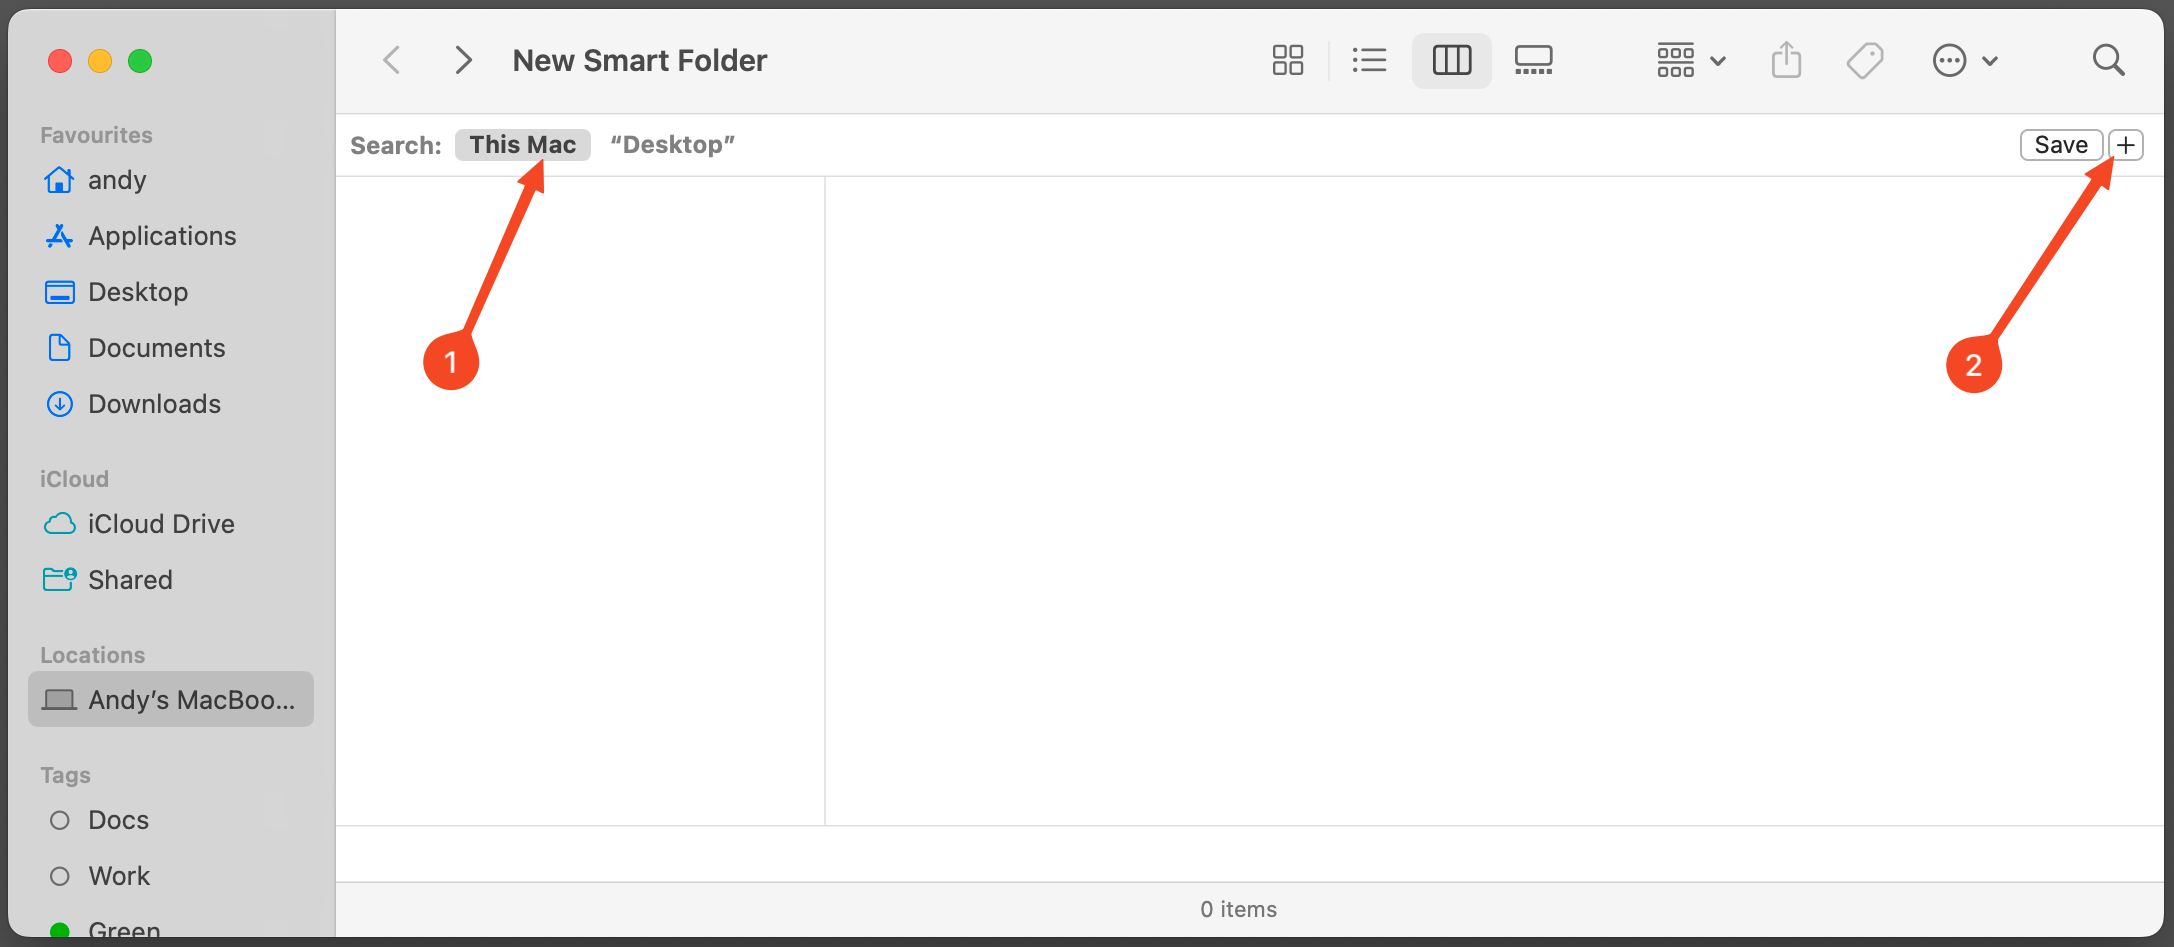
Alongside the “Search” option, select whether you want to locate files stored on your entire drive or just within the folder you’ve got open. Next, click the “+” (plus) icon on the right end of the window.
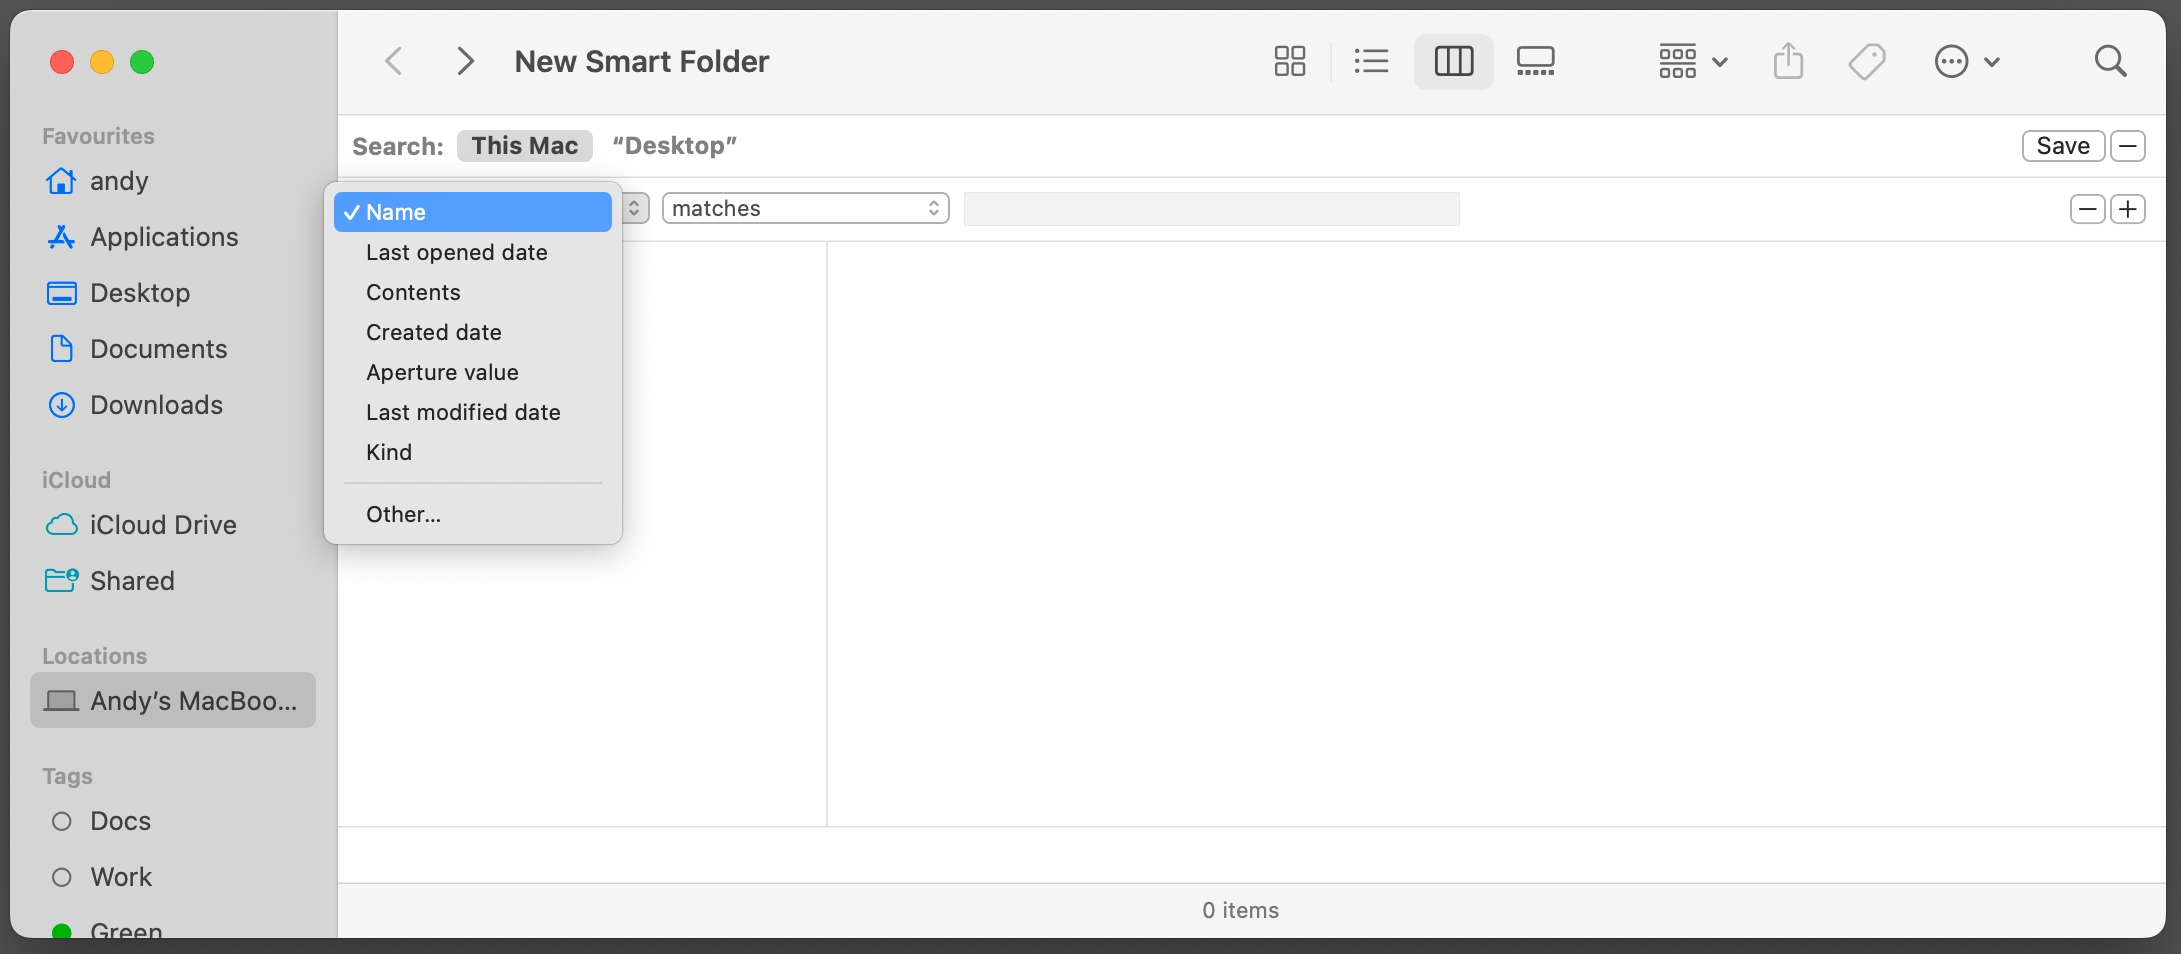
Click the dropdown labeled “Name” and pick a category. Most are self-explanatory, but you can experiment with the options if you aren’t sure. Hit “Other” to see a vast selection of extra options.
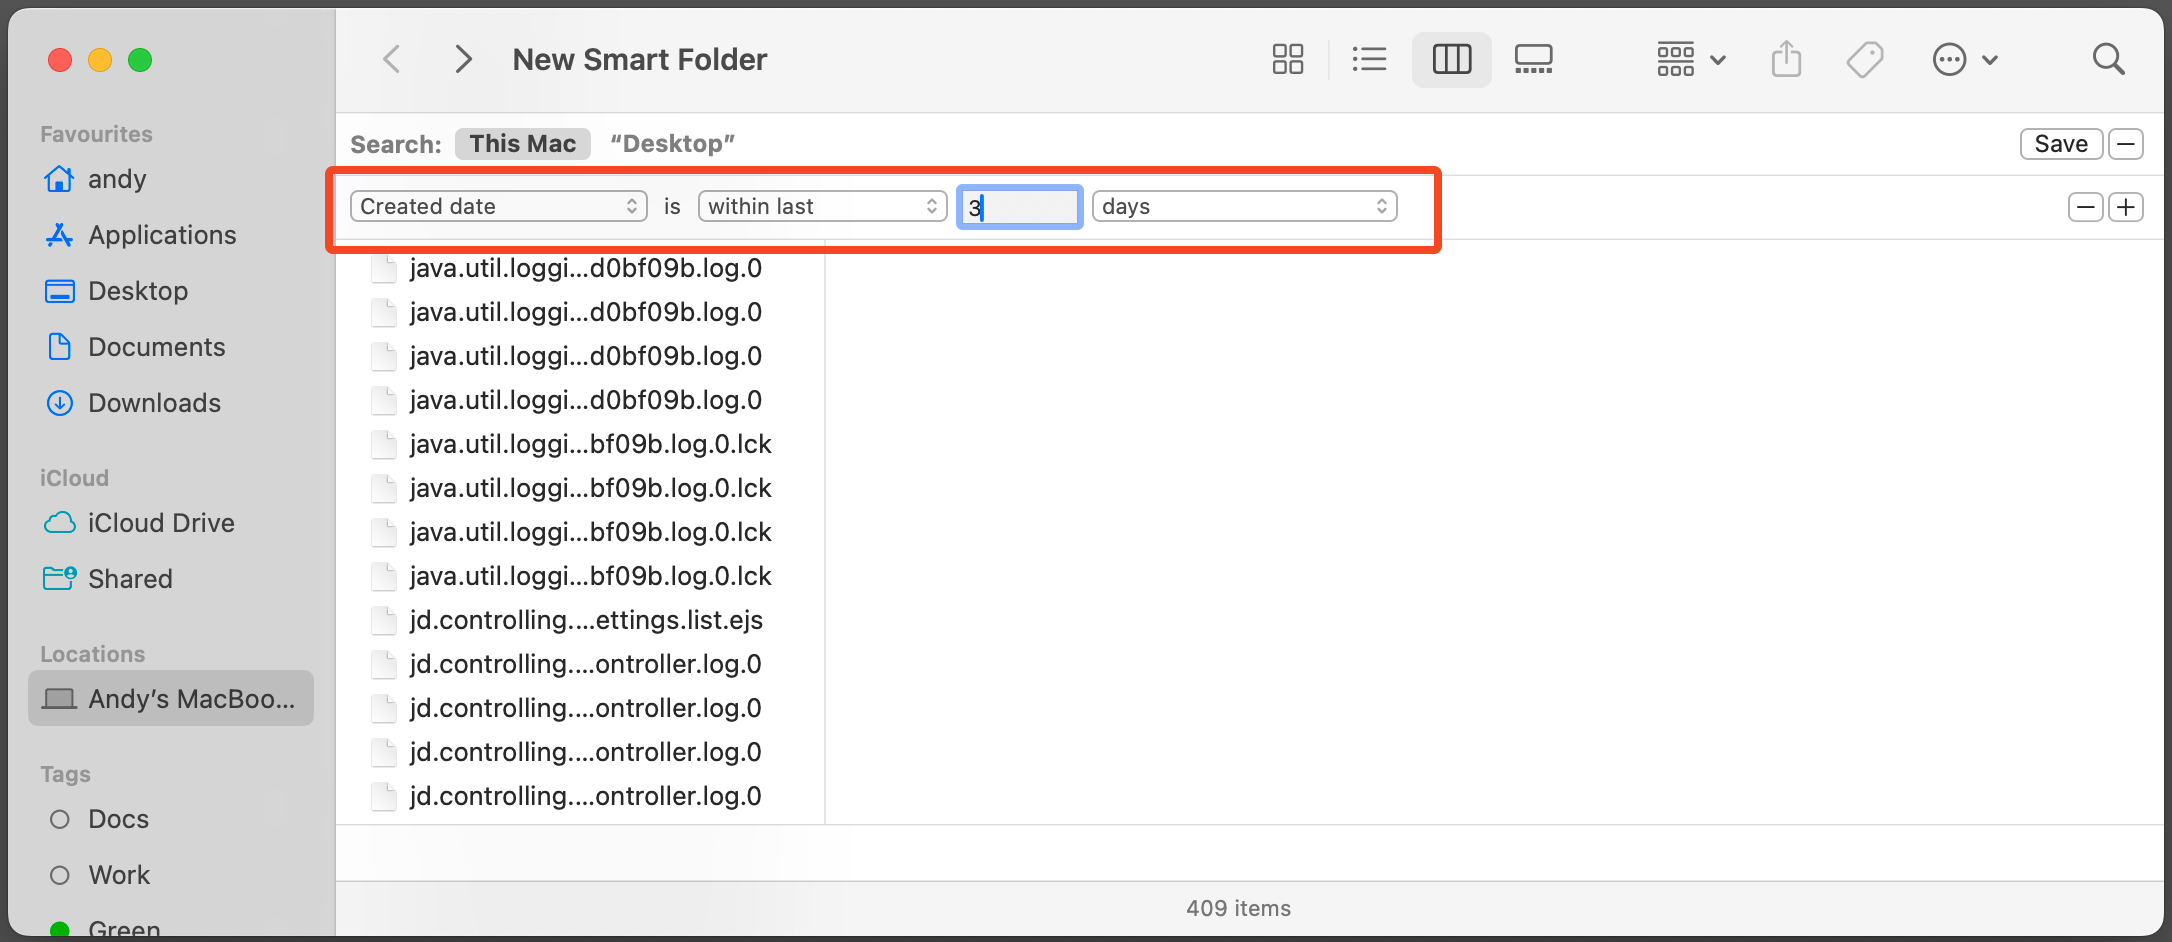
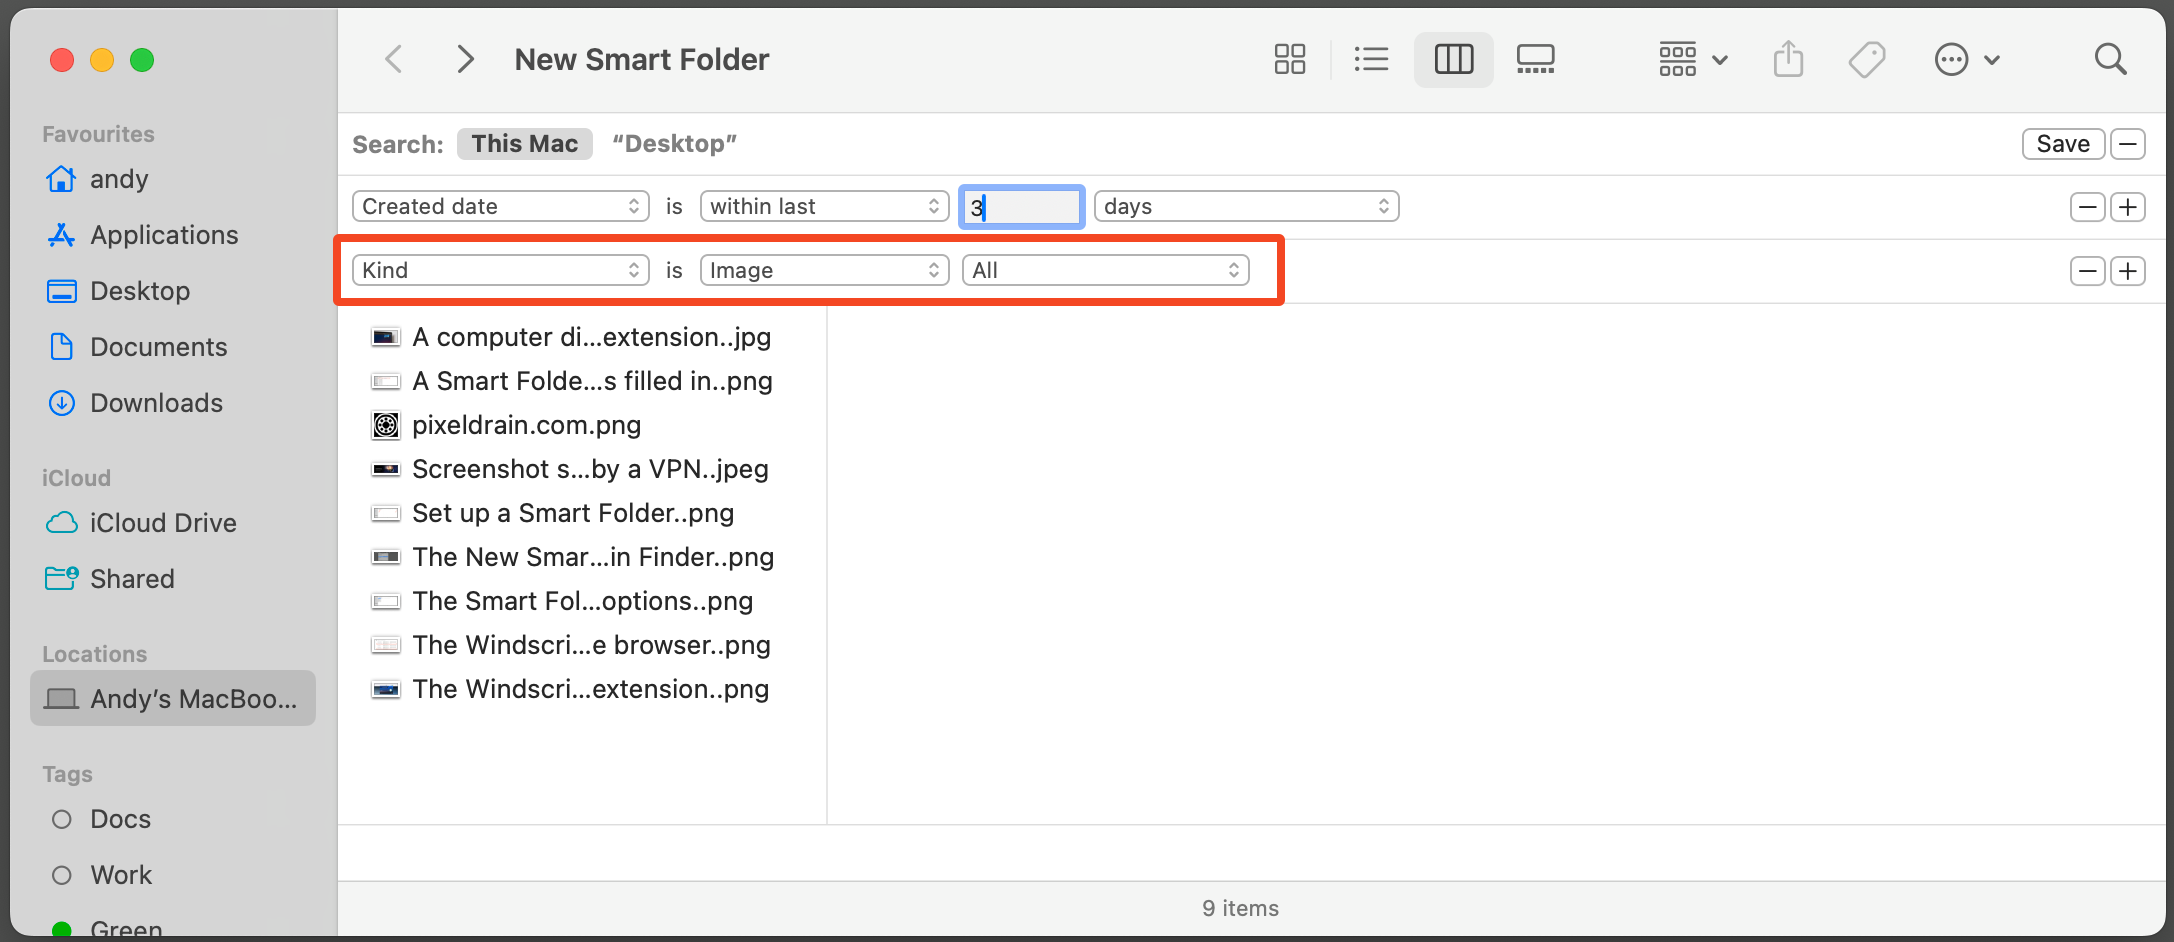
Then fill in the rest of the rule. In my example, I want to highlight recently created files, so I select “Created date,” “within last,” “3,” and “days.”
Hit the “+” button to add more rules and make the search more specific. I’ve added “Kind,” “Image,” and “All.” This Smart Folder will show all images created within the last three days.
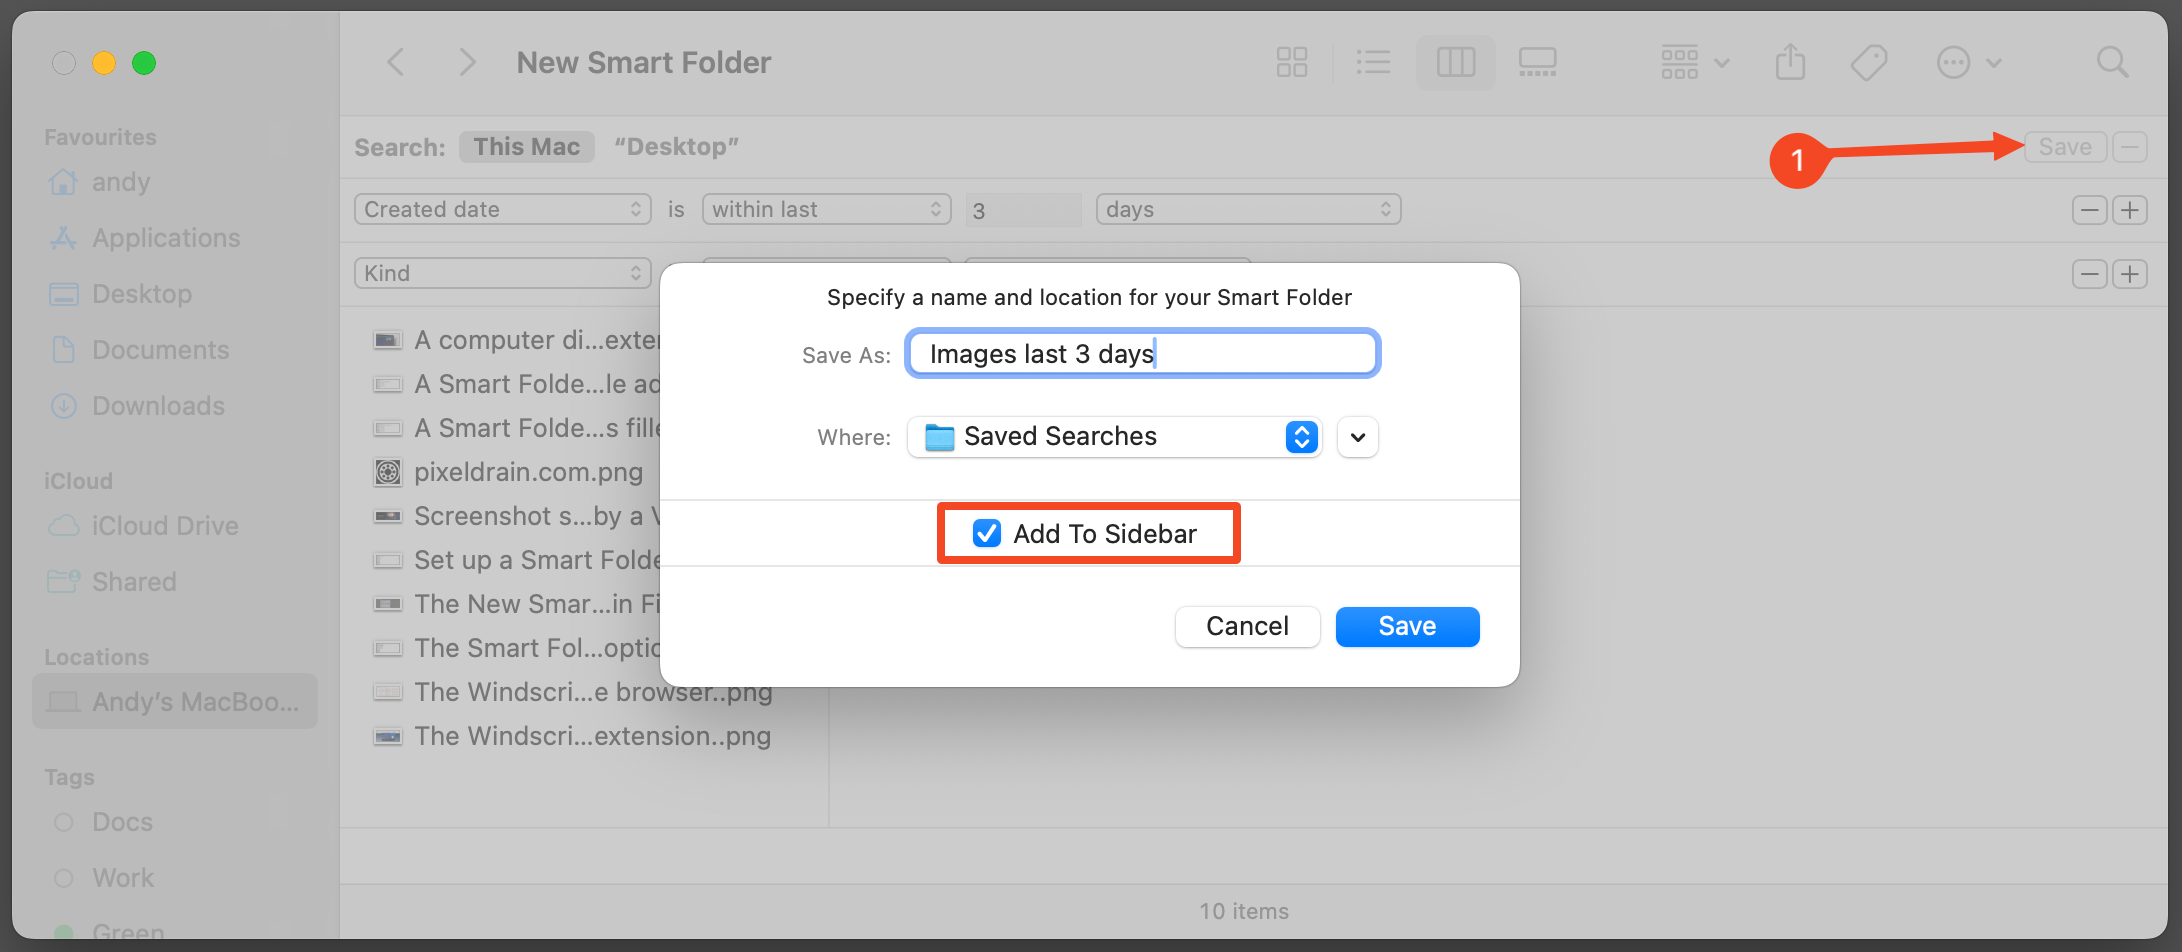
Click “Save” to finish. Name the Smart Folder and choose where to save it. By default, it’ll appear in your Finder sidebar as well.
How to Create the Most Useful Smart Folders
Smart Folder rules are stackable, so you can add as many criteria as you need. But don’t go overboard. The trick is to be specific, but not too specific.
There are some limitations to what a Smart Folder will find. For example, if you’re looking for the content of a file, it will need to be in a format that macOS can read natively.
You can save Smart Folders anywhere on your Mac, just like any other folder. In most cases, it’s better to keep them in the default “Saved Searches” folder and have them appear in the Finder sidebar for easy access.
However, you can also place them in your Dock. Drag the folder onto the Dock, to the right of the dividing line next to the Trash icon.
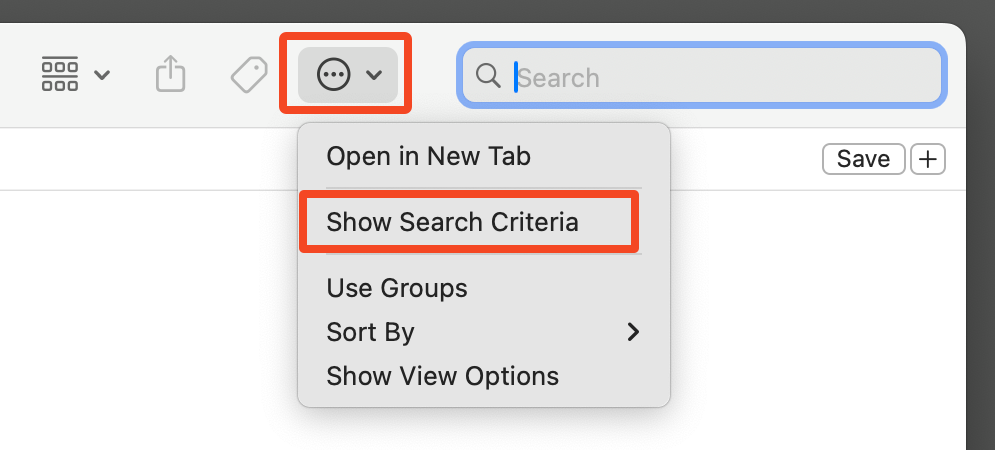
You can edit Smart Folders even after you’ve created them. Open it, click the Options icon in the toolbar, and select “Show Search Criteria.” You can now change the search rules to tweak the contents of the folder.
When you no longer need a Smart Folder, simply delete it by moving it to the trash. This won’t delete any of the files within the folder.
Smart Folders are one of those macOS features that are somewhat hidden, yet remarkably powerful and hard to live without once you discover them. They’re well worth trying, and Finder has a lot more hidden tricks to explore, too.

