Is your Mac constantly beeping with notifications, making it difficult for you to focus? You’re not alone. We’ve compiled a list of seven different notification settings that can help you make your Mac quieter both in terms of audio volume and the volume of notifications you see.
1
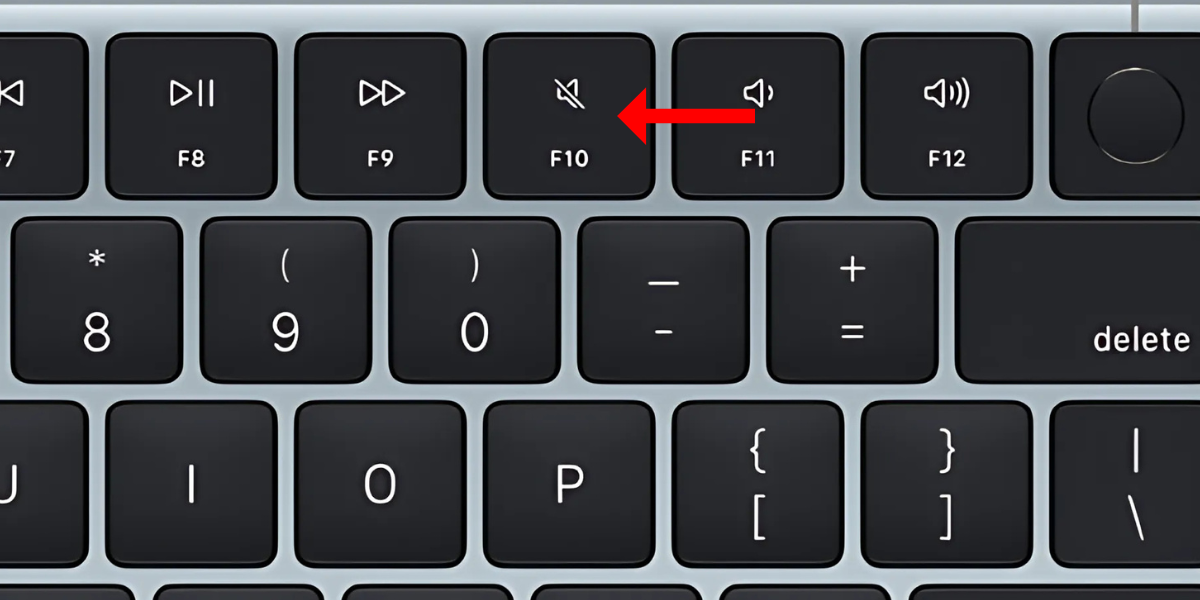
Press F10 to Silence MacBook Notifications
The easiest and quickest way to make your Mac quieter is to press the F10 or mute key (situated at the top right of the keyboard). The mute key immediately silences all the system sounds coming from notifications, applications (such as Apple Music or Chrome), or any other source, for that matter.
The quick alerts you hear when you type in the wrong password, those from a Chrome tab, or the audio playing on secondary devices like Bluetooth speakers, all go away when you press the mute button on your Mac’s keyboard.
You can also press the volume down key repeatedly or drag the volume slider all the way to the left, but that takes more time. When you’re ready for the sounds, press the button again to unmute them (the button acts as a toggle switch).
2
Enable Do Not Disturb Mode
If you want to make your Mac quieter for attending an online class/meeting, watching a podcast/educational video, or enjoying a new release on Netflix undisturbed, you can enable the Do Not Disturb mode on your Mac.
Unlike the mute button, Do Not Disturb silences the incoming notifications, email alerts, and iPhone calls that reflect on your Mac while allowing audio playback through the speakers or a Bluetooth device.
On Apple devices like iPhones, iPads, and Macs, Do Not Disturb mode is available as a Focus mode. To enable, press the F6 button (the one with the crescent moon). This silences the notifications and alerts until you disable the mode.
Alternatively, you can go to the menu bar, click on the Control Center, select Focus, and then enable the Do Not Disturb mode for a specific duration, like an hour.


3
Disable Website Notification on Safari
If you’re fed up with constant alerts from a website, you can turn off the browser notifications for that particular website.
First, click on the Safari button next to the Apple menu.
Then, select “Settings” from the drop-down menu.
On the window that opens, select the “Websites” tab.
In the panel on the left, scroll down and select “Notifications.”
Now, you should see the websites that can send you alerts. Click on the upward or downward-facing arrow to their right and choose Deny. If you don’t want to receive notifications from any web page, uncheck the “Allow websites to ask for permission to send notifications” option at the bottom.
If you’re a Chrome user, head to Settings > Privacy and Security > Site Settings > Notifications, and check the “Don’t allow sites to send notifications” option.
4
Mute Notifications From Apps Temporarily
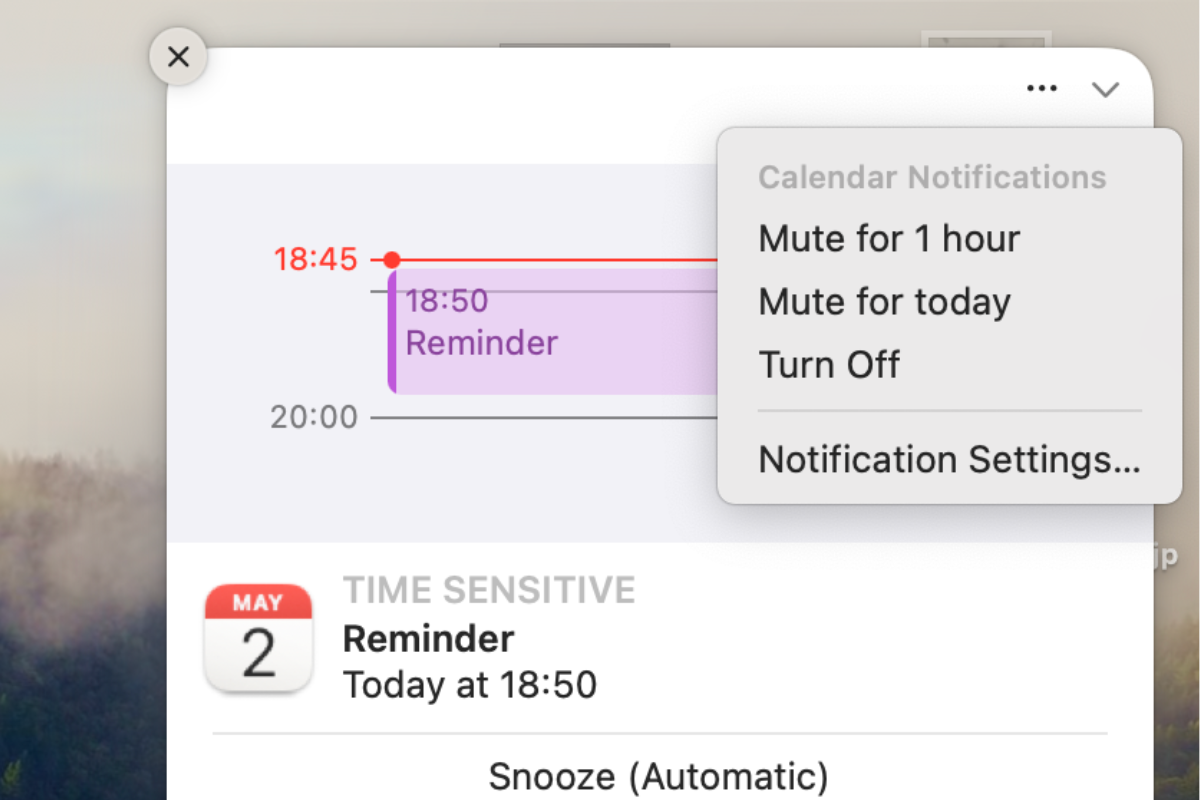
If you want to make your Mac quieter for a while, macOS allows you to pause notifications temporarily for specific durations, like an hour or a day.
When you get a notification, click to expand it, and then press the three-dot button. In the drop-down menu, select the option that suits you the best. You can choose from the following options: “Mute for 1 hour,” “Mute for today,” and “Turn off.”
5
Turn Off Notifications From Specific Apps
If you don’t wish to receive notifications from a specific app, say Calendar, Google Chrome, or a messaging app like WhatsApp or Telegram, you can head to the settings menu to prevent the app from showing you any alerts.
Go to Settings > Notifications, and under “Application Notifications,” select an app.
In the following menu, turn off the toggle beside “Allow notifications.”
Now, the app won’t show you any notifications unless you enable them from the same menu.
6
Disable Calls From iPhone in FaceTime
With all the notifications we already handle on our Macs, those additional alerts for incoming iPhone calls can get pretty annoying. Not only do they ring your Mac, but they also bring you back to the home screen, breaking your concentration.
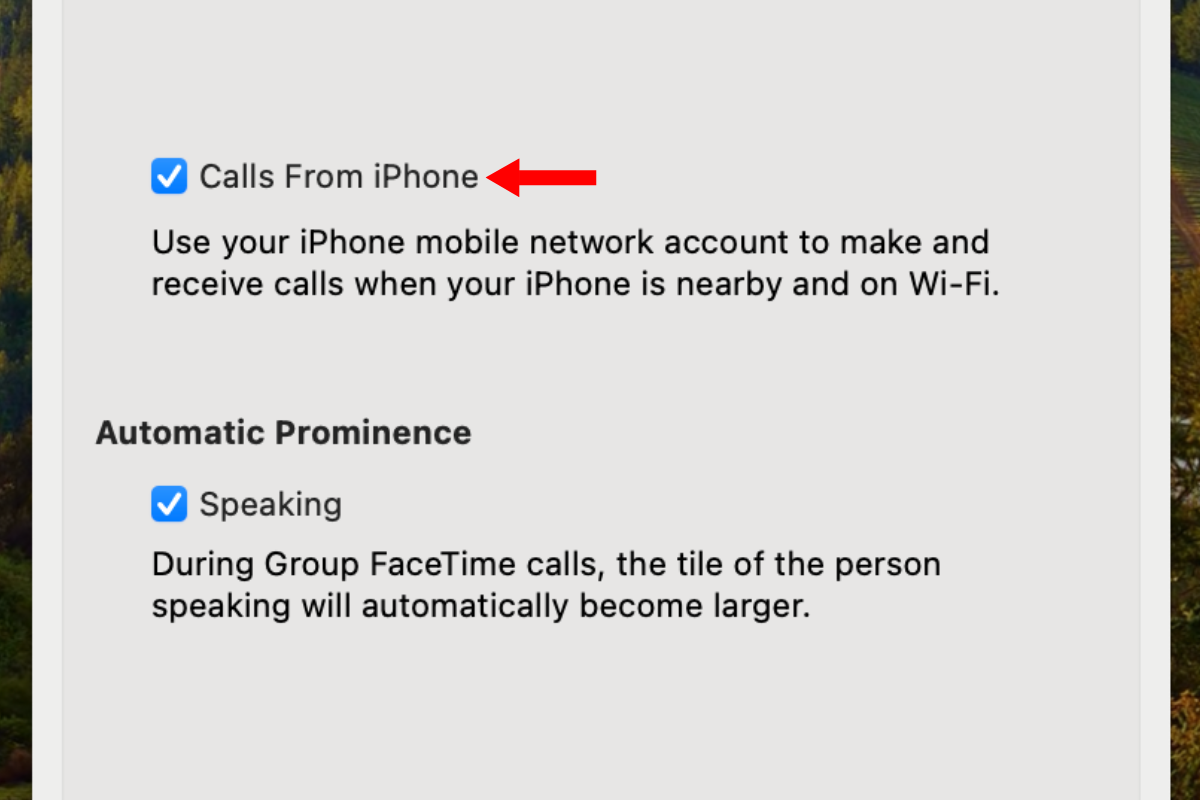
The good news is that you can turn off the incoming call alerts from your iPhone by changing one FaceTime setting.
Open the settings for the FaceTime app and uncheck the box beside “Calls From iPhone.” That’s it. From now on, your Mac won’t disturb you with incoming calls on your iPhone.
7
Turn Off iPhone Notifications on macOS Sequoia
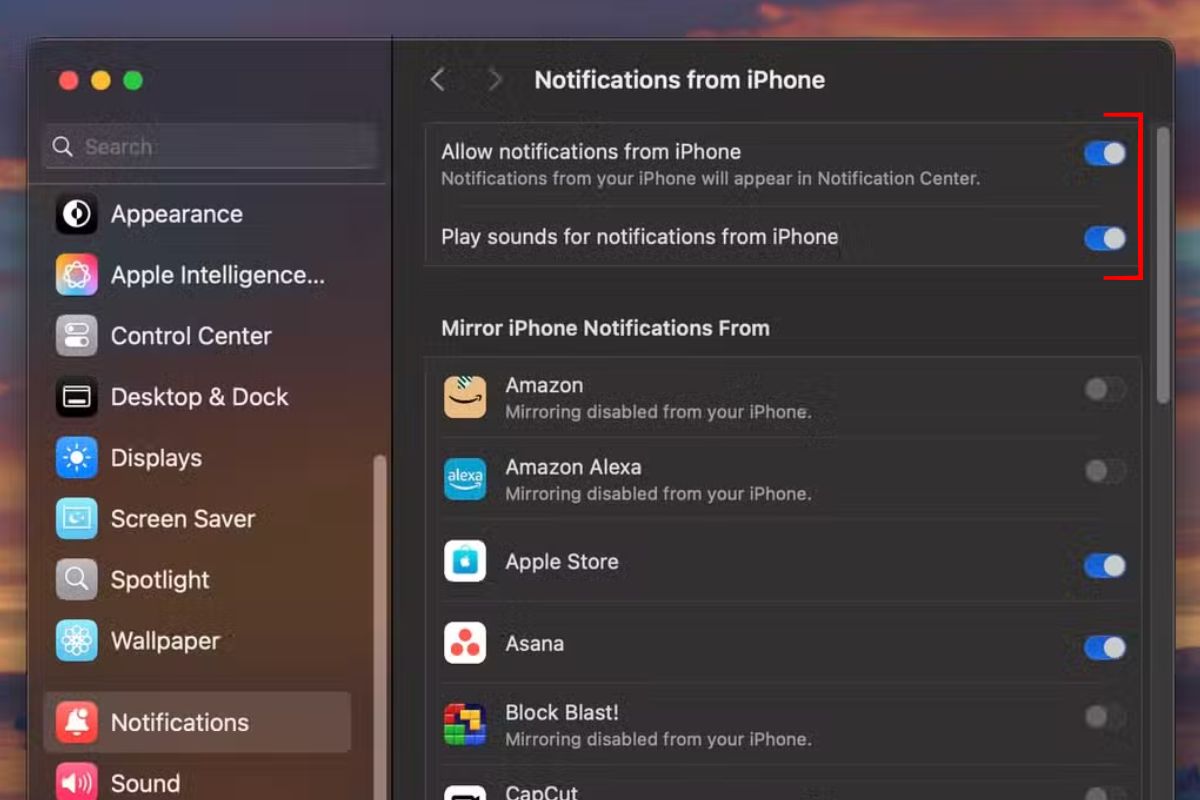
With macOS Sequoia, Apple has released a new feature called iPhone mirroring. The way it works is that it allows you to control your iPhone directly from your Mac. However, this also means that you receive all your iPhone’s notifications on your Mac.
If that isn’t something you want, go to Settings > Notifications > Allow notifications from iPhone and toggle the “Allow notifications from iPhone” option off.
Once you do this, you’ll still be able to use the apps on your iPhone from your Mac without facing the constant buzzing of alerts from different apps.
If you’ve just got a new Mac, we have plenty of articles for you to go through. For instance, you can read about the five settings to change on your new Mac here. Here’s another piece about 10 hidden Mac features you should use in your everyday routine.


