Microsoft Word allows you to create neat tables within documents. Once a table is created, there are several easy ways to add more rows or columns, and we’re going to show you how to do just that.
Press Tab to Add Rows
The simplest way to add rows to your table is by placing the cursor in the cell at the bottom-right corner of your table and then pressing Tab on your keyboard.
This will add a new row. Each time you want to add a row, you can select the cell at the bottom right and press Tab again. If you select any other cell and hit Tab, then the cursor will move to the next cell. It’s only in the last cell that a new row gets added automatically.
RELATED: Tables and Other Formatting Controls
Press Delete to Remove Rows and Columns
You can also delete rows and columns quickly by pressing the Delete key on your keyboard. First, you need to select a row or column. The quickest way to select a row is to click the area right outside the first cell on the left. You’ll notice that your mouse pointer has been flipped.
When you see the flipped pointer, you can click to select the entire row. Now, press Delete on your keyboard to get rid of the entire row.
To select a column, move your mouse pointer above the first cell of any column. The pointer will change to a down arrow symbol. Now, click to select the entire column.
Hit Delete on your keyboard to delete the column.
Use the Ribbon Menu to Add Rows or Columns
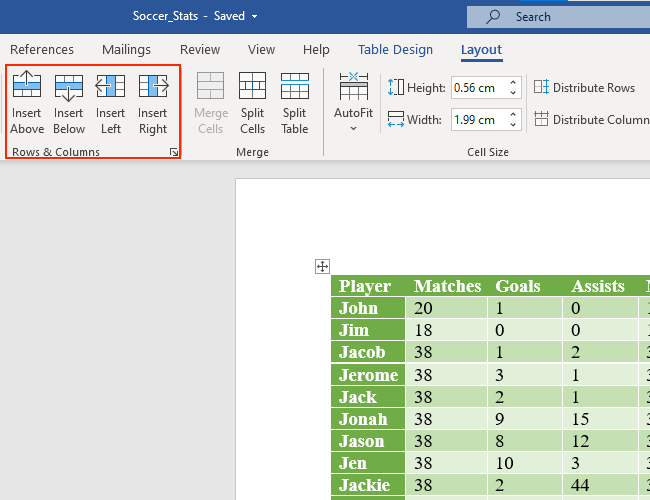
If you have a table in your Word document, the ribbon menu allows you to see some additional options to add rows and columns. You can access these options using the Layout tab in the ribbon menu up top. The only confusing part is that there are two tabs named Layout in the menu bar for some reason. You need to select the “Layout” tab on the right—the one next to Table Design.
Once you’ve selected this, you will find several table-related options here. We’ll focus on the “Rows & Columns” sub-head here since our goal is to add rows and columns.
If you want to insert a row above the cell that you’ve selected in your Microsoft Word table, click “Insert Above.” To add a row below the cell that you’ve selected, click “Insert Below.”
You can also add columns quickly using the buttons given here. “Insert Right” will add a column to the right of the cell. Similarly, “Insert Left” will add a column to the left of the selected cell.
You can also click the arrow icon that’s to the right of the “Rows & Columns” sub-head to reveal a few more options.
Here, you can click “Insert entire row” or “Insert entire column” to add rows or columns.
Delete Rows and Columns Using the Ribbon Menu
Microsoft Word also allows you to delete rows and columns using the same ribbon menu. Click the “Layout” tab next to Table Design.
Now, go to the “Rows & Columns” sub-head. Click “Delete” to reveal the options to remove rows and columns.
Select “Delete Columns” to remove the columns that you’ve selected in your Word table. Alternatively, you can click “Delete Rows” to remove the selected rows from your table.
Add Rows and Columns Using the Context Menu
Another quick way to add rows and columns involves revealing the context menu in Microsoft Word tables. To do this, select any cell, column, or row, and press the right-click button on your mouse and select “Insert.”
You can select “Insert Columns to the Left” or “Insert Columns to the Right” to add columns to the left or right side of the cell that you’ve selected.
Alternatively, you can click “Insert Rows Above” or “Insert Rows Below” to add rows above or below the selected cell in your table.
You will also find similar options in the “Insert” button that’s in the menu with the font selection options, which is also revealed after you right-click a cell.
Use the Context Menu to Remove Rows and Columns
Removing rows and columns is pretty straightforward using the context menu. The simpler method is to right-click inside any cell and then click the “Delete” menu in the box at the top (the one with the font customization options).
Here, you can click “Delete Rows” or “Delete Columns” to delete rows or columns from your table.
Alternatively, you can select a row or a column in your table and then hit the right-click button on your mouse. Now, click “Delete Columns” to remove the selected columns. This option will be called “Delete Rows” if you’ve selected one or multiple rows.
If you found this article useful, you’ll definitely have a lot of fun nesting a table within another table in Word.


