On Windows 11, the ability to have multiple accounts lets you create a separate space for everyone who will be using the computer without interfering with your experience. However, when the account is no longer needed, it’s possible to delete it in several ways, including through the Settings app, Control Panel, User Account, Computer Management, Control Panel, and PowerShell.
If you have to temporarily restrict access to a user, you don’t need to delete the account. Instead, you should disable the user on Windows 11.
In this Windows 11 guide, we will walk you through the different ways to delete accounts on your computer.
How to delete an account on Windows 11
To delete an account and data with the Setting app on Windows 11, use these steps:
- Open Settings.
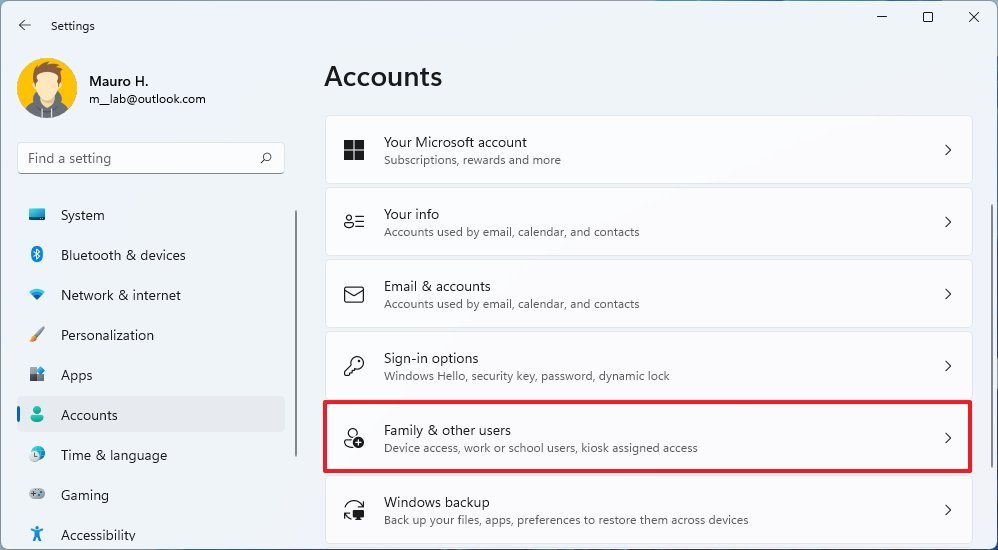
- Click on Accounts.
-
Click the Family & other users page on the right side.
Source: Windows Central
-
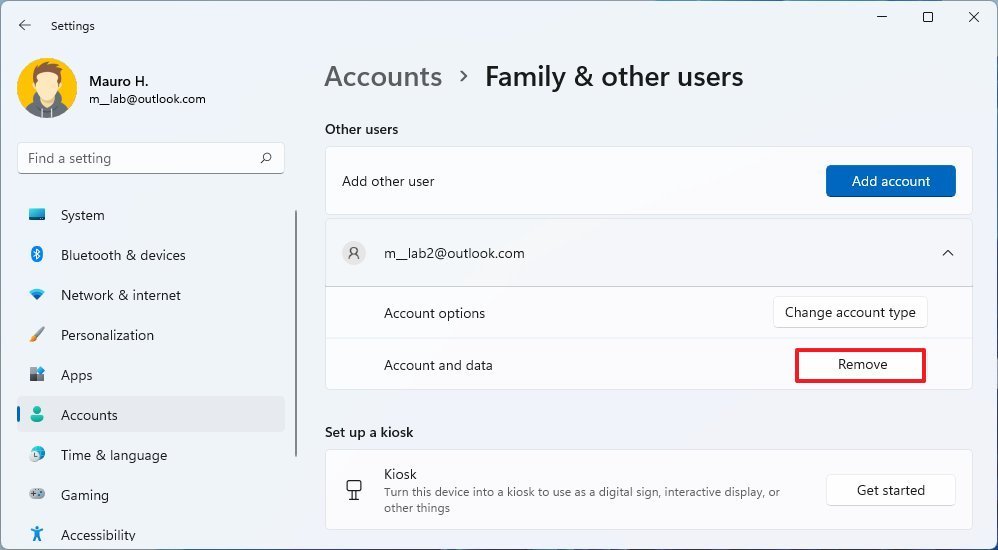
Select the account and click the Remove button.
Source: Windows Central
- Click the Delete account and data button.
Once you complete the steps, the account and data files from the user will be erased from the system.
How to delete an account using Control Panel
To delete account and files with Control Panel, use these steps:
- Open Control Panel.
-
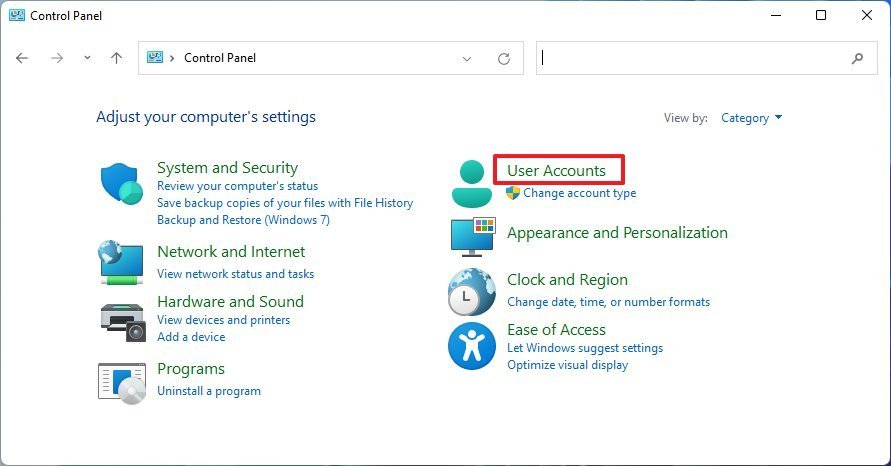
Click on User Accounts.
Source: Windows Central
-
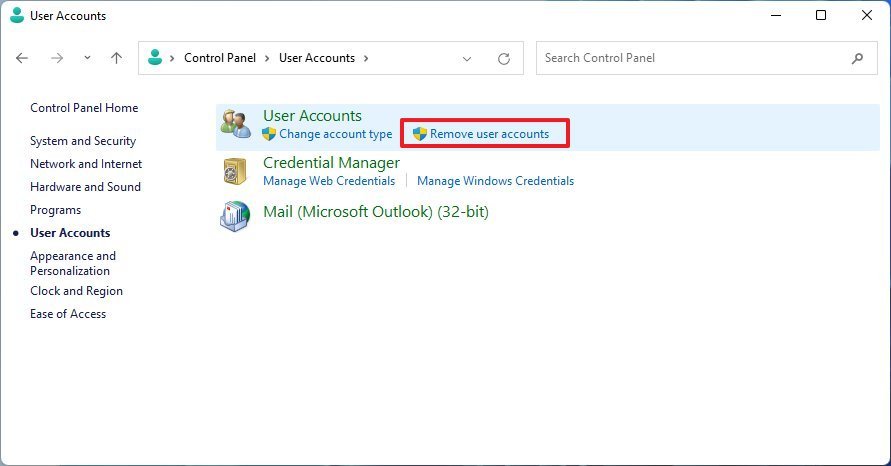
Click the Remove user accounts option.
Source: Windows Central
- Select the account to remove.
-
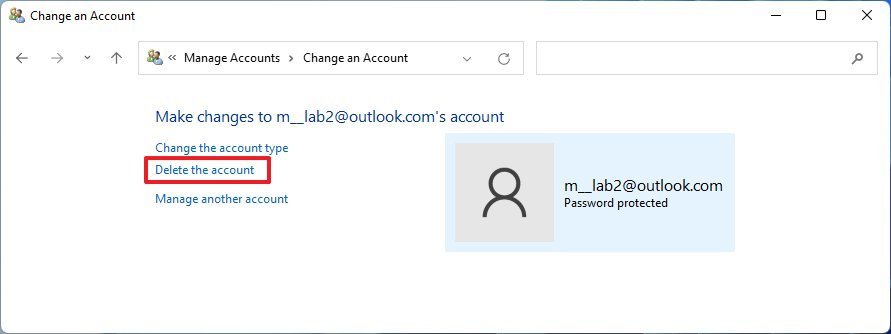
Click the Delete the account option.
Source: Windows Central
-
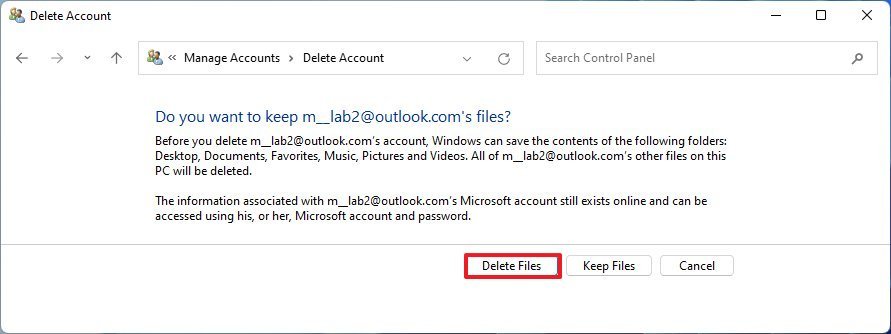
Click the Delete Files button to delete the account and files.
Source: Windows Central
- Click the Keep files button to delete the account, keeping the files in the profile folder.
- Click the Delete Account button.
After you complete the steps, the account will be removed from Windows 11.
How to delete an account using Computer Management
To remove an account with Computer Management, use these steps:
- Open Start.
- Search for Computer Management and click the top result to open Computer Management.
-
Navigate the following path:
Computer Management > System Tools > Local Users and Groups > Users -
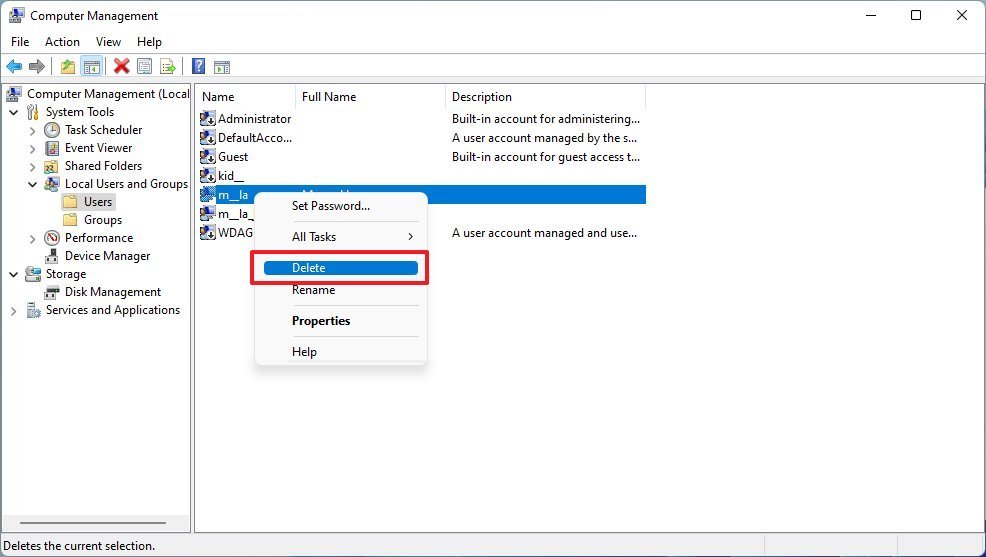
Right-click the user and select the Delete option.
Source: Windows Central
- Click the Yes button.
Once you complete the steps, the account will be removed, but the files will remain in the “Users” folder, under the account name folder.
How to delete an account using User Account
To delete an account from the legacy User Account interface, use these steps:
- Open Start.
- Search for netplwiz and click the top result to open the legacy User Account interface.
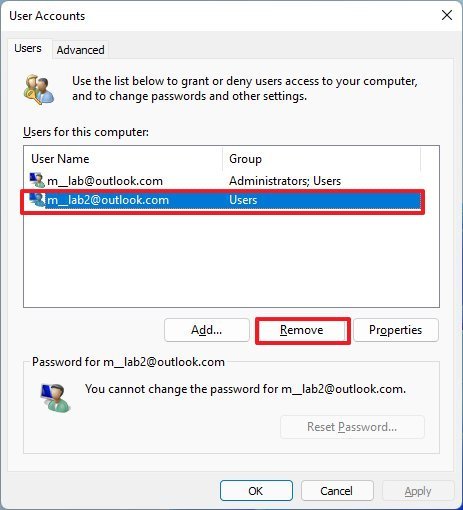
- Select the account to delete on Windows 11.
-
Click the Remove button.
Source: Windows Central
- Click the Yes button.
- Click the Apply button.
- Click the OK button.
After you complete the steps, the Windows 11 account will be removed without deleting the user’s files.
How to delete an account using Command Prompt
To remove an account with Command Prompt on Windows 11, use these steps:
- Open Start.
- Search for Command Prompt, right-click the top result, and select the Run as administrator option.
-
Type the following command to note the available user accounts and press Enter:
net user -
Type the following command to delete the user account on Windows 11 and press Enter:
net user USER-NAME /deleteIn the command, replace “USER-NAME” for the name of the account to delete. This example deletes the “JohnSmith” account:
net user JohnSmith /deleteSource: Windows Central
Once you complete the steps, the command will delete the account, and the account files will continue to be available on the computer.
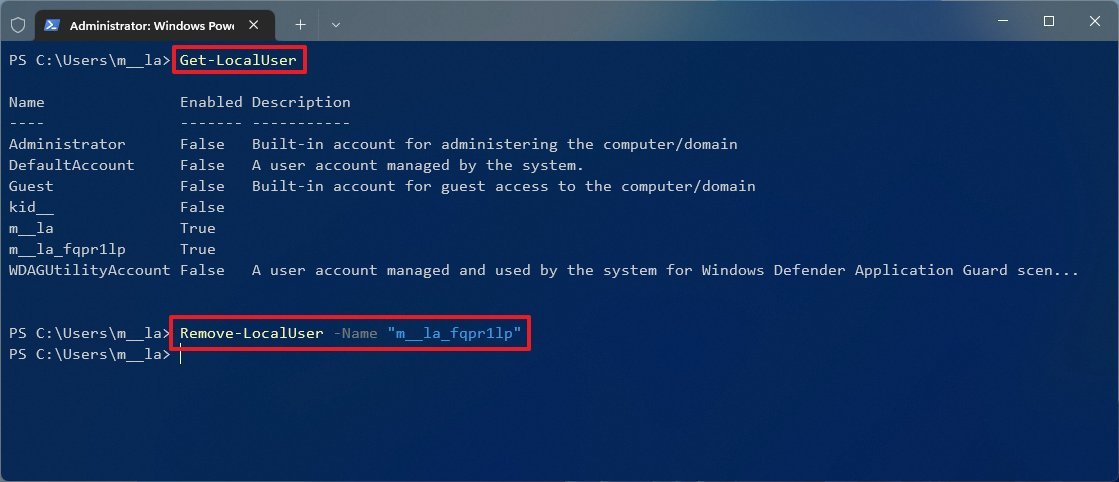
How to delete an account using PowerShell
To delete an account with PowerShell commands on Windows 11, use these steps:
- Open Start.
- Search for PowerShell, right-click the top result, and select the Run as administrator option.
-
Type the following command to note the available user accounts and press Enter:
Get-LocalUser -
Type the following command to delete the user account on Windows 11 and press Enter:
Remove-LocalUser -Name "USER-ACCOUNT"In the command, replace “USER-ACCOUNT” for the name of the account to delete. This example deletes the “JohnSmith” account:
Remove-LocalUser -Name "JohnSmith"Source: Windows Central
After you complete the steps, PowerShell will delete the account without removing the files on Windows 11.
More Windows resources
For more helpful articles, coverage, and answers to common questions about Windows 10 and Windows 11, visit the following resources:


