On Windows 11, the ability to determine wireless or wired network connection information (such as IP, DNS, and default gateway addresses) can come in handy in many situations. For example, you may need this information to diagnose and resolve connectivity issues to the local network or internet or determine whether you have to update specific settings. You can quickly find the router’s IP address with the default gateway information. You can learn whether the laptop is using the correct wireless network. Or it can be helpful as you try to set up a remote desktop connection.
Whatever the reason it might be, Windows 11 includes multiple ways to quickly check your computer’s network configuration using the Settings app, Task Manager, Control Panel, Command Prompt, and PowerShell. However, depending on the option you choose, the available details may vary.
In this Windows 11 guide, we will walk you through the different ways you can use to check the network configuration on your computer.
How to check network configuration with Settings
On Windows 11, the Settings app lets you review the network connection configuration for each interface (Wi-Fi and Ethernet). You can also check a slew of details for all interfaces.
Wi-Fi network settings
To view the wireless connection configuration on Windows 11, use these steps:
- Open Settings.
- Click on Network & internet.
-
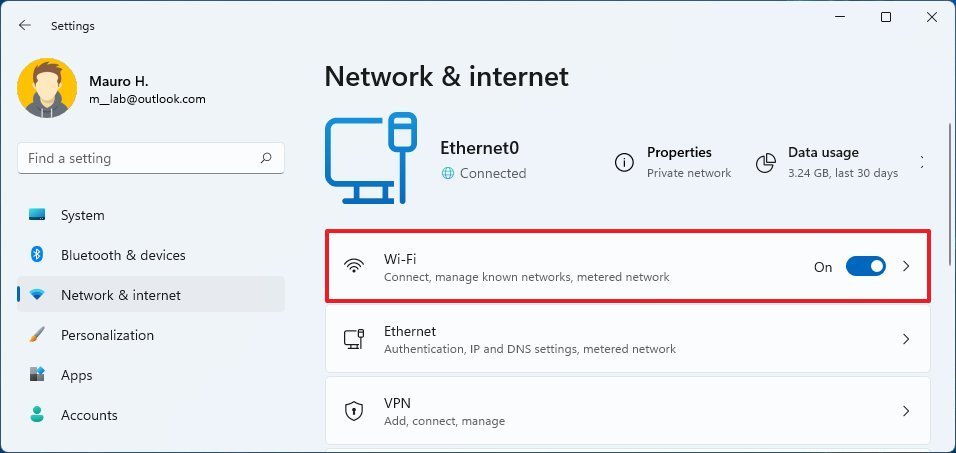
Click the Wi-Fi page on the right side.
Source: Windows Central
-
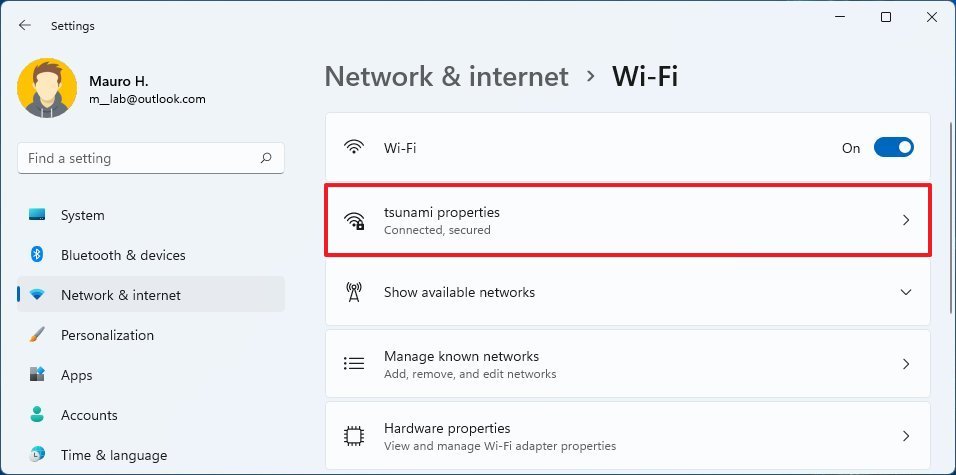
Click the connection properties setting.
Source: Windows Central
-
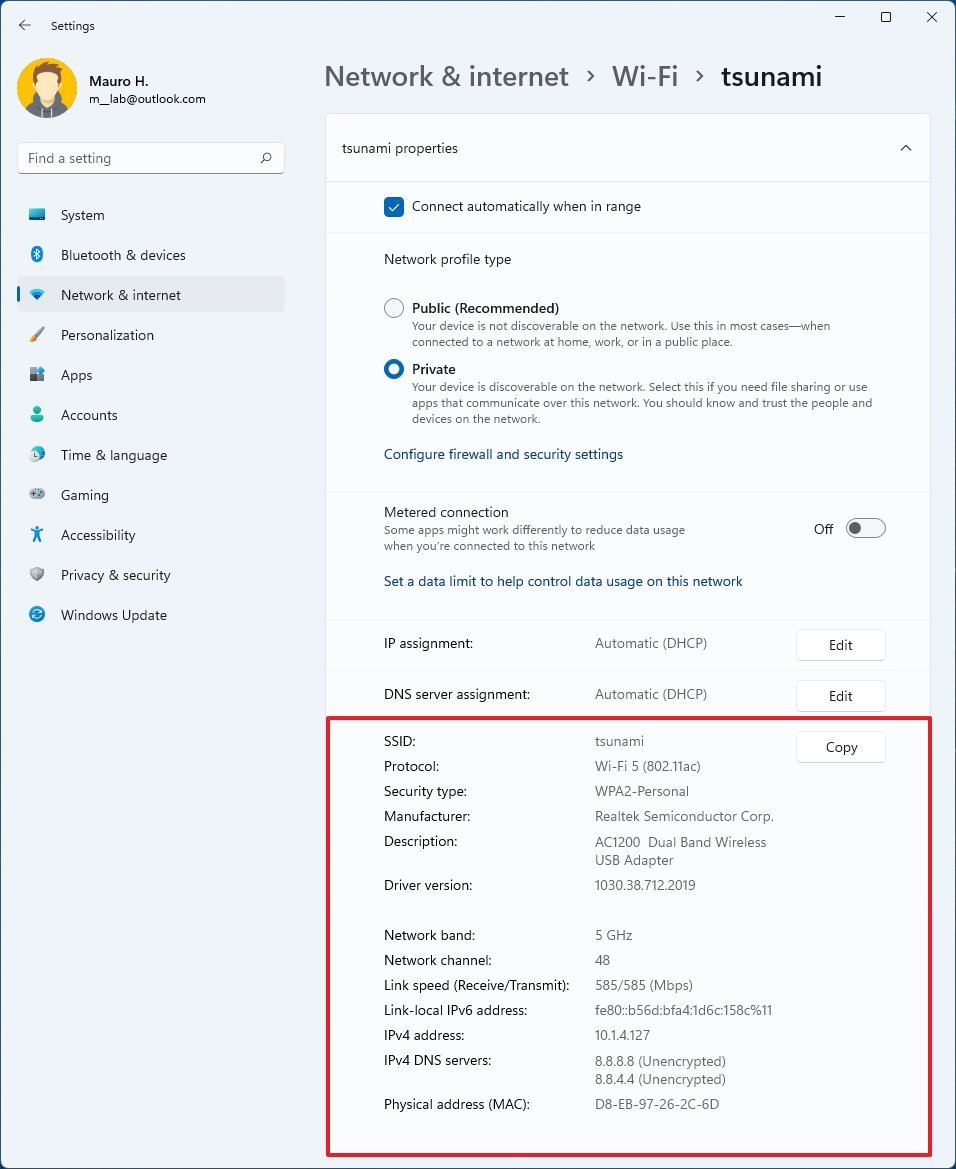
Confirm the wireless network settings on Windows 11.
Source: Windows Central
On the “Wi-Fi” page, you can determine many settings about the connection, including:
- Service Set IDentifier (SSID).
- Protocol.
- Security type.
- Manufacturer.
- Driver version.
- Network band.
- Network channel.
- Link speed.
- IPv6 addresses.
- IPv4 address.
- IPv4 DNS servers.
- Physical address (MAC).
Also, it’s possible to determine whether the TCP/IP address and DNS server addresses are static or dynamically assigned by the DHCP server and the network profile type the connection is using.
Ethernet network settings
To view the wired connection configuration on Windows 11, use these steps:
- Open Settings.
- Click on Network & internet.
-
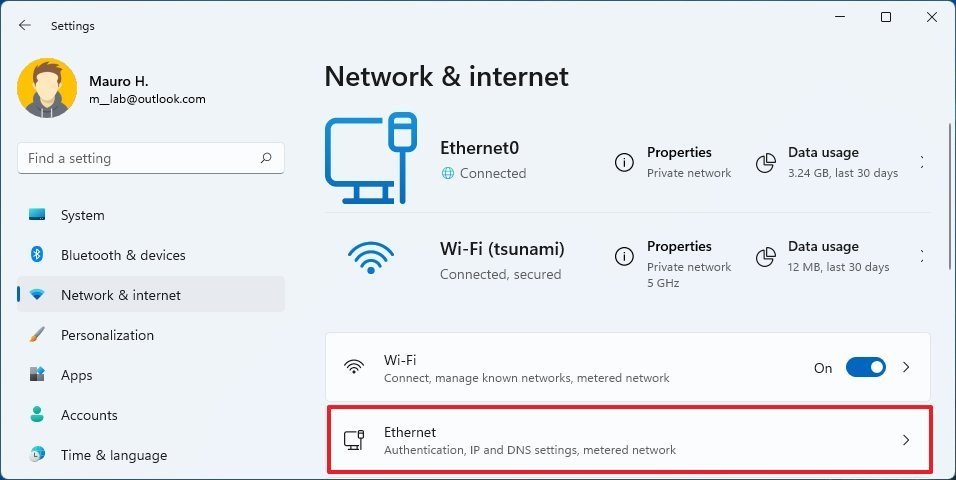
Click the Ethernet page on the right side.
Source: Windows Central
-
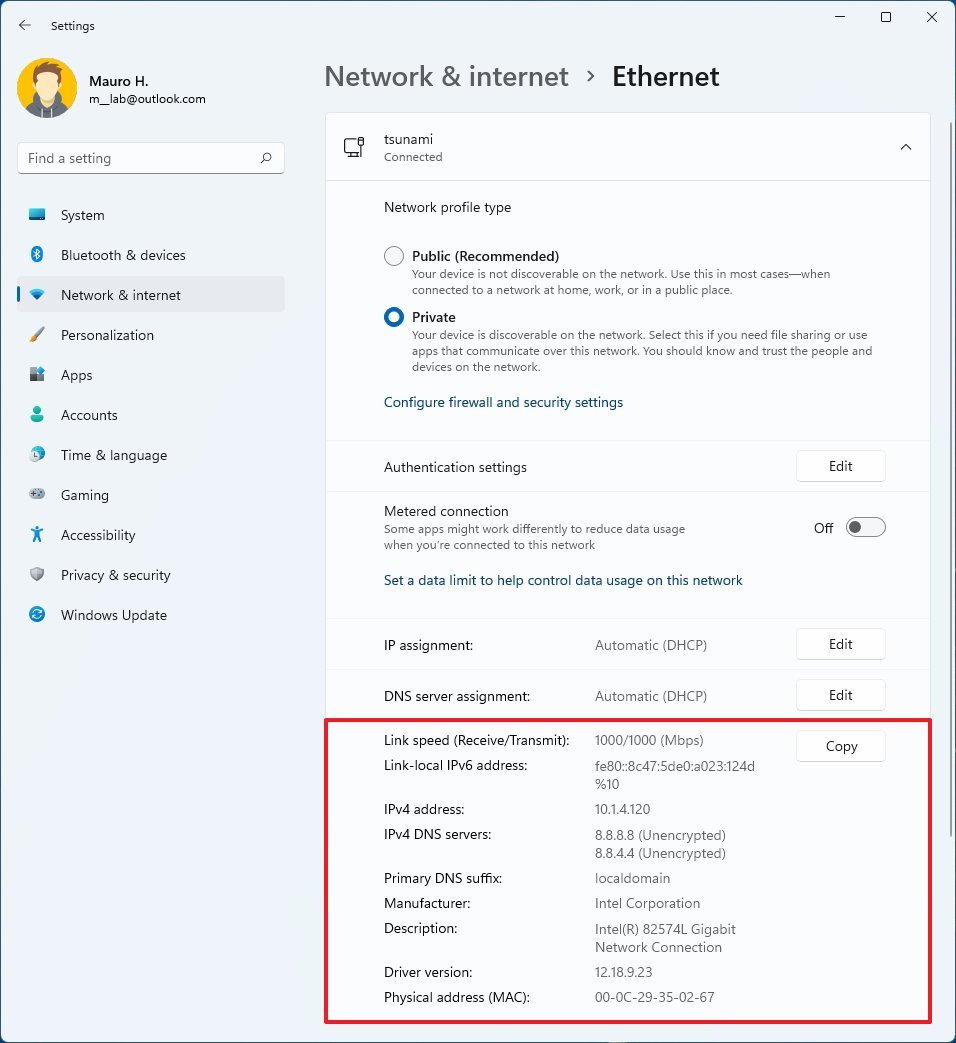
Confirm the Ethernet network settings on Windows 11.
Source: Windows Central
On the “Ethernet” page, you can determine many settings about the connection, including:
- Link speed.
- IPv6 addresses.
- IPv4 address.
- IPv4 DNS servers.
- Primary DNS suffix.
- Manufacturer.
- Driver version.
- Physical address (MAC).
All network settings
To view the network configuration for all the interfaces on Windows 11, use these steps:
- Open Settings.
- Click on Network & internet.
-
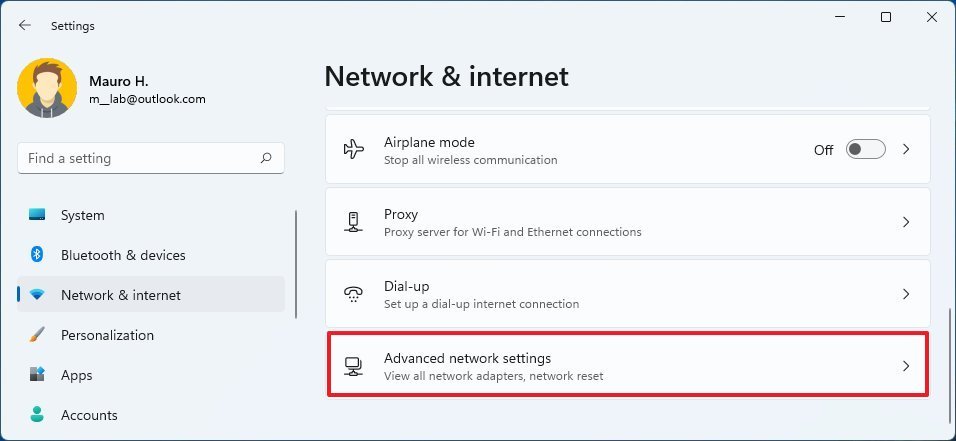
Click the Advanced network settings page on the right side.
Source: Windows Central
-
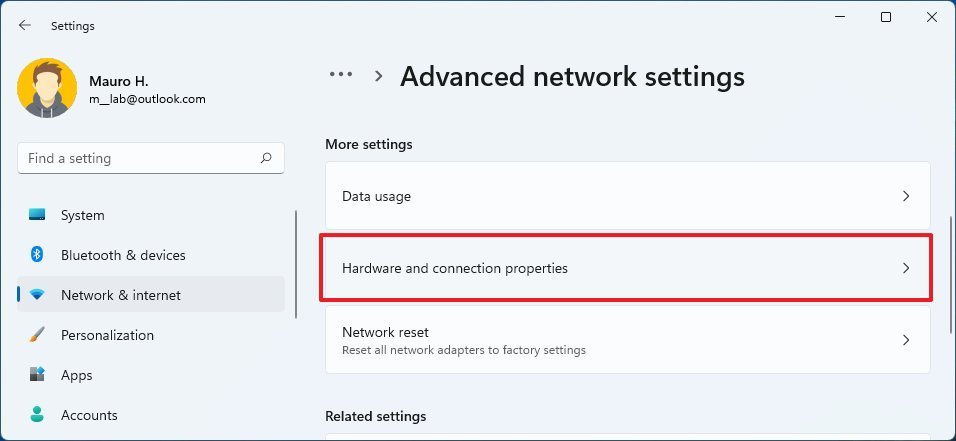
Under the “More settings” section, click the Hardware and connection properties setting.
Source: Windows Central
-
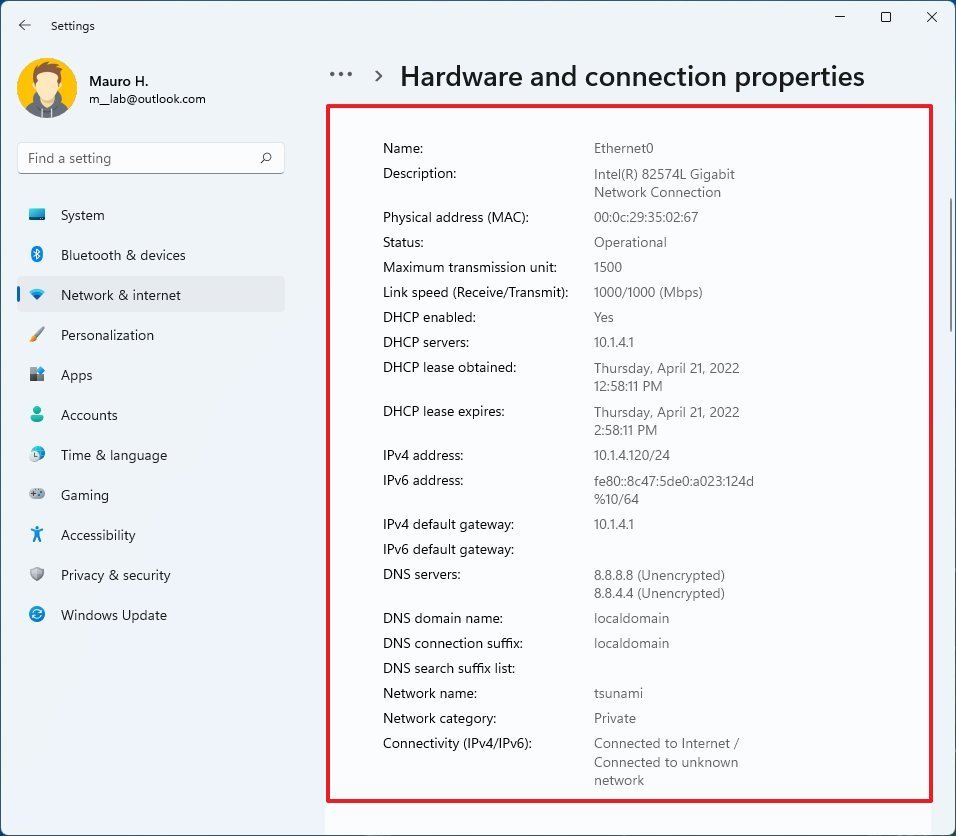
Confirm all the network interfaces settings on Windows 11.
Source: Windows Central
The “Hardware and connection properties” page lists all the network connections, including wireless, wired, and virtual adapters. Some available information includes TCP/IP address, MAC address, status, maximum transmission unit (MTU), network category, link speed, and more.
You can also click the Copy button to copy the network information to the clipboard and paste it into a text file.
How to check network configuration with Task Manager
If you only need to find out the current TCP/IP address of the connection, you can also use Task Manager with these steps:
- Open Start.
-
Search for Task Manager and click the top result to open the app.
Quick tip: You can always open the app quickly with the Ctrl + Shift + Esc shortcut or right-clicking the Start button and selecting the Task Manager option.
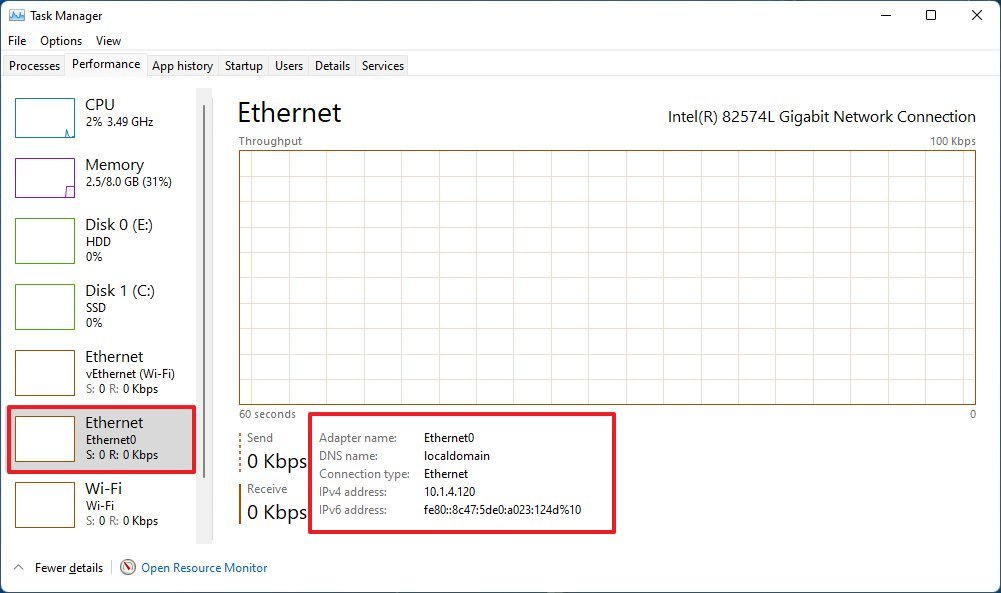
- Click the Performance tab.
- Select the network adapter from the left side.
-
Confirm the current IPv4 and IPv6 addresses, connection type, DNS name, and adapter name.
Source: Windows Central
Once you complete the steps, you will know the basic configuration of the network adapter and activity.
How to check network configuration with Control Panel
To check the network adapter configuration with Control Panel, use these steps:
- Open Control Panel.
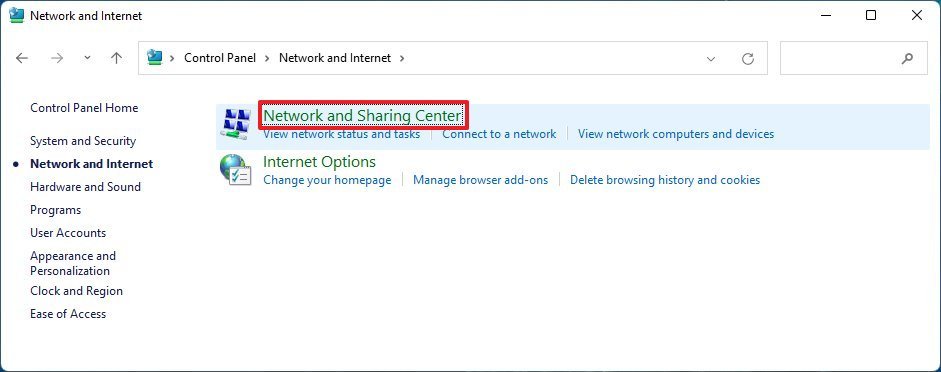
- Click on Network and Internet.
-
Click on Network and Sharing Center.
Source: Windows Central
-
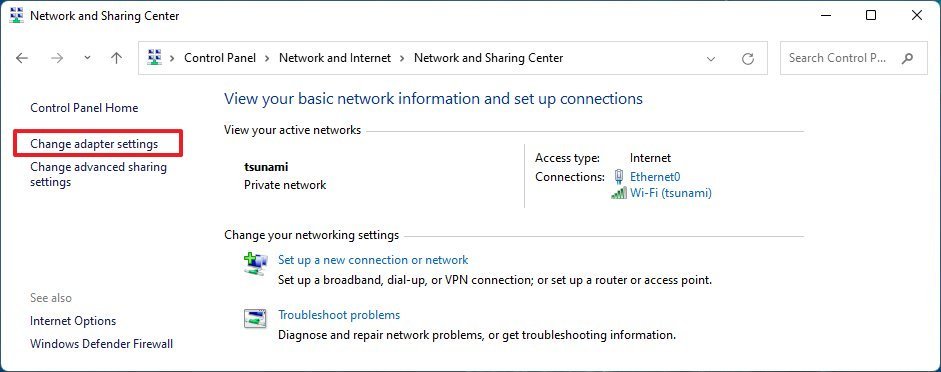
Click on Change adapter settings from the left navigation pane.
Source: Windows Central
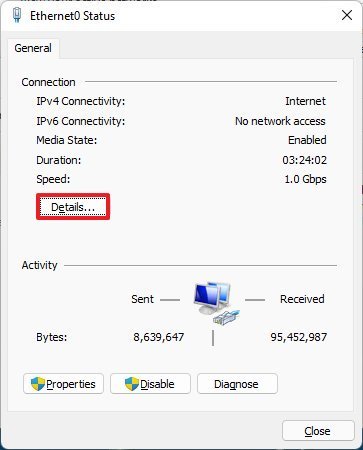
- Double-click the network adapter.
- (Optional) Confirm the sent and received packets to determine the link activity.
-
Click the Details button.
Source: Windows Central
-
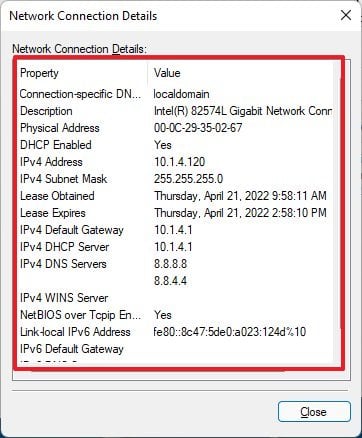
Confirm the network connection details on Windows 11
Source: Windows Central
On this page, you will find the current configuration settings of the connection, some of which include:
- Connection-specific DNS suffix.
- Physical address.
- DHCP enabled.
- IPv4 address.
- IPv4 subnet mask.
- Lease obtained.
- Lease expires.
- IPv4 default gateway.
- IPv4 DHCP server.
- IPv4 DNS servers.
How to check network configuration with Command Prompt
To determine the IP, DNS servers, default gateway, and other network settings with Command Prompt use these steps:
- Open Start.
- Search for Command Prompt and click the top result to open the app.
-
Type the following command to check the basic network configuration and press Enter:
ipconfigSource: Windows Central
- Confirm the basic connection details like IPv4 address, DNS server addresses and suffix, and default gateway (router) for all connections.
-
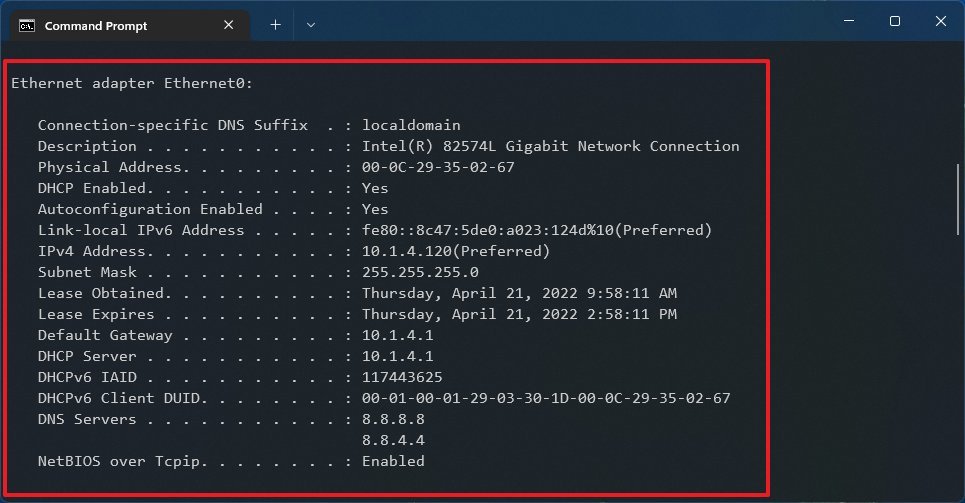
Type the following command to check all network configurations and press Enter:
ipconfig /allSource: Windows Central
- Confirm more advanced network details like the TCP/IPv4 and IPv6 information, DNS servers and suffix, DHCP and lease information, and more.
After you complete the steps, the network configuration for all interfaces will be listed in the command output result.
How to check network configuration with PowerShell
To find out the network connection configuration for one or all interfaces with PowerShell, use these steps:
- Open Start.
- Search for PowerShell and click the top result to open the app.
-
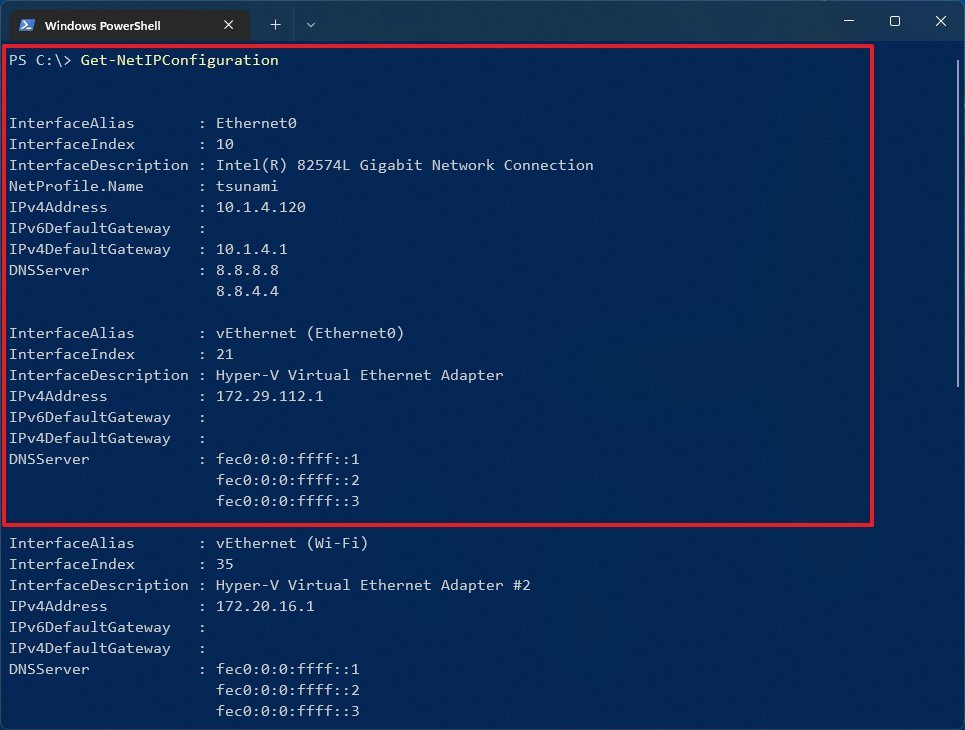
Type the following command to check the basic network configuration for the physical adapters and press Enter:
Get-NetIPConfigurationSource: Windows Central
- Confirm the connection details like TCP/IPv4 and IPv6 addresses, DNS servers and default gateway addresses, interface name and index number, and more.
-
(Optional) Type the following command to check the network configuration for all adapters (such as lookback, virtual, active, and disconnected) and press Enter:
Get-NetIPConfiguration -All -
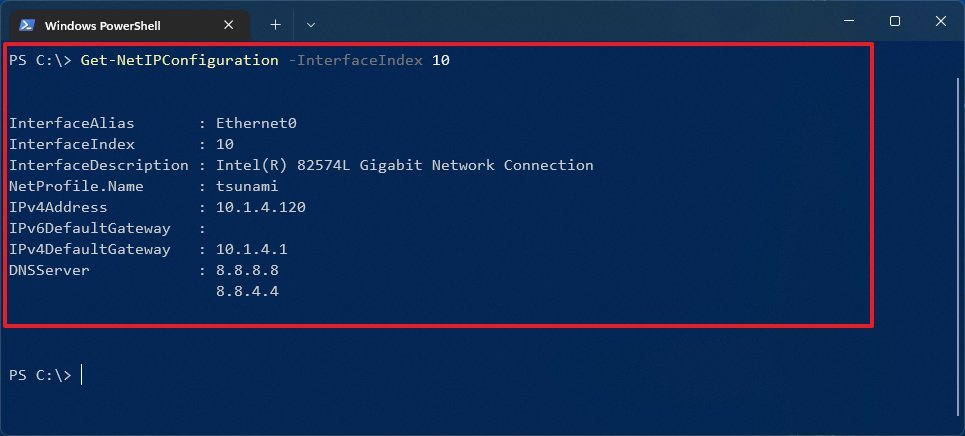
Type the following command to show network configuration details of a specific interface and press Enter:
Get-NetIPConfiguration -InterfaceIndex 10Source: Windows Central
In the command, change “10” for the index number that represents your network adapter.
Once you complete the steps, PowerShell will display the network configuration for one or all interfaces (Ethernet, Wi-Fi, virtual, or lookback), depending on your command.
We are focusing this guide on the most common tools and commands to determine the network connection configuration on Windows 11. Although you may find different tools and commands, these instructions should be more than enough information for most cases.
More Windows resources
For more helpful articles, coverage, and answers to common questions about Windows 10 and Windows 11, visit the following resources:

Windows 11’s new dynamic refresh rate mode arrives on Surface Laptop Studio
Microsoft has started rolling out a new firmware update on the Surface Laptop Studio for devices enrolled in the Windows Insider Dev or Beta Channels, which appears to finally enable Windows 11’s new “dynamic refresh rate” feature that’s compatible with certain high refresh rate displays.


