On Windows 11 and 10, the ability to save the Command Prompt or PowerShell command output to a text file can be helpful in many situations. For instance, exporting the command output for analysis is convenient for troubleshooting a problem. You can also print the return of a command to a text file to save a configuration for documentation purposes and more.
You can always select and right-click the content to copy the output to the clipboard and paste it to a text file. However, the approach requires additional steps, which you can avoid with a single command using the redirected output to the file function.
This guide will walk you through the steps to save the command output to a text file on Command Prompt or PowerShell on Windows 11. (The instructions will also work on Windows 10.)
How to save command output to file using Command Prompt
To save the command output to a text file with Command Prompt, use these steps:
- Open Start.
- Search for Command Prompt.
- Right-click the top result and select the Run as administrator option.
- Type the following command to save the output to a text file and press Enter: YOUR-COMMAND > C:PATHTOFOLDEROUTPUT.txt
In the command, change “YOUR-COMMAND” with your command and “c:PATHTOFOLDEROUTPUT.txt” with the path and file name to store the output.
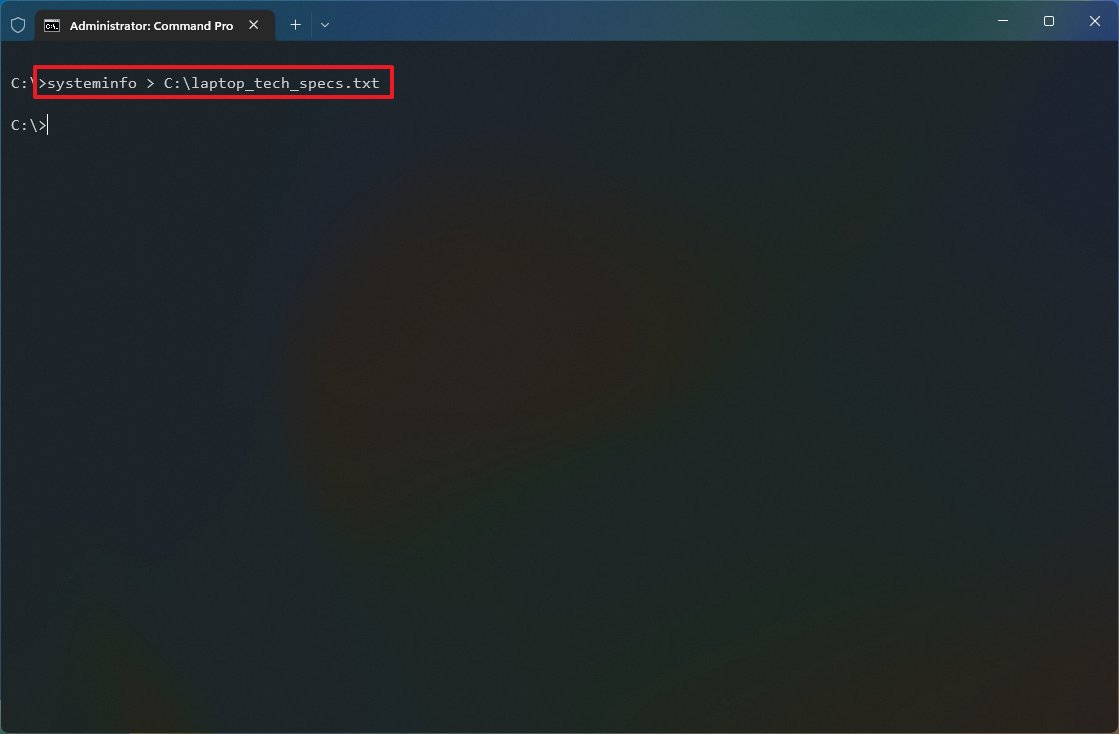
This example exports the system technical specifications to the “laptop_tech_specs.txt” file: systeminfo > C:laptop_tech_specs.txt

- (Optional) Type the following command to save the output and view results on the screen and press Enter: YOUR-COMMAND > C:PATHTOFOLDEROUTPUT.txt | type C:PATHTOFOLDEROUTPUT.txt
In the command, change “YOUR-COMMAND” with your command and “c:PATHTOFOLDEROUTPUT.txt” with the path and filename to store and view the output.
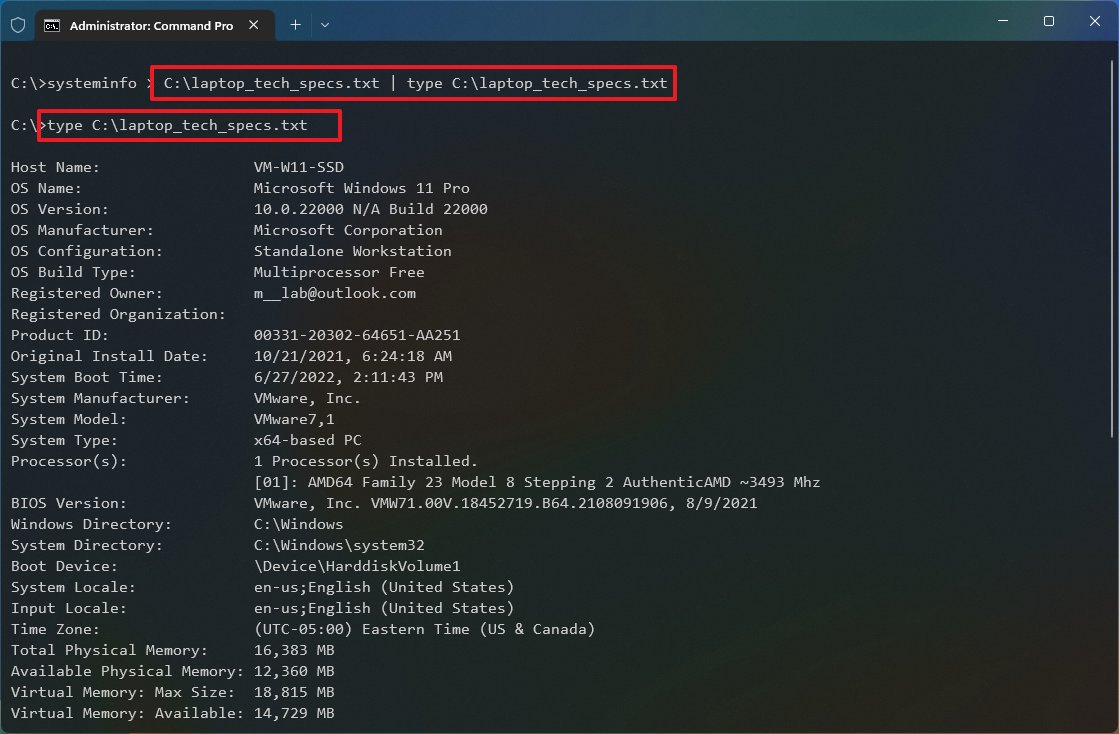
This example exports the system technical specifications to the “laptop_tech_specs.txt” file and prints the information on the screen: systeminfo > C:laptop_tech_specs.txt | type C:laptop_tech_specs.txt
- Quick tip: If you have problems viewing the file, you can use the type c:PATHTOFOLDEROUTPUT.txt command after step No. 3.

Once you complete the steps, the command output will be saved into the text file, which you can review or share with tech support.
How to save command output to file using PowerShell
To save the command output to a text file with PowerShell on Windows 11 or Windows 10, use these steps:
- Open Start.
- Search for PowerShell.
- Right-click the top result and select the Run as administrator option.
- Type the following command to save the output to a text file and press Enter: YOUR-COMMAND | Out-File -FilePath C:PATHTOFOLDEROUTPUT.txt
In the command, change “YOUR-COMMAND” with your command and “c:PATHTOFOLDEROUTPUT.txt” with the path and file name to store the output.
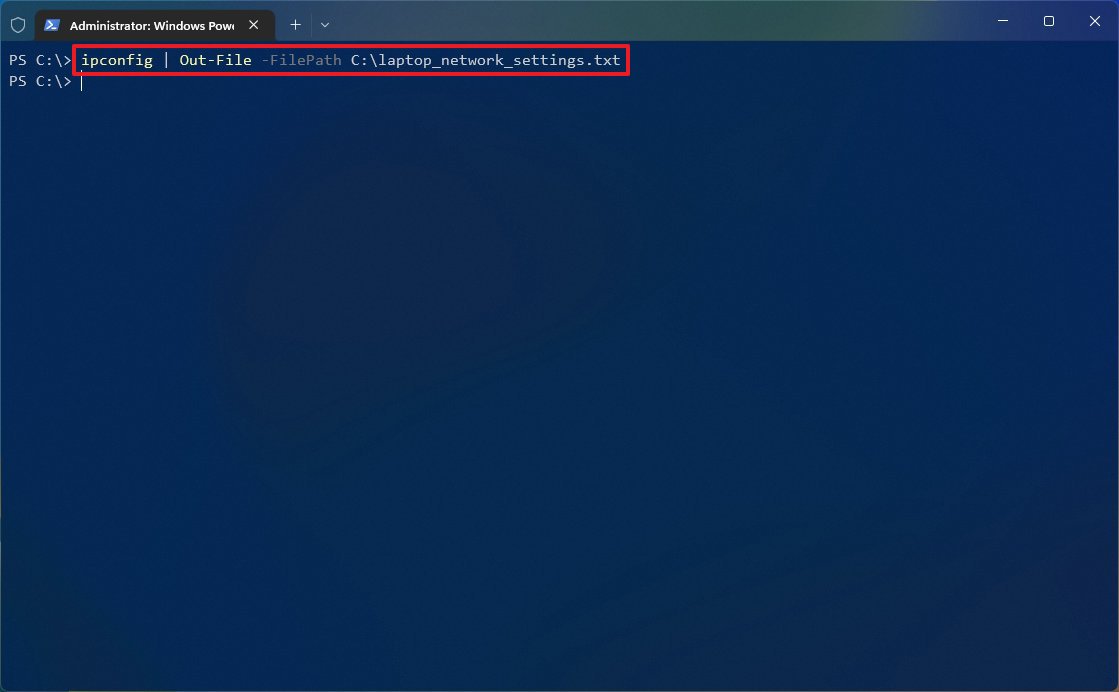
This example exports the IP address configuration to the “laptop_network_settings.txt” file: ipconfig | Out-File -FilePath C:laptop_network_settings.txt

- (Optional) Type the following command to view the saved output on the screen and press Enter: Get-Content -Path C:PATHTOFOLDEROUTPUT.txt
In the command, change “c:PATHTOFOLDEROUTPUT.txt” with the path and file name with the output content.
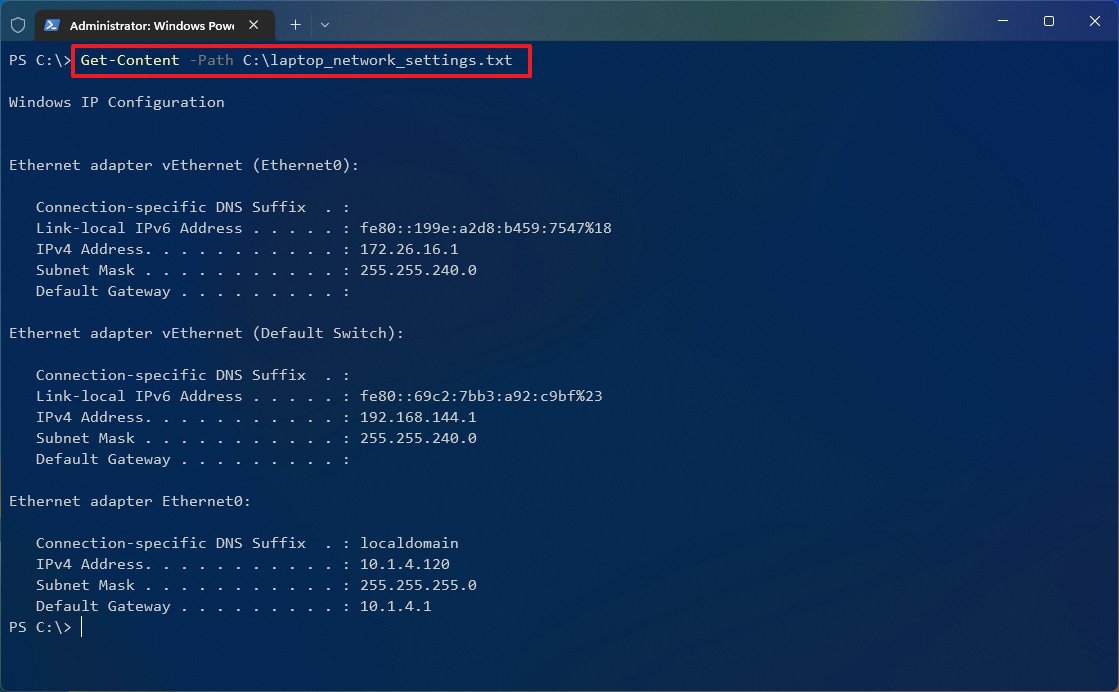
This example shows the contents of the “laptop_network_settings.txt” file: Get-Content -Path C:laptop_network_settings.txt

After you complete the steps, PowerShell will save the result into a text file on your specified location.
More Windows resources
For more helpful articles, coverage, and answers to common questions about Windows 10 and Windows 11, visit the following resources:


