There are a range of Xbox TV media remotes you can buy to attach to your Xbox One, Xbox Series X, or Xbox Series S console, but if you have a relatively new TV, you might not need to.
Thanks to the magic of HDMI-CEC, you may be able to ditch having multiple remotes entirely, and just use whatever remote came with your TV to control your Xbox. HDMI-CEC is a relatively new tech that stands for “Consumer Electronics Control,” and it allows devices to communicate over HDMI for adjusting TV controls, interacting with apps, and so on. For Xbox, it allows you to control the entire dashboard, as well as use media controls in apps like YouTube and the Blu-ray player.
It’s often not enabled by default, however, and the steps to enable it may vary by manufacturer. But here are the basic steps for enabling it for your Xbox Series X or Xbox Series S.
Enable HDMI-CEC on your TV
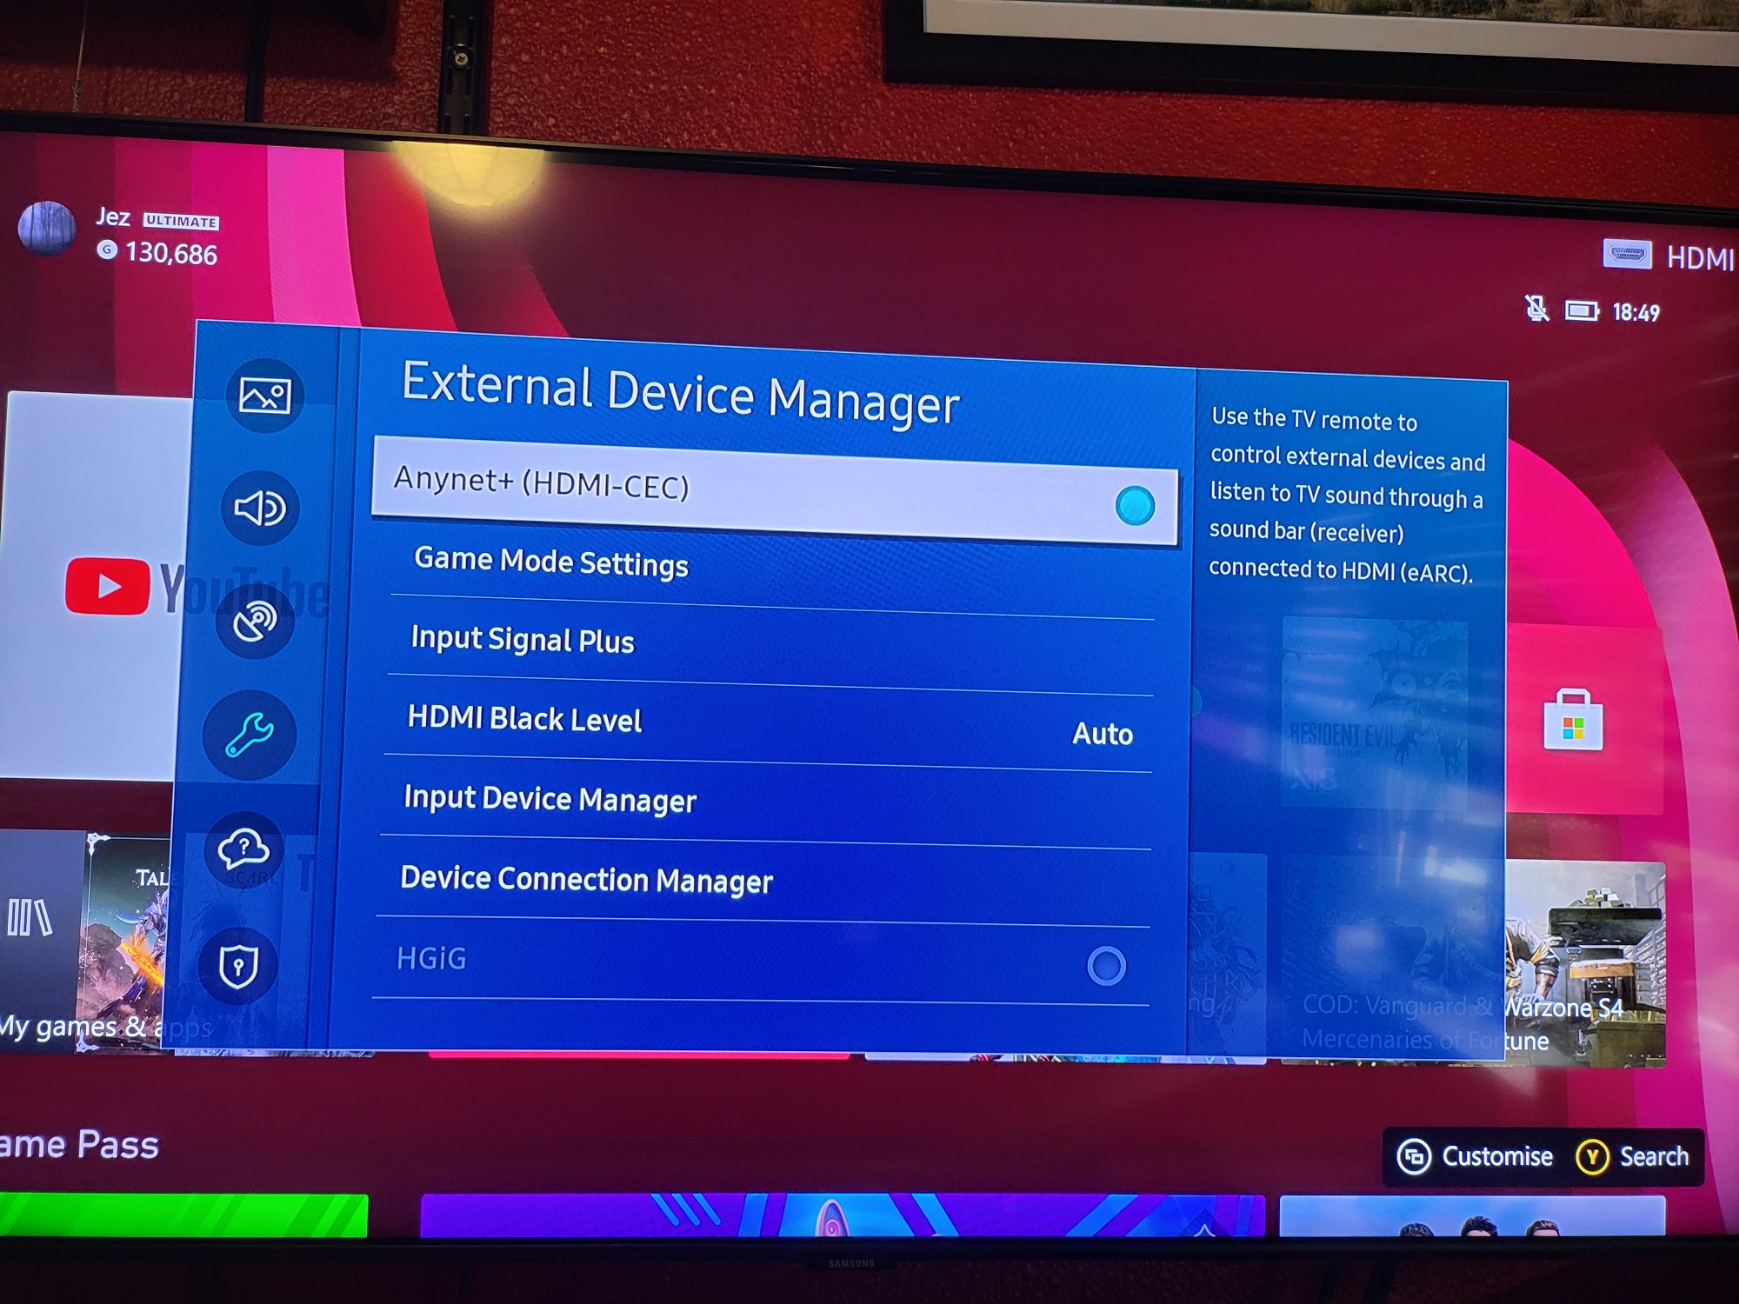
1. First, you’ll need to enable HDMI-CEC on your TV or monitor, which often isn’t turned on by default. Different manufacturers may even have different brand names for HDMI-CEC. Here’s what it looks like on a Samsung TV.
2. Press the home button on your TV remote, or the settings button if one is available.
3. You’re looking for a setting that refers to HDMI-CEC or external device control. On a Samsung TV, it’s under General > External Device Manager > Anynet+. I have no idea why Samsung branded it this way, but here we are.
4. Once you have enabled HDMI-CEC features on your TV, you should be able to enable remote control on your Xbox console.
It’s worth checking with the manufacturer of your TV or display to make sure it has HDMI-CEC, although most of the best modern 2022 TVs for Xbox most likely do have HDMI-CEC. LG TVs refer to it as “SimpLink,” Philips describes it as “EasyLink,” Samsung calls it “Anynet+,” Sony TVs often call it “BraviaLink,” or “BraviaSync,” and so on.
Enable HDMI-CEC on your Xbox
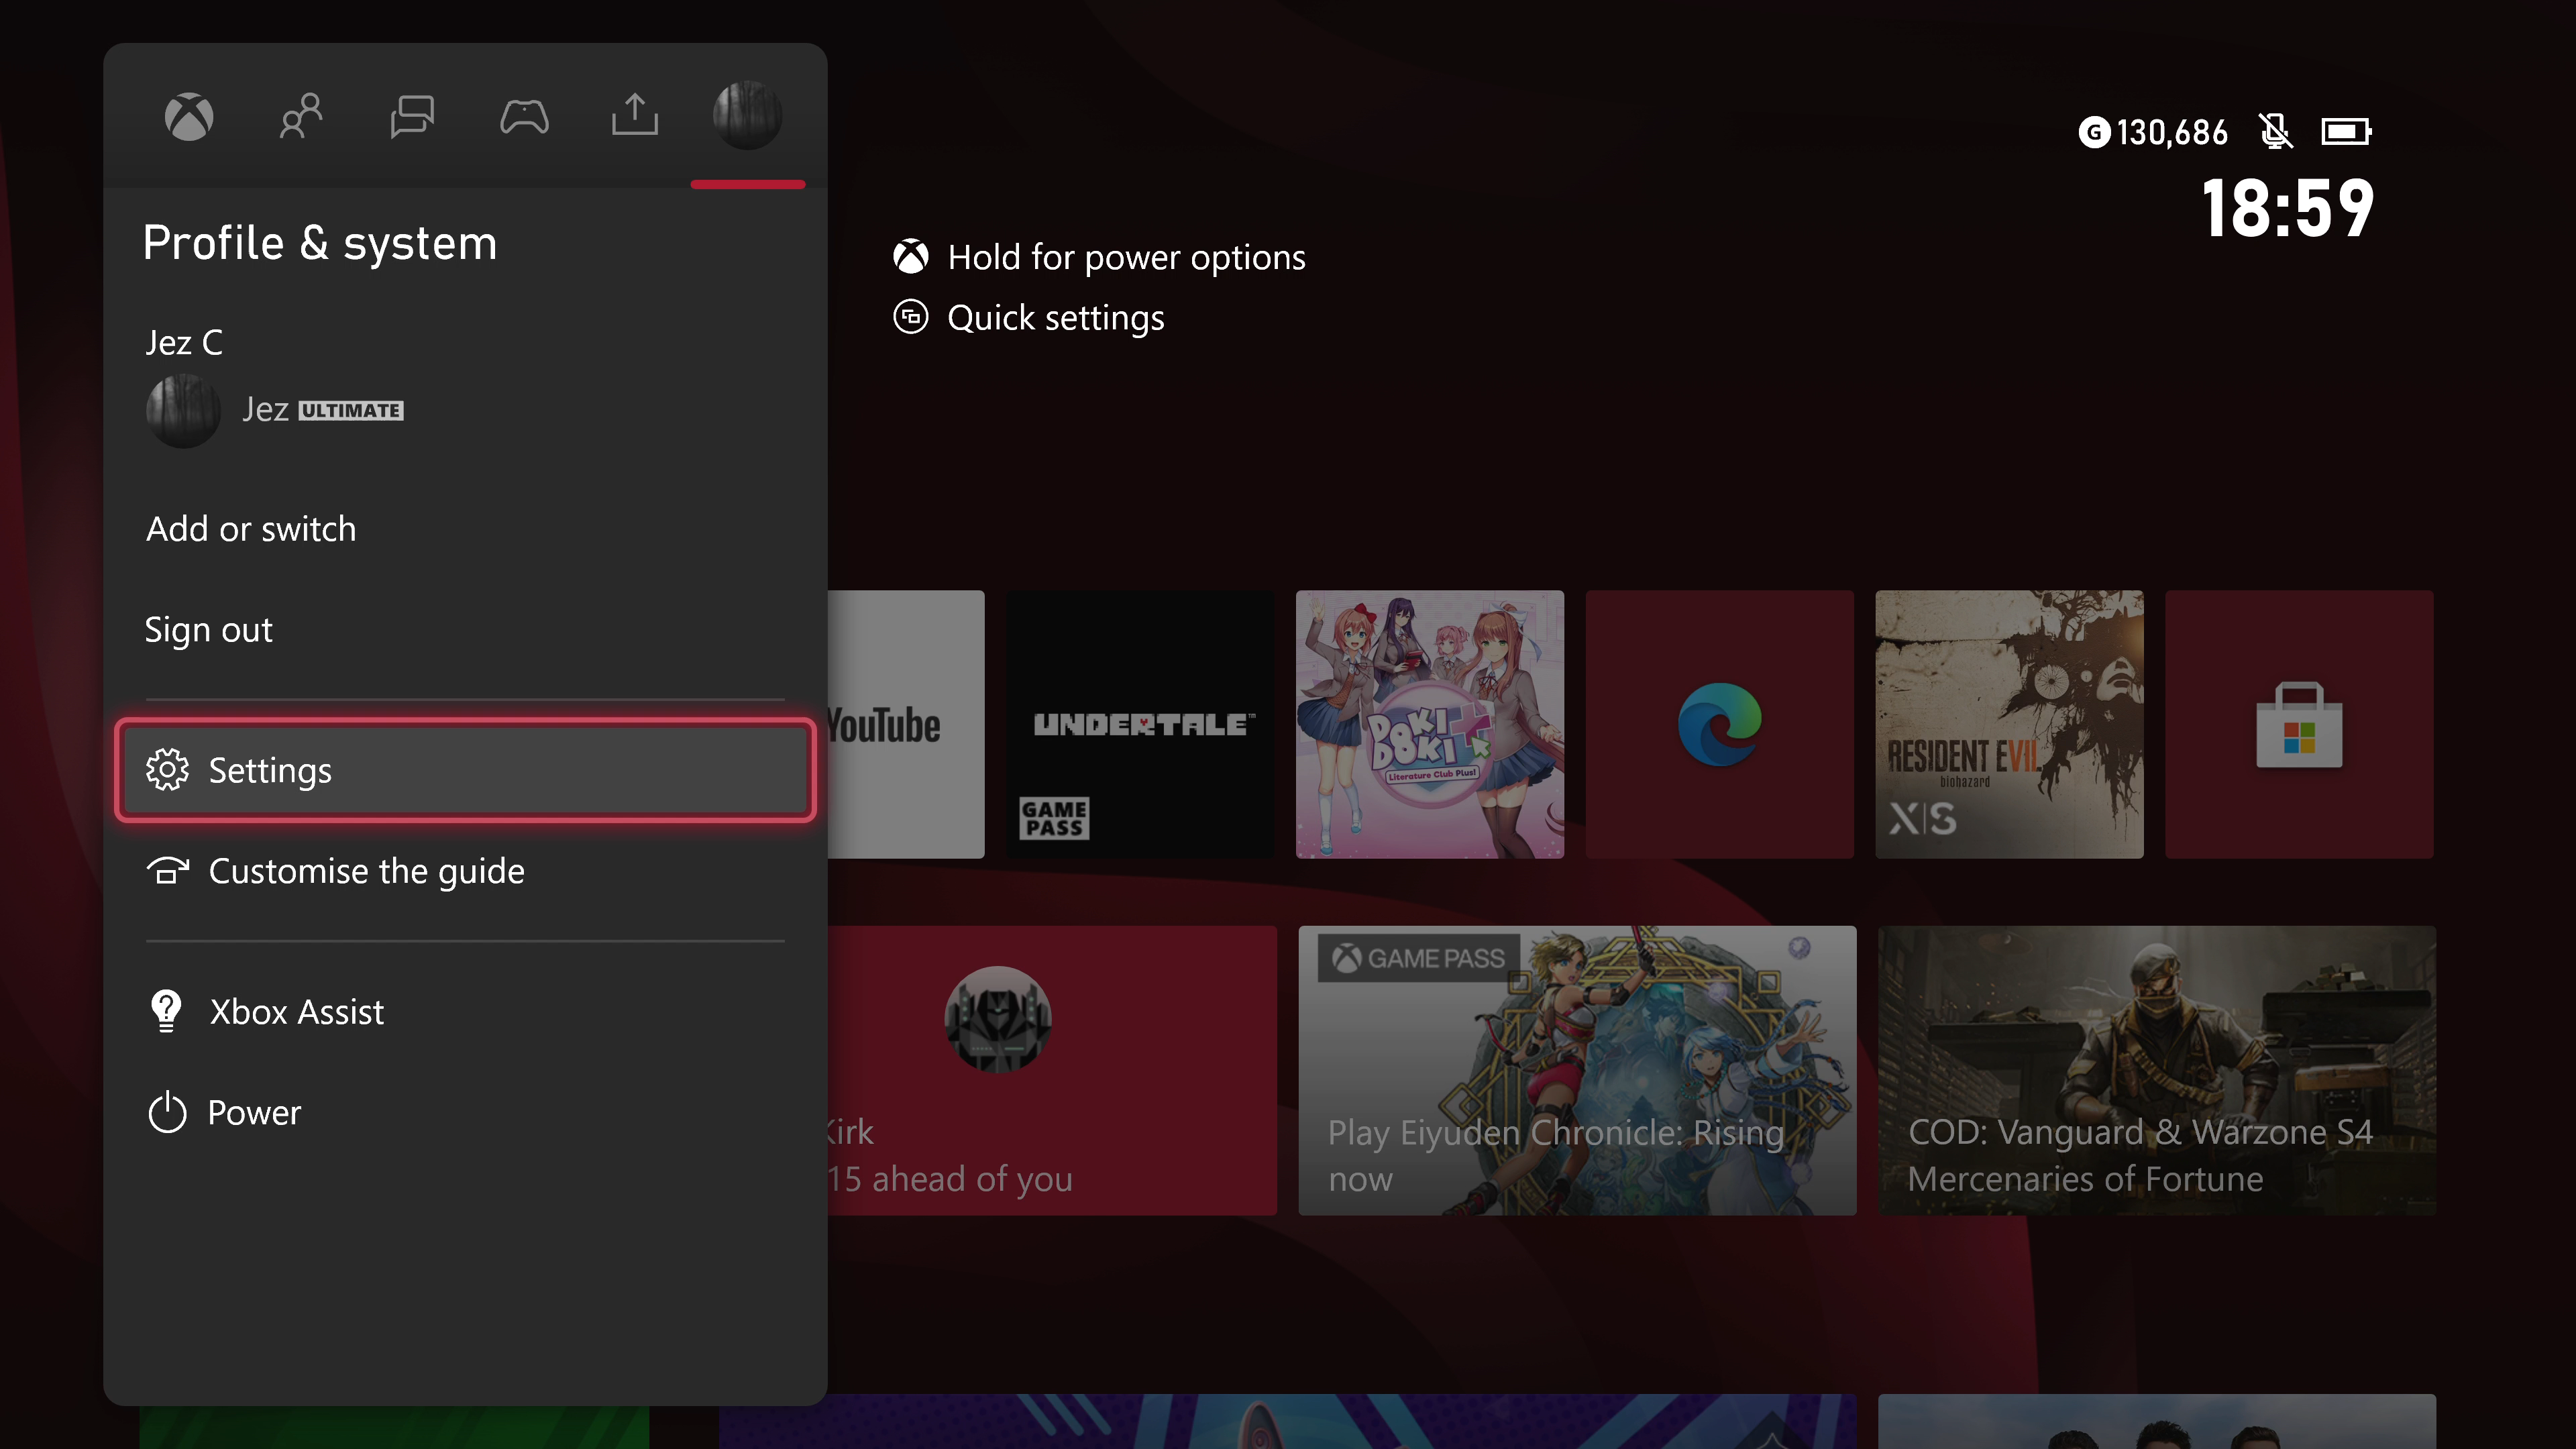
Next, you need to enable HDMI-CEC on your Xbox console. Doing this is relatively straightforward, but the setting is hidden away in a few menus. Here’s how to get it done.
1. As depicted above, open the Xbox menu using the Xbox button on your controller.
2. Navigate right until you find Settings.
3. Navigate down to Devices & connections.
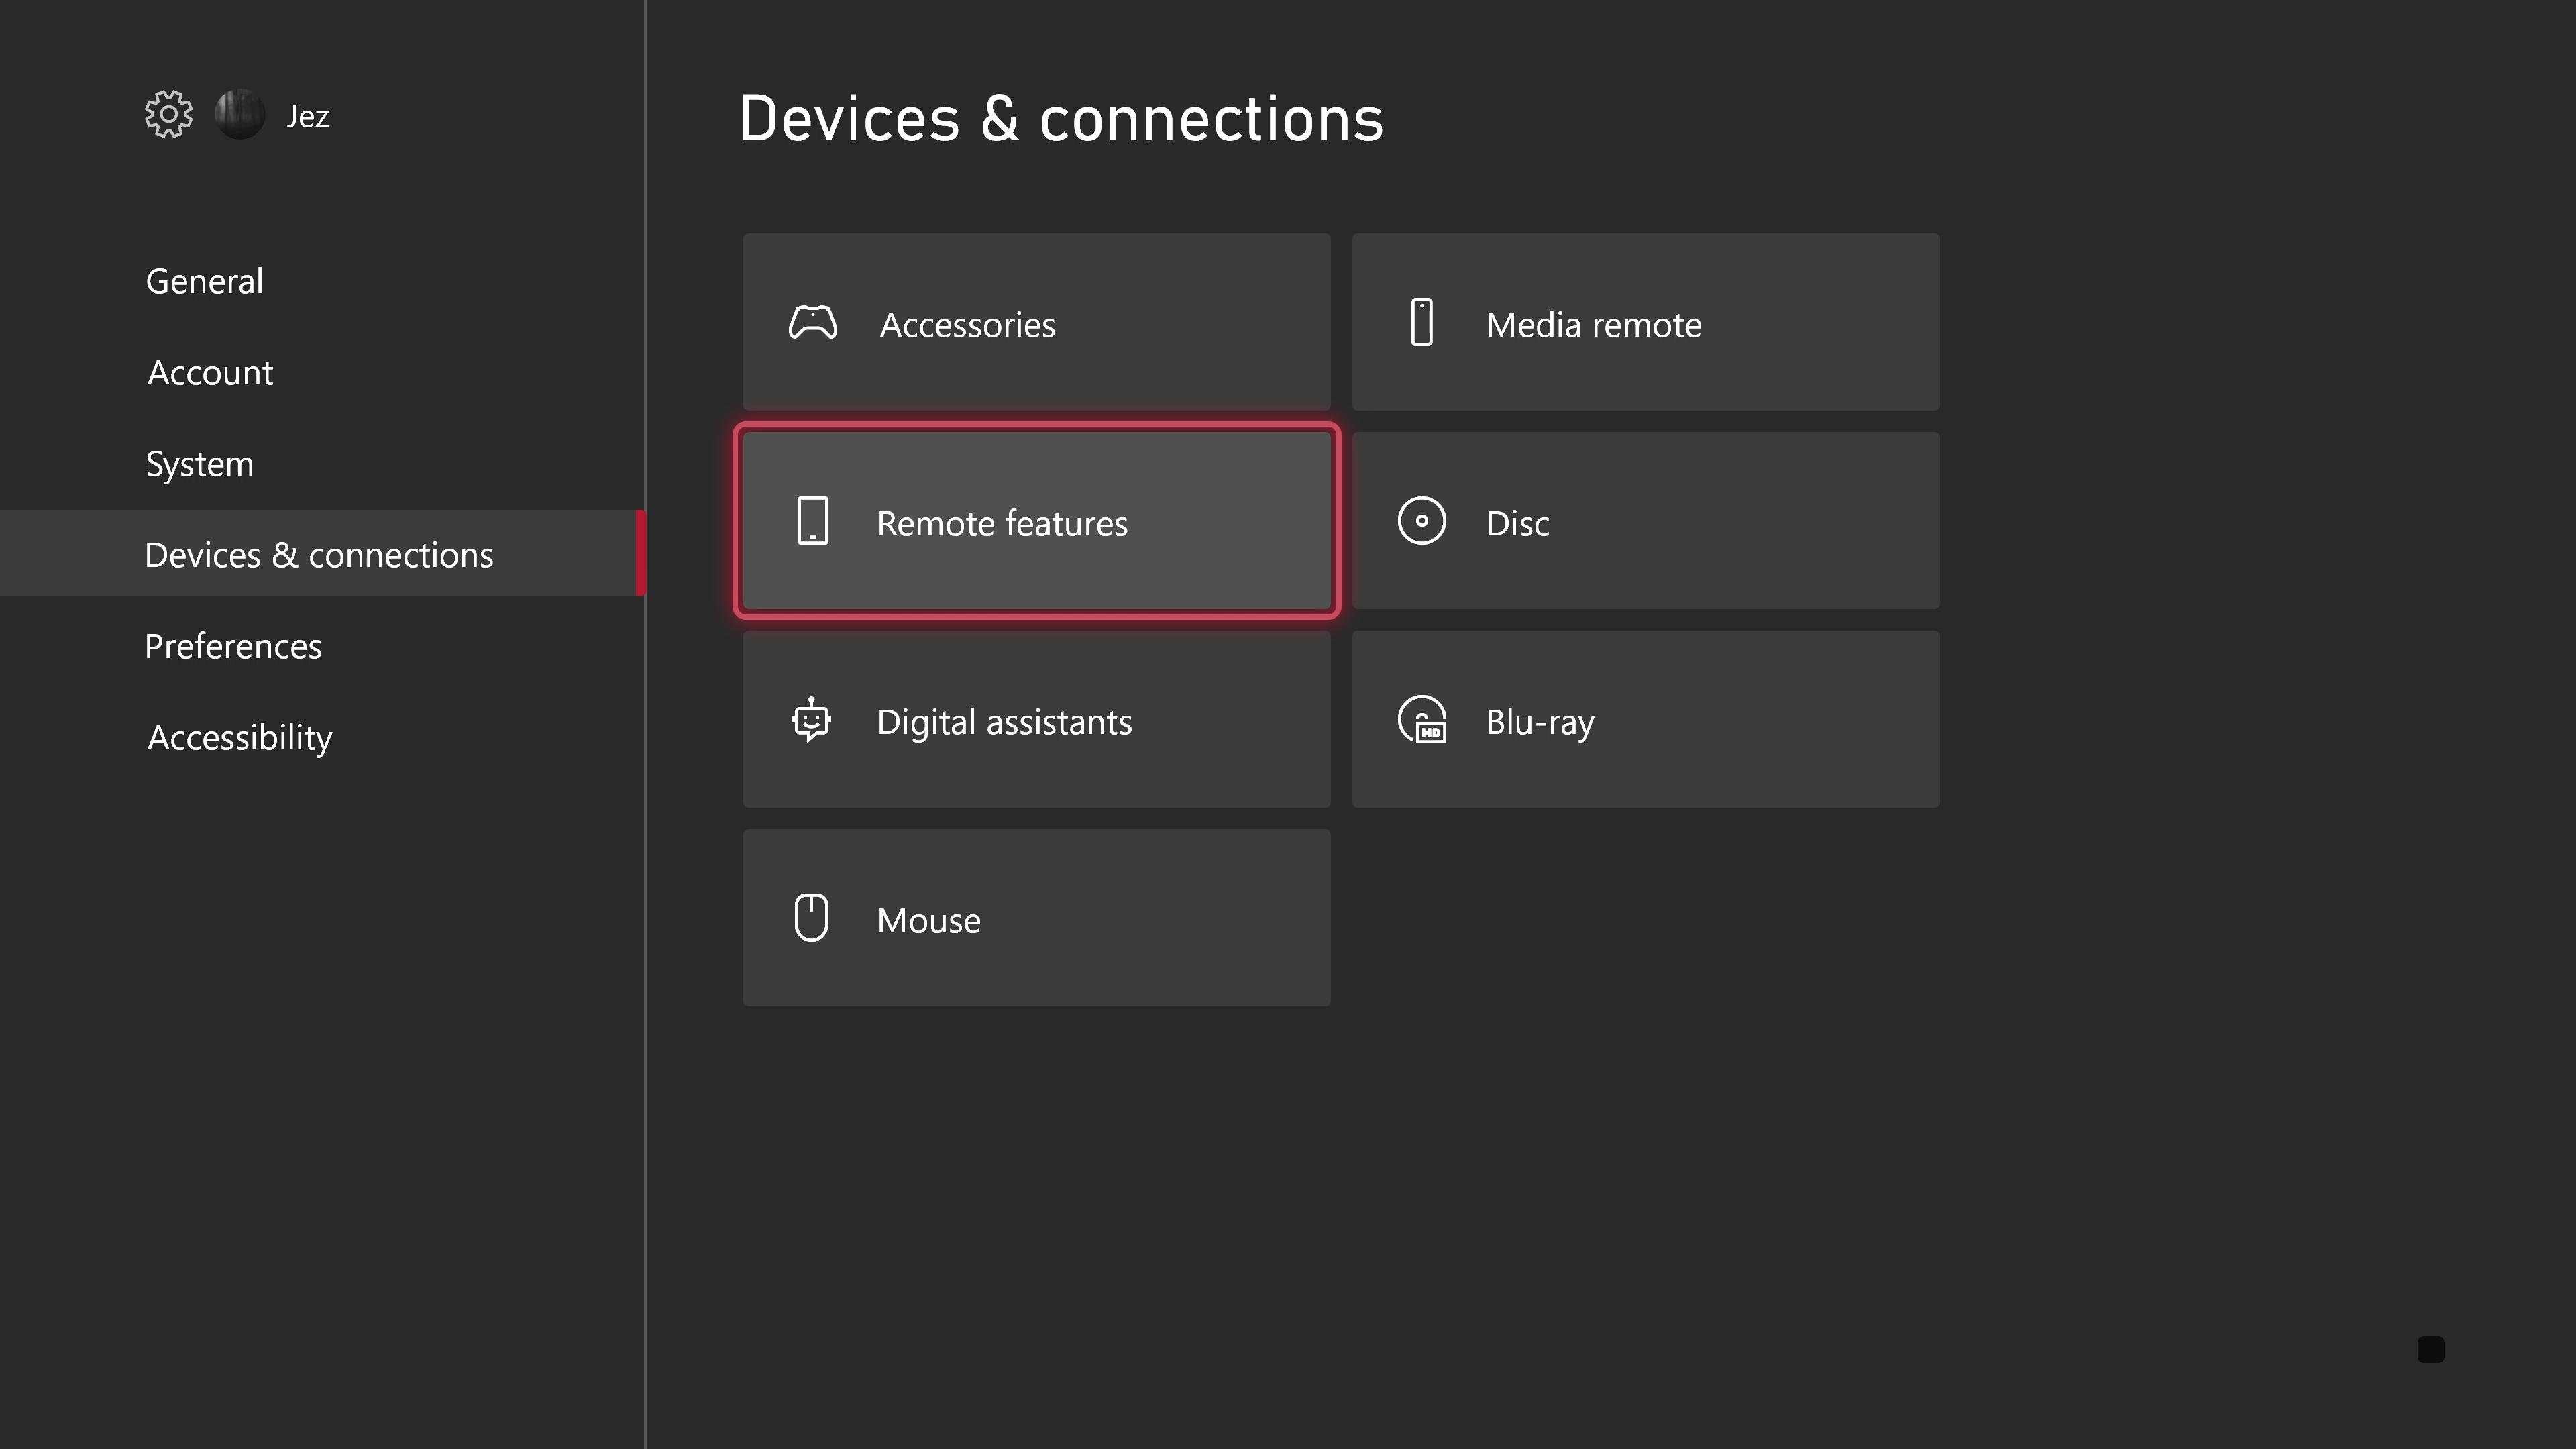
4. Select Remote features as seen above.
5. If it’s not already enabled, in this new menu select Enable remote features. You may need to input your passkey if you have one set up. You may also be prompted to turn off power-saving settings you may have set up.
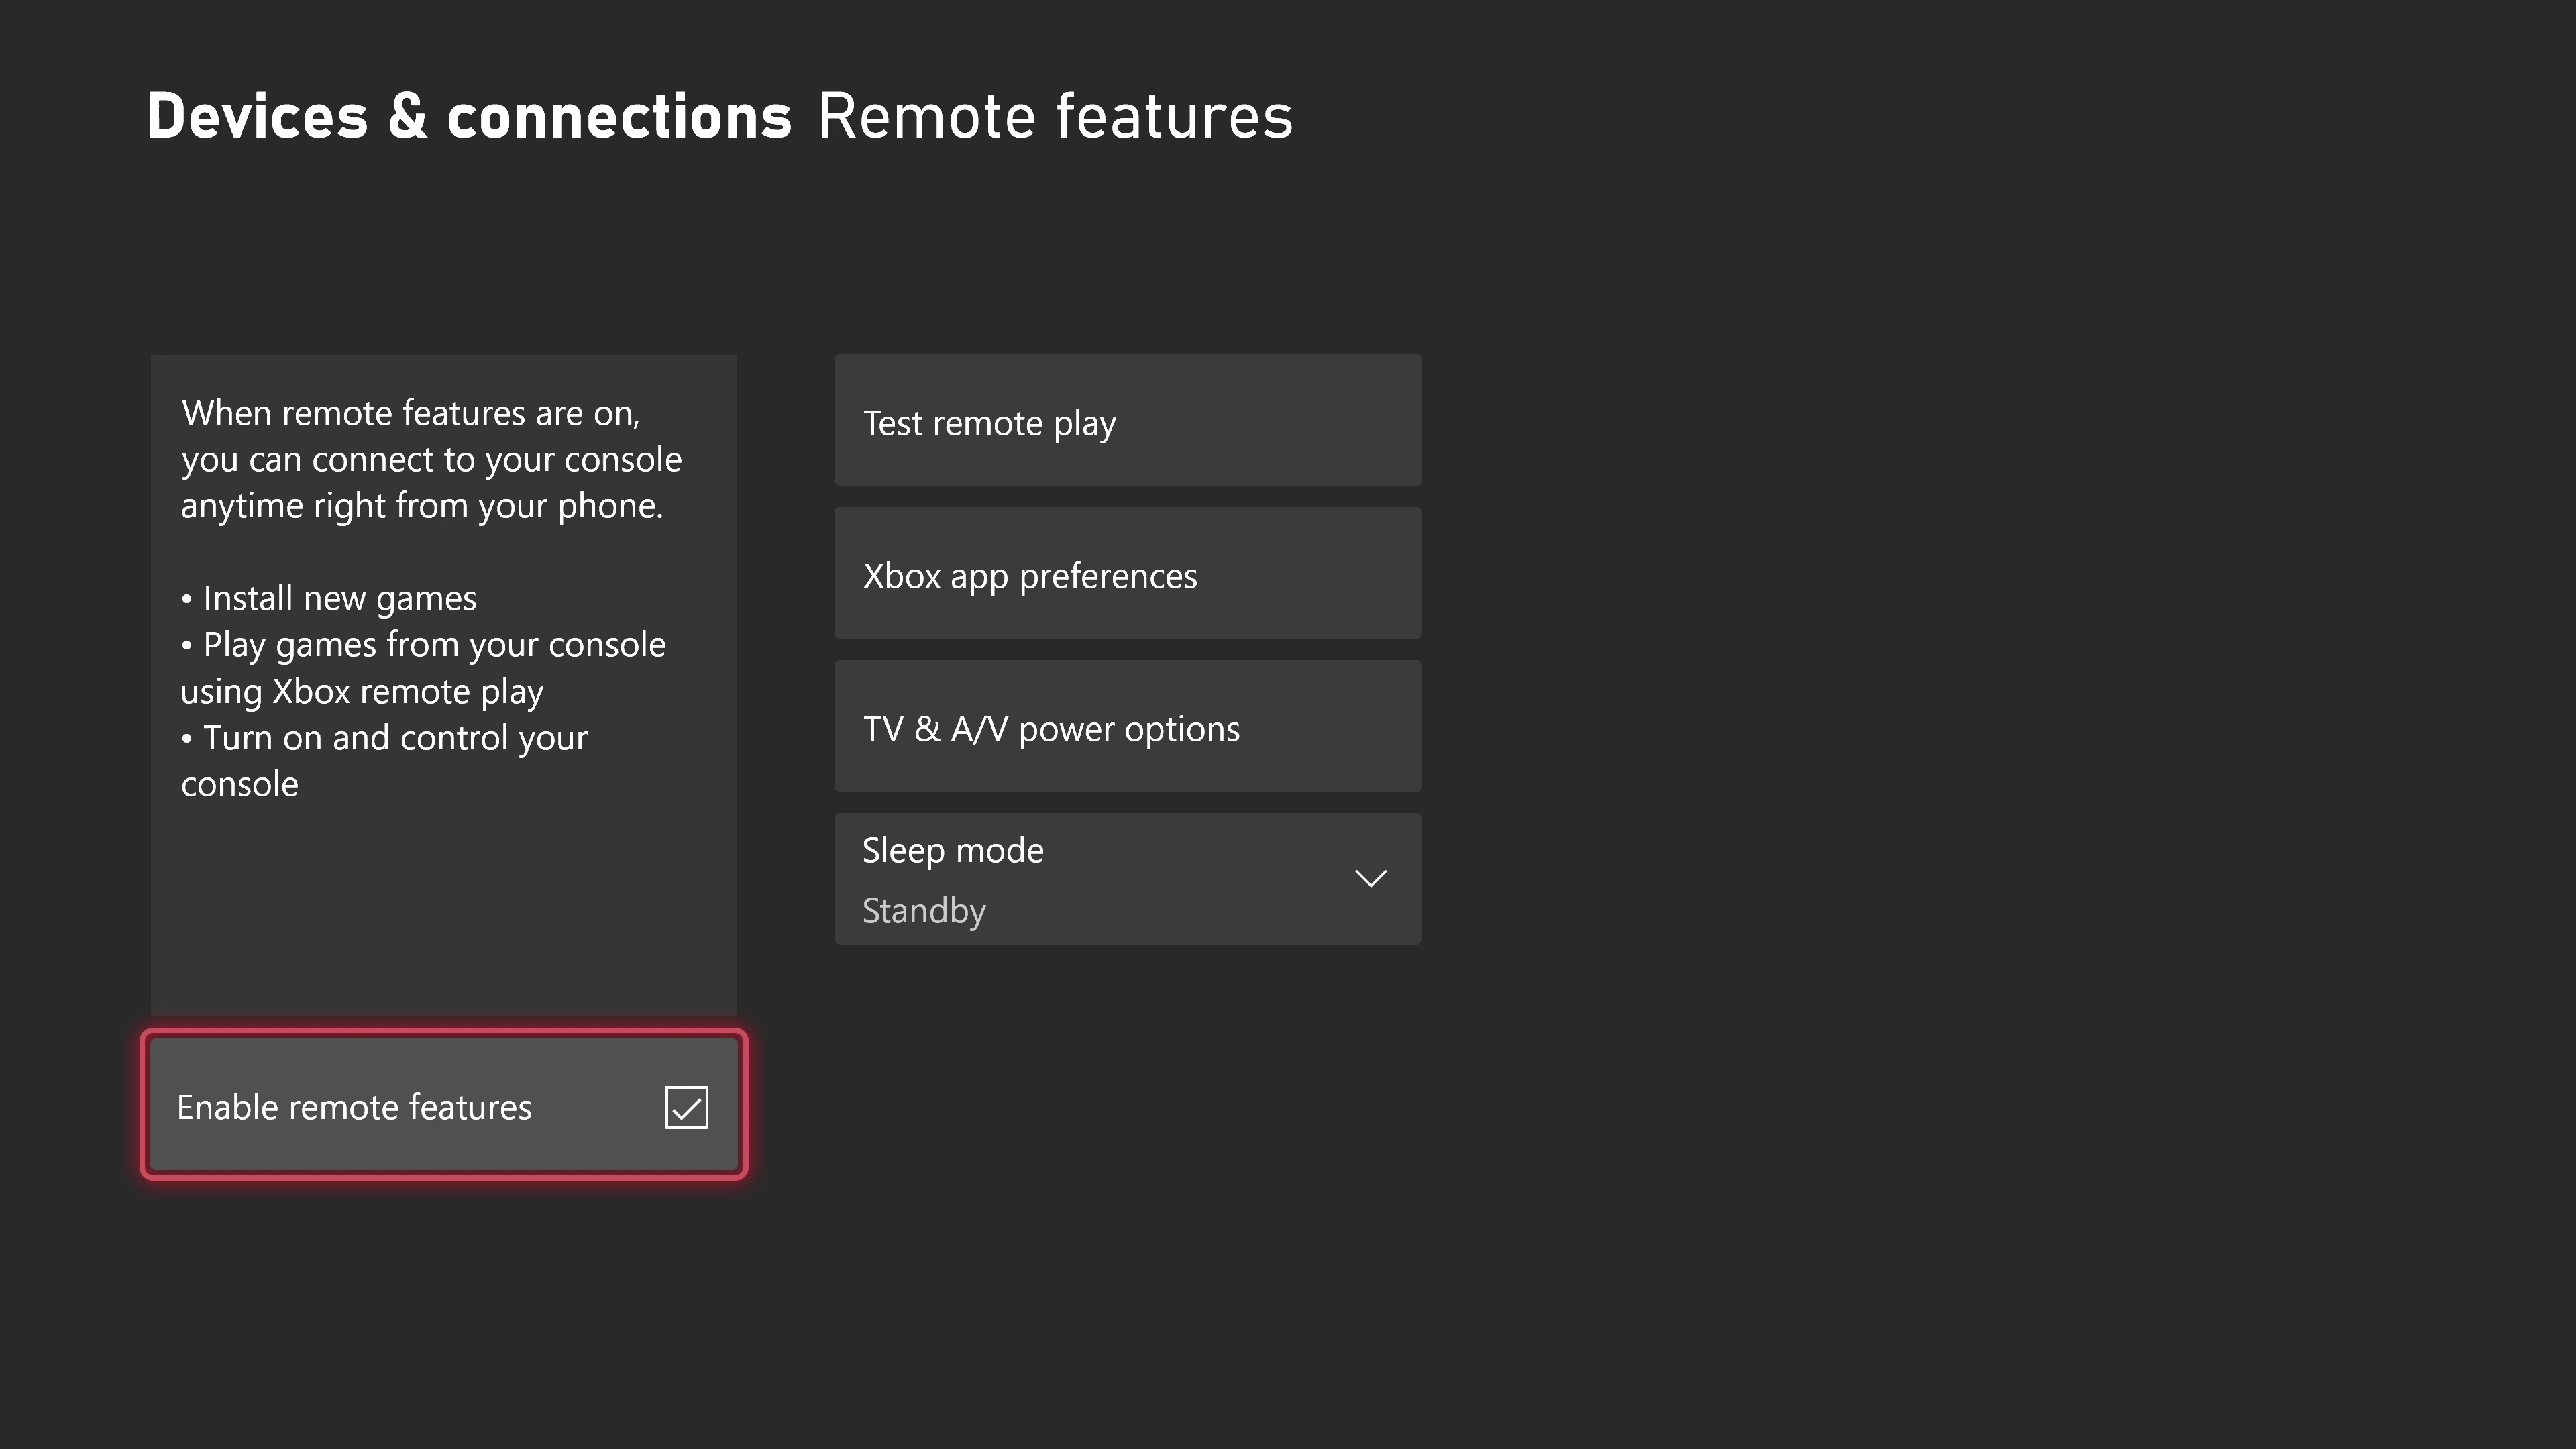
6. Next, select TV & A/V power options in the same menu.
7. Enable HDMI-CEC on the left column.
8. Select Use TV remote for console on the right column, and configure any other settings you’d like to set.
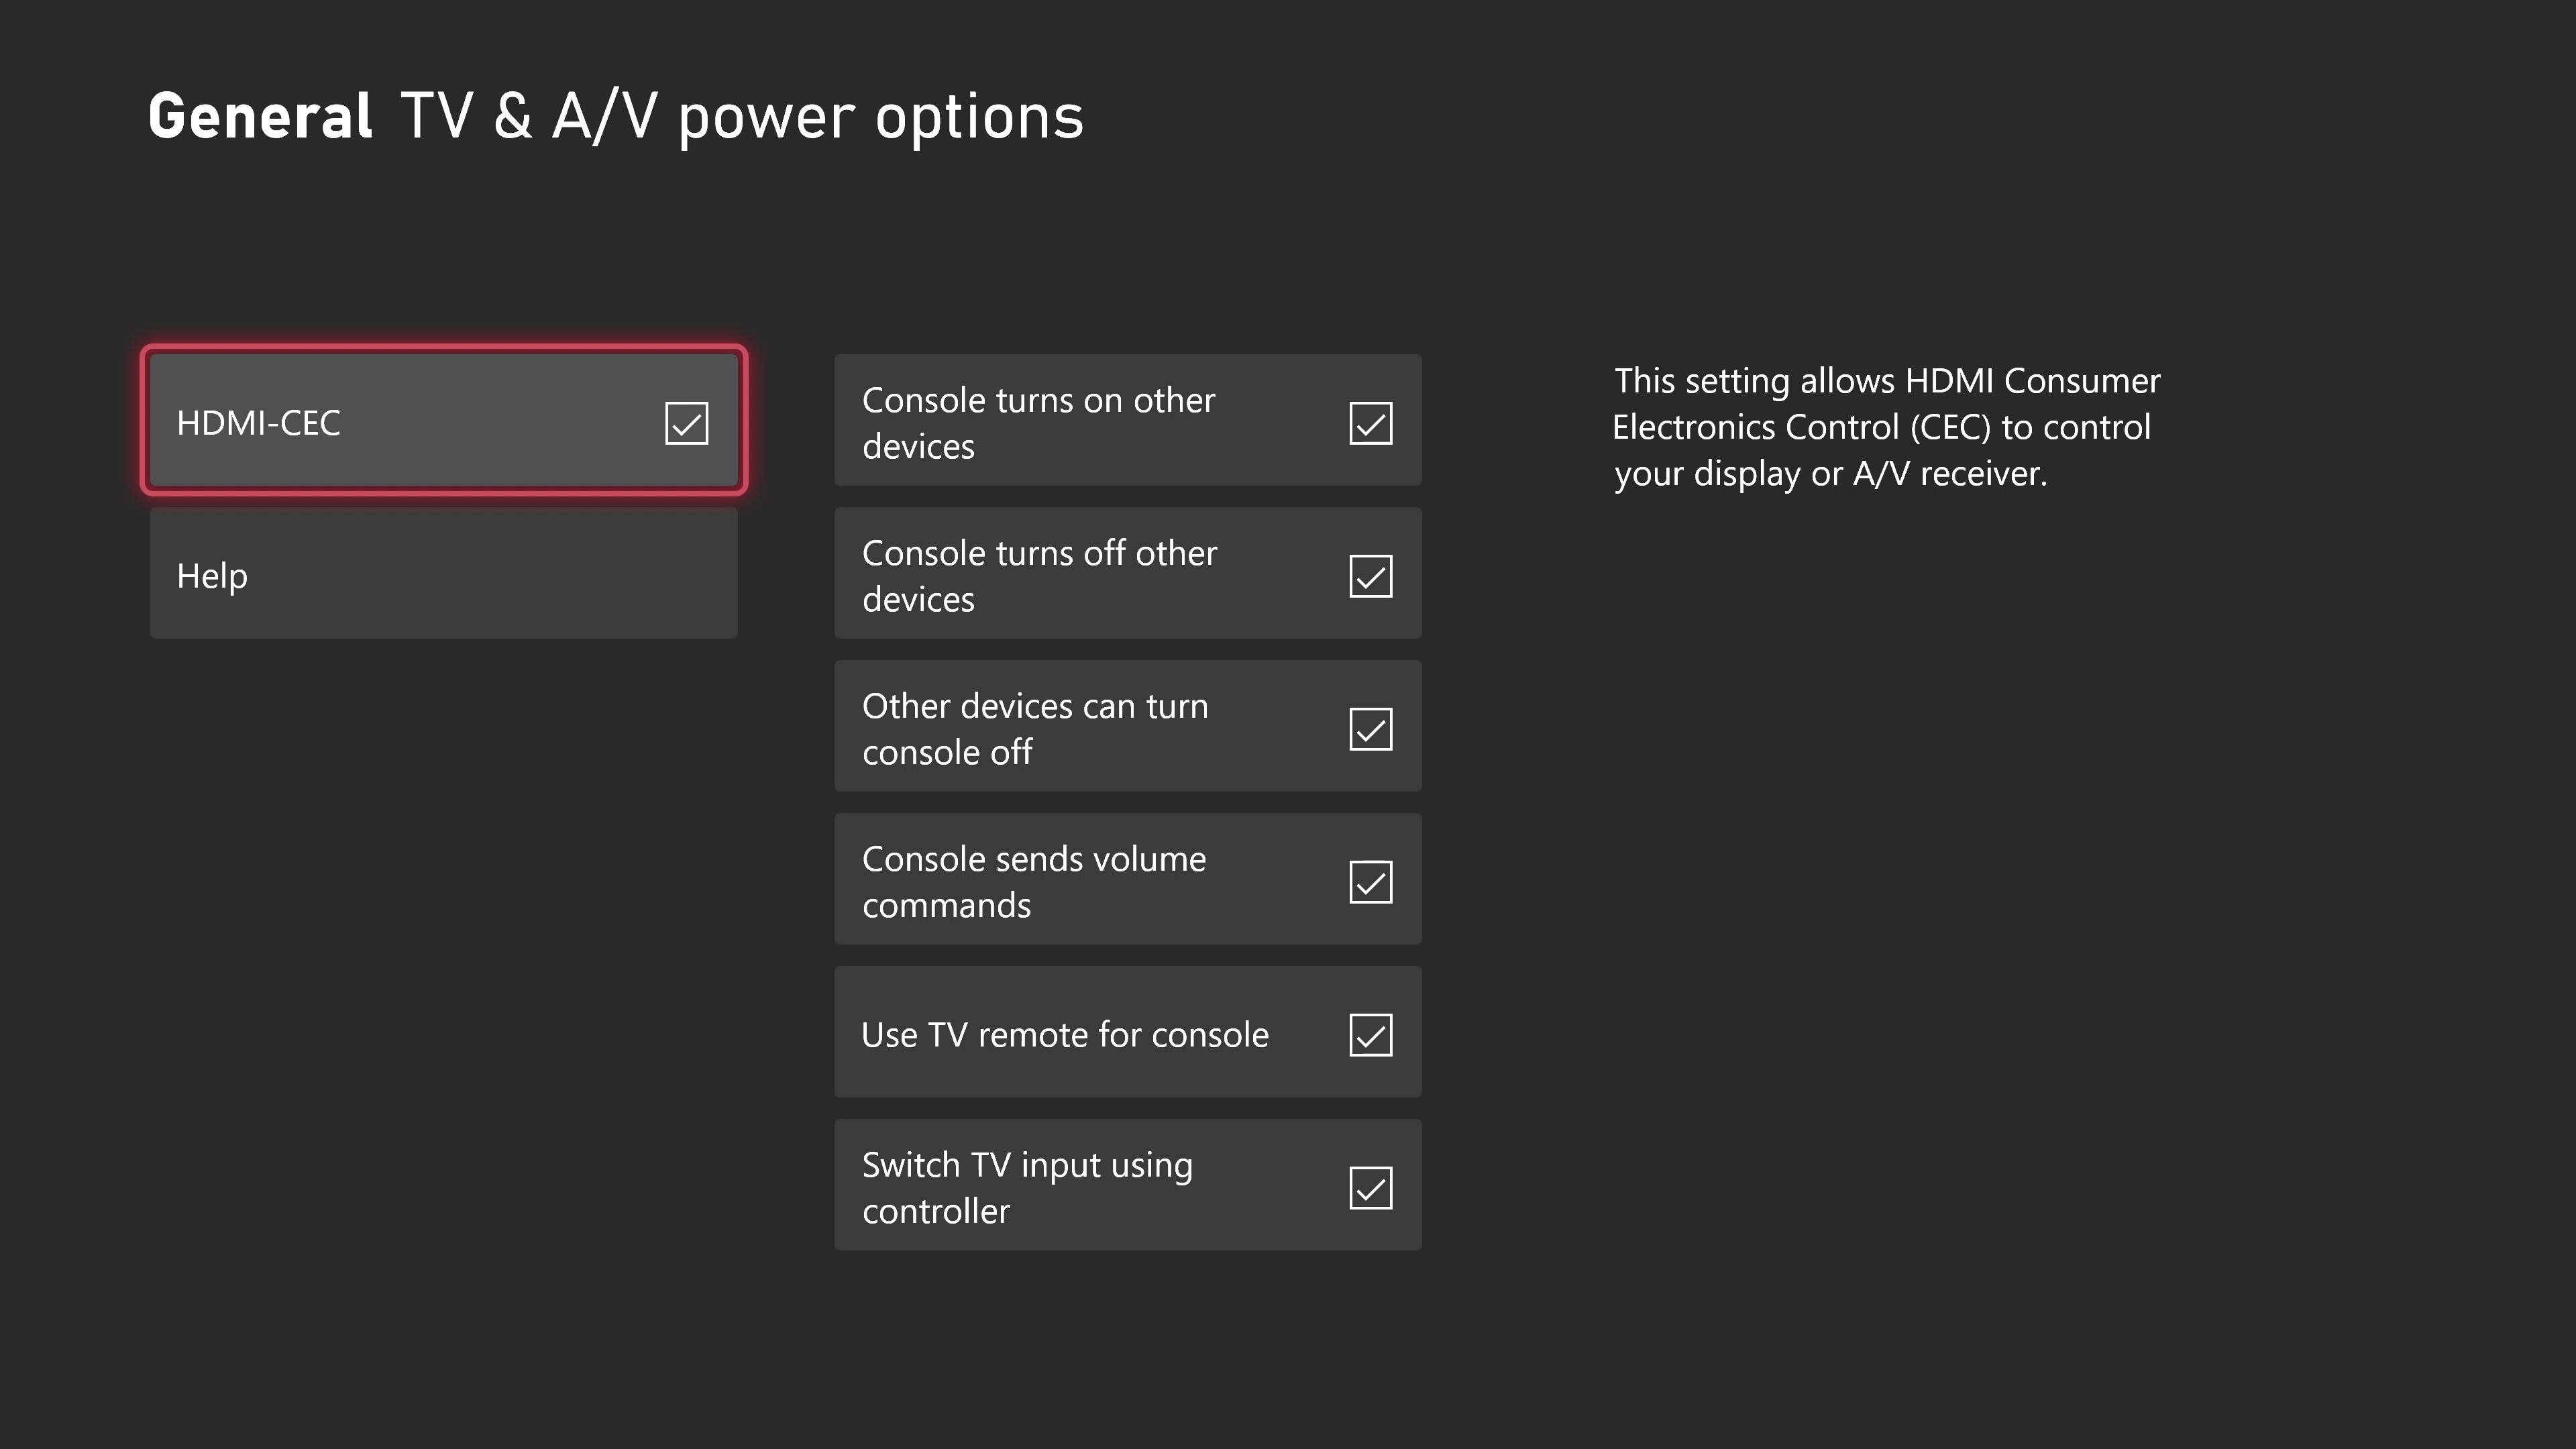
Note: If you set up the console to turn off and on other devices, it may take control of your TV’s power at unwanted moments if you use your TV for things other than gaming. Also, you may need to reboot your TV and Xbox by long-pressing the power button on your console and TV remote to make sure the new settings stick.
If you don’t have a TV with HDMI-CEC and still want a dedicated remote for controlling your TV, we typically recommend the Talon Media Remote for Xbox as our top recommendation for best Xbox media remote.
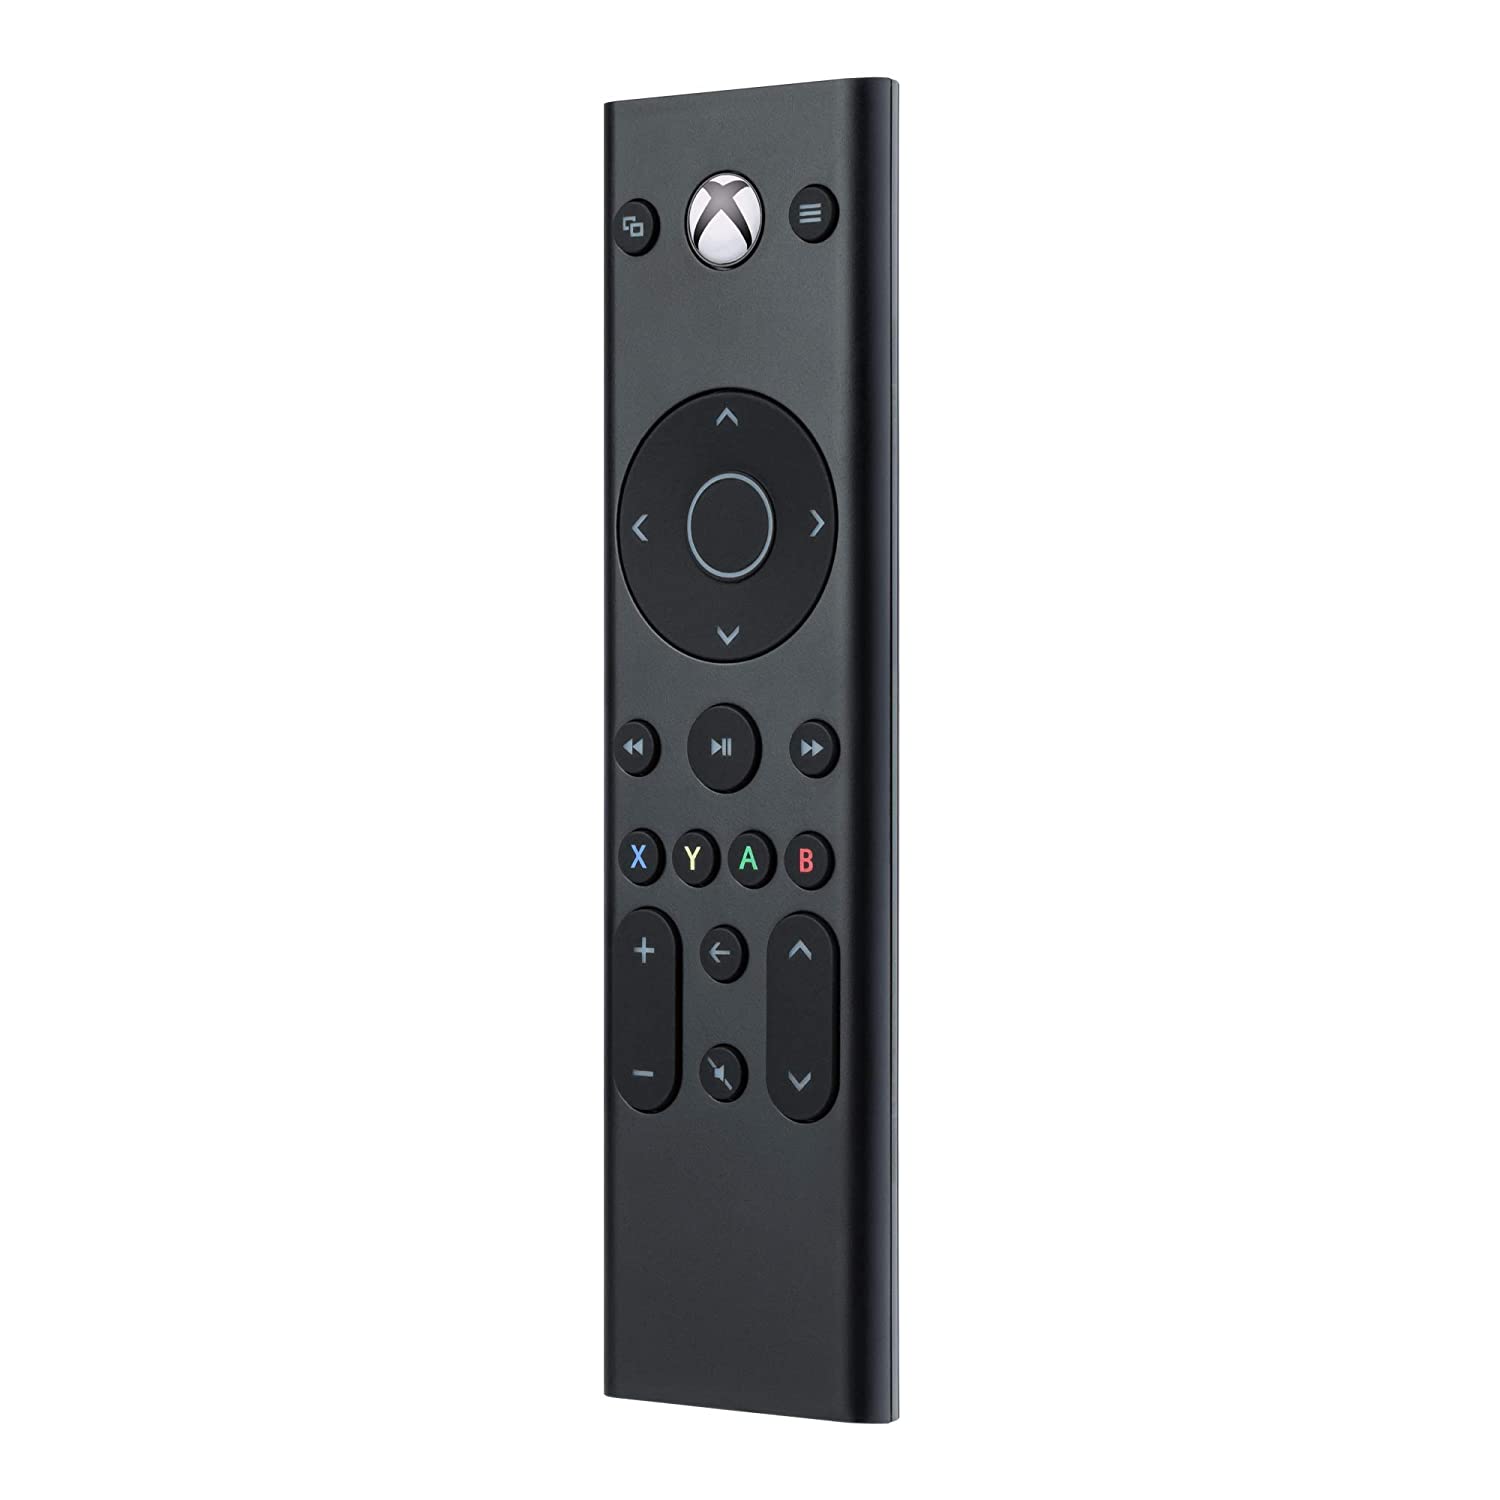
PDP Talon Xbox Media Remote
The PDP Talon Media Remote for Xbox gives you a much more couch-friendly option for controlling media apps like Netflix, YouTube, for Xbox One X|S consoles, and your Blu-ray player on an Xbox Series X console. It supports all the standard controls on the console. However, some things that require direct-to-TV connectivity may still require HDMI-CEC, such as volume controls and the like.


