When you add a new printer to Windows 11, the system will detect and set up the device with default settings, including assigning the long and complex manufacturer designation name. Although the default name makes it unique and descriptive, sometimes you may still need to change its name for various reasons.
For instance, you only have one printer and want to show a short and simple name. If you print from different locations, changing the name and adding the location information may help to avoid sending a print job to the wrong printer. Or, if the system assigns the incorrect information, you may want to rename the printer to reflect the correct name.
Regardless of the reason, Windows 11 allows you to change the name of your printers to virtually anything you want using the Settings app, Control Panel, Command Prompt, and PowerShell.
This guide will walk you through four ways to rename a printer on Windows 11.
How to change printer name using Settings on Windows 11
To change the name of the printer on Windows 11, use these steps:
- Open Settings.
- Click on Bluetooth & devices.
- Click the Printers & scanners page from the right side.
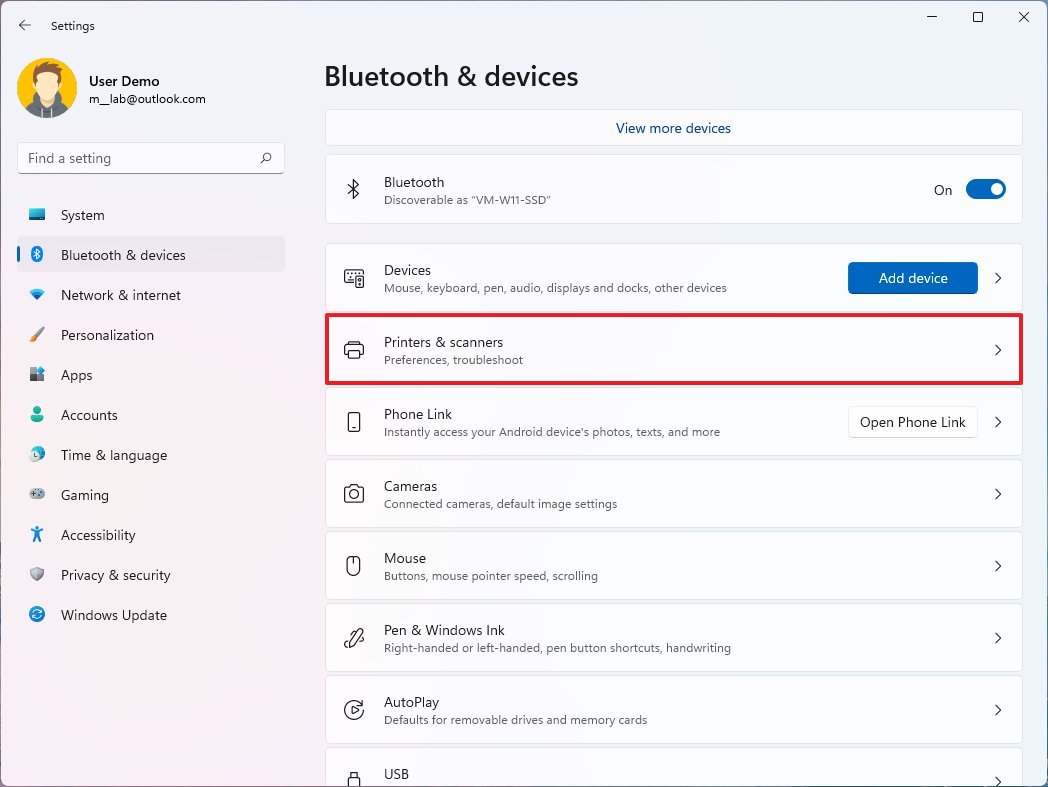
- Select the printer to rename.
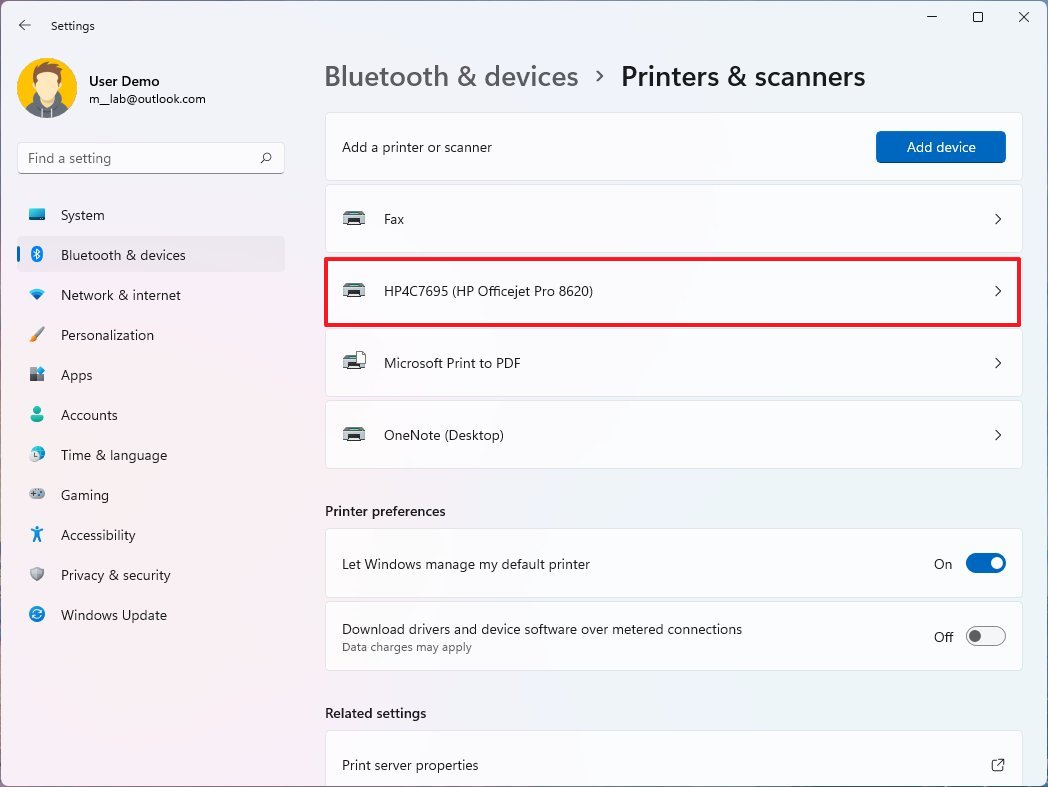
- Click the Printer properties setting.
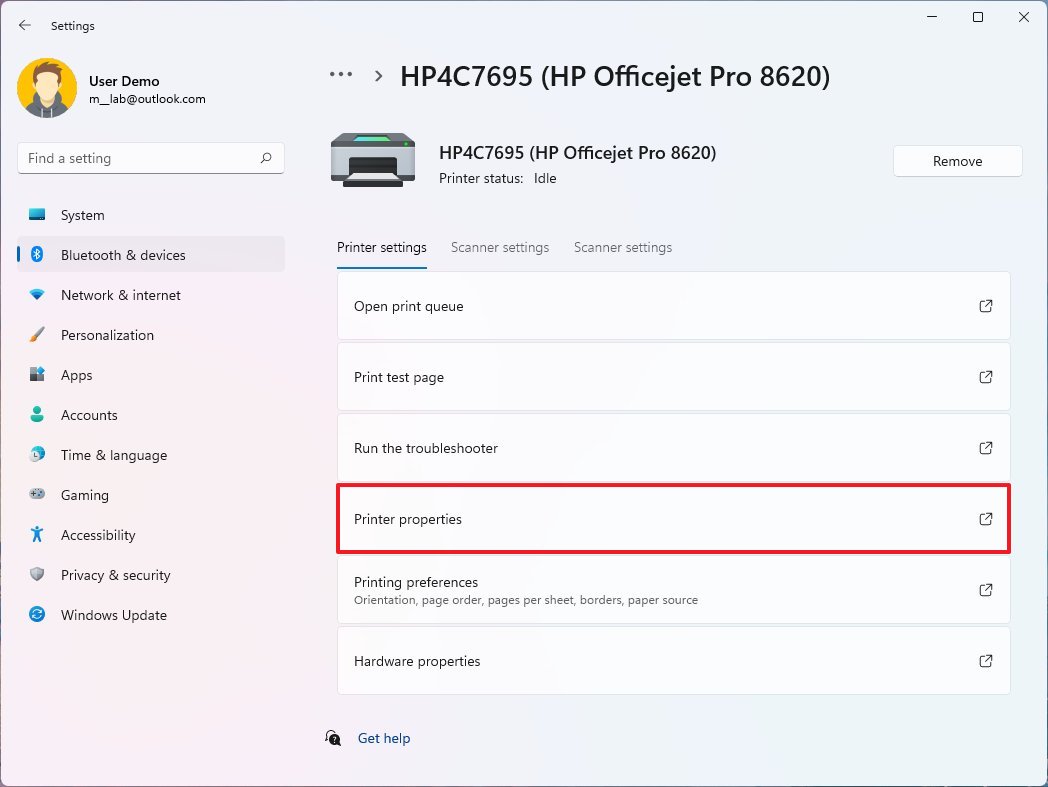
- Click the General tab.
- Confirm a new name for the printer on Windows 11.
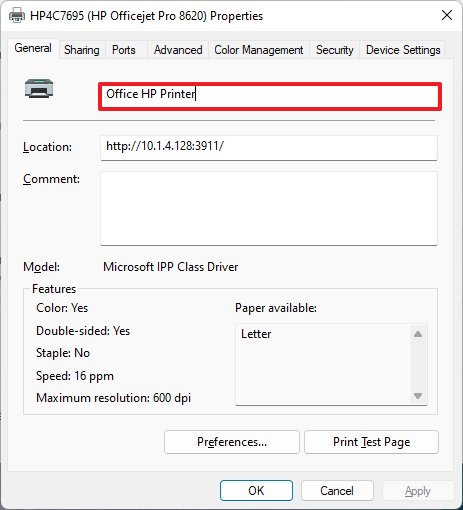
- Click the Apply button.
- Click the OK button.
Once you complete the steps, the new name will be reflected on the device.
How to change printer name using Control Panel on Windows 11
To specify a different printer name through Control Panel, use these steps:
- Open Start.
- Search for Control Panel and click the top result to open the app.
- Click on Hardware and Sound.
- Click on Devices and Printers.
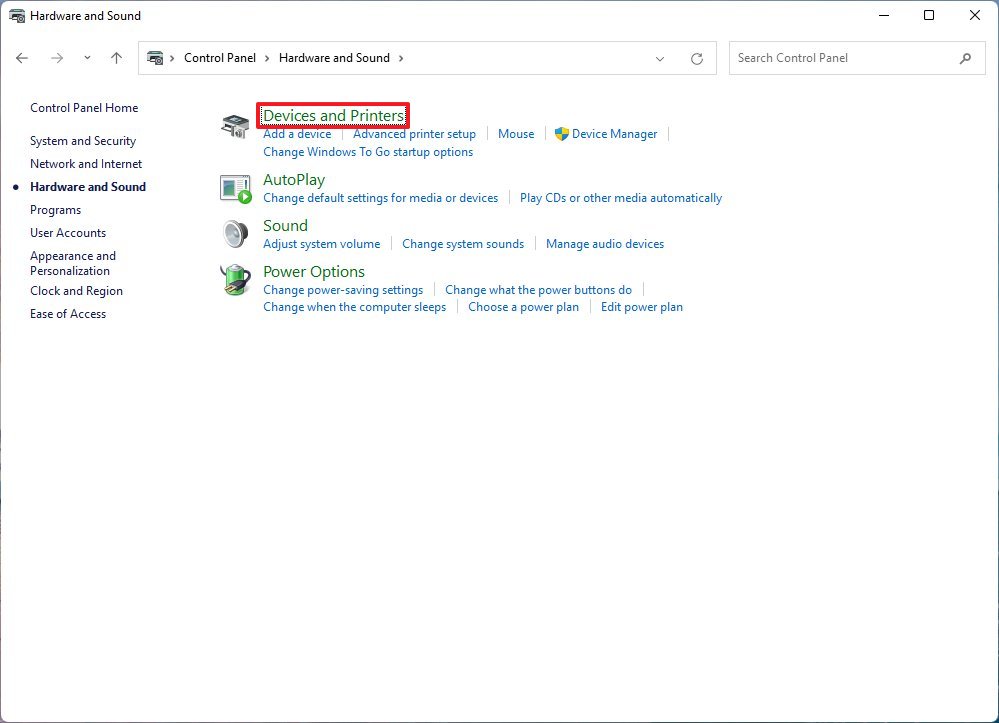
- Under the “Printers” section, right-click the device to rename and select the Printer properties option.
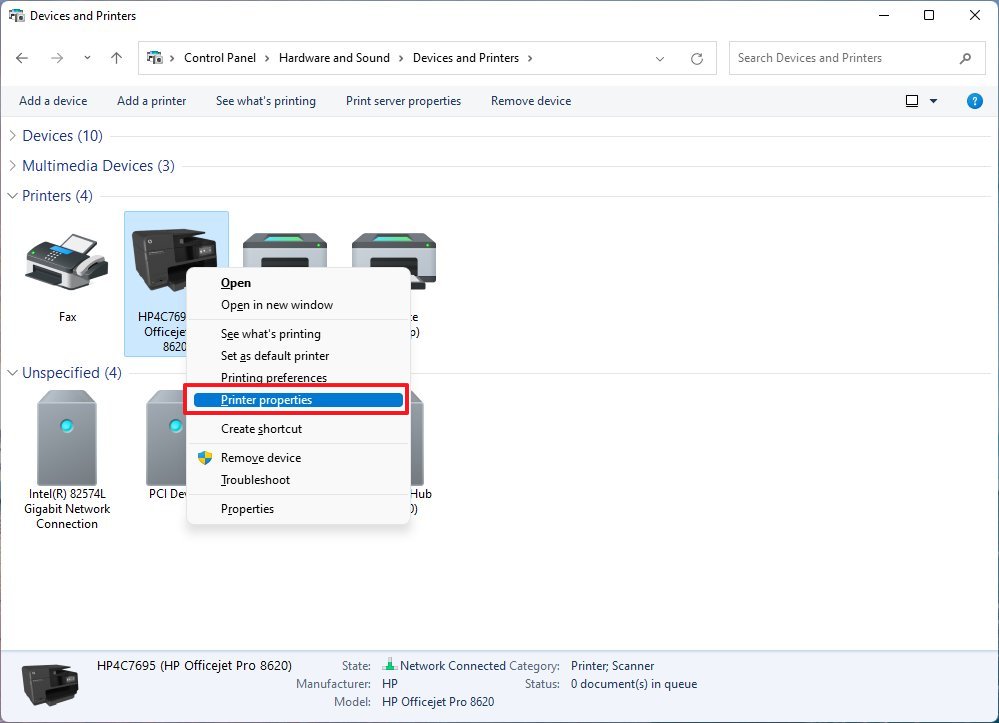
- Click the General tab.
- Confirm a new name for the printer.

- Click the Apply button.
- Click the OK button.
After you complete the steps, the printer name will be updated on your computer.
How to change printer name using PowerShell on Windows 11
To change the printer name with PowerShell, use these steps:
- Open Start.
- Search for PowerShell, right-click the top result, and select the Run as administrator option.
- Type the following command to list the available printers and press Enter: Get-Printer | Format-Table Name
- Type the following command to change the name of the printer and press Enter: Rename-Printer -Name “CURRENT-PRINTER-NAME” -NewName “NEW-PRINTER-NAME”
In the command, make sure to specify the current and new name of the printer. This example changes the printer name to “HomePrinter”: Rename-Printer -Name “HP4C7695 (HP Officejet Pro 8620)” -NewName “Office HP Printer”
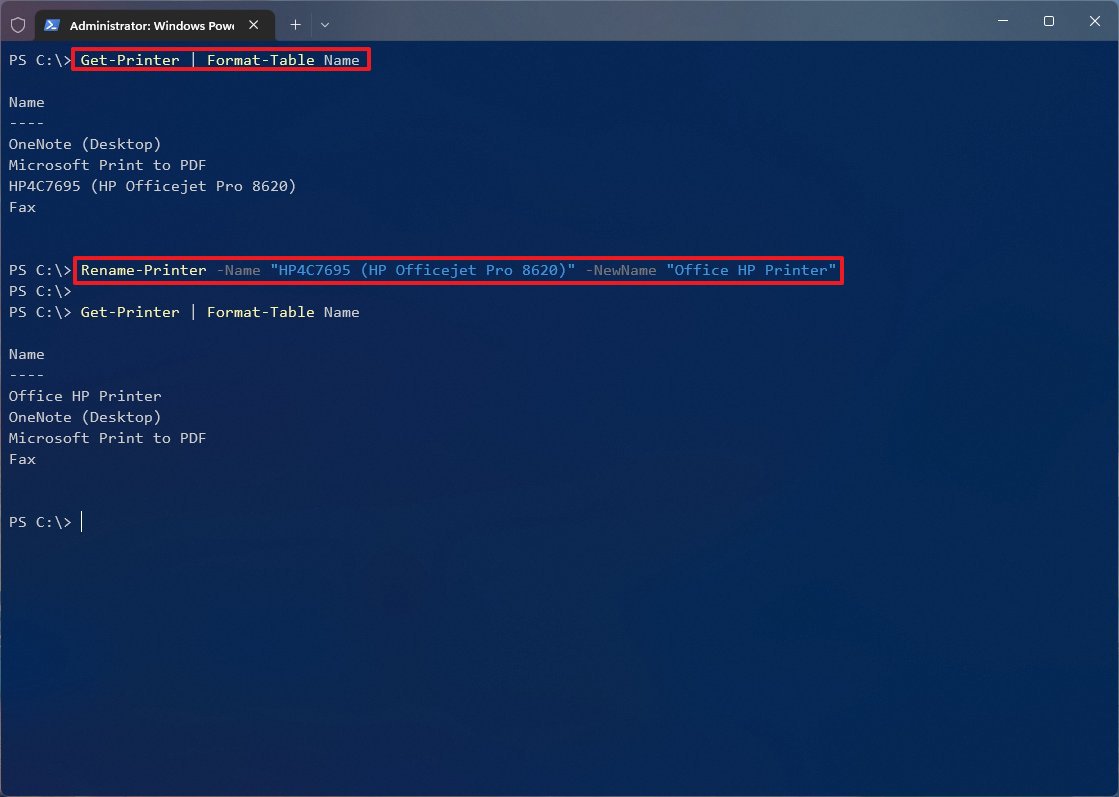
Once you complete the steps, the PowerShell command will apply the new name for the device.
How to change printer name using Command Prompt on Windows 11
To change the printer name using Command Prompt, use these steps:
- Open Start.
- Search for Command Prompt, right-click the top result, and select the Run as administrator option.
- Type the following command to change the name of the printer and press Enter: cscript %WINDIR%System32Printing_Admin_Scriptsen-USprncnfg.vbs -x -p “CURRENT-PRINTER-NAME” -z “NEW-PRINTER-NAME”
In the command, make sure to specify the current and new name of the printer. This example changes the printer name to “HomePrinter”: cscript %WINDIR%System32Printing_Admin_Scriptsen-USprncnfg.vbs -x -p “HP4C7695 (HP Officejet Pro 8620)” -z “Office HP Printer”
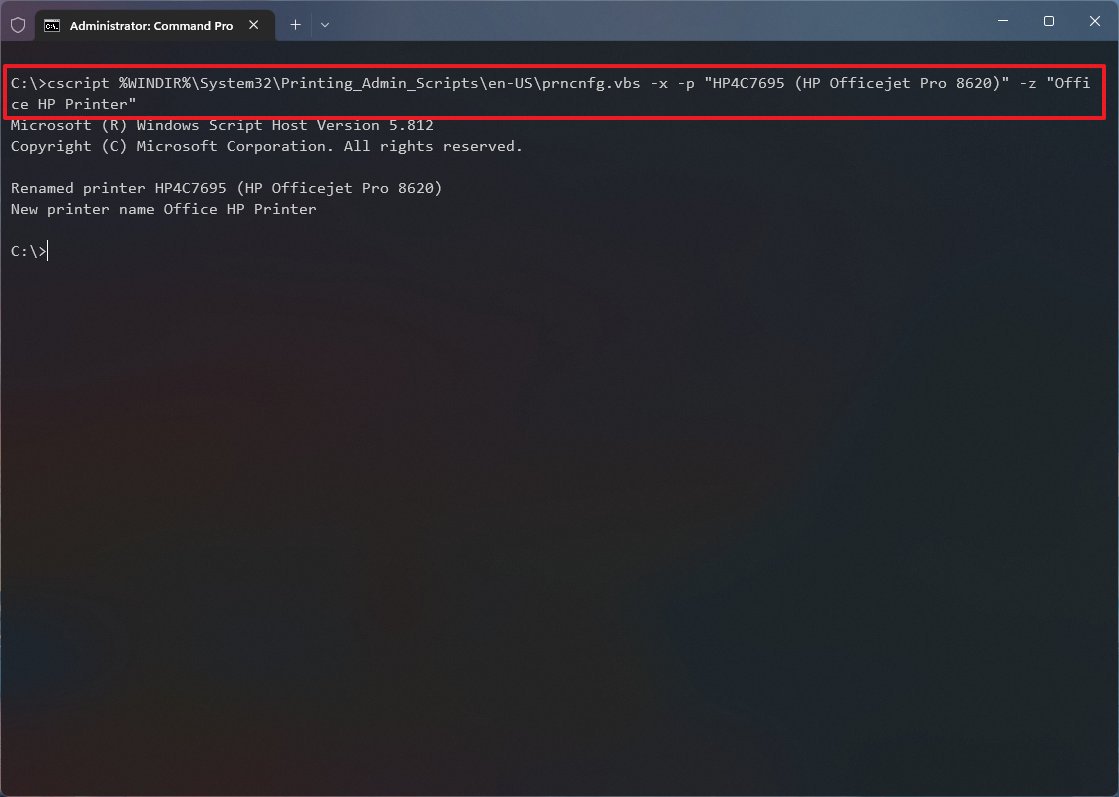
After you complete the steps, Command Prompt will replace the name of the printer with the new one you specified.
More resources
For more helpful articles, coverage, and answers to common questions about Windows 10 and Windows 11, visit the following resources:


