Slack is known for its ability to swiftly create channels for all kinds of work decisions, from team brainstorming to coordinating client meetings. But sometimes, Slack channels don’t need to be public – and users may want to hold private conversations that aren’t as easy for others to see. That could be a place to discuss sensitive business information or even air any problems you have with Slack itself.
For times like these, it’s best to make a channel private. If you have the right permissions in a Slack workspace, you can convert a channel to a private mode at any time. Here’s how to do it and what to know about making the change.
Convert a channel to private in Slack
Before you begin, note that making a channel private is a permanent step. It will always be private afterward, with no way to change it back to public. Make sure the channel will never again need to be public before you begin.
Step 1: Make sure you have the right permissions. Not every Slack user can implement a privacy setting. By default, only owners and admins can convert channels like this. Owners also have the option to limit private channels even more if they choose. If necessary, contact the Workspace Owner or Org Owner for more information.
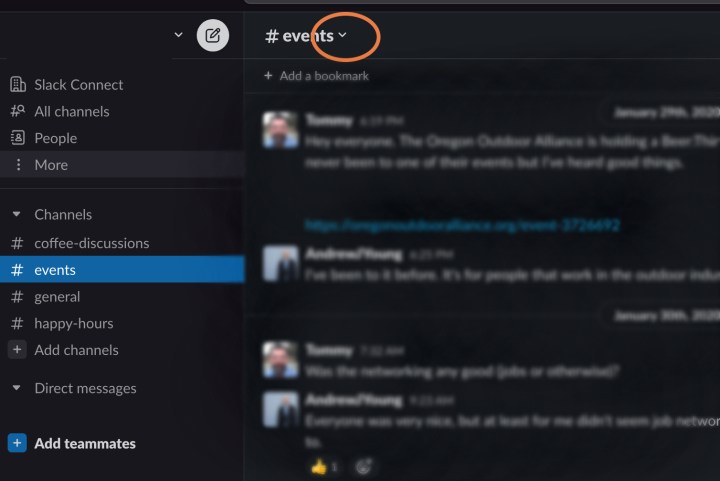
Step 2: Open Slack and navigate to the channel that you want to convert. Look at the very top of the channel, above the discussion thread, and you’ll see the current name of the channel. Select the Arrow beside this name to open up the channel menu.

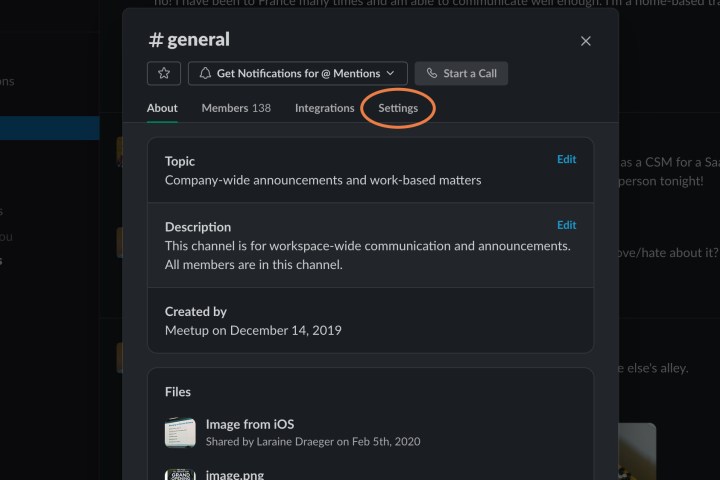
Step 3: In the Channel menu, select the Settings tab.

Step 4: Scroll until you reach the option to Change to a private channel. Select it. Confirm that you want to convert the channel, and it will immediately be made private. Everyone currently in the channel will receive a message saying that the channel has been made private. Now only members can see the channel, and an existing member has to invite new members for them to join.
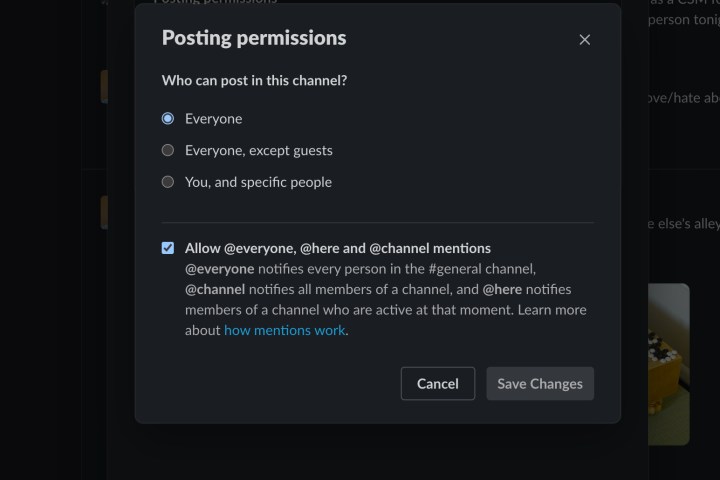
Step 5: If you don’t want to make the channel permanently private, you still have options for controlling some kinds of access. Under Posting permissions, you can select Edit and choose who can post in the channel, and you can also decide if channel-wide chat options are enabled or not. That gives you a bit of extra customization if you’d like to keep the channel public but want to stop certain practices.

How to make a new Slack channel private
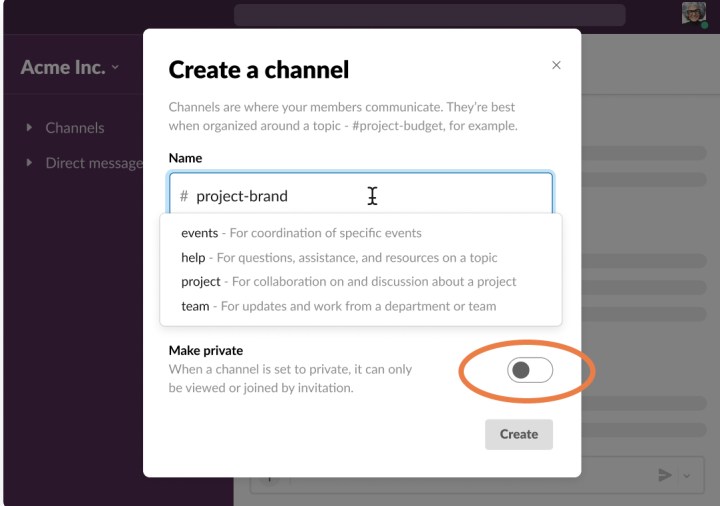
If you are creating a new channel, you can set it to private right away. When choosing the channel name, toggle the option to Make private. Then you can invite members one at a time to the channel. This may work better for some kinds of discussions.

Extra tips for making a Slack channel private
-
Every Slack workspace has a primary General channel that’s used for public discussions. This channel cannot be converted to a private channel. Even with the right permissions, you won’t see the private option in the channel settings.
-
Converting channels to private can get a little confusing if there are people from multiple organizations on the same channel. Only members of the organization where the owner/admin set the channel to private will see it (or not see it) as private. Members of other organizations will continue to see it as public. That may mean coordinating a plan so all organizations make a channel private at once.
-
Making a channel private does not automatically make any files or documents posted there private. However, messages and files posted after a channel is private can only be searched by other members of that specific channel, not the entire workspace.
Want to learn more about how to customize Slack just the way you want it? Take a look at our guide to tips and tricks for Slack that will help you create discussions faster, share a wide variety of content, and much more.
Editors’ Recommendations


