On Windows 10, hibernation is a power-saving feature that saves the content in memory onto the hard drive (inside the “Hiberfil.sys” hidden system file), allowing a complete shutdown of the device to extend battery life without losing your current work. The next time you resume, the previous session will load into memory, allowing you to pick up where you left off.
Although hibernation doesn’t resume as fast as sleep on Windows 10, the feature will come in handy when you aren’t using the device for an extended period when running out of battery, the laptop has a battery drain issue, or when you have to swap the battery (if you still have one of those devices).
This guide will walk you through the steps to enable and configure hibernation to extend battery life on your laptop or completely shut down your computer, preserving your current session upon resuming.
How to enable hibernation on Windows 10
To enable hibernation using Command Prompt, use these steps:
- Open Start.
- Search for Command Prompt, right-click the top result, and select the Run as administrator option.
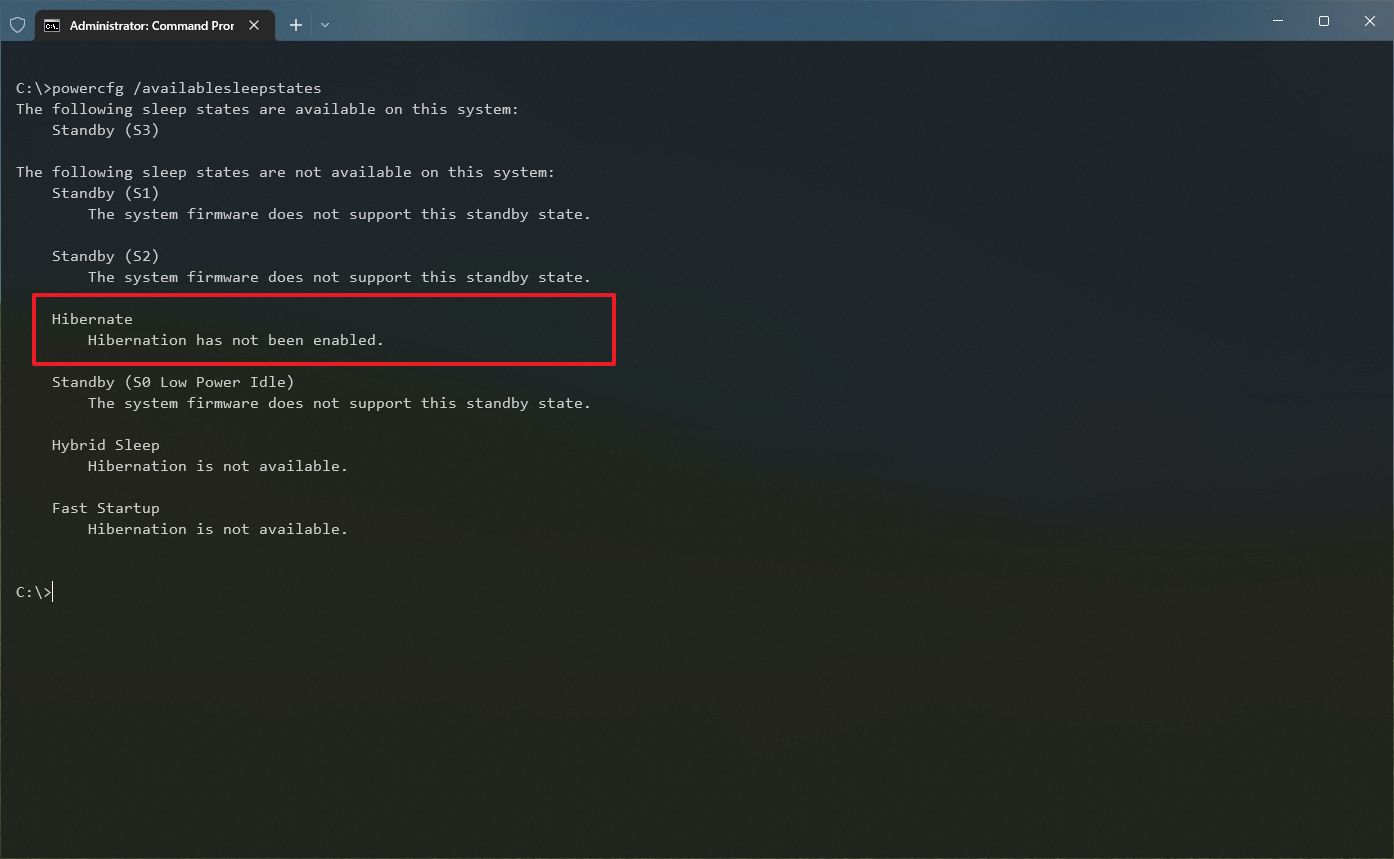
- Type the following command to confirm if hibernation is already enabled on your device and press Enter: powercfg /availablesleepstates
- Quick note: If Hibernate appears under the “The following sleep states are available on this system” section, then the feature is enabled, and you don’t need to continue with step 4.
- Type the following command to enable the feature on your computer and press Enter: powercfg /hibernate on
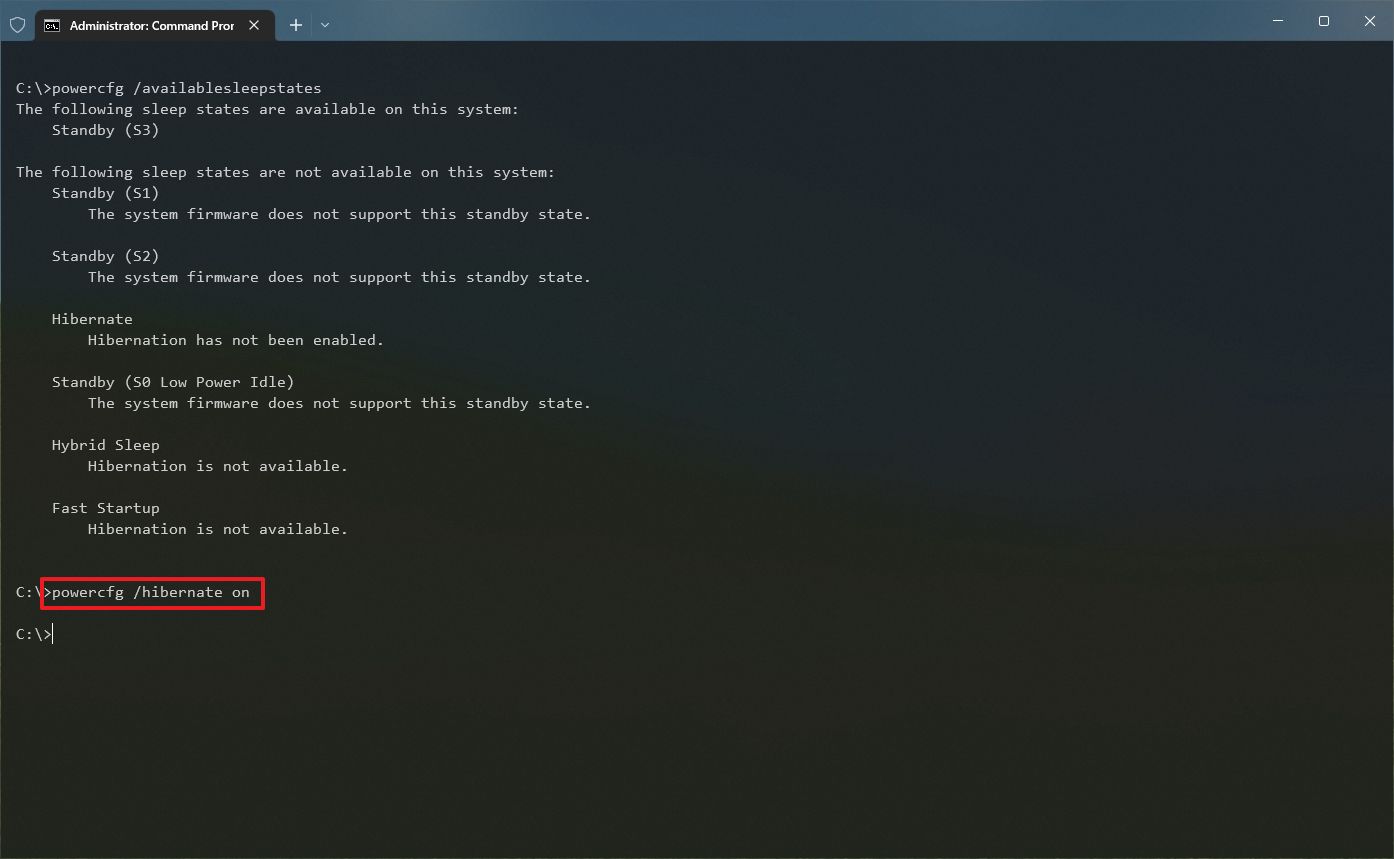
Once you complete the steps, Windows 10 will enable hibernation on your computer. However, it’s not a feature available on all system configurations. If you’re unable to use hibernation on Windows 10, it could be for one of these reasons:
- Graphics card driver doesn’t support this power state. Updating to the latest video driver may fix this issue.
- Hibernation may be supported, but it’s not enabled inside the Unified Extensible Firmware Interface (UEFI) or legacy Basic Input/Output System (BIOS). Accessing the motherboard firmware and adjusting the settings using your device manufacturer support website may resolve the problem.
- Hybrid sleep feature is enabled. In some cases, you may need to disable this feature before hibernation becomes available.
- Hardware is not compatible with hibernation. For example, devices with InstantGo don’t have the hibernate option.
How to add hibernation option to Power menu on Windows 10
To add the hibernation option to the Power menu on Start, use these steps:
- Open Control Panel.
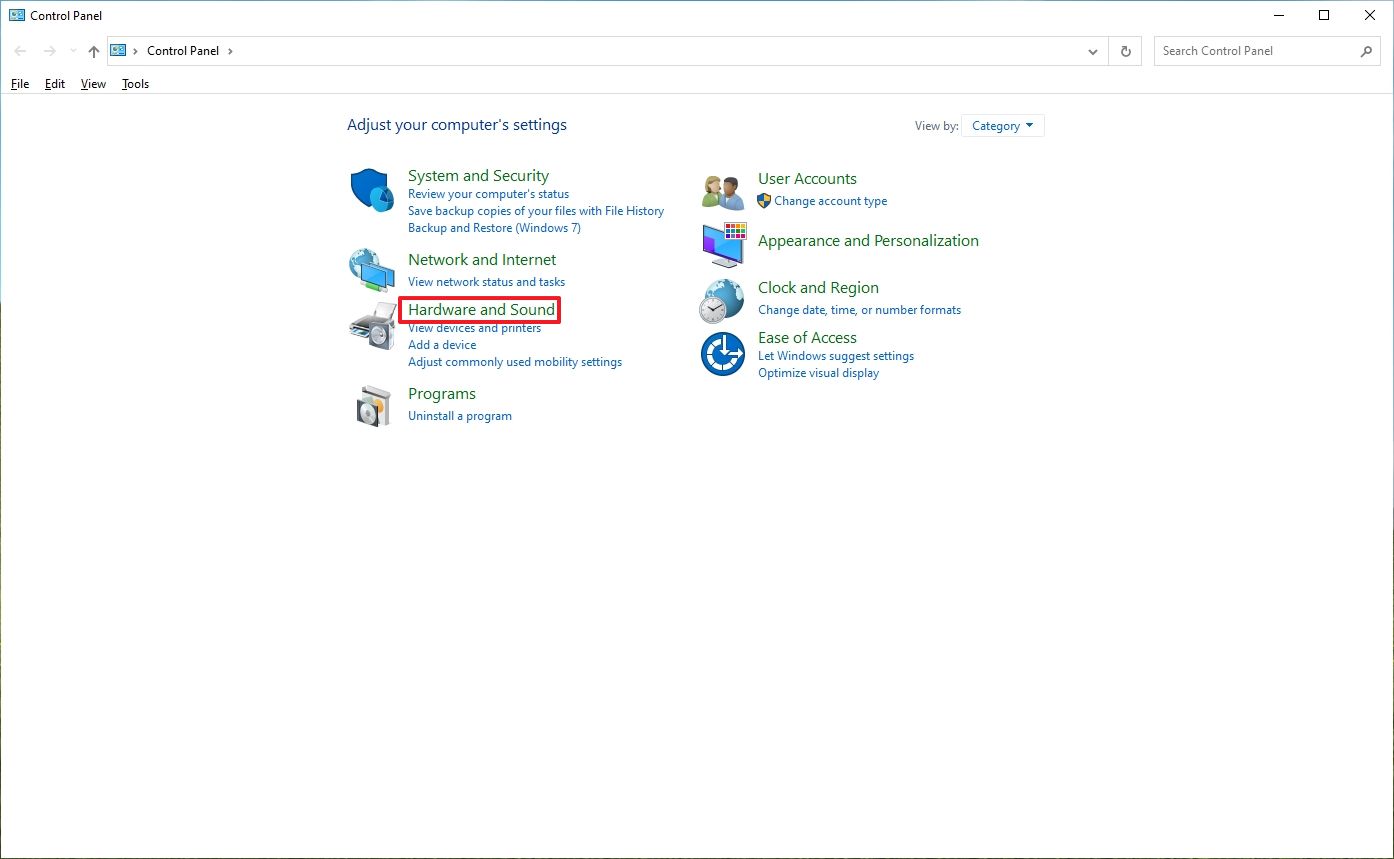
- Click on Hardware and Sound.
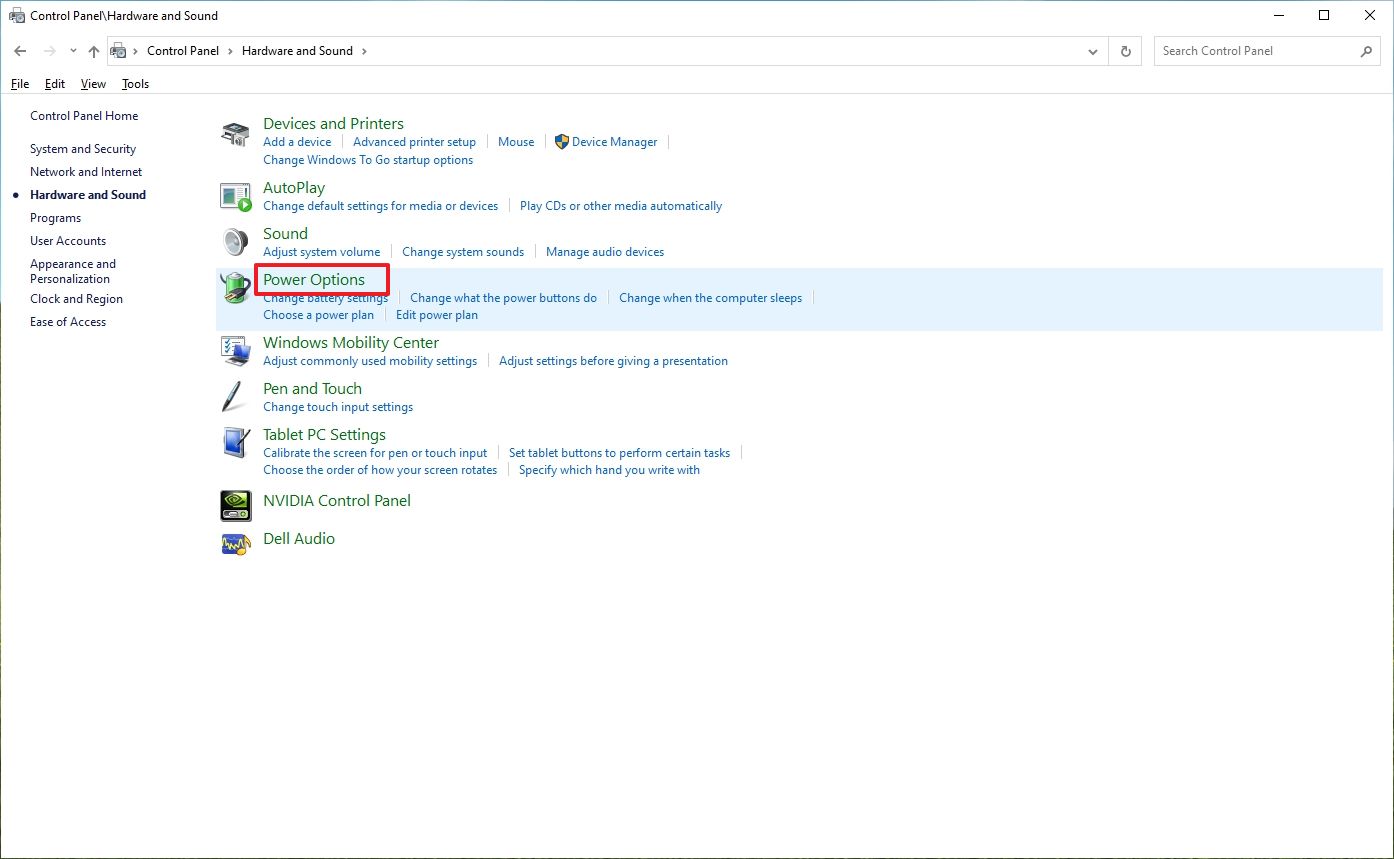
- Click on Power Options.
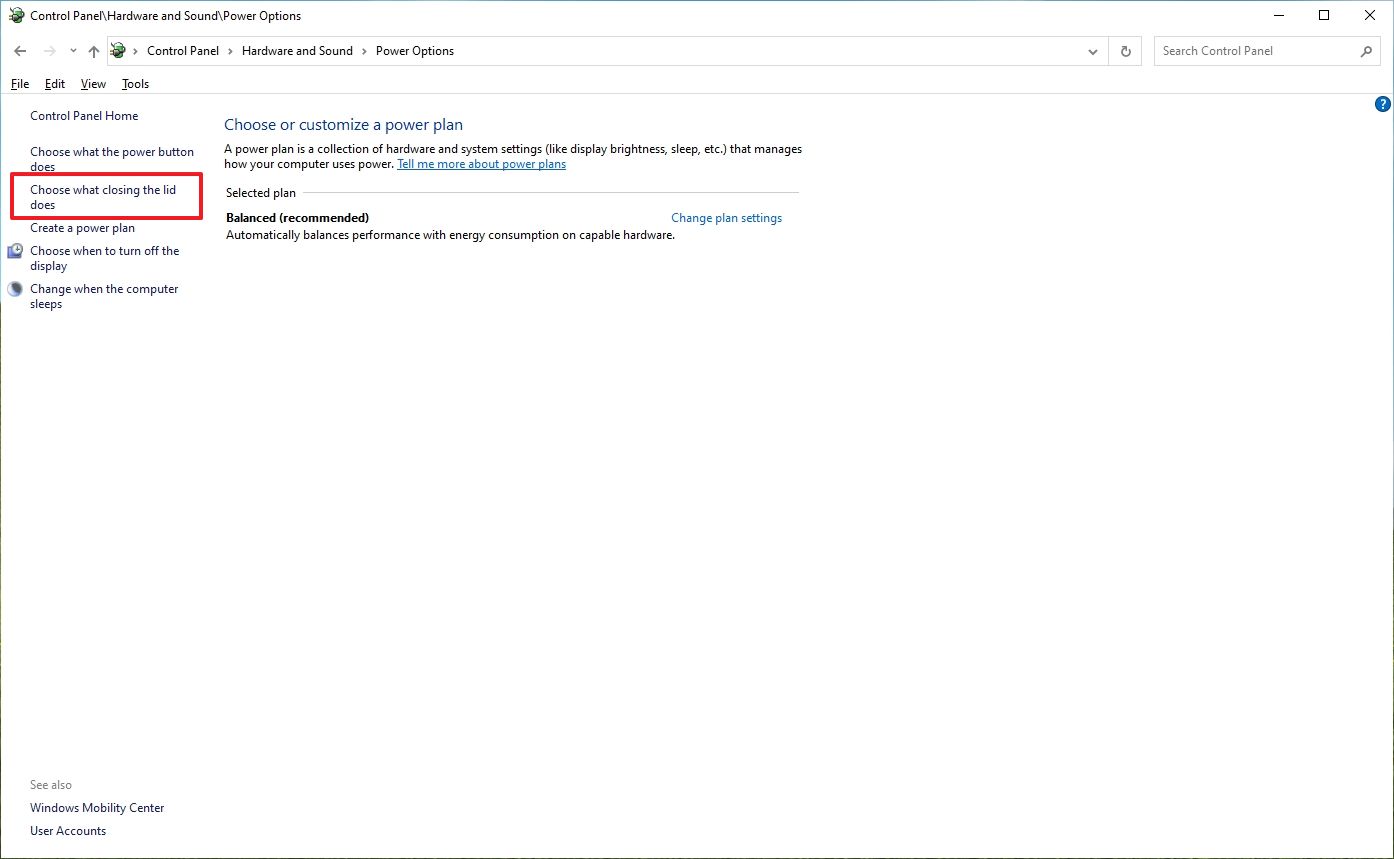
- Click the “Choose what closing the lid does” option from the left pane.
- Quick tip: If you’re using a desktop computer, you can select the “Choose what the power buttons do” option to get to the settings.
- Click the “Change settings that are currently unavailable” option to modify the Shutdown settings.
- Check the Hibernate option.
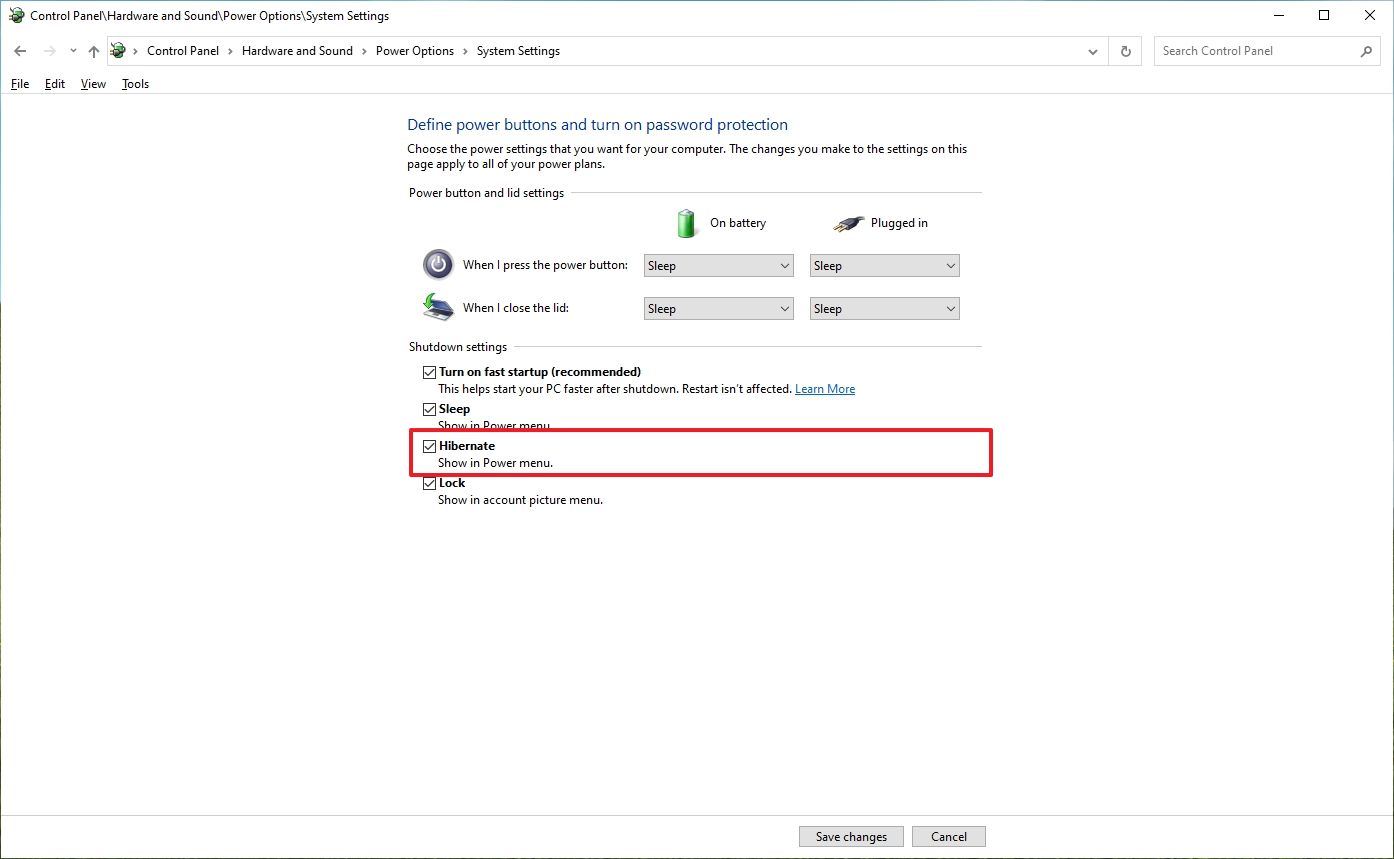
- Click the Save changes button.
After you complete the steps, the “Hibernate” option will be available in the Power menu in the Start menu, Lock screen, and Power-user menu (Windows key + X keyboard shortcut).
Customize power button to hibernate
To put your device into hibernation when pressing one of the power buttons or closing the lid, use these steps:
- Open Control Panel.
- Click on Hardware and Sound.

- Click on Power Options.

- Click the “Choose what closing the lid does” option from the left pane.

- Under the “Power and sleep buttons and lid settings” section, use the drop-down menu to allow your device to enter into the hibernation state when you press the power or sleep button, or when closing the laptop lid.
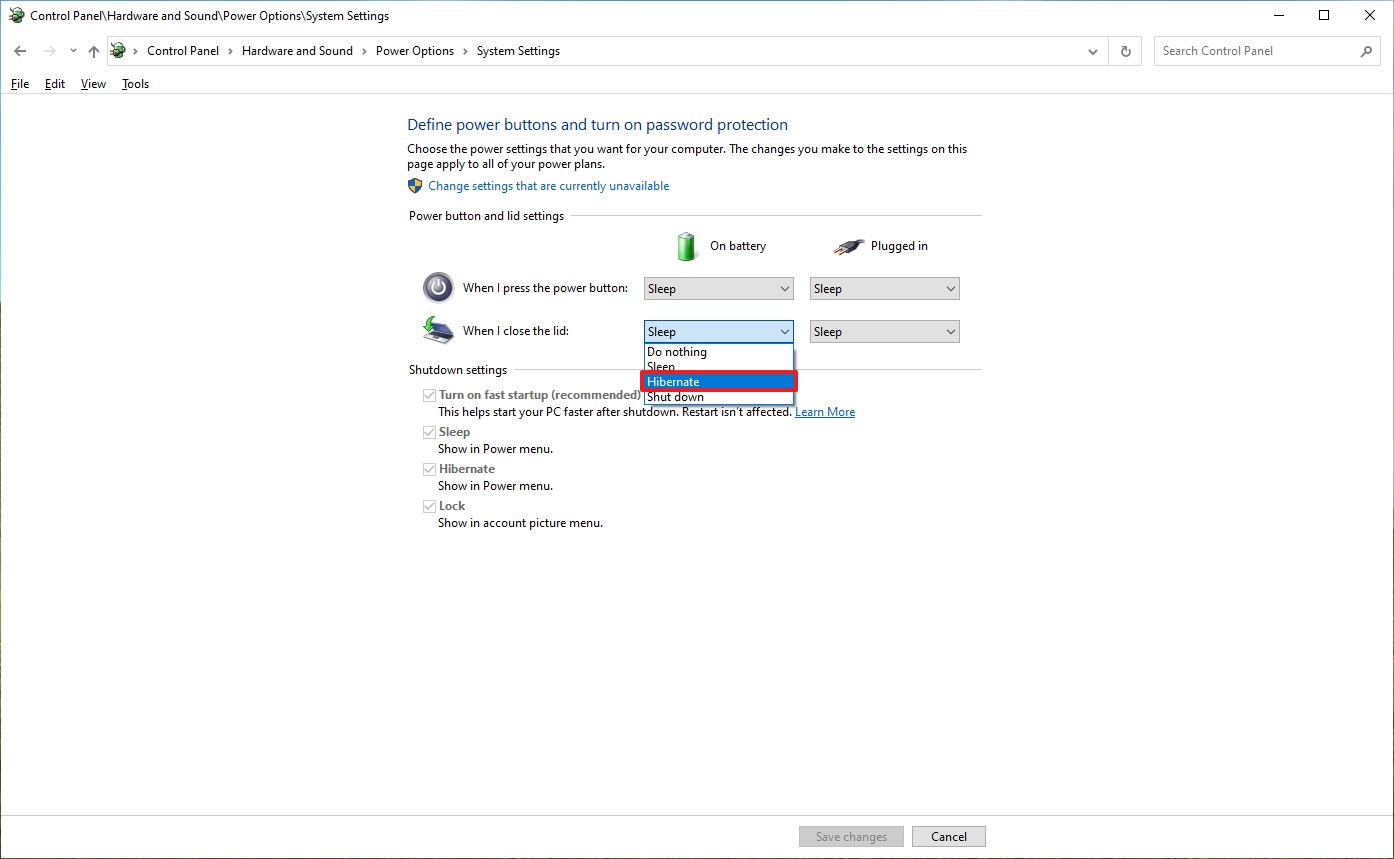
Once you complete the steps, your computer will enter into hibernation depending on your configuration.
How to configure hibernation settings on Windows 10
If you want to prolong battery as much as possible, you can adjust the power settings to allow your computer to hibernate automatically.
To change the hibernation timers on your computer, use these steps:
- Open Control Panel.
- Click on Hardware and Sound.

- Click on Power Options.

- Click the “Change plan settings” option under the current power plan in use.
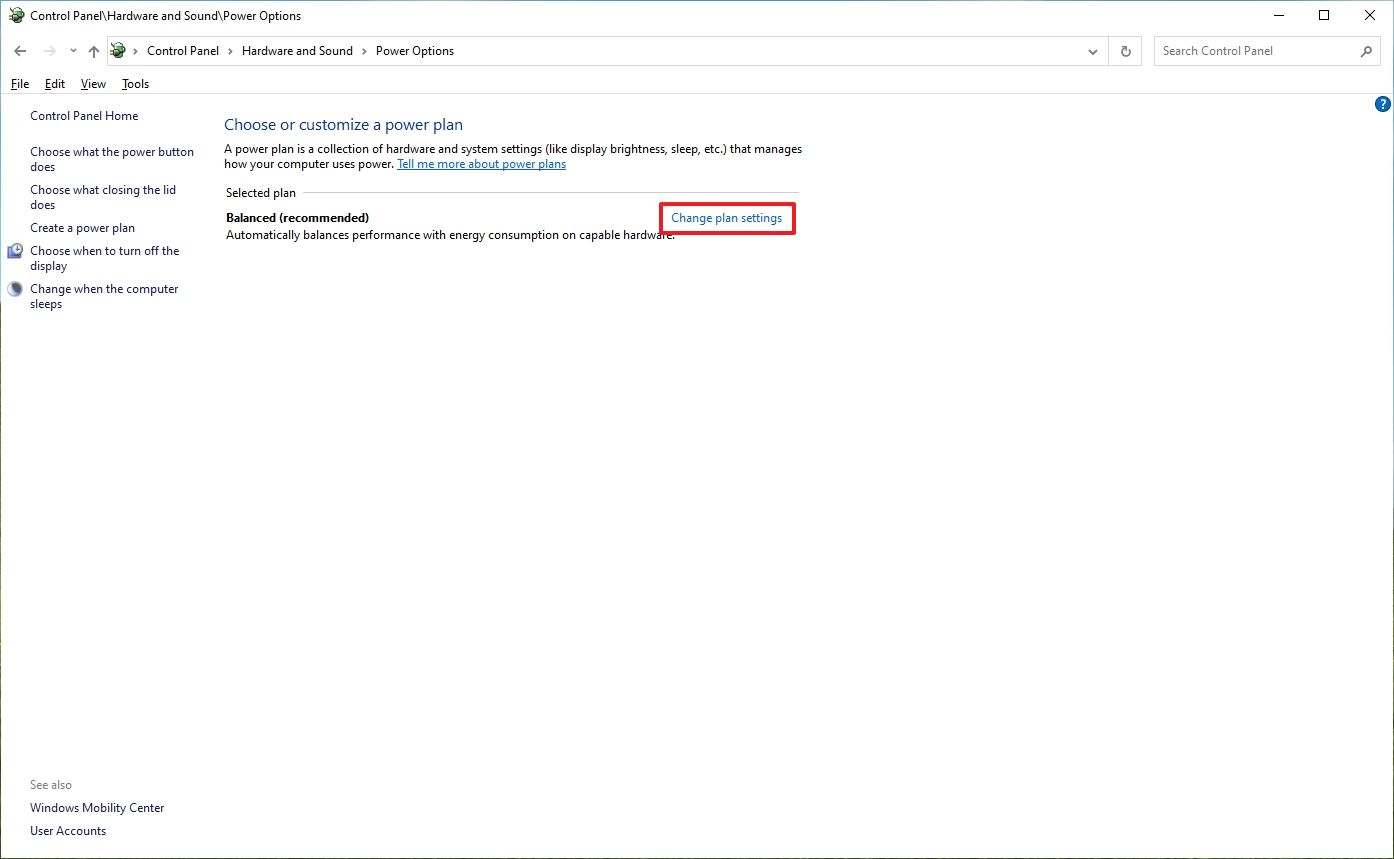
- Click the “Change advanced power settings” option.
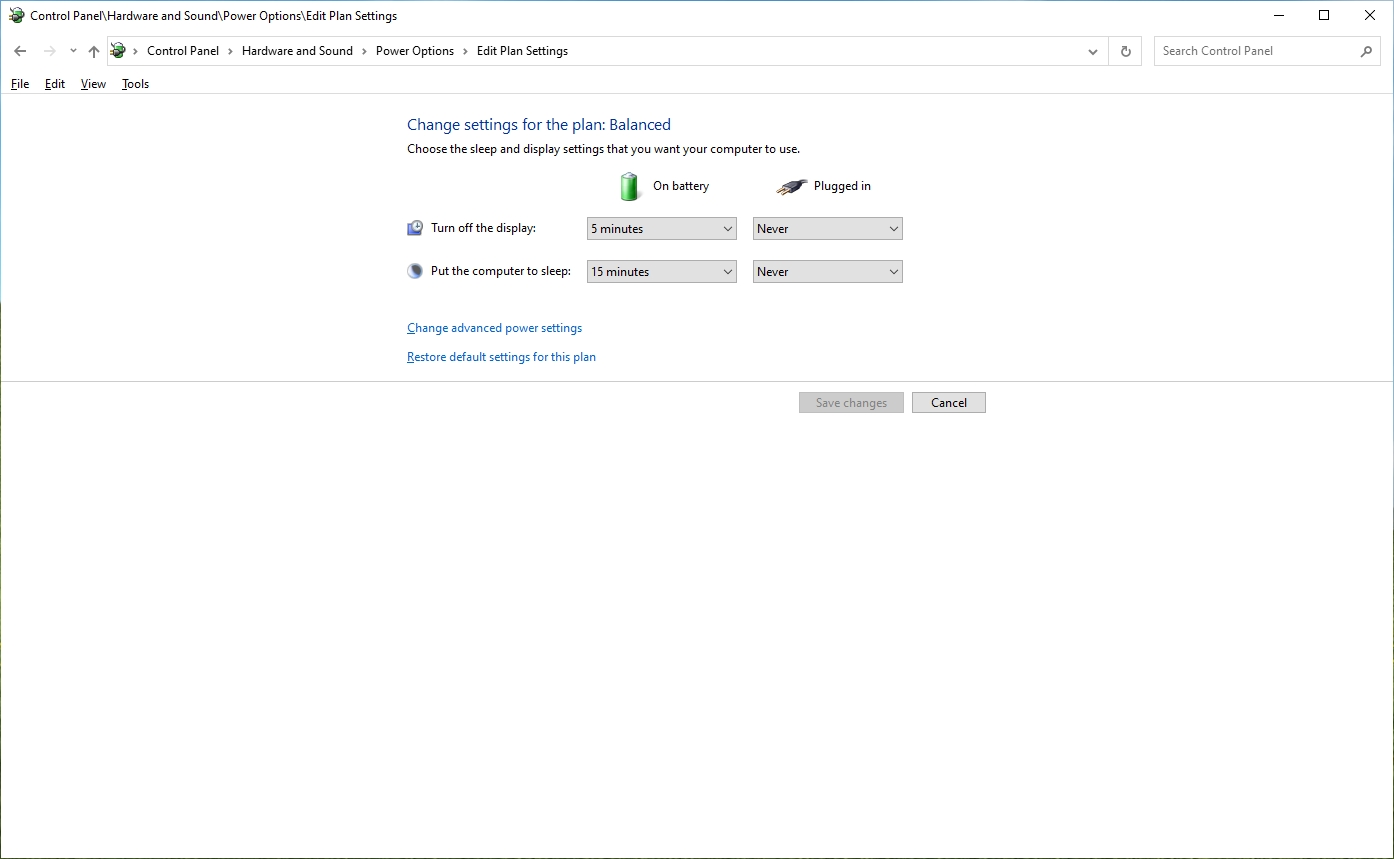
- Expand the Sleep branch.
- Expand the Hibernate after branch.
- Use the On Battery option to set the number of minutes before putting the device into a hibernation state when the laptop is running on battery.
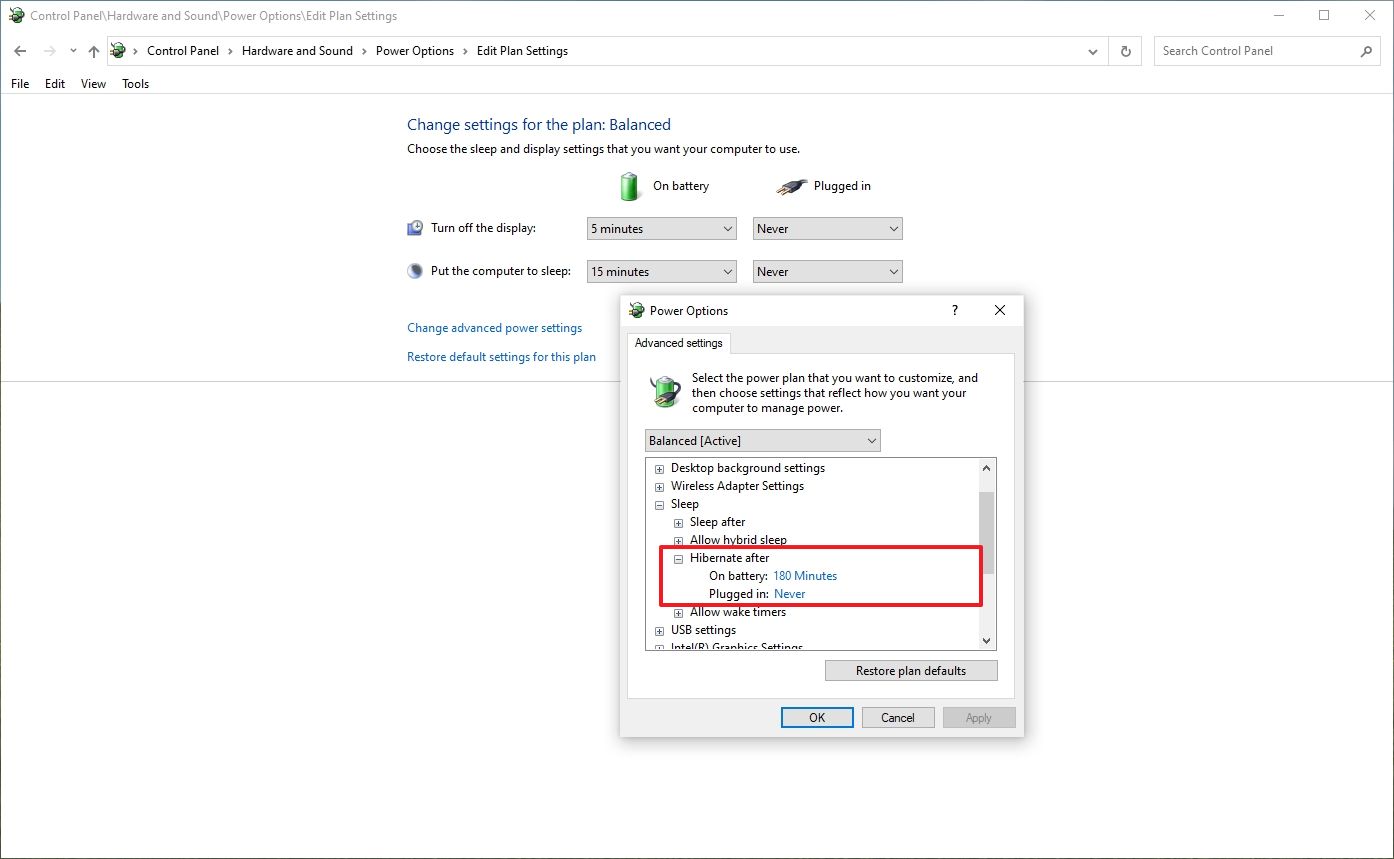
- Use the Plugged in option to set the number of minutes before putting the device into a hibernation state when the laptop is connected to a power source.
- Click the Apply button.
- Click the OK button.
After you complete the steps, your device should go into hibernation automatically after the specified time you configured.
Similar to previous versions, hibernation offers a reliable method to save battery life while preserving your session. However, it’s the option that takes the most time to process a shutdown and resume because it requires writing the content in memory to the hard drive to hibernate and writing the information back to memory upon resume.
If you want to save battery with the fastest resume time, perhaps the sleep option is the recommended method. However, you may lose unsaved work if your device loses power during sleep.
More resources
For more helpful articles, coverage, and answers to common questions about Windows 10 and Windows 11, visit the following resources:


