The reality of our device-rich world is this: You’ll sometimes have a phone or tablet that isn’t the same make as your computer. To make matters worse, you might have photos on your iPhone or iPad that you want to transfer to your Windows PC.
Apple and Microsoft don’t make this easy at times, but with the right tools, it’s a quick process to save your photos where you want them. Better still, you don’t have to rely on just one method. You can utilize both the cloud and good old-fashioned hardware to back up your photos.
How to download and install iTunes

While iPhones and other Apple devices have traditionally worked best within its ecosystem, Windows remains dominant in the desktop world. Apple realizes this, with iTunes still available on Windows PCs, acting as the hub for managing your Apple devices and content.
Hooking up an iPhone or iPad to your Windows PC isn’t as simple as plugging in the device. Many everyday tasks require iTunes, which includes a piece of software known as “Apple Mobile Device Support,” allowing your iPhone or iPad to communicate freely with your PC to communicate freely. This allows you to browse the device via the File Explorer, or instantly import photos and videos to your hard drive.
iTunes is available direct from Apple, but also via the integrated Microsoft Store (opens in new tab). We recommend that those with Windows 10 and Windows 11 visit the Microsoft Store app, providing an easier installation process, versus the traditional application.
Alternatively, you can download iTunes from Apple (opens in new tab) if you’re using a Windows version prior to Windows 10. Folks using older versions of Windows will need to install this version of the software, although it offers identical features.
How to transfer iPhone and iPad photos using File Explorer
Once iTunes is installed on your PC, Apple devices like the iPhone and iPad will be automatically detected when connected over USB. File Explorer is one of the simplest ways to extract photos and videos, directly connecting the device’s onboard storage.
Apple devices are often named NAME’s iPhone or NAME’s iPad, the NAME denoting the owner’s first name. Selecting the device through File Explorer will surface various files, including a DCIM media folder. Diving into the DCIM folder isn’t much different from a digital camera, with easy drag-and-drop access to files on your phone or tablet.
Transferring images from your iPhone or iPad is only a few clicks away through File Explorer, using the steps below.
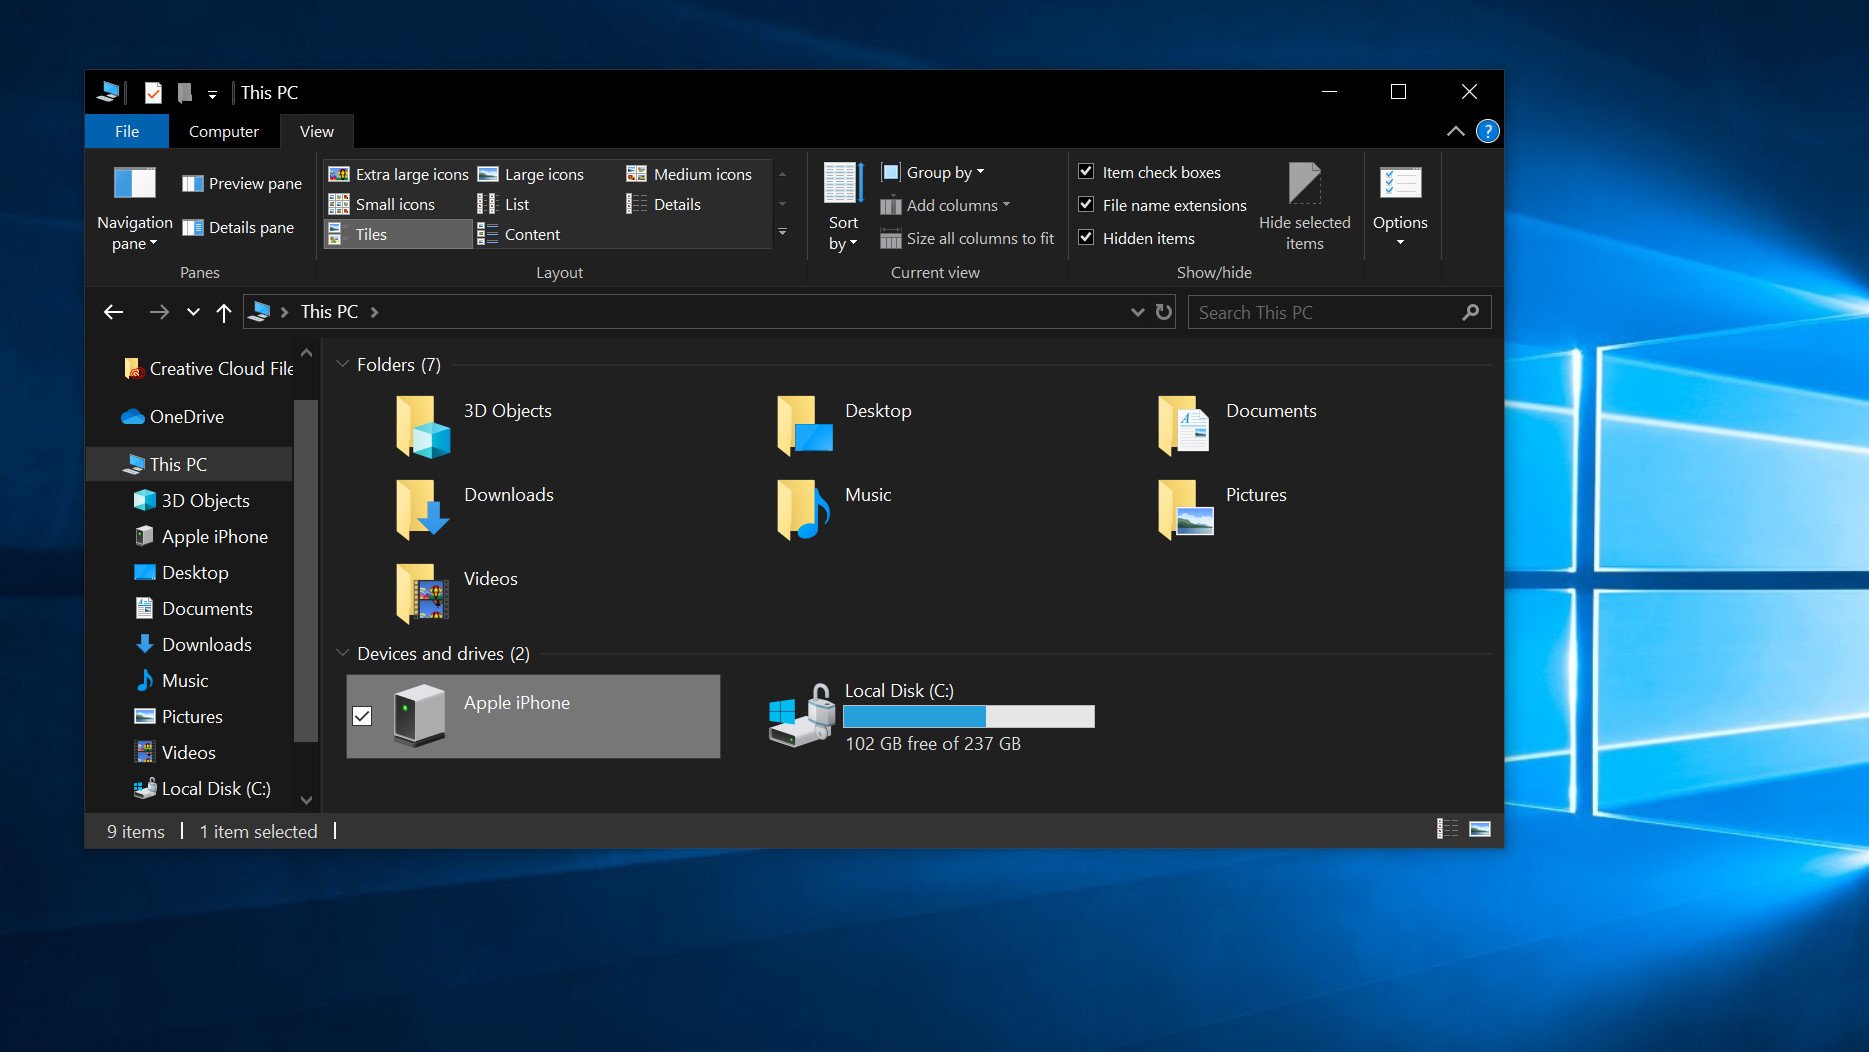
- Plug your iPhone or iPad into your PC using a suitable USB cable.
- Launch Windows Explorer from your desktop, Start menu, or taskbar. You can also use the Windows key + E shortcut on your keyboard.
- Click the arrow next to This PC in the menu on the left side of the window. The arrow looks like >.
- Click NAME’s iPhone or NAME’s iPad in the This PC sub-menu.
- Double-click Internal Storage.
- Double-click DCIM.
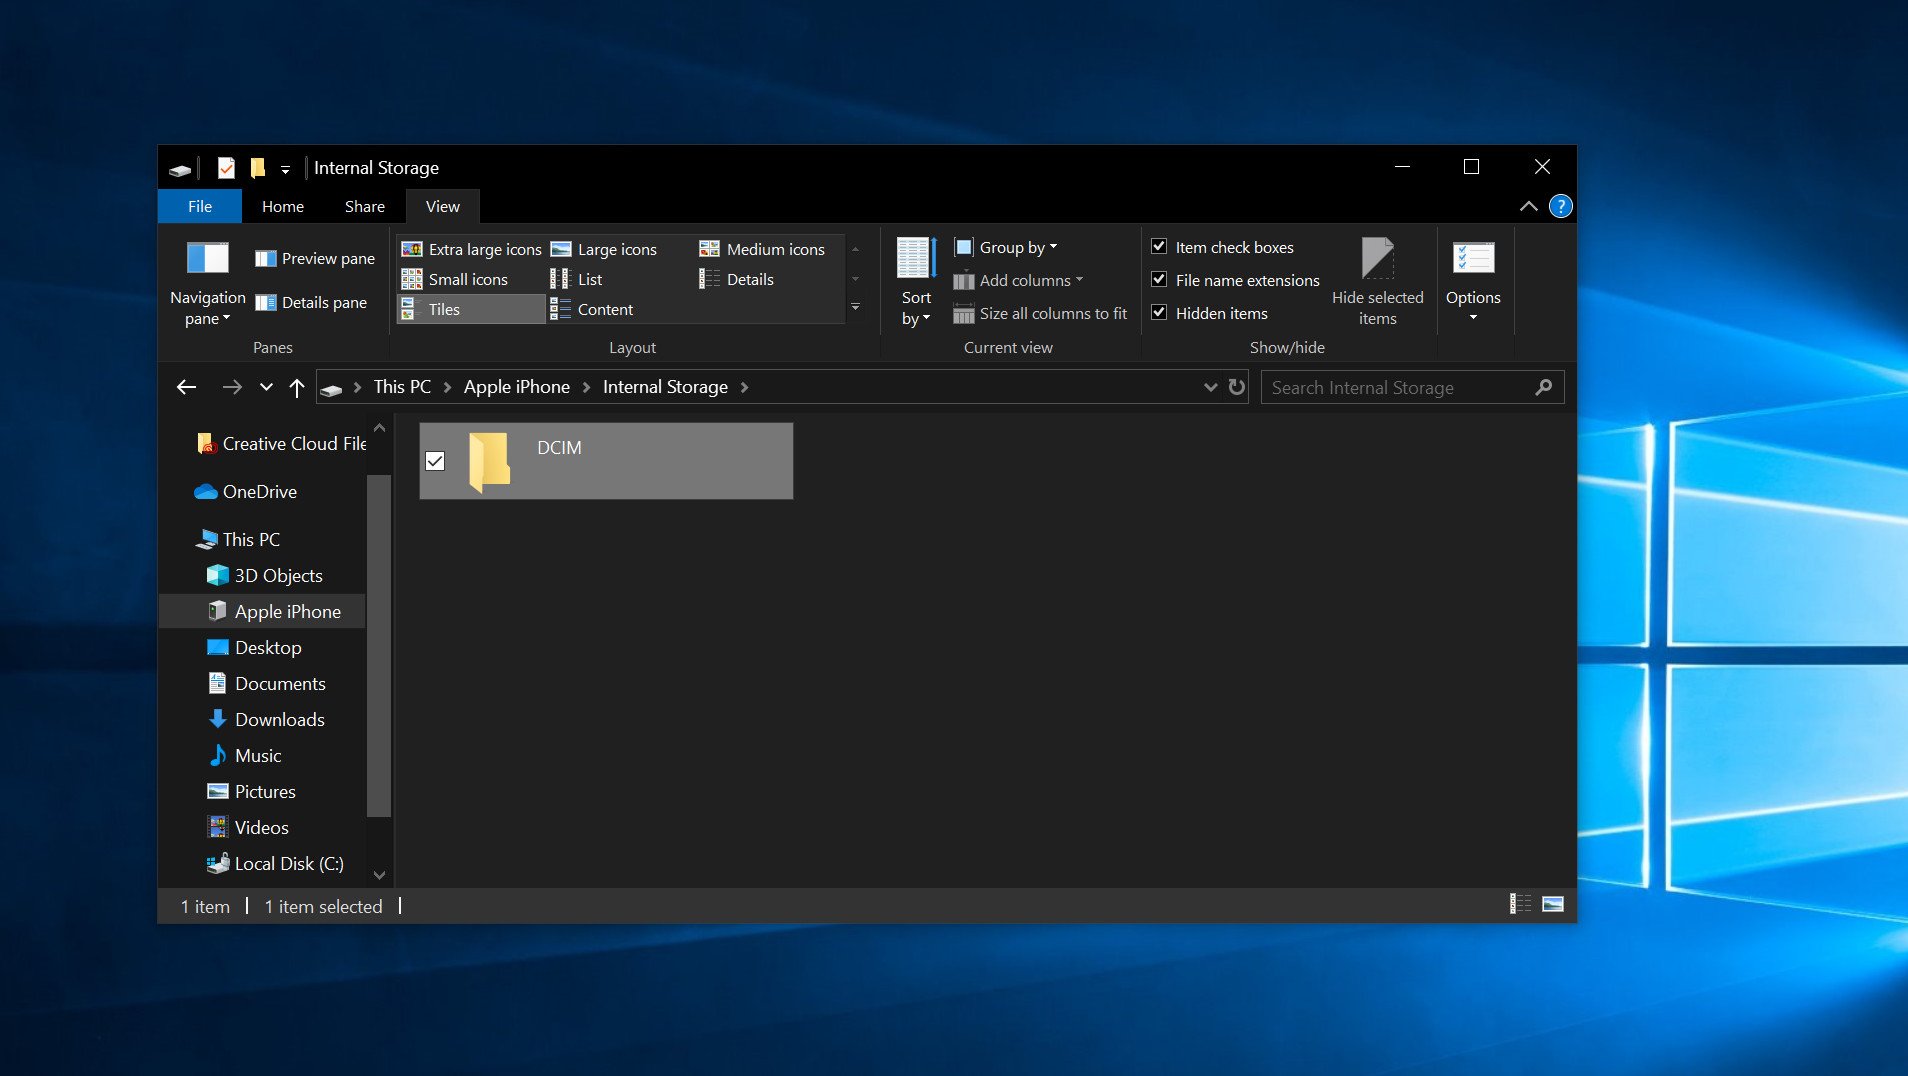
Now, you can begin the process of selecting the photos you want to copy from your Apple device to your PC.
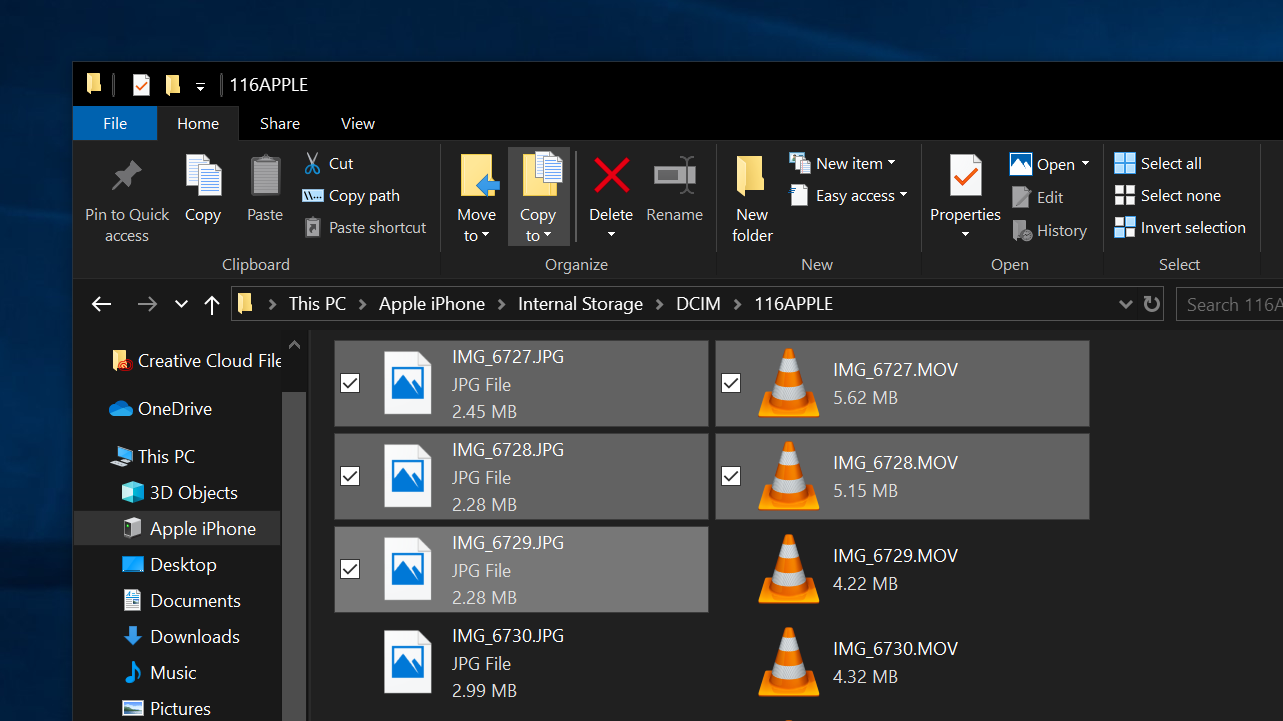
- Double-click a folder. They should all contain images.
- Click an image. You can hold the Ctrl key on your keyboard and click to select multiple images. You can also use the Ctrl + A shortcut on your keyboard to select all photos at once.
- Click Copy to — it is located near the top of the window.
- Click Choose location… to select a location. You can also click one of the options listed in the dropdown menu.
- Click a destination to save the pictures.
- Click Copy. Make sure you don’t unplug your iPhone or iPad during the process!
How to transfer iPhone and iPad photos using the Windows Photos app
Windows also ships with a dedicated Photos app, ideal for viewing and editing photos through a slick, easy interface. It also allows you to import photos from iPhones and iPads in bulk, providing a one-click solution to move all your photos to your PC.

- Plug your iPhone or iPad into your PC using a suitable USB cable.
- Launch the Photos app from the Start menu, desktop, or taskbar.
- Click Import. It is located in the top-right corner of the window.
- Click any photos you’d like to not import; all new photos will be selected for import by default.
- Click Continue. The Photos app will begin the import process. Make sure you don’t unplug your iPhone or iPad during the process!
How to transfer iPhone or iPad photos using iCloud
Windows 10 also supports Apple’s iCloud storage service, allowing iPhone and iPad users to wirelessly pull photos and videos from their accounts over the internet. Unlike transfers over a USB cable, you don’t need to install iTunes and dig around in local files.
Syncing photos via iCloud only requires the standalone iCloud app available via the Microsoft Store and Apple, offering the option to automatically sync content uploaded using the same Apple ID. While you might need to pay for extra iCloud storage when transferring media in bulk, it’s a hassle-free way to import iPhone and iPad photos without the wire.
- Launch the Microsoft Store from the Start menu, taskbar, or desktop.
- Search for iCloud (opens in new tab) in the Microsoft Store.
- Click Get. ICloud will now download to your PC.
- Click Launch once the download is complete.
- Type your Apple ID.
- Type your password.
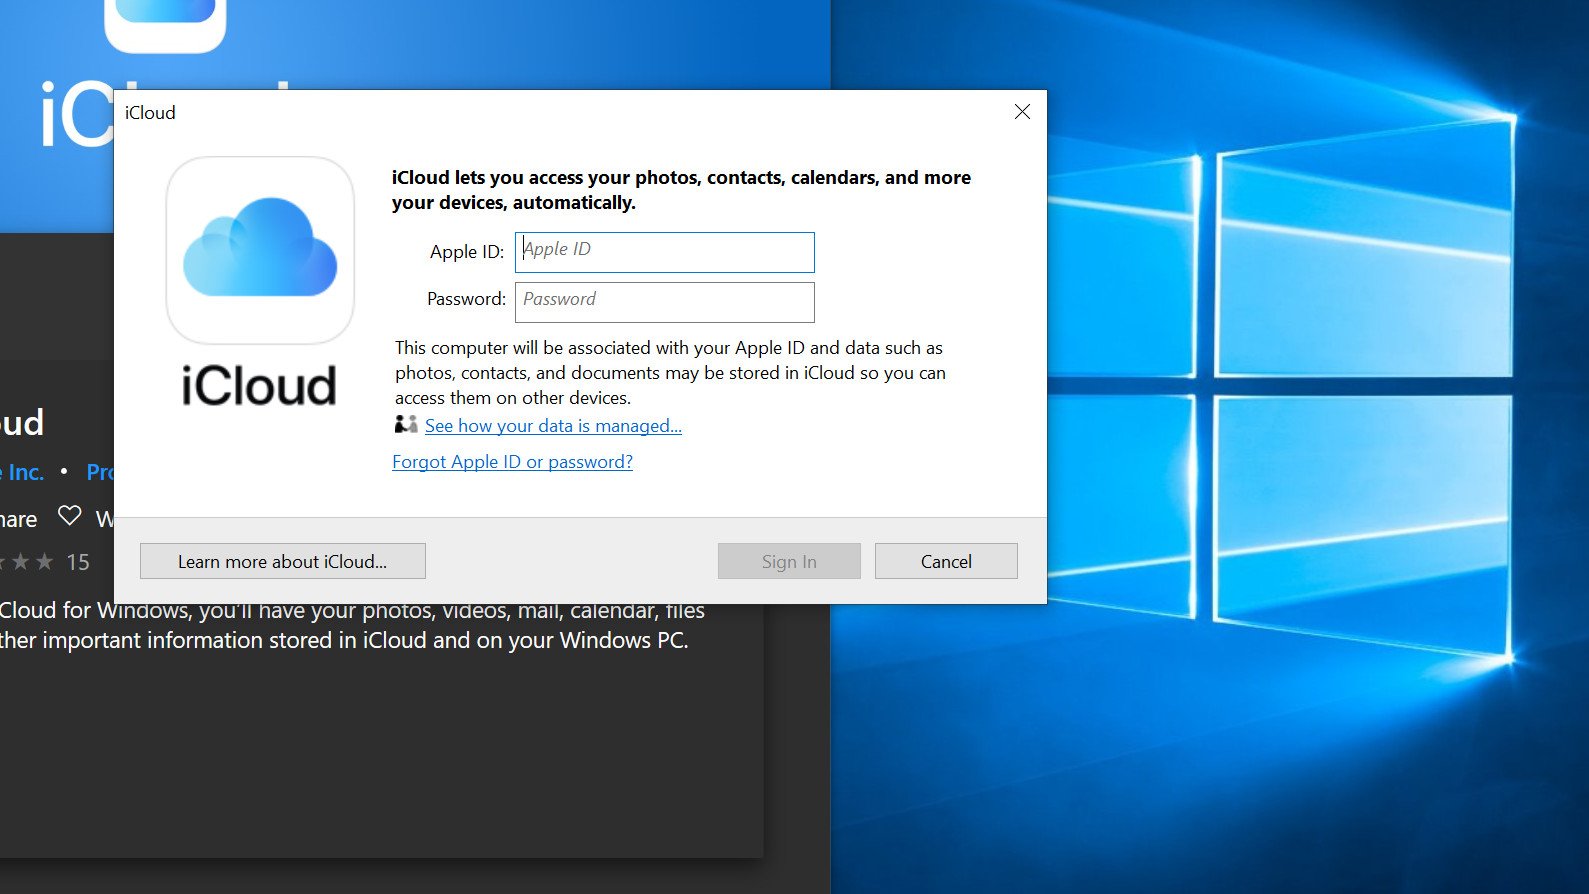
- Click Sign In.
- Click the Options button next to Photos.
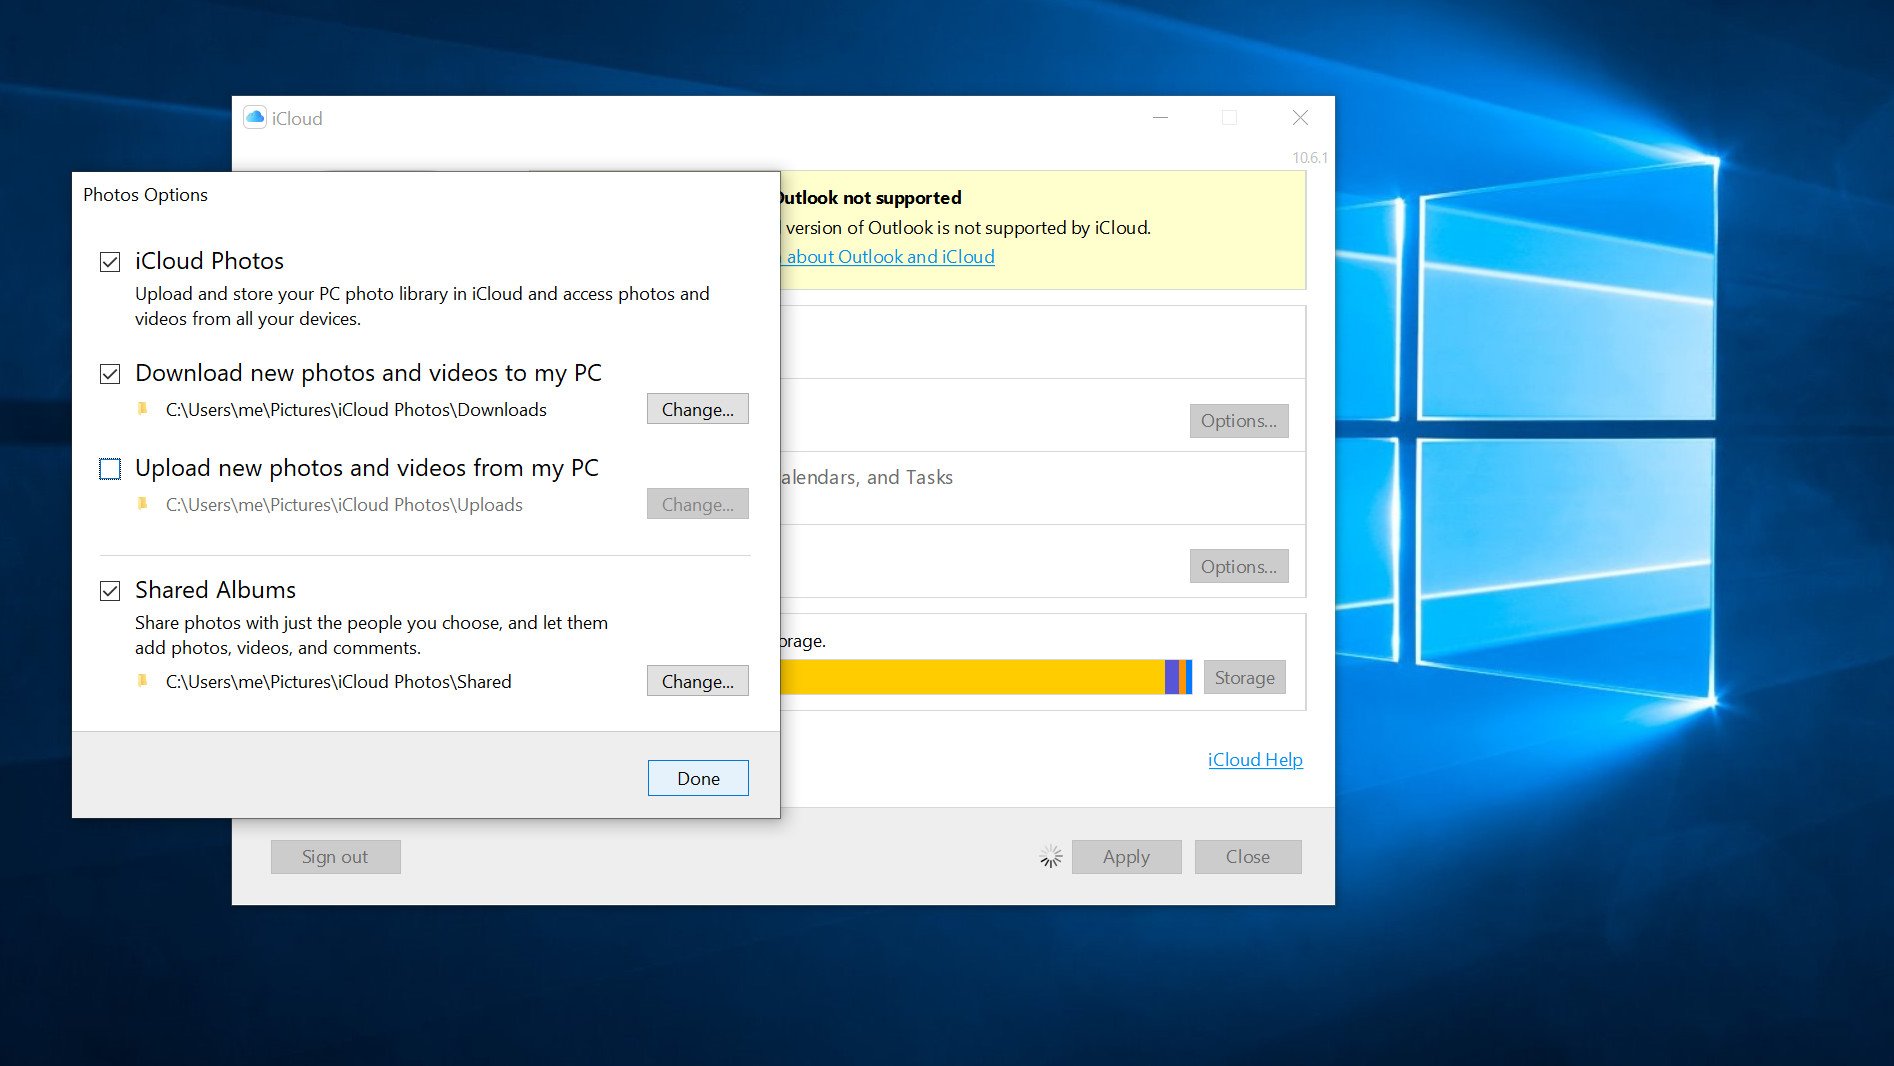
- Click the box next to iCloud Photos so that a checkmark appears.
- Click the box next to Upload new photos from my PC so that the checkmark disappears. You can set these options how you’d like, but this ensures you’re just getting the photos off your iPhone or iPad onto your PC.
- Click Done.
- Click Apply. Any photos in your iCloud will now download to your PC.
Alternatively, you can download iCloud from Apple (opens in new tab) if you’re using a Windows version prior to Windows 10. Folks using older versions of Windows will need to install the traditional application, although it offers identical features.


