Even simple things like file management can be frustratingly complicated in Windows 10 and Windows 11.
With its nested file system and hundreds of menus, functions, and folders, Windows is a highly complex organism. All your installed applications add yet another layer of headaches. If you want to work quickly and efficiently within Windows, you’ll need to optimize it to fit your way of working. Fortunately, Microsoft’s operating system is by no means rigid—on the contrary, it can be quite adaptable. This applies not only to the design, but also to basic operation.
Enter this guide. We’ll show you a handful of tricks, hidden functions, and additional software that will make your everyday Windows PC life much easier. For even more ease-of-use help, be sure to check out PCWorld’s guides on how to make Windows 11 look like Windows 10 and 8 ways to ease eye strain in Windows.
This article was translated from German to English, and originally appeared on pcwelt.de.
Organize your Windows desktop
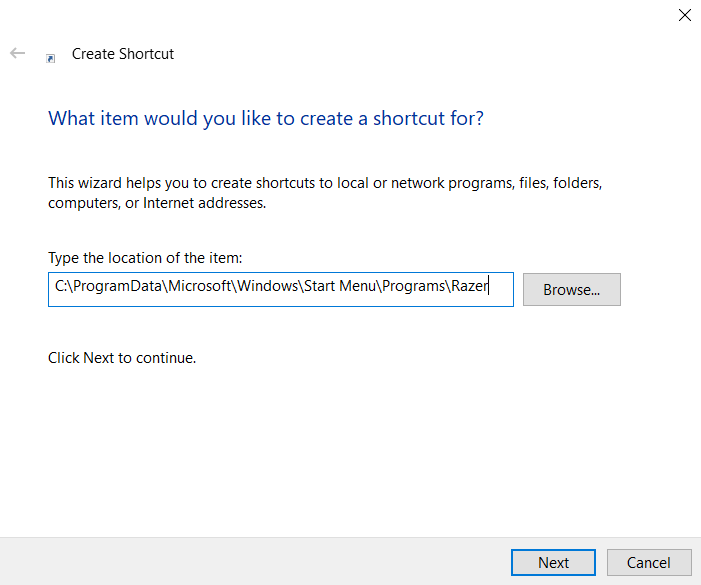
For frequently used programs, it’s worthwhile to create a shortcut on the desktop. Then you can quickly start the software you are looking for by double-clicking the icon on the Start screen.
Sam Singleton
The desktop is not just a colorful palette to display the programs and functions on your computer. Used correctly, it is an effective tool for organizing work.
For example, it’s advisable to create links to all applications that you regularly use on the desktop so that they’re always easily accessible. You have two options for this. First, you can right-click on a free area of the desktop, select New > Shortcut, browse to the path of the EXE file of the program you want to create a shortcut for, then complete the process by entering a name and clicking on Finish.
This works just fine, but an even easier way exists. Locate the EXE file of the application, right-click on it, and select Show more options [Windows 11 only] > Create shortcut. A message will say that you cannot create a shortcut at this point and asks if you want to create the shortcut on the desktop instead. If you click on Yes it’ll create the program icon on the desktop. (The same process works with other files such as documents you’re working on.)
Over time, your desktop may fill up with more and more icons. To help keep them in order, you can arrange them into folders. Right-click on a free area of the desktop, select New > Folder and give it a recognizable name (such as “browsers,” “Office programs,” or “work projects”). Now drag the appropriate files into the folder with the mouse.
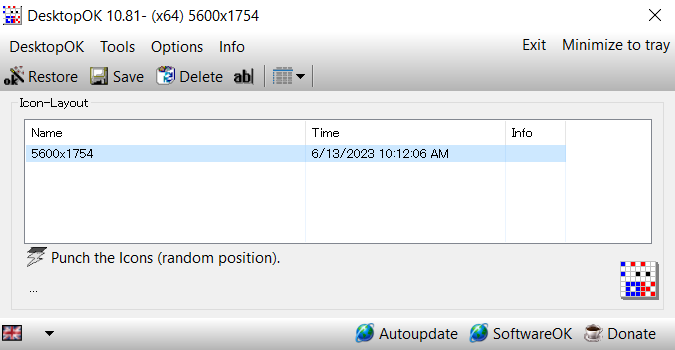
The freeware DesktopOK saves the icon arrangement at different screen resolutions and restores it if necessary. This also works on other computers with a file transfer.
Sam Singleton
If you want even more options for tweaking your desktop, a free application called DesktopOK provides additional possibilities. This freeware lets you save the arrangement of icons on your desktop with just the click of a mouse. If the icons have moved, you can return to your original saved state at any time with DesktopOK. The tool also accommodates different screen resolutions so you can immediately continue working as usual if you upgrade your monitor or add a second display. You can even save icon arrangements and load them on other PCs.
Load up the Windows taskbar
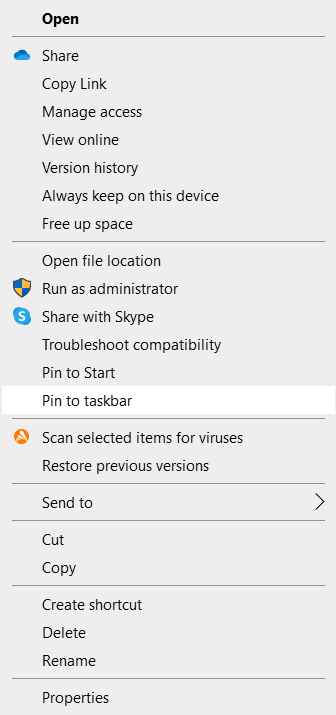
Another way to make your programs easily accessible by placing them in the taskbar. It’s always visible and thus great for quick access. Either drag-and-drop a program link from the desktop or an EXE file from File Explorer onto the bar at the bottom of the screen, or right-click on the program and select Show more options > Pin to taskbar in the context menu.
Sam Singleton
Unfortunately, adding file shortcuts to the taskbar is not as easy. But a trick can get it to work. Right-click on the file in Explorer and go to Show more options > Create shortcut. Then right-click on the new shortcut and select Properties. In the Destination field, write the word Explorer in front of the path, followed by a space. Click on Other icon and select an icon for the file if desired (Windows will insert the Explorer icon by default) and click OK. Finally, right-click the shortcut and go to Pin to taskbar.
Of course, the Start menu is also a suitable area to create links for frequently used applications. To place software onto the Start menu, right-click a program shortcut on the desktop or an EXE file in Explorer and select Show more options > Pin to Start.
Tip: After clicking on All Apps, Windows presents you with a long list of installed programs in the Start menu. To get to a specific application quickly, click on the letter “A” at the top and in the next window, then click on the first letter of the desired software’s name.
Make Windows easier to actually use
Windows has an extensive range of functions that make it easier for people with visual impairments to use the operating system (though these options can also greatly help usability on pixel-packed 4K displays). Several of these options are grouped together in the Settings app under Ease of Access. For example, you can activate speech output, which reads out the text in the active window. Under Text size you will find a slider to improve the font display. (Unfortunately, it has no effect on the icon names.)
You can simply enlarge the desktop icons by pressing the Ctrl key while the desktop is active and turning the mouse wheel. The mouse pointer can also be enlarged; you’ll find the settings by searching for “Change mouse pointer size.” That said, the universal tool for reading small, poorly visible text and viewing details is called Magnifier. Make sure that Smooth image and text edges is activated in the options that appear.
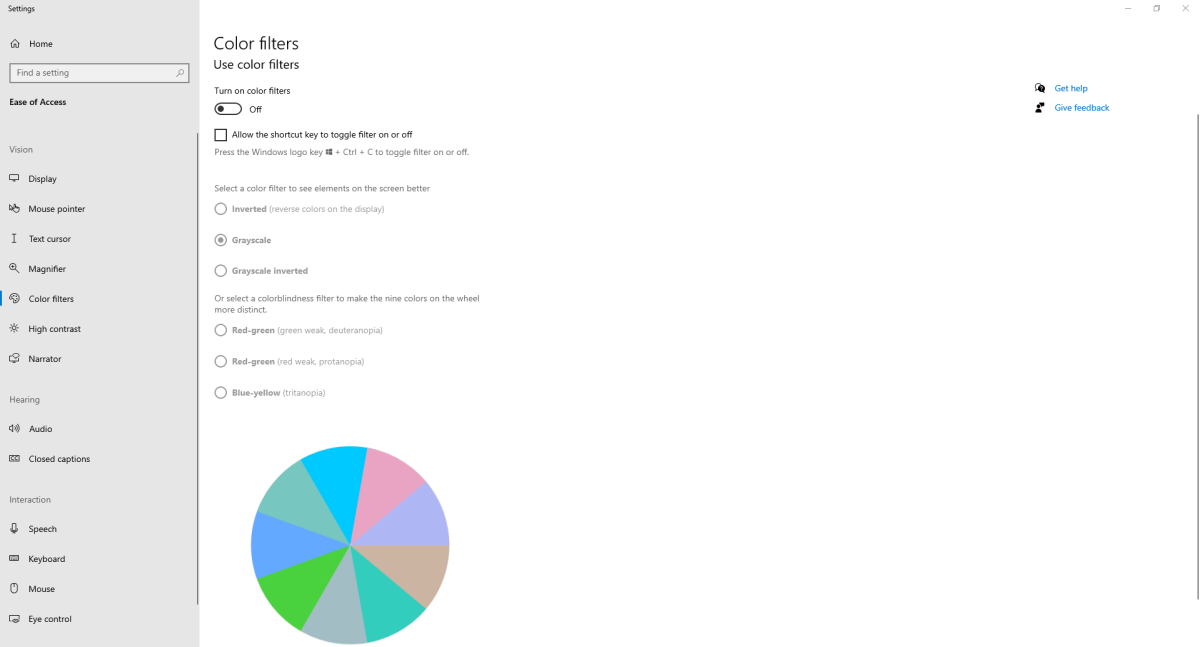
For people who have difficulty distinguishing individual colors, Windows offers a range of color filters.
Sam Singleton
People who have difficulty distinguishing between individual colors and have a red-green deficiency, for example, will find a way to adjust the Windows display accordingly under Color filters. Under Contrast Designs, on the other hand, you can set the desktop to maximum contrast.
In the Mouse section of the Ease of Access settings, you’ll find an option to control the mouse pointer completely via the numeric keypad on your keyboard. Alternatively, in the Keyboard section, you can activate the Windows on-screen keyboard and type using mouse clicks, instead. The Speech section can activate built-in speech control for hands-free operation.
For people with hearing problems, Windows offers to translate system sounds into graphic signals. You can turn on “Show audio alerts visually” in the Hearing section of the Ease of Access settings.
Adapt File Explorer for fast everyday work
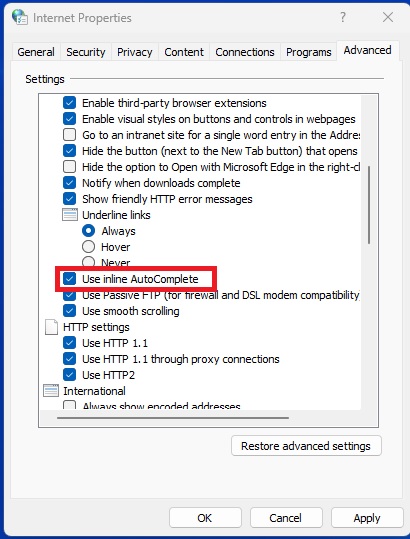
In the browser settings of Windows you will find a hidden option that activates autocomplete for quick folder searches in Explorer.
Foundry
Even working with File Explorer can be optimized. To ensure that you immediately land in a frequently used folder after opening Explorer, you need a special shortcut: right-click on the desktop and then on New > Shortcut. Enter the command: %windir%\explorer.exe C:\Temp as the path, for example, to open the folder C:_ Temp. (The exact file path can be replaced with the location of your choosing.) Give the shortcut a recognizable name such as “Temp Directory” and click on Finish. You can now copy this shortcut to the taskbar and the Start menu as described above.
You can also work faster with File Explorer if you switch on the auto-complete function. It’s located in a place where you would never expect it—in the settings of Internet Explorer. Yes, seriously. Although IE is no longer included in Windows 11, the settings still exist and now refer to the more modern Edge browser. One of the options also controls the auto-complete function of Explorer.
Click on the search box in the taskbar, type inetcpl.cpl and select result for Control Panel item. This opens the Internet Properties window. Switch to the Advanced tab, set a check mark next to Use inline AutoComplete and confirm with OK. If Explorer was open, close and restart it. Enter the first letter of the desired folder in the input field. The Explorer will now immediately present you with a list of possible folders. By entering additional letters, you can further filter the selection.
File Explorer’s search function can also be improved. It already offers dozens of options to search for files and can also search for file contents in Word documents, for example. However, it’s slow and awkward to use. The superb Everything works considerably faster. This long-beloved freeware does not have a desktop search function, so it cannot look inside files. When searching for file names, however, it delivers suitable results almost immediately, after performing an initial index when you set up the program.
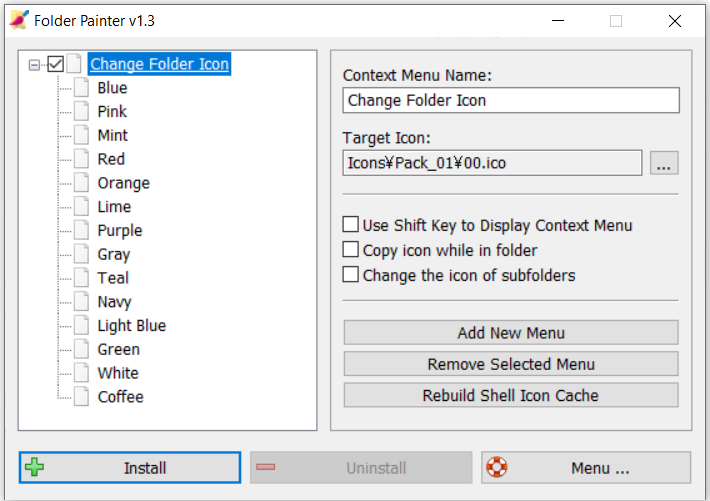
Folder Painter offers to color the folders in Explorer with one of 14 colors.
Sam Singleton
Moving on, Windows displays (almost) all folders in the same yellow color. Only a few cases, such as the sync folder of OneDrive, use a different-colored symbol. With Folder Painter, however, you can design a color-coding system for your directories and, for example, mark download directories in red and work folders in blue. This often makes it easier to find the folders you’re looking for. Folder Painter is even intelligent enough to automatically display hidden folders in a paler shade. During installation, the tool sets itself in the context menu of File Explorer. If you then right-click on a folder and go to Show more options [Windows 11 only] > Change folder icon, you can choose from among 14 different colors.
Microsoft traditionally relies on the single-window technique for Windows Explorer, which makes copying and moving files unnecessarily cumbersome and confusing. Sure, it’s true that you can open another Explorer window without any problems, or use Windows 11’s new (sadly inadequate) Explorer tabs. But it’s better to use third-party tools that feature two windows right from the start, such as Double Commander. This file manager also offers other helpful functions such as tabs for quickly switching between drives and a viewer for different file types.
Activate more mouse functions with manufacturer software
Many modern computer mice have more than just two buttons and a scroll wheel. Special gaming models offer seven or eight buttons that can be assigned different functions or macros. But mice for office workstations also often have four or more buttons. You can assign predefined functions or a key combination to the keys using the driver software provided by the mouse’s manufacturer. Using these tools, many Windows can be carried out more quickly and easily.
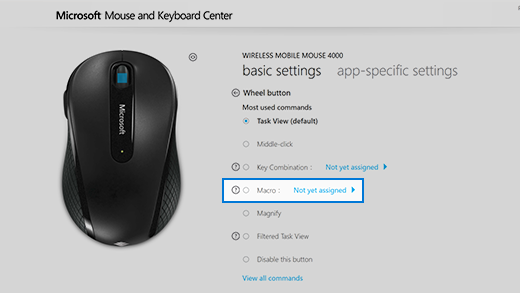
With the Microsoft Mouse and Keyboard Center, you can assign functions, macros, and key combinations to the keys of your mouse.
Microsoft
Microsoft provides the Mouse and Keyboard Center for its mice. With this software, you can, for example, show and hide the Windows desktop, call up the Start menu and the Settings app, or execute a macro at the touch of a button. Logitech’s counterpart is called Logitech Options. Be aware, though, that both programs usually only work with mice from the respective manufacturer.


