Quick Links
With Windows 11’s minimal File Explorer design, Microsoft sacrificed a lot of useful features found in the old Windows 10 ribbon-style File Explorer. There are some ways you can still use that old File Explorer inside Windows 11.
Access the Old File Explorer from Control Panel
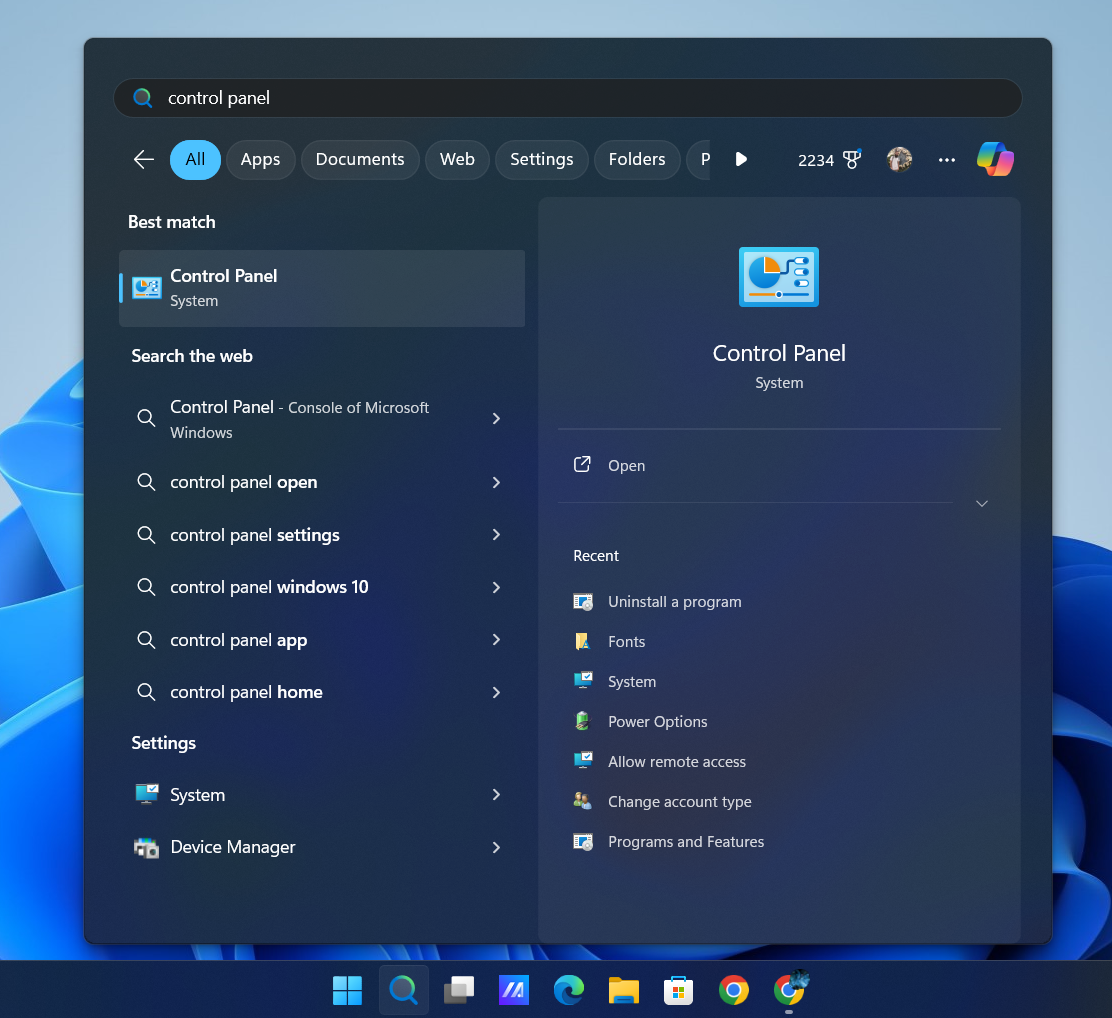
The quickest way to access Windows 10 File Explorer is through the Control Panel. Go to Search and enter Control Panel, then go to the top result.
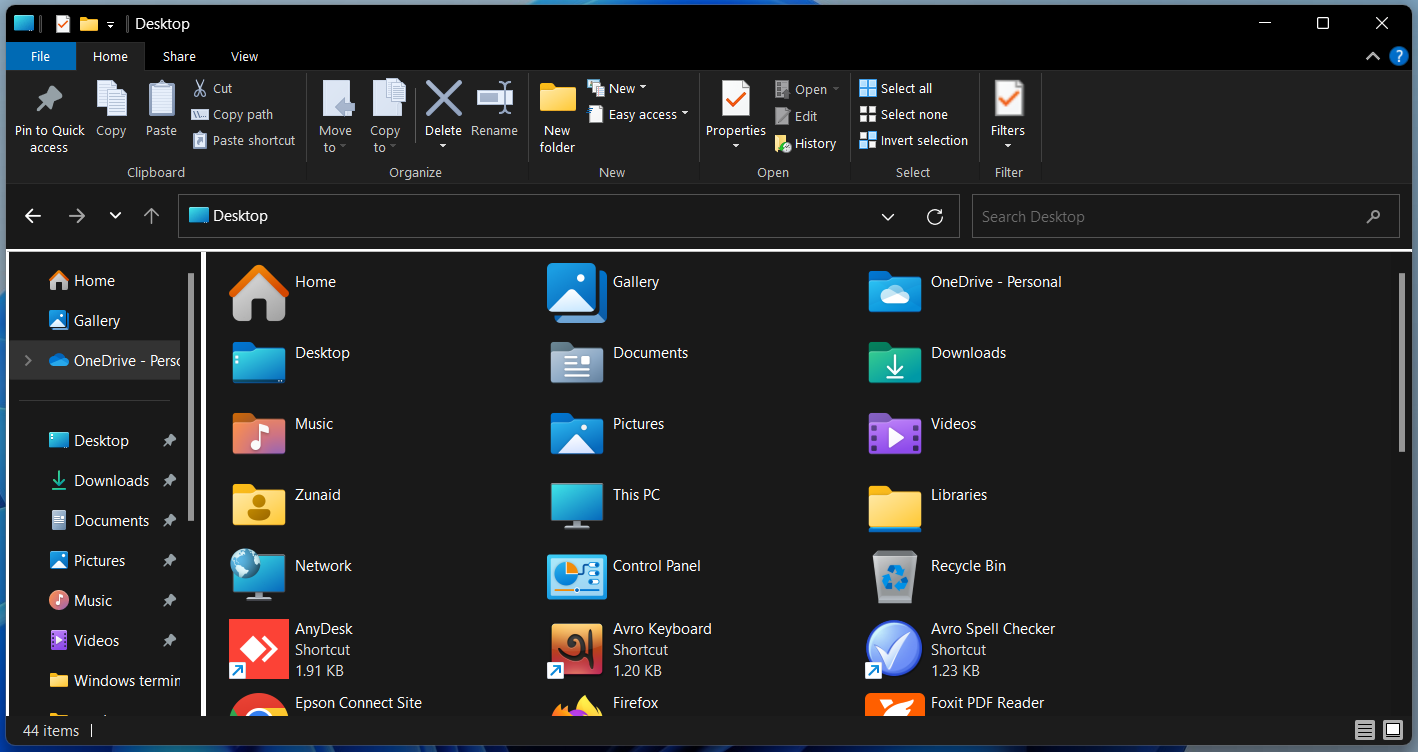
Press the up arrow button repeatedly. Alternatively, hit Alt+Up Arrow on your keyboard.
You’ll arrive in the File Explorer. Interestingly, it’s Windows 10 File Explorer.
You can explore different drives and folders. The Windows 10 File Explorer will remain as long as you continue surfing inside this window. However, once you exit the window and open a new window as you usually do, it will go back to the Windows 11 File Explorer.
So, this isn’t a permanent solution, nor is it convenient to open the Control Panel whenever you’d like to use the old File Explorer. That’s where ExplorerPatcher and StartAllBack, two handy tools, will help you.
Use ExplorerPatcher to Bring Back Windows 10’s File Explorer
Third-party tools that modify the user interface like this often break with major (and sometimes minor) updates to Windows. This won’t damage your PC, but it might mean you have disable or uninstall it until it is patched to handle the latest Windows release. You shouldn’t use it on a PC you rely on for daily work.
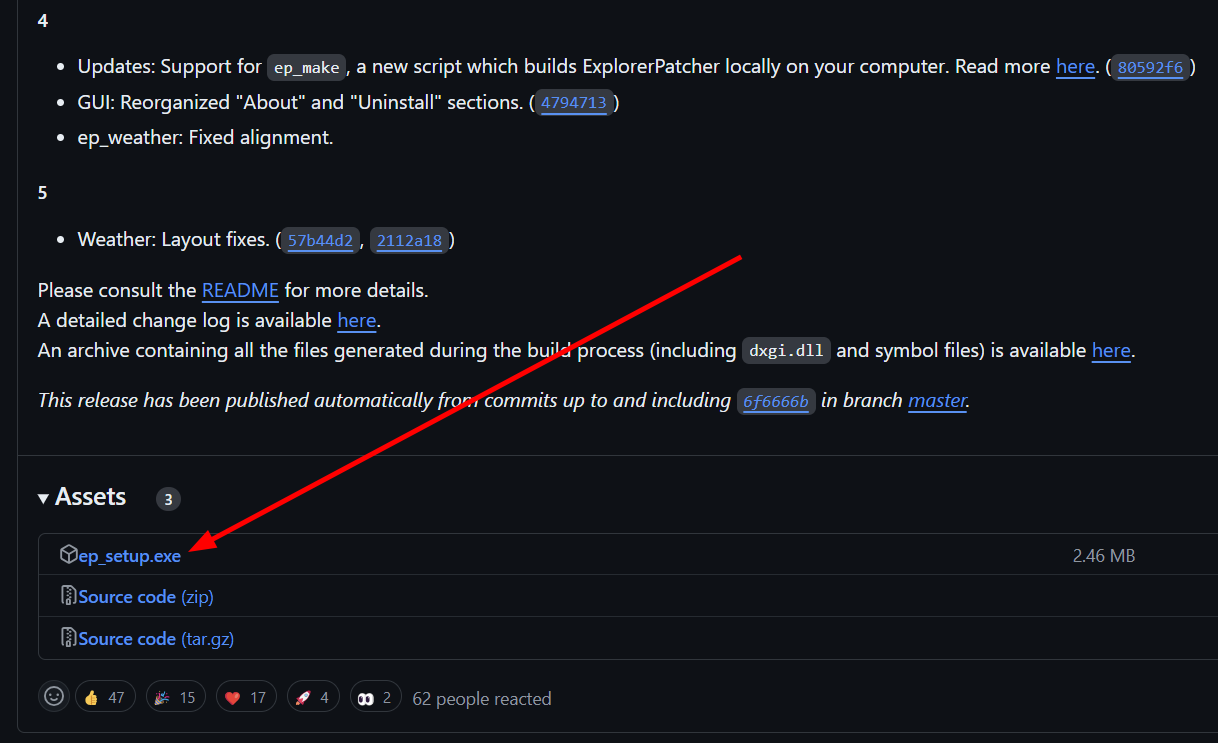
ExplorerPatcher is a neat tool that lets you switch between Windows 10 and 11 working environments. You can customize the Taskbar, System tray, Start Menu, File Explorer, and more. From the GitHub repository, grab the EXE file from the latest release.
Installation is straightforward. Open the setup file and it will be installed automatically. Since there’s no GUI installer involved, the only way to know it was installed successfully is by noticing the change in the elements of your Taskbar.
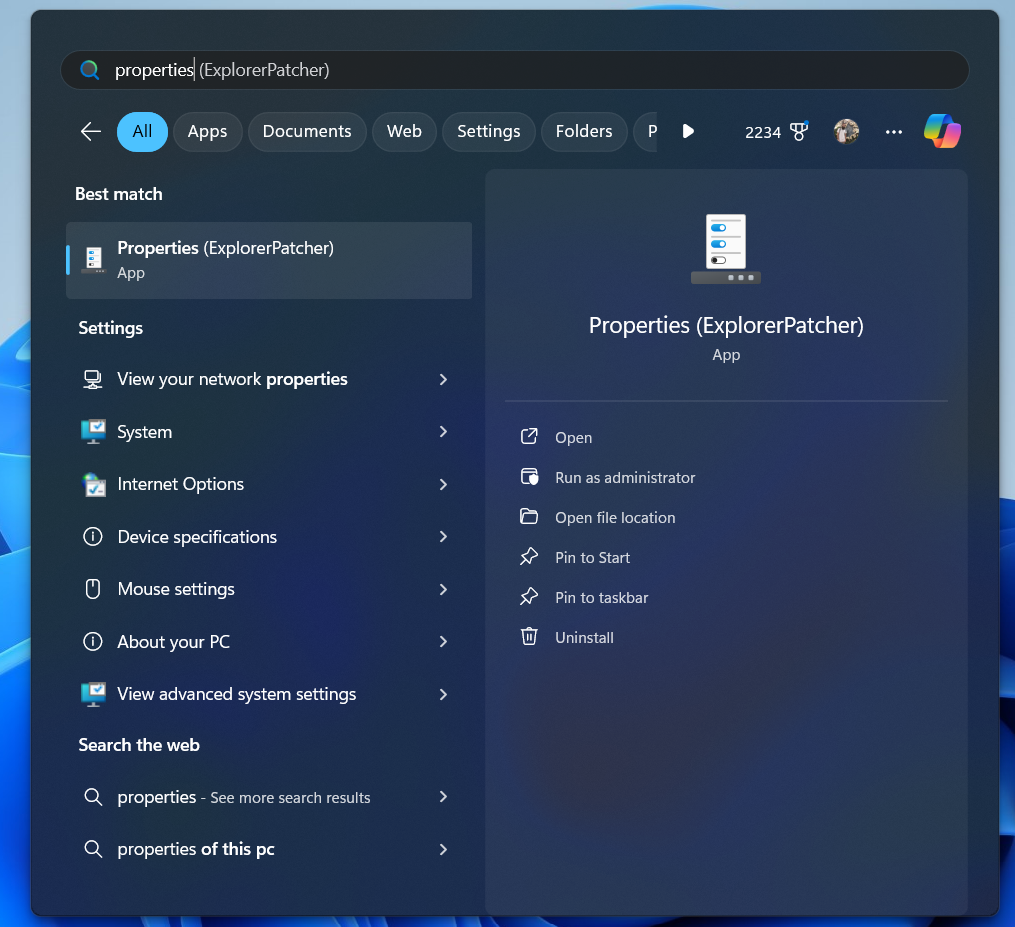
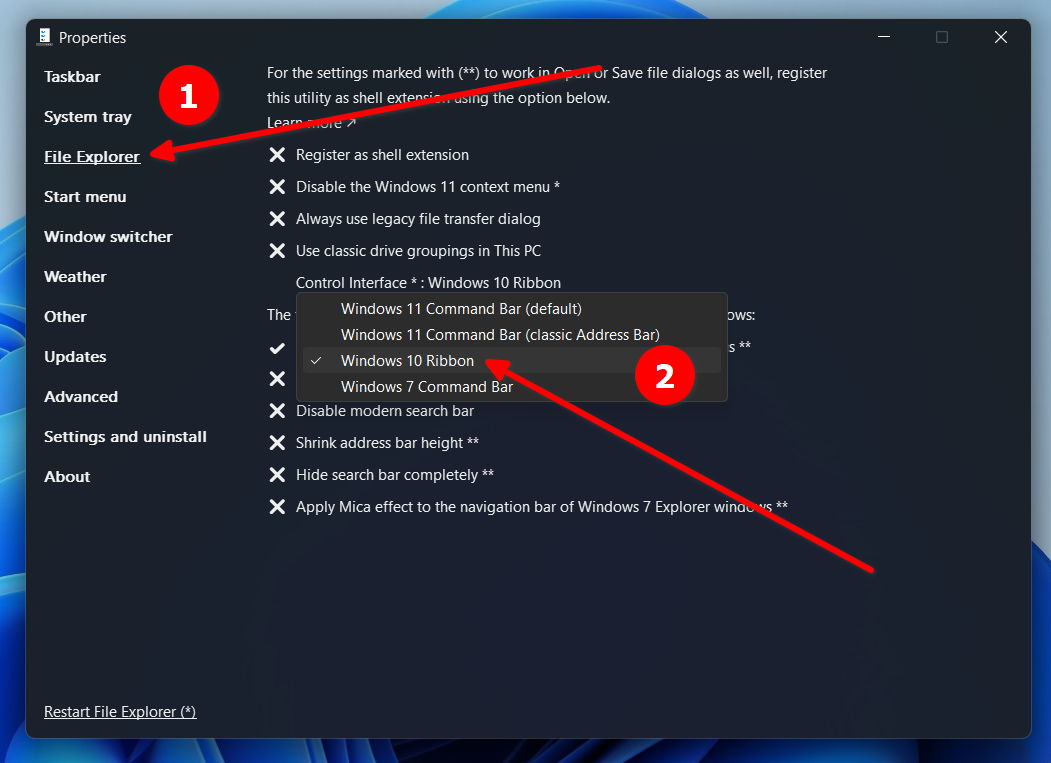
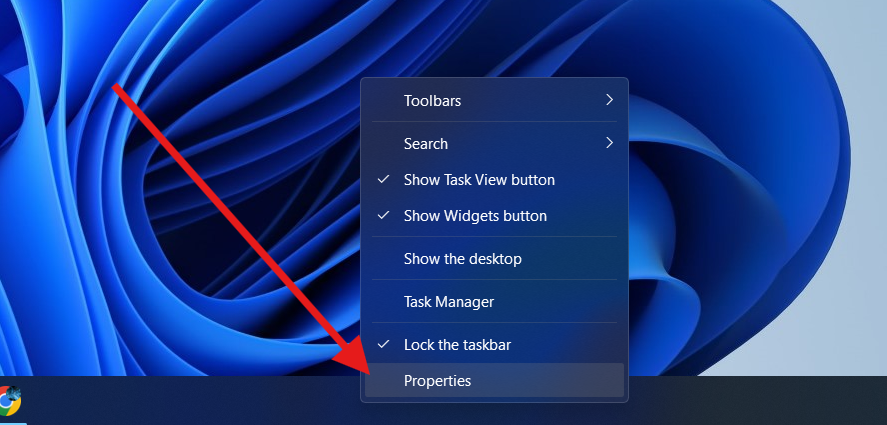
Now let’s change the File Explorer. To access ExplorerPatcher, go to Search and enter Properties, then select the top result.
On the left side, go to “File Explorer.” From the Control Interface drop-down menu, choose “Windows 10 Ribbon.”
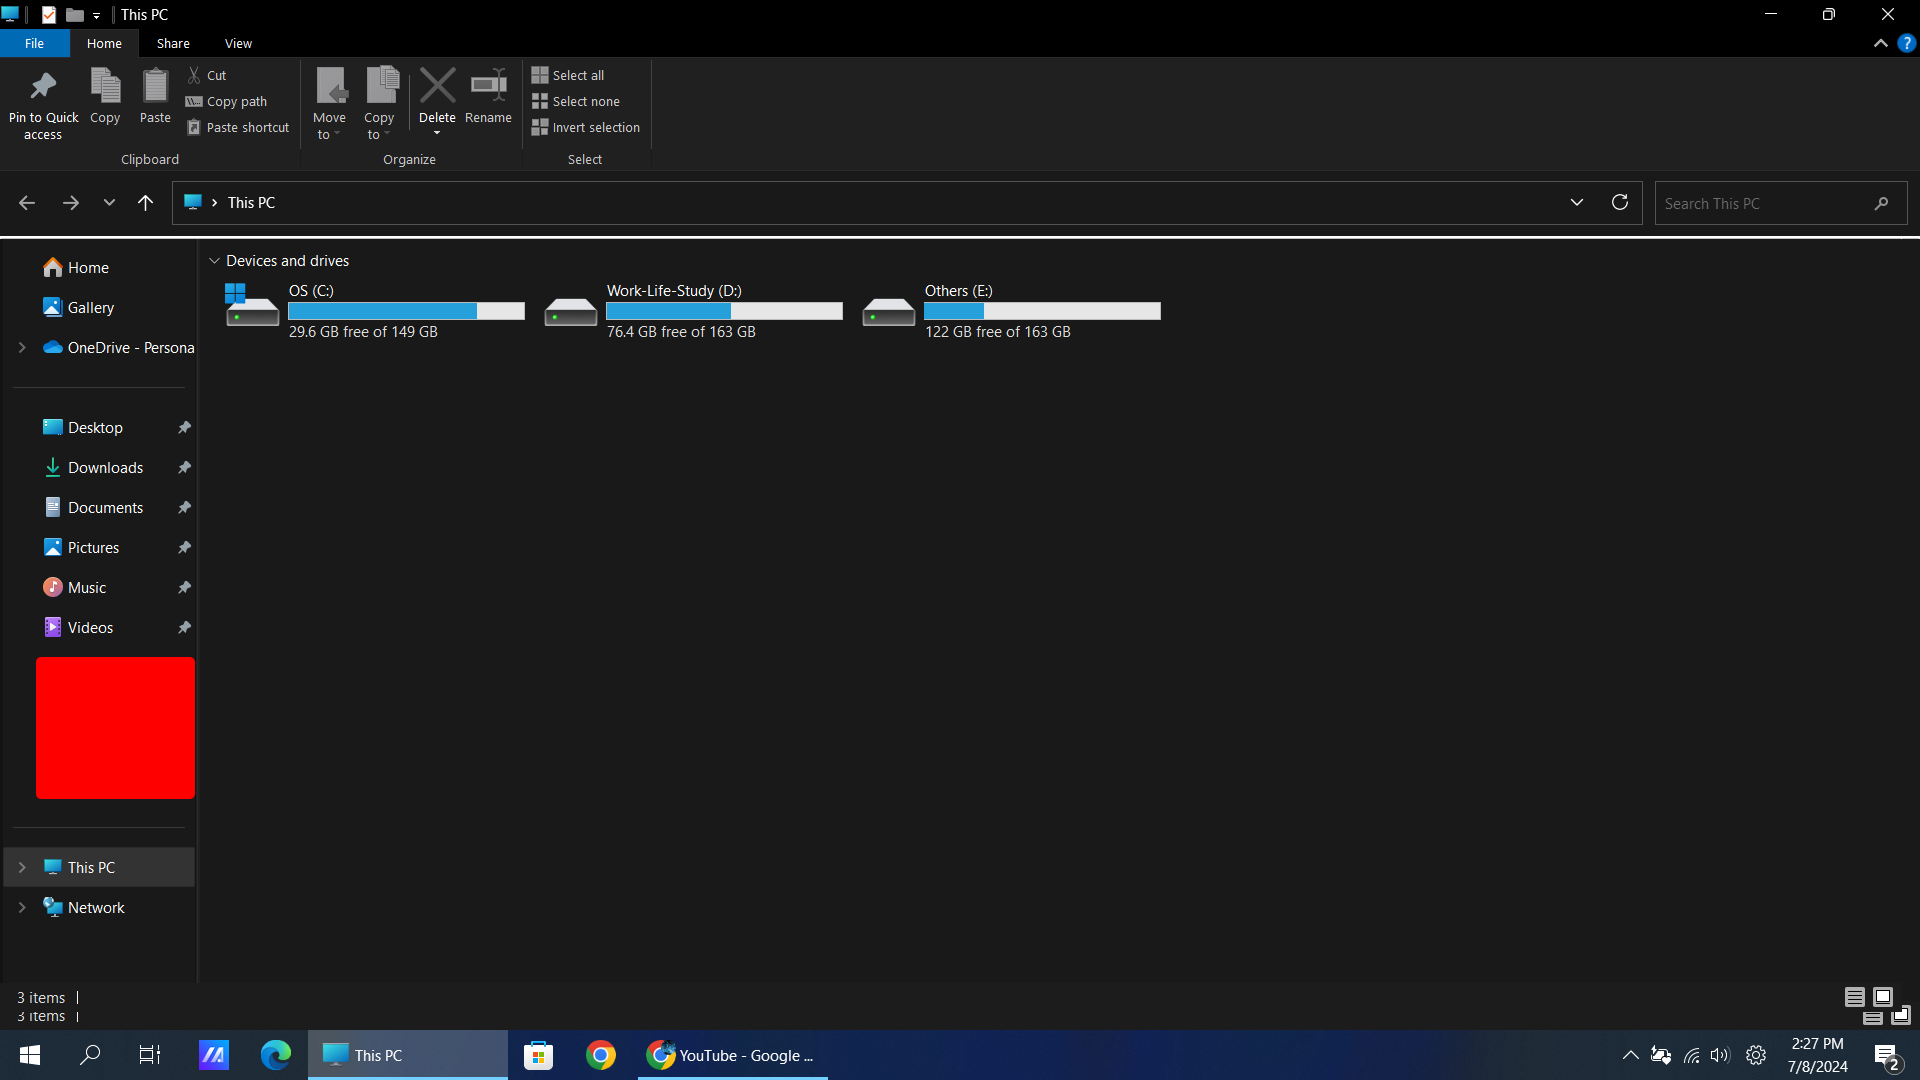
Open File Explorer, and you’ll discover it has the Windows 10 Ribbon instead of the Windows 11 command bar.
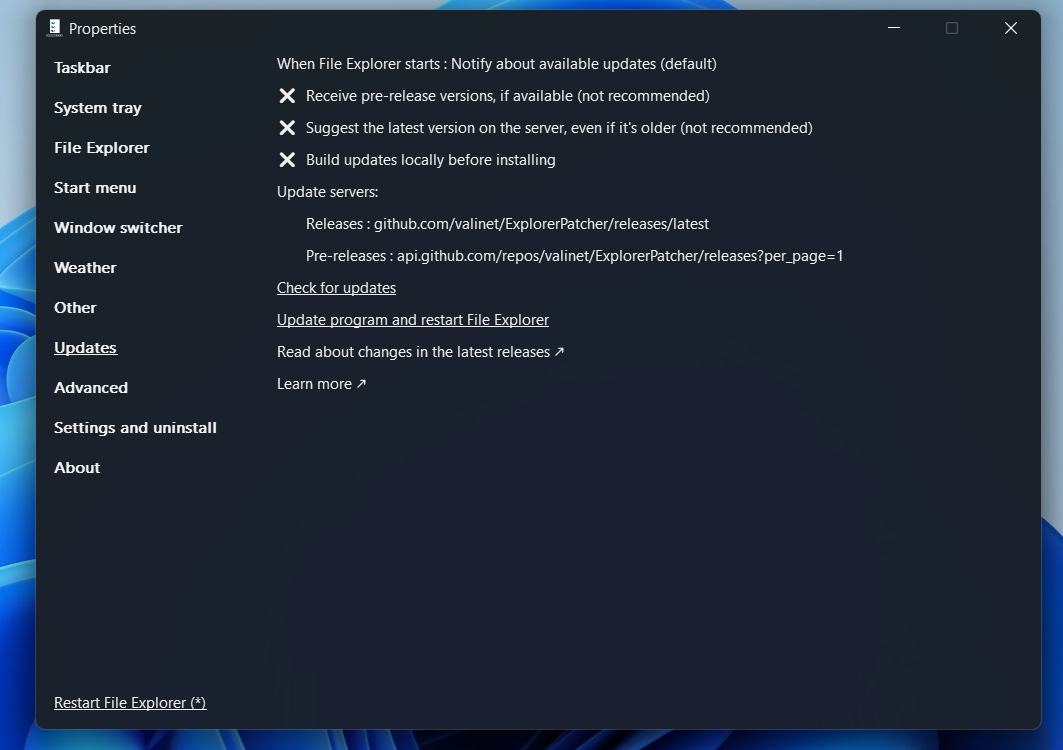
Likewise, you can check other visual elements and tweak them to look like Windows 10 or even Windows 7. The application is easy to keep updated, too. If there’s a new version available on GitHub, you’ll be notified, and then you can choose to install the newest version from within the app. You can also manually update the app if you prefer.
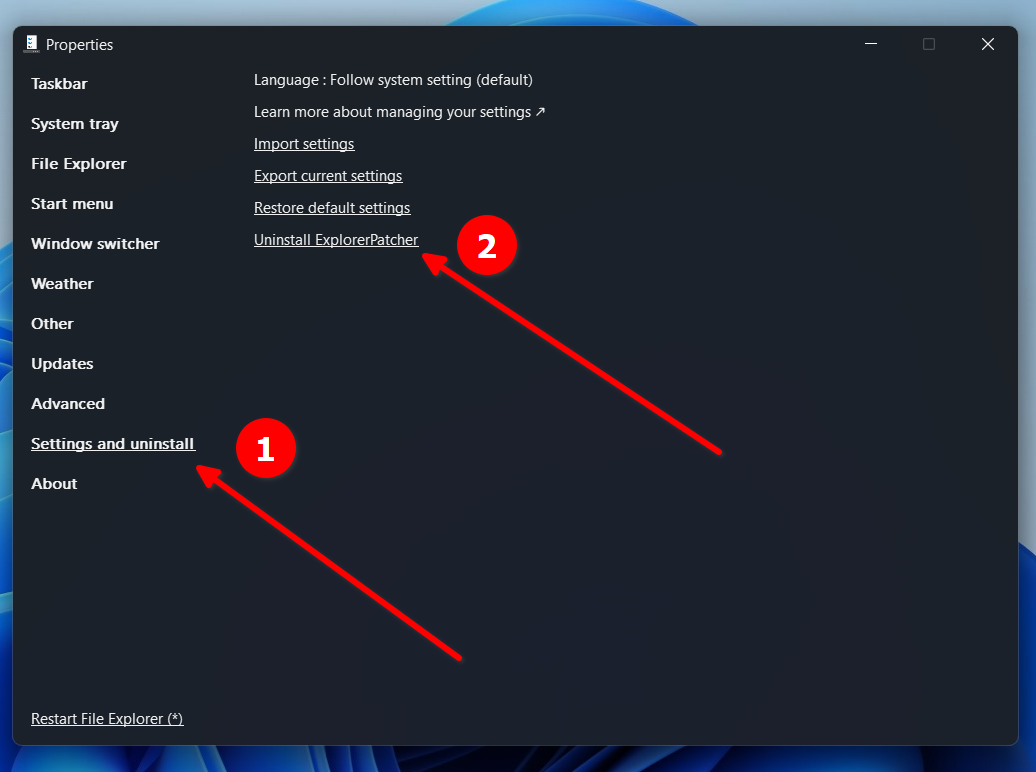
To uninstall the app, open the app and go to “Settings And Uninstall.” Then click “Uninstall ExplorerPatcher.”
When you see the uninstalling prompt, press “Yes.” If you’d like to learn more about what you can do with ExplorerPatcher, check out the official wiki.
Using StartAllBack
Third-party tools that modify the user interface like this often break with updates to Windows. These are cosmetic changes, and they won’t damage your PC, but it might mean you have to uninstall the modification until it is patched to handle the latest Windows release. You shouldn’t use it on a PC you rely on for daily work.
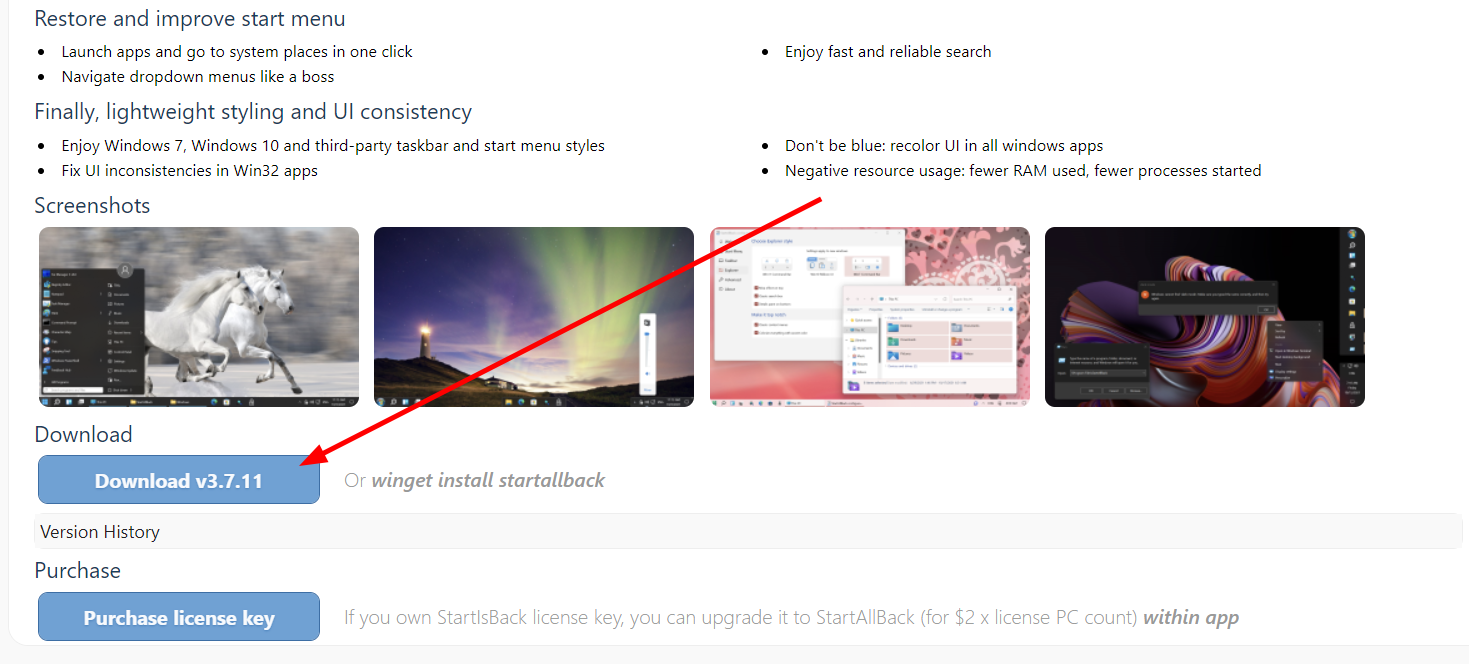
StartAllBack is another tool for customizing various Windows UI elements on Windows 11. Unlike ExplorerPatcher, it’s not open-source and costs $5 to buy a license. However, you can get a limited-time trial to test it out. Download the app from the official website, then run the executable.
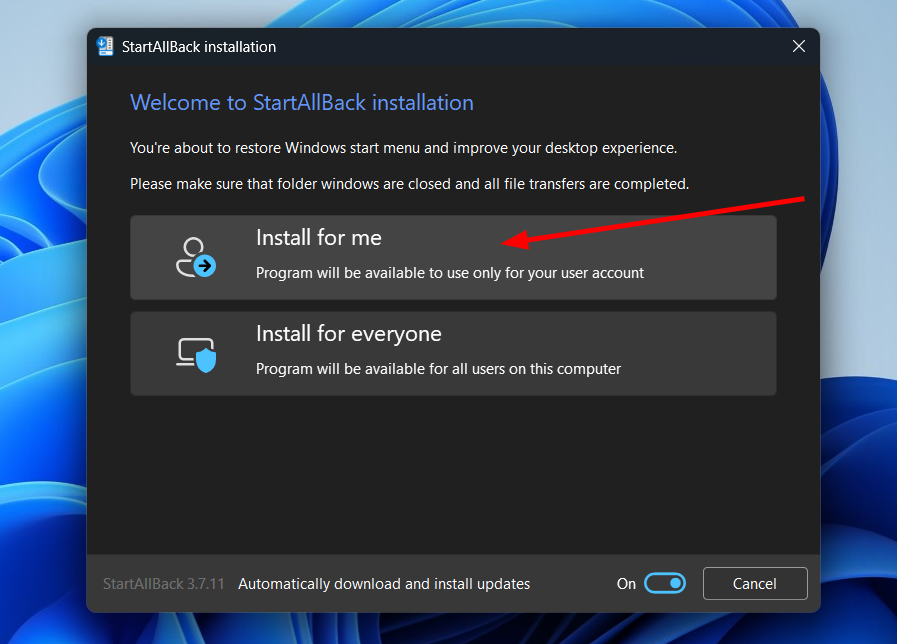
During installation, you’ll be asked to install it for either the current user or all users. You also have the option to turn automatic updates on and off. For this guide, I’ll only install it for the current user.
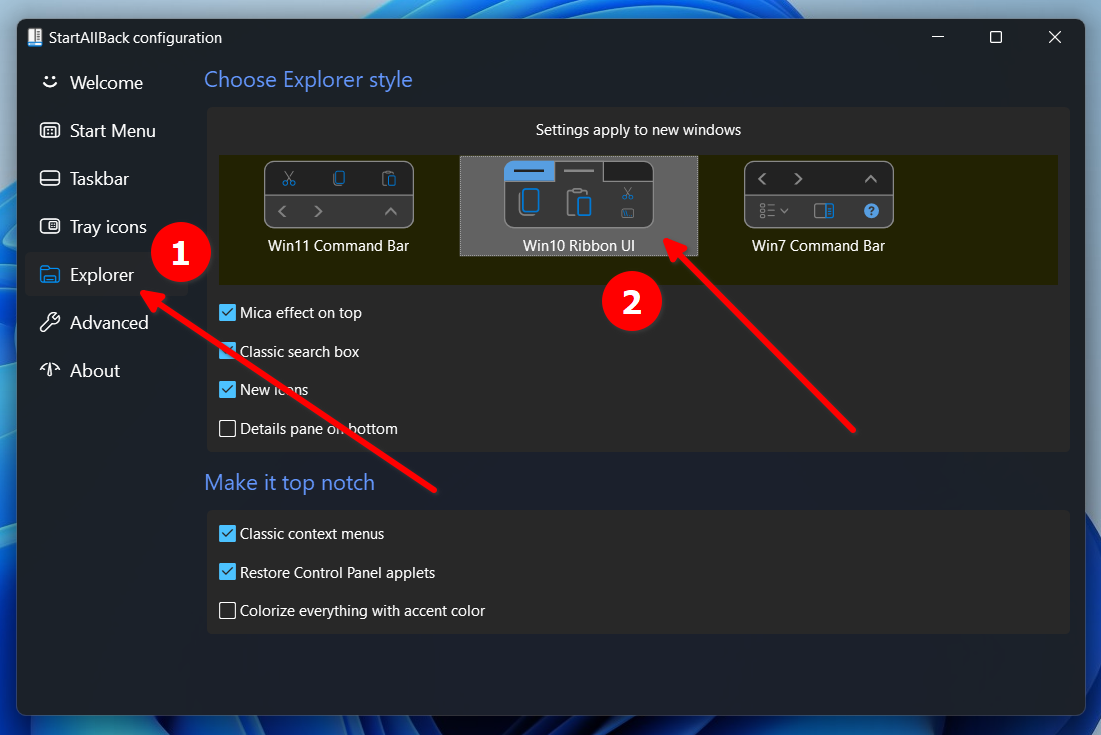
After that, it will be automatically installed, and you’ll immediately notice your Taskbar change. The StartAllBack configuration window will also pop up. Go to “Explorer,” then, if it’s not chosen by default, choose “Win10 Ribbon UI” under Choose Explorer Style.
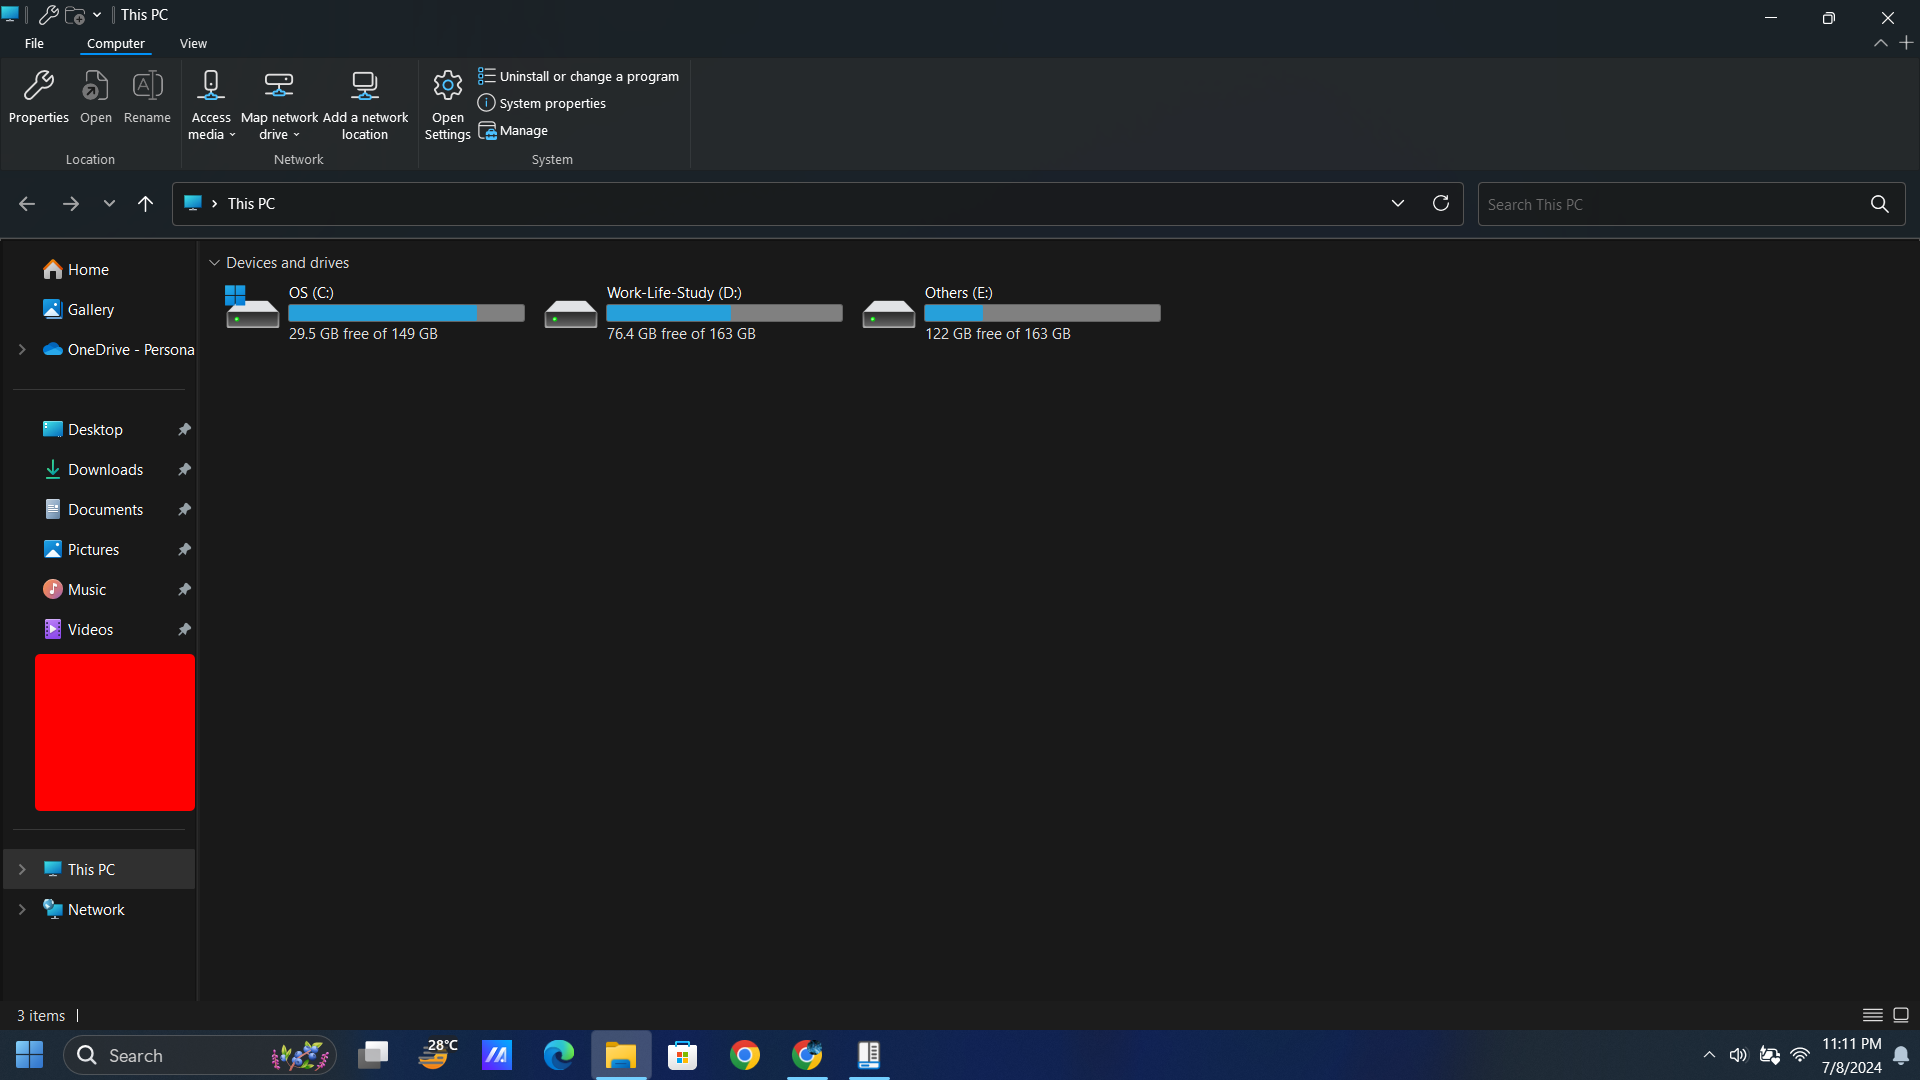
Open a new window to see the new look.
You may notice that the default Windows 10 File Explorer in StartAllBack isn’t 100% faithful. You can play with the different settings to make it look exactly like Windows 10. If you’d like to access StartAllBack later, right-click the Taskbar and click on “Properties.”
You can uninstall StartAllBack from the Control Panel or use the Winget package manager.
You don’t have to stop here, either. You can get the old Windows Task Manager back on Windows 11, too.


