With the Microsoft 365 suite being such a comprehensive collection of complex programs, sometimes it’s easy to miss some of the handiest tricks. I’ve brought together a few that I find the most useful, and hopefully, they’ll make your Microsoft 365 experience more secure, efficient, and enjoyable.
In this article, I’ll cover six of the most commonly used Microsoft 365 apps—Word, Excel, OneNote, PowerPoint, Outlook, and Teams—and explain which hacks work best with each app.
Double-Click Format Painter
Works in Excel, Word, OneNote, and PowerPoint.
The Format Painter is an invaluable time-saver, as it allows you to duplicate formatting from one element to another. However, if you need to duplicate that formatting to many other elements, clicking the Format Painter tool each time takes too long.
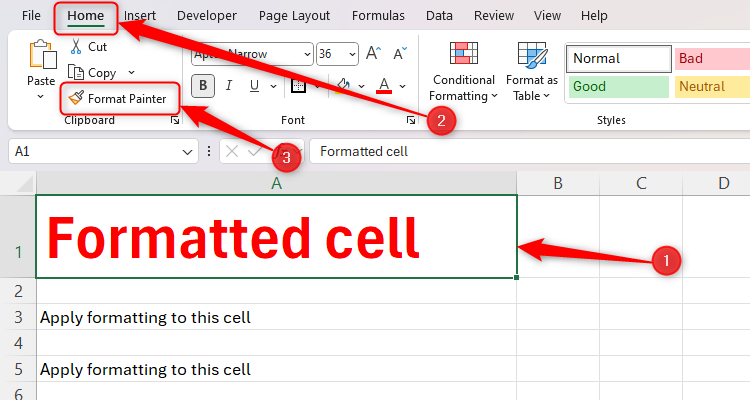
Instead, there’s a way to keep the Format Painter active as you go through your work and apply the copied formatting to anything you click. First, select the text, cell, image, or graphic containing the formatting you wish to duplicate (such as bold, border, and font size), and then double-click “Format Painter” in the Home tab.
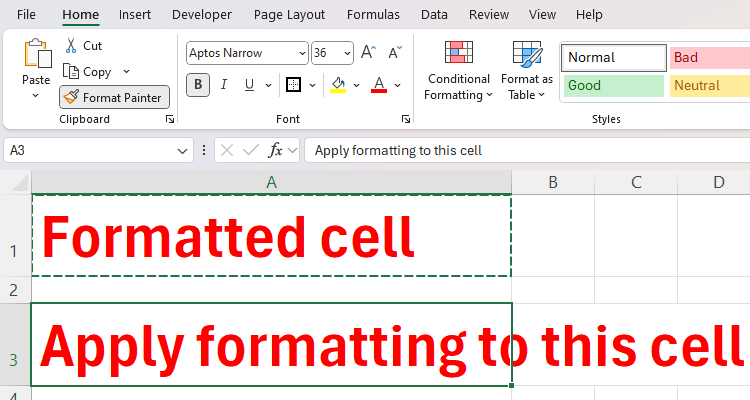
Then, click the text, cell, image, or graphic where you want that formatting to apply, before repeating the process on all the other required elements.
You’ll notice that your cursor will remain a Format Painter, and the Format Painter button will remain selected, until you press a key on your keyboard or click the Format Painter button again.
As of August 2024, you can’t format text in To Do, the double-click Format Painter doesn’t work in the early-2024 Outlook release. You can’t use the Format Painter in Teams, because it’s not a necessary tool for this program.
Use Version History
Works in Word, Excel, and PowerPoint.
Accessing a file’s Version History can be a vital capability of the Microsoft 365 suite in various situations:
- You might remember and prefer a previous version of the work you are creating.
- If you made a significant mistake and want to revert to the pre-mistake copy of the file.
- If you have shared a file and want to see the changes made, you can do so with Microsoft 365’s Version History.
If you have a Microsoft 365 Personal or Family account, you can view up to as many as 25 previous versions of a file. However, this feature only works for files stored in your OneDrive or SharePoint. If you sign in with a school or business account, the number of versions will depend on your administration settings.
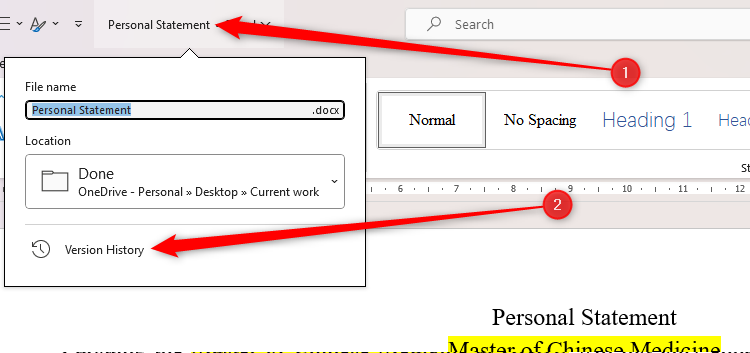
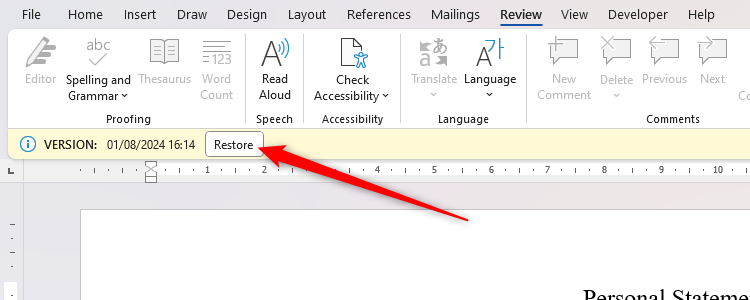
To access your version history first, ensure you have the relevant file open. Then, click the file name at the top of your screen, and click “Version History.”
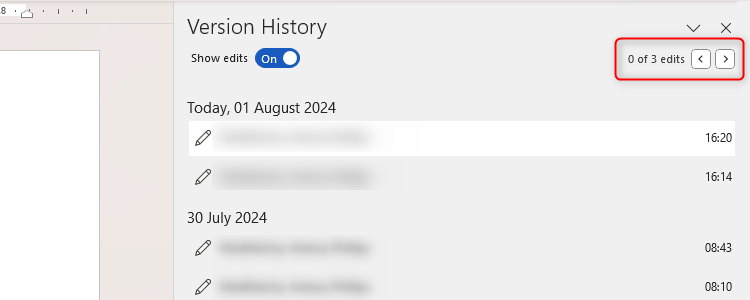
You can then click through the changes using the right and left arrows in the Version History sidebar, and you’ll also see a list of the people who have made changes and when they did so.
When you choose and click a version in the sidebar, Word will show you a comparison between the latest version and the previous version you selected. If you’re happy, click “Restore” in the yellow bar that appears along the top of your screen.
Use the In-App Search Bar
Works in all apps, but more comprehensively in Word, Excel, PowerPoint, and OneNote.
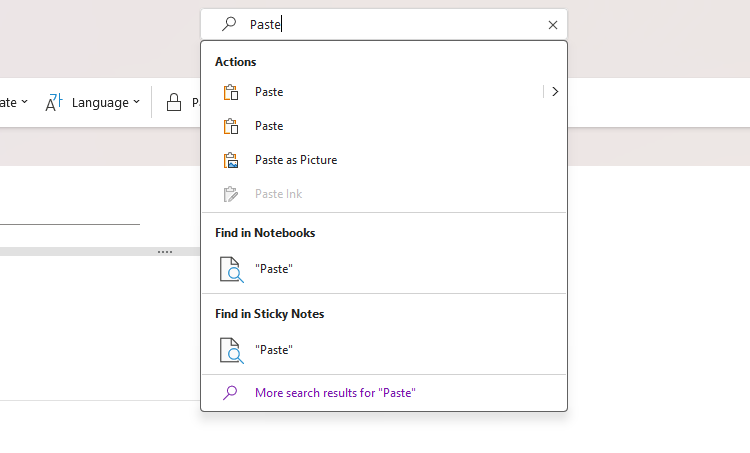
The search bar in Word, Excel, PowerPoint, and OneNote is more comprehensive than in the other apps:
- You can search for an action, such as “Paste,” “Multilevel list,” or “View Macros.”
- The search bar will also let you find words, numbers, or characters within the file.
- The third result lets you view more comprehensive Help articles, which open in the sidebar on the right of your screen. OneNote also searches your Sticky Notes for the same search teams.
You can also access search bars in To Do, Outlook, and Teams, but these only let you search for content within the file, not actions or more comprehensive support. However, this can be particularly useful if your file contains large volumes of content.
Use the Mobile Apps
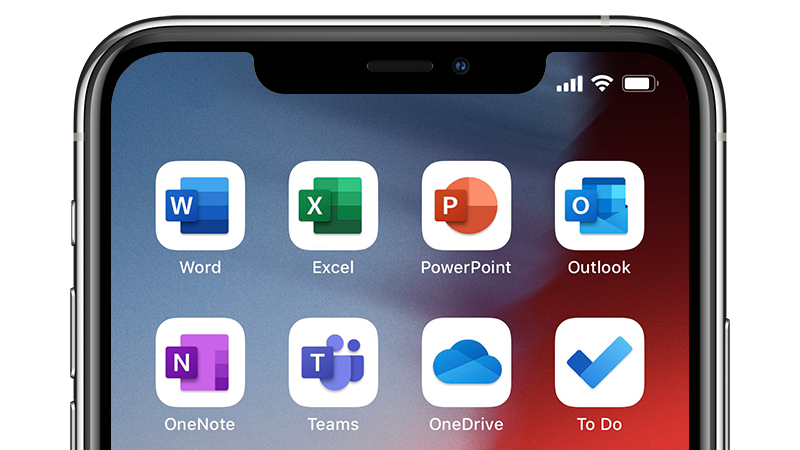
You can get mobile apps for Word, Excel, OneNote, PowerPoint, Outlook, and Teams.
I use the mobile apps all the time, because it’s great to be able to do work and home stuff on the go. Whether it’s jotting down an idea on OneNote, sending an email on Outlook, viewing your accounting Excel spreadsheet, or re-reading an instructional PowerPoint, it’s really convenient to have the apps in your pocket at all times. Just make sure you log in using the same account you used on your PC or tablet, and everything will sync nicely (providing you have internet—if you don’t, the app will save any changes you make and sync when you re-establish a connection).
Password-Protect Your Work
Works with Excel, Word, PowerPoint, and OneNote.
Password-protecting your work gives you extra peace of mind that it is safe, even if your device ends up in the wrong hands. And doing so is straightforward.
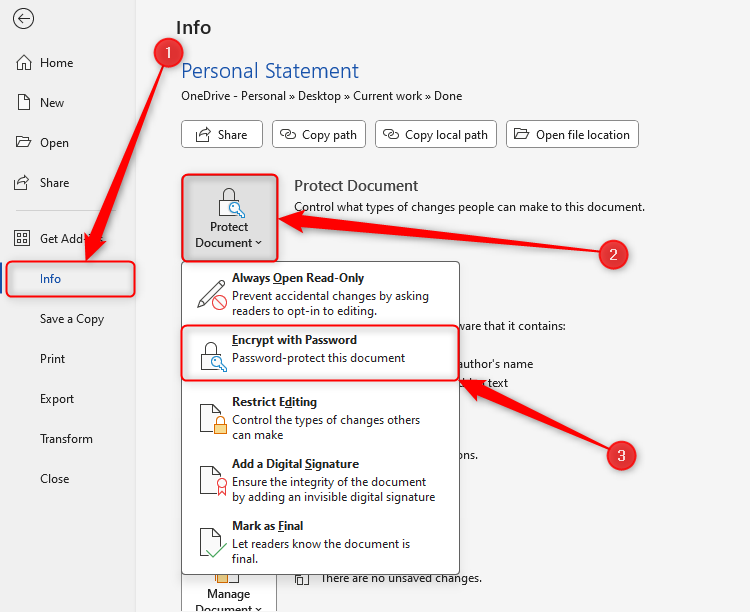
Click “File” in the top-left corner of your Excel, Word, or PowerPoint window, and choose “Info.” Then, click “Protect Document,” and “Encrypt With Password.”
You will then be asked to type your password twice, and then you can click “OK.” Remember to save your password somewhere safe!
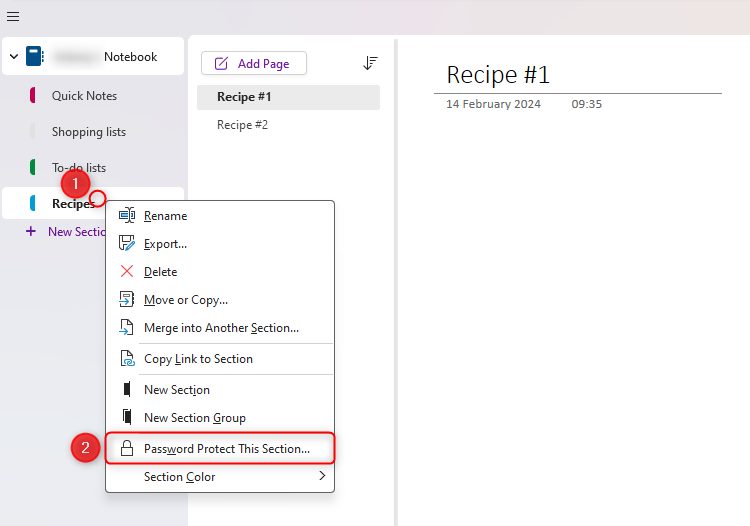
The route for password-protecting in OneNote differs slightly. You can only password-protect a Section, not the Pages within a Section. To do this, right-click the relevant Section, and choose “Password Protect This Section.”
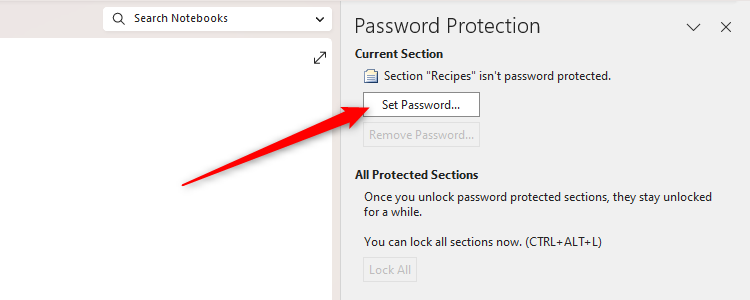
You can then enter the password (twice) by clicking “Set Password” in the right-hand sidebar that opens.
In Outlook, you can encrypt outgoing emails, but you cannot add passwords to outgoing or received emails. You can’t password-protect a Teams chat or folder, but you can limit file and folder permissions in SharePoint.
Check Accessibility
Works in Excel, Word, OneNote, PowerPoint, and Outlook (automatically).
Microsoft 365’s Accessibility Checker ensures your work doesn’t present possible issues for people with disabilities. It does this by setting certain rules, such as making sure all non-text content has alternative text, or that images or objects are in line with the text.
When activated, the tool returns errors (content that is impossible or difficult for some people to read), warnings (content that can be difficult to read), tips, and intelligent services (AI-automated accessibility-friendly content for you to review).
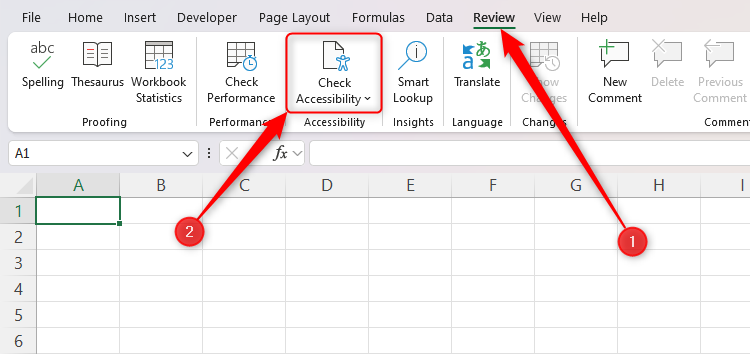
To use this vital tool, click “Check Accessibility” in the Review tab.
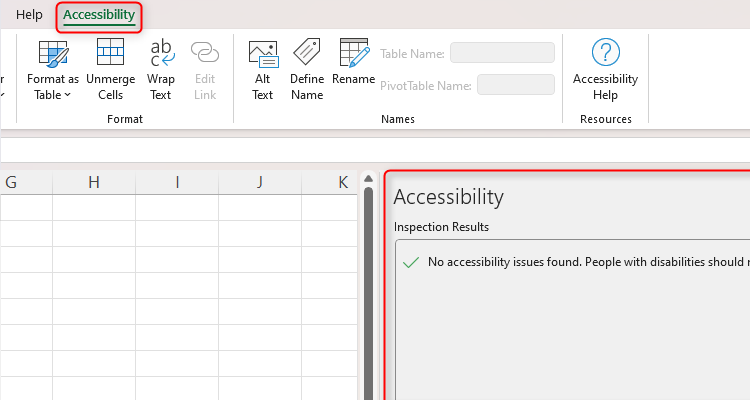
You will then see a report in the right-hand tab on your screen, where you can review the suggestions. An Accessibility tab will also open on the ribbon, where you can make changes to make your file more accessible.
In Outlook, the Accessibility Checker runs automatically in the background when you compose an email. If it detects accessibility issues, a MailTip prompts you to review and correct them before you send your email.
Teams does not have the Accessibility Checker tool.
Use the OneDrive Personal Vault
You can store most file types in the Personal Vault, including files from all Microsoft 365 apps.
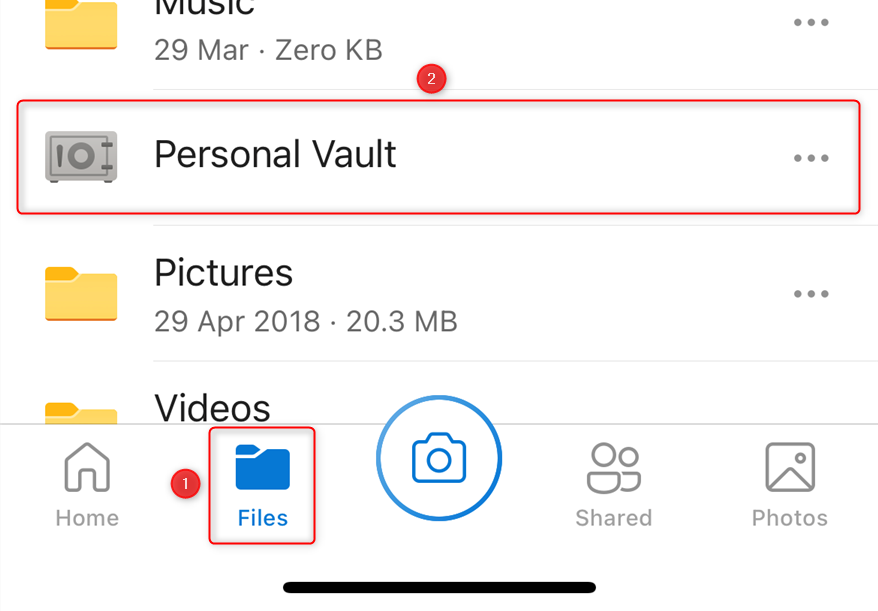
The OneDrive Personal Vault is a great way to store sensitive Microsoft 365 files (and other documents, such as a scan of your passport) with another layer of security. Once you’ve set up your Vault, you can access it through your fingerprint, facial recognition, or an additional passcode, and it will lock after a period of inactivity.
While you can add up to three files to your Personal Vault for free, a Microsoft 365 Personal plan will enable you to upload an unlimited number of items. You can access this on your PC or, as shown in the screenshot below, via the OneDrive app.
While many of the above hacks work on the apps’ web-based versions, it’s worth subscribing to Microsoft 365, as the desktop apps offer more flexibility and a broader toolset than Microsoft 365 for the web.


