

How to add money to your Apple Account on iPhone, iPad & Mac

Loading funds into your Apple Account can simplify purchasing apps, music, and other services. Here’s a guide on how to add funds to your Apple Account.
Adding funds to your Apple Account is a quick and secure way to ensure you can always access the apps, music, and services you need. The process is straightforward and convenient whether you use an iPhone, iPad, Mac, or the web.
It used to be called Apple ID, but in 2024 Apple has changed it to Apple Account.
“With the releases of iOS 18, iPadOS 18, macOS Sequoia, and watchOS 11, Apple ID is renamed to Apple Account for a consistent sign-in experience across Apple services and devices, and relies on a user’s existing credentials,” the company said.
One of the primary advantages of adding funds to your Apple Account is the added control layer it provides over your spending. It’s useful for parents who wish to manage their children’s App Store spending or those who want to stick to a strict budget for digital purchases.
By preloading your account with a set amount of funds, you can limit spending to that amount, avoiding unexpected charges on your credit or debit card. Additionally, Apple occasionally offers special deals where adding a certain amount to your account can give you bonus credit.
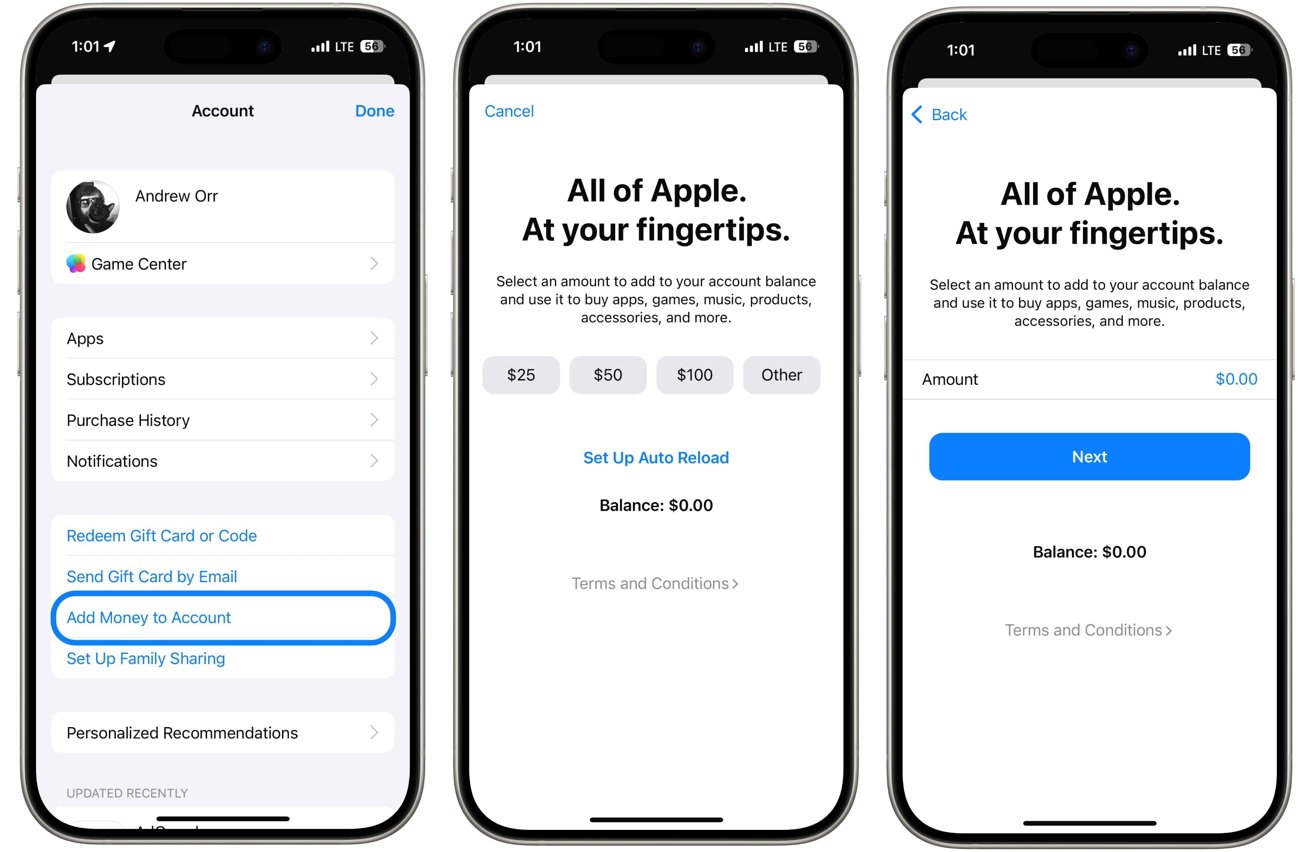
Add funds to an Apple Account on iPhone & iPad
To add funds to your Apple Account using an iPhone or iPad, follow these steps to ensure a quick and secure transaction.
Add funds to an Apple Account on iPhone & iPad
- Start by opening the App Store on your iPhone or iPad.
- In the top right corner, tap on your profile picture or the sign-in button if you’re not already signed in.
- Scroll down and select Add Money to Account.
- Choose the amount you want to add, or tap Other to enter a specific amount.
- Follow the prompts to complete the payment using your preferred method.
Add funds to an Apple Account on Mac
Adding funds to your Apple Account on a Mac is also straightforward, allowing you to easily manage your balance. And in macOS Sequoia, Apple tweaked the Mac App Store interface to display your account balance under your account name in the bottome left.
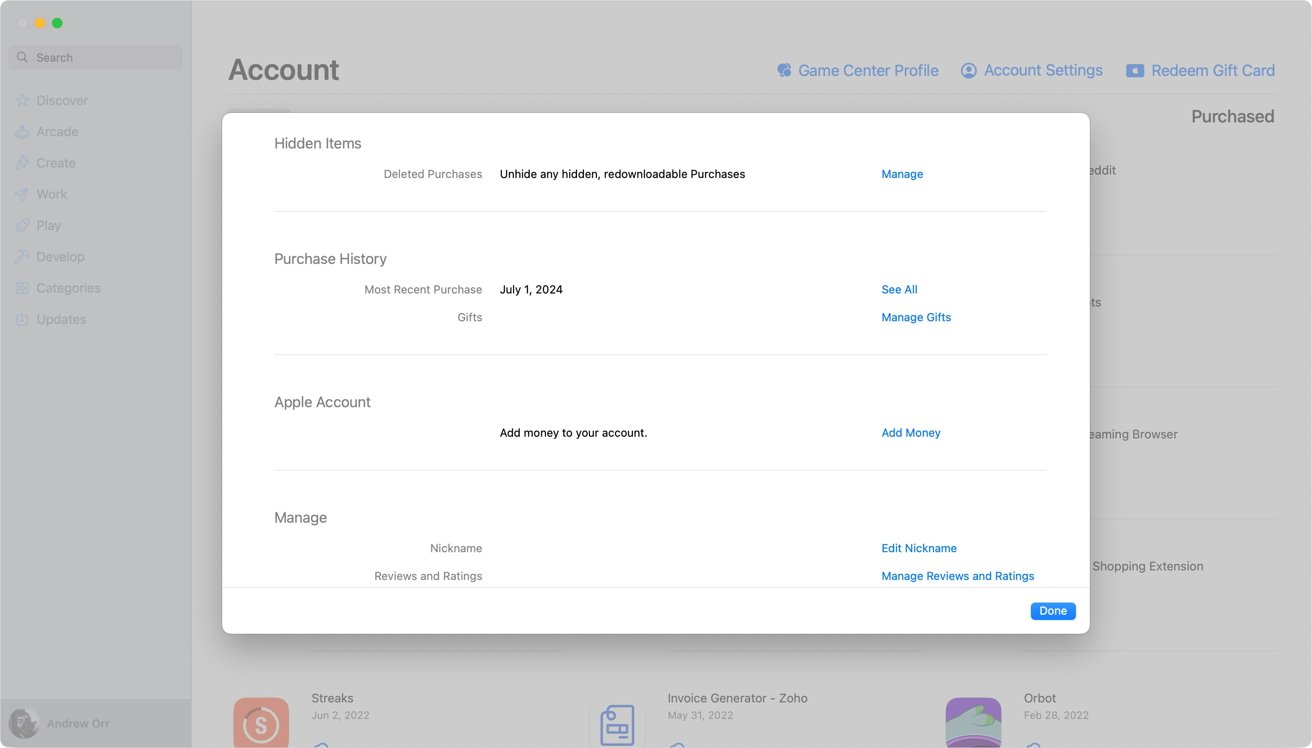
Add funds to an Apple Account on Mac
- Launch the Mac App Store.
- If you aren’t signed in, click the sign-in button or your name at the bottom of the sidebar.
- Click on Account Settings at the top of the window. You might need to enter your Apple Account password.
- In the Apple Account section, click on Add Money.
- Select the amount you wish to add or enter a custom amount. Follow the on-screen instructions to finish the transaction.
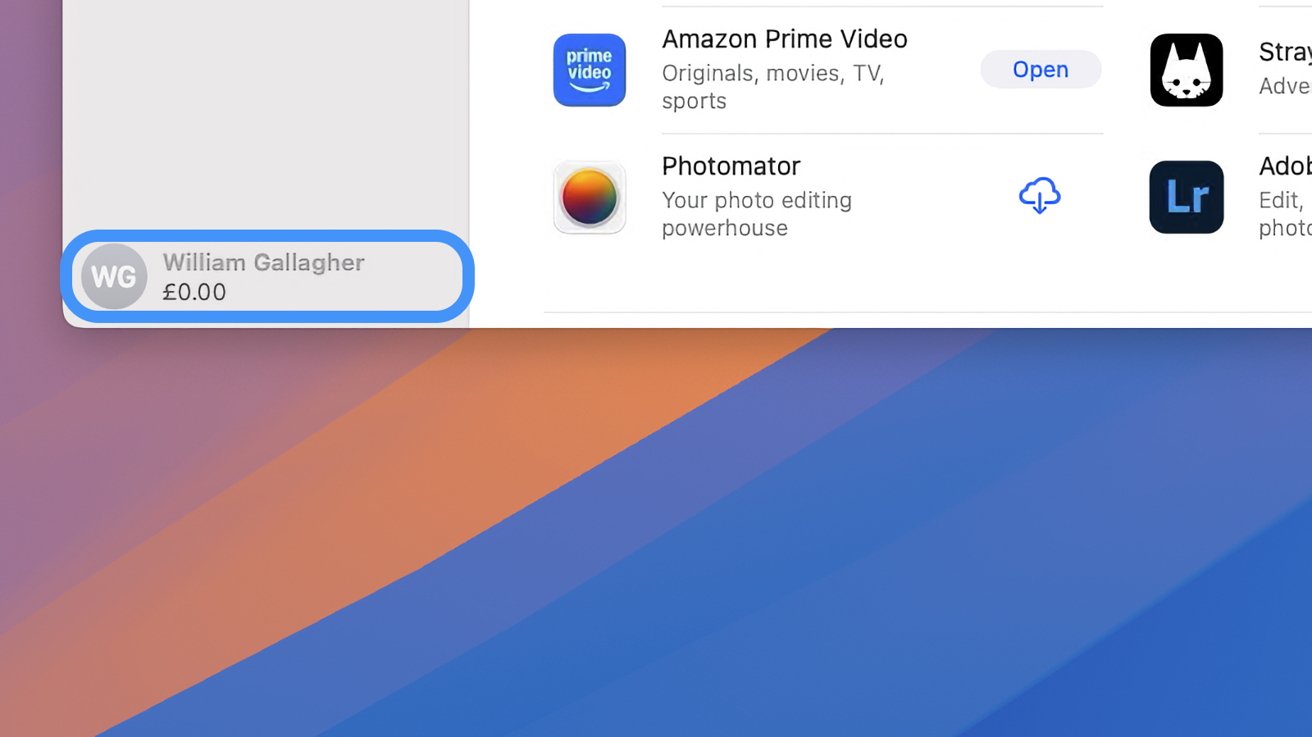
macOS Sequoia now displays the account balance up front
Maintaining a funded Apple Account can provide peace of mind and greater control over your digital spending. Whether for yourself or a family, having funds readily available ensures uninterrupted access to apps, music, movies, and other services.


