If you have a Microsoft 365 Personal or Family subscription, you probably still don’t know about the Microsoft Defender app, which you can download on Windows 11, 10, iOS, and Android devices. If you don’t, you’re missing out.
The Microsoft Defender app is an additional perk included in your subscription. It is designed as a central security dashboard for all devices connected to the service, along with some extra features. However, the app’s functionality depends on the platform.
For example, on Windows 11 or 10, the app offers an experience to review the malware protection on your devices, but it doesn’t provide an antivirus solution. Instead, it taps into the “Microsoft Defender Antivirus” already available on your computer.
On the other hand, you can also review the protection of your Android device. In addition, it offers an antivirus solution for the phone.
On computers and phones, the app offers a VPN service to add an extra layer of protection when browsing the web. However, this service is limited and not meant to be an option to bypass geographical restrictions or stream video.
Finally, in partnership with Experian, the Microsoft Defender app can also monitor identity theft. When using this feature, you can monitor your and your family’s identities for breaches on the internet and dark web.
In this guide, I will explain the steps to get you started with the Microsoft Defender app on Windows 11 (and 10) and your mobile device.
Get started with the Microsoft Defender app on Windows 11 and 10
On Windows, the Microsoft Defender app offers an overview of the security across your devices, as well as access to a free VPN service and identity monitoring.
Install the Microsoft Defender app
To install the Microsoft Defender app on Windows 11 (or 10), use these steps:
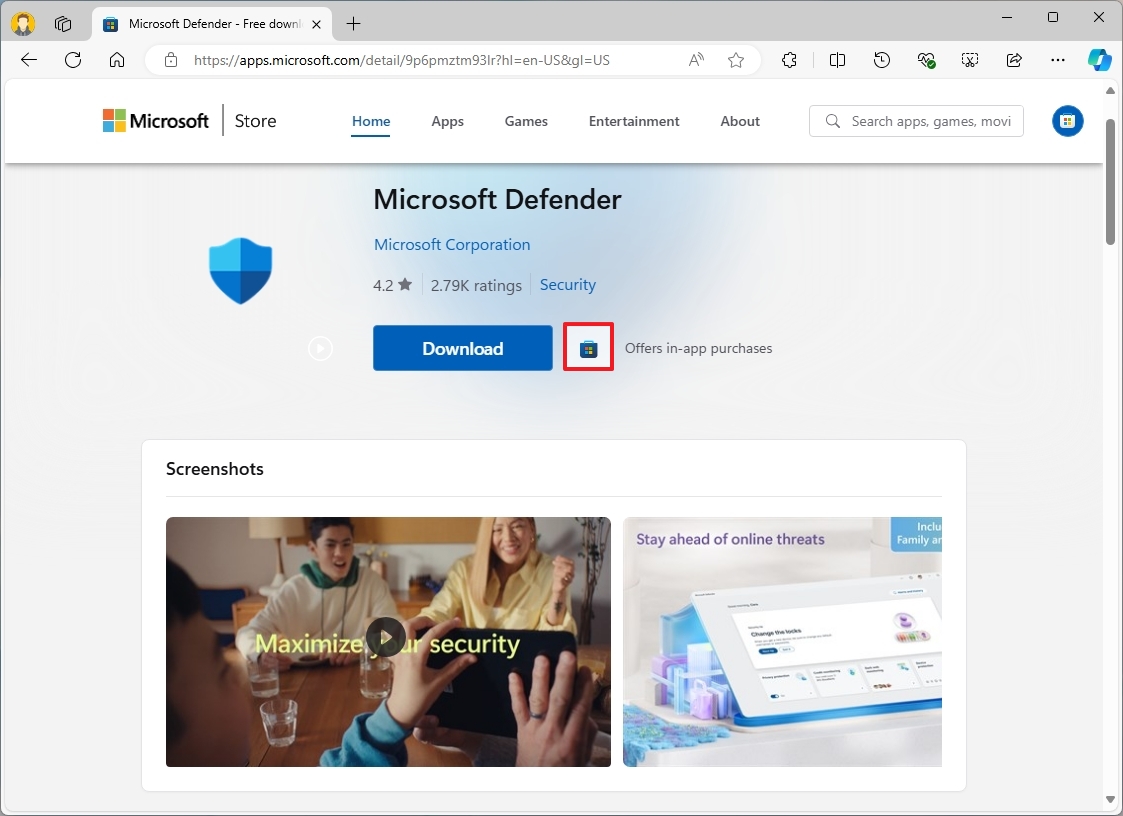
- Open the app download page.
- Click the “View in Store” button.
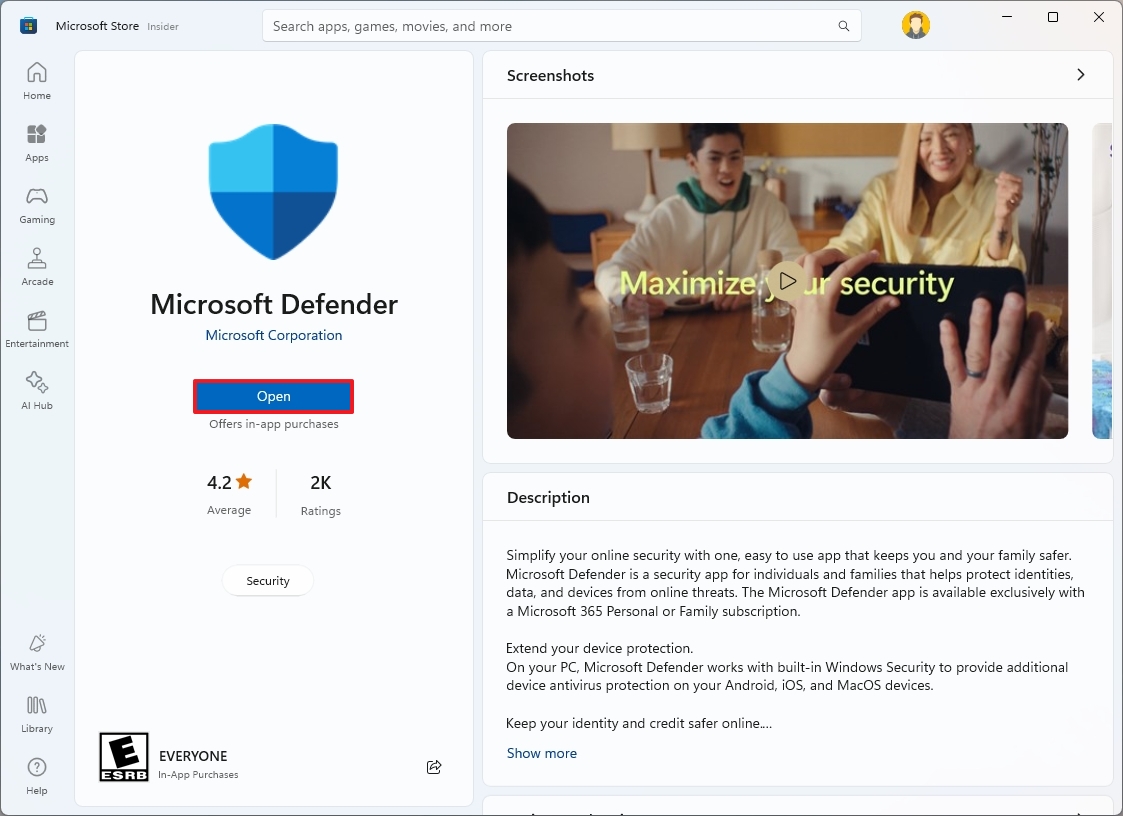
- Click the “Get” button.
- Click the Open button.
- Sign in using the Microsoft account credentials associated with the subscription.
Once you complete the steps, the app will also be available through the Start menu.
Review devices protection
On the desktop version of the app, you can use these steps to review the protection status on your computer:
- Open Start.
- Search for Microsoft Defender and click the top result to open the app.
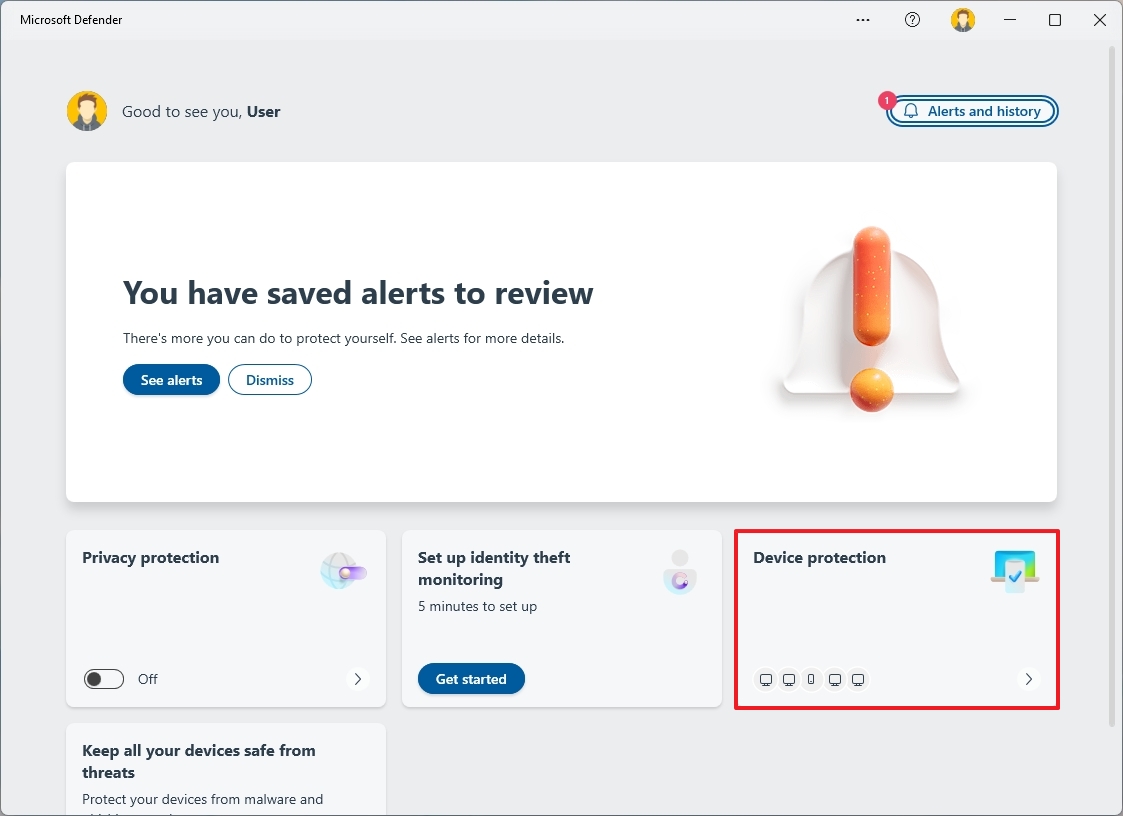
- Click on Device protection.
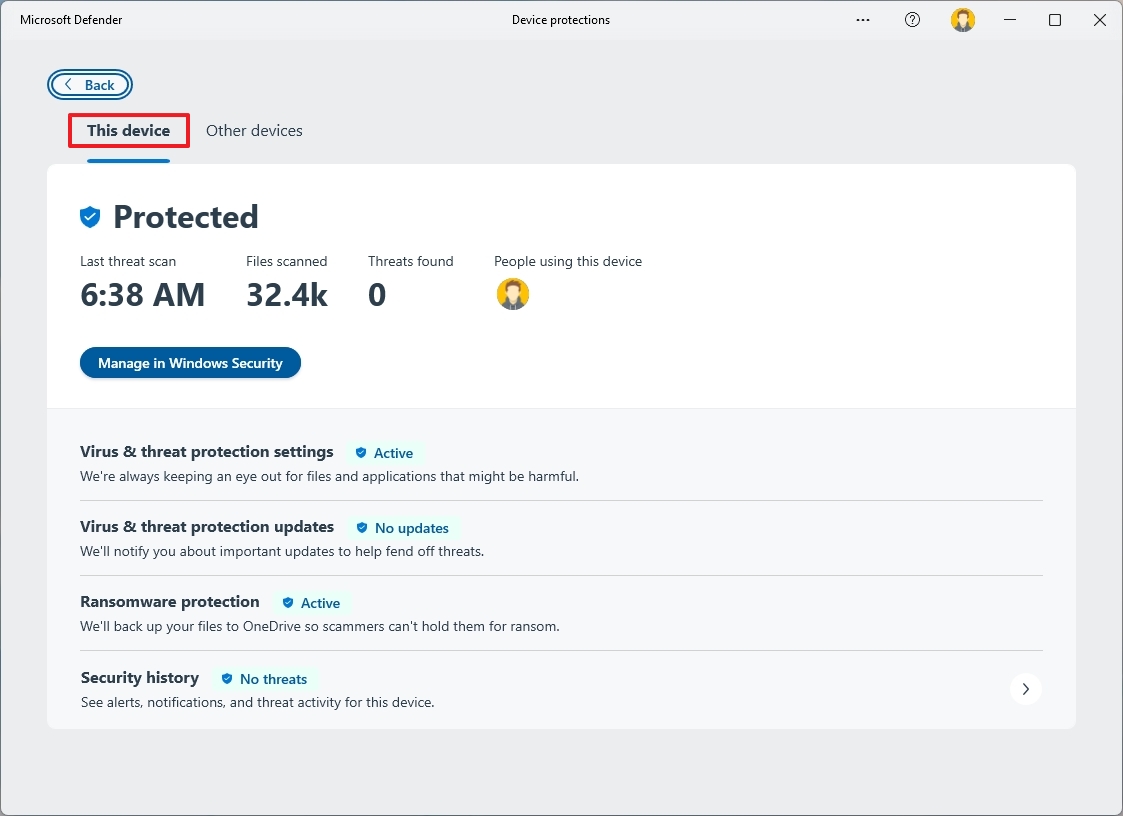
- Click the This device tab.
- Check the antivirus scan status.
- Check the security features’ status and whether they require updates.
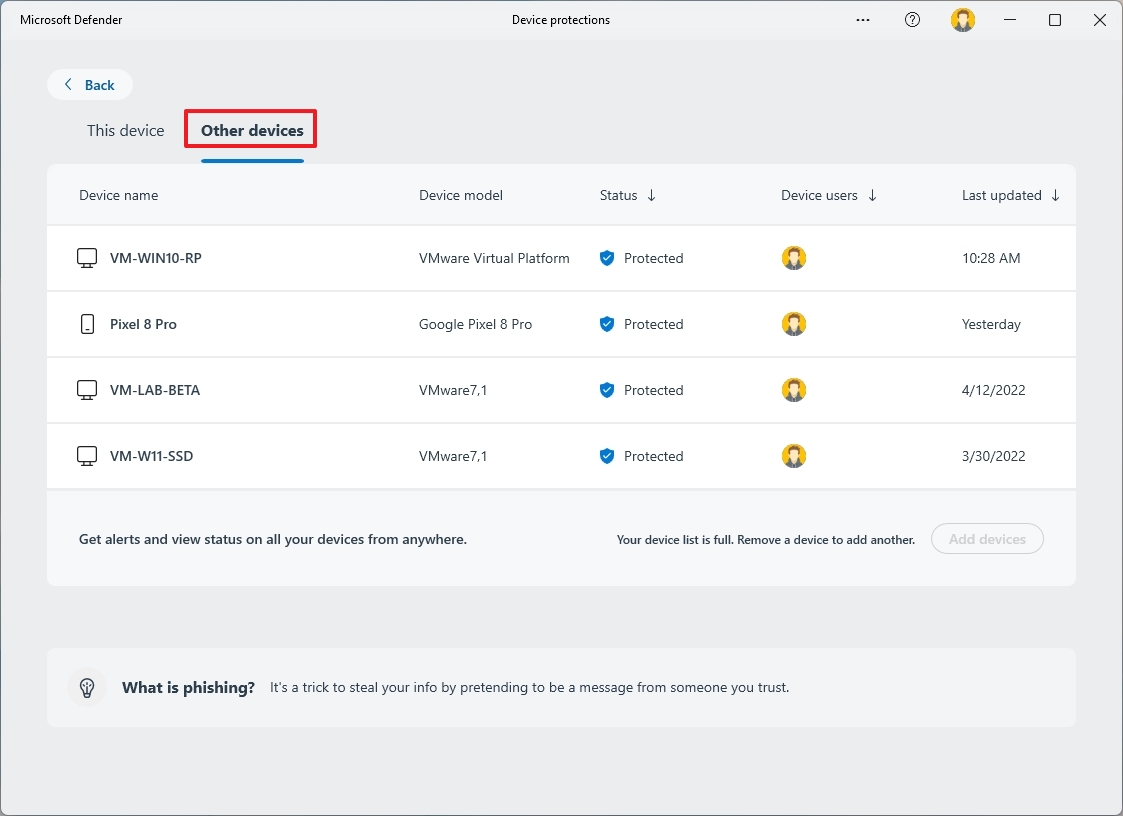
- Click the “Other devices” tab.
- Check the protection status of your other devices.
When checking your devices’ protection, you will be able to review the last scan, the number of files and threats found, along with the status of the antivirus, ransomware protection, and security history. These are part of the “Microsoft Defender Antivirus” already installed on your computer, not the “Microsoft Defender” app.
On the other hand, when viewing the status of other devices, you will only be able to see whether the local protection on your other devices is enabled.
Add or remove devices
You can always add or remove devices from the Microsoft Defender app.
Remove device
To remove a device, use these steps:
- Open Start.
- Search for Microsoft Defender and click the top result to open the app.
- Click on Device protection.
- Click the Other devices tab.
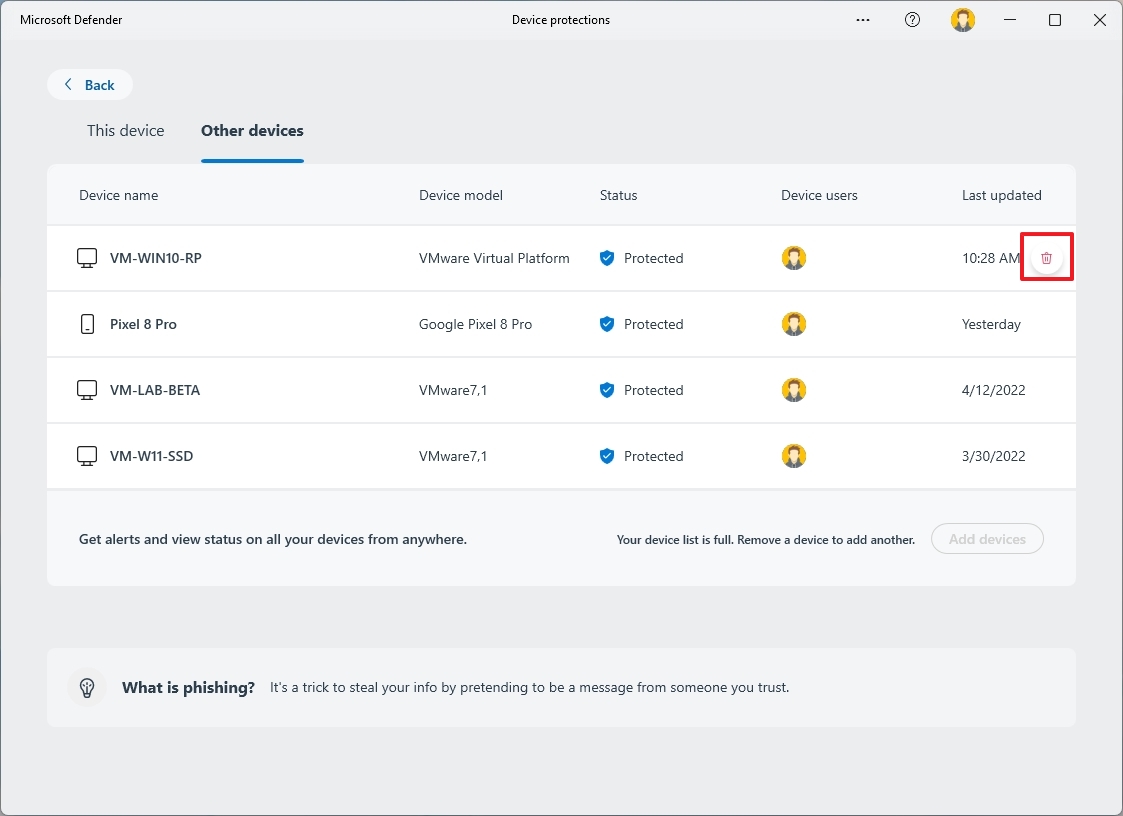
- Hover over the device and click the Remove (trash) button.
- Click the Remove button.
Once you complete the steps, the device will be removed from the app, but this action will not uninstall or disable any security feature on that computer.
Add device
To add a new device to the Microsoft Defender app, use these steps:
- Open Start.
- Search for Microsoft Defender and click the top result to open the app.
- Click on Device protection.
- Click the Other devices tab.
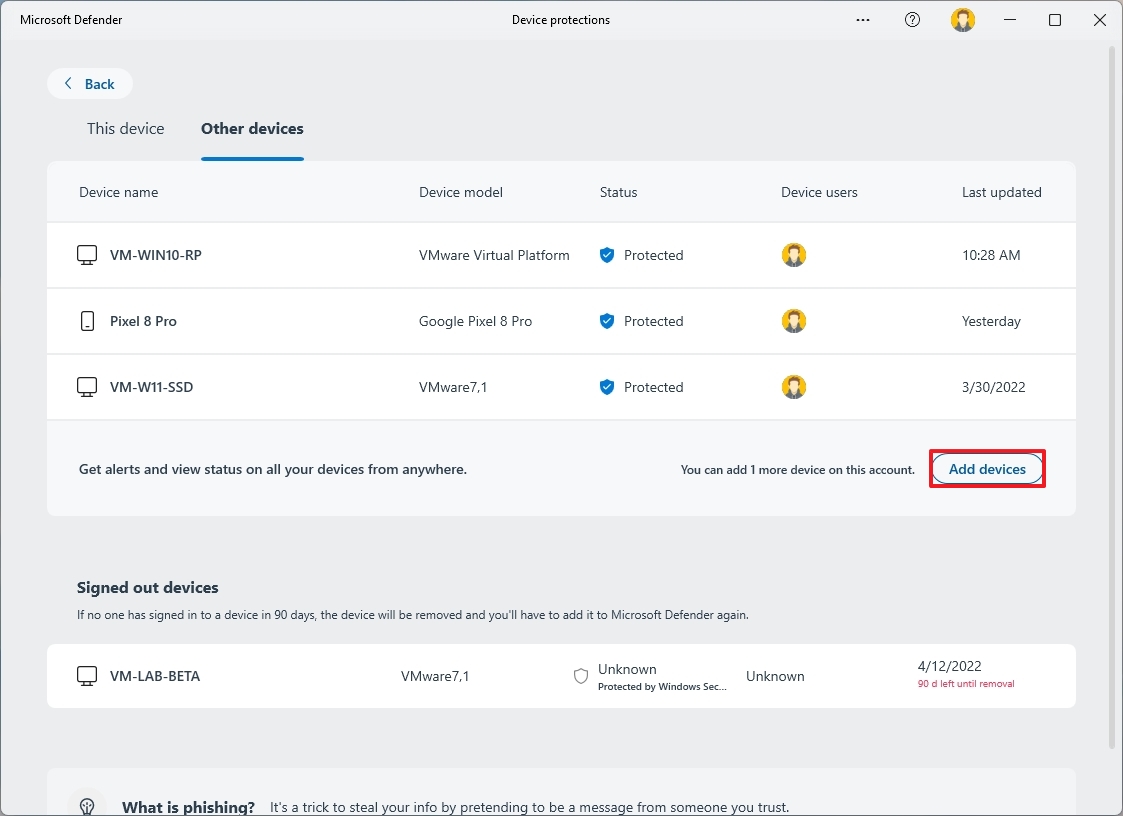
- Click the Add device button.
- Continue with the on-screen directions.
The process of adding a new device is similar to setting up the app on your computer or phone. You only have to install the app and sign in with the same Microsoft account.
Set up privacy protection
Although Microsoft Defender has some interesting features, perhaps one of the main reasons to consider setting up this app is because of the device protection feature.
The “device protection” is a feature that offers free access to the Microsoft Defender VPN (Virtual Private Network), which gives you an extra layer of security while browsing the web.
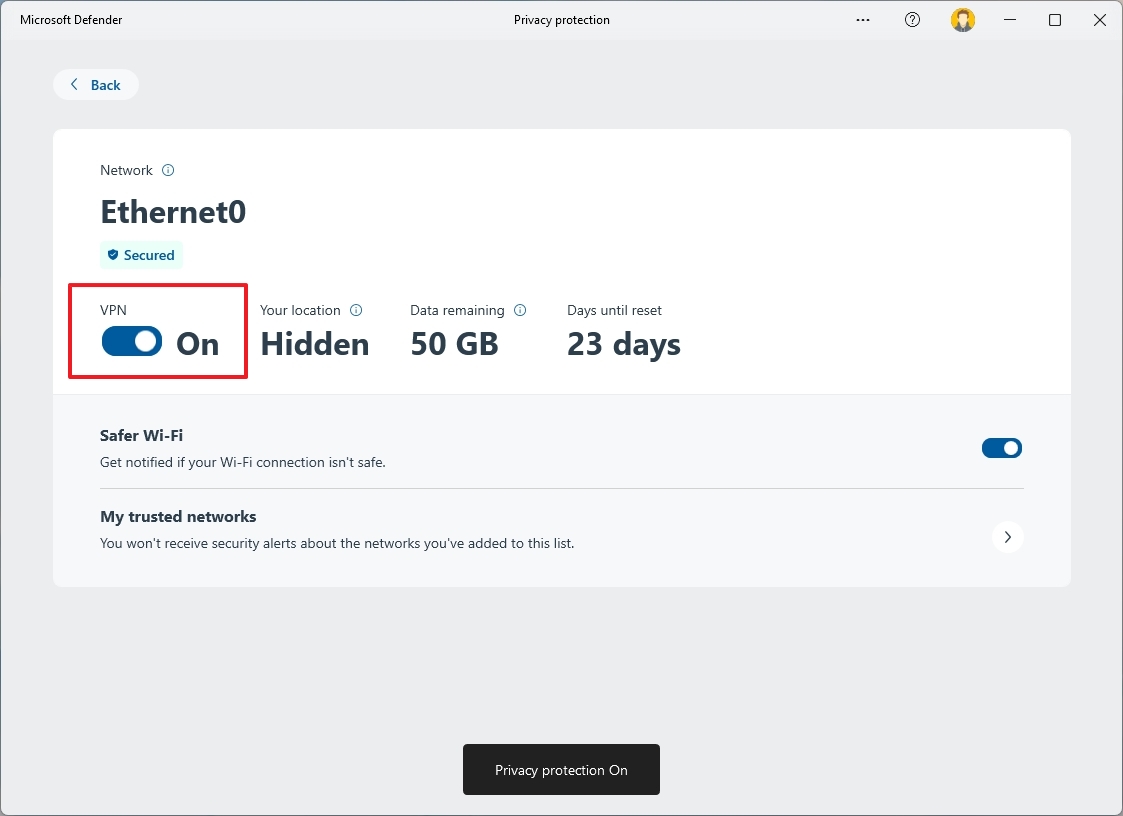
When you set up this feature, the app will create a VPN connection between your computer and the Microsoft Defender VPN server to encrypt your internet connection, hiding your public IP address and online activities from marketers and malicious individuals.
To enable the VPN feature for privacy protection, use these steps:
- Open Start.
- Search for Microsoft Defender and click the top result to open the app.
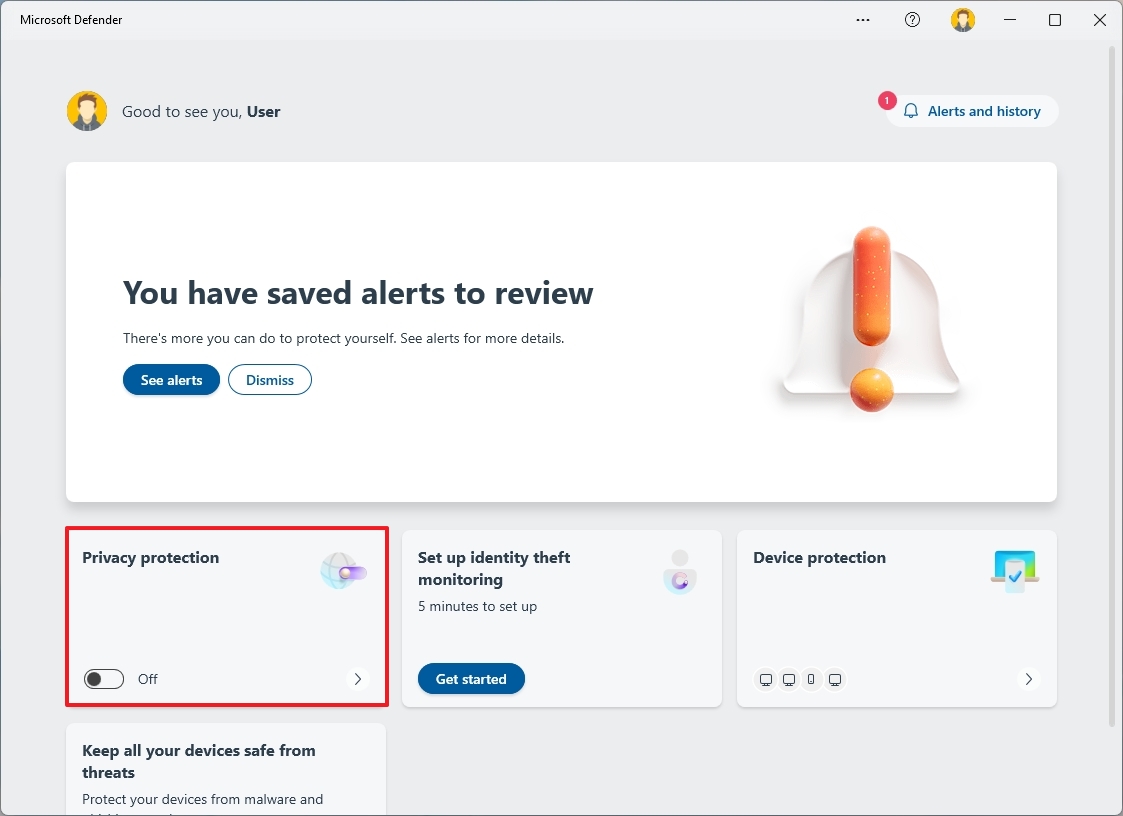
- Click on Privacy protection.
- Turn on the VPN toggle switch to connect.
- (Optional) Turn off the VPN toggle switch to disconnect.
The service offers 50GB of data per month at full speed, and then until the data is reset, you will continue to have access to the service but at a reduced speed. As a result, this is not a service suited for video streaming or bypassing regional restrictions, as you also don’t have the option to choose the server.
If you don’t have a Microsoft 365 Personal or Family subscription, you can use the free VPN service on Microsoft Edge. However, unlike the Defender offer, you only get 5GB of data, and it only works when browsing the web with the browser.
Identity theft monitoring
Another perk of the Microsoft Defender app is the identity theft monitor feature for users in the United States (only). As part of this feature, Microsoft uses a partnership with Experian to monitor your identity details and those of your family for public and dark internet breaches.
The service can monitor personal details, such as emails, passwords, phone numbers, personal documentation, banks, credit cards, and services like eBay and PayPal.
To get started with the identity theft monitor feature, use these steps:
- Open Start.
- Search for Microsoft Defender and click the top result to open the app.
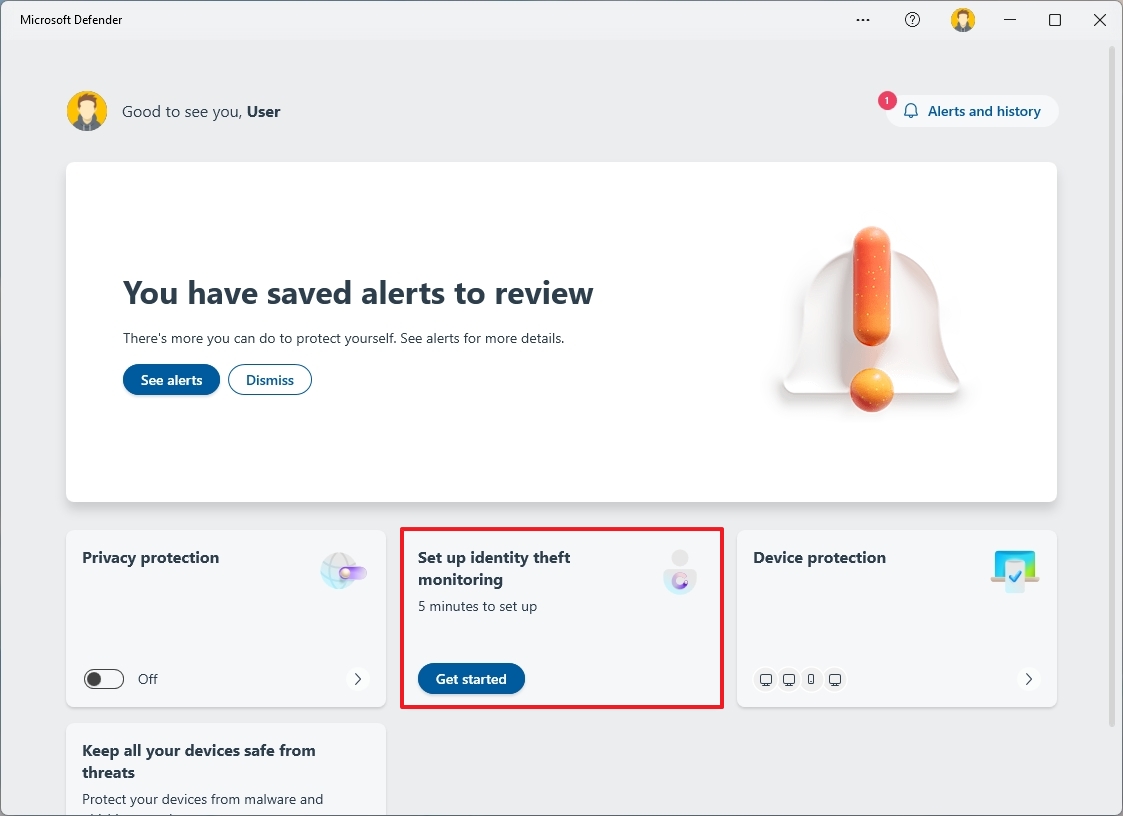
- Click on Set up identity theft monitoring.
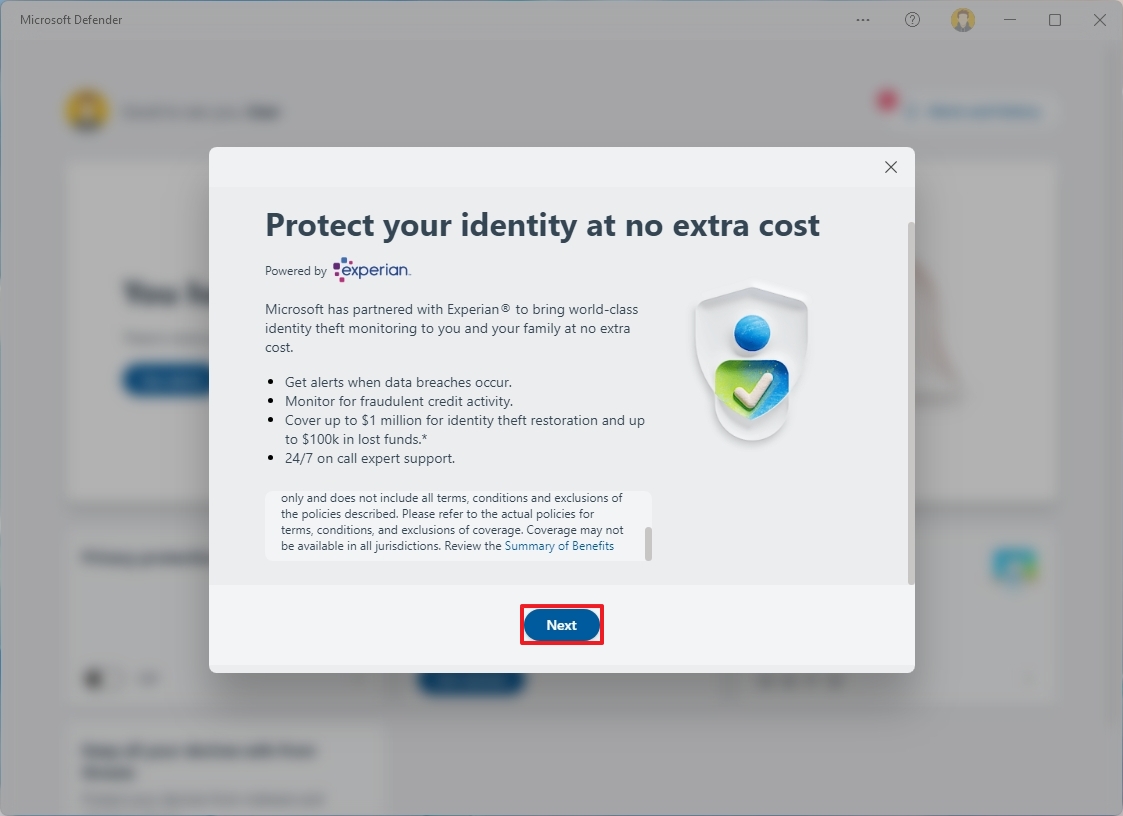
- Click the Next button.
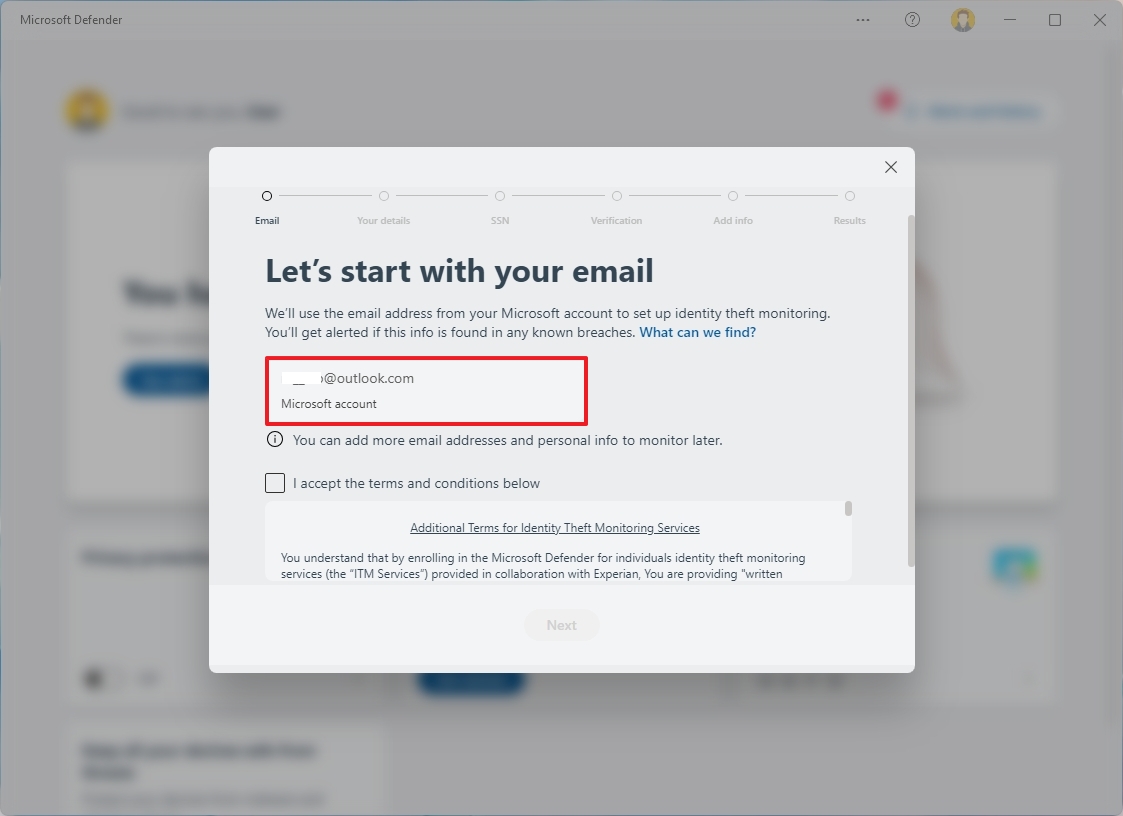
- Confirm that your Microsoft account is correct.
- Check the option to agree to the terms.
- Continue with the on-screen directions.
Once you complete the steps, if the Microsoft Defender service finds your personal details in a breach, you will receive an alert with more information and recommendations to remedy the problem.
In addition, the service offers daily access to professionals who can help you understand and resolve the issue.
Get started with the Microsoft Defender app on Android
The Microsoft Defender experience on Android is very similar, but the interface and features are a little different.
Install Microsoft Defender on Android
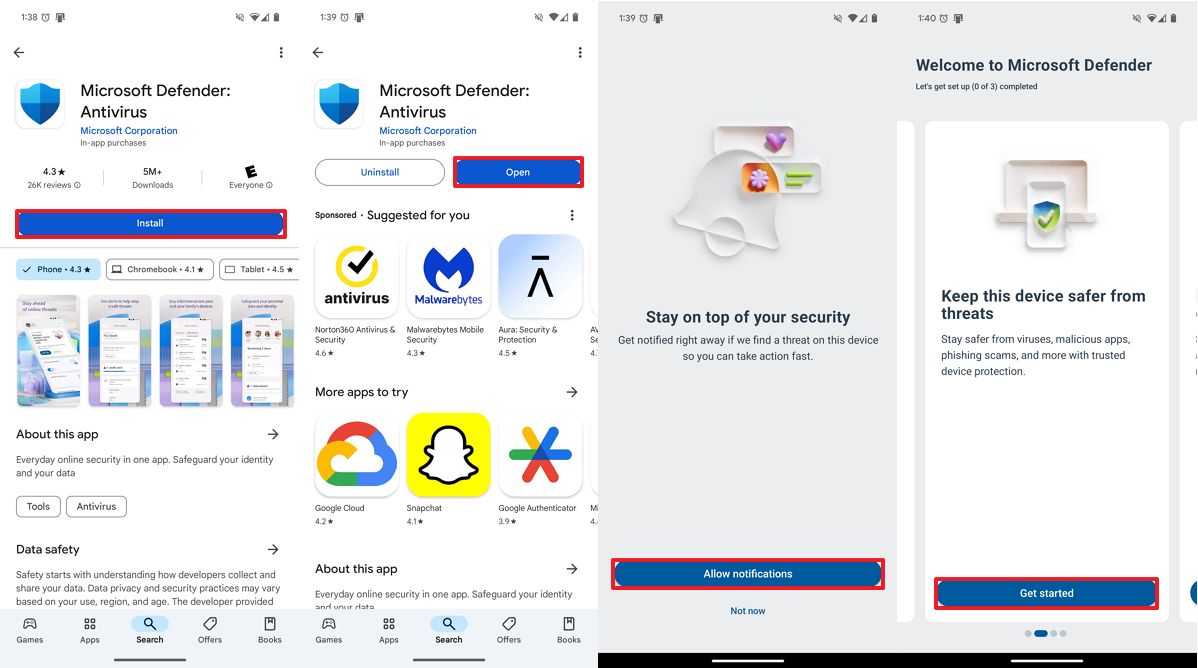
To install the app on Android, use these steps:
- Open the Microsoft Defender app download page.
- Click the Install button.
- Click the Open button.
- Sign in using the Microsoft account credentials associated with the subscription.
- Click the “Allow notifications” button.
- Click the Allow option for Android.
- Swipe left to get started.
- Click the “Get started” button on the “Keep this device safer from threats” card.
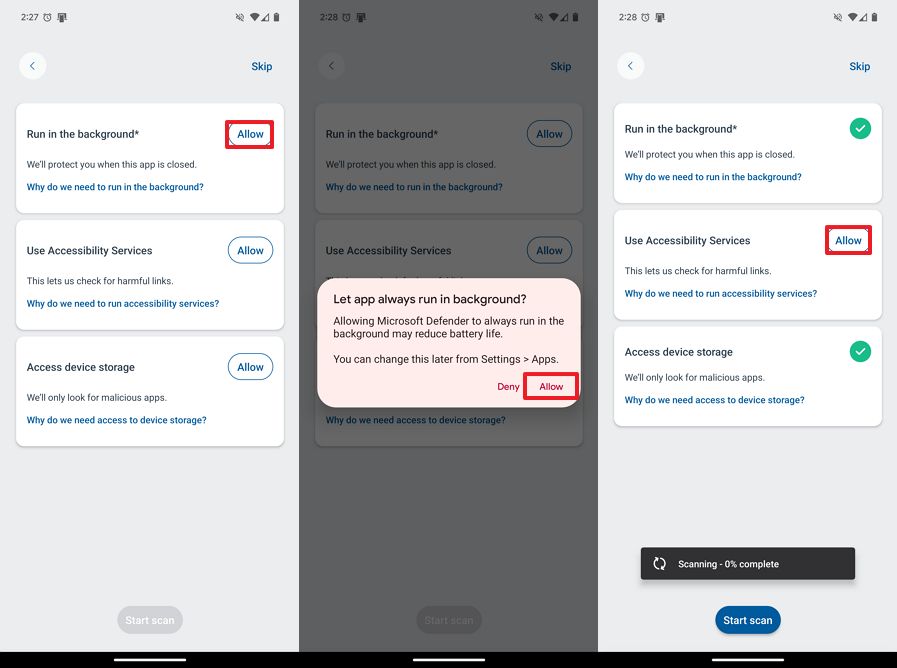
- Click the Next button.
- Click the Allow button for the “Run in the background” option.
- Quick note: You will need to enable this option to allow the service to operate while it’s not in use. However, running services in the background will cause the battery to drain faster.
- (Optional) Click the Allow button for the “Use Accessibility Services” option to enable the app to check for harmful links.
- Click the Allow button for the “Access device storage” option to enable the app to scan and detect viruses.
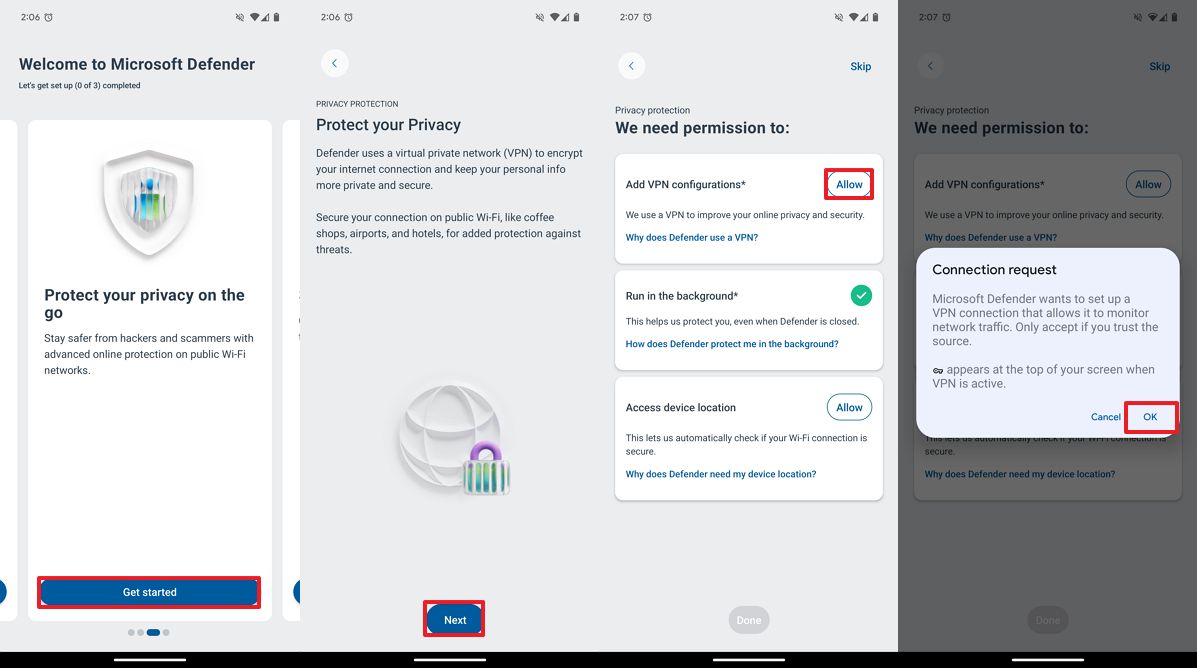
- Click on the Get started button on the “Protect your privacy on the go” card from the main page.
- Click the Next button.
- Click the Allow button for the “Add VPN Configuration” option to turn on the VPN feature.
- Click the OK button.
- Click the Skip button from the top right to access the Microsoft Defender dashboard.
After you complete the steps, you can access the dashboard to start using the app, but the experience between the desktop and mobile versions will be a little different.
Run antivirus on Android
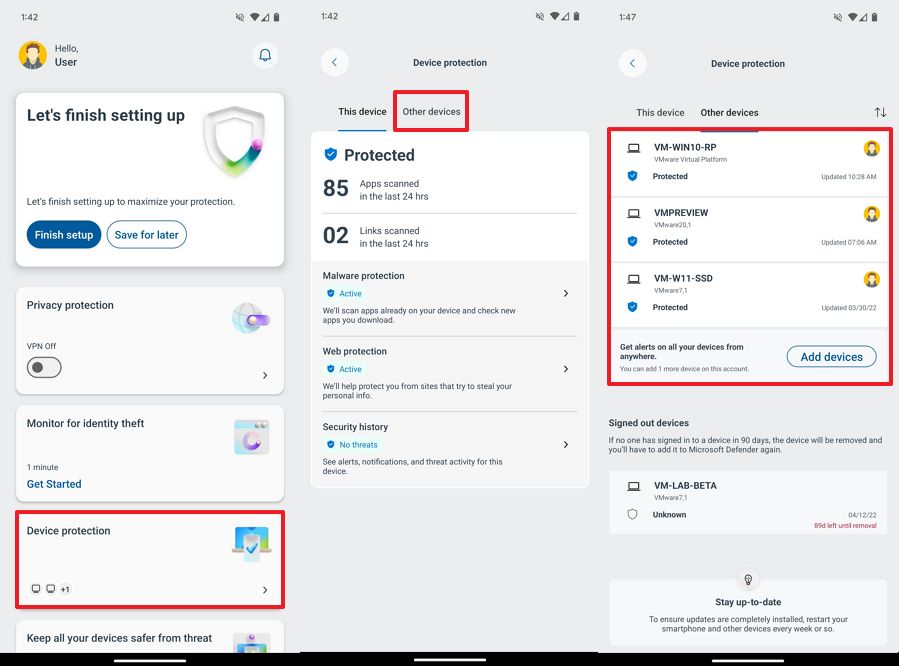
Unlike the version of the app for Windows, the Android version includes an antivirus that can scan apps for malware. It runs automatically when turning on the “Run in the background” option, but you can also run a scan manually.
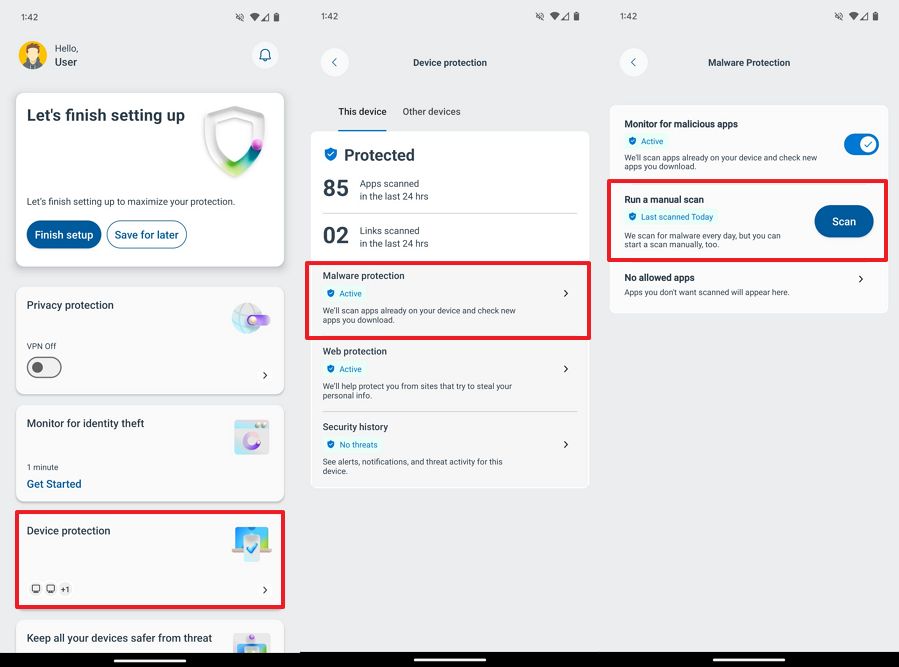
To run the Defender antivirus manually on Android, use these steps:
- Open the Microsoft Defender app on Android.
- Click on Device protection.
- Click the This device tab.
- Check the antivirus scan status.
- (Optional) Click the “Malware protection” setting.
- Click the Scan button for the “Run a manual scan” setting.
- Quick note: On this page, you can turn off the feature on or off, and you can control those apps you don’t want to be scanned.
- (Optional) Click on Web protection to turn the feature on or off.
- (Optional) Click on “Security history” to review alerts, notifications, and threat activities.
- Click the “Other devices” tab.
- Check the protection status of your other devices.
Once you complete the steps, the antivirus will run to detect and remove malicious applications.
Enable privacy protection
The “privacy protection” feature offers the same VPN service as on Windows or macOS devices.
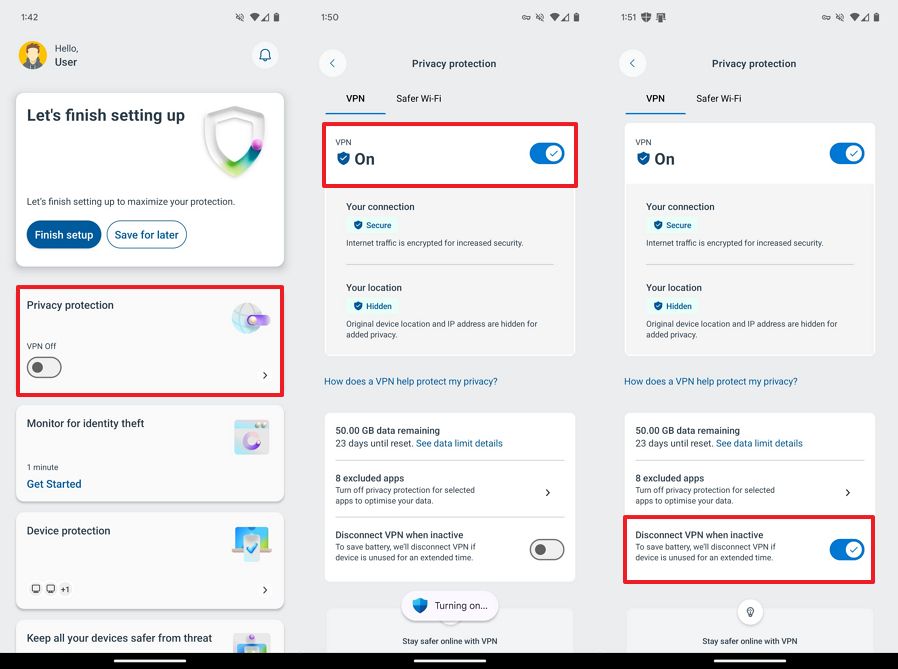
To turn on the Microsoft VPN service on Android, use these steps:
- Open the Microsoft Defender app on Android.
- Click on Privacy protection.
- Turn on the VPN toggle switch to encrypt the internet traffic.
- Turn off the VPN toggle switch to disable the feature.
- (Optional) Turn on the “Disconnect VPN when inactive” toggle switch to disconnect when the connection is not active.
After you complete the steps, the phone will connect to the Microsoft VPN service to encrypt the traffic from any application, hiding your public IP and online activities from marketers and malicious individuals.
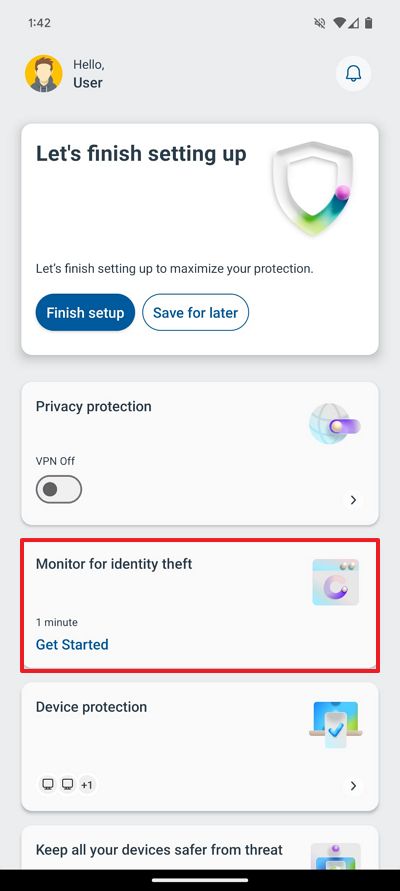
Identity theft monitoring
To get started with the identity theft monitor feature, use these steps:
- Open Start.
- Search for Microsoft Defender and click the top result to open the app.
- Click on Monitor for identity theft.
- Click the Next button.
- Confirm that your Microsoft account is correct.
- Check the option to agree to the terms.
- Continue with the on-screen directions.
Once you complete the steps, the service will start monitoring your personal details. If it finds your details on a breach, you will receive an alert with more information and recommendations to remedy the problem.
Other tips and considerations
If you plan to use this application, even though you can have multiple devices with its services, you are limited to the number of seats available in your Microsoft 365 subscription, meaning that you can only connect up to five devices.
I’m also focusing on Windows and Android devices in this guide, but the app is also available for iOS users.
Also, it’s important to make some clarifications about the app because it can be confusing for some users. The “Microsoft Defender” app doesn’t install another antivirus on your computer. Instead, it’s an app that offers a central hub to review the security of your devices connected with the same Microsoft account.
The app connects to the “Windows Security” app already installed on Windows 11 (and 10) to get information about the Microsoft Defender Antivirus and Ransomware Protection.
On Android, the app is listed as “Microsoft Defender: Antivirus,” and it offers virtually the same functionalities. However, this variant of the app installs an antivirus for your mobile device.
On iOS, the app is listed as “Microsoft Defender: Security,” and it provides most of the features, including VPN access, identity theft monitoring, antivirus, and scanning for harmful links.
More resources
For more helpful articles, coverage, and answers to common questions about Windows 10 and Windows 11, visit the following resources:


