Key Takeaways
- SteamOS can now record gameplay natively on the Steam Deck in Game Mode (but not Desktop Mode)..
- Gameplay recordings are stored in the Steam Deck’s Media Library, where you can view, edit, save, or transfer them to PC or mobile.
- You’ll need to use a third-party app to record gameplay if you’re using Desktop Mode.
Valve is finally rolling out official gameplay recording for the Steam Deck, offering multiple ways to share game footage in just a few steps. Here’s how to enable the feature, how it works, and what you can expect from the footage.
Why Record Your Gameplay?
There all sorts of reasons to record your gameplay footage, whether it’s for the community, to aid in troubleshooting, or for creating your own content.
Posting gameplay clips online is probably the main reason, as sharing amusing or impressive gameplay moments is a great way to reach out to other fans. If you’re a content creator, you can create video compilations out of your clips and show off your gameplay to others, which can help grow an audience.
Another side is the troubleshooting aspect, as gameplay footage can also be used to demonstrate bugs, errors, crashes, or other technical issues in certain games. With video evidence, you can send proof of these issues to developers or the game’s community which could lead to patches or tips to address the issues.
Gameplay footage can be useful for pathfinding and guidance in games as well, as you can refer back to it to remember where to go or what to do on certain parts of your games.
Record Gameplay Natively With SteamOS
SteamOS finally added a way to record gameplay natively, even in Gaming Mode, and all you have to do is toggle a specific setting.
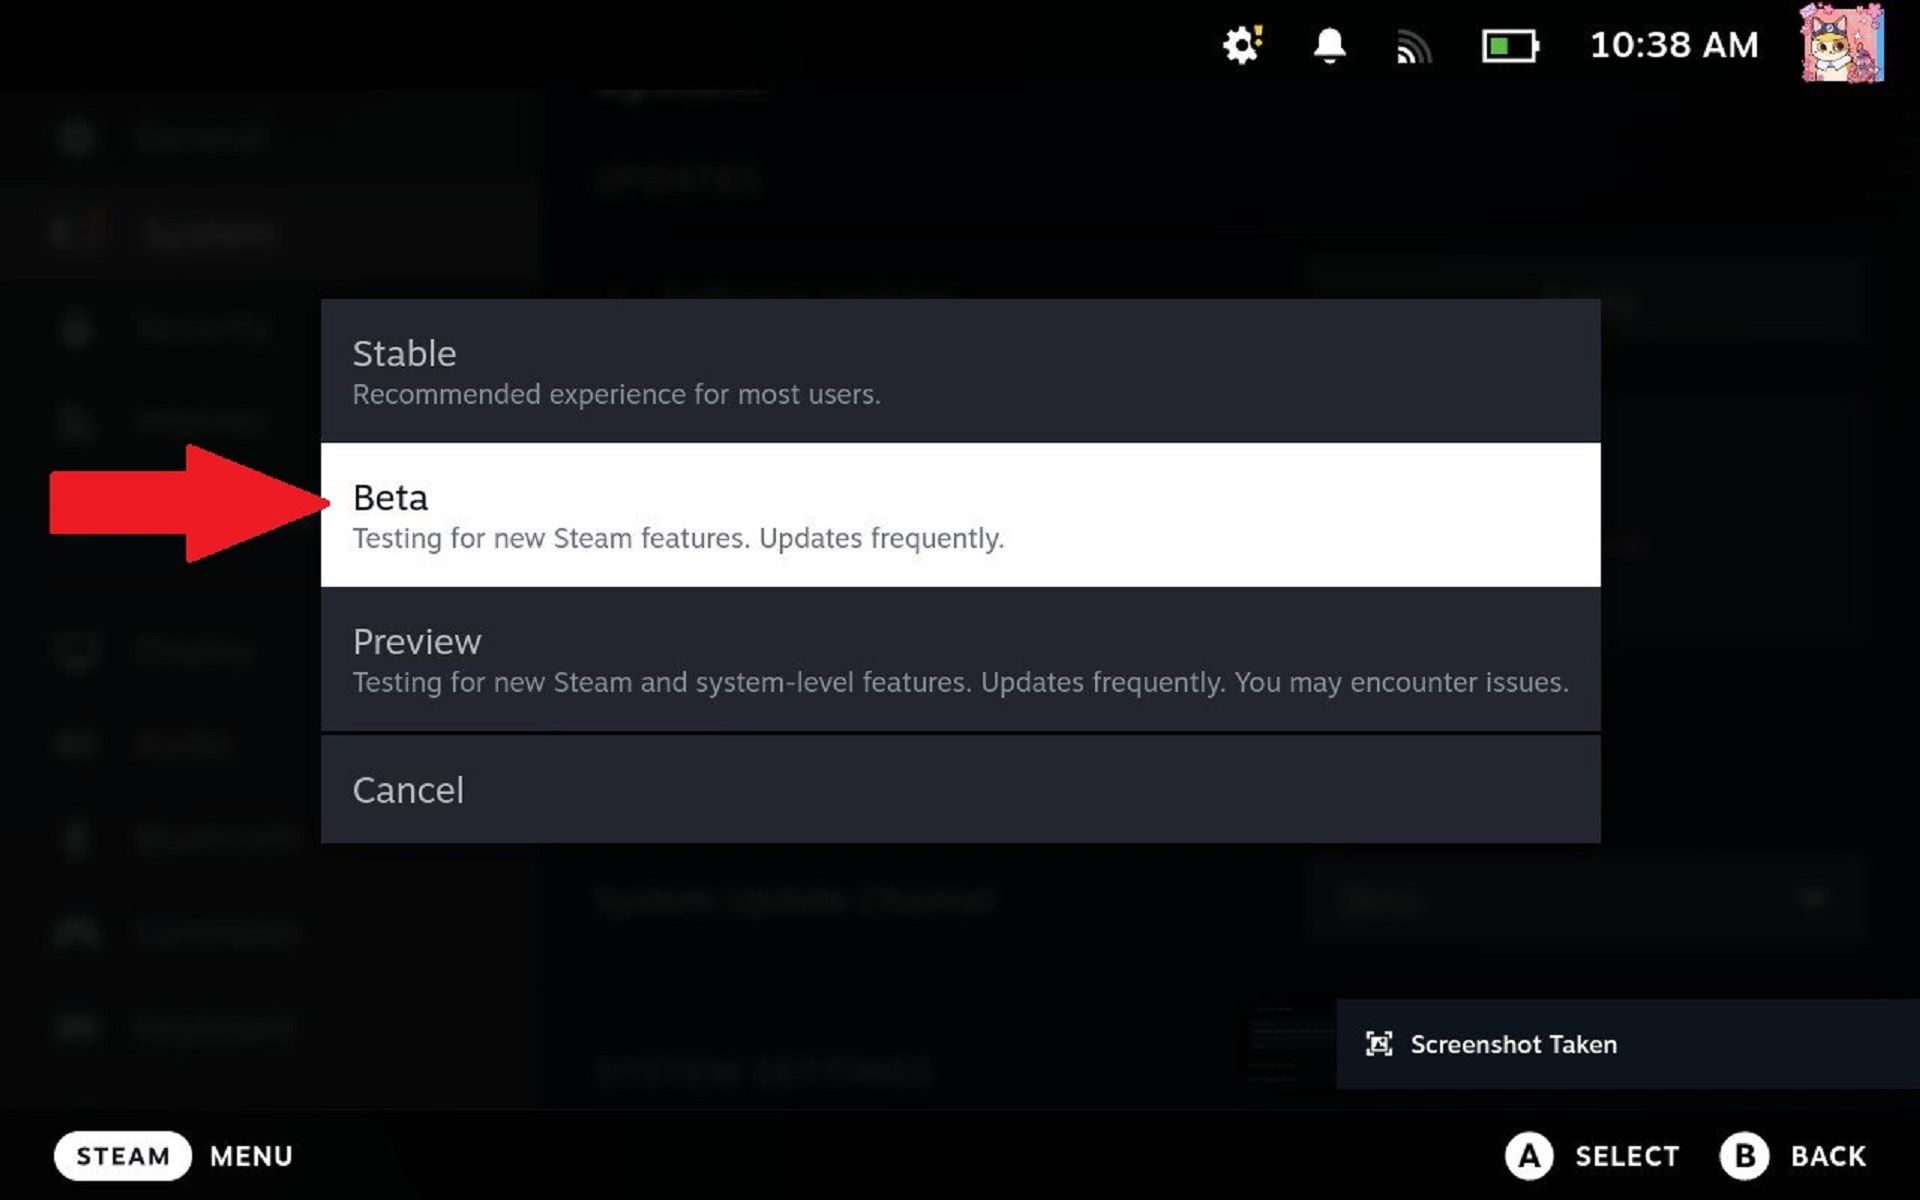
For now, you have to opt into beta features in order to use it, which is easy to do. Navigate to your settings by pressing the “Steam” button on your Steam Deck and going to Settings > System > Beta Participation > Beta and selecting the prompt to restart your Deck.
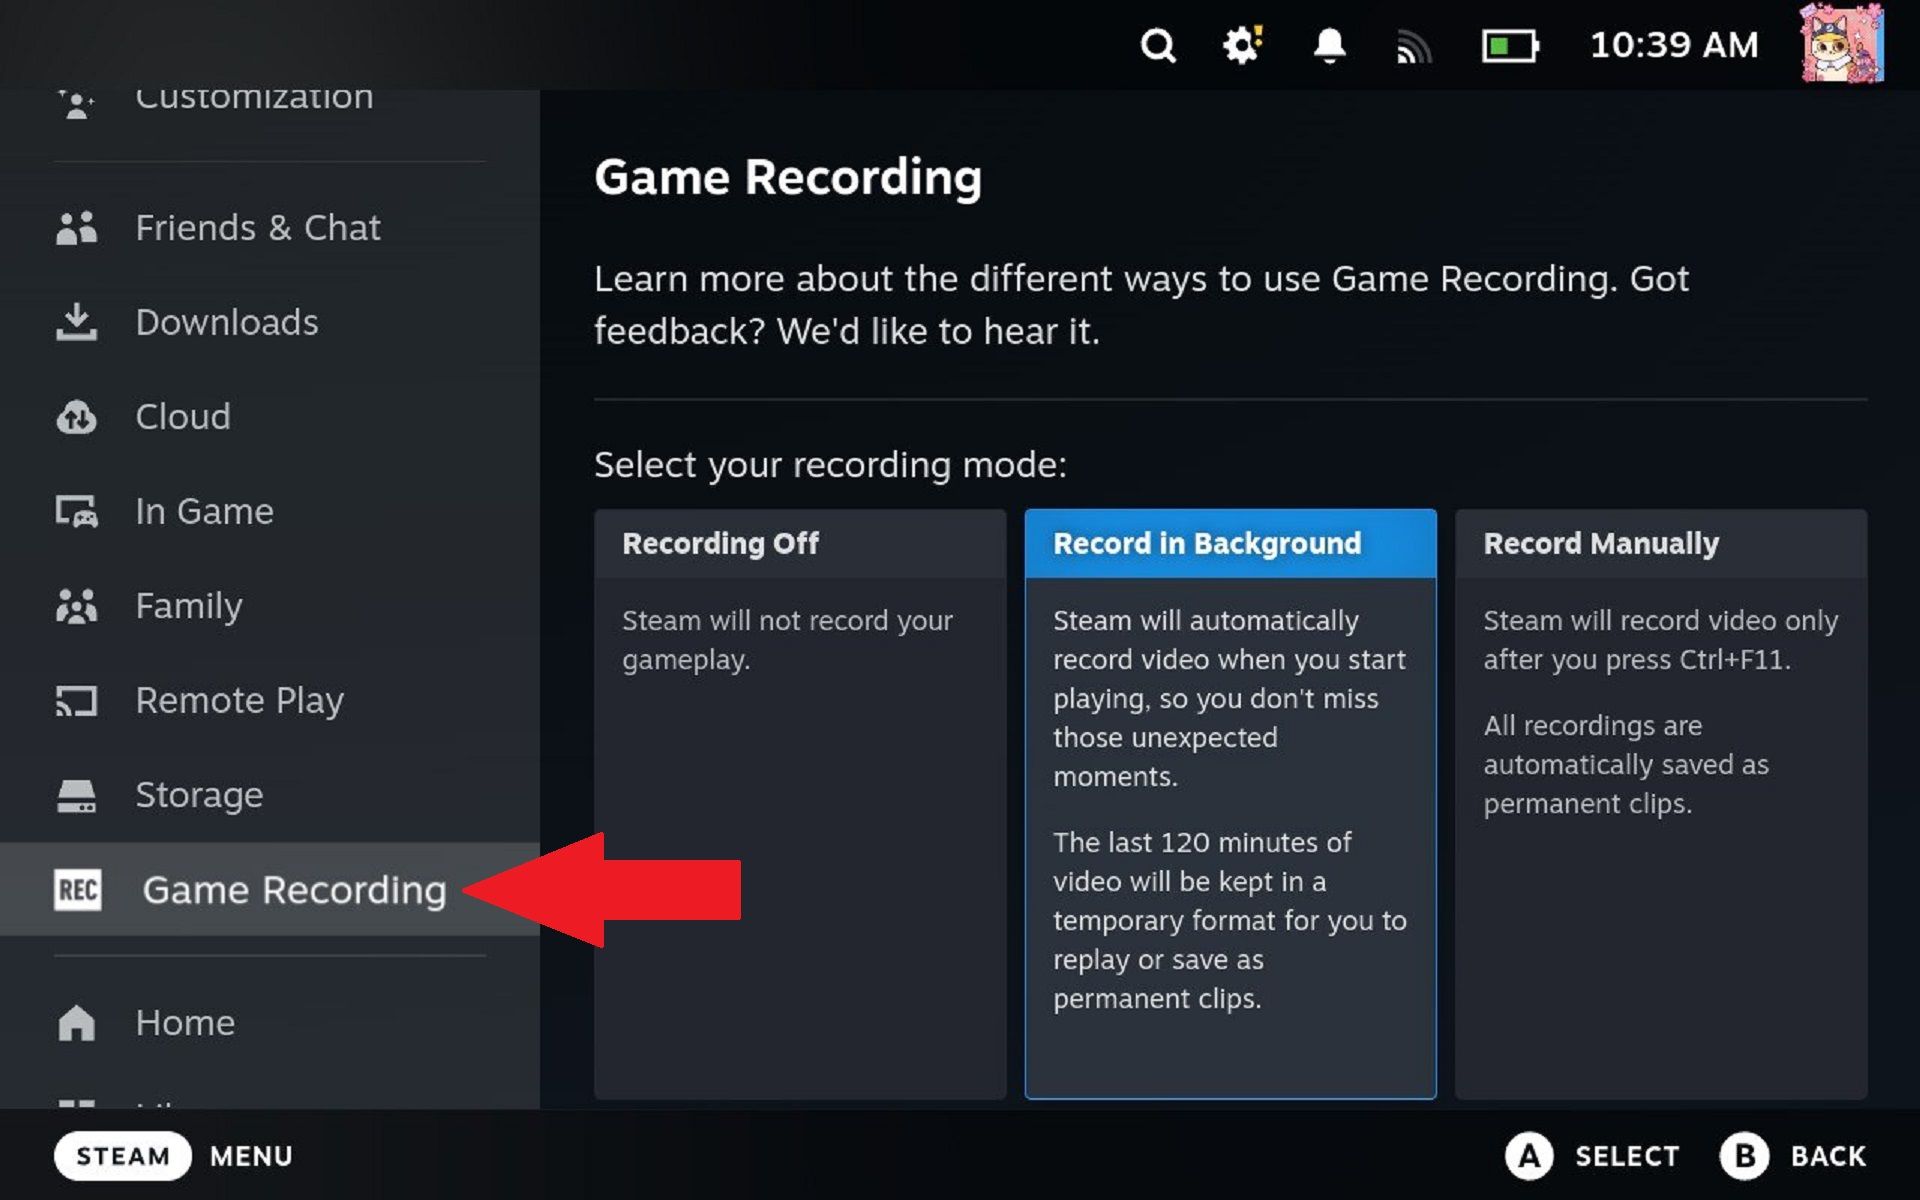
Once restarted, go back to “Settings” and select the newly created “Game Recording” section to select the method of recording you’d prefer. The default setting will save the last two hours of gameplay automatically for you to review later, which Steam later deletes on its own if you don’t save it.
Alternatively, you can set your Steam Deck to record gameplay at the press of a specific keystroke, which is automatically bound to Ctrl+F11. You can input this command by opening the virtual keyboard with the Steam button+X, or you can remap the command to the “Menu” button on the right side to record gameplay with just a long press.
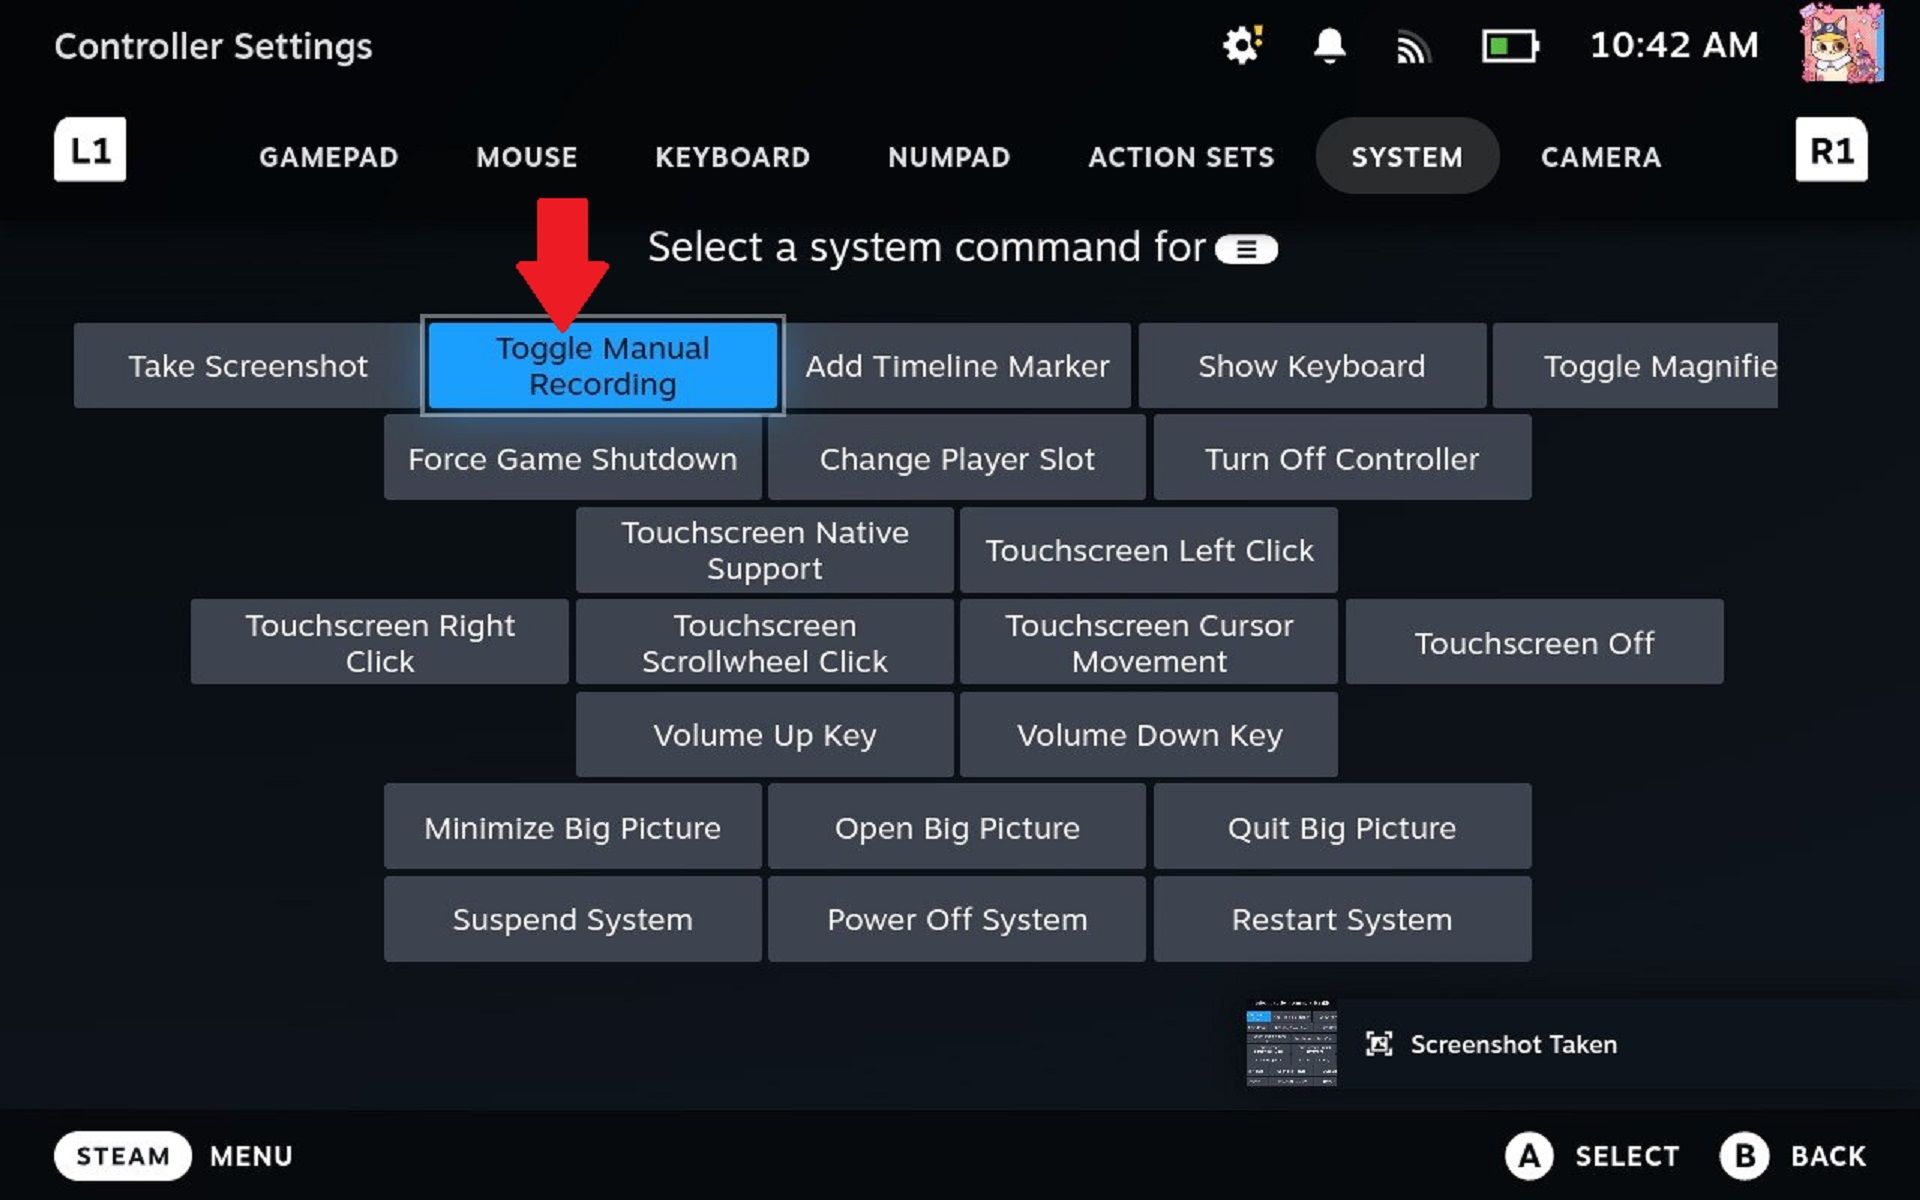
Press the “Steam” button again and go to Settings > Controller and select “Edit” on the “Desktop Layout” option at the very bottom. Select “Edit Layout” > “Buttons”, go down to the bottom where the menu button options appear and select “Change Action Set” on “Command 2.”
You will find the option to toggle manual recording under the “System” tab. You could remap this to any button you wish, but I recommend the right menu button because it’s the easiest to access and only has one other function.
Where Do Your Recordings Go?
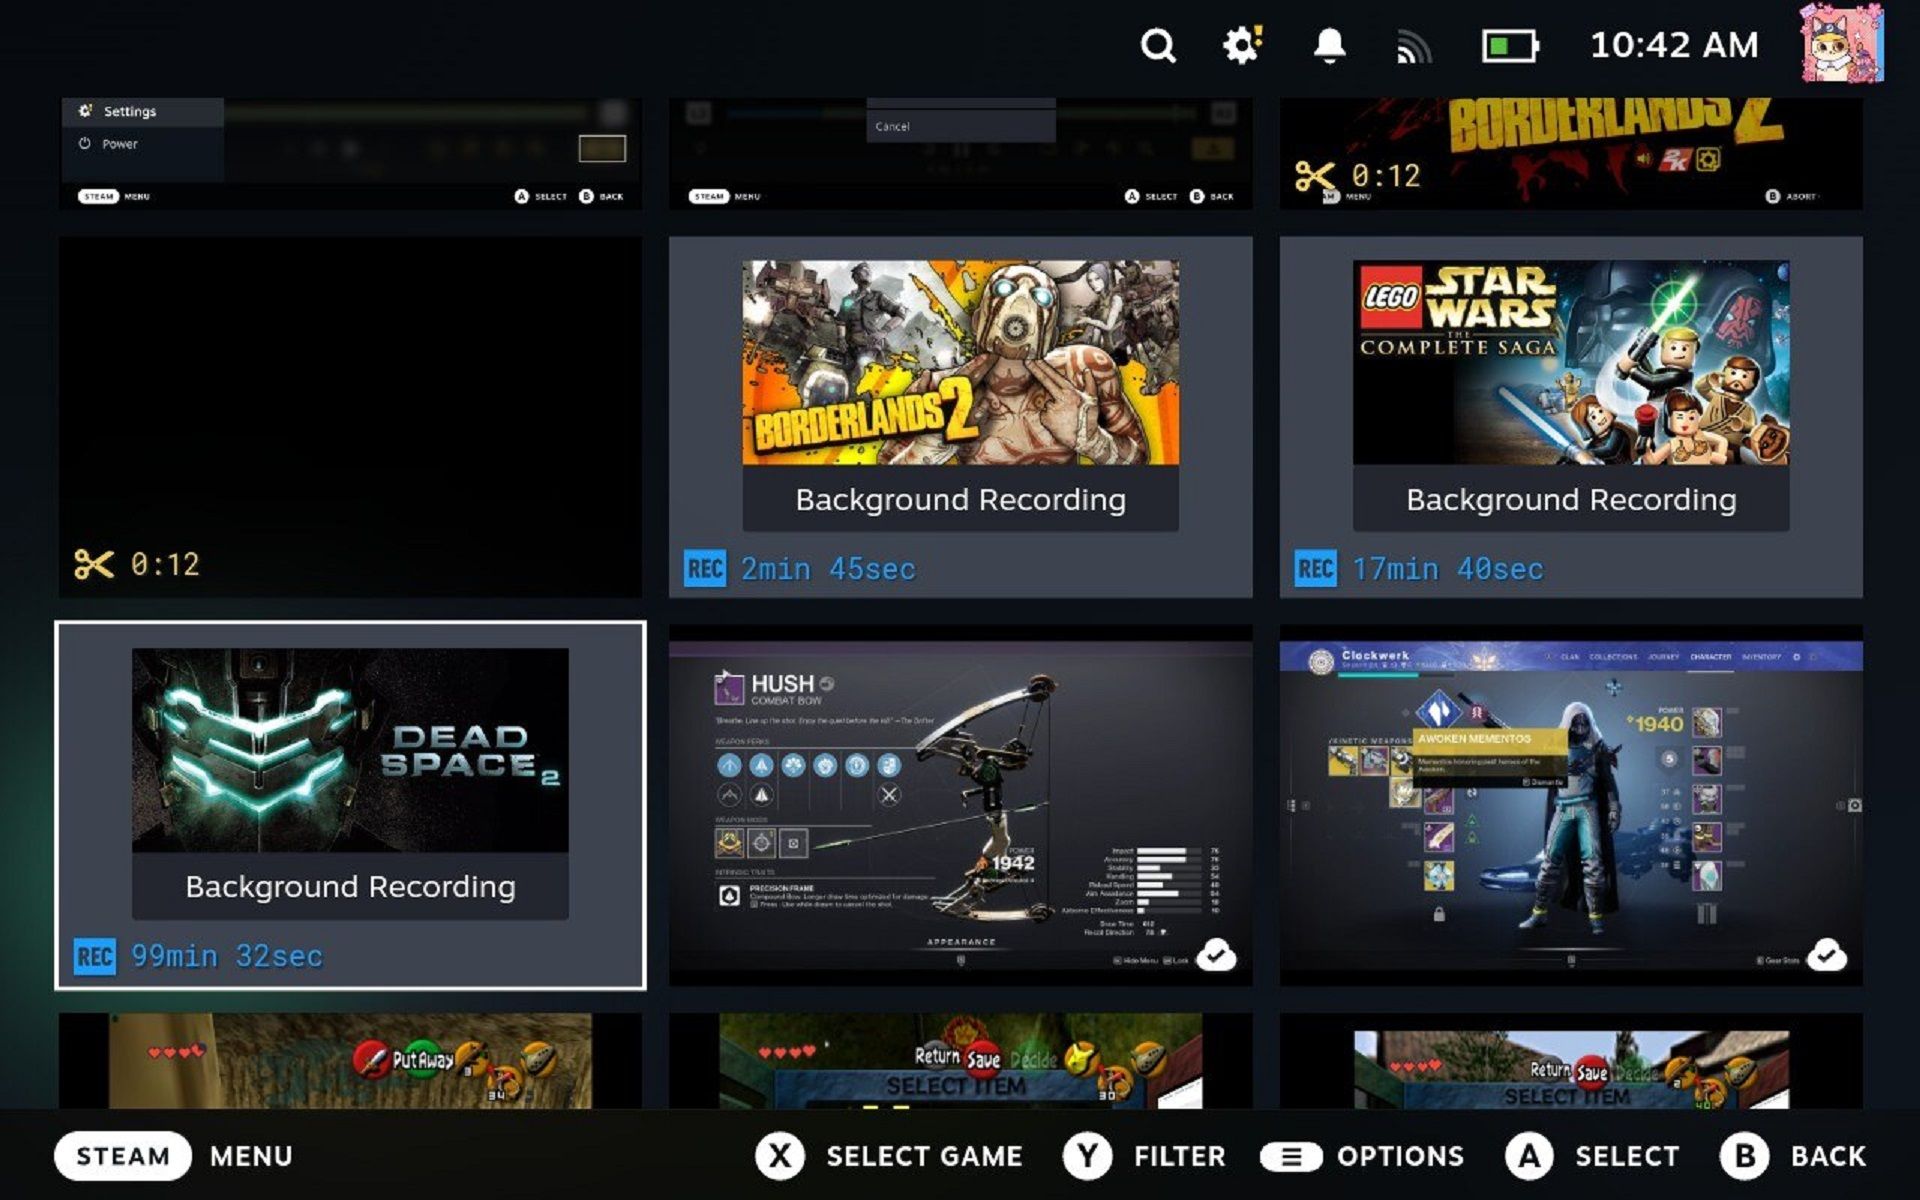
Gameplay recordings are automatically stored in your Steam Deck’s Media section, the same place where screenshots are saved. You can find it by pressing the “Steam” button and selecting the “Media” option, which will automatically show your most recent screenshots and recordings first.
From here, you can view, edit, and save your clips permanently. You can also create timestamps for relevant moments by placing markers to make sure you share only the relevant parts of your footage. You can create these in-game as well by pressing Steam+Y at the same time while game recording is enabled.
Currently, Steam’s beta recording feature won’t automatically sync your recordings to your Steam cloud, so they will only be accessible from the Deck itself unless you transfer them.
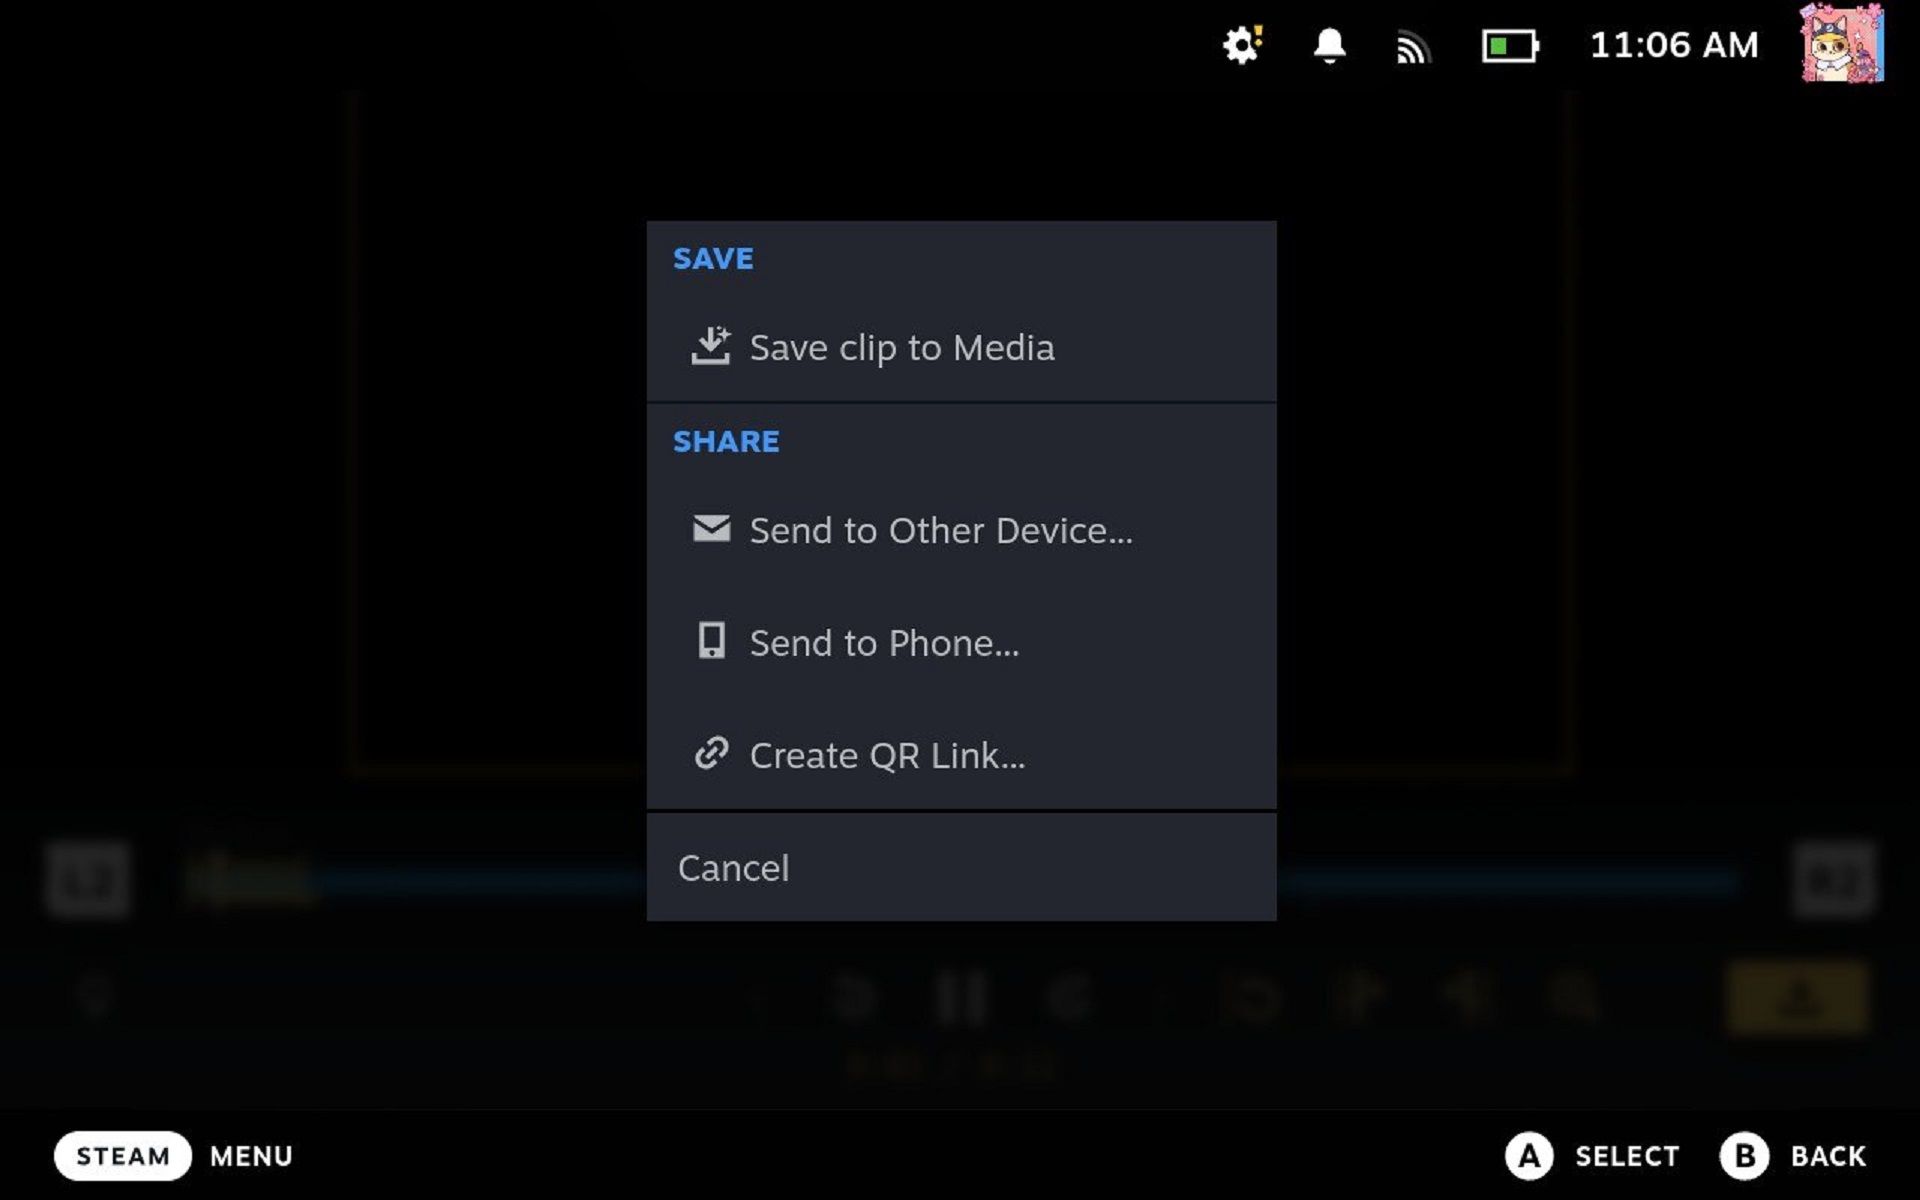
Luckily, Steam has a built-in way to send the videos to your PC Steam client remotely. All you have to do is select the scissors icon in the bottom right of your recording, select the clip you want to save using the markers and press the download button where it will automatically detect your PC Steam client and send it there for two days.
From there, you can save it permanently to your Media folder. You can also transfer your files from the Steam Deck with a USB-C flash drive or other easy methods.
How to Screen Record in Desktop Mode
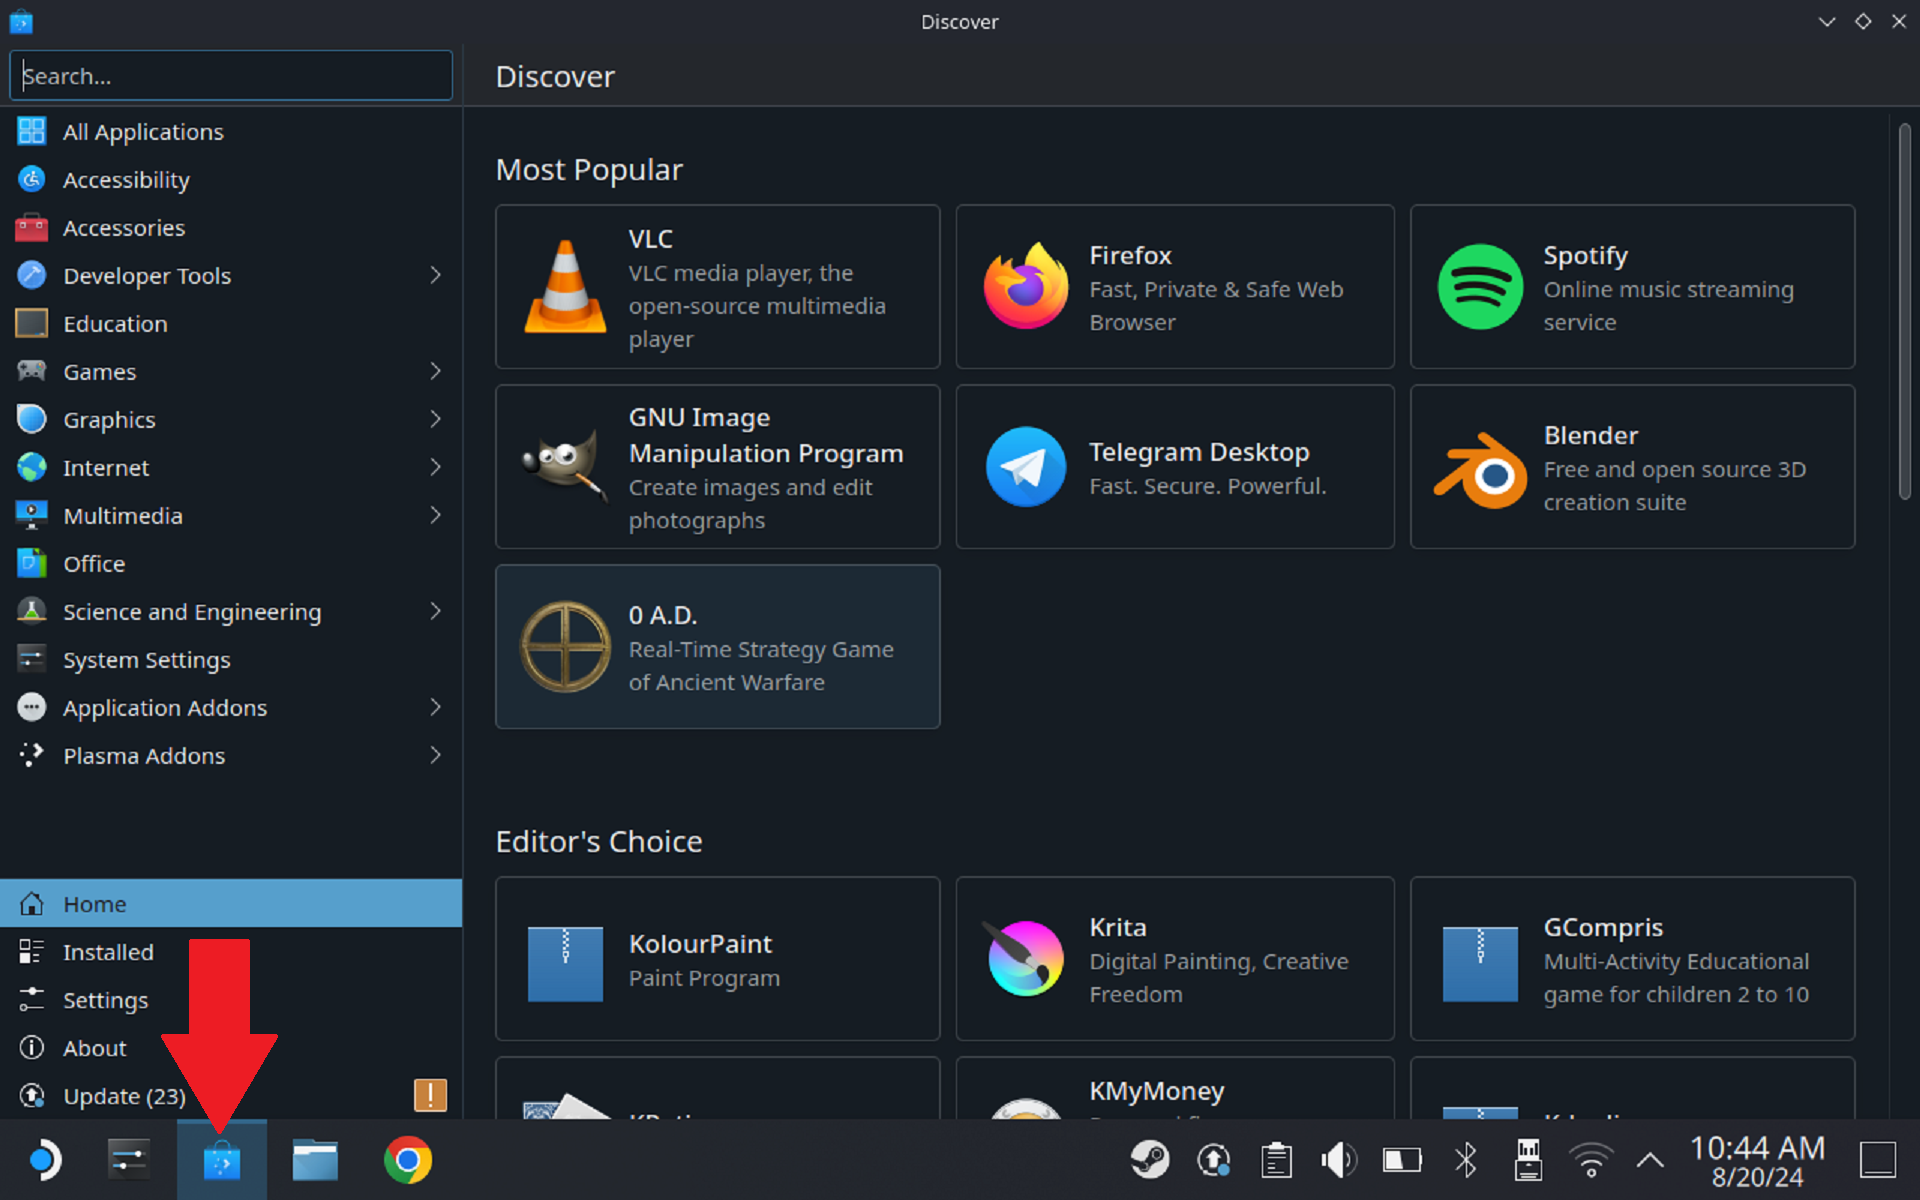
If you want to record footage in desktop mode, you’ll have to use a third-party app, since the game recording feature only functions when playing a game. Luckily, there are a few different apps that will let you do this, which you can install from the Steam Deck’s Discovery app with a simple search.
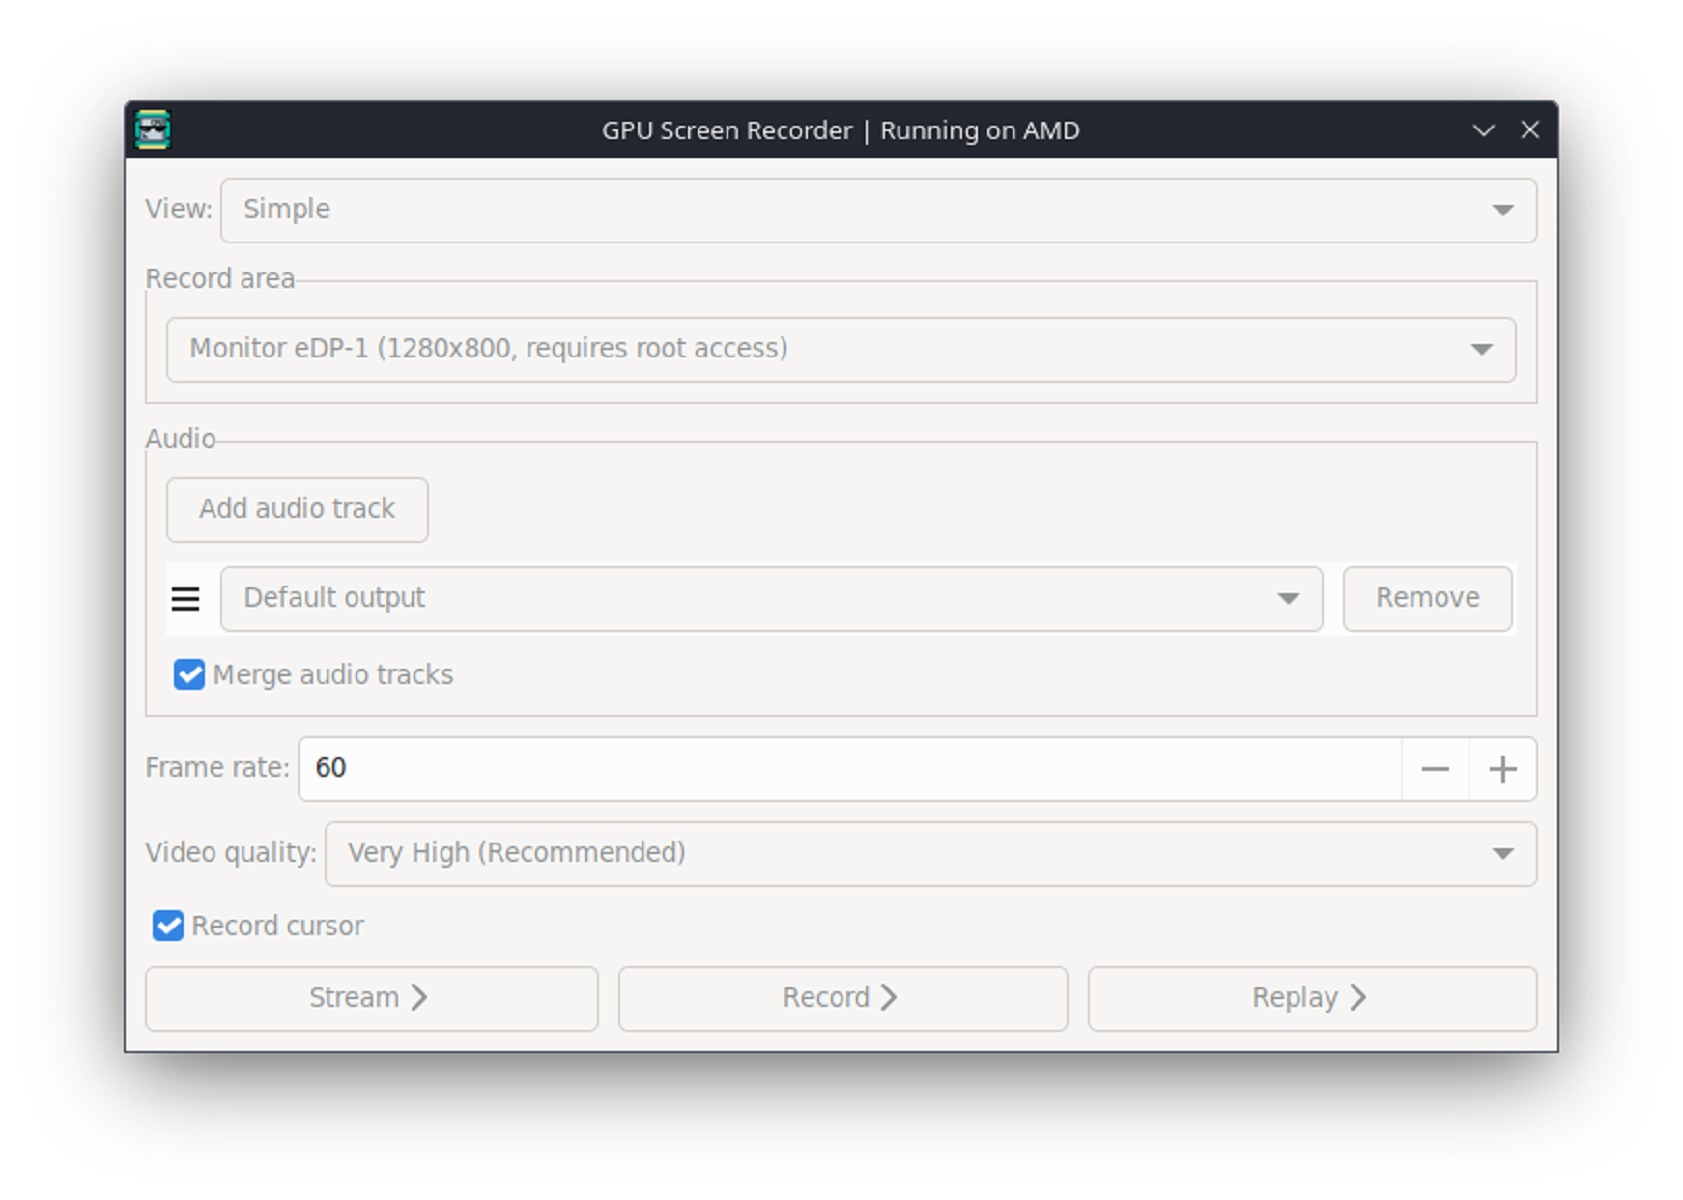
I recommend the GPU Screen Recorder app, which records your entire screen, regardless of what is currently displayed on it.
To find it, go to desktop mode by holding down the power button and selecting “Desktop Mode.” After the reboot, click on the “Discover” icon at the bottom of the screen and search for “GPU Screen Recorder,” click on it, and select “Install.”
After the installer sets up the app for you, you can click on the drop-down menu to select the app and screen you wish to record. It will then capture anything that is displayed on your screen, regardless of what it is.
Alternatively, you can always set up your Steam Deck on a dock to display on your monitor via an HDMI connection and record it with a capture card. This will also require an external application like OBS, but it would cut out the need to transfer the files after the fact or opt into beta features.
As the feature is still in beta, the Media tab doesn’t seem to show the metadata for each video or information about the resolution or framerate of a recording. Moving it to an external device, however, confirms that most, if not all recordings will output in the Steam Deck’s native 1280×800 resolution.
In its current state, the recording feature will also capture popups and elements that may be part of SteamOS or the Steam UI rather than the game itself. This means that the footage will capture notifications that friends have come online or achievement pop-ups. If you don’t want to share this with others, you may want to turn them off or edit them out.
It’s worth noting that these features are still in beta and are subject to change before Valve officially rolls them out as part of SteamOS. As such, the screen recorder has a few minor issues, like struggling to record non-Steam games and being unable to display certain information.
If you don’t want to deal with the potential issues that come with beta features, the SteamOS screen recorder will likely be implemented in the near future as an official feature. Pretty soon, you’ll be able to share your Steam Deck gameplay with anyone almost instantaneously just like you can on the Nintendo Switch.


