


While Microsoft Excel is one of the most powerful spreadsheet applications, it’s also the most intimidating tool in the Microsoft Office suite. If you’ve never used Excel before or are just a bit nervous to start, this beginners guide is for you.
We’ll walk you through creating and saving a new workbook, adding and organizing spreadsheets, entering text and numbers, and the basics of functions and formulas.
Ready? Open the Excel application and let’s get started!
Note: The details in this guide applies to Microsoft Excel for Microsoft 365 on Windows. You may see variations in terms, tool locations, or available options, but most Excel versions have the same basic features.
How to create a new workbook
You can create a new empty workbook where you add your own spreadsheets or simply begin with a built-in Excel template for a jump-start. For this guide, you can choose the Blank workbook to best familiarize yourself with the features we’ll discuss.

How to name and save a workbook
Just like when you use Microsoft Word, it’s crucial to name and save your Excel files right from the start. You can then continue to save the changes you make to ensure you don’t lose your work.
- To name and save a new workbook, open the File tab and select Save.
- Choose a location for the file and give it a name on the right.
- Select Save.
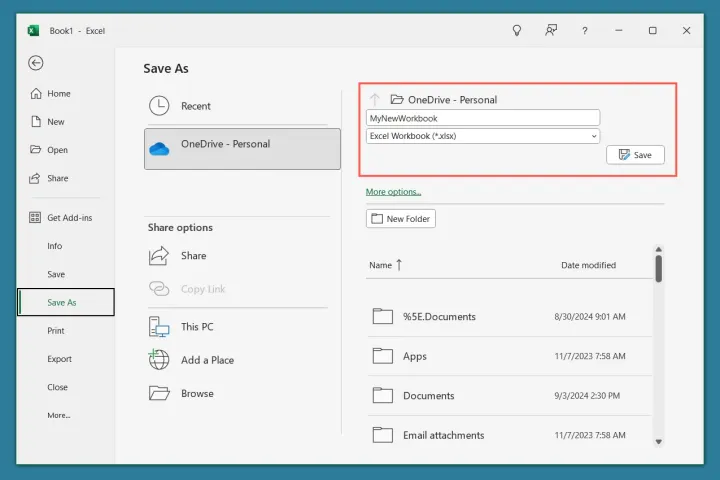
To continually save your file, you can use the Save button in the Quick Access Toolbar at the top or use File > Save.

How to use AutoSave
If you’re a Microsoft 365 subscriber, you can also take advantage of the AutoSave feature. With this enabled, the file saves automatically to OneDrive as you work on it, eliminating the need for you to manually save it.
- Turn on the AutoSave toggle in the title bar to enable the feature.
- Choose the OneDrive account if you have more than one.
- Enter a file name if you haven’t already and pick OK.
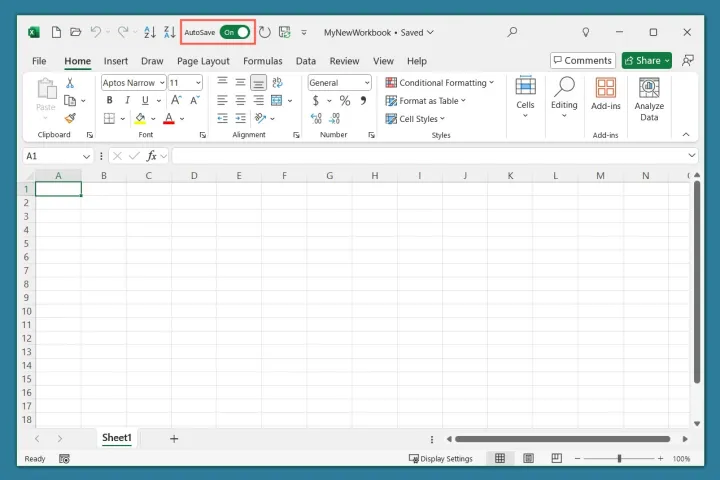
You’ll notice that the AutoSave toggle remains enabled in the title bar. Just keep in mind that this applies only to the current workbook. Follow the same steps to enable AutoSave for additional Excel files.
Get familiar with the workbook and spreadsheet view
Like other Microsoft Office applications, Excel has a title bar at the top, a row for tabs like Home and Insert beneath, and then the ribbon right below that. At the bottom of the Excel window is the status bar.

Getting familiar with the workbook and spreadsheet view is one of the most important things to learn about Excel.
The spreadsheet view
The main part of the window is the spreadsheet, which is comprised of columns, rows, and cells. It’s in the cells that you enter your data.
Each column has a letter at the top and each row has a number on the left. This means that every cell has a unique name by default, called a cell reference.
For example, the first cell in a sheet, located on the top left, is cell A1 because it’s in column A, row 1. You can also see the cell name in the Name Box to the left of the Formula Bar.

The Formula Bar
The Formula Bar is where you can see and enter the contents of a cell.
If you enter simple text in a cell, you’ll see it in the cell and in the Formula Bar.

But if you enter a formula in a cell, you’ll see the formula in the Formula Bar and the result in the cell.

We’ll explain more details on formulas later in the guide.
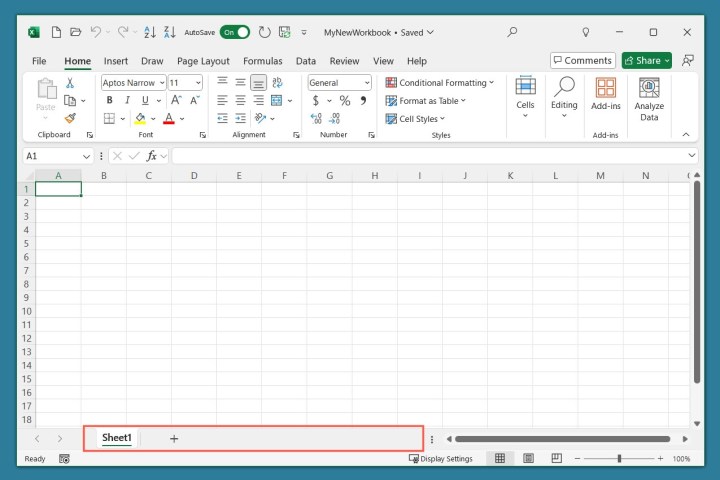
The sheet tabs
At the bottom of the workbook, you’ll see the sheet tabs (tabs for the spreadsheets). Within any Excel workbook you create, you can add multiple spreadsheets. These then display as sheet tabs, making it easy to switch between them.
This brings us to the next section which is creating and organizing spreadsheets.
How to add and organize spreadsheets
Once you create, name, and save your workbook, you can start working with spreadsheets.
Along with adding sheets, you can customize them for better organization. This includes renaming sheets, adding a tab color, and rearranging the sheet tab order.
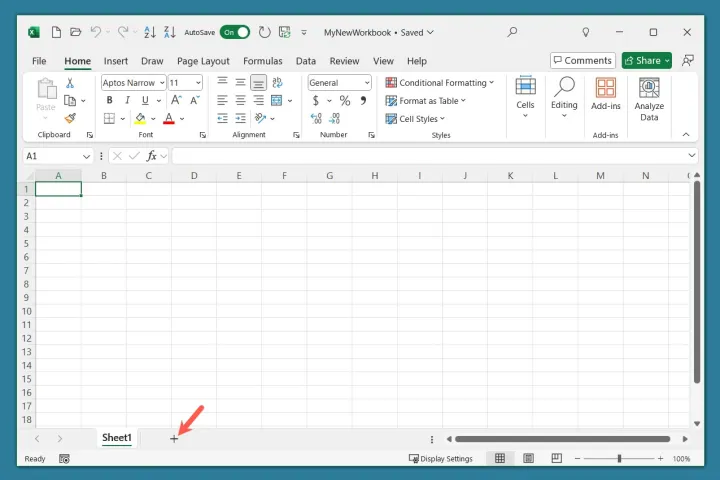
Create a spreadsheet
To add a new spreadsheet, click the plus sign to the right of a sheet tab at the bottom.
Rename a spreadsheet
By default, Excel names each new spreadsheet you add as Sheet1, Sheet2, Sheet3, and so on. If you plan to use many sheets or want an easy way to distinguish between them, you can give a sheet its own name.
Either double-click the current sheet name or right-click the sheet tab and choose Rename. Type the new name and press Enter.

Add a sheet tab color
Along with renaming sheets for better recognition, you can add a sheet tab color. This gives you a handy way to organize related sheets by color or to quickly spot one you frequently use.
Right-click the sheet tab, move to Tab Color, and choose a color in the pop-out palette.

You’ll then see the colored sheet tab.

Rearrange sheet tabs
One more way to keep your sheets organized is to arrange them in the order that works best for you.
After you create more sheets, simply select, hold, and drag a sheet tab where you want it. As you drag, you’ll see a tiny arrow appear directly above. When the arrow is in the location where you want the sheet tab, release.

How to work with cells
Cells are the crux of the spreadsheets in Excel. You’ll use these rectangles to enter text, values, formulas, and data.
To enter something in a cell, simply select the cell, begin typing, and press Enter when you finish. Alternatively, you can select the cell, place your cursor inside the Formula Bar, and enter your cell data there.

Enter text in cells
You’ll likely use text in Excel for a variety of purposes. You may have a spreadsheet for an employee schedule, monthly bills, a calendar, or a project plan.
Just select a cell and enter the text as described above. You can then keep the cell selected and head to the Home tab to format the text if you like.
Use the tools in the Font section of the ribbon to change the font style, size, or color and the Alignment section to center it or align it to the left or right.

Tip: You can learn how to wrap text in Excel for sentences and paragraphs.
Enter numbers in cells
While entering a number in a cell is the same as entering text, it’s normally the formatting of that value that’s important. For instance, you may want to format it as a currency, percentage, time, or date.
After you enter the number, keep the cell selected and go to the Home tab.
Open the drop-down menu at the top of the Number section of the ribbon and choose the format you want to apply. Alternatively, you can use one of the format buttons in that same section.

How to use functions and formulas
The real power behind Microsoft Excel is the ability to manipulate data that includes using functions and formulas. Because Excel’s functions and formulas can easily warrant multiple tutorials, we’ll just cover the basics here.
About functions and formulas
A function is a preprogrammed operation that performs a task behind the scenes. Common examples of Excel functions include SUM, AVERAGE, and MIN.
A formula is an equation that can use a function to perform an operation on cells or values. Examples of formulas using the above functions include:
- SUM(A1,B1): Adds the values in cells A1 and B1.
- AVERAGE(A1,B1): Averages the values in cells A1 and B1.
- MIN(A1,B1): Returns the minimum value from cells A1 and B1.
It’s important to note that you are not required to use a function in a formula if you’re performing a simple operation.
For example, you can add the values in cells A1 and B1 using the formula =A1+B1. You can see that we simply use a plus sign to add the cell values.
That formula performs the same operation as this one that uses the SUM function: =SUM(A1,B1).
Functions are most helpful for performing complex operations and go beyond basic equations like addition, subtraction, and multiplication.
Enter a formula in a cell
When you enter a formula in a cell, you must start it with an equal sign (=). This tells Excel that a formula is to follow.
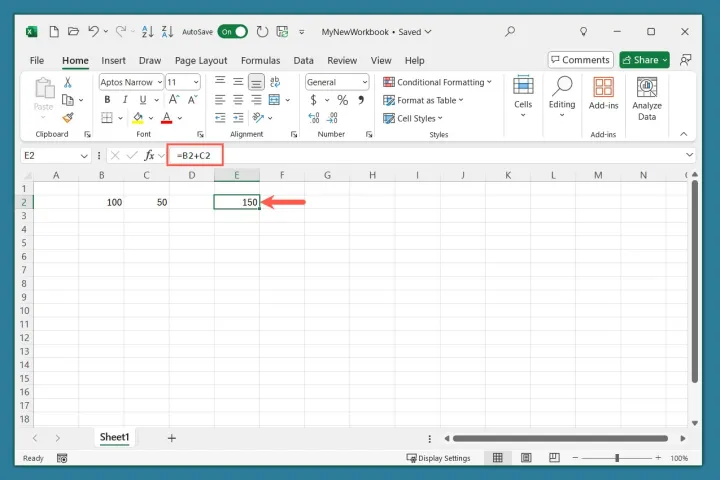
After you type the formula and press Enter, you’ll see the result in that cell. For a simple example, we enter a formula in cell E2 to get the sum of the values in cells B2 and C2.
As you can see, the formula we enter in cell E2 is replaced with the result while you can see the formula in the Formula Bar.
Get help with functions and formulas
As a beginner, you’ll probably need a bit of help with the functions available and how to properly assemble a formula (syntax). Luckily, Excel provides assistance to get you started.
Tip: You can also check out how to use ChatGPT to write Excel formulas.
- Either go to the Formulas tab and select Insert Function in the ribbon or use the Insert Function button to the left of the Formula Bar.

- Enter a description of the operation you want to perform in the box at the top of the pop-up window or choose a category and select Go.
- You’ll then see the results beneath. Choose a function in the list to see its description and formula syntax. Select OK to use the function.
- In the subsequent pop-up window, enter the values or cell references you want to use for the function’s formula. You’ll see a brief description of the result you’ll receive. Select OK to use the formula.
- You’ll receive the formula result in the cell and can review the formula you created in the Formula Bar.


There you have it — a basic guide to using Excel as a beginner. But there is much more to learn! For setting up a spreadsheet, look at how to add an Excel column. And for structuring your data visually, check out how to make a graph in Excel.


