Managing the constant influx of emails manually can feel like a full-time job. That’s why it makes sense to automate your inbox. With features like quick steps and email filters, you can streamline routine tasks and let Outlook do the heavy lifting. Here’s how I automate my Outlook inbox.
1 Utilize Quick Steps
I used to manually perform the same actions, like archiving emails, marking them as read, or moving them to specific folders, which took time and effort. To simplify the process, I began using custom Quick Steps, and managing emails has been remarkably easy ever since. It lets me automate repetitive tasks with just a few clicks and keep my inbox organized.
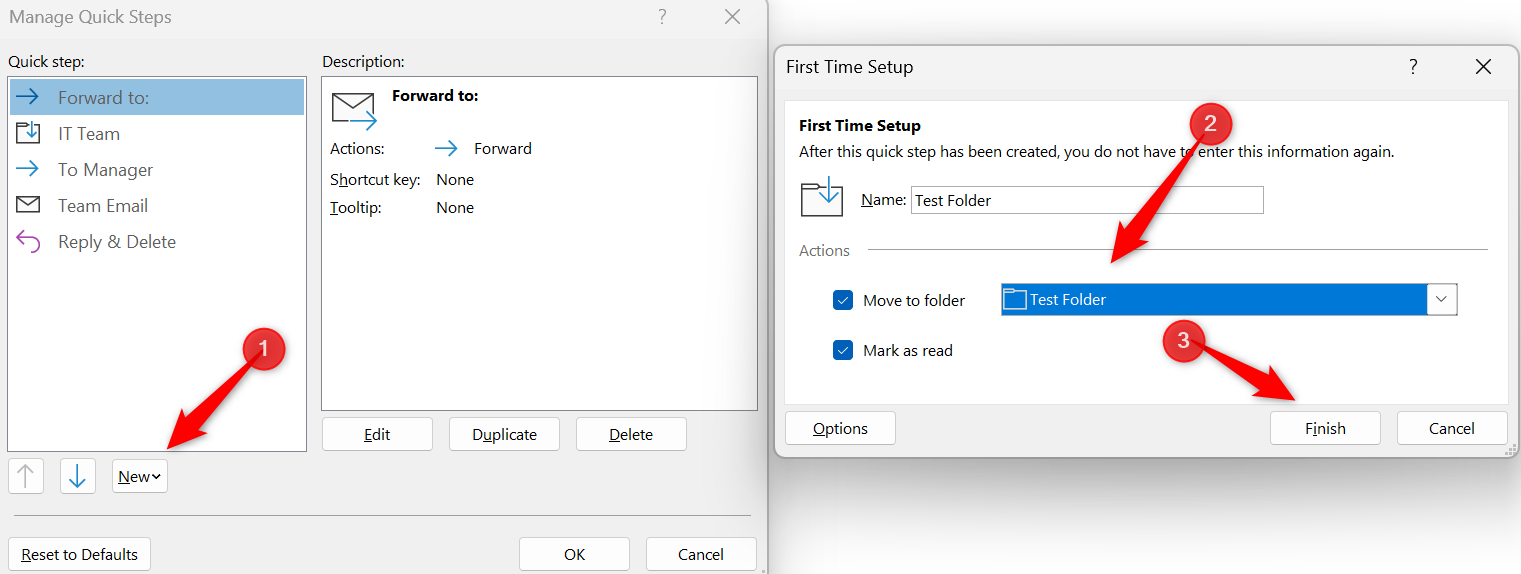
To set up Quick Steps in Outlook, go to the “Home” tab and click on the downward arrow in the bottom-right corner of the Quick Steps group. Then, click “New,” choose the actions you want to automate, and if needed, click “Custom” to create custom quick steps. Once you’re done, click “Finish” and start using the quick step to automate tasks.
2 Turn On Focused Inbox
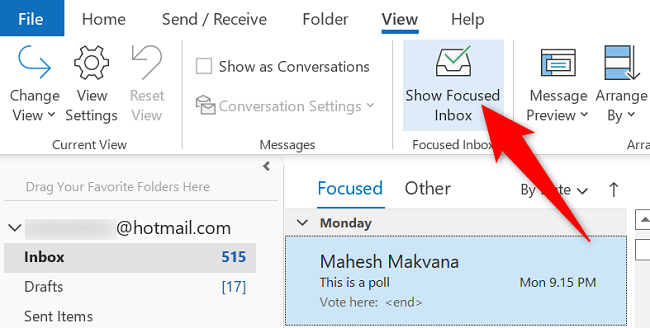
The Focused Inbox feature has been a game-changer for keeping track of my important emails. Before using it, crucial messages used to get buried under a pile of less relevant ones. This feature now automatically divides my inbox into two tabs: Focused and Other. The Focused tab contains emails from frequent contacts, while lower-priority ones are sorted into the Other tab.
To activate Focused Inbox, open Outlook and go to the “View” tab in the top menu. From there, click on “Show Focused Inbox.” If Outlook misplaces an email in the wrong tab, right-click it and move it to the correct one. Outlook will adjust its sorting for future emails based on your preferences.
3 Create Email Templates
When I started my first job, I used to waste a lot of time drafting the same types of emails from scratch repeatedly. It was a rookie mistake, but after getting advice from a senior colleague, I created templates for frequently used emails. I use pre-written templates, which has made my email communication much faster and more consistent.
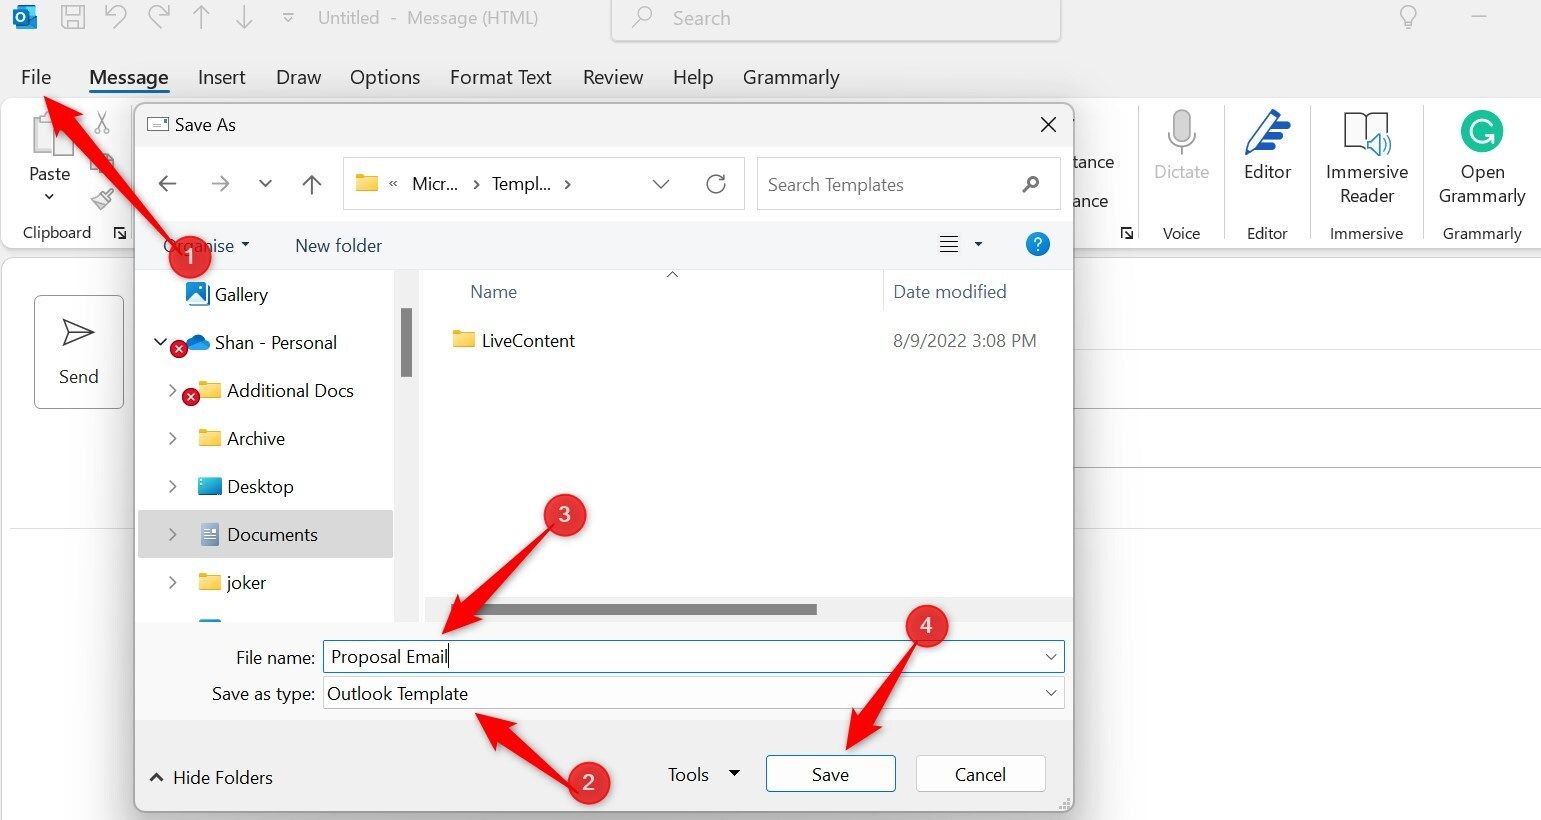
To create a template in Outlook, draft your email, including the subject line and body text, and leave placeholders like “Recipient’s Name” where needed. Once done, click “File” in the email window and choose “Save As.” In the “Save as Type” dropdown, select “Outlook Template” (*.oft), and save it with a memorable name.
4 Schedule Emails for Delayed Delivery
Microsoft Outlook allows you to draft emails now and schedule them to be sent later, and I’ve been using it since my first week with Outlook. This feature helps me easily coordinate across different time zones, send timely reminders, and ensure my emails arrive at just the right moment.
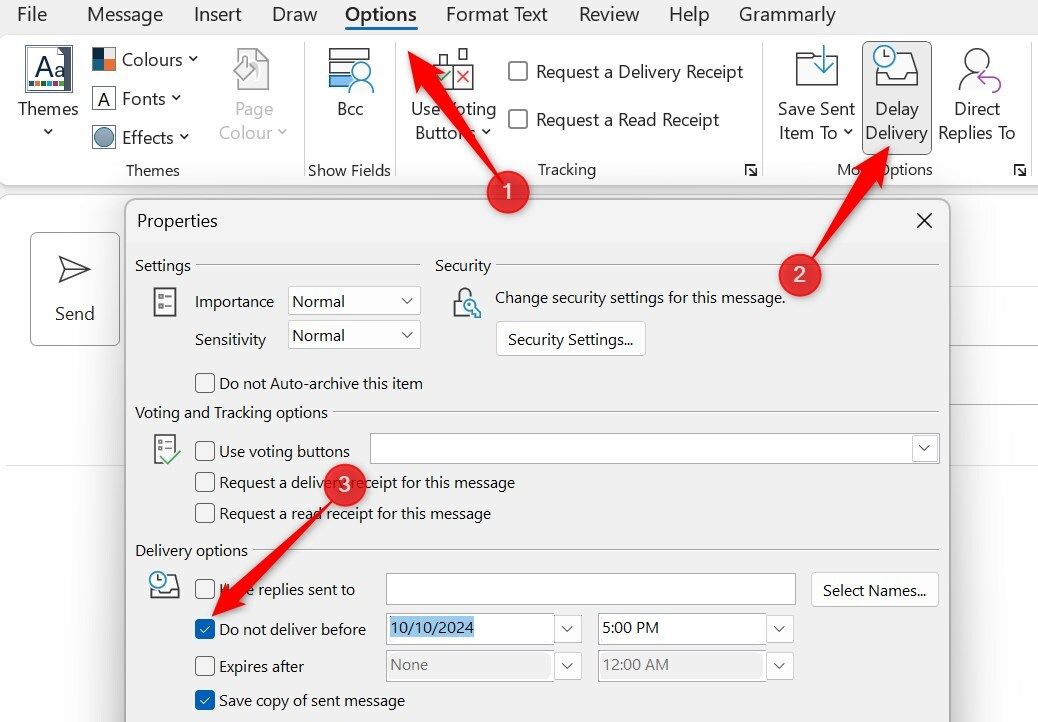
It also allows me to write emails during my free time and space them throughout the day, making it easier to manage responses. To schedule an email in Outlook, ready your email, go to the “Options” tab in the email window, and click on “Delay Delivery” in the More Options group. Then, check the box next to “Do Not Deliver Before” and select your desired date and time.
After that, click “Close” then “Send.” The email will remain in your Outbox and be automatically sent at the scheduled time.
5 Take Advantage of the Sweep Feature
Sweep is a handy yet often overlooked tool for managing repetitive and unwanted emails. I didn’t start using it until much later than I should have. This feature lets you quickly delete, move, or archive large amounts of emails from specific senders with just a few clicks. I frequently use it to clear out newsletters and promotional emails from my inbox.
To use the Sweep feature, select an email from the sender you want to manage, then find the “Sweep” button in the “Home” tab. Click it to open the drop-down menu, and choose your preferred action: move all messages from the Inbox folder, keep only the latest message and delete the rest, delete all messages from the Inbox, or more.
After selecting your preferred action, click “OK.” Then, wait for the Outlook client to process your request.
6 Set Up Auto-Replies When You’re Out of Office
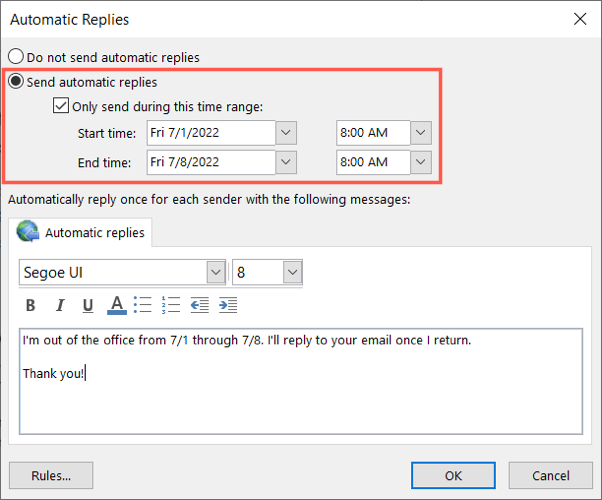
One feature I always recommend everyone to use is the out-of-office auto-reply. It informs others that you’re unavailable, whether for a business trip or vacation, and lets them know when they can expect a response. This way, your inbox doesn’t get overwhelmed with emails and follow-ups, and you won’t have to explain your absence once you’re back.
To set up automatic replies in Outlook, go to the “File” tab, click “Automatic Replies,” and enable the “Send Automatic Replies” option. Check the “Only Send During This Time Range” box and set your absence’s start and end dates/times. You can even create different messages for people inside and outside your organization.
Once done, click “OK,” and Outlook will handle the auto-replies for you during your specified period.
7 Filter Incoming Emails Smartly
One of the most effective ways to streamline email management is by smartly filtering incoming messages. I’ve set up rules to direct important emails from specific contacts into their folder, categorize less important ones separately, flag emails containing certain keywords, and more. With this filtering, most emails go straight to their designated locations.
To create rules in Outlook, go to the “Home” tab, click “Rules,” and select “Manage Rules & Alerts.” Then, click “New Rule” and choose the criteria for how you want your emails to be automatically filtered.
In addition to the examples mentioned earlier, you can set rules to apply categories automatically, use conditional formatting to highlight important emails, and much more.
8 Automatically Archive Old Emails
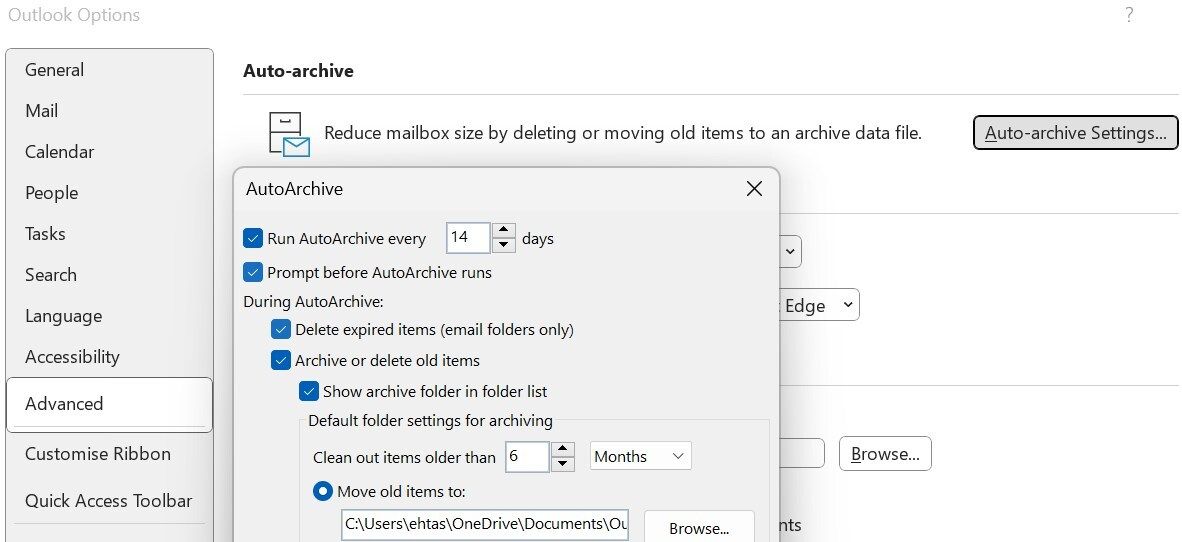
One of the most effective ways to keep my Outlook inbox organized is by using the auto-archiving feature. With Auto Archive, I can automatically move emails from my inbox to designated folders or the archive based on specific time intervals. This prevents my inbox from becoming cluttered with emails I no longer need.
If I need to access any archived emails, I can easily find them in their respective folders. To set up AutoArchive in Outlook, go to File > Options. Next, click “Advanced” in the left-hand pane, locate the AutoArchive section, and click “AutoArchive Settings.” From there, you can choose how often you want AutoArchive to run (e.g., every 7 or 14 days).
You can also designate a specific folder for archiving and configure AutoArchive to only apply to certain emails.
These are some methods I use to automate my email management in Outlook. They help minimize manual effort and prevent my inbox from becoming cluttered. If you haven’t tried them yet, you’re missing out. Also, we often make unintentional mistakes in Outlook that can complicate inbox management, so you should try to avoid them.


