On Windows 11, during the installation process to the Windows 11 2024 Update (version 24H2) using an in-place upgrade, the system creates a backup of the previous setup to revert the process in case a critical issue occurs.
However, even after the installation, the files are kept inside the “Windows.old” folder, taking around or more than 20GB, which could be significant for devices with limited capacity.
If your computer is low on storage after installing the 2024 Update, Windows 11 includes multiple ways to reclaim most of the lost storage using the Settings app and Disk Cleanup.
In this how-to guide, I’ll explain the steps to delete the previous installation files to free up space after upgrading to the latest version of the operating system.
How to free up space after upgrading to Windows 11 2024 Update using Settings
To reclaim space after installing the most recent release of Windows 11, use these steps:
- Open Settings.
- Click on System.
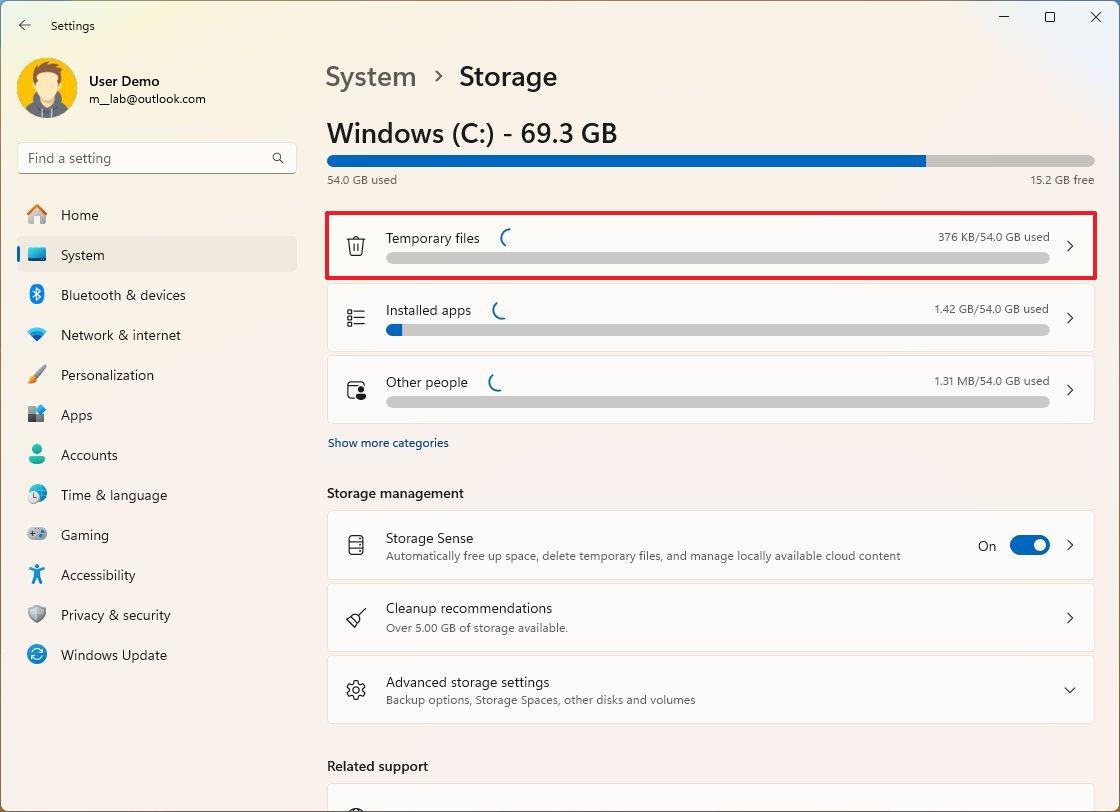
- Click on Storage.
- Click the Temporary files page on the right-side.
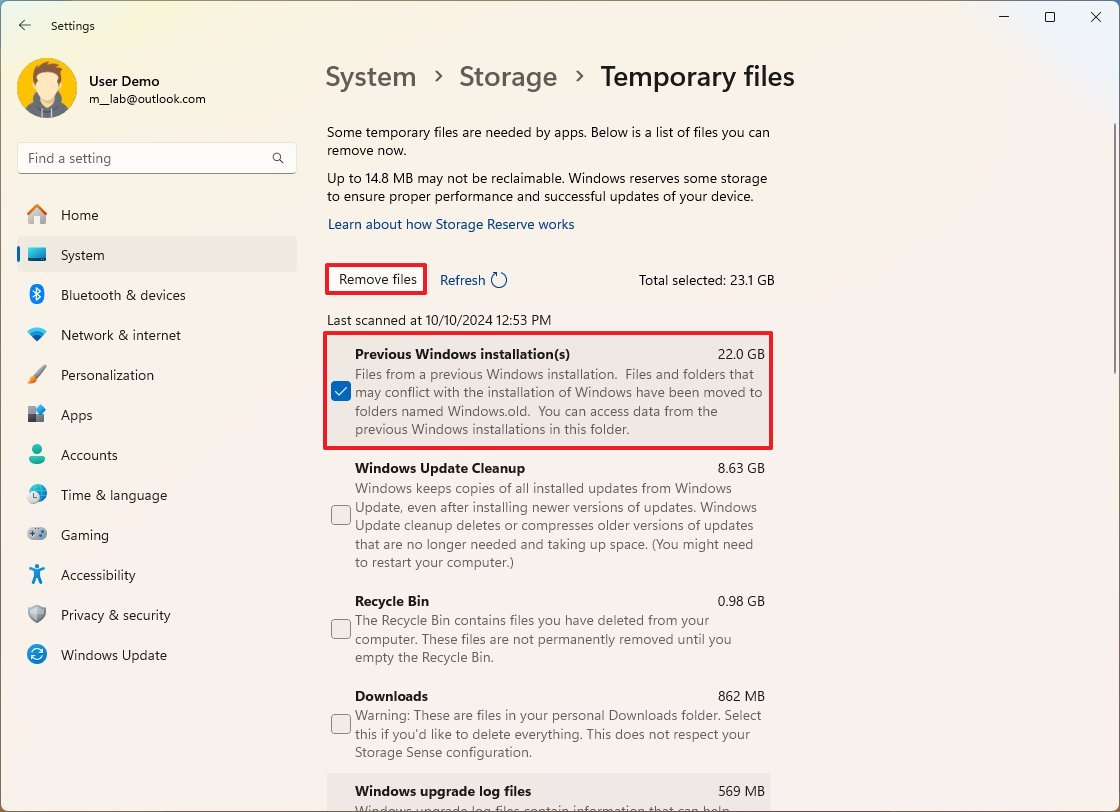
- Clear all the preselected items (if applicable).
- Check the “Previous Windows installation(s)” option.
- Click the Remove files button.
Once you complete the steps, you will have some additional space for more important files.
How to free up space after upgrading to Windows 11 2024 Update using Disk Cleanup
To free up space after upgrading to Windows 11 version 24H2, use these steps:
- Open Start.
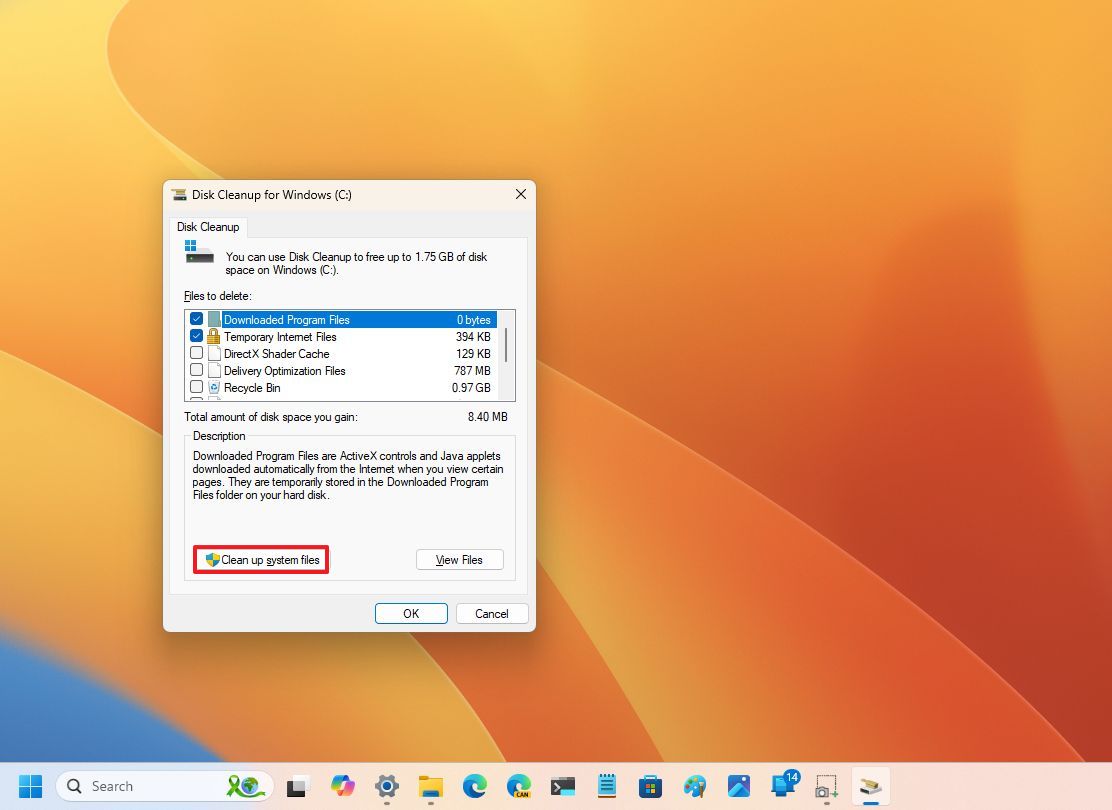
- Search for Disk Cleanup, and click the top result to open the settings.
- Click the “Clean up system files” button.
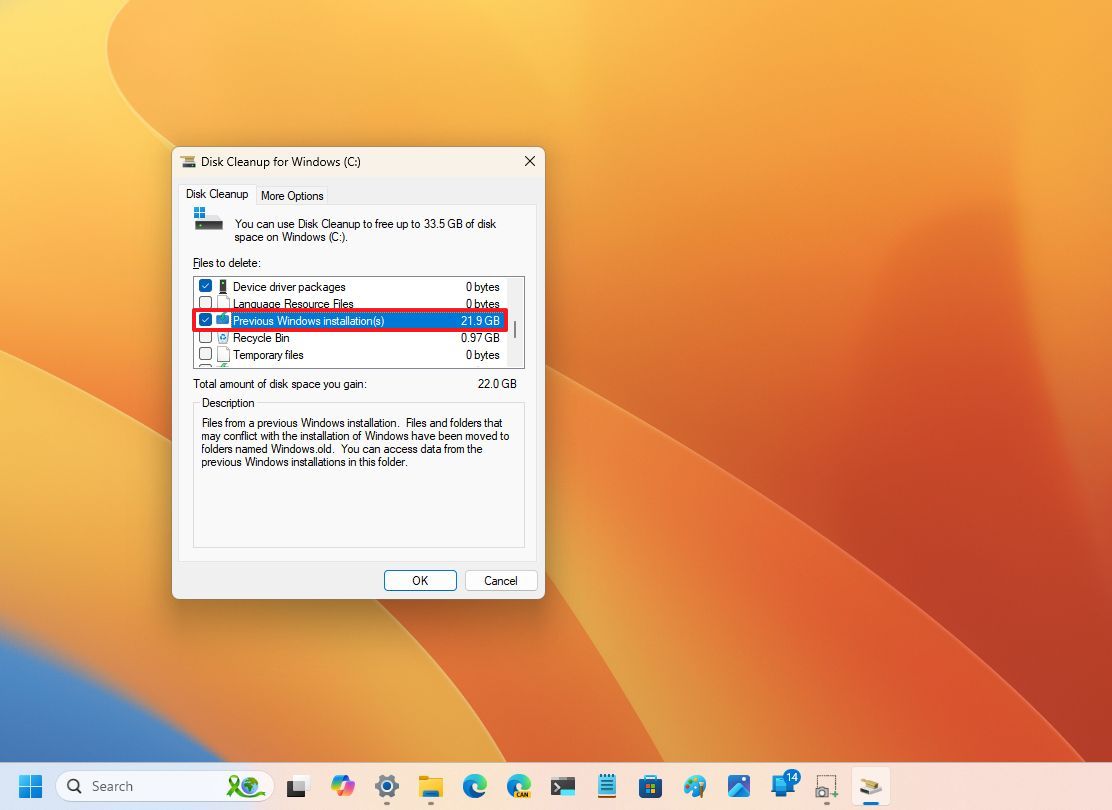
- Check the “Previous Windows installation(s)” option.
- Clear the Downloads option to avoid deleting downloaded files inside the “Downloads” folder (if applicable).
- Click the OK button.
After you complete the steps, the process will delete the previous installation files, freeing up storage on the installation drive.
Although you can delete the backup files for a previous installation, the option is only available for the first ten days after the upgrade. After that period, the system will delete files automatically.
Also, after proceeding with the deletion of the files, you will no longer be able to roll back to the previous installation through the recovery settings. However, you can still reinstall version 23H2 if you have the installation media by doing a clean installation.
It’s important to note that a number of users have been reporting an issue trying to clear the “Windows Update Cleanup” cache, which contains copies of installed updates. However, this is not related to clearing the files for a previous installation.
More resources
For more helpful articles, coverage, and answers to common questions about Windows 10 and Windows 11, visit the following resources:


