Adding your signature to a Microsoft Word document is the ultimate way to personalize it as your own, especially for documents like letters or contracts. In this guide, I’ll run through several ways to add a signature to a Word document.
If you want to create a space for adding a handwritten signature after your document is printed, use Word’s Signature Line tool in the Text group of the Insert tab. Once selected, you can type your or the expected signer’s name, title, and email address, and there will be a line where you or they can sign.
Upload a Handwritten Signature
My preferred way to add a signature is to sign on some paper by hand, and then upload it to my Word document. It’s the best method to make the signature look the most natural, and once you’ve done it once, your signature can be saved on your computer for repeated use.
This method works just as smoothly on both the Microsoft Word desktop app and Word for the web.
First, use a black pen and white paper to create your signature before taking a photo of it with your phone. Then, send the picture of your signature to your computer. I use Microsoft Drop to do this in a few seconds, but you can also transfer it from your phone to your computer via email or a cloud platform such as OneDrive.
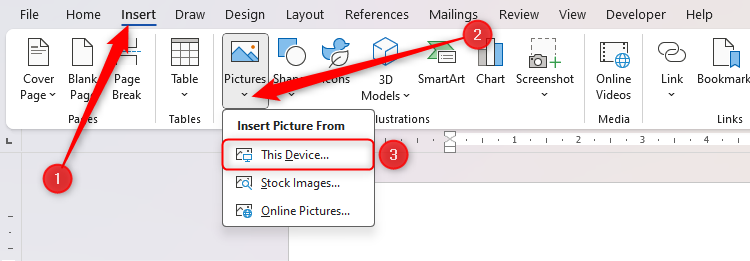
Returning to your PC, in Microsoft Word, click Insert > Pictures, and click “This Device.”
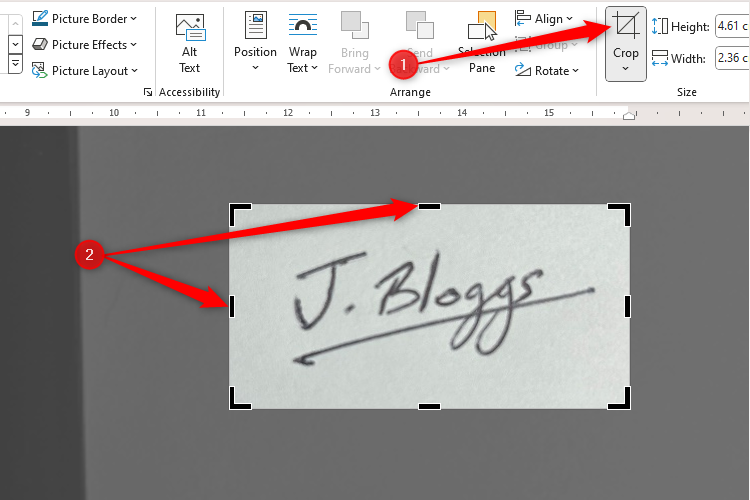
Once you have located and inserted the picture of your signature, use the Crop tool in the Picture Format tab to remove any unneeded space.
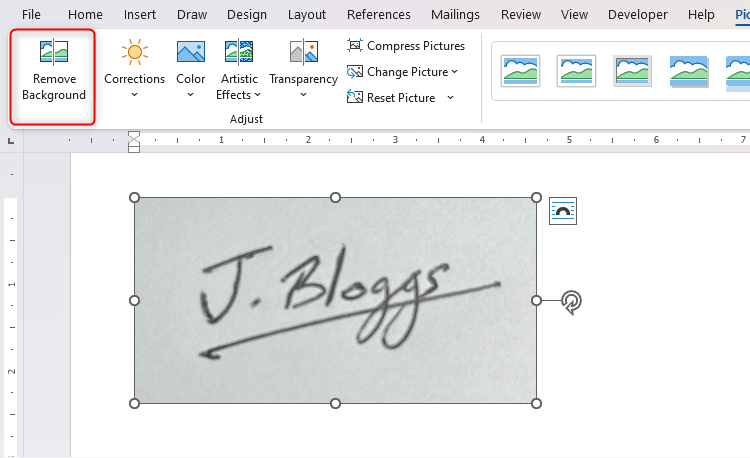
Then, use the Remove Background tool in the Picture Format tab to deal with any unwanted background coloration.
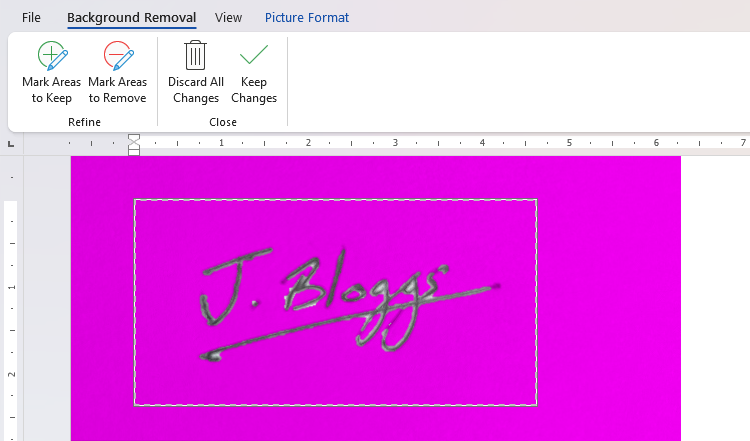
After you click “Remove Background,” Word will do most of the work for you automatically, with the pink areas being the sections the program has identified as needing to be removed. You can also click “Mark Areas To Keep” and “Mark Areas To Remove” to further refine the image’s appearance. When you’re happy with how the signature looks, click “Keep Changes.”
This process is surprisingly intuitive—Word successfully picked up most of the background that needed to be removed, and I only had to make one or two minor tweaks to perfect how it looked.
Finally, right-click your perfected signature and click “Save As Picture,” so you can use it again in future documents. Just make sure you save it somewhere safe, such as in your OneDrive Personal Vault or a password-protected folder.
Use Your Finger or a Stylus on Your Phone or Tablet
Another effective way to add your signature to your Word document is to open the saved file on your phone or tablet using either the Microsoft 365 mobile app or the Microsoft Word mobile app.
When you’ve finished typing your letter on your PC, make sure you leave a couple of lines of space where your signature will go.
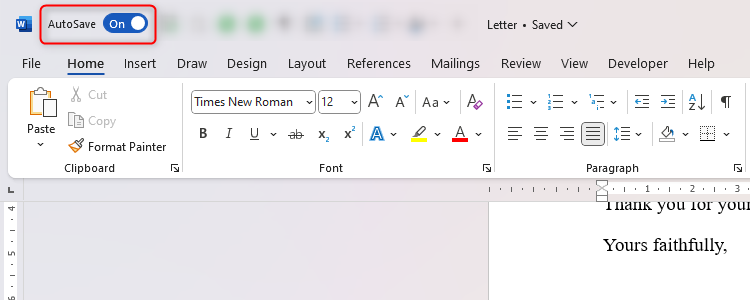
For this process to work, your document needs to be synced to your Microsoft OneDrive account. So, head to the top of your Word window, and make sure the AutoSave toggle says “On.” If it doesn’t, click the toggle, sign in to your Microsoft account, and save your file in a memorable place.
I’ll show you how this works on the iPhone Microsoft Word app, but the process is very similar on other devices and if you use the Microsoft 365 mobile app.
After signing in to the same Microsoft account on your Microsoft 365 or Word tablet or mobile app, locate and open the document on your phone, and tap the “Edit” icon at the top of your screen.
Now that you’re in editing mode, you can expand the mobile app’s ribbon to see the different editing options. To do this, tap the three dots in the bottom-right corner of your screen (or the arrow in the same location on an Android device).
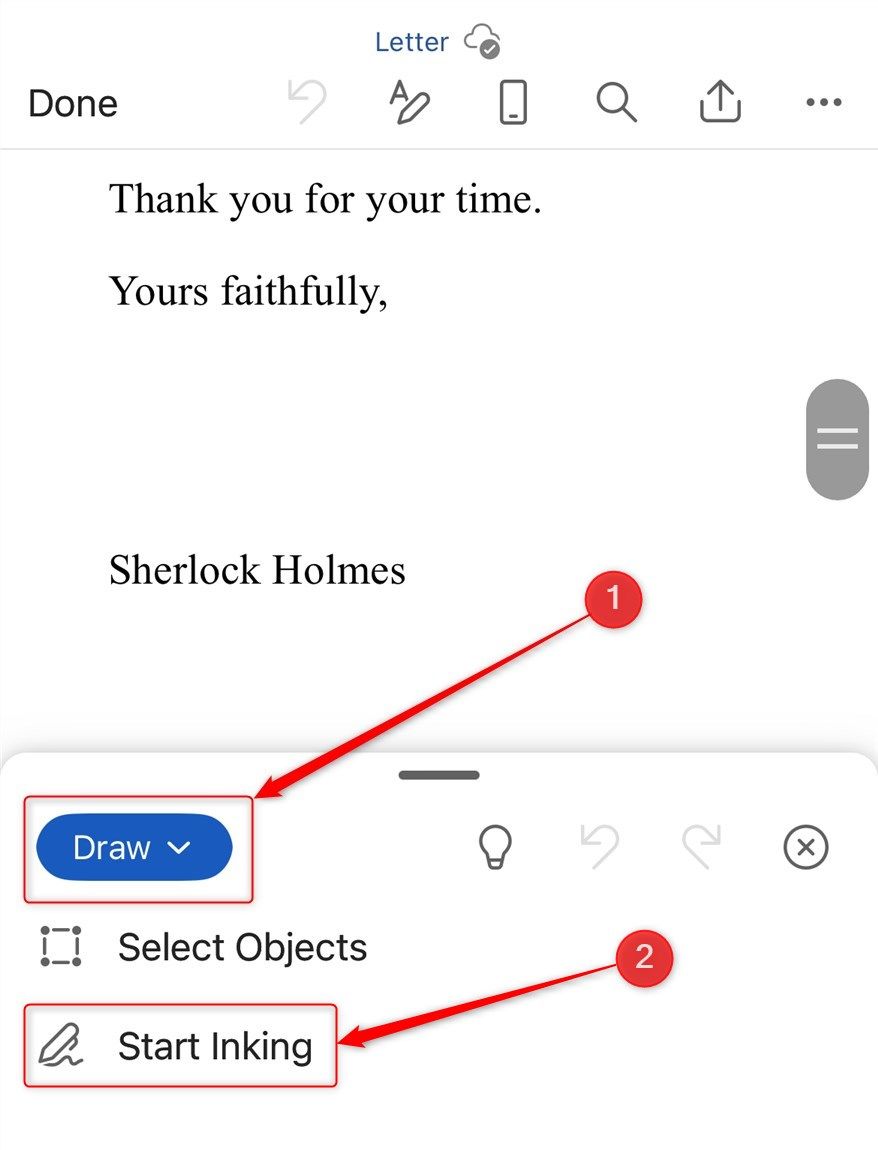
Then, head to the “Draw” menu, and tap “Start Inking.”
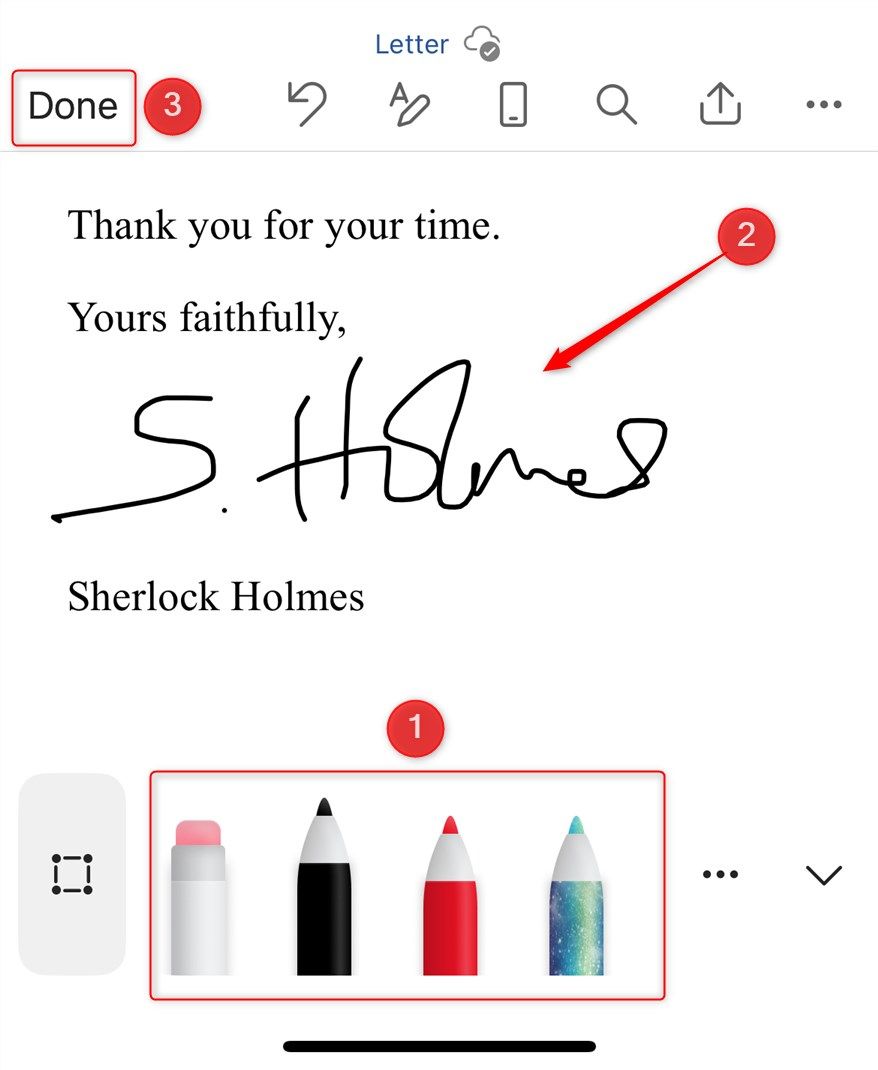
You’re now ready to add your signature. First, select your pen style from the options at the bottom, and then use your finger or a stylus to create your signature. When completed, tap “Done.”
You can now close your Word mobile app, and head back to the document on your PC. There, click the signature to resize and reposition it if necessary.
If the signature doesn’t show up on your PC straightaway, close and reopen the document.
Again, if you want to save your signature for future use, right-click the image, and click “Save As Picture.”
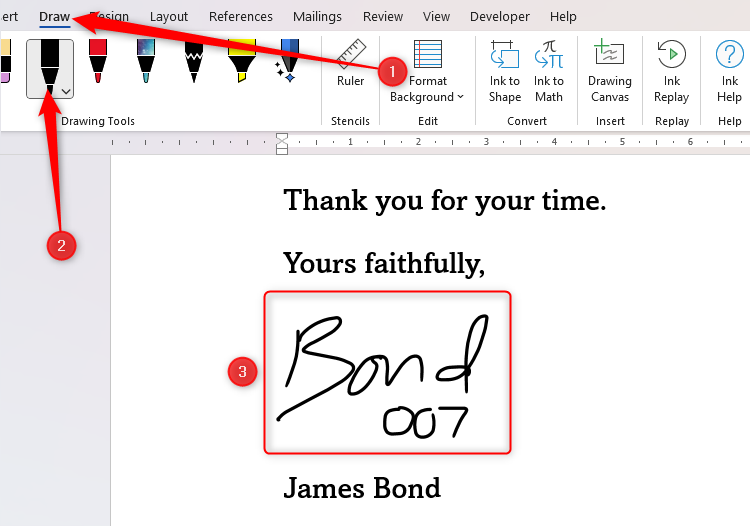
A quicker way to add a signature to your Word document on your PC is by using the desktop app’s Draw tool. The major downside of this approach compared to those listed above is that the resultant signature can look less natural, and it can take a few attempts before you’re happy that what you’ve got looks anything like your actual signature!
Open the “Draw” tab on the ribbon, and choose your preferred pen. Then, use your mouse to create your signature.
If you’re using Word for the web, click Insert > Drawing > Draw to access the same tool.
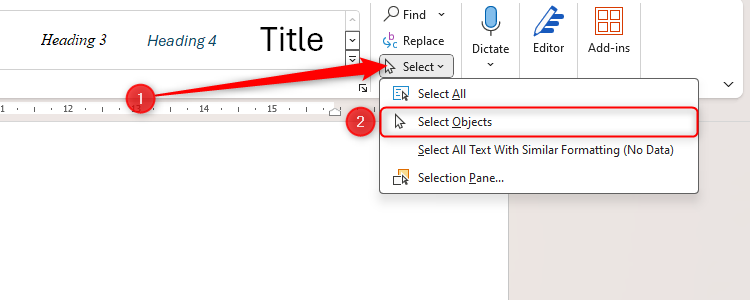
However, if you un-clicked and re-clicked your mouse to create the separate letters, your signature will be made up of several individual shapes that you need to group together. To resolve this, first click “Select” in the Editing group of the Home tab, and click “Select Objects.”
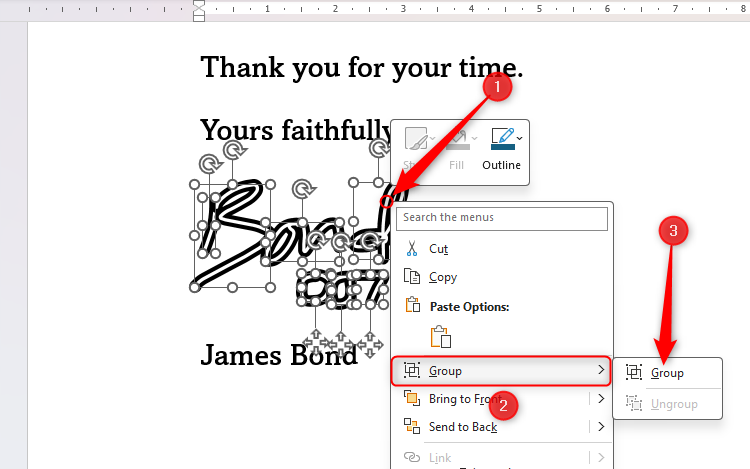
Then, select all the drawing strokes you made to create your signature.
Finally, right-click any of the selected drawing strokes, and click “Group” twice.
Your signature is now one whole image, which you can right-click again to “Save As Picture” for future use if you wish.
Use a Digitally Verified Signature
Sometimes, you may need to add a more formal signature, especially if you’re signing a legally binding document like a contract. In this case, you might need to sign your file with a digital signature, which is accompanied by a digital ID that verifies that you—not someone pretending to be you—signed the document.
You can also add an invisible signature, which protects the authenticity of the content within the document and prevents others from making changes after you have signed.

Read more
How to Add (or Remove) a Digital Signature in Microsoft Office Files
Keep things legit by signing your Office files.


