Quick Links
There are numerous ways to change column widths in Excel, but did you know you can force Excel to do this automatically when you add or remove data?
Traditional Ways to Adjust Column Widths (Manually)
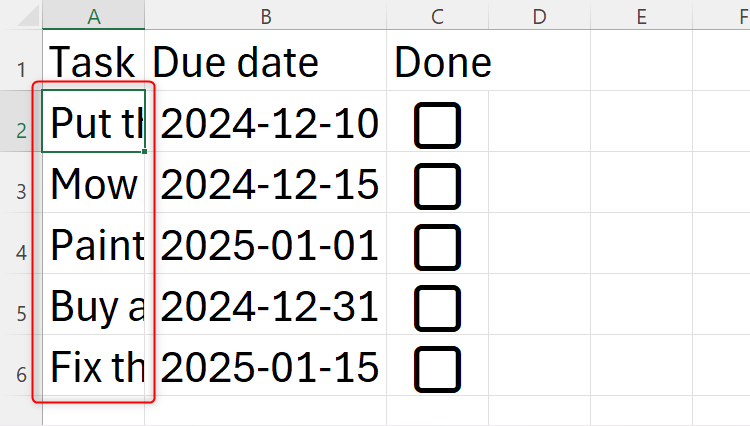
In this example, Excel’s default column width isn’t wide enough to show all the text in column A.
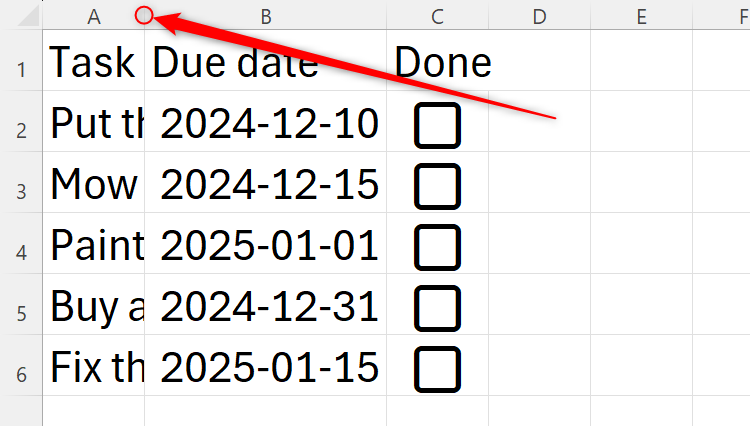
Excel offers two well-known ways to adjust your columns’ widths. First, you could click and drag or double-click the boundary between the headers for columns A and B.
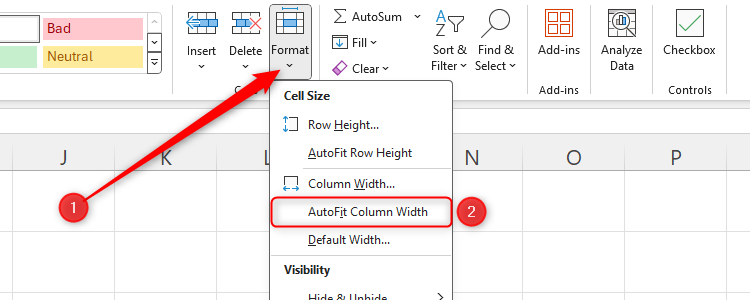
Alternatively, you could select the columns you want to adjust (or select the whole sheet), and click Format > AutoFormat Column Width in the Home tab on the ribbon.
While useful in some scenarios, these traditional methods require extra steps that can waste valuable time when you’re working on your spreadsheet.
Adjusting Column Widths Automatically
Instead, Excel can automate this process so that whenever you add or remove data from a cell, the column automatically readjusts without you having to perform any more actions.
This process involves using Excel’s Visual Basic for Applications (VBA). Although this is a programming language, don’t be deterred! It’s a really straightforward step that even people who have never dealt with code before can implement in less than a minute.
Step 1: Open VBA
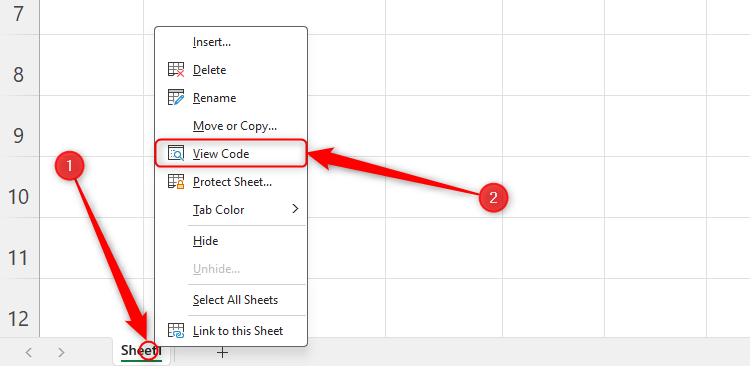
Locate the sheet whose columns you want to adjust automatically, and right-click the sheet tab at the bottom of the Excel window. Then, click “View Code.”
Step 2: Add a Single Line of Code
In the VBA window, select “Worksheet” from the first of the two drop-down menus.
Now, type:
Cells.EntireColumn.AutoFit
in the blank space between the first and last lines of code.
Step 3: Close the VBA Window
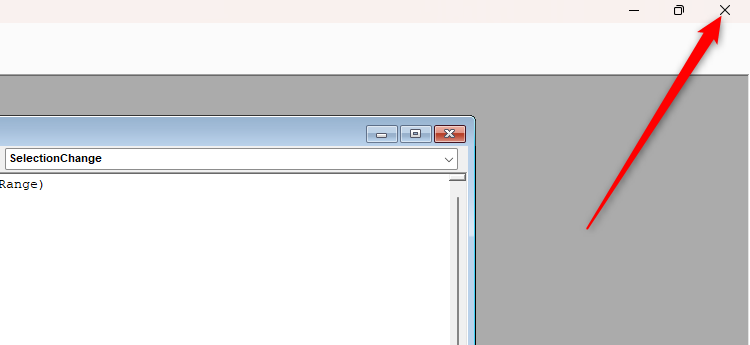
Click the “X” in the top-right corner of the entire VBA window to close it.
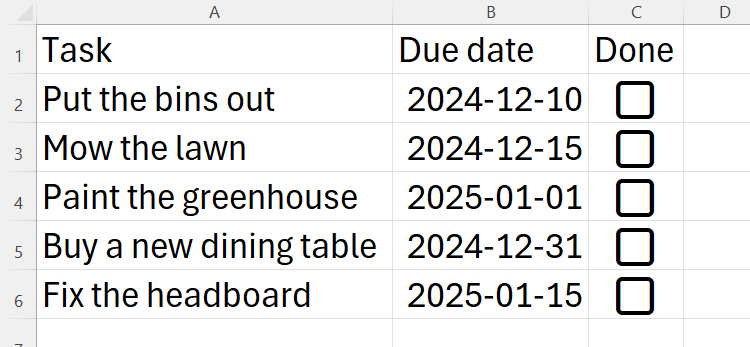
This brings you back to your Excel spreadsheet, and the column widths will adjust automatically as soon as you reactivate the sheet (by selecting any cell). You’ll notice that columns containing lots of data will expand, those with minimal data will shrink, and blank columns will remain at the default width until you populate them with new data.
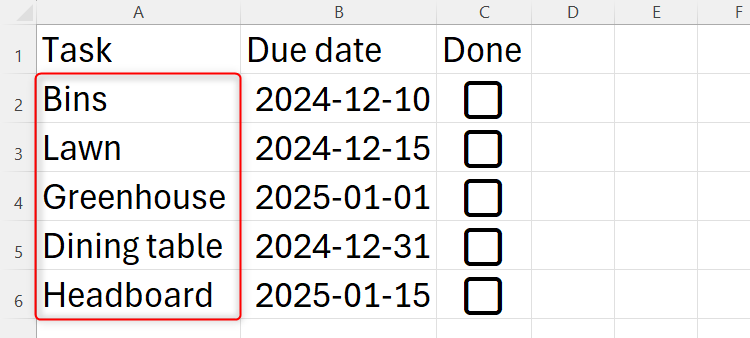
What’s more, when you add or remove data, the columns will adjust automatically. In this example, I’ve shortened the names of the tasks, and you can see that column A has shrunk to accommodate this data adjustment.
To undo this automation process, reopen the VBA window, delete the line of code you added, and close the VBA window. From this point, you’ll need to adjust your column widths manually using one of the two methods outlined in the first section above.
Things to Note
I use this technique all the time to keep my spreadsheets tidy and save time. However, there are a couple of caveats to consider:
First, you can’t undo this coded automation by pressing Ctrl+Z. As a result, as soon as you adjust the VBA, you can’t undo any actions to revert your work to how it was before you took this step. In other words, the VBA adjustment effectively blocks the undo “stack,” so make sure you’re entirely happy with any recent changes you made to your spreadsheet’s contents before you go ahead and add this line of code.
Second, if you clear the contents of a column that had been adjusted automatically based on the code you input, it will stay at that width. It will only readjust if you add new data to a cell in that column or resize it manually using one of the two techniques explained at the top of this guide.
Another way to make all text readable in an Excel cell is by using the program’s Wrap Text tool. This maintains the current column width but forces the text to continue on a new line within the cell. The downside of this method is that you may end up with inconsistent row heights, which can make your spreadsheet look untidy and more challenging to read.


