If you’ve run into a file size limitation, it’s possible to split your large files into multiple smaller files. You can then recombine these files to get the actual large file. I’ll show you various ways to do that on your Windows 11 PC.
7-Zip
The easiest way to split large files on Windows 11 is by using the free and open-source 7-Zip app. This app allows you to compress your files and extract various archive types. You can use this tool to create multiple archives from a single large file.
To do that, open your favorite web browser and launch the 7-Zip site. Download the app installer, run it, and restart your Windows 11 system.
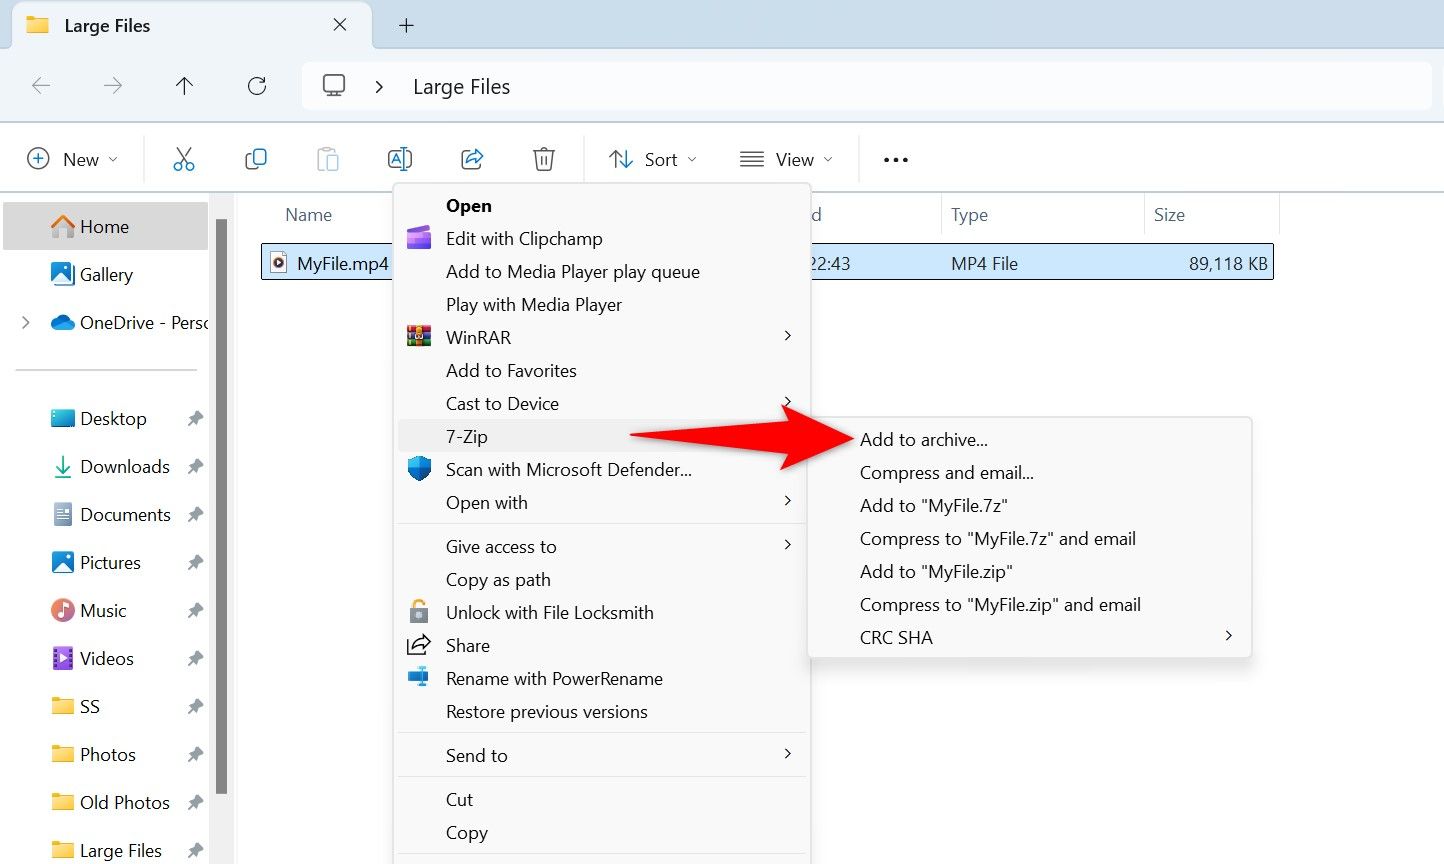
Next, open File Explorer (press Windows+E) and find the large file you want to split. Right-click the file and choose Show More Options > 7-Zip > Add to Archive.
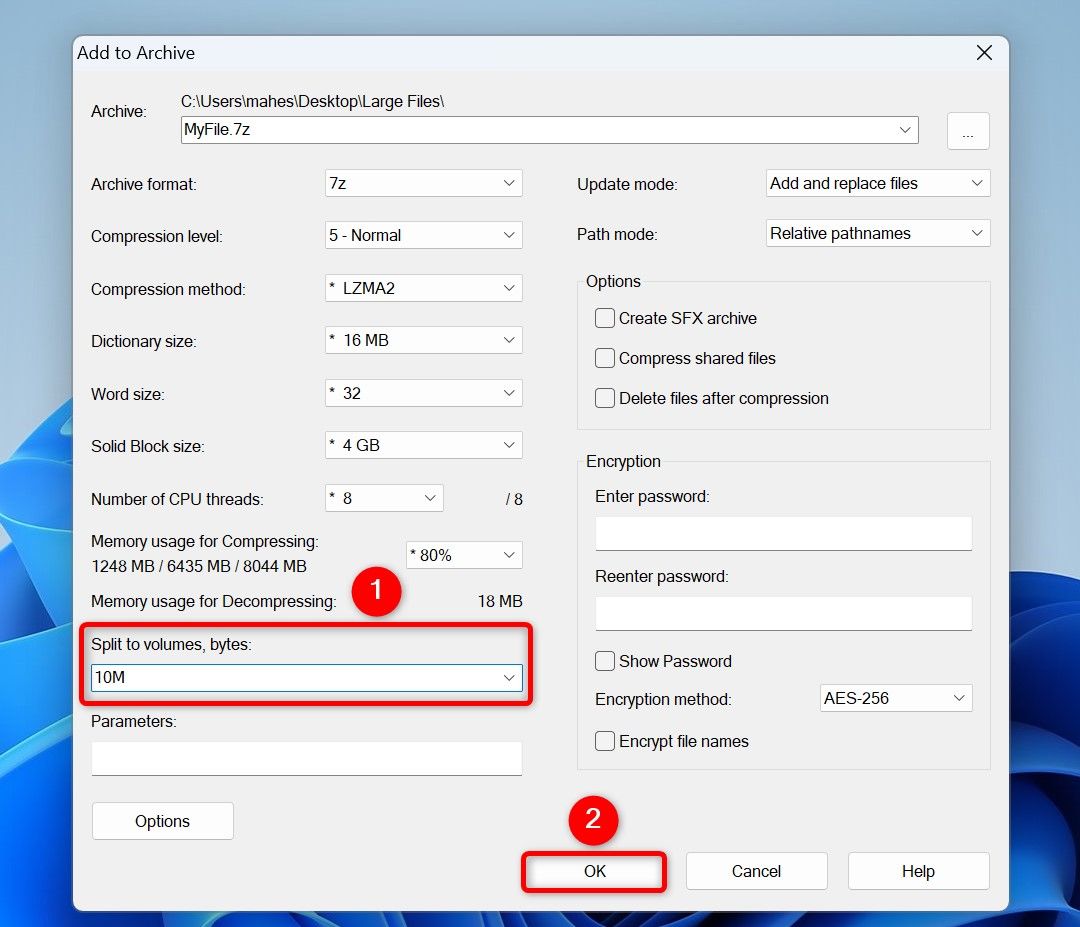
You’ll see the Add to Archive window. Here, click the “Split to Volume, Bytes” field and type the size for each small file to be generated. For example, to make each chunk 10 MB in size, type 10M.
Optionally, configure other options in the same window. Then, at the bottom, click “OK.”
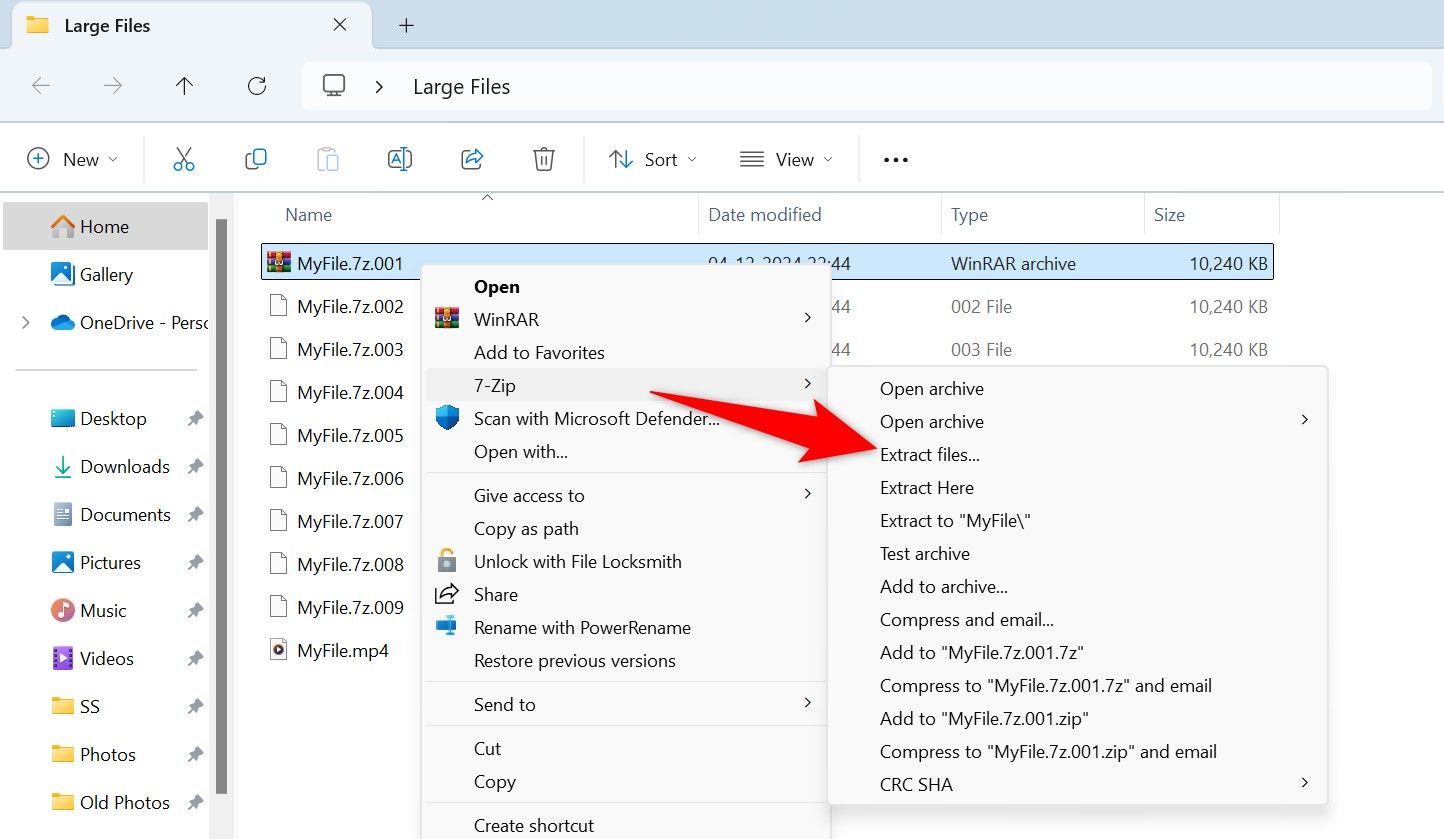
7-Zip will begin creating multiple files out of the one large file you’ve given it. It’ll save those multiple small chunks in the same directory as the original file. The chunks will have the same name as the original file name followed by numbers, like 001, 002, and so on.
To recombine these small files into one file, right-click the first chunk (that says “001”) and select Show More Options > 7-Zip > Extract Files. In the open window, choose where you want to save the extracted file and select “OK.”
If you run into an error while recombining files, ensure all the chunks are in the same folder. If they aren’t, copy and paste them in a single folder before performing the extraction process.
WinRAR
WinRAR is another graphical tool you can use to split large files into multiple smaller files on your PC. To use it, go to the WinRAR site, then download and install the tool. Afterward, restart your computer.
Launch File Explorer and find the file to split. Right-click the file and select WinRAR > Add to Archive.
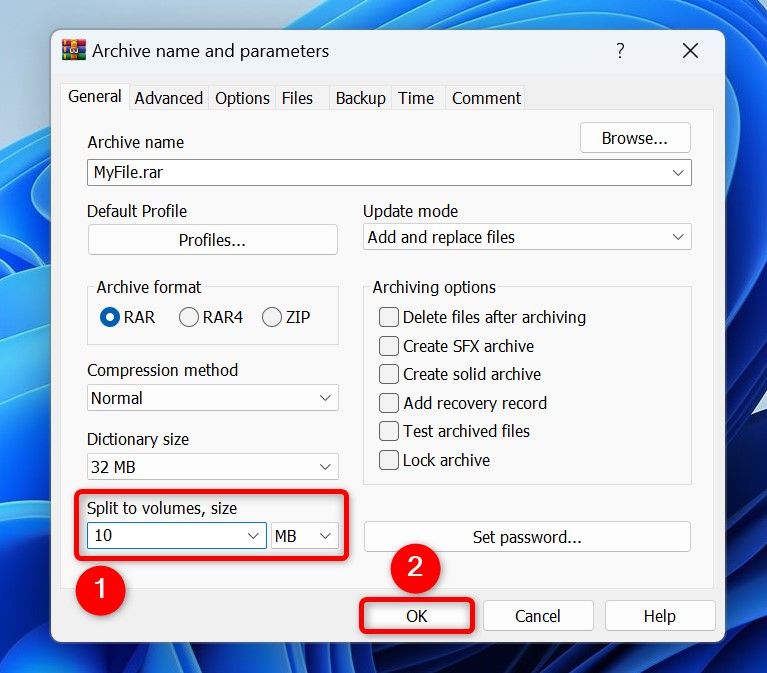
On the Archive Name and Parameters window, click the “Split to Volume, Size” field and type the size for each file chunk. Make sure to select the correct unit from the given drop-down menu. Optionally, configure other options, like the archive format, and so on. Then, click “OK” to start splitting your file.
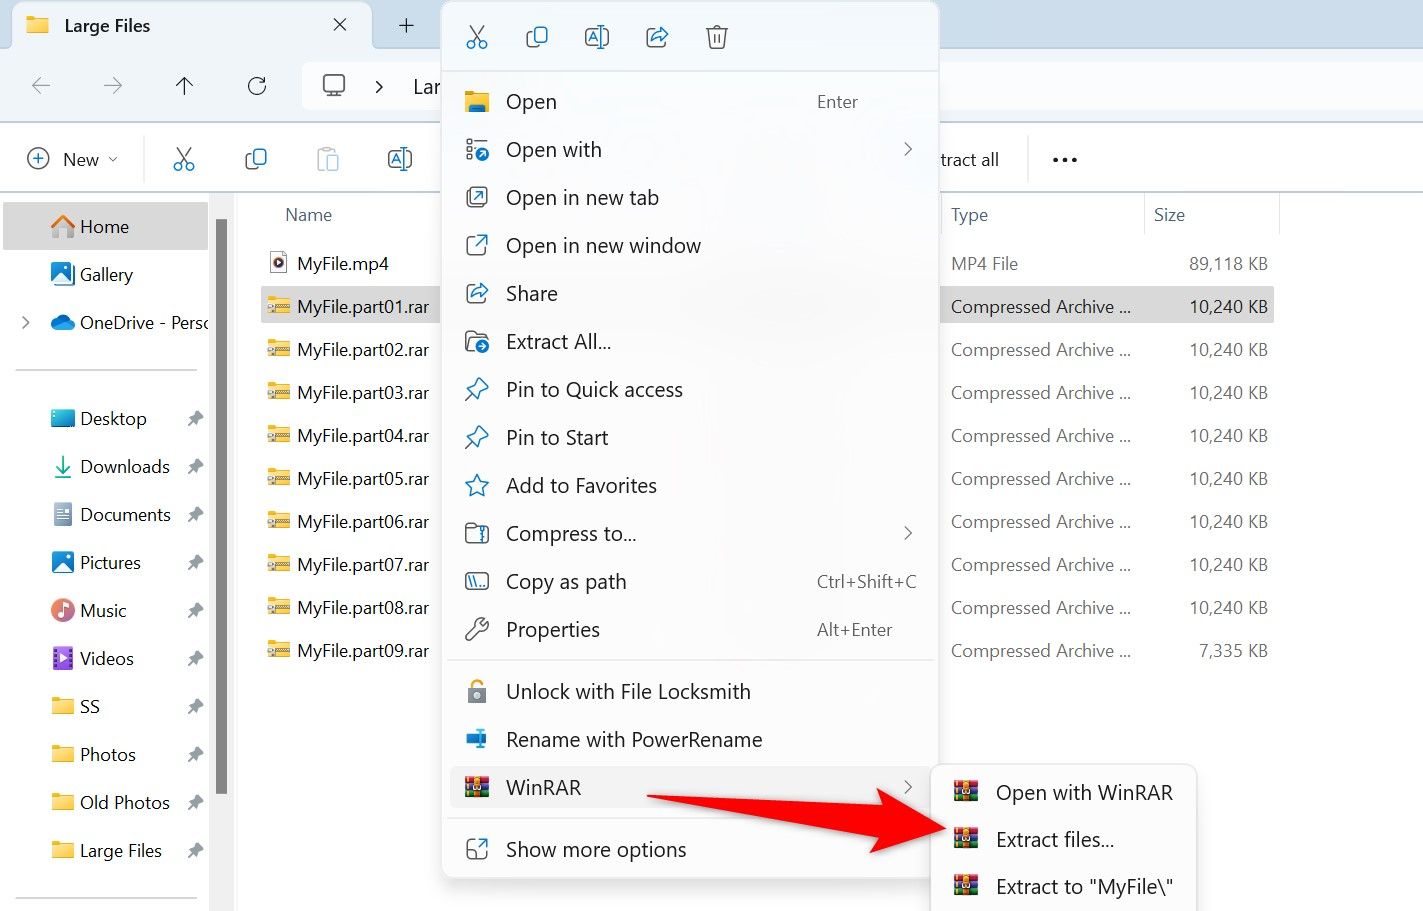
WinRAR will create file chunks of the size you specified and will place these chunks in the same folder as the original file. The chunks will say part1, part2, and so on. In the future, to recombine these files and get the original file, right-click the first chunk (that says “part1”) and choose WinRAR > Extract Files.
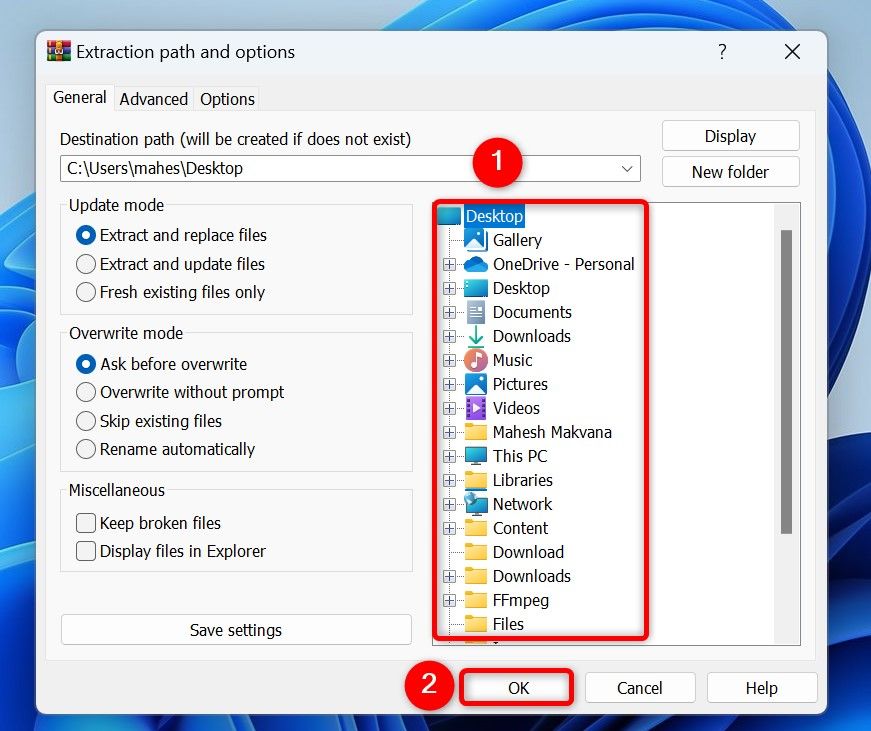
On the Extraction Path and Options window, select the folder in which you want to save the resulting file. Then, click “OK.”
WinRAR will start recombining your files. If an error occurs, ensure all the file chunks are in the same folder.
PowerShell
If you don’t want to use a third-party tool, you can use Windows 11’s built-in PowerShell utility to split and merge files. To do that, open Windows Search (press Windows+S), type PowerShell, and launch the utility.
In PowerShell, type the following command. Replace “PATH” with the full path to the folder where your large file is located. Then, press Enter.
cd PATH
If your folder path has spaces, enclose the path in double quotes.
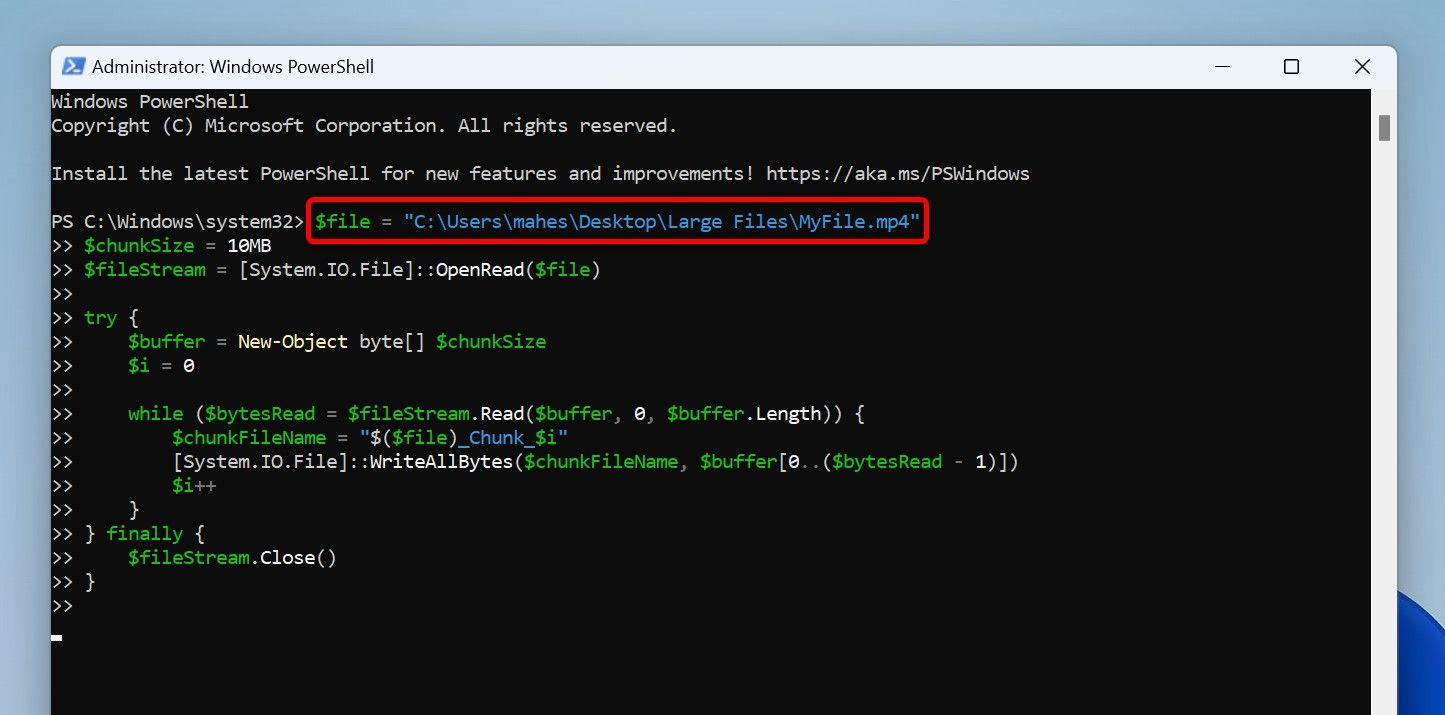
Next, run the following script in PowerShell. Here, replace “MyFile.ext” with the full file path (including the extension) of the large file that you want to split. Replace “10MB” with the size you want each file chunk to have.
        $file = "MyFile.ext"
$chunkSize = 10MB
$fileStream = [System.IO.File]::OpenRead($file)try {
    $buffer = New-Object byte[] $chunkSize
    $i = 0    while ($bytesRead = $fileStream.Read($buffer, 0, $buffer.Length)) {
        $chunkFileName = "$($file)_Chunk_$i"
        [System.IO.File]::WriteAllBytes($chunkFileName, $buffer[0..($bytesRead - 1)])
        $i++
    }
} finally {
    $fileStream.Close()
}
PowerShell will create multiple files from the given file and save those files in the same folder as the original file.
In the future, to recombine the multiple files, run the following script. Here, replace “RecombinedFile.ext” with the resulting file name, “PATH” with where the chunks are located, and “MyFile.mp4” with the chunk names.
$outputFile = "RecombinedFile.ext"
$chunkFiles = Get-ChildItem -Path "PATH" -Filter "MyFile.mp4_Chunk_*" | Sort-Object Nameif (Test-Path $outputFile) {
Remove-Item $outputFile
}
$outputFileStream = [System.IO.File]::Create($outputFile)
try {
foreach ($chunk in $chunkFiles) {
$chunkData = [System.IO.File]::ReadAllBytes($chunk.FullName)
$outputFileStream.Write($chunkData, 0, $chunkData.Length)
}
} finally {
$outputFileStream.Close()
}
Git Bash
Another command-line method to split large files into multiple smaller files is by using Git Bash. You run a command with this tool and it turns your large file into multiple smaller files.
To do that, open the Git Bash site, and download and install the tool. Then, open File Explorer (press Windows+E) and access the folder where your large file is located.
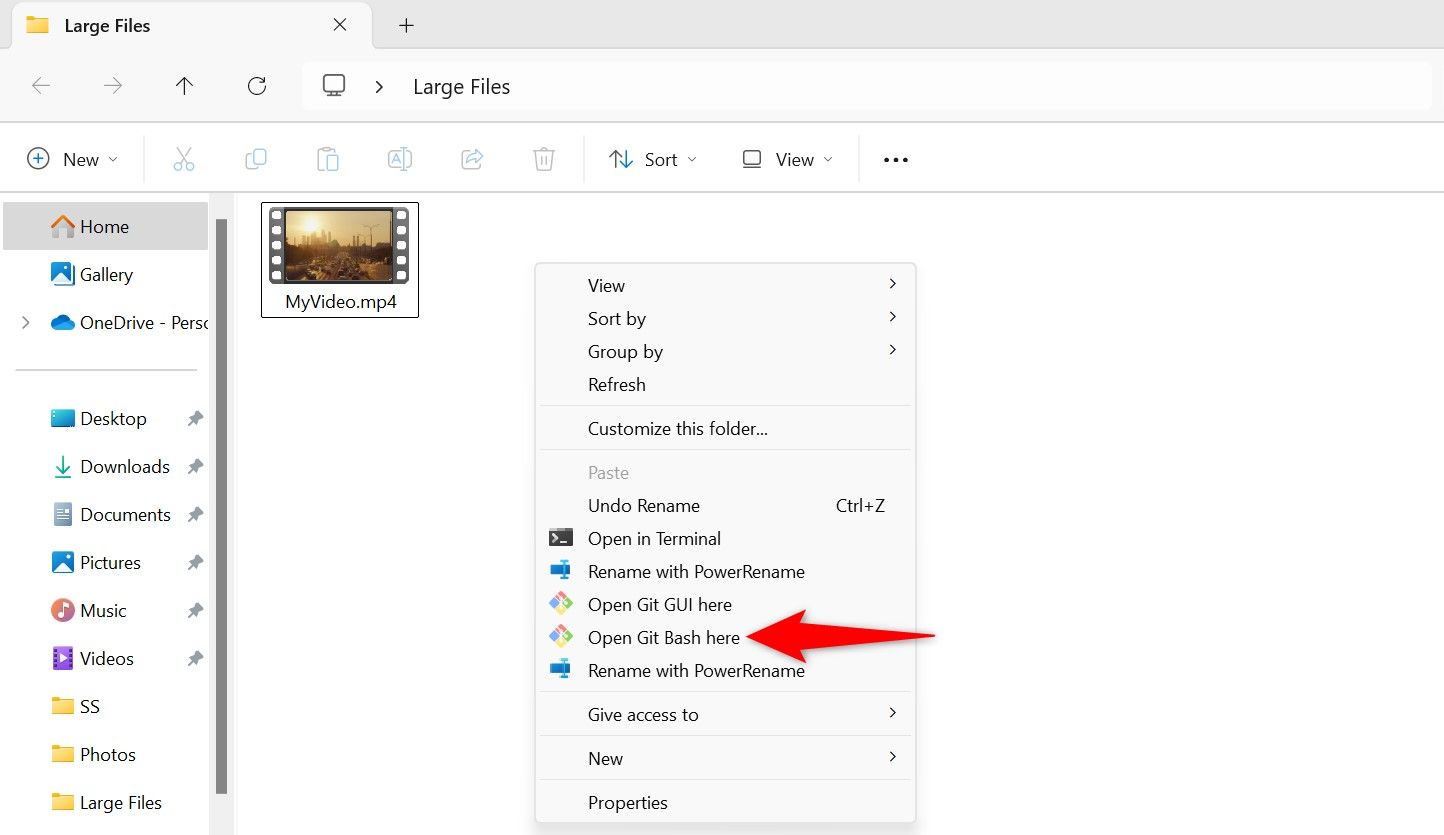
In the folder, right-click anywhere blank and choose Show More Options > Open Git Bash Here.
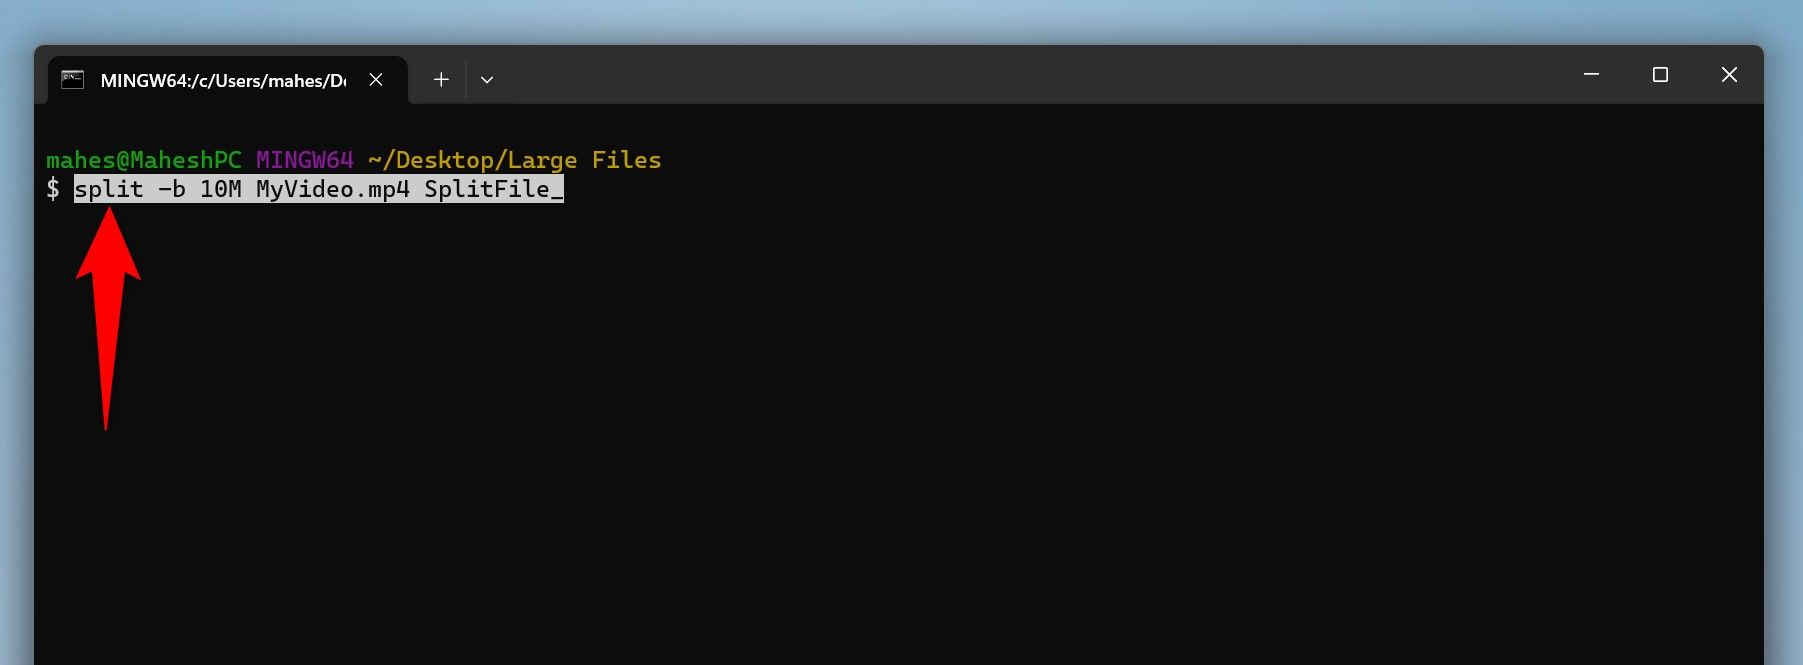
On the open window, type the following command. Replace “10M” with the size for each file chunk, “MyFile.ext” with the name of your large file, and “SplitFile_” with the prefix for file chunks. Then, press Enter.
split -b 10M MyFile.ext SplitFile_
Git Bash will create smaller files from the given large file.
To recombine these files in the future, use the following command. Replace “SplitFile_” with the prefix you used when splitting the file and “OriginalFile.ext” with the name and the extension you want the resulting file to have.
cat SplitFile_* > OriginalFile.ext
Git Bash will make your original file from the given chunks.
And that’s how you split a large file into smaller ones—useful when sending big files via email to overcome the attachment limit, for example.


