If you’re just getting started with Google Slides, its extensive features and add-ons can be a little overwhelming. Here are some tips to help you get going with this powerful alternative to Microsoft PowerPoint.
What Is Google Slides?
If you’ve heard of Google Slides before, feel free to skip ahead; if you haven’t, here’s a crash course on what you need to know. We’ll go over the basics and get you brushed up on what Google Slides is and how you can get started right away.
Slides is a free, web-based presentation program designed to compete with Microsoft Office PowerPoint. It’s part of Google Workspace, the name of Google’s complete office suite. The other main services included in the cloud-based suite are Sheets and Docs.
Google Slides is available on all devices and platforms. All you need is an internet connection and a web browser or, in the case of mobile, the Android and iOS apps. Google does the rest and handles the brunt of the heavy lifting while it runs the software in the cloud.
Slides support several file types, including PPT, PPTX, ODP, JPG, PNG, POT, TXT, SVG, PDF, and more. This makes it easy to view or convert Microsoft Office files directly from Google Drive or insert images directly into a slide.
Since Slides is an online presentation program, you can share and collaborate with multiple people on the same file and track revisions, changes, and suggestions, all in real-time. Have you heard enough? Let’s get started.
How to Sign Up for an Account
Before you can use Google Slides, you have to sign up for a Google account (an @gmail account). If you already have one, feel free to move on to the next section. If not, we’ll go over the simplest way to create a Google account and get you set up with Slides.
Head over to accounts.google.com, click “Create Account,” and then click “For My Personal Use.”
On the next page, provide your first and (optional) last name, then click “Next.”
Now do the same for your birthday.
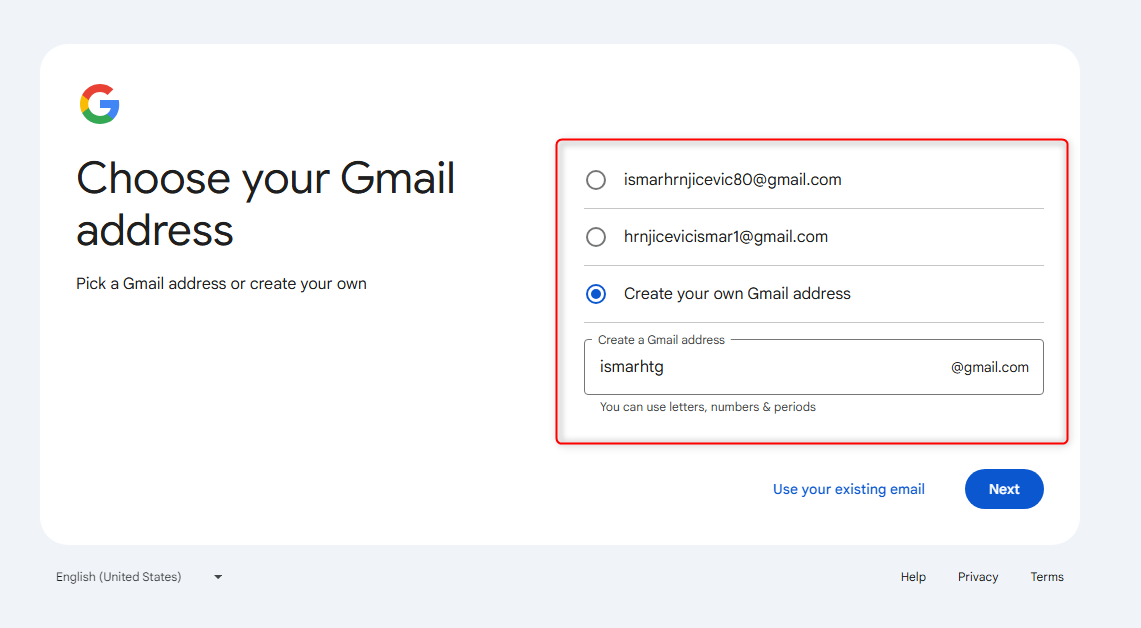
The next step is to decide what your Gmail address will be. Google will automatically provide a few examples, but you can also make your own. When you’re done, hit “Next.”
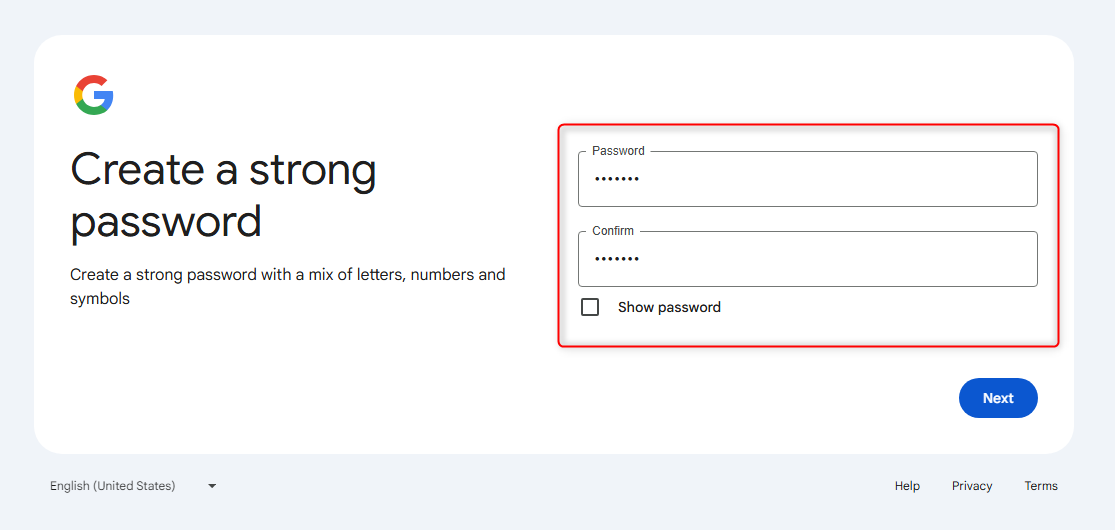
The next step is to create a strong password and then confirm it in the bottom field. Avoid using the same password that you have on any other account. Also, don’t write it down anywhere; instead, try to memorize it.
You’ll now have to verify your phone number. This is both for preventing bots and to provide you with a recovery option in case you lose the password. After typing in your phone number, click “Next.” A 6-digit verification code will be sent to your phone, which you’ll need to enter on the following screen.
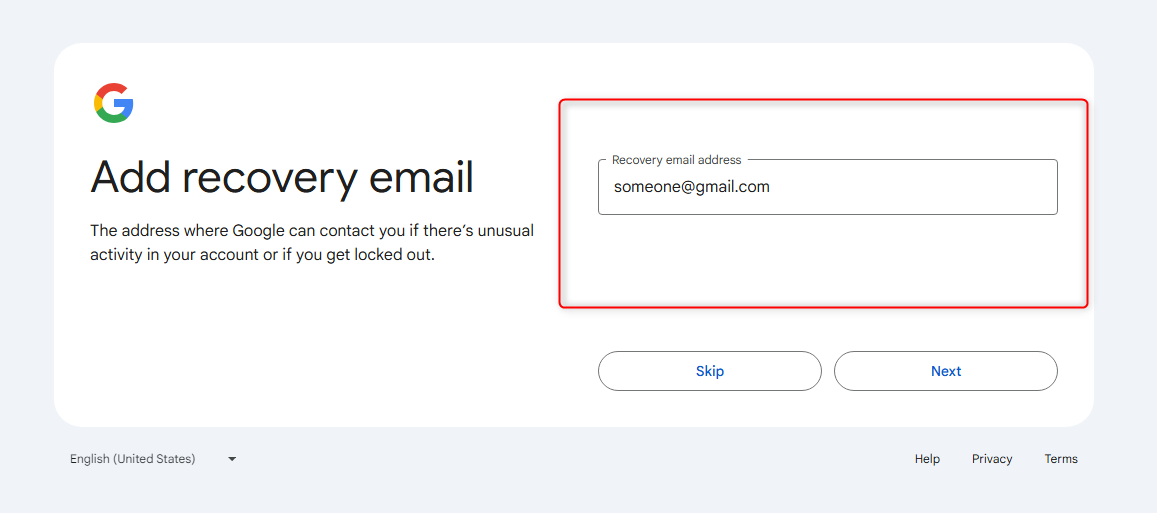
After you verify your phone number, the subsequent pages require you to provide a recovery email address. Consider asking a friend or family member you trust for their email.
After that, you must agree to the Privacy Statement and Terms of Service. Congratulations! You’re the proud owner of a new Google account.
How to Create a Blank Presentation
Now that you have a Google account, it’s time to create your first presentation. Head over to Google Slides and click on the “Blank Presentation” image with the multicolored “+” icon, or choose one of the templates next to it.
On most browsers, you can type “slides.new” into the address bar to quickly create a new blank presentation.
How to Add a New Slide
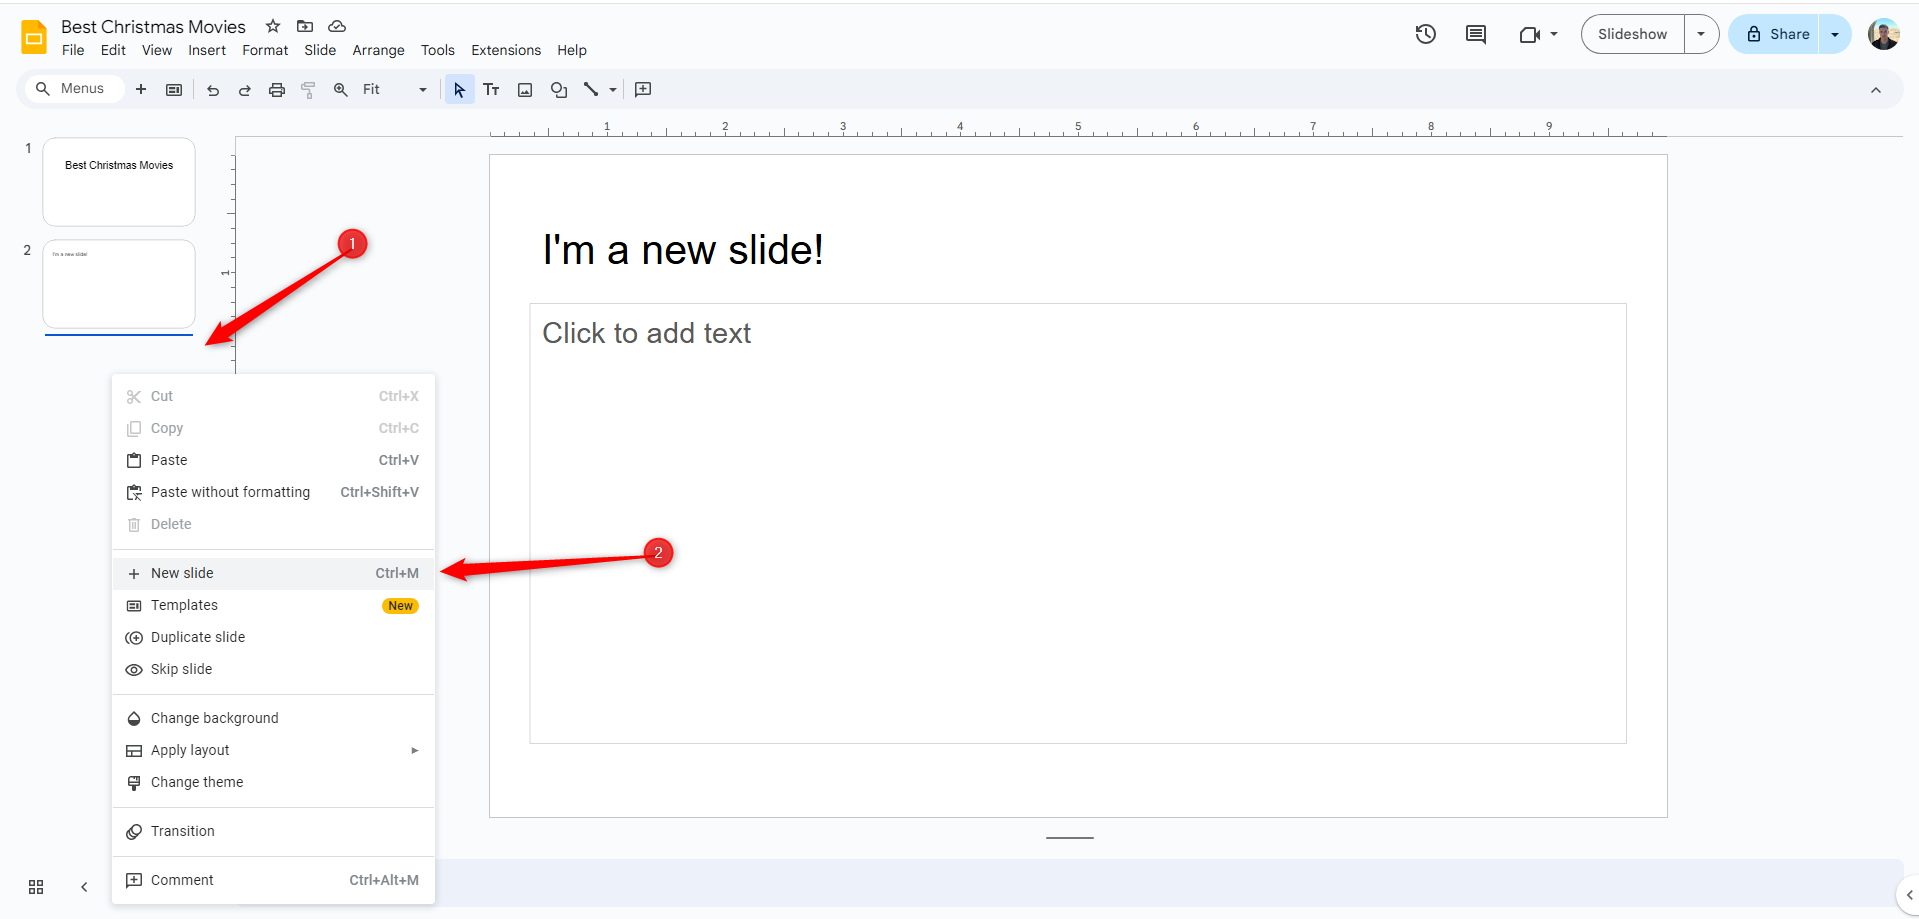
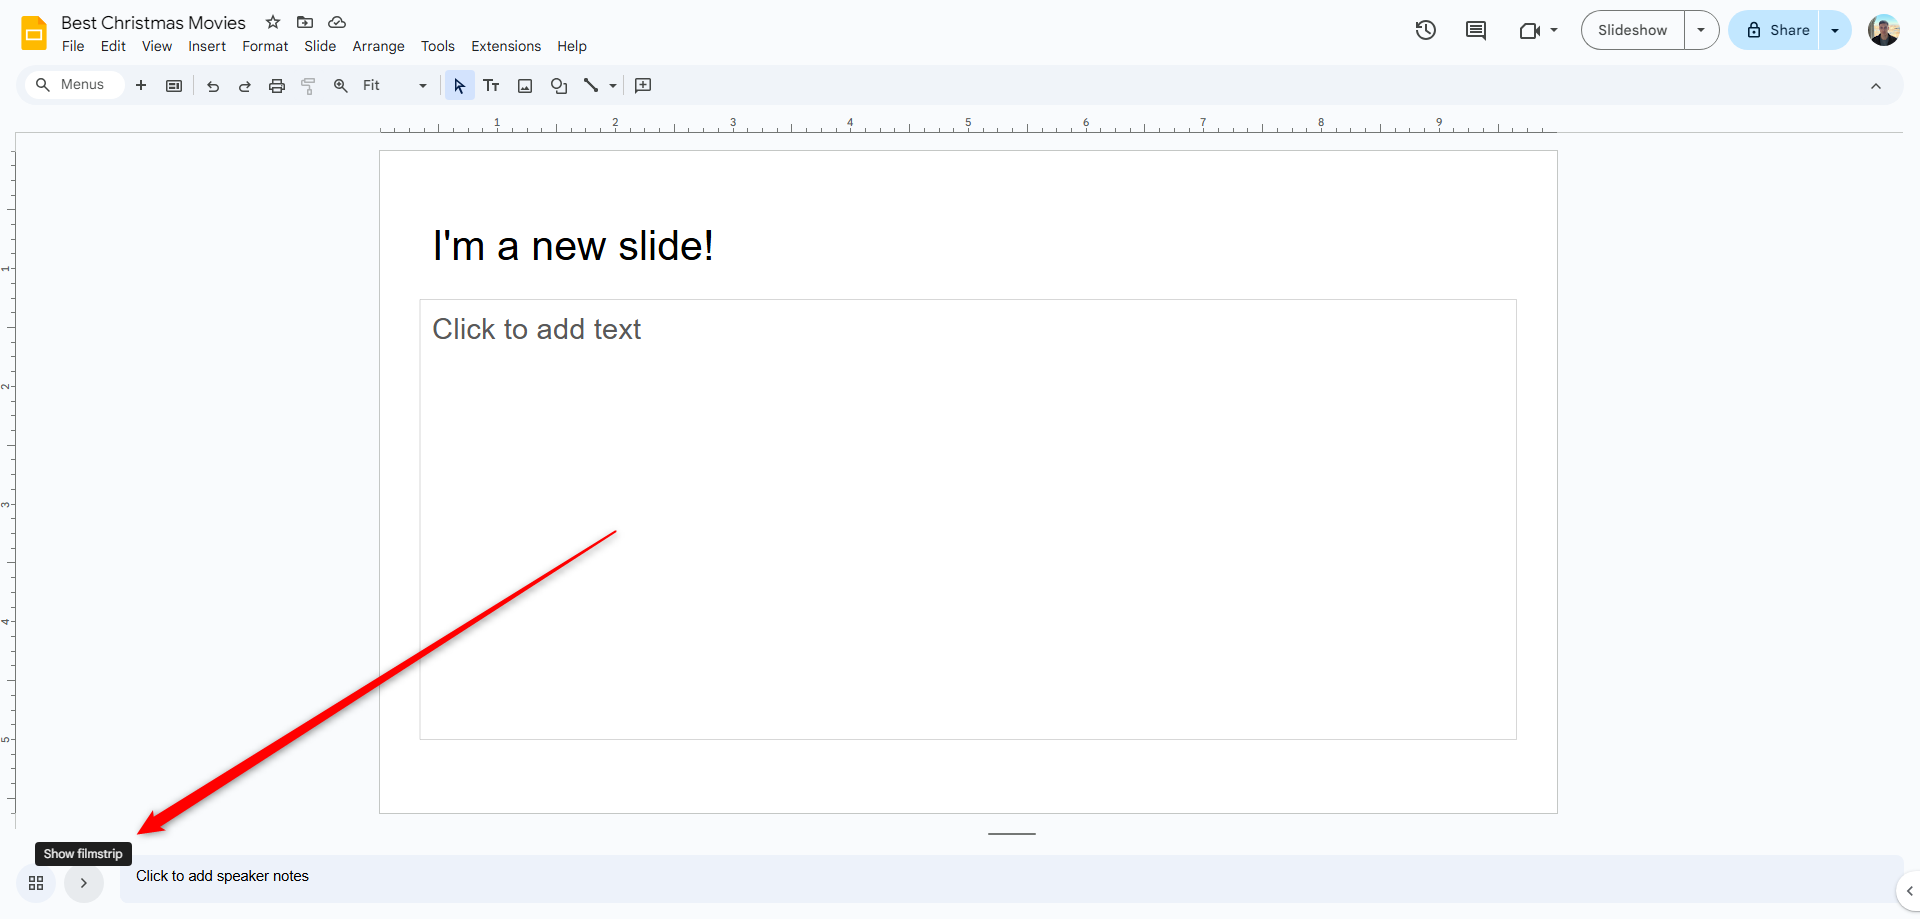
Once you have a blank presentation, it’s time to populate it with a few slides. The easiest way to do this is to press Ctrl+M (Windows) or Command+M (Mac) on your keyboard, and a new slide will appear on your screen. Alternatively, right-click on the left sidebar and select “New Slide” in the context menu.
If you don’t see the sidebar, click on the “>” icon in the bottom-left corner, and the sidebar will reappear.
How to Import a Microsoft PowerPoint Presentation
Even if you’re new to Google Slides, you might already have a collection of Microsoft PowerPoint files you’d like to be able to use. If that’s the case, then you have to upload all your presentations before you can view them. While it might not support some of the more advanced features and effects of some PowerPoint presentations, it works pretty well.
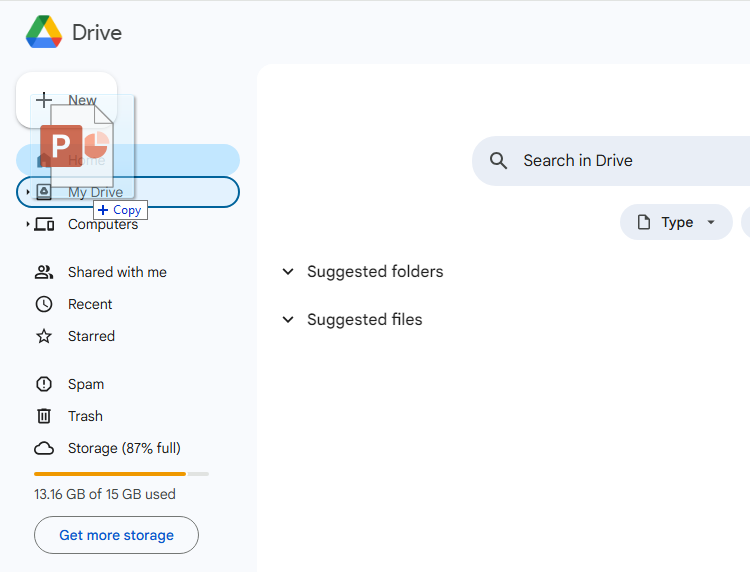
When you import a PowerPoint presentation, you can use either Google Slides or Drive to upload your files. Both methods let you drag and drop a file from your computer directly into the web browser for easy upload. Your Drive houses all of your uploaded files, but when you go to the Slides homepage, it only shows you presentation-type files.
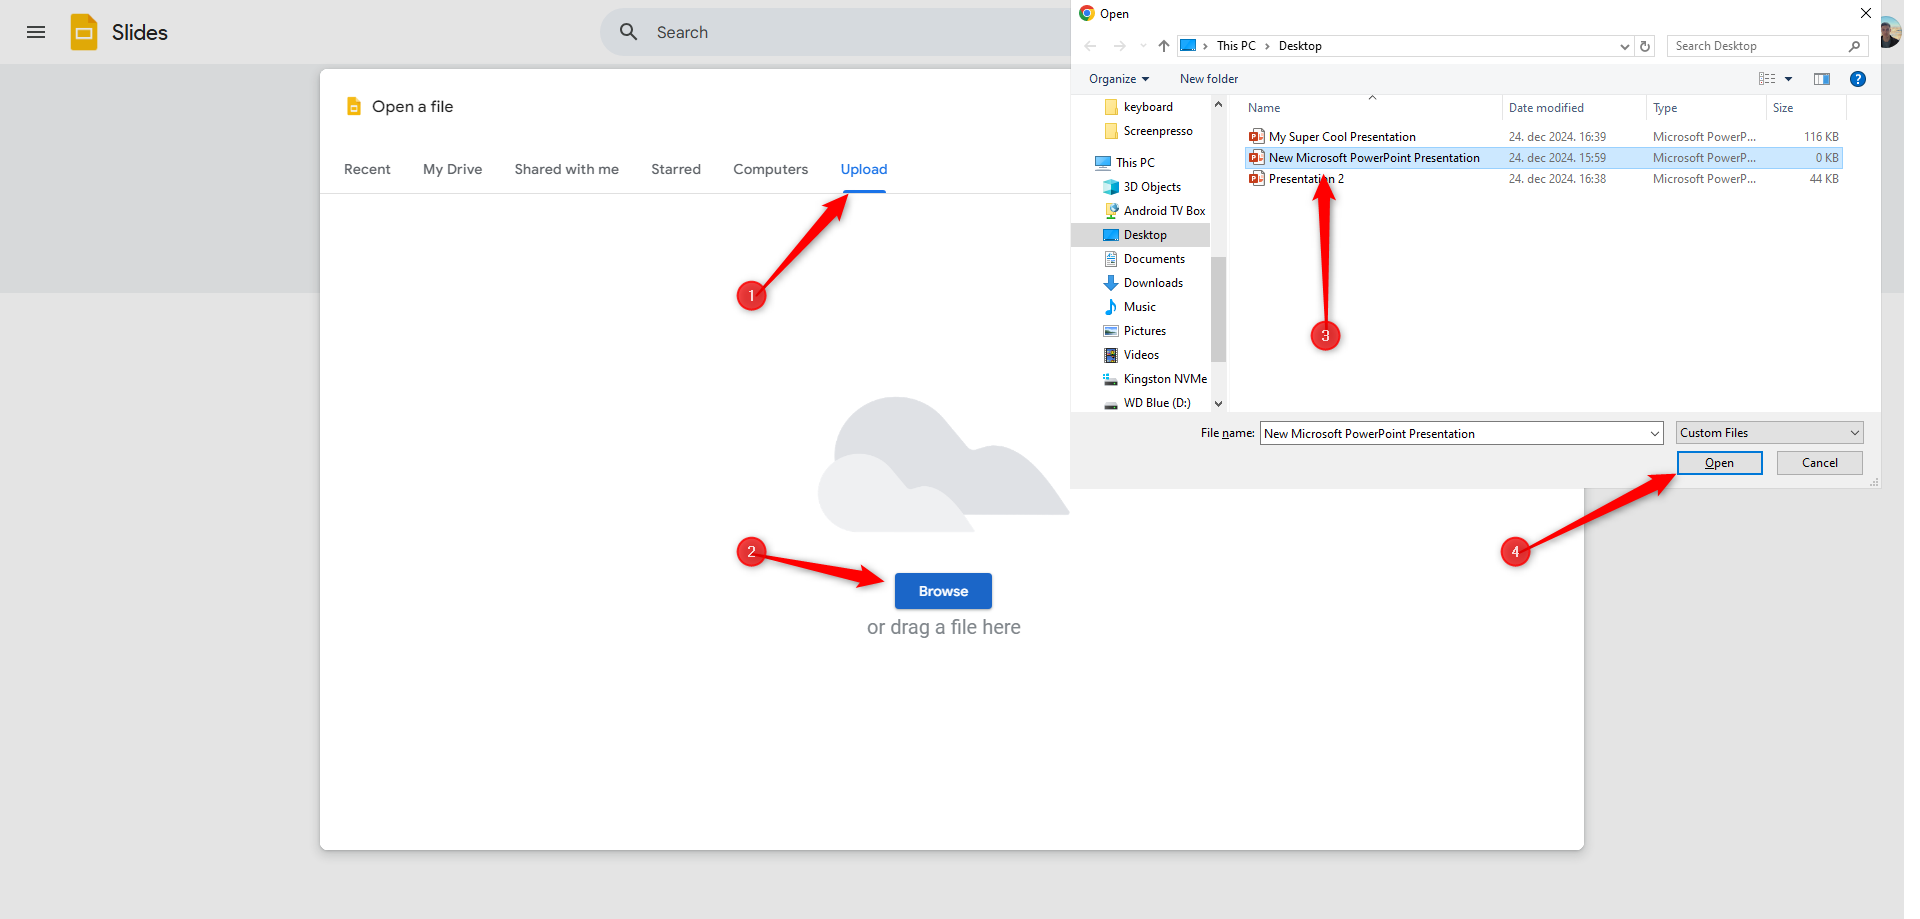
To upload a file from the Slides homepage, click the folder icon in the top right and then click the “Upload” tab.
Now go to “Upload” and drag and drop any files you want to upload directly into this window or click “Browse” to find the file manually.
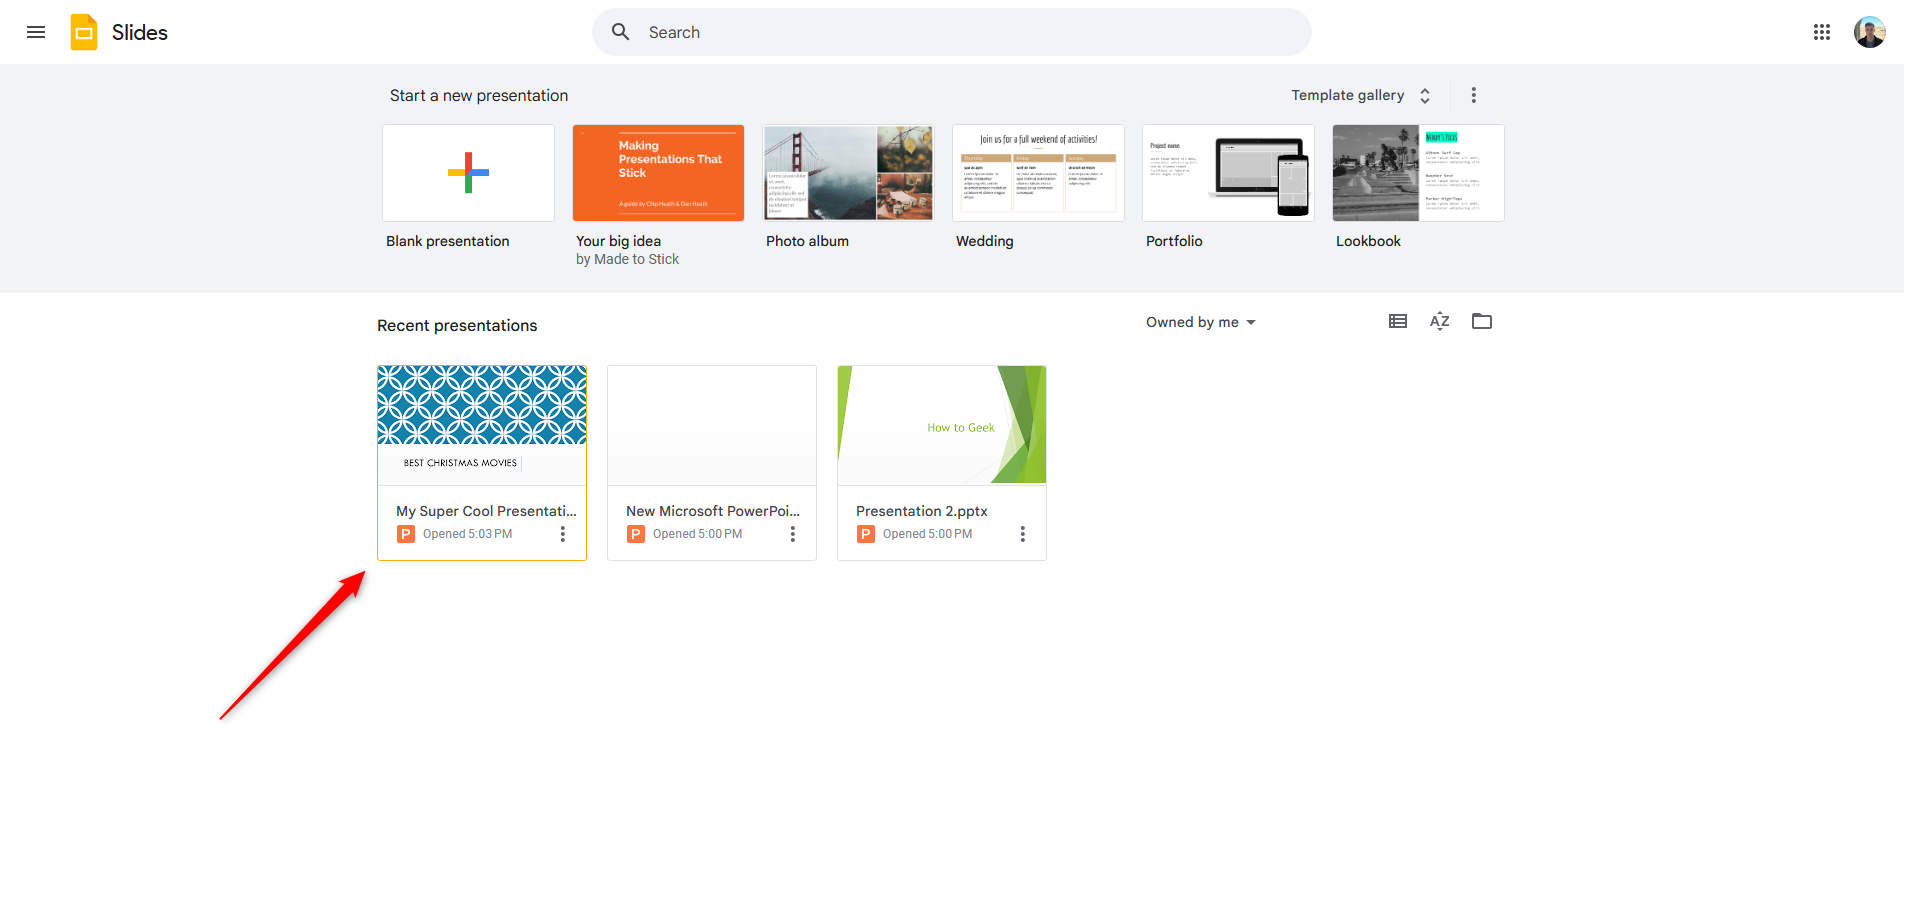
Once the file uploads, Slides opens it automatically, and it’s ready for you to edit, share, or collaborate. To open a PowerPoint presentation that you want to view or edit, click on the file from your Google Slides homepage.
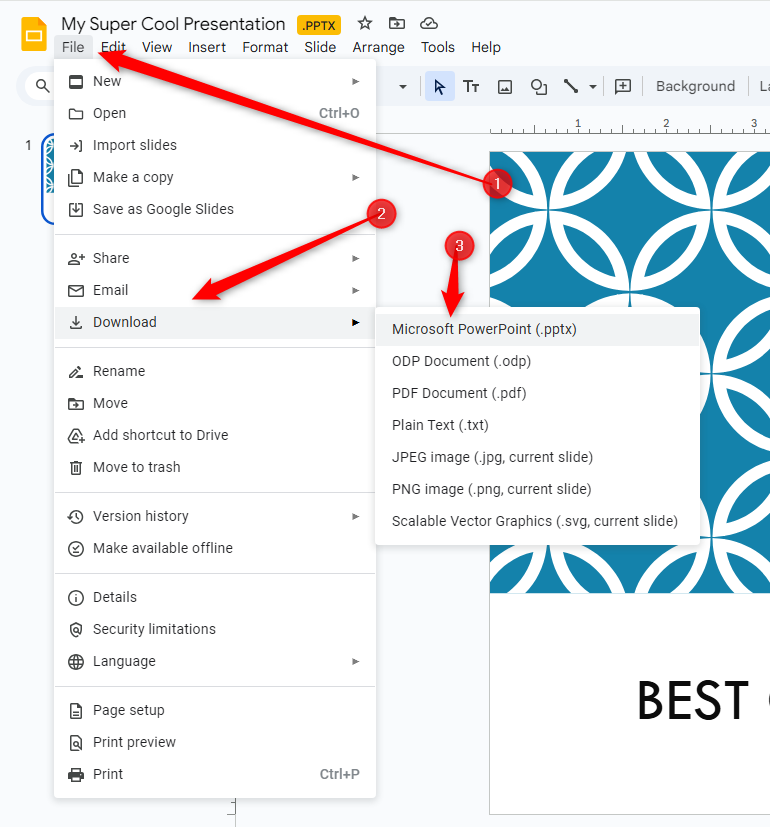
After you’ve finished editing your file, you can download and export your presentation back into a Microsoft PowerPoint format (or any other supported format). Just go to File > Download > your desired format, and it’ll download the presentation to your Downloads folder.
How to Add an Image
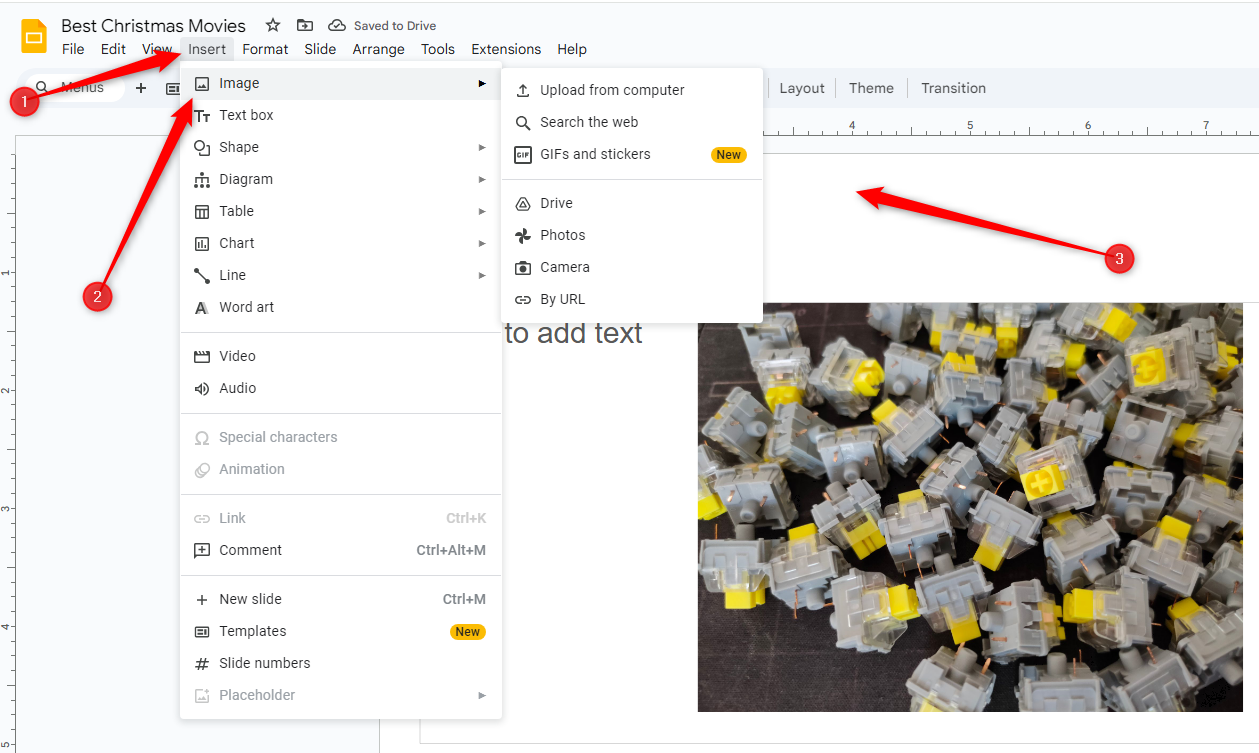
Images are an essential part of any successful presentation. They provide a visual element that can help illustrate concepts while also engaging your audience. To add an image, go to Insert > Image, then select one of the options.
How to Check Your Spelling in Google Slides
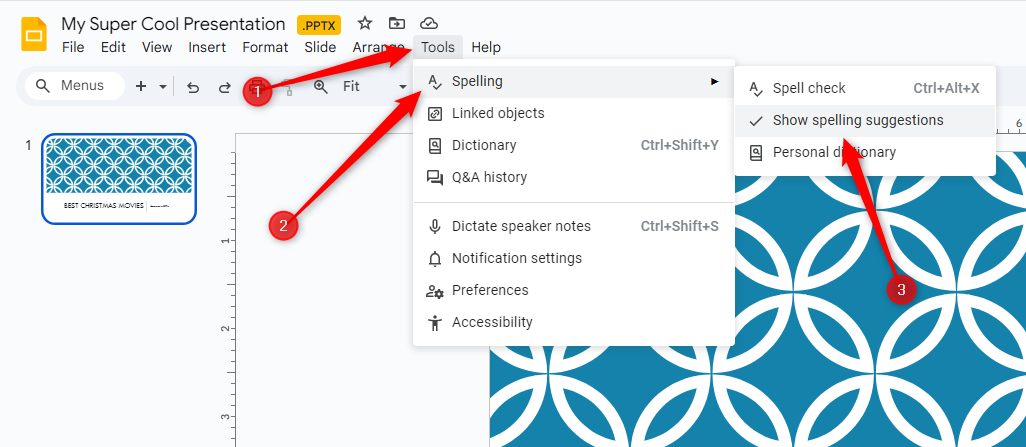
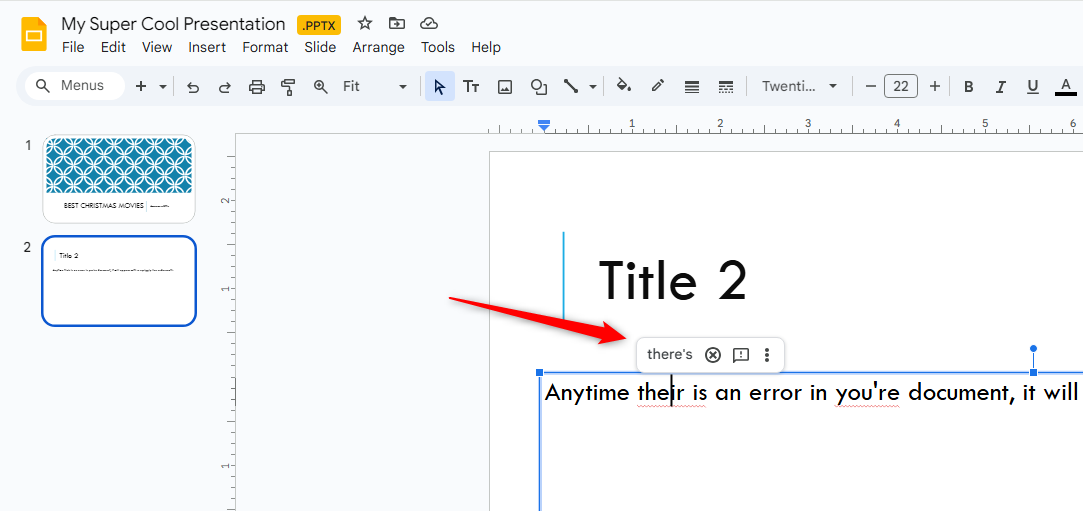
Now that you have a few presentations, it’s time to make sure your spelling and grammar are correct. Just like Docs, Slides is equipped with a spellchecker. If you misspell something, it underlines the error with a squiggly line and prompts you to make a change. This should be enabled by default, but you can confirm it by ensuring that there’s a checkmark next to Tools > Spelling > Show Spelling Suggestions.
To see spelling corrections and suggestions, right-click the word with the line underneath. You can also open the Spell Check and Grammar tool directly by pressing Ctrl+Alt+X (Windows) or Command+Alt+X (Mac).
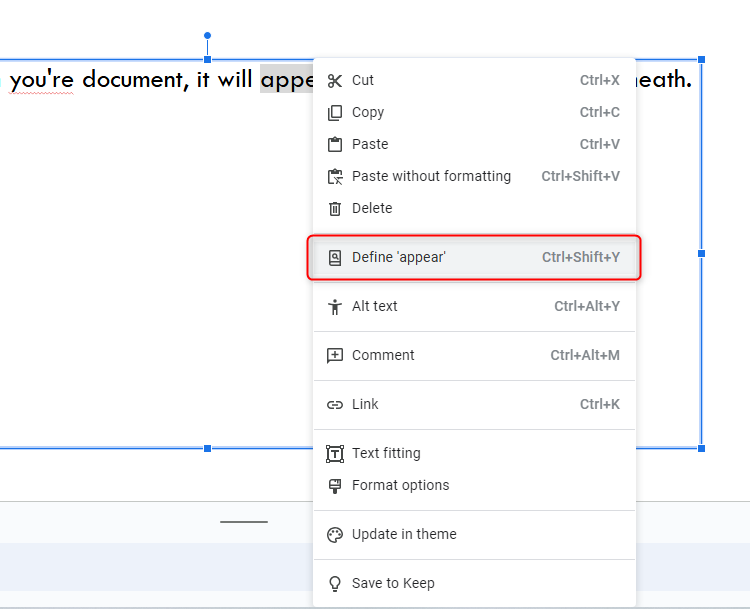
Along with a spellchecker, Google Slides comes loaded with a built-in dictionary and thesaurus. To use them, highlight a word, right-click it, and then click “Define [word].”
How to Collaborate on Presentations
One of Google Slides’s best features is its ability to generate a shareable link. Anyone you share the link with can view, suggest edits to, or directly edit the presentation. This eliminates the hassle of sending a file back and forth between collaborators. Each person has their own text entry cursor to use on their computer.
To do this, click the blue “Share” button in the top-right corner of the file you want to share. Next, choose how and with whom you want to send a link to the file. You can add people by typing in their email addresses. Alternatively, click “Get Shareable Link” to hand out the invitation yourself.
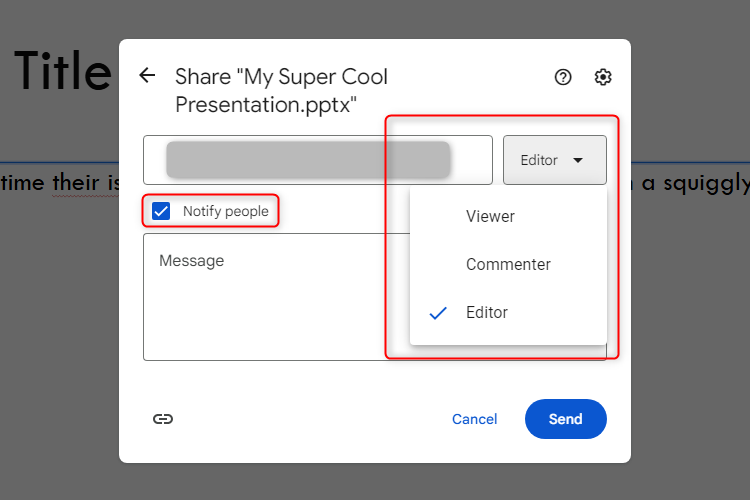
When you share the presentation via email, you can also choose the permission type for that person by clicking on the drop-down menu. If you wish to send the person an email alert, click on the checkbox next to “Notify People.”
If you choose to generate a shareable link, you can select one of these options from the drop-down menu under the “General Access” section in the main share menu:
- Restricted: The shareable link is disabled. Even if someone has access to the link and used it previously, it’ll no longer work, and their permission will be automatically revoked.
- Anyone with the link (Viewer): Users with the link can only view the presentation. This is the default permission when you change from Restricted, and it still allows the shared user to download the file to their computer.
- Anyone with the link (Commenter): The shared user can leave comments on the presentation, which is handy for a team project.
- Anyone with the link (Editor): This option grants users full editing permissions. However, you retain ownership of the file, so they cannot delete it from your Drive.
Thanks to these flexible options, you maintain full control over the various access levels to the presentation.
How to See All Recent Changes to a Presentation
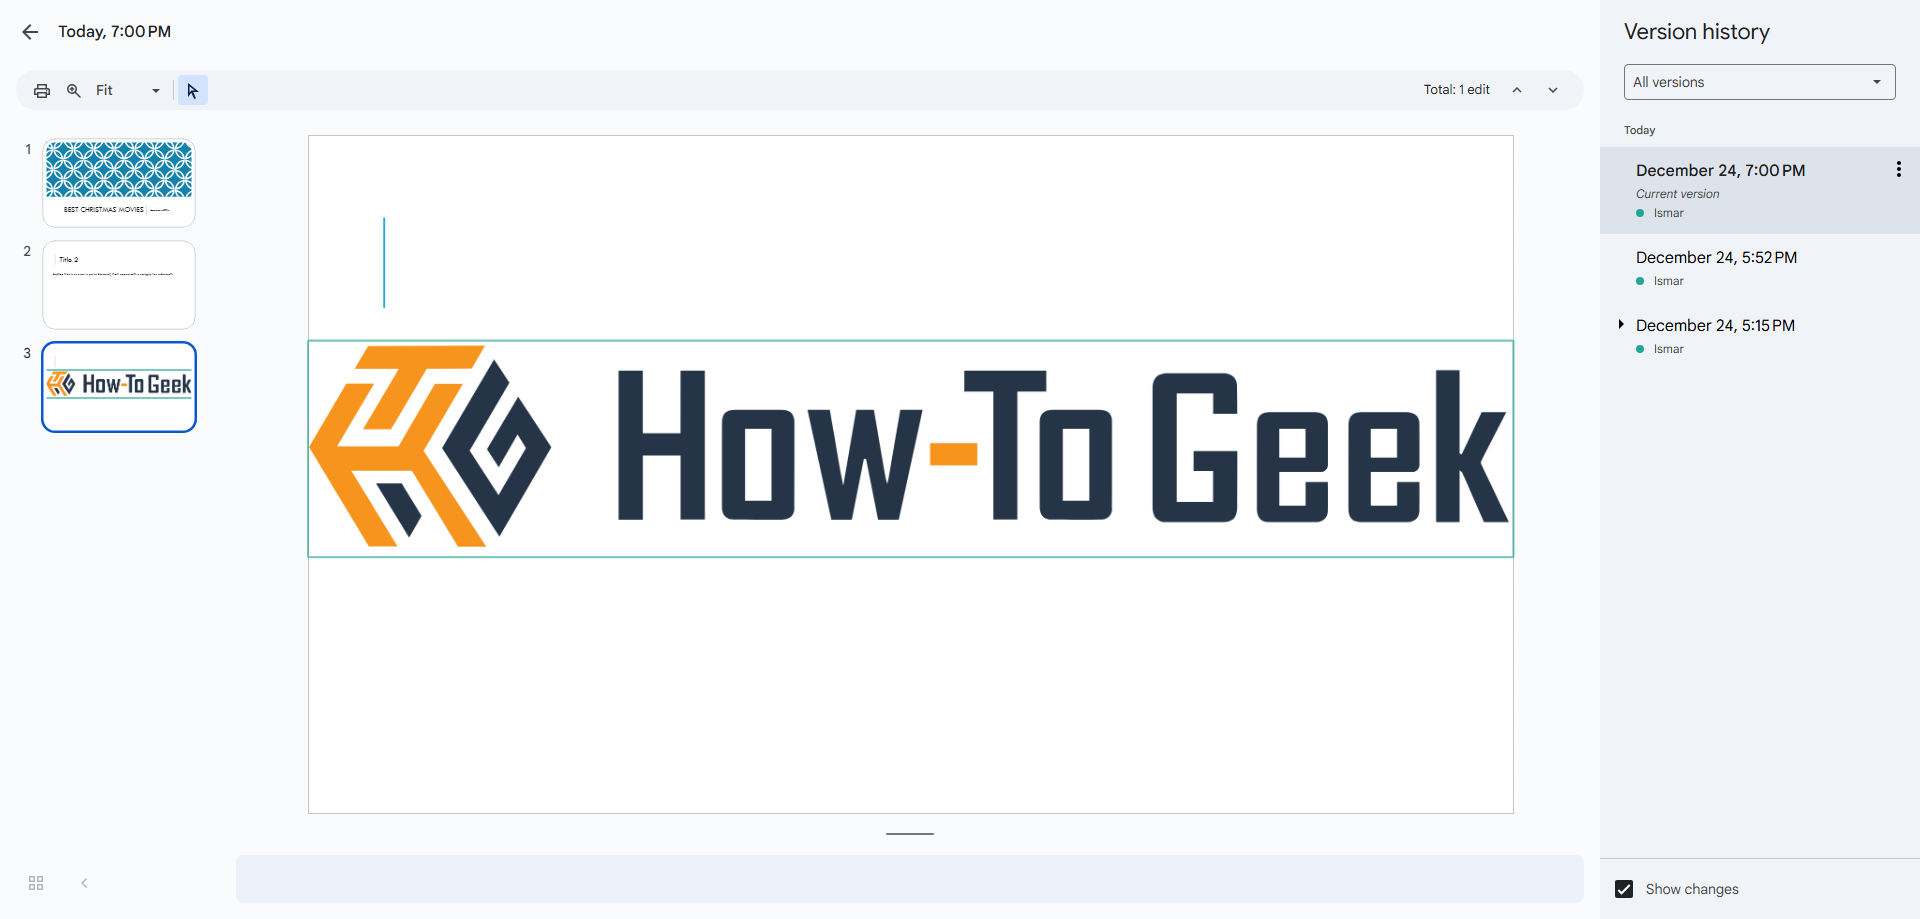
When you share a presentation with others, you can’t keep track of all the small changes that happen without your knowledge. Fortunately, Slides has a revision history. Google Slides tracks all changes that occur in a presentation and organizes them into periods to reduce clutter. You can even revert a file to any of the previous versions listed in the history with a single click.
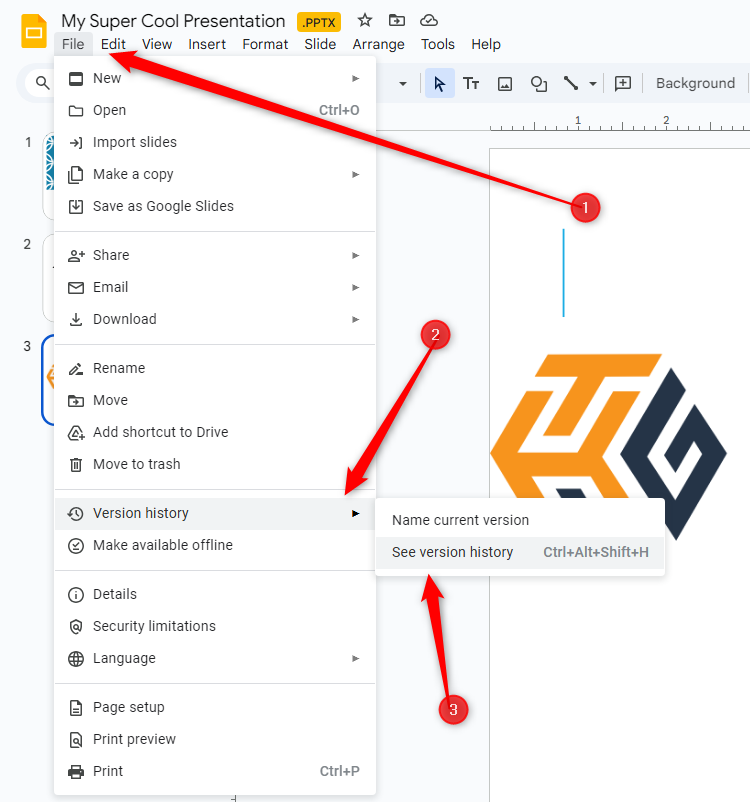
You can see all recent changes by clicking File > Version History > See Version History. Alternatively, press Ctrl+Alt+Shift+H (Command+Option+Shift+H on Mac).
How to Link to a Specific Slide
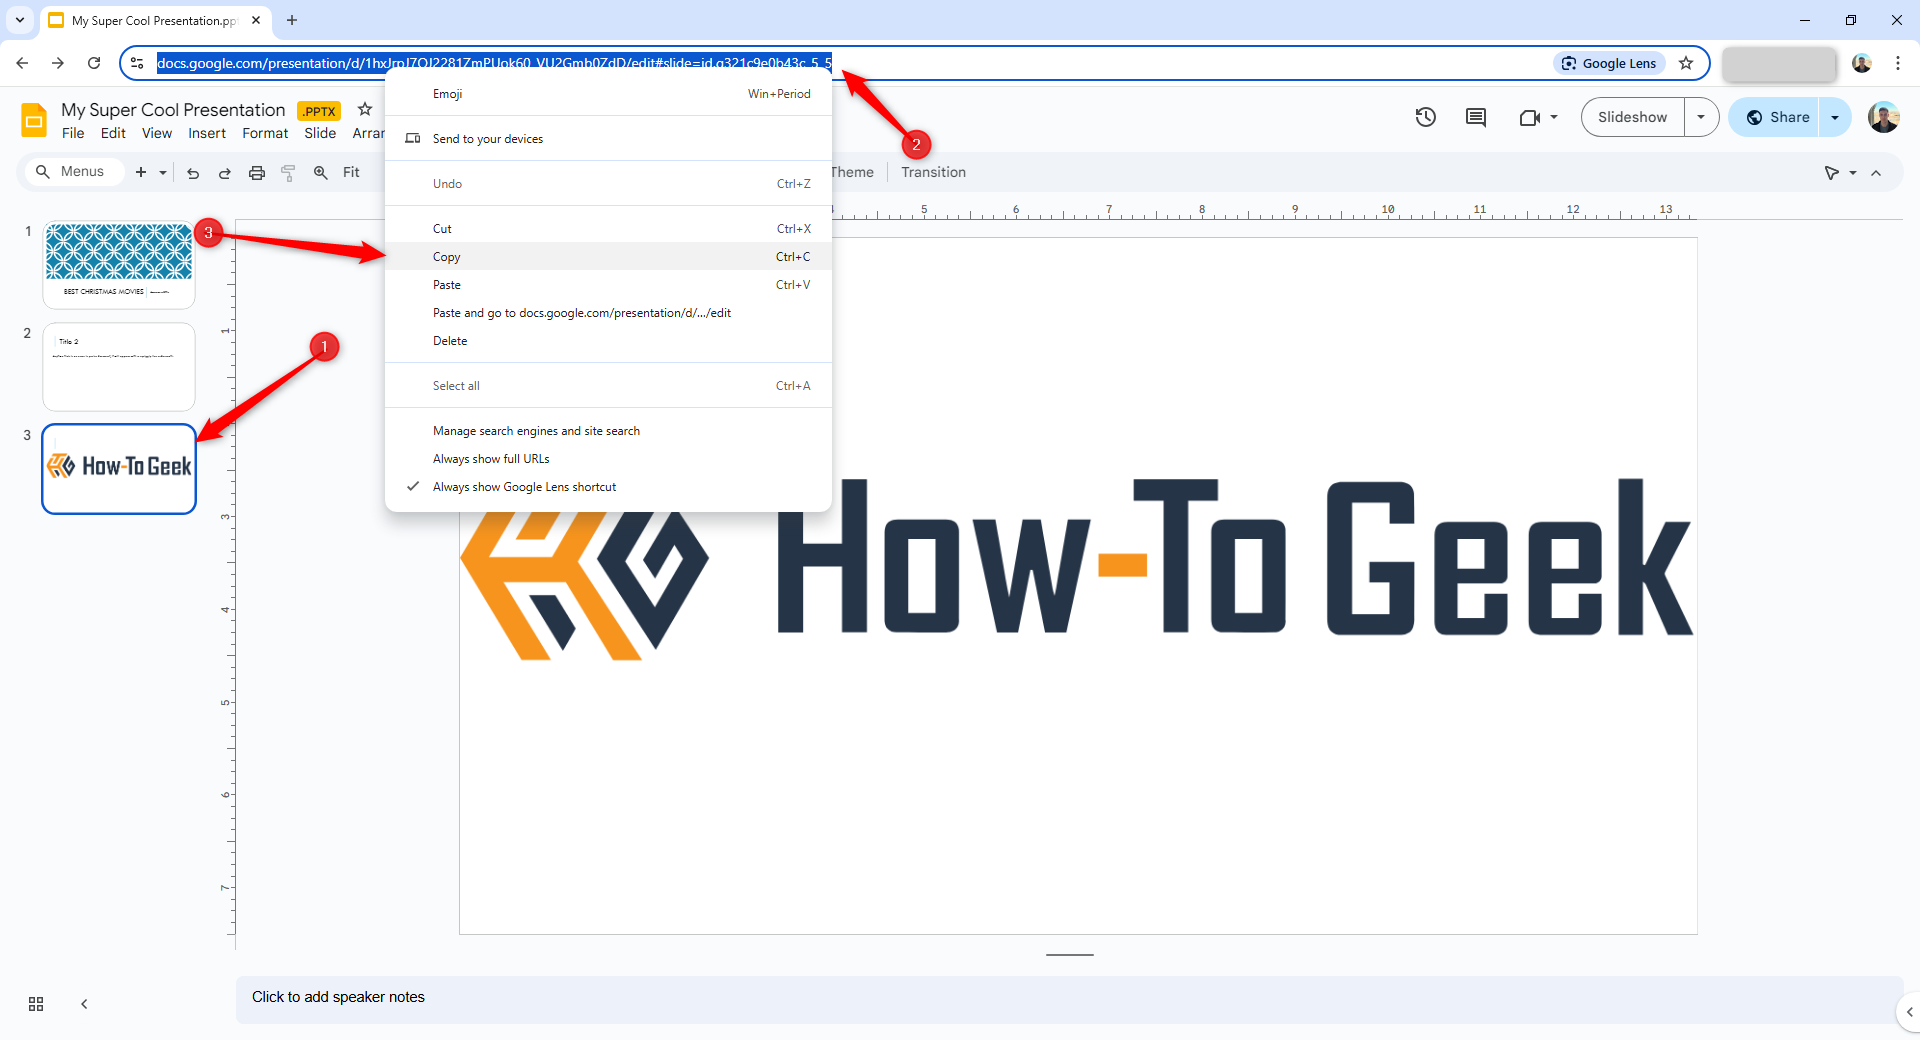
You can share a link to a specific slide in your presentation with a friend or coworker without having to mention which one you’re referencing. When someone clicks the link and the presentation loads, it jumps directly to the slide you’re referencing. However, you do have to enable file sharing before you can link to a specific slide in your presentation.
Since Slides is a web app and each slide has a unique URL, to link to one, you just have to click it in the left pane and copy the URL directly from the address bar.
How to Insert Special Characters into a Slide
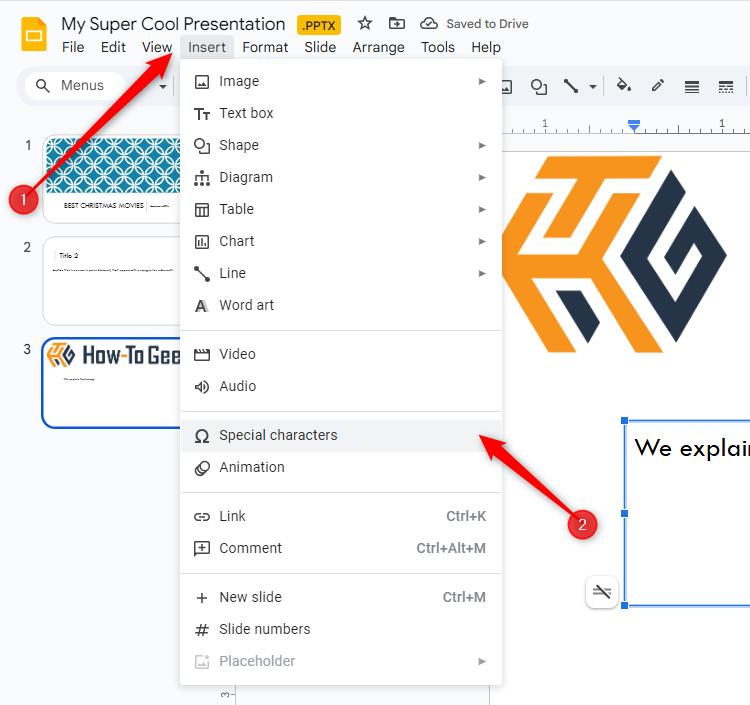
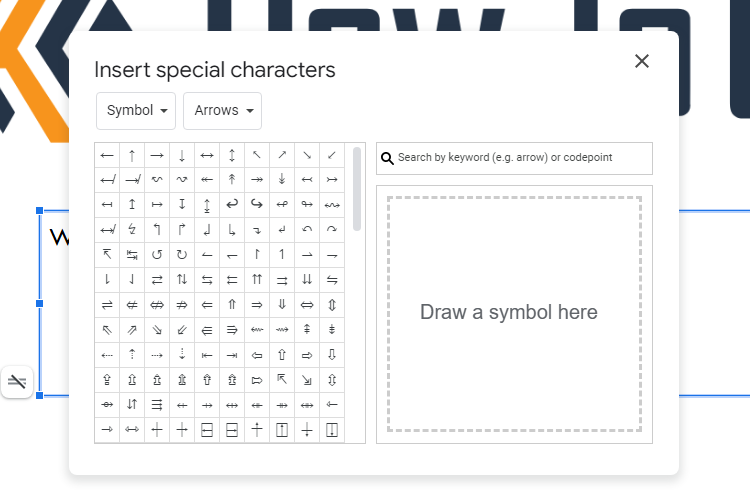
Google Slides has a character insertion tool. This allows you to insert special characters into your presentation without having to remember any Alt-codes. There are tons of symbols, characters, languages, and so much more. So, whether you want an arrow, different language scripts, or a few silly emojis to spruce up your presentation, Google Slides makes it easy to include them. To open the character insertion tool, go to Insert > Special Characters.
From here, you can manually search for specific characters using the category drop-down menus, search bar, or even your drawing skills to look up a character.
How to Use Google Slides Offline
If you want to bring your Google Slides presentation with you to school or work and don’t want to rely on an internet connection, you can use Slides offline without resorting to PowerPoint. Any changes you make to the file offline will update the next time you connect to the internet.
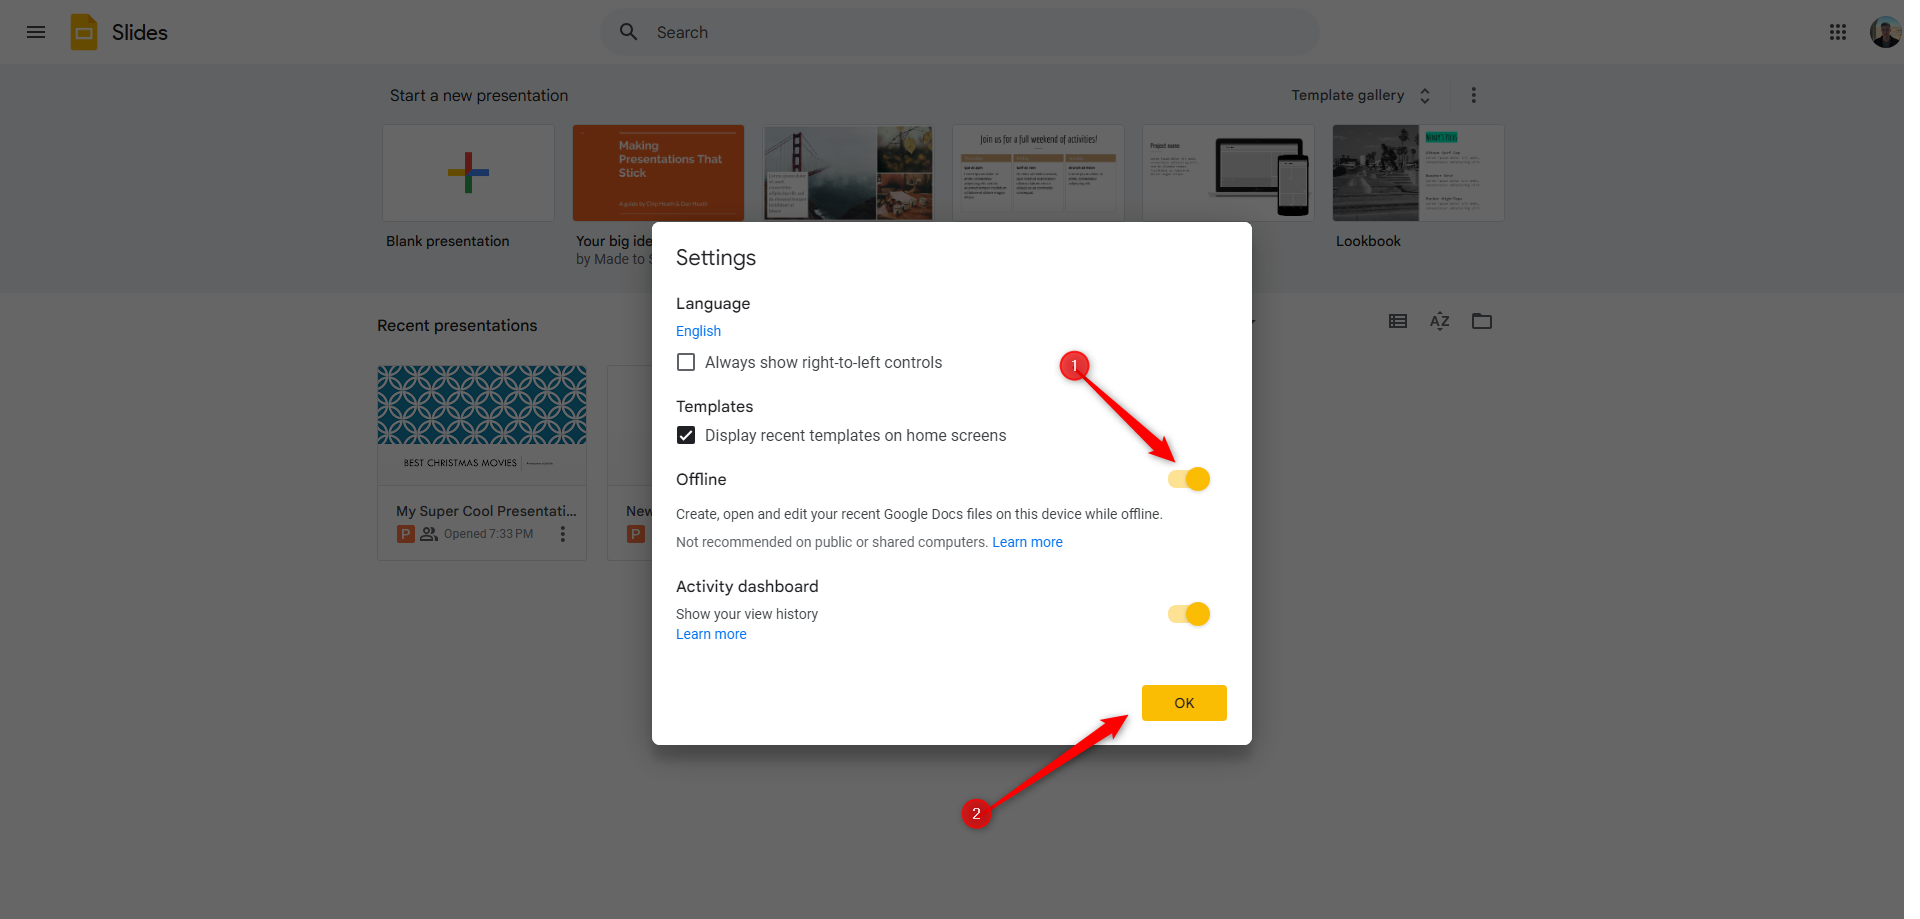
First, download the Google Docs Offline extension for Chrome. Next, to enable a presentation for offline use, go to the Google Slides’ homepage and, in the top-left corner, click the Hamburger menu > Settings. Once here, enable the “Offline” option, then click “OK” to save.
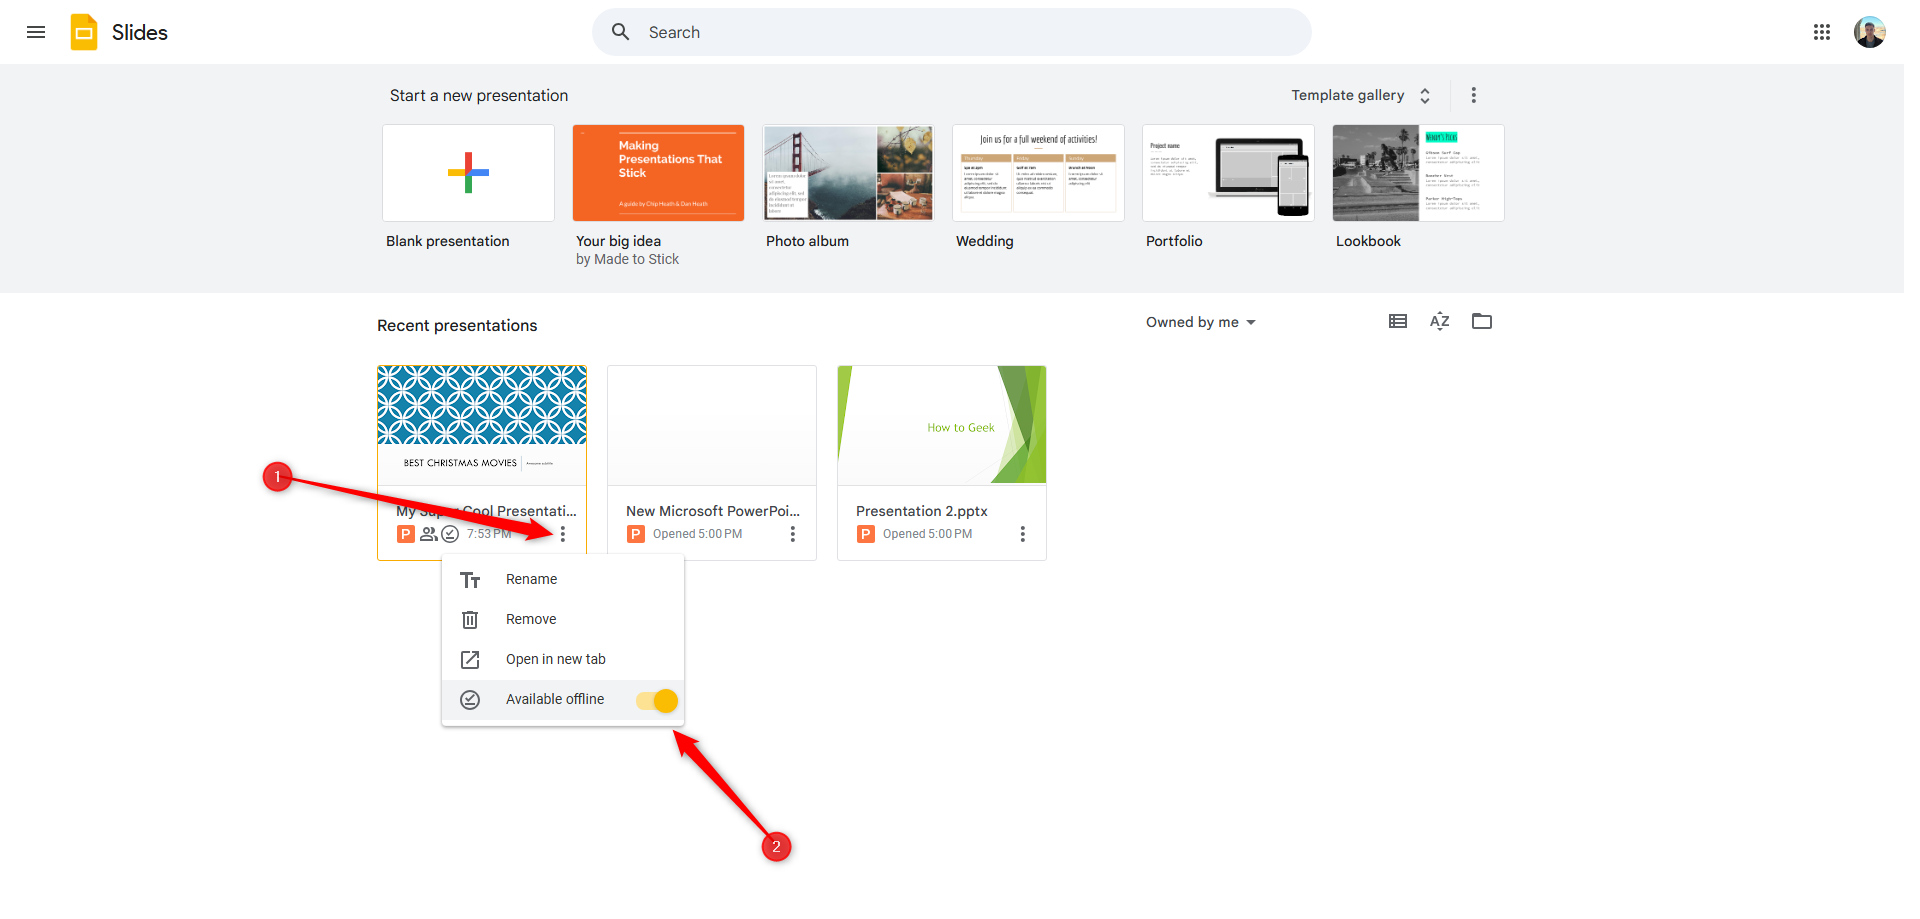
Google only downloads and makes the most recently accessed slideshows available for offline use to save storage space on your device. Fortunately, you can manually enable important files by clicking the three-dot icon and toggling “Available Offline” to On.
Congratulations on completing our little Google Slides crash course. This app is a powerful, feature-rich alternative to Microsoft Office’s PowerPoint, especially if you have to collaborate on a slideshow. Now that you know the basics, you can focus on mastering the more advanced Slides tricks.


