As our Windows laptops tirelessly work for us, issues can gradually sneak in. If ignored, these issues may lead to costly repairs or even replacements. To ensure your laptop stays in top condition, you must routinely check its hardware health. Here are a few simple tips to help you do just that.
1 Check the Health of Your Battery
Over time, a laptop battery degrades and loses its ability to hold a charge, which impacts your device’s performance, runtime, and reliability. Ignoring early signs of wear can accelerate the degradation process and cause the battery to wear out faster. Overheating can also occur, which might hamper other internal components.
To prevent these issues, regularly monitor your laptop battery’s health. If you notice any problems, calibrate the battery and avoid overcharging to reduce wear. You can generate a battery health report to track important battery details, such as charge cycles, capacity history, and estimated runtime.
To create a battery health report, open PowerShell, type powercfg /batteryreport, and press Enter. Then, navigate to “C:\Users\YOUR_USERNAME\battery-report.html” to view the report.
2 Assess the Condition of Your SSD or HDD
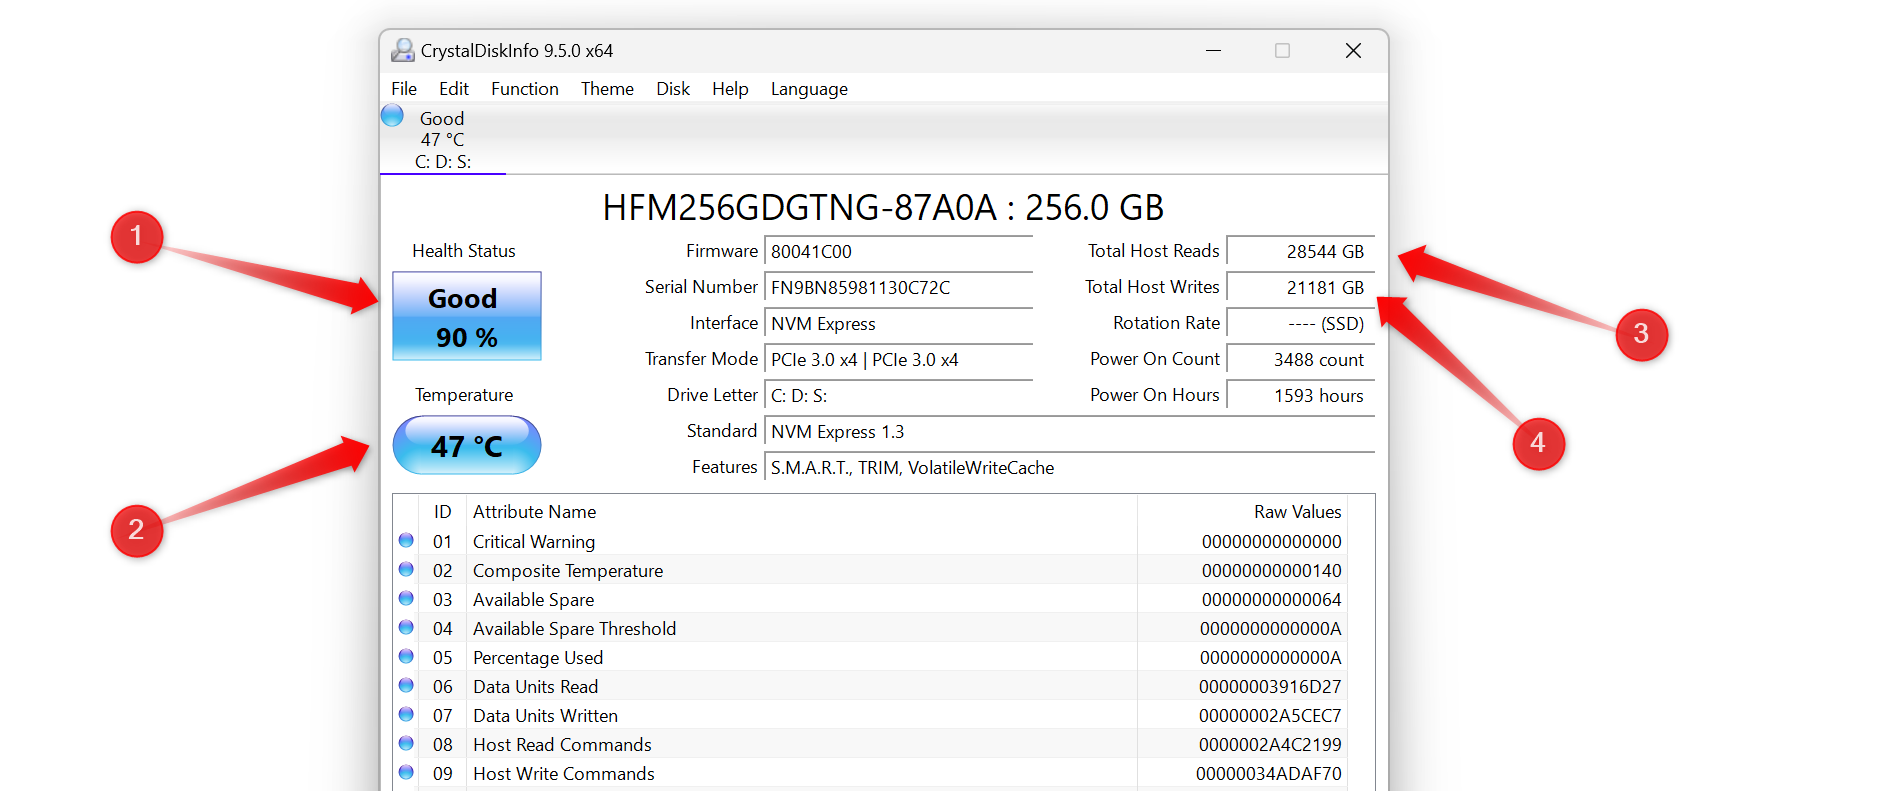
Storage drives that hold your valuable data are susceptible to failure. If they wear out, and you overlook the warning signs, they could fail, causing the loss of important files. By regularly checking the health of your drive, you can spot errors, bad sectors, or other potential issues early, giving you the chance to back up your data before a failure occurs.
CrystalDiskInfo is a helpful tool for monitoring your drive’s health. It indicates the health of your drive—blue for “Good,” yellow for “Caution,” and red for “Bad.” It also shows the operating temperature and other statistics. For SSD drives, it shows “Total Host Reads” and “Total Host Writes,” which you can compare to the drive’s Terabytes Written (TBW) rating.
3 Check Your RAM for Problems
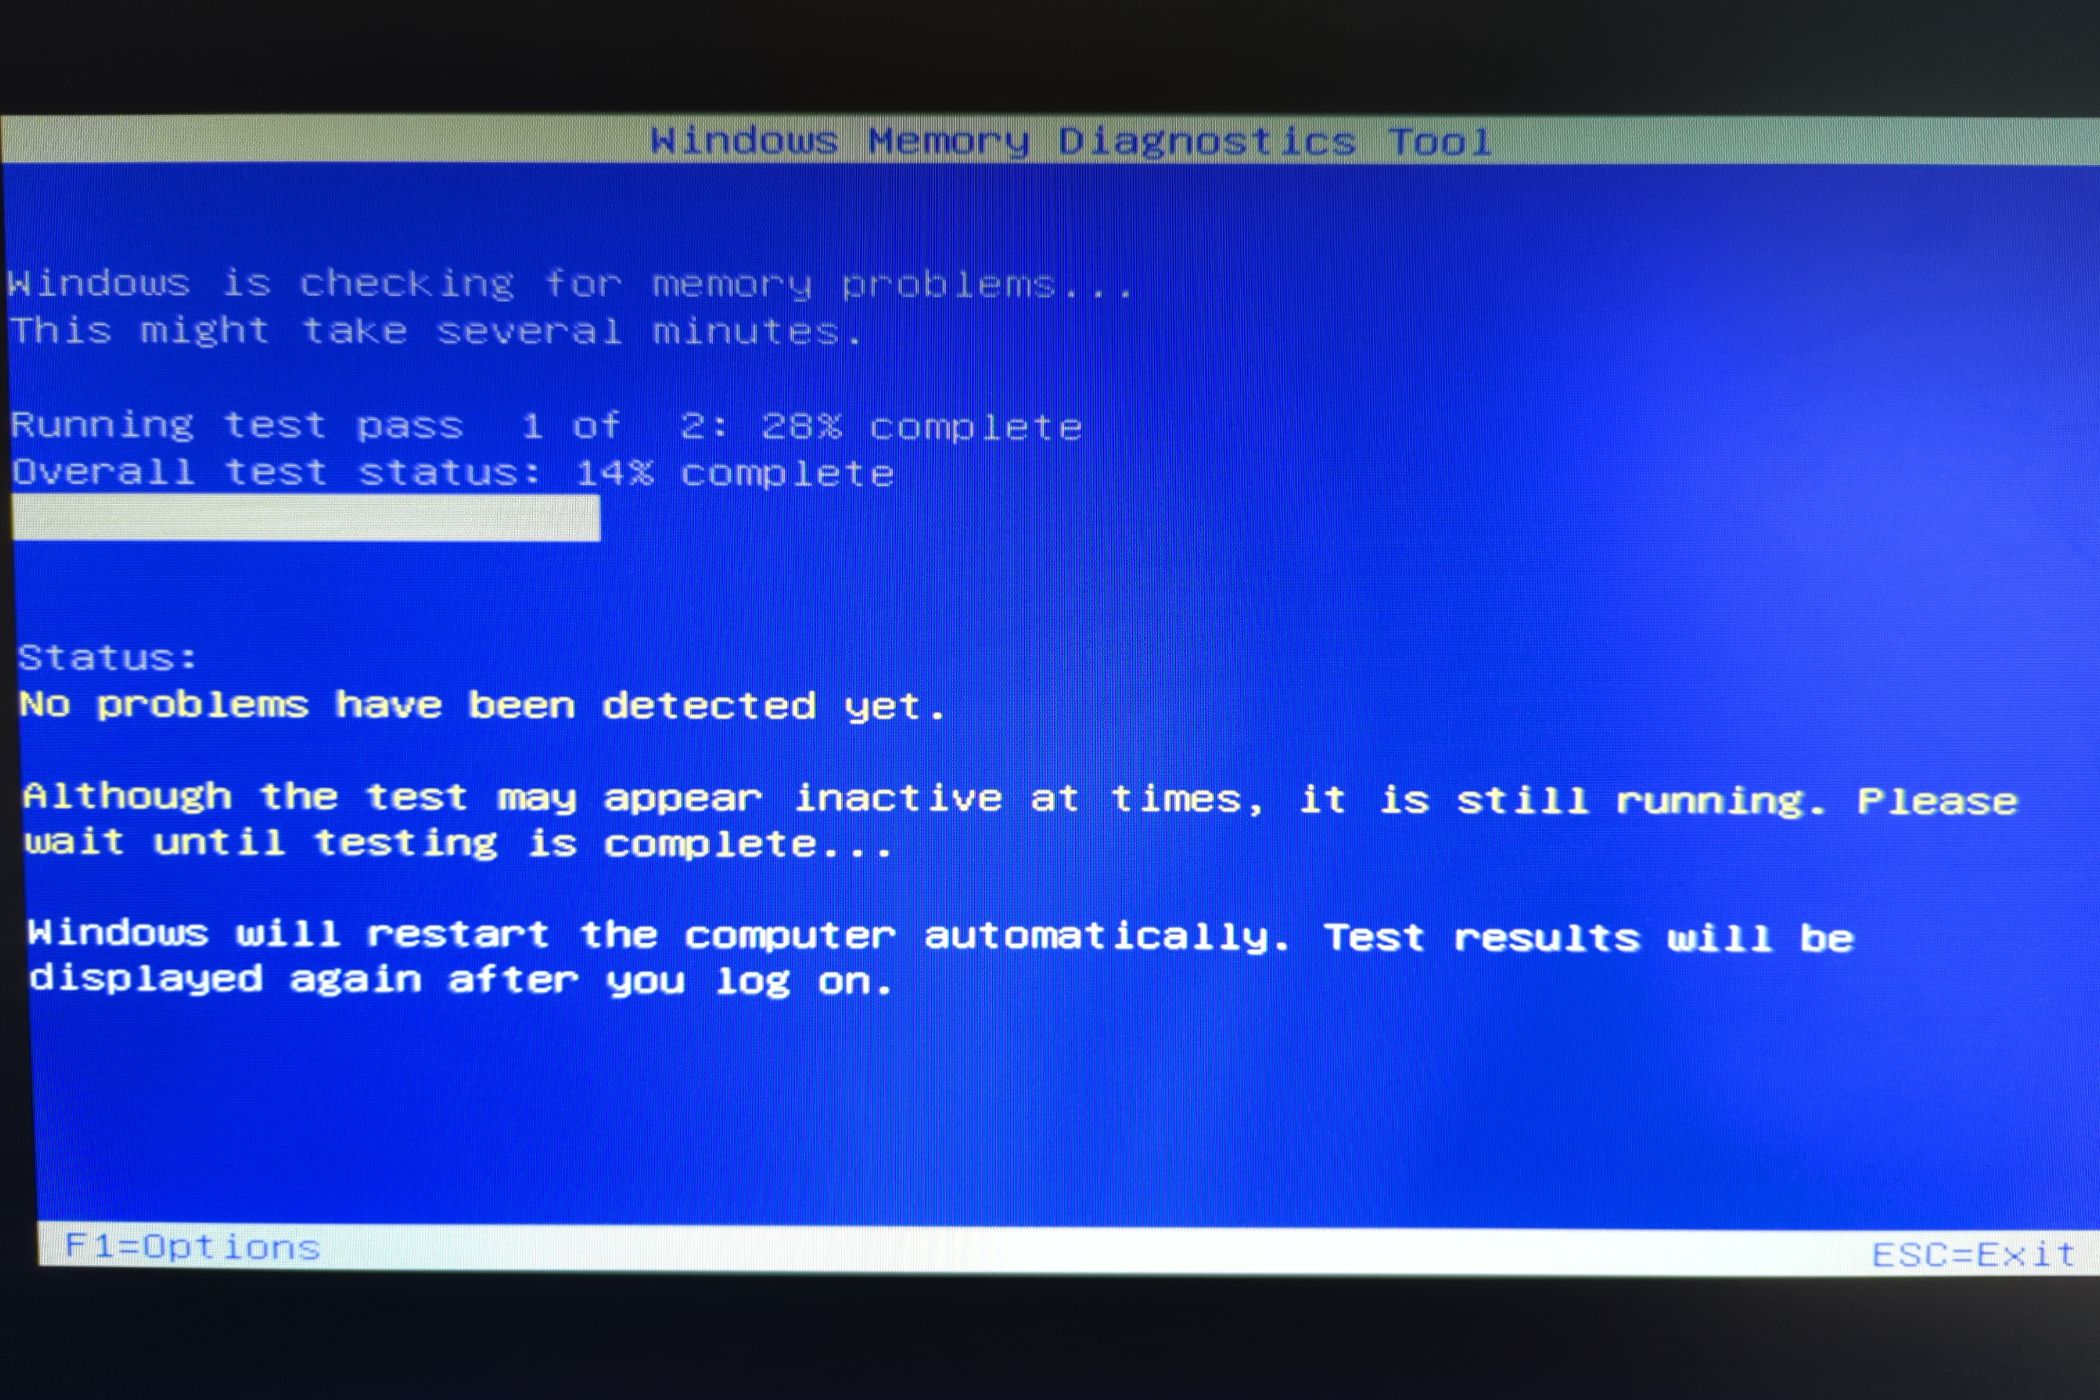
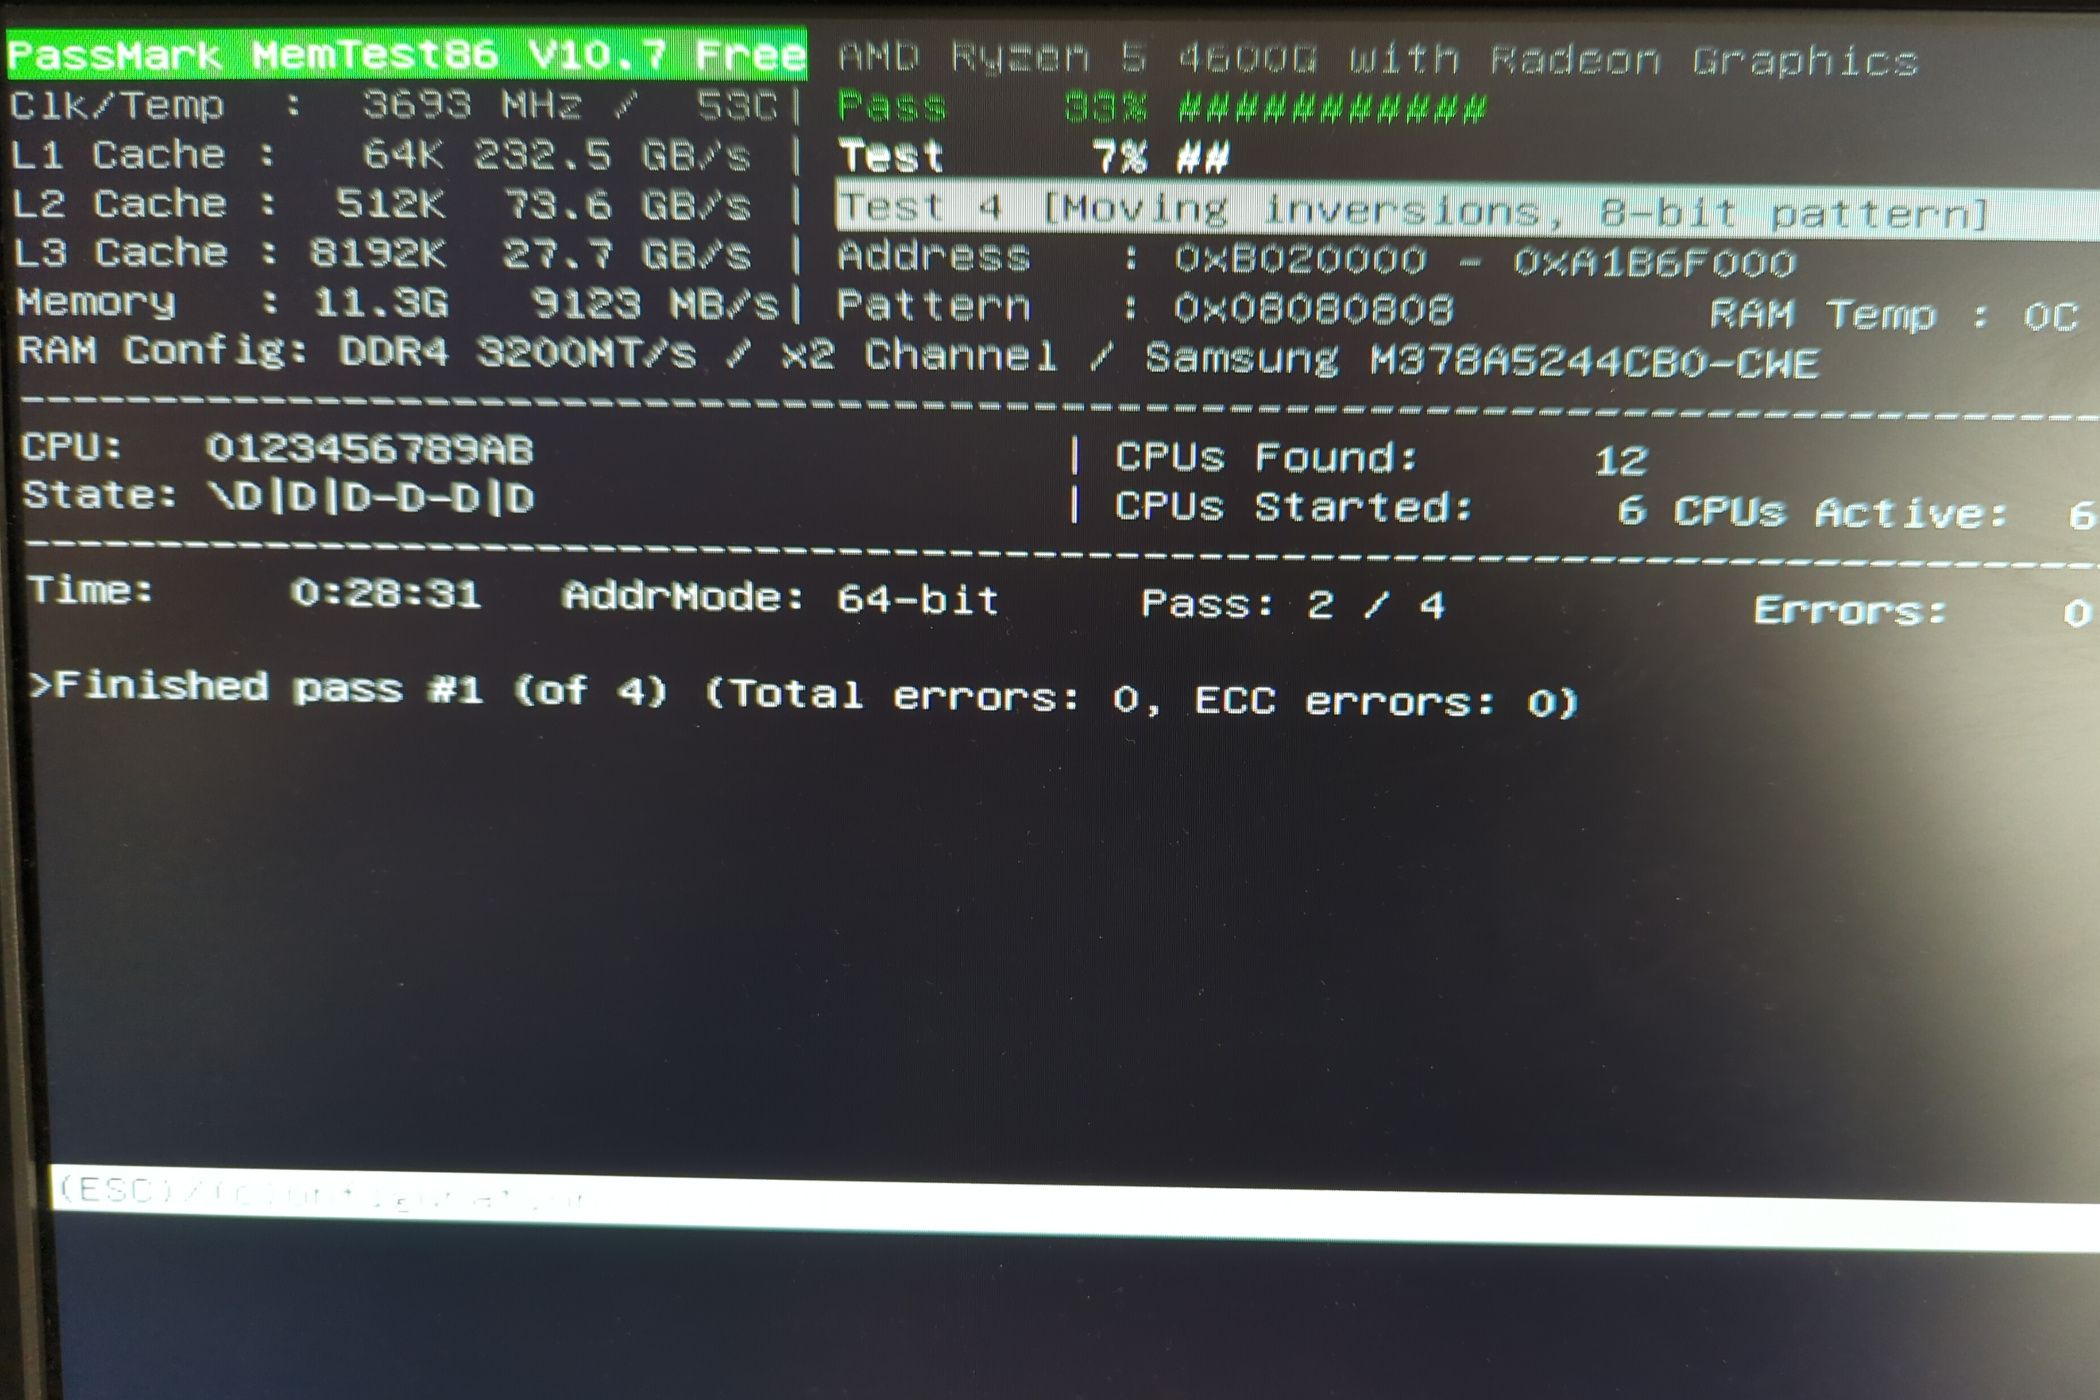
A faulty RAM can cause crashes, freezes, and system instability. Even if one of the sticks malfunctions, you’ll experience slower performance. Testing your RAM helps identify issues with one or more sticks, allowing you to replace them on time. This prevents unexplained problems like BSODs and ensures your laptop doesn’t break down when you need it most.
There are two ways to check for RAM issues. First, you can use the built-in Windows Memory Diagnostic tool, which detects problems with memory and notifies you of any issues, either automatically or through the Event Viewer.
For a more thorough analysis, you can use MemTest86, which often identifies RAM issues that the built-in tool might miss.
4 Test Your Computer Display
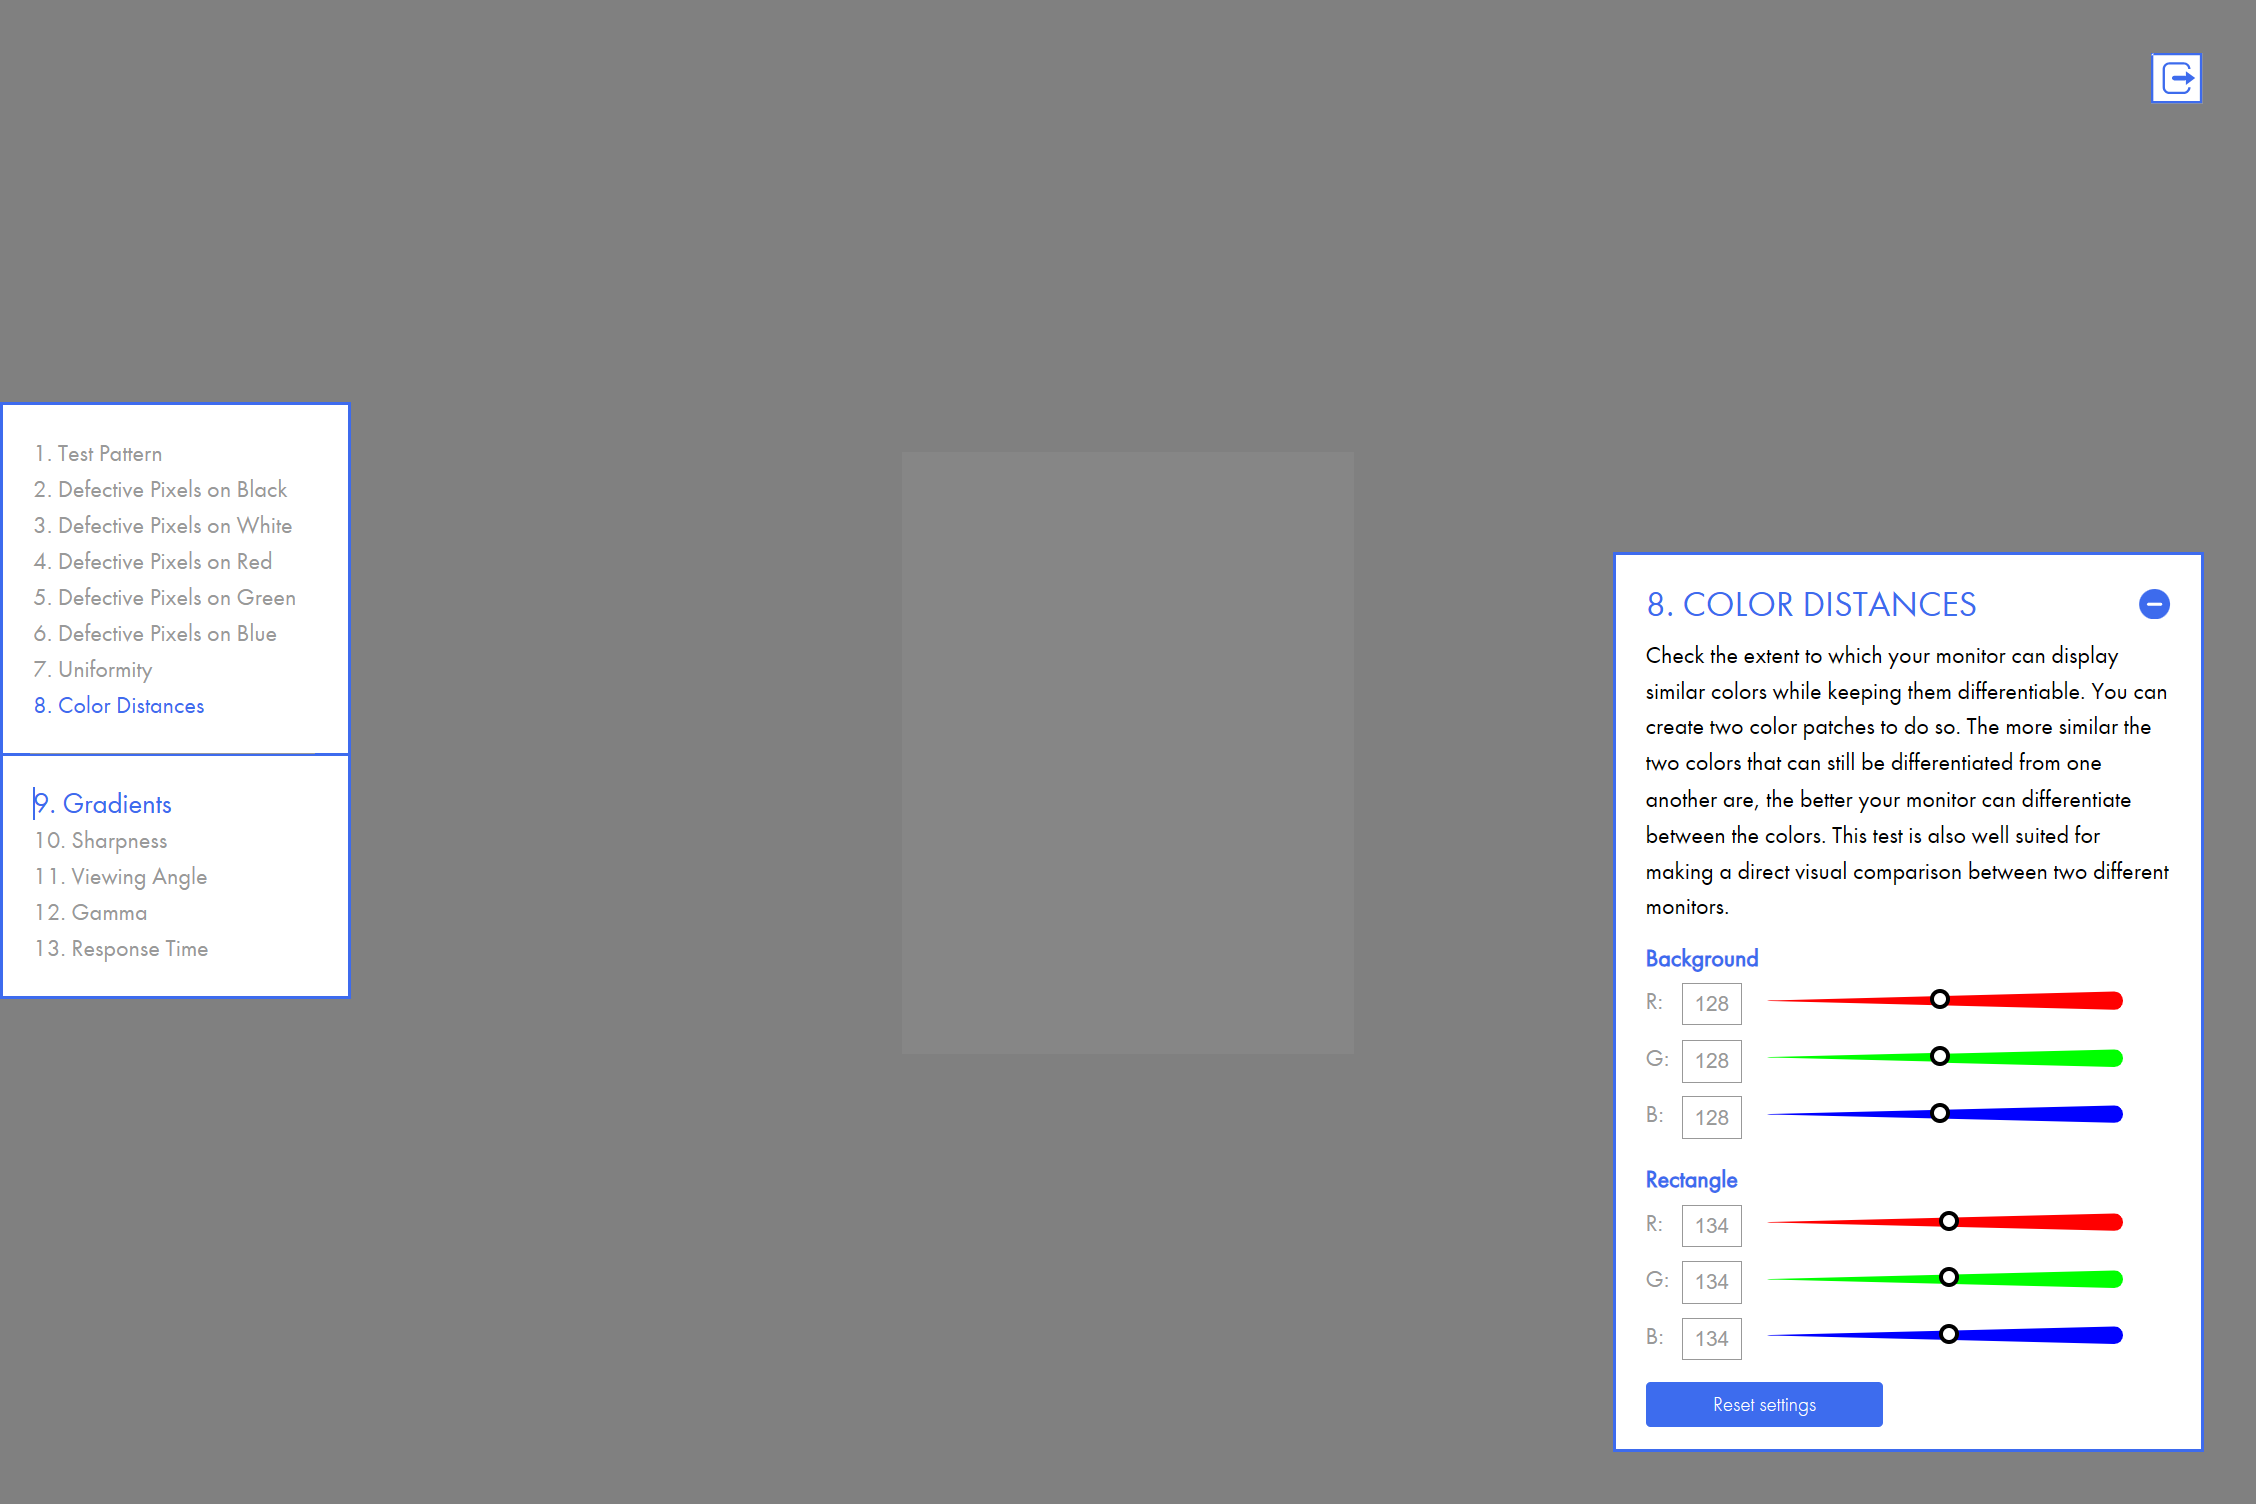
Over time, your laptop display may develop issues such as dead pixels, color distortion, and other problems that impact your visual experience but are difficult to spot with the naked eye. Running a screen test can help you determine whether these issues relate to your laptop’s screen or stem from your GPU, graphics drivers, or other settings that can be easily fixed.
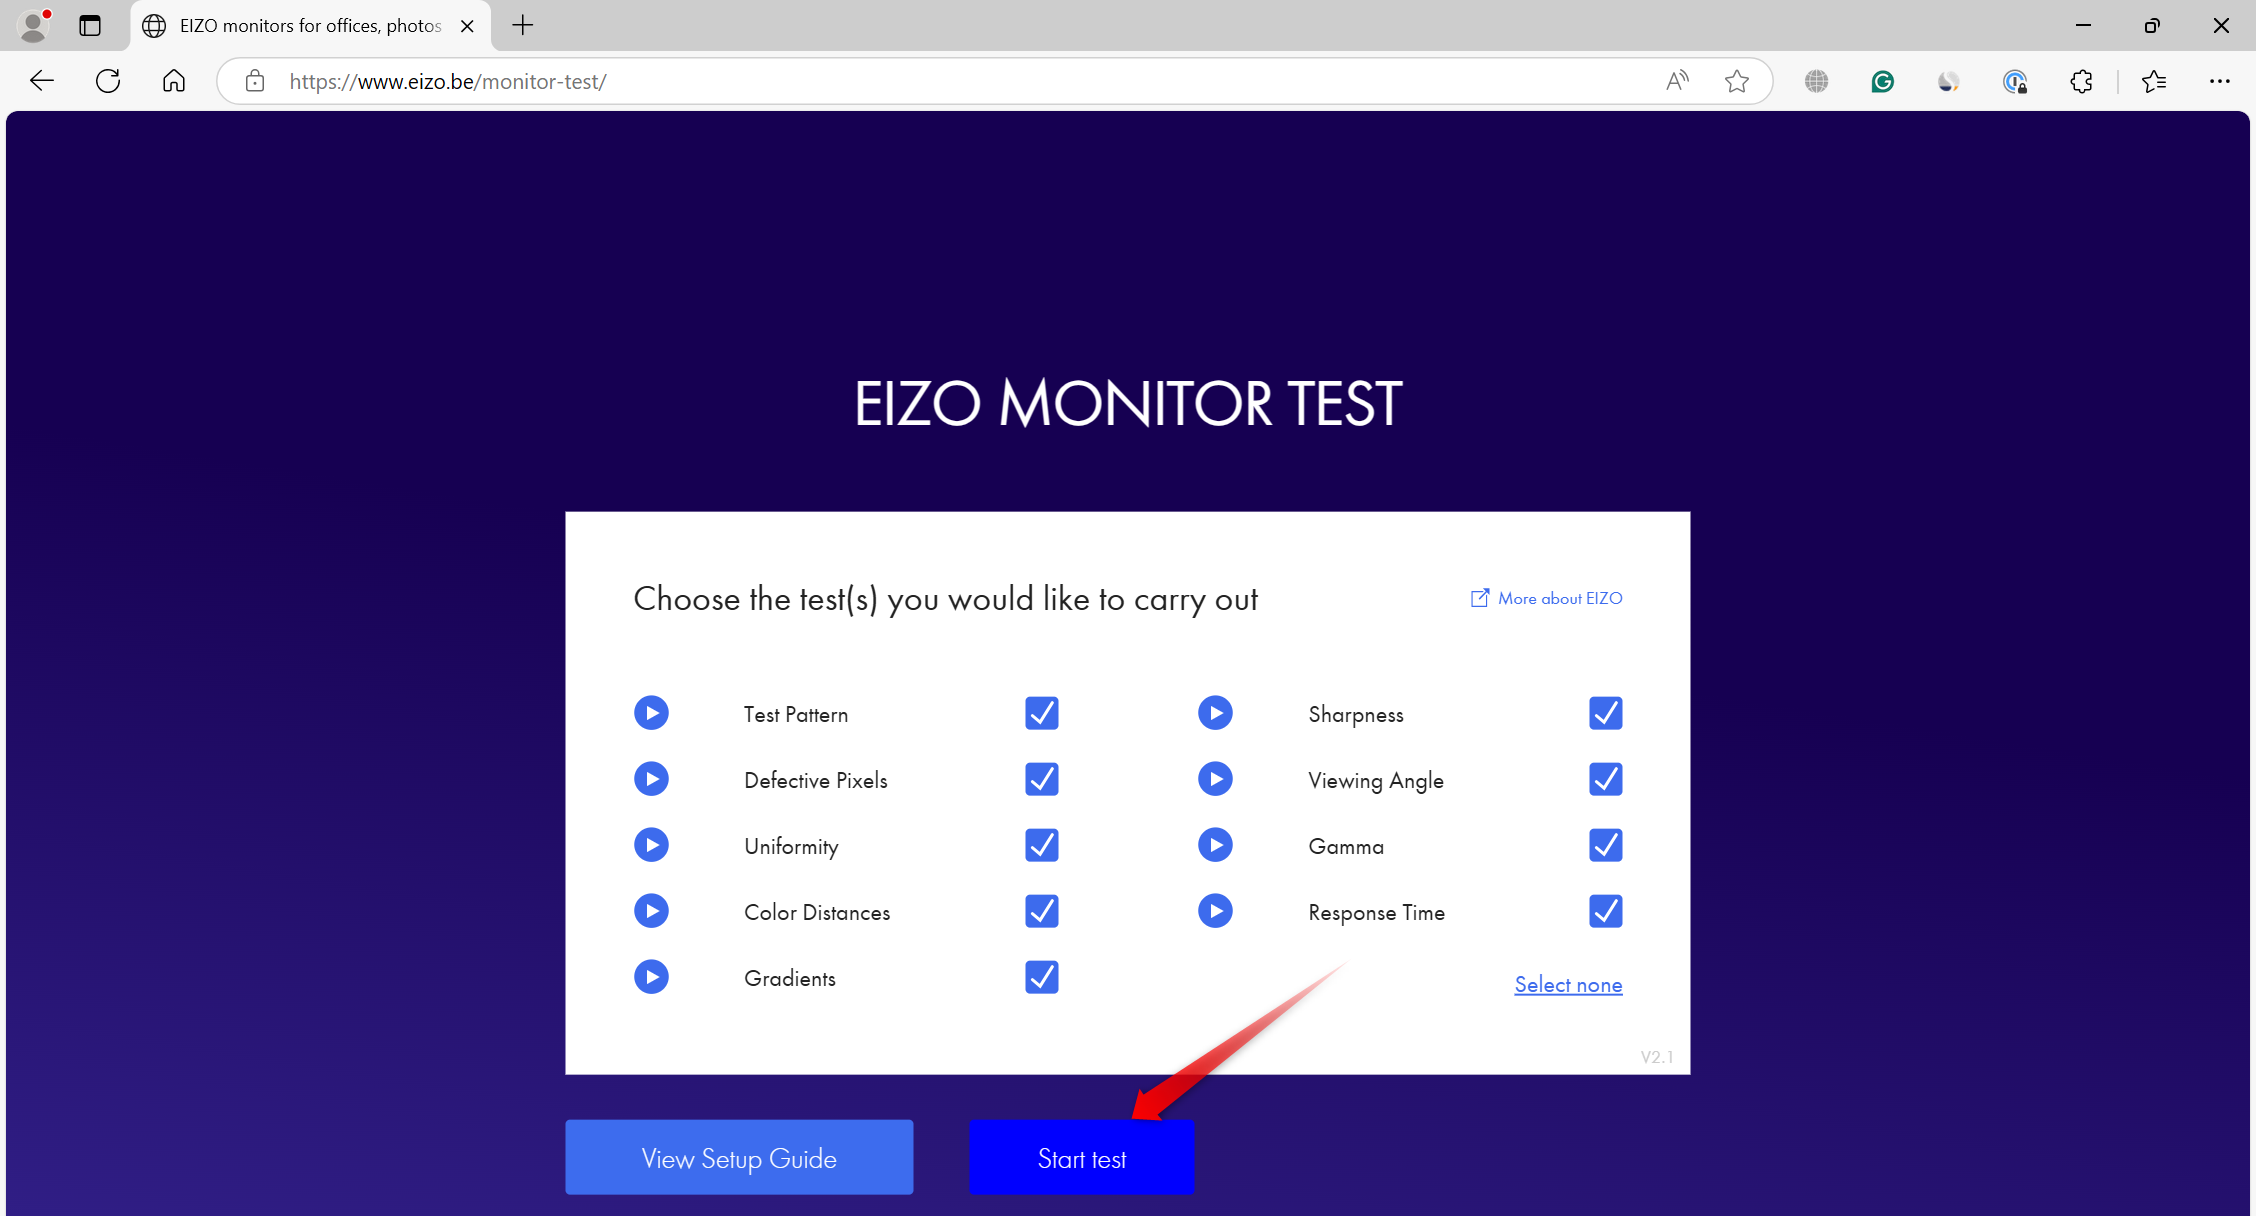
If your laptop doesn’t offer a built-in LCD screen test, like Dell’s BIST diagnostic, you can visit the EIZO website to run the test.
Go through all the available options during the test to check for any display issues. If you notice abnormalities like dead pixels (dots that don’t change color), uneven lighting around the edges, or flickering, this indicates a problem with your screen.
So, you should have your device inspected by the manufacturer if it’s still under warranty, or by a nearby technician if the warranty has expired.
If no issues appear during the test, the display problems you’re experiencing are likely caused by something else and will need further investigation.
5 Check the Effectiveness of the Cooling System
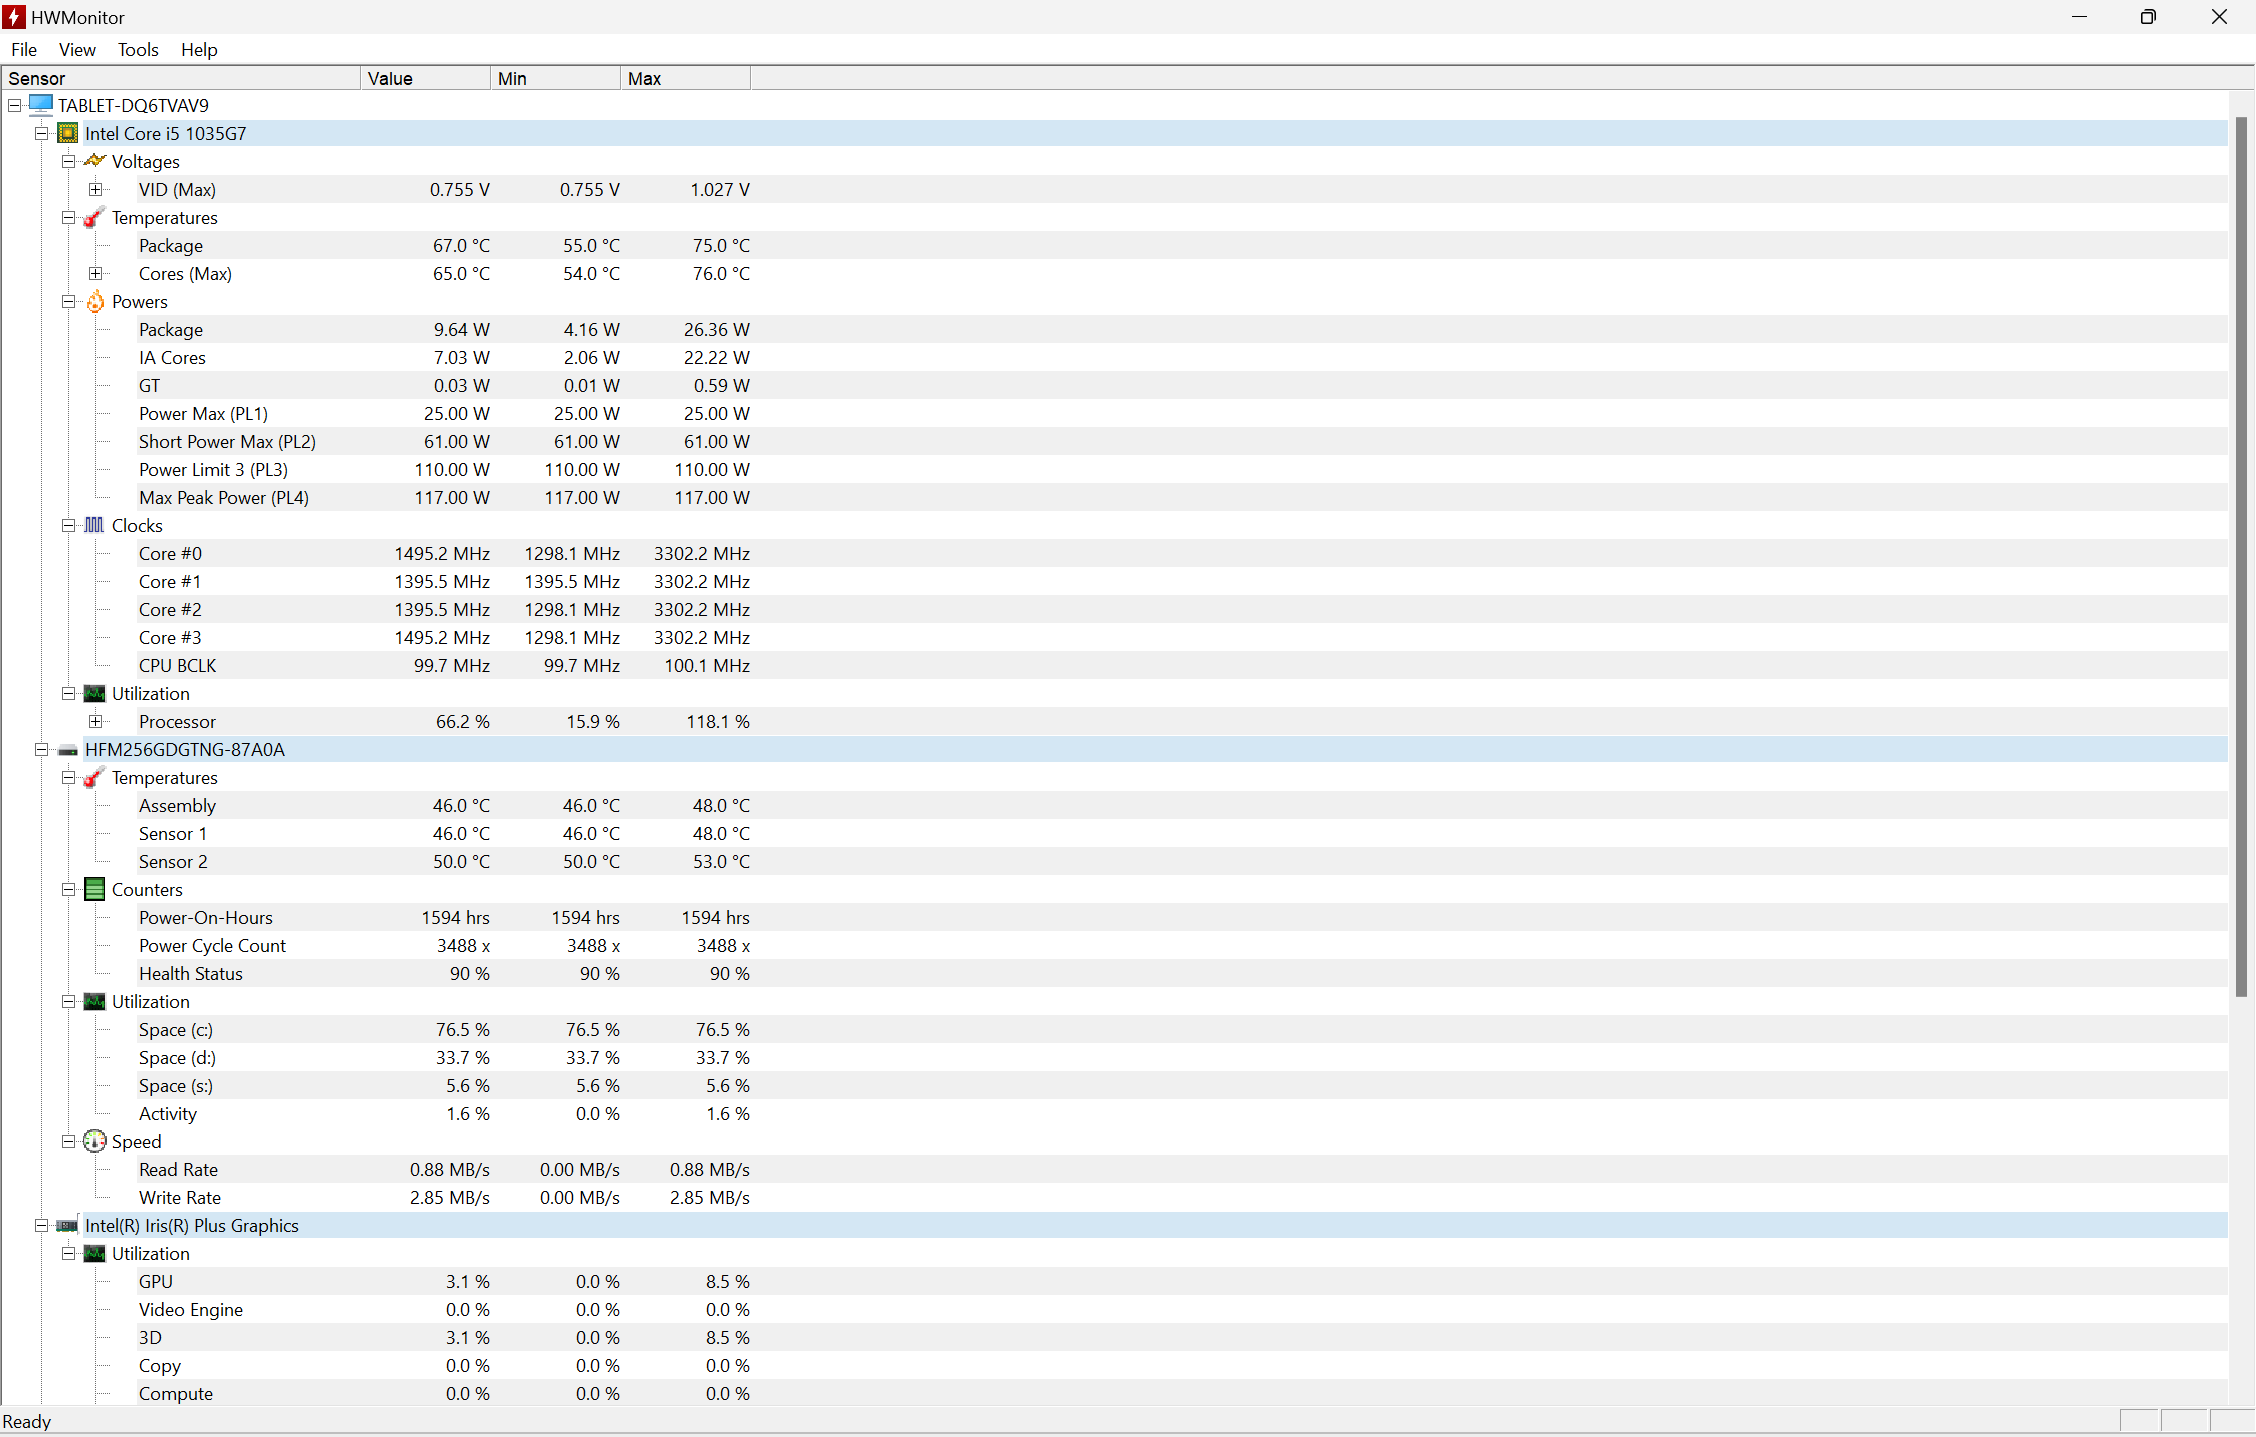
Overheating can reduce your laptop’s performance and, if left unchecked, may lead to physical damage. Therefore, you must regularly monitor the effectiveness of its cooling system to ensure it properly regulates internal heat. An easy way to do this is to check the temperatures of key components like the CPU and GPU during demanding tasks.
Tools such as HWMonitor can help you monitor component temperatures. If they exceed safe ranges, your cooling system isn’t working well. To fix this, place your laptop on a hard surface rather than on a bed or couch, clean dust-covered exhaust vents, don’t overstress components, and use the laptop in a room with a moderate ambient temperature.
If these measures don’t lower the temperatures, use a cooling pad and explore other options to reduce heat. You might miss these critical issues if you don’t test your cooling system.
6 Run a System Diagnostic Report
Running a System Diagnostic is a great way to assess your laptop’s health and performance. This test checks hardware and software configurations and tests your disk, network, CPU, drivers, RAM, and more. It then generates a report detailing the components working correctly and highlights any issues it detects.
In one test, you can assess hardware performance, uncover system configuration issues, and spot bottlenecks that require optimization.
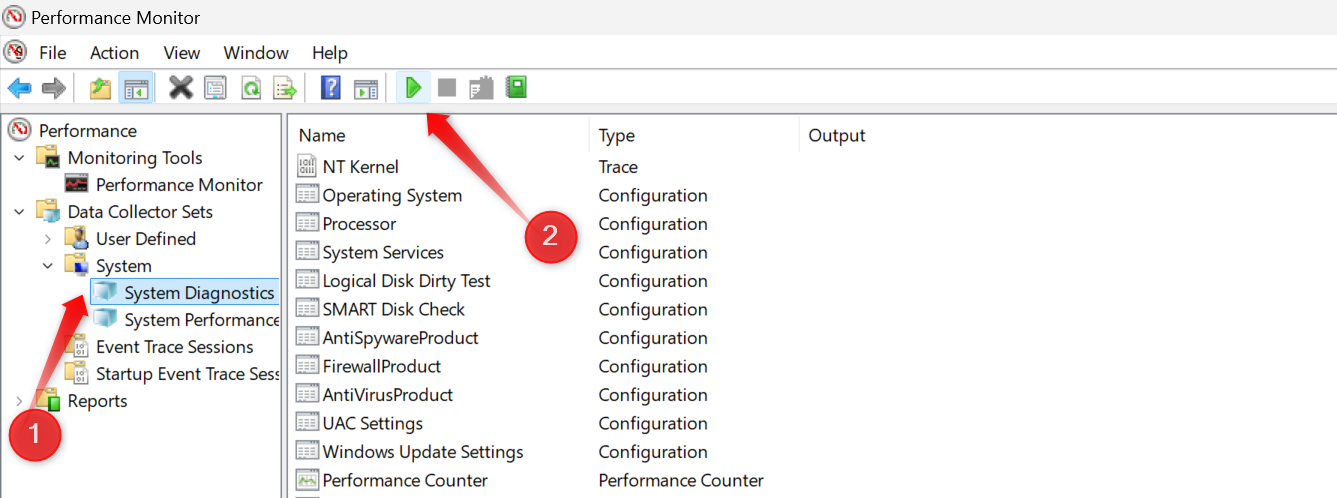
To generate a System Diagnostic report, type “Performance Monitor” and open the app. In the left sidebar, navigate to Data Collector Sets > System > System Diagnostics, and click the green play button in the top menu.
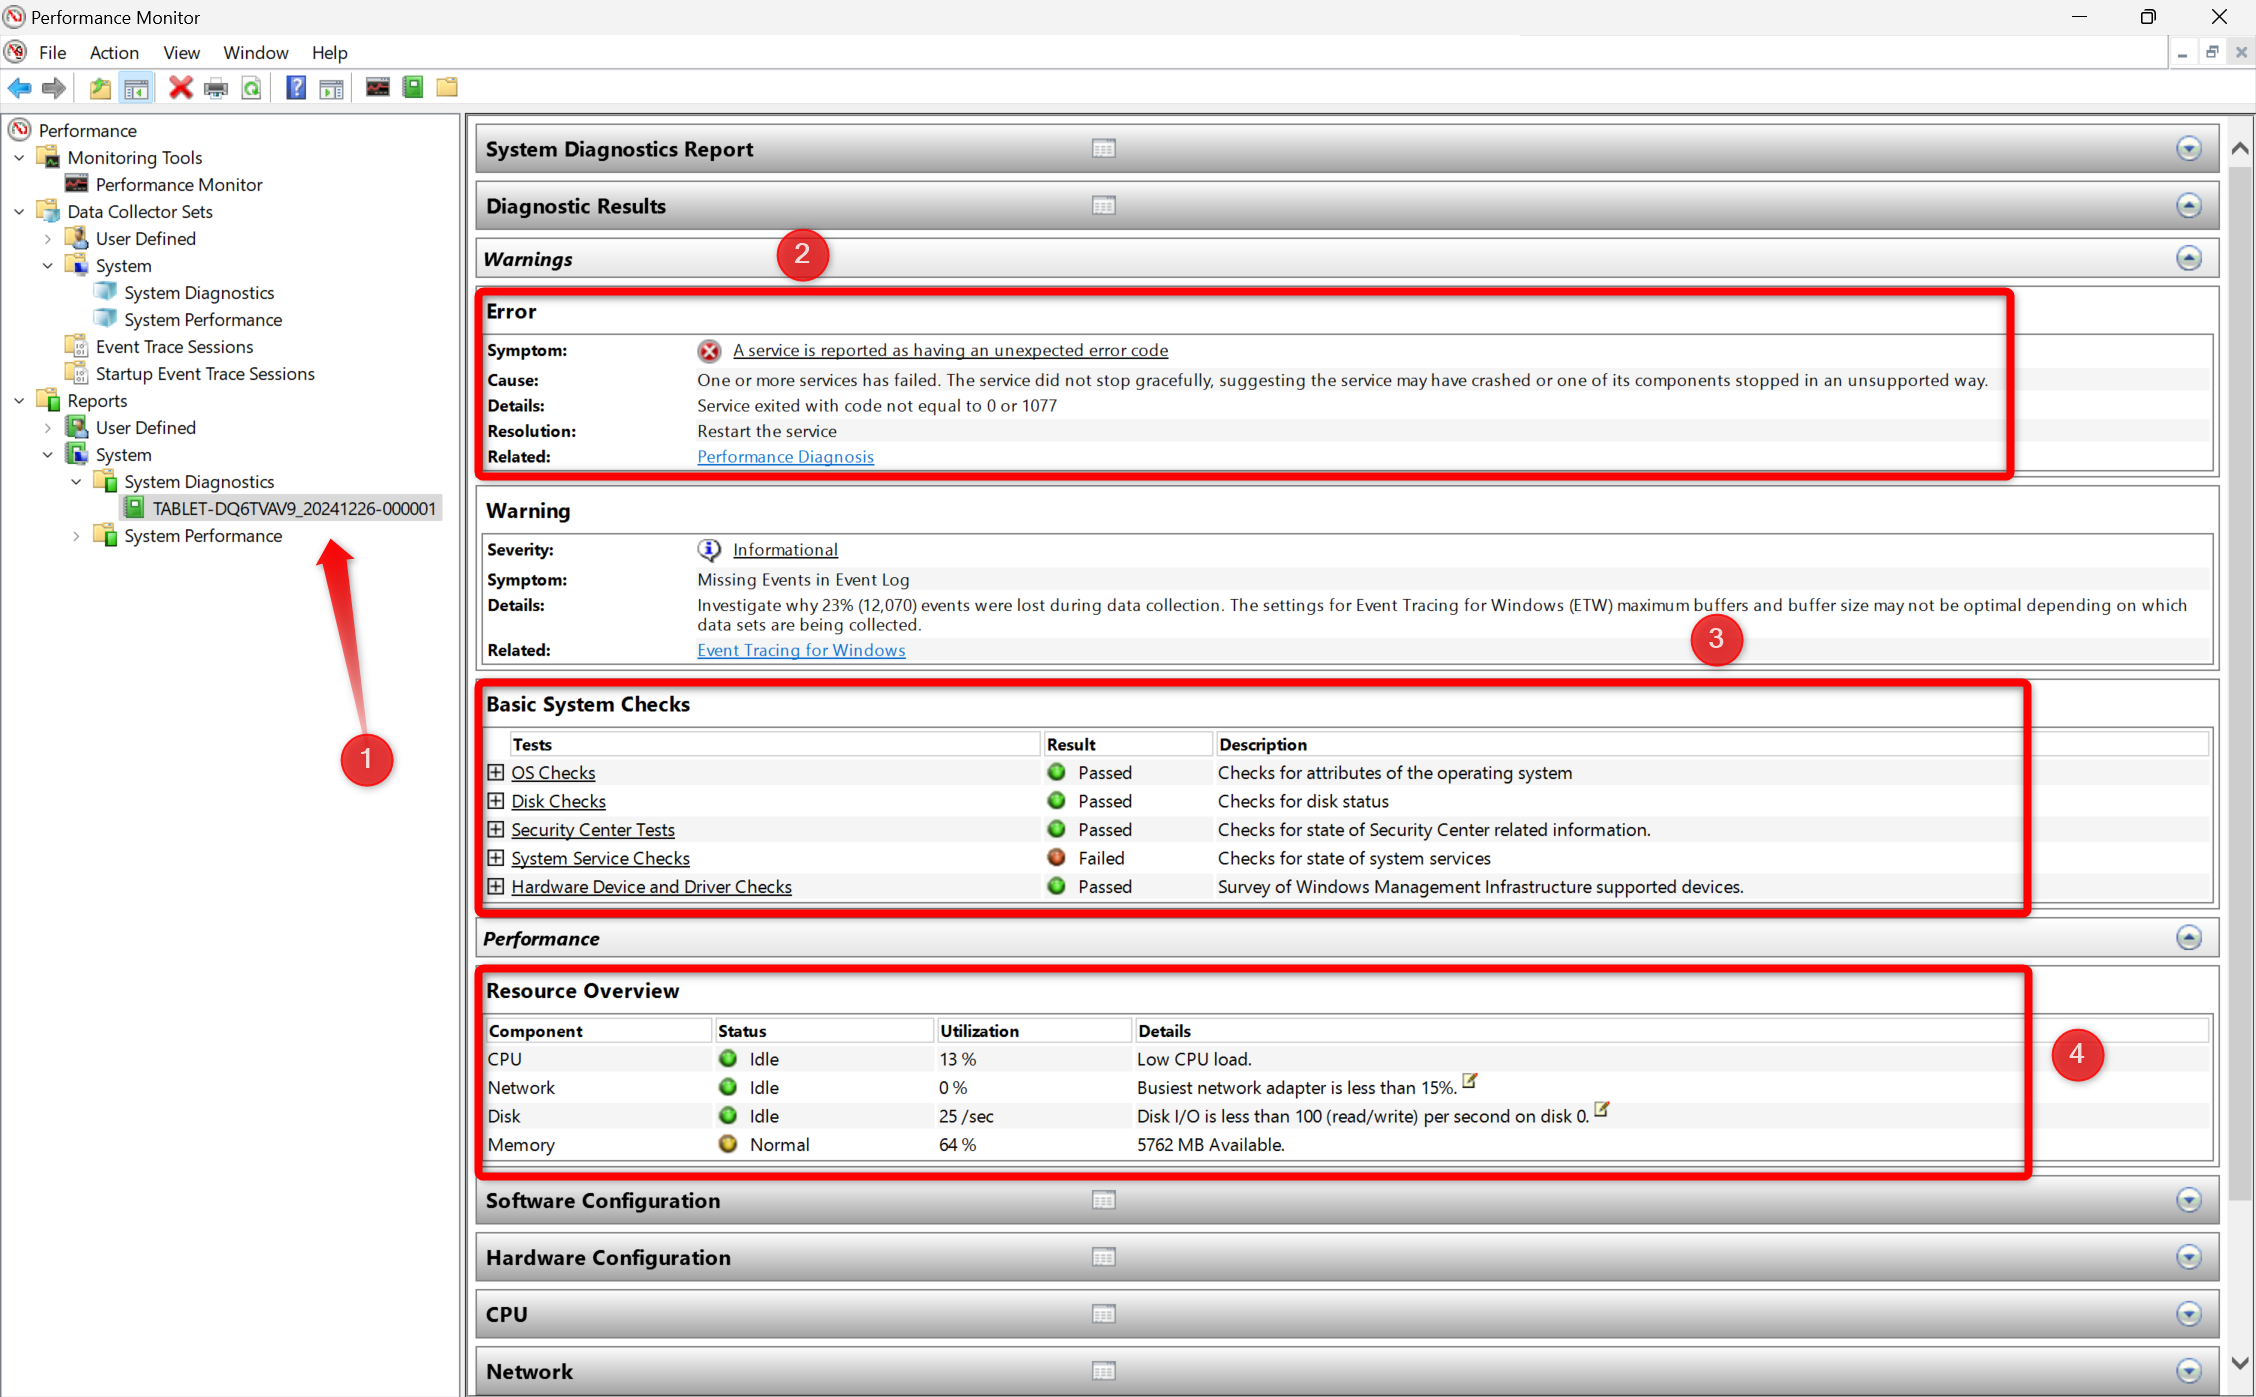
Wait a minute, expand the “Reports” category, go to “System,” expand the “System Diagnostics” menu, and open the latest generated report. Review the diagnostic results across all categories to spot issues with your laptop’s components or operating system settings and fix them accordingly.
7 Review Your Laptop’s Reliability History
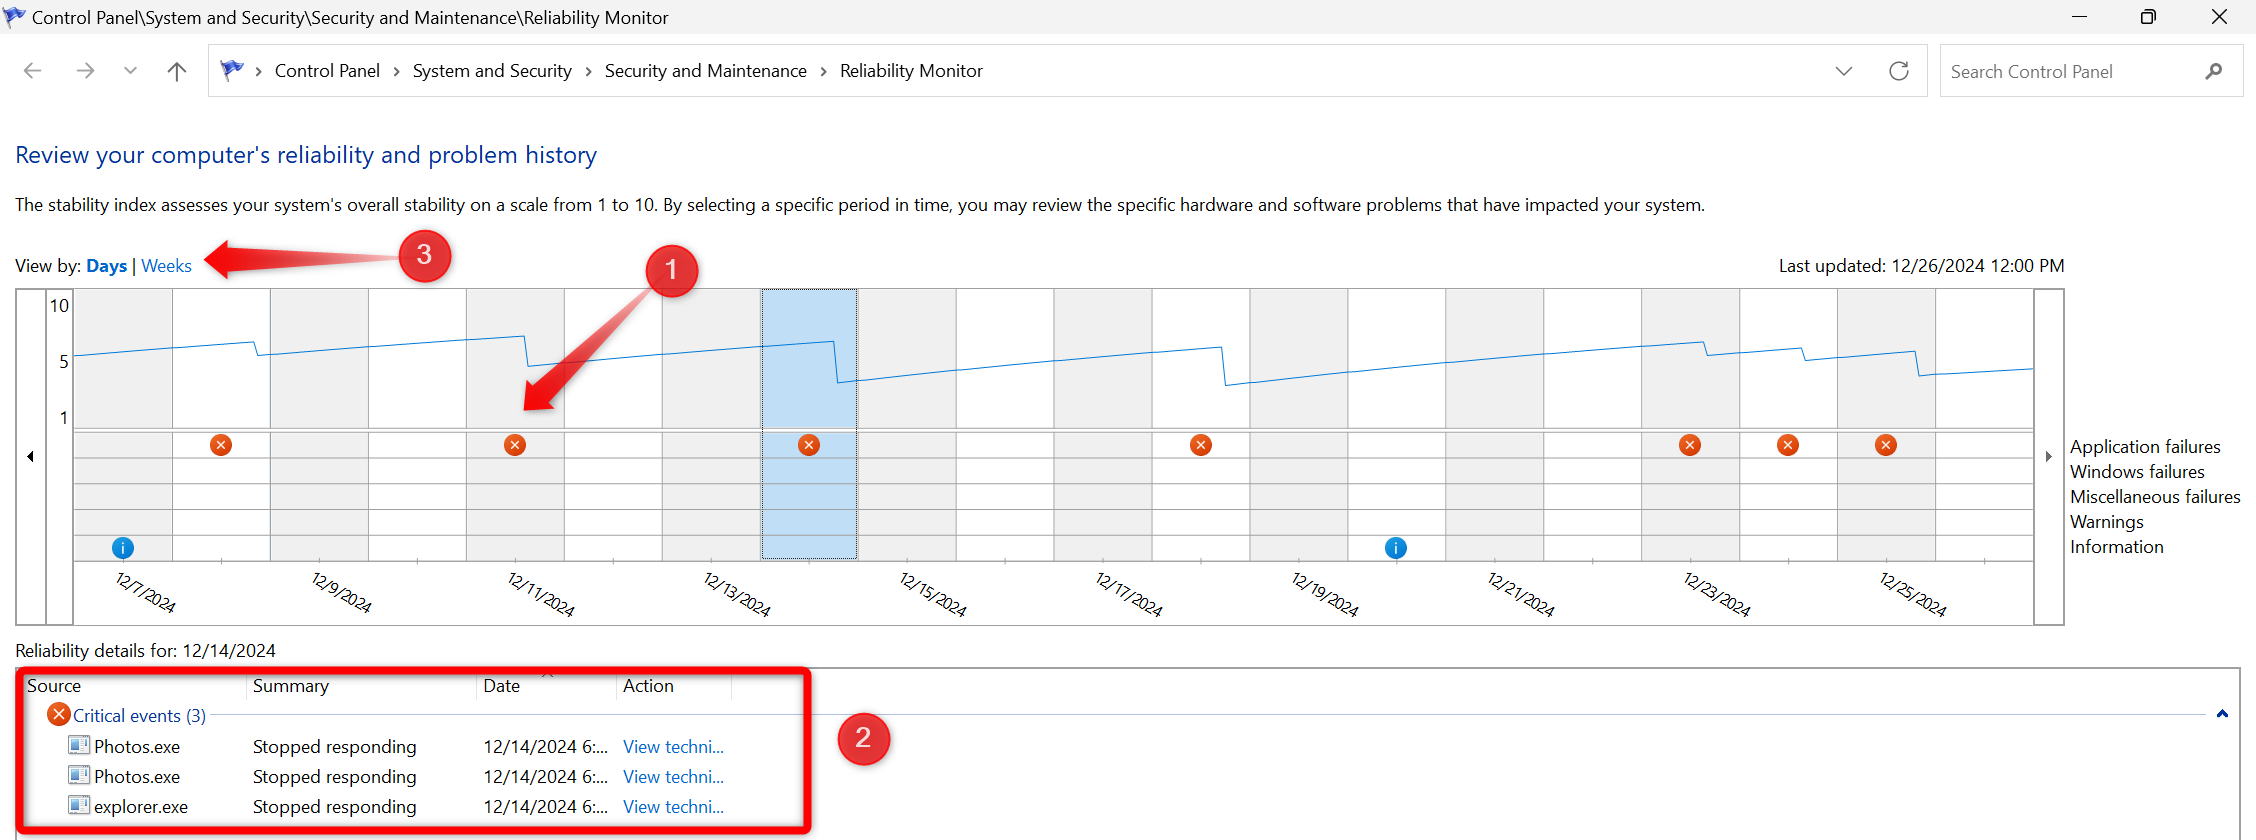
Reliability History provides an overview of problems your device has faced in the past days and weeks. It displays a stability index, rating your device’s health on a scale of 1 to 10. A perfect score of 10 indicates no issues, while a drop signals problems. You can look at details of these issues and address them to improve system stability.
To access Reliability History, type “reliability” in Windows search and click “View Reliability History.” This opens a page with the stability index. Red crosses mark days with errors, while warning signs highlight serious issues. Click a specific day to see details of critical errors. To see a weekly summary of issues, switch to the Weeks view.
You can also note the date and time of any detected issue and look up further details in the Event Viewer.
These health checks can help you identify potential issues with your laptop early, allowing you to fix them before they escalate and cause serious damage. While you don’t have to perform these checks daily, setting a routine, like once every two weeks, can ensure your system stays in top shape. If you notice any issues, fix them promptly without delay.


