Microsoft Forms is useful for creating straightforward quizzes, surveys, and tests, and its self-explanatory interface makes it a popular tool. However, you might not be using it to its full potential! In this article, I’ll share some tools and tricks you should use to get the most out of this versatile program.
1 Branch Questions Based On Previous Answers
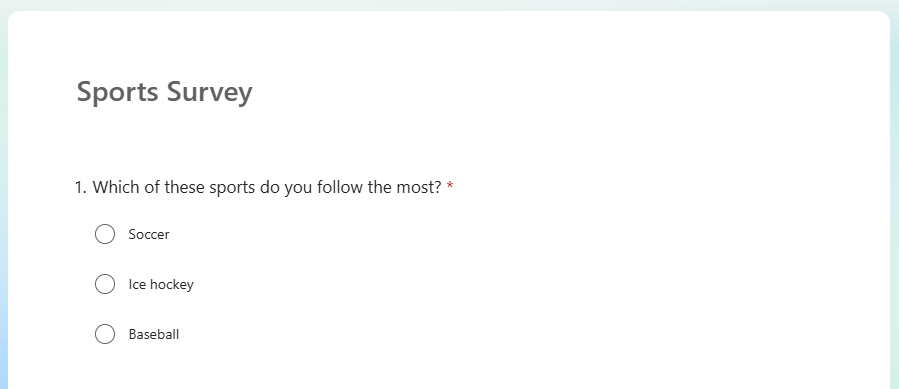
You can dictate which questions your respondents see depending on the answers they have already given. In this example, the first question asks the respondent to select which sport they follow the most.
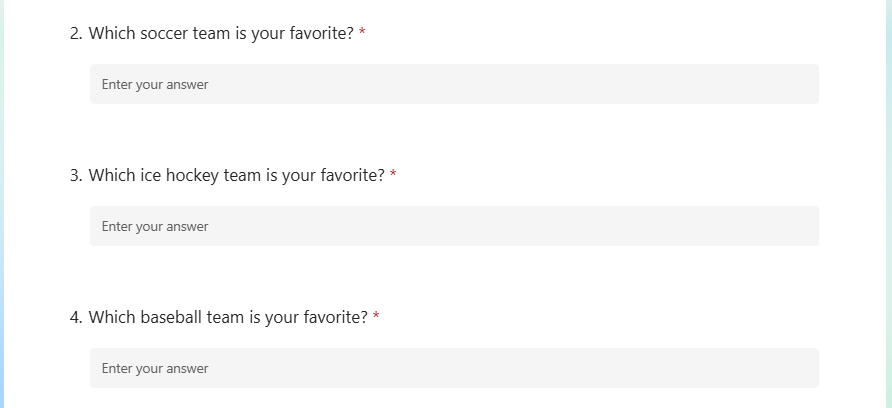
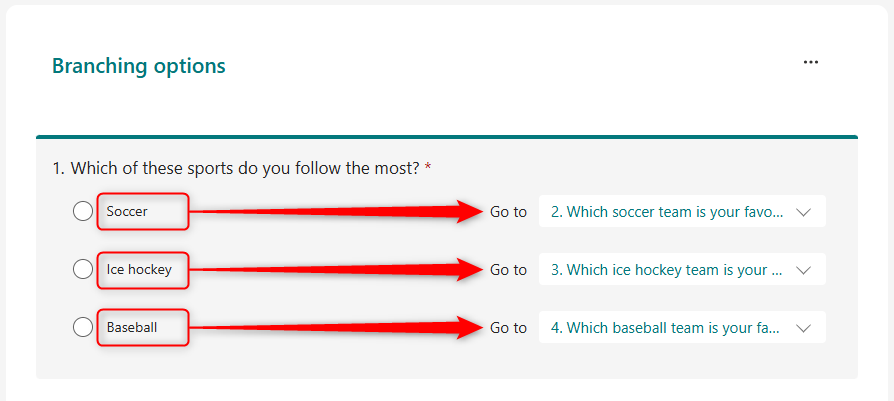
The next question the user needs to answer relates directly to what they chose for question 1. If they chose “soccer,” they need to be directed to question 2, which asks them to nominate their favorite soccer team. If they chose “ice hockey,” they need to nominate their favorite ice hockey team in question 3, skipping out question 2. Finally, if they chose “baseball,” they need to select their favorite baseball team in question 4, avoiding questions 2 and 3.
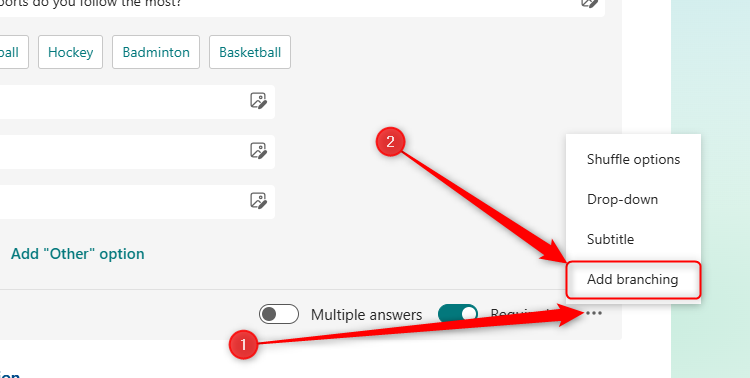
To do this, select the question that dictates where the respondent will be taken next (in my case, question 1), and click the three dots in the bottom-right corner. Then, click “Add Branching.”
Now, choose which question the person completing your form should be directed to, depending on which option they choose.
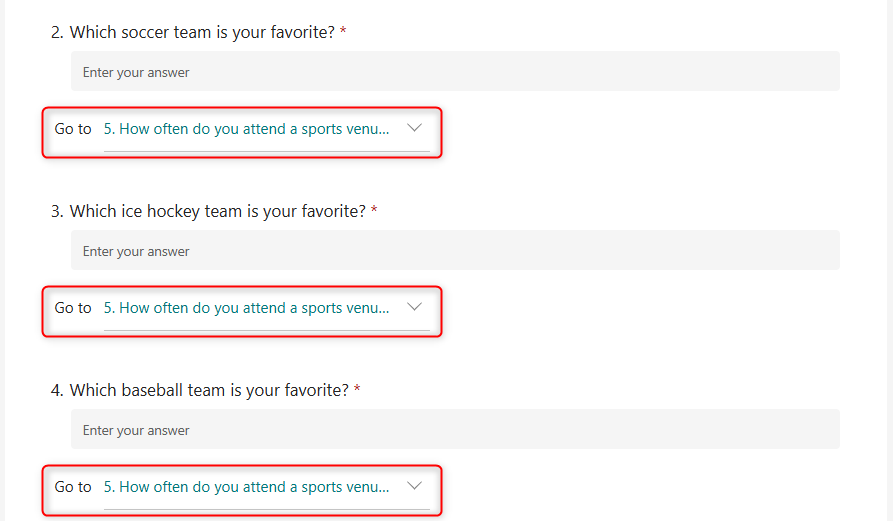
After the respondent has chosen their favorite team (questions 2, 3, or 4), depending on the sport they selected (question 1), I want them to proceed to question 5, which asks them how often they attend a sports venue to watch a live sports event. This means I need to add branching to questions 2, 3, and 4. Otherwise, the respondent will see a question unrelated to the sport they chose.
When you have finished adding all your branching options, click “Back” at the top of the window.
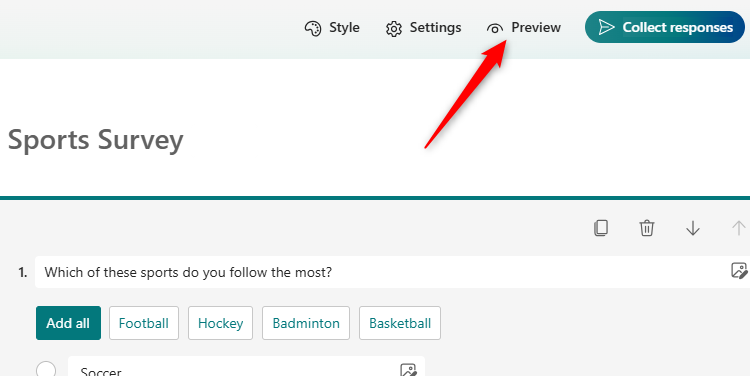
Finally, click “Preview” to check that your branching has worked successfully.
2 Copy Multi-Choice Options From Excel or Word
Do you need to insert a long list of options in a multiple-choice question? Typing all the different answers as individual choices can take forever and is likely to result in error.
Luckily, if you have the list of options already typed into Excel or Word, you can copy and paste it straight into Microsoft Forms.
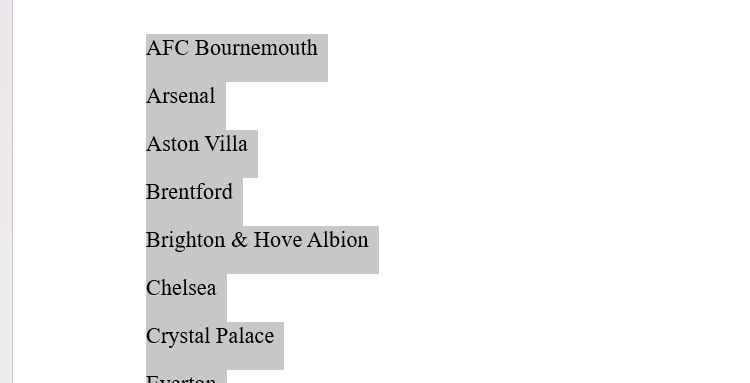
First, make sure each option is in a separate row in Excel or a new paragraph in Word. Then, select them all, and press Ctrl+C.
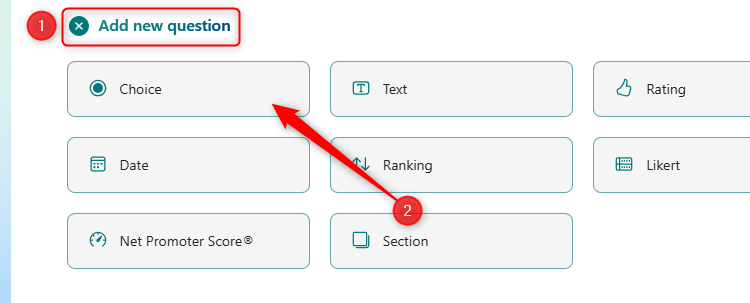
Now, head to your form in Microsoft Forms, click “Add New Question,” and create a “Choice” question.
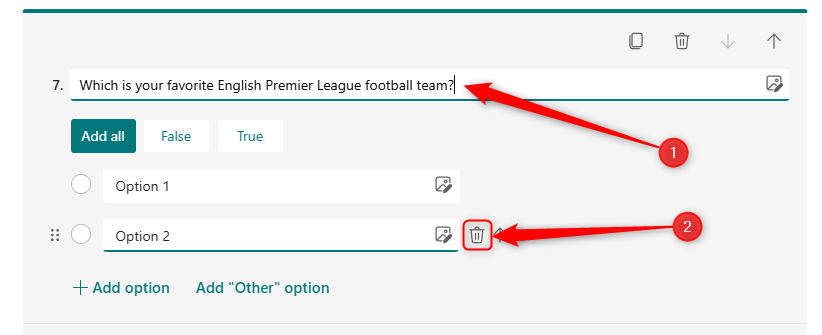
Next, type the question, and delete Option 2 by clicking the trash icon next to it.
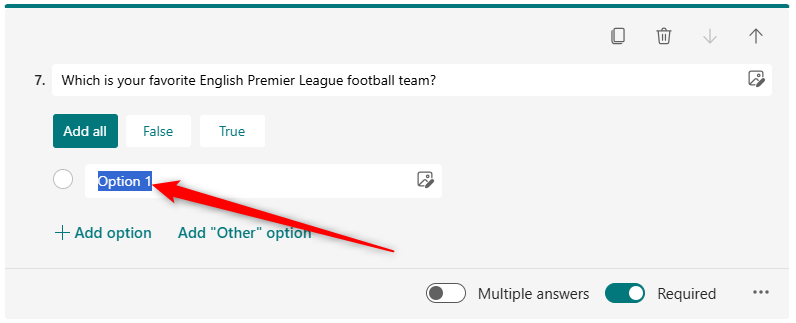
Finally, select the text in the Option 1 field, and press Ctrl+V.
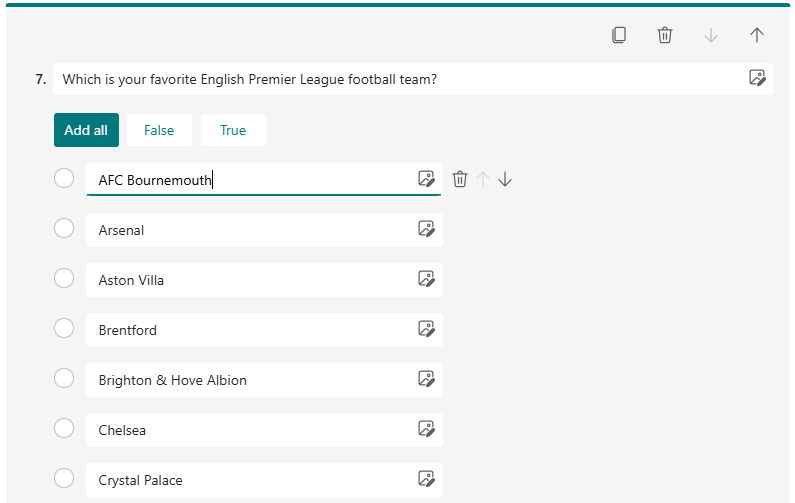
See how each item in the list appears magically as separate options for the respondent to select!
3 Set a Start and End Date
If you need to designate the timeframe for accepting form submissions, you can set a start and end date.
For example, you might have finished creating your form, and you want to plan ahead by sending it to everyone who needs to complete it. However, they still have yet to receive a piece of information that will help them answer the questions, so you don’t want them to respond just yet.
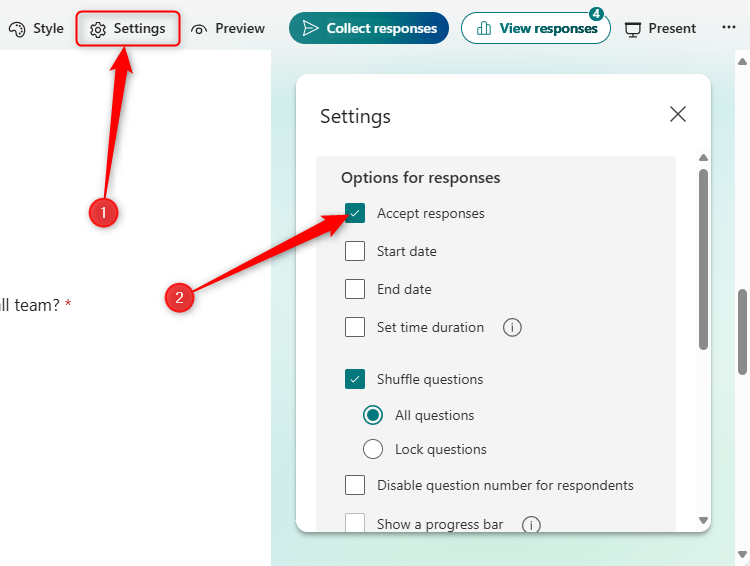
To do this, open the relevant form, and click “Settings” in the ribbon. Then, check “Accept Responses.” This is a crucial step, whether you set a timeframe or not, because it makes sure that the form is accessible.
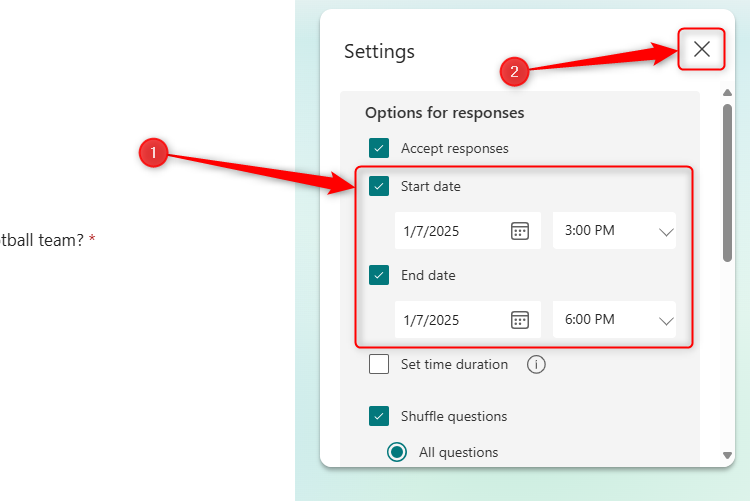
Now, check “Start Date” to dictate the date and time your form becomes available, and check “End Date” to specify a date and time after which people can no longer submit responses.
After you have set the relevant dates and times, simply click the “X,” and these new settings will be saved immediately.
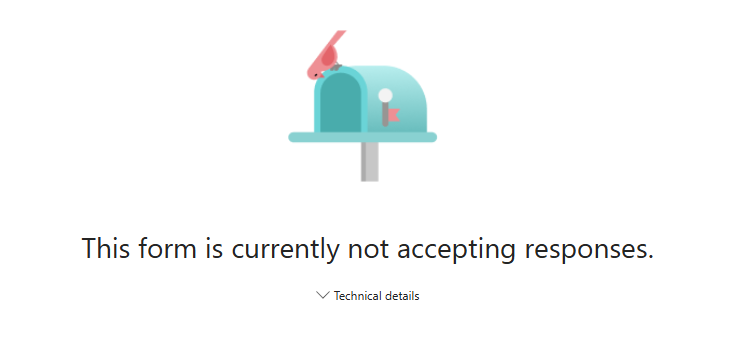
Finally, “Collect Responses” and copy and paste the URL into your web browser to check that your adjustments have worked as expected. For example, if the start date is in the future, you should see a message saying that the form is not accepting responses.
4 Shuffle Your Questions
This is an undervalued tool that has many benefits. For example, if you’re conducting an academic survey, displaying your questions in a random order helps reduce the likelihood of patterned responses, giving you a more accurate set of results. Also, if you’re a teacher, randomizing your questions means that your students are less likely to be able to copy each other’s responses!
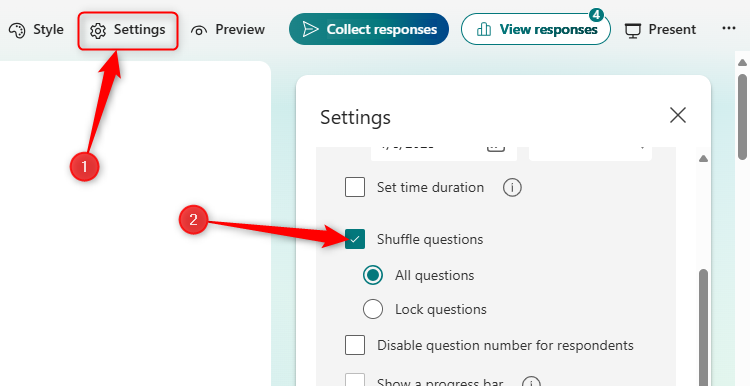
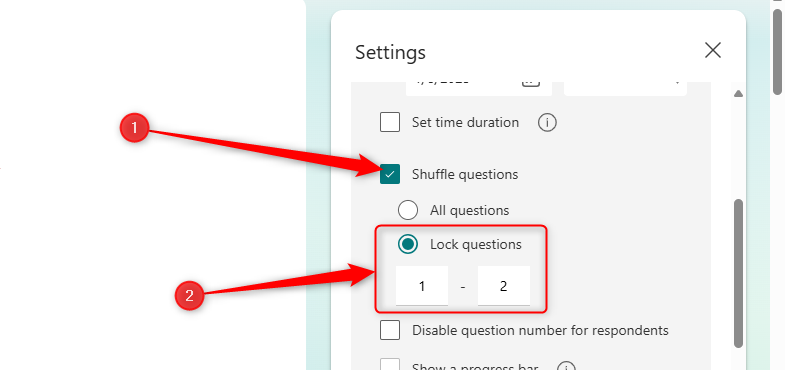
To activate this option, click “Settings” in the form’s ribbon, and check “Shuffle Questions.”
Notice how you can lock certain questions. For example, if you want your respondents to type their name and date of birth in questions 1 and 2 before they complete your survey, you can lock these so they don’t get lost among the survey’s questions.
When you’re done, click “X” in the top-left corner of the Settings pane, and your new settings will save instantly.
Even though your respondents see the questions in a randomized order, when you view the responses, they’ll be in the order in which you typed them when creating your form.
You can’t shuffle the questions if you have multiple sections or pages in your form. You should also avoid shuffling if you have used branching—branching favors sequential questions, whereas shuffling removes this logical order altogether.
5 Display a Message Upon Completion
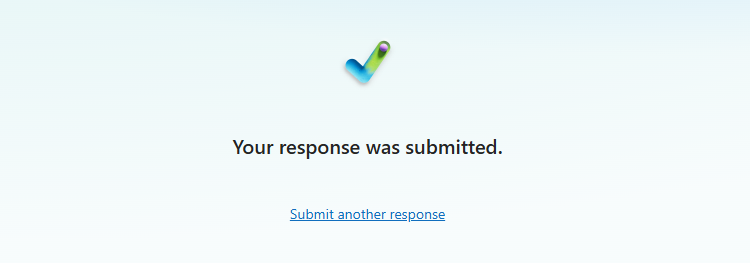
By default, your respondents will see a message saying “Your response was submitted” when they have completed and sent the form, and you don’t need to do anything to activate this process.
However, why not make your message a little more personal and professional? Maybe you could include a note informing the respondent who they should contact if they have any questions about the survey, an announcement about when the results will be made public, or even a lighthearted pun about the content of the form the respondent has just completed.
Click “Settings” at the top of the Microsoft Forms window, and scroll down to and check “Customize Thank You Message.” Then, type the personalized message the respondent will see when they submit their answers, and click the “X” in the top-right corner to save this change.
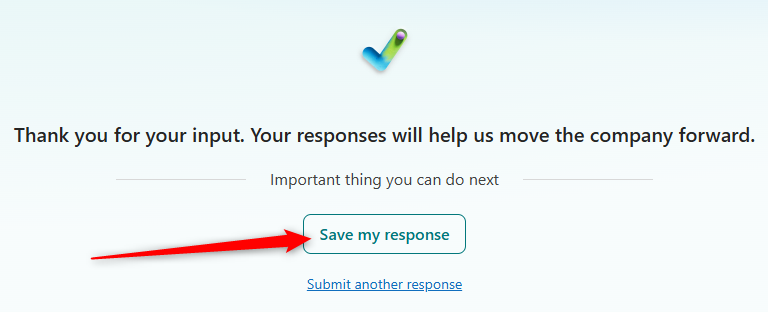
Here’s an example of a customized message and what it looks like to the end user.
The thank-you message can be plain text only (in other words, no hyperlinks or images), and you can use up to 4,000 characters.
6 Decide Whether Respondents Can Save and Edit Their Answers
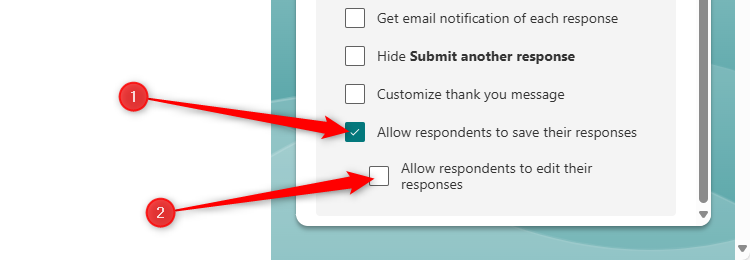
The last option in the Settings menu lets you decide whether people can save their responses to their own Microsoft Forms account. What’s more, when it’s checked, another option appears that gives you the option to allow your respondents to edit their responses.
“Allow Respondents To Save Their Responses” activates a “Save My Response” button that allows respondents to keep a copy of their form answers when submitted. When they click this button, they will be able to access their response via the Filled Forms tab in their Microsoft Forms account (if they have one). However, it doesn’t mean they can save and continue.
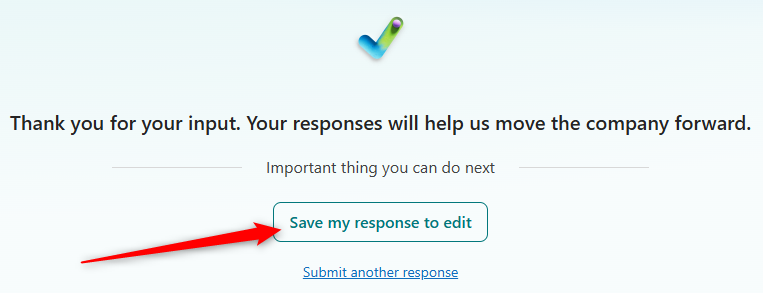
On the other hand, checking “Allow Respondents To Edit Their Responses” activates a button that says “Save My Response To Edit” when they submit their form. If they click this button, they will be able to load their response via the Filled Forms tab in Microsoft Forms, and they will also see an additional button at the top of their screen that says “Edit Response.”
You can check and uncheck these options anytime to change respondents’ permissions. For example, if you uncheck “Allow Respondents To Save Their Responses” having checked it previously, respondents will be informed that the URL is invalid if they try to revisit their answers. Similarly, if you then choose to recheck this option, respondents who saved the form previously will be able to access their answers once again.
Once you’ve created your form and implemented the settings and tools you learned in this article, duplicate your form so that you and others can use it as a template for future surveys and questionnaires.


