The Nintendo Switch isn’t comparable in power to other modern home consoles, but there are a few ways to get smoother gameplay, faster load times, and longer battery life out of the handheld hybrid.
1
Use “Boost Mode”
The “Boost Mode” name is a bit of a misnomer—it’s really just an always-on feature that affects specific games, and you have no control over—but it can and does improve CPU and GPU speeds. Again, for specific games.
A Digital Foundry test performed back when it was first rolled out noted that big first-party titles like Super Mario Odyssey and The Legend of Zelda: Tears of the Kingdom both showed notable performance and load time improvements. Third-party games such as Mortal Kombat 11 also show benefits from the feature, and while Boost Mode wasn’t mentioned by name, Fortnite previously received its own performance-enhancing update at one point.
To make the most of Boost Mode, you just have to play games that support it. There’s no setting you need to toggle on or anything like that, either. As long as your Switch is updated to at least firmware 8.0 or later, it’s a possibility.
Provided your Switch has been updated within the past couple of years and has access to the internet, you should be all set to take advantage of Boost Mode whenever a particular game accounts for it.
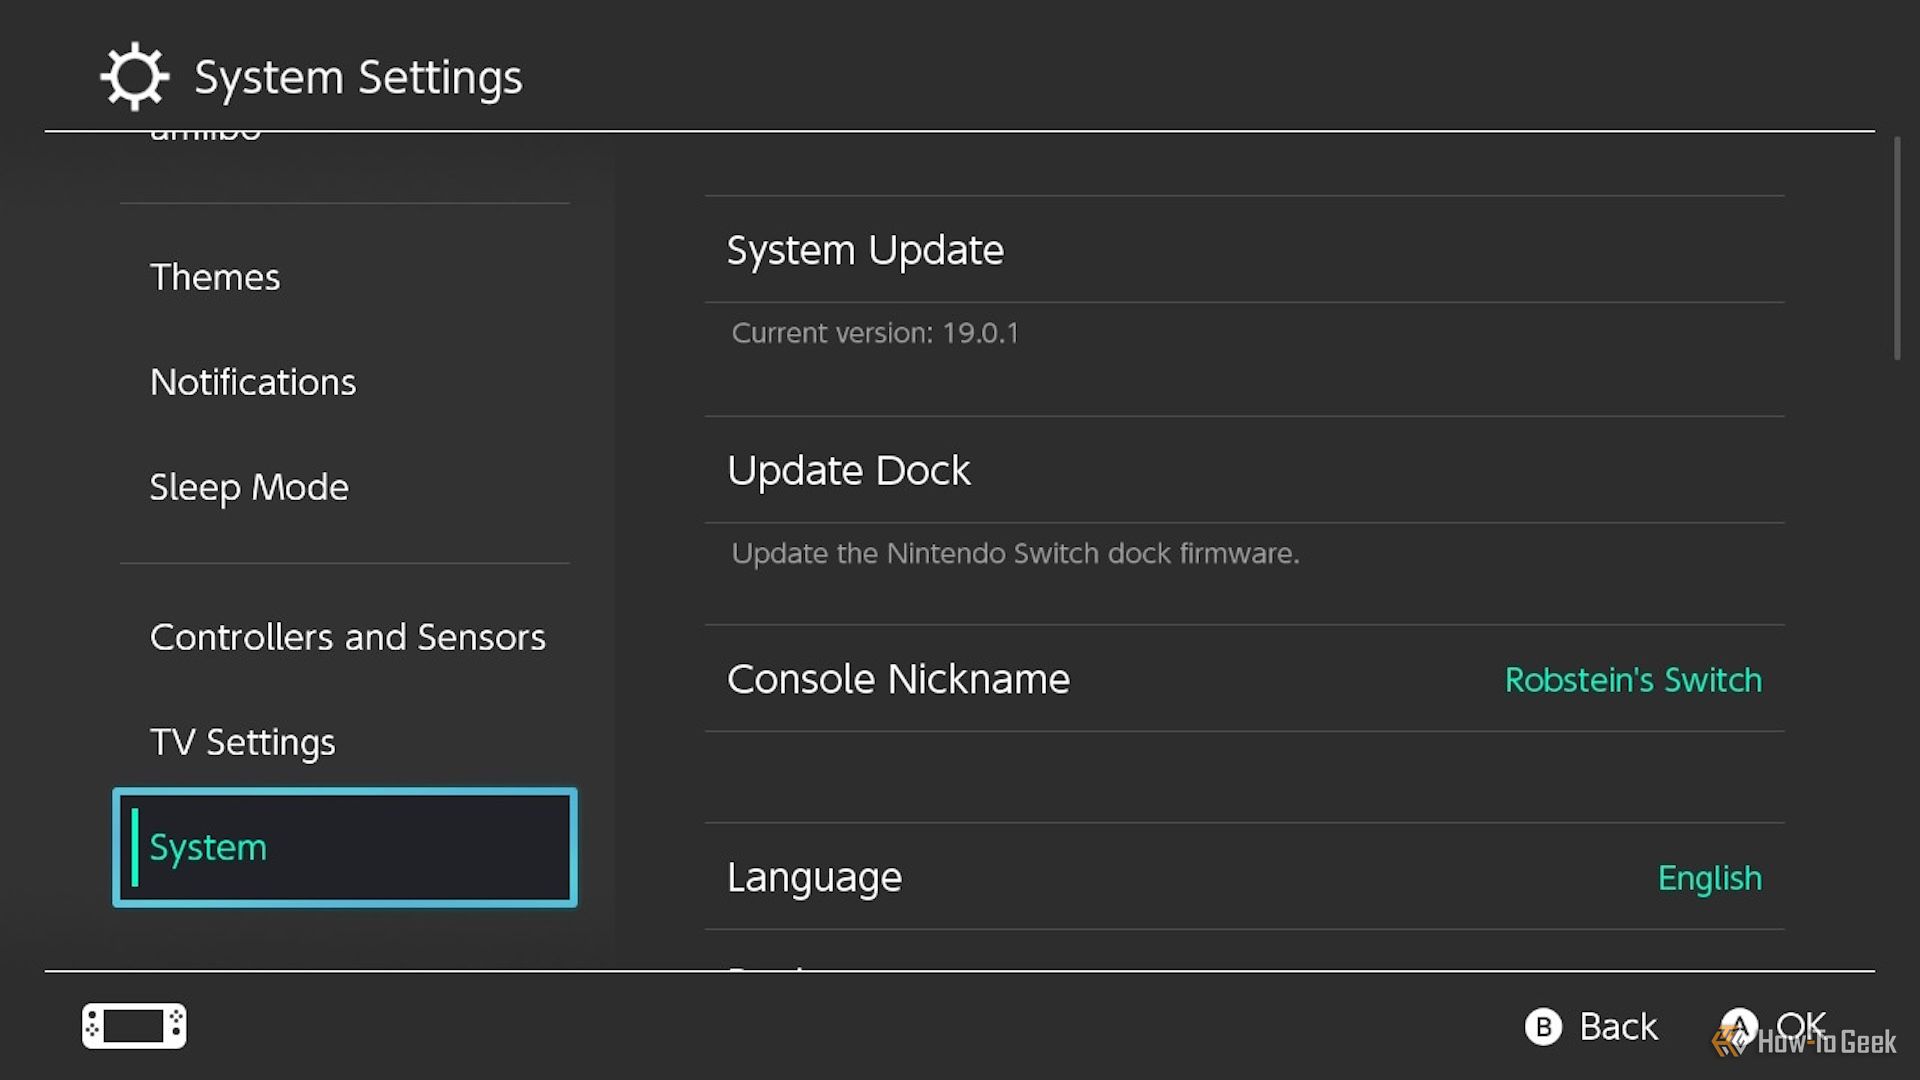
To check, start from the Home screen and open System Settings > System > System Update. If the “Current version” listed under “System Update” is at least 8.0, you’re good to go.
If not, select “System Update” and follow the prompts to update your Switch firmware.
2
Check for In-Game Performance Settings
Several games over the years have included their own graphical and performance settings that can be adjusted to favor fidelity or performance modes.
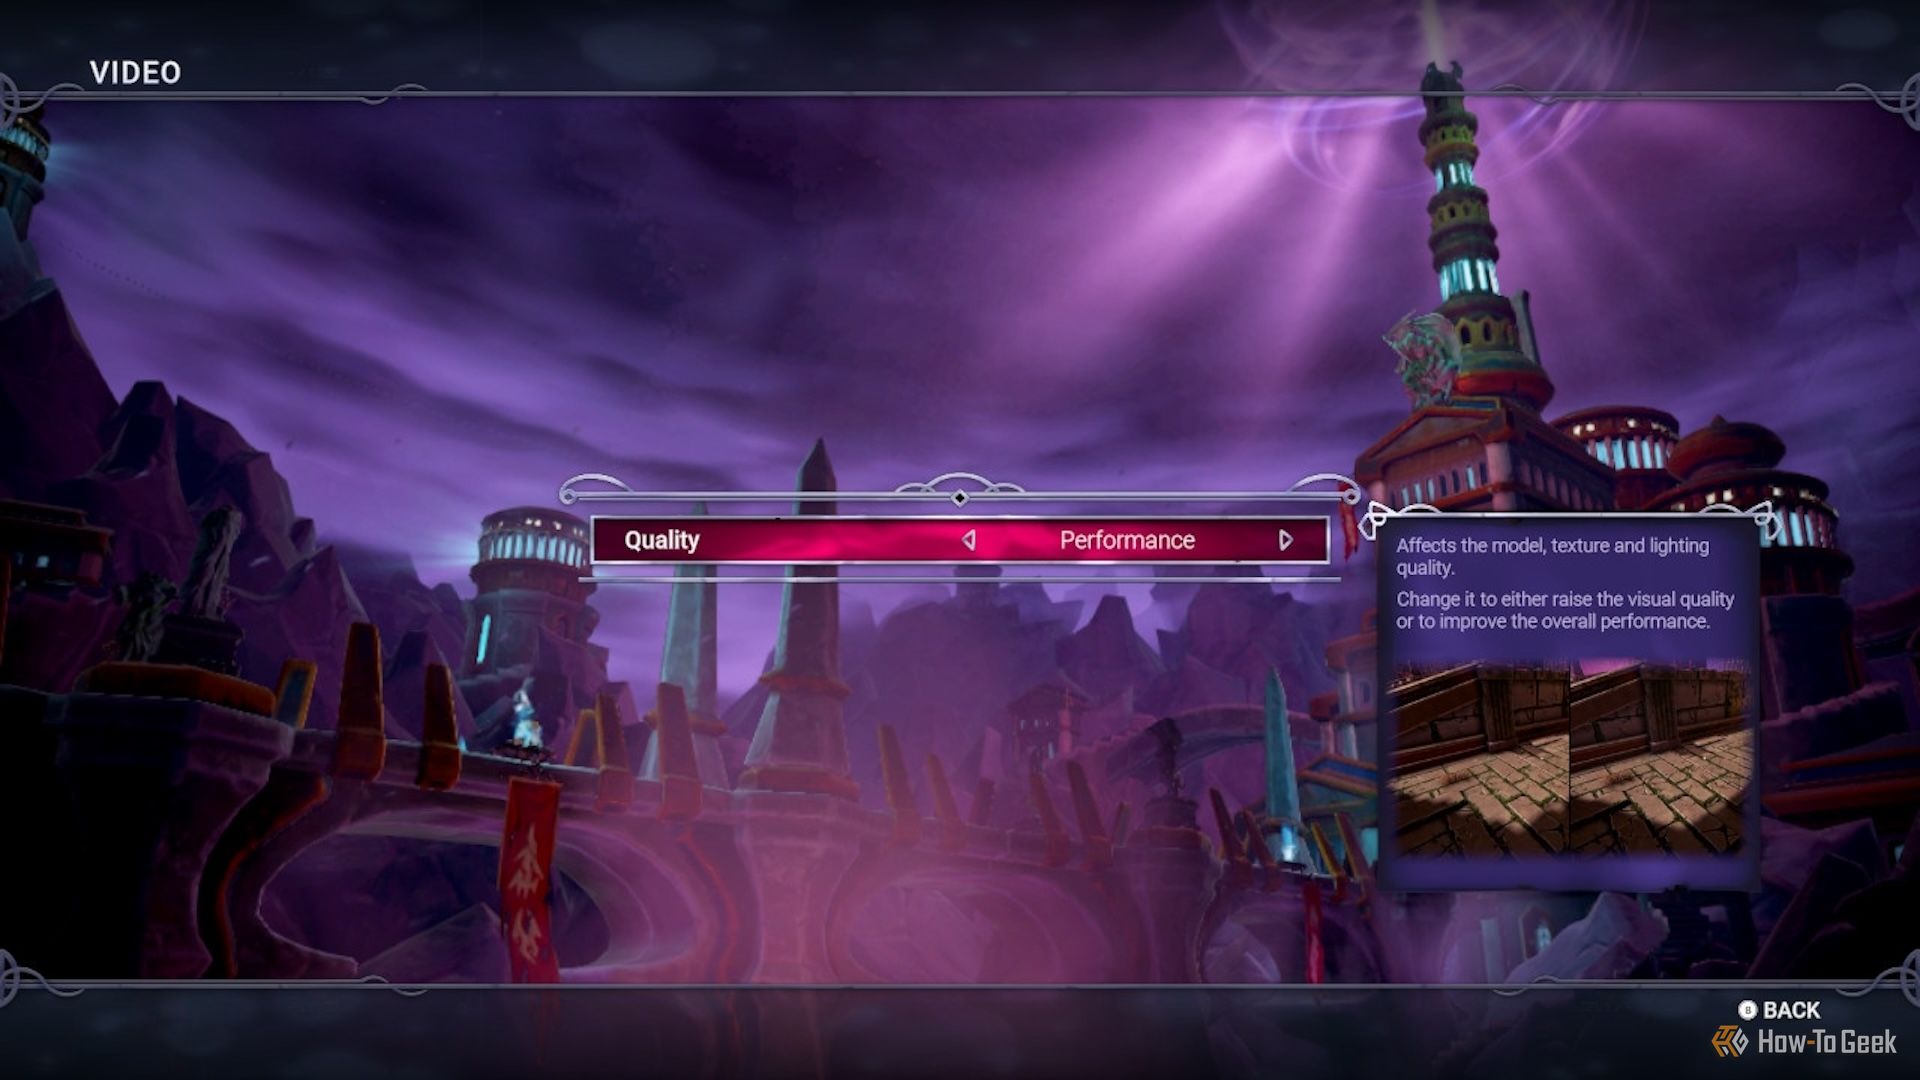
Look for something like “Graphics” or “Performance” in the settings and see what might be available. For example, games like Ziggurat II have a video setting that lets you choose between “Performance” (everything runs better) or “Quality” (better looking textures and lighting).
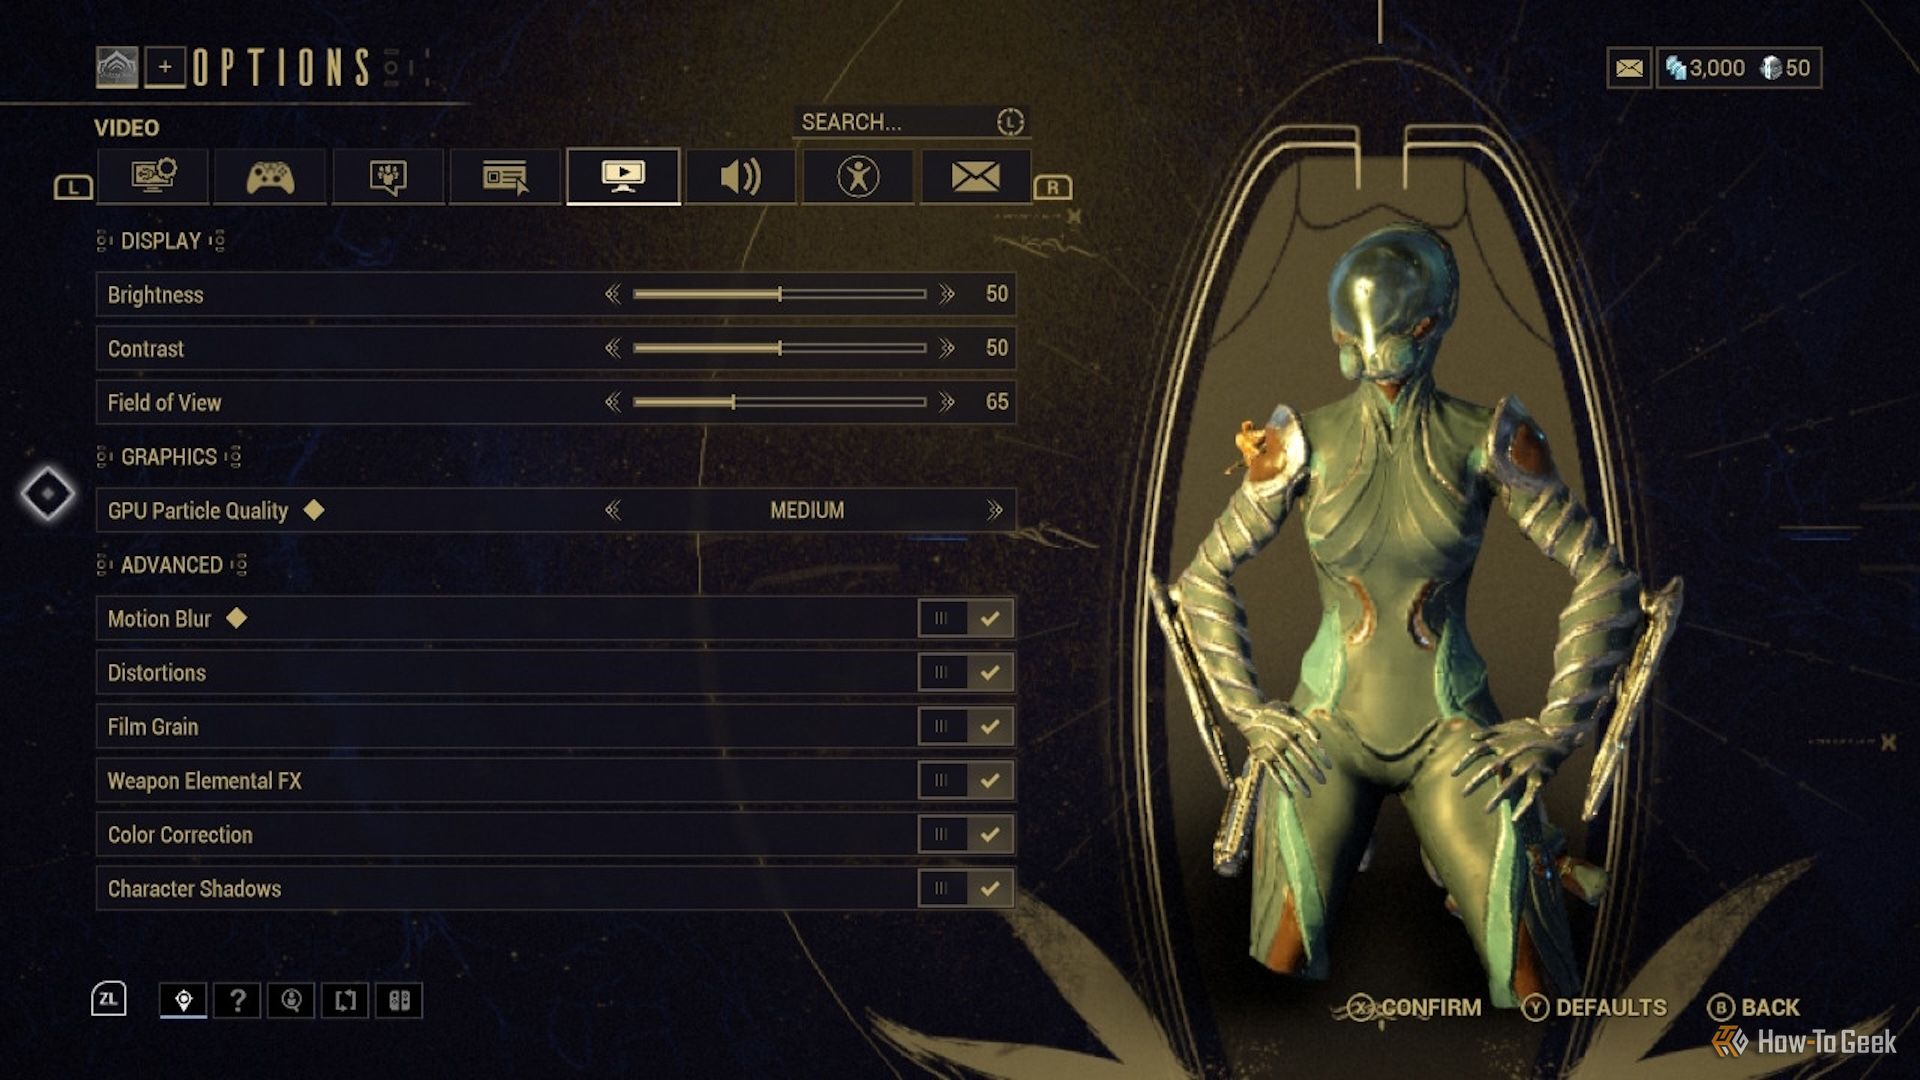
Warframe offers a more complex set of options that let you adjust the complexity of particle effects. You can also turn off individual graphical elements—such as character shadows and motion blur—for smoother gameplay.
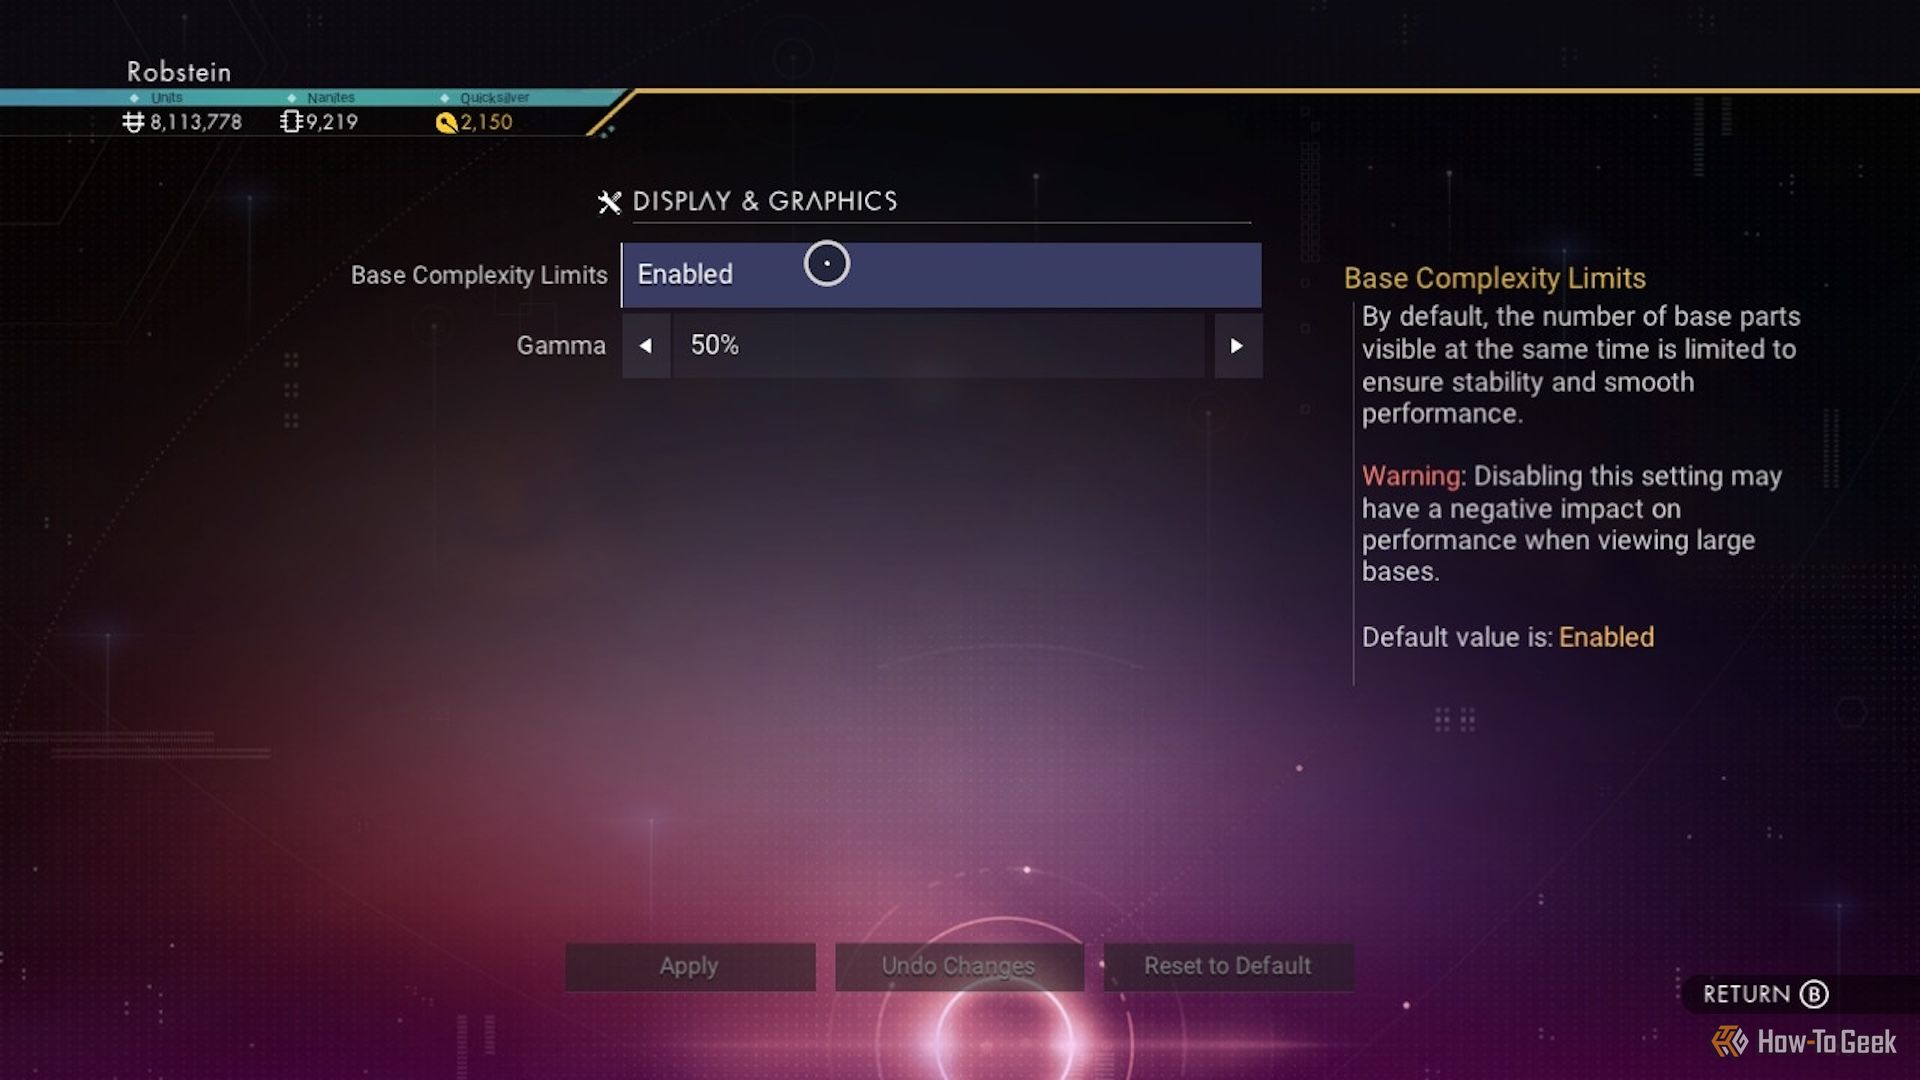
On the other hand, while No Man’s Sky doesn’t offer anything akin to a Performance Mode setting, it does allow you to turn Base Complexity Limits on or off to avoid potential issues when visiting a large base.
Unfortunately, this isn’t an option for every single Nintendo Switch game on the market. The best way to check is to start up something you want to play on your Switch, and then dive into the options.
3
Shuffle Your Games Around
It might not be apparent from the outset, but the medium on which your Switch games are stored will have an effect on load times. This generally doesn’t impact in-game performance unless you’re playing a game with “no load times” (loading is disguised by doors opening, elevators moving, and so on), but lengthy load times can still hurt one’s enjoyment.
When it comes to loading, the Switch’s built-in memory is the fastest option. Faster than your average microSD card, and even faster than games being played on a cartridge. So, if you want a particular game to load as fast as possible, make sure it’s installed on the internal flash memory.
This approach depends largely on which games you own digitally, how big they are, and how much free space is still available in the Switch’s internal memory.
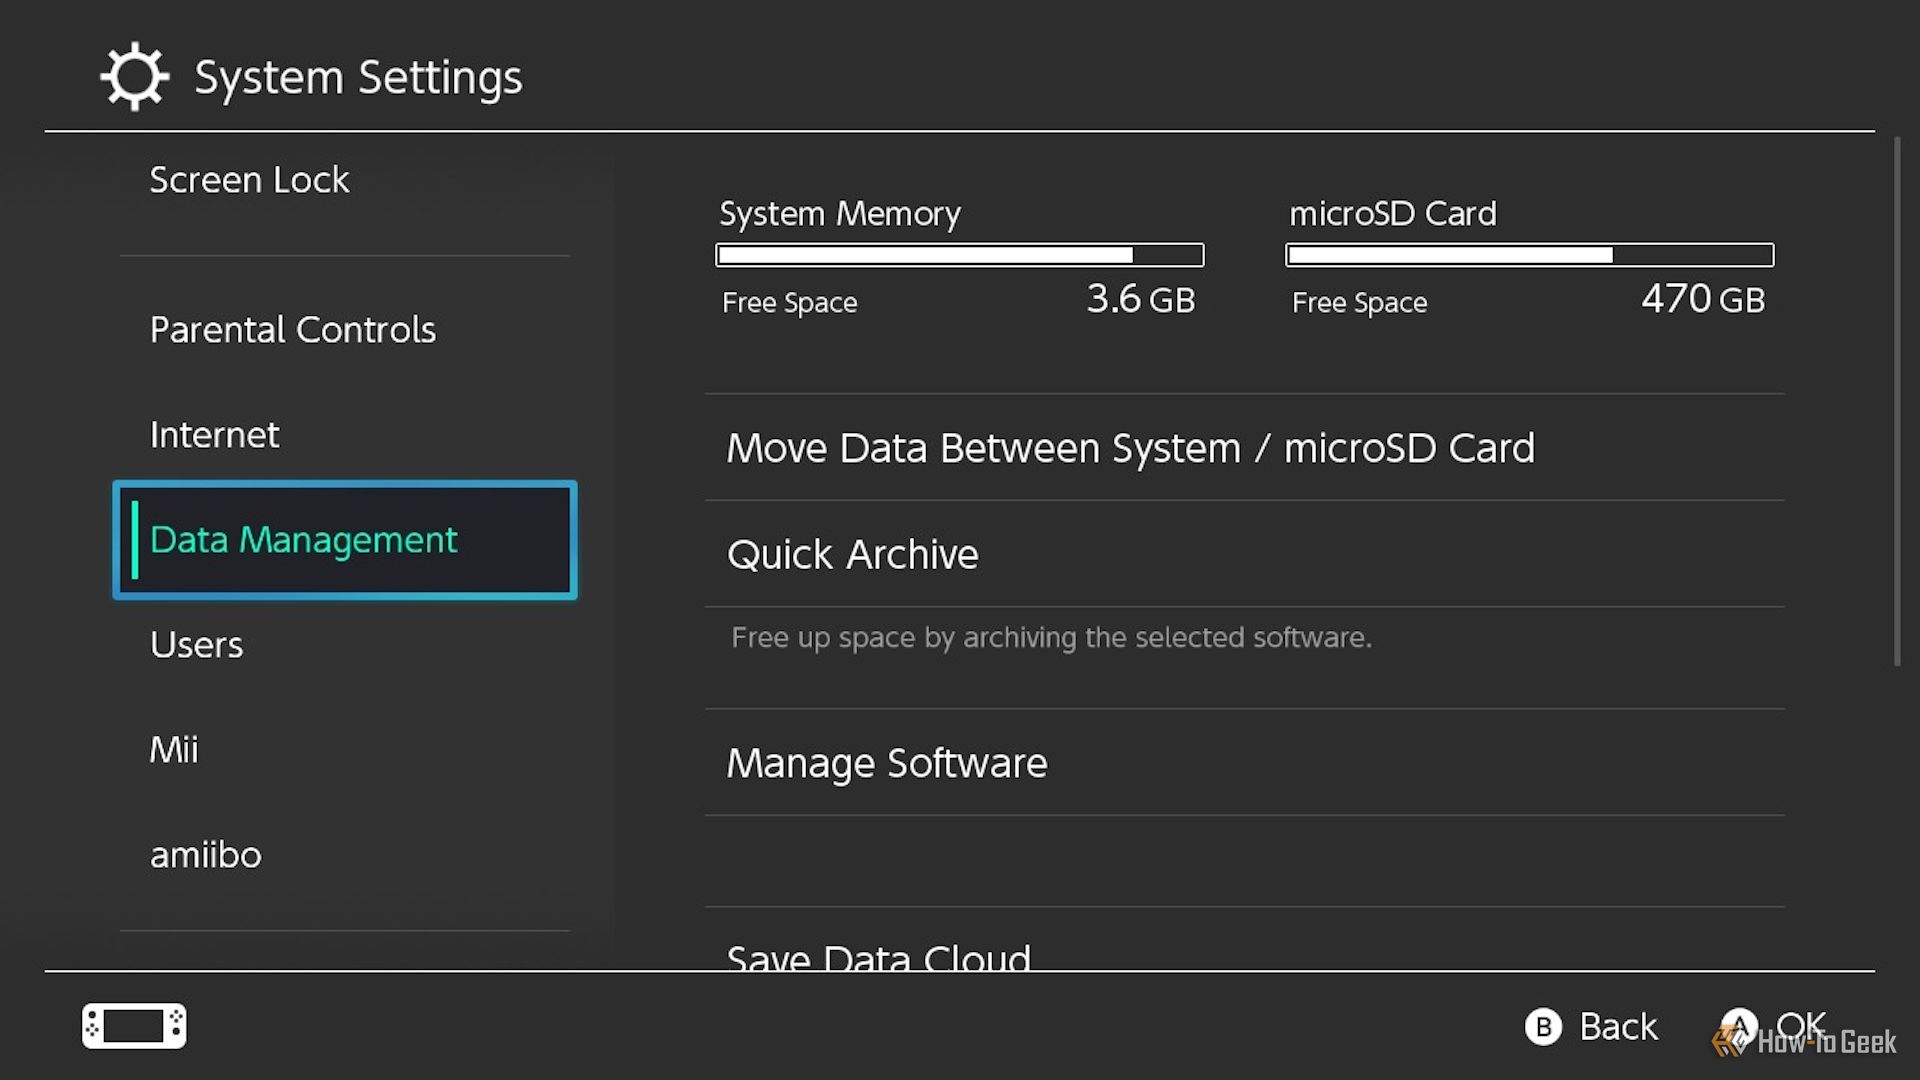
To see your available storage space, open “System Settings” from the home screen, then scroll down and select “Data Management.” “System Memory” is for internal storage, and “microSD Card” is for an installed memory card (if you’re using one).
Compare available space to a game’s file size and you’ll have an idea of whether it will fit. On the eShop, select the game, scroll down to “Software Details” and look for “Required Space.” If the game is already on your Switch but stored on a microSD card, you can transfer it to internal memory instead.
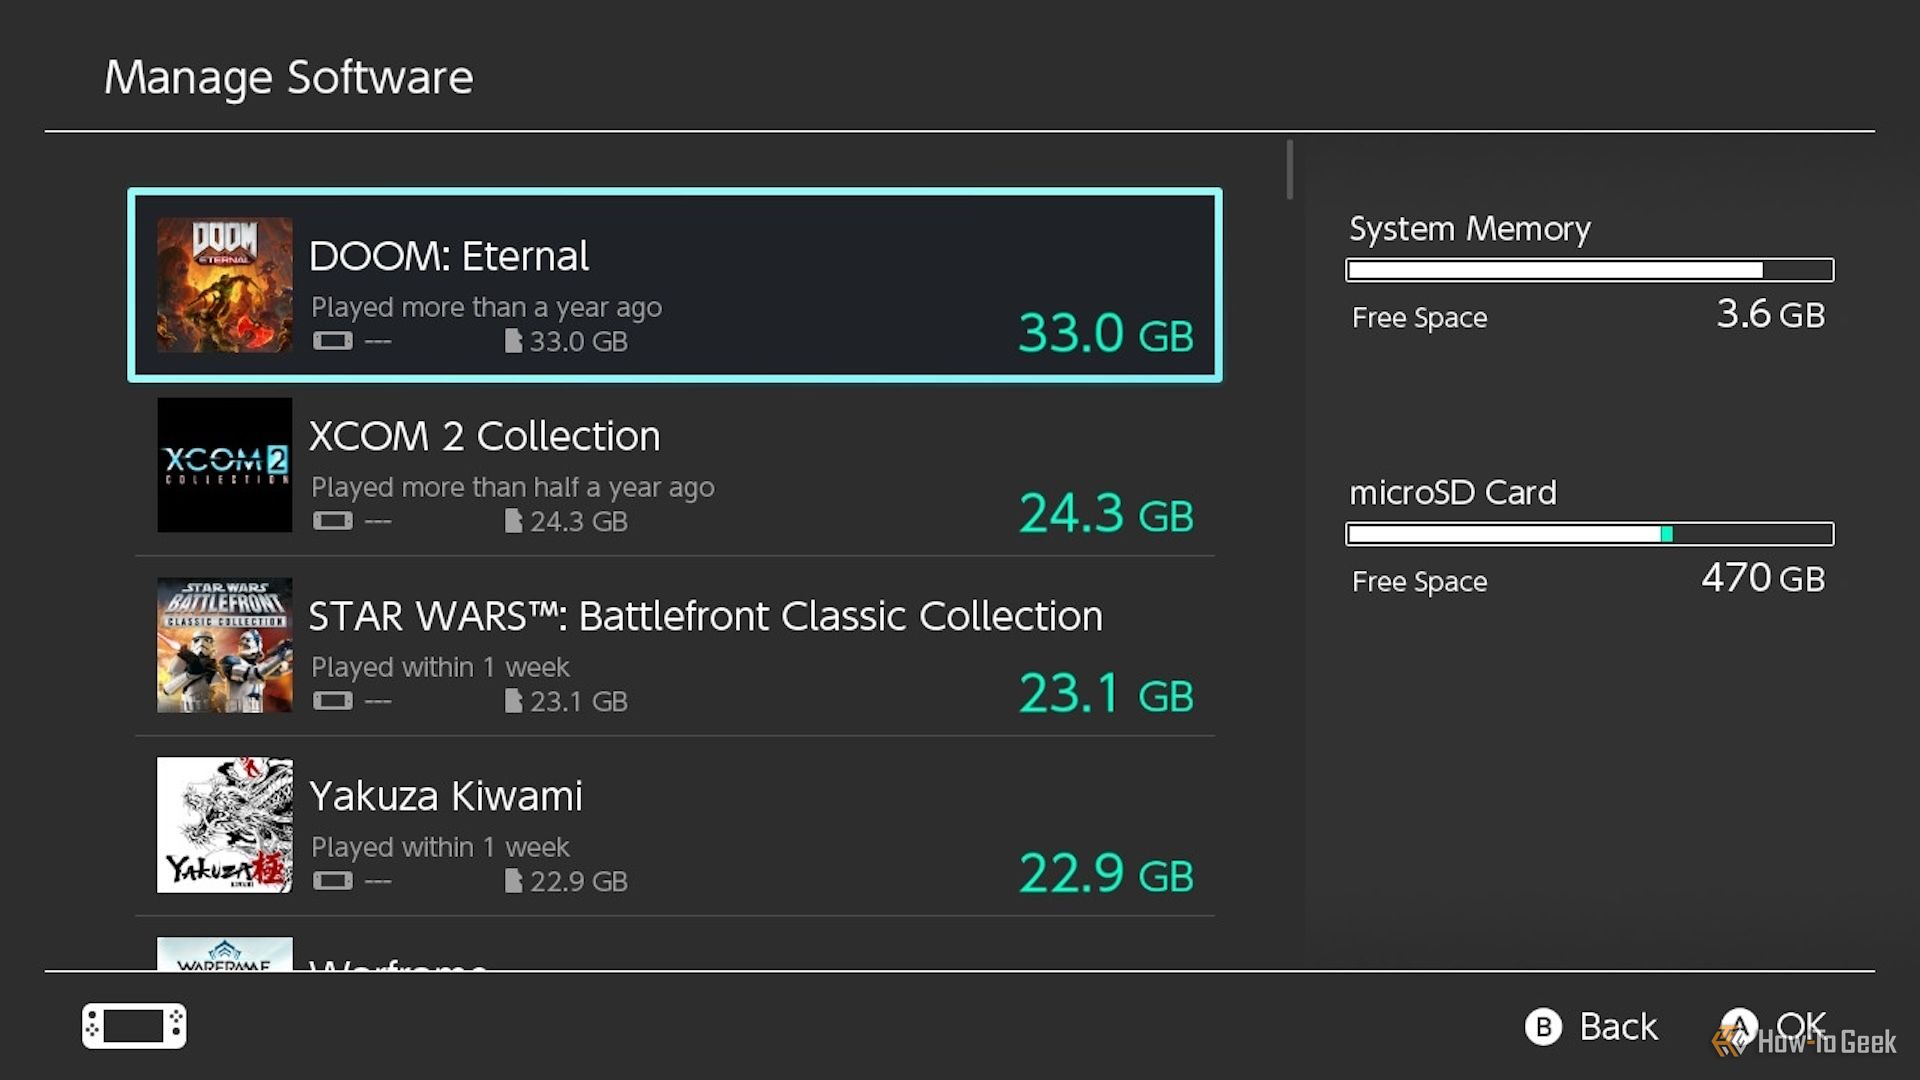
From the home screen, open System Settings > Data Management and choose “Manage Software” to view all of your installed games and their file sizes, as well as where they’re installed and how much memory is available.
To transfer games to internal memory, go back to “Data Management” and select “Move Data Between System / microSD Card” instead, then choose “Move to System Memory.”
Select the game you want to move from the list, then select the “Move Data” button in the bottom-left corner and wait for the transfer to complete. If there’s not enough available System Memory space, you’ll need to either transfer games over to the microSD card or delete them from System Memory to create more.
Keep in mind that storing too many games in System Memory can also slow down their load times, so try to keep less-played titles on a cartridge or microSD card instead.
4
Get an A2 microSD Card
The problem with relying on System Memory to assist with load times is that there isn’t a lot of it. So adding a microSD card to further expand the available space for your digital games makes a lot of sense.
Where this can become its own sort of issue is when you get the “wrong” kind of microSD card, which can potentially slow down your Switch.
To be clear: As long as the microSD card is compatible with your Switch, there’s no harm in using it. You just might experience noticeably slower load times for games saved to the card. However, microSD cards rated as A2 currently offer the fastest load speeds except for internal memory.
This isn’t to say you should immediately go out and buy an A2-rated card, especially if you already have a microSD card for your Switch, but it’s something to keep in mind the next time you’re in the market or plan to swap in a card with more storage space in the future.
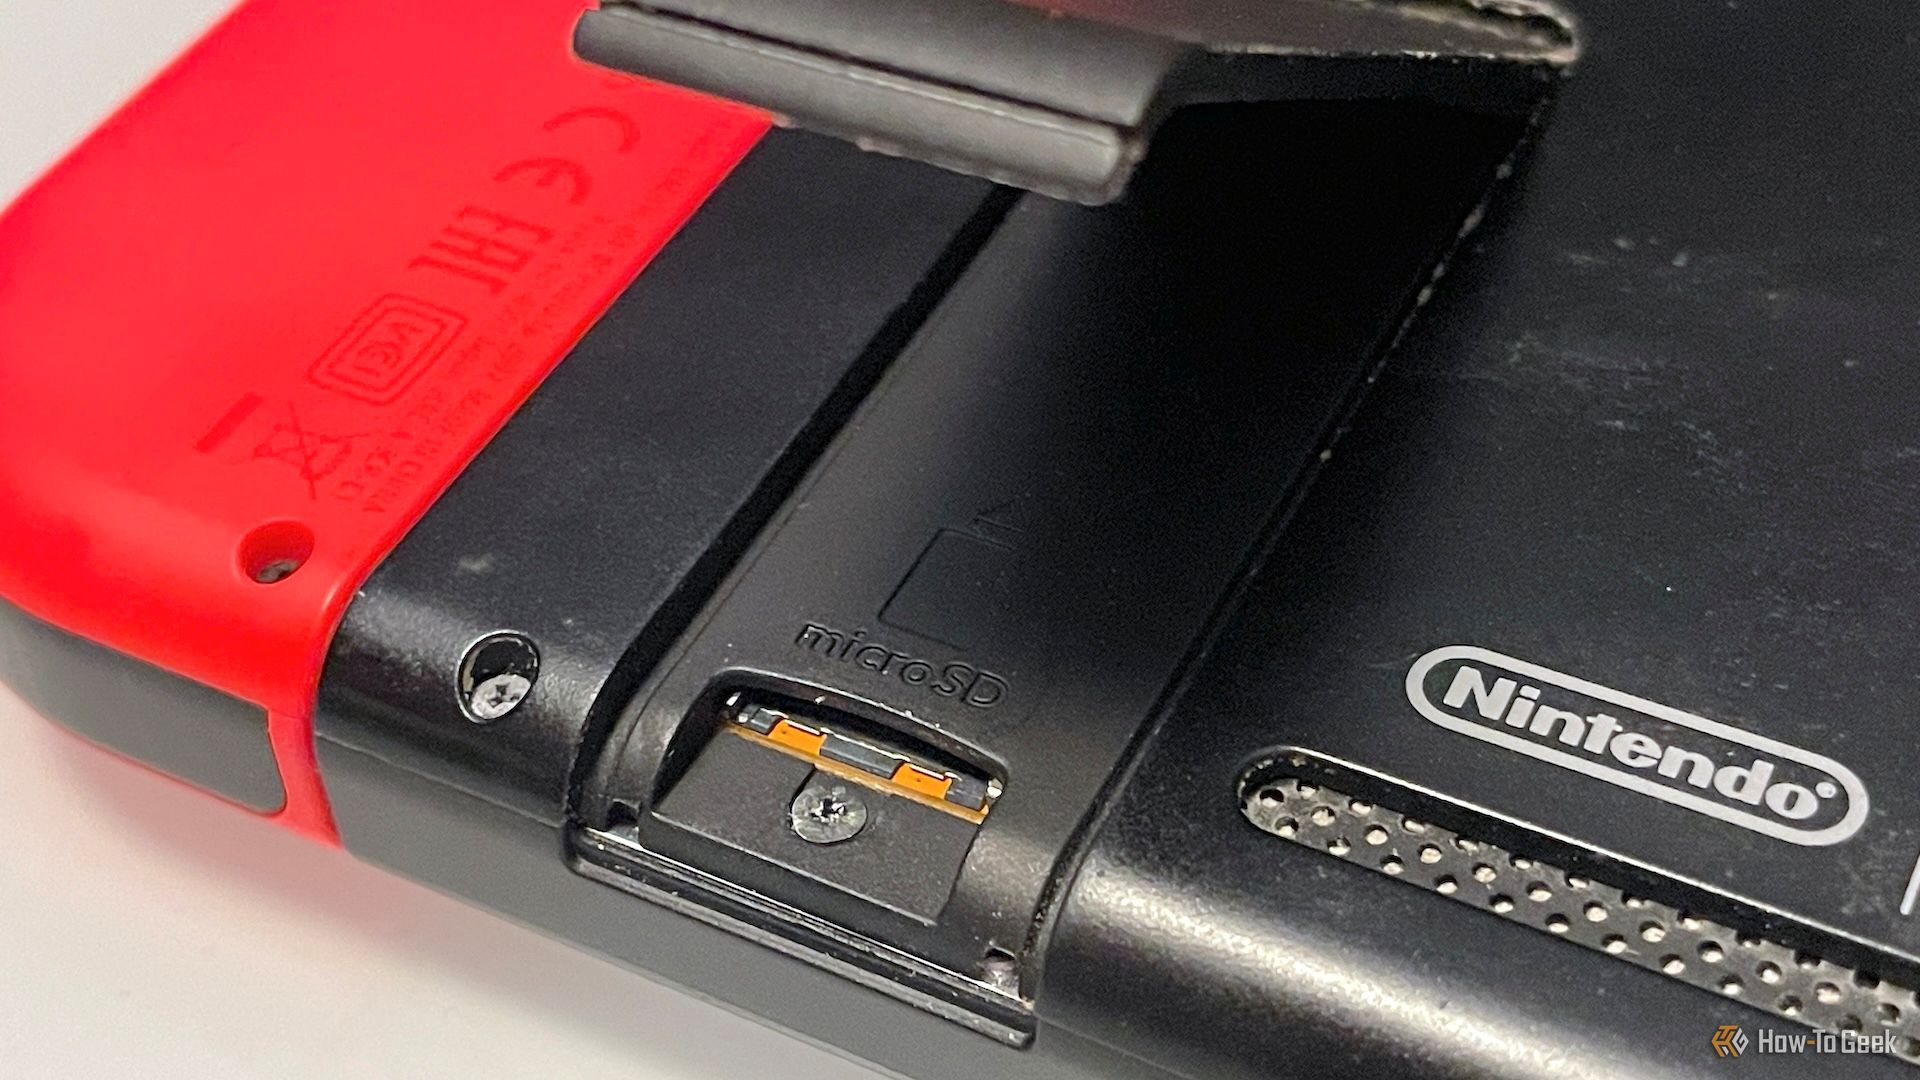
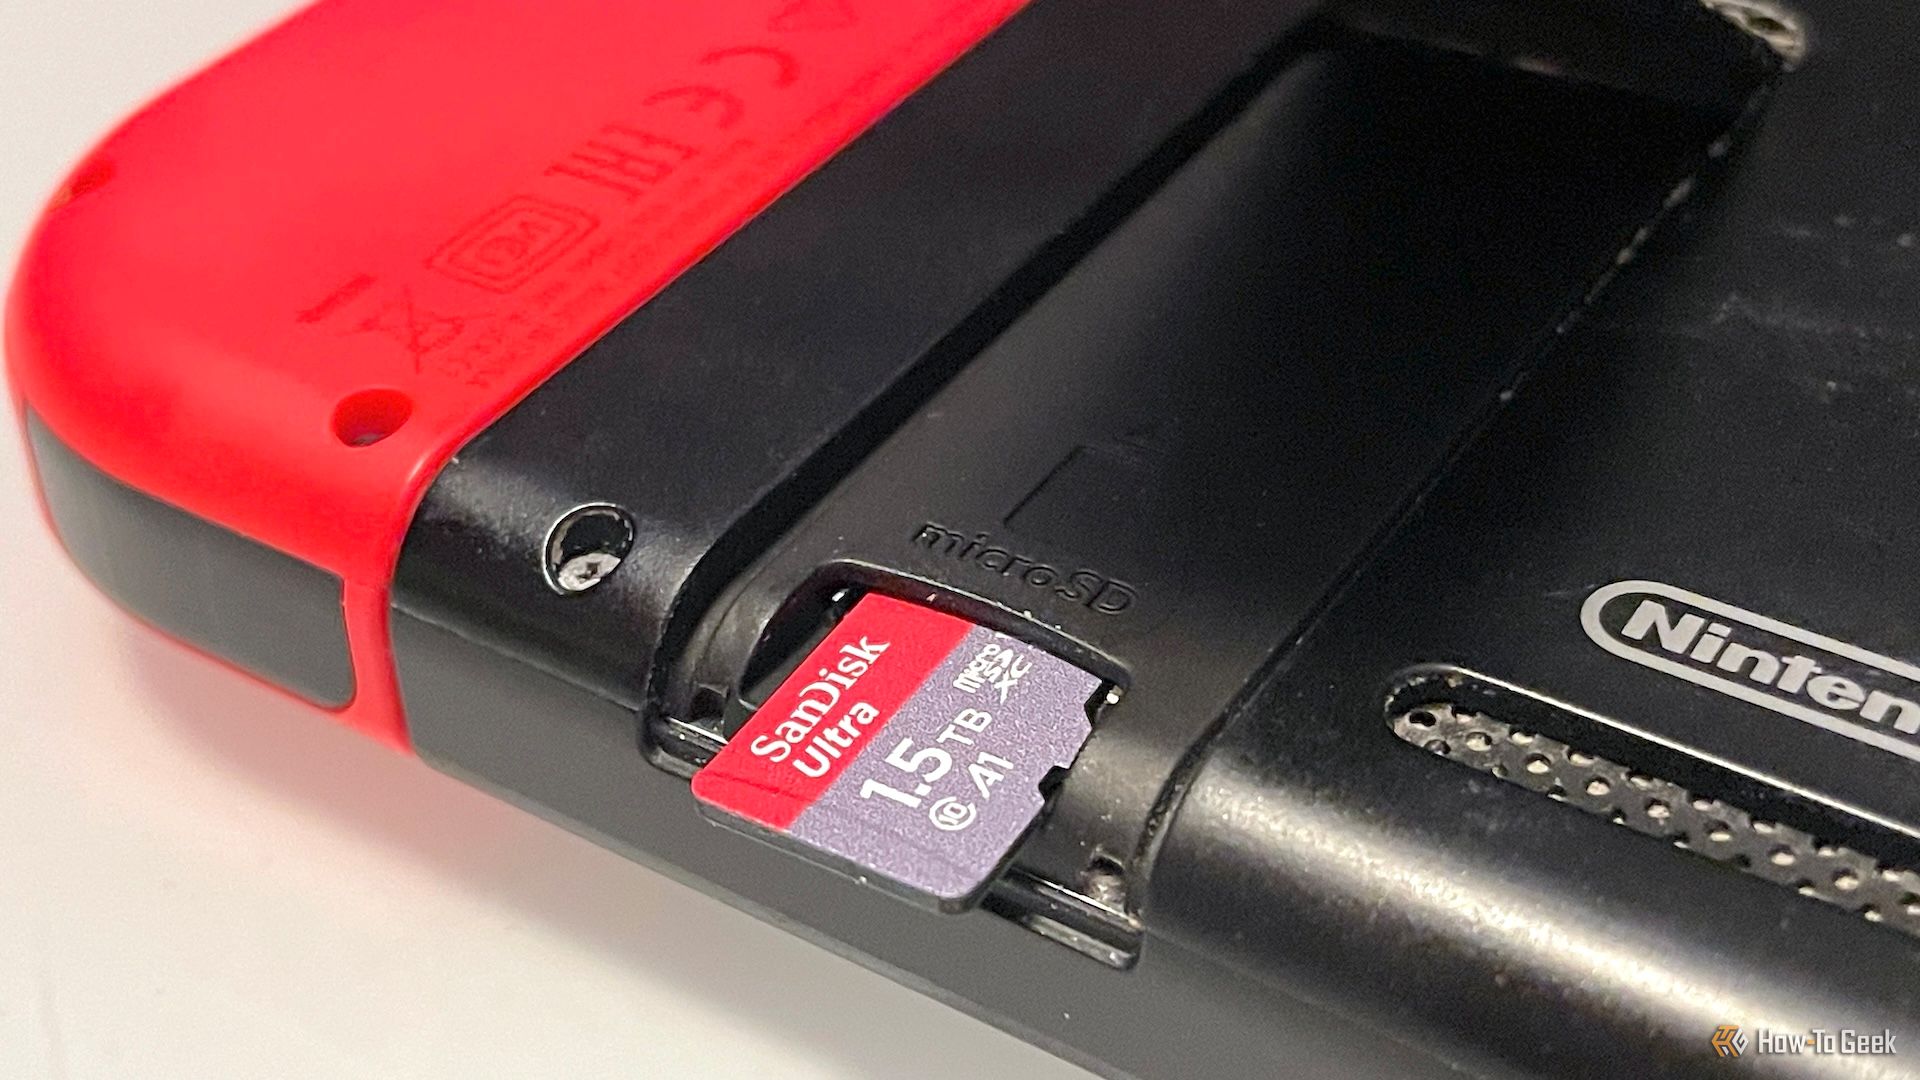
To install a new compatible microSD card, turn off the Switch first, flip the console face-down, then pop open the small door in the bottom-left corner. On a Switch Lite, the door is located on the back in the bottom-right corner.
Insert the card into the revealed slot with the text facing up and the copper-colored pins (visible on the back of the card) facing in towards the switch. Push until you hear a soft click. Close the door and turn the Switch back on.
If the card was already formatted for the Switch, you don’t have to do anything else. If it hasn’t been formatted yet, open “System Settings” from the home screen and select “System.”
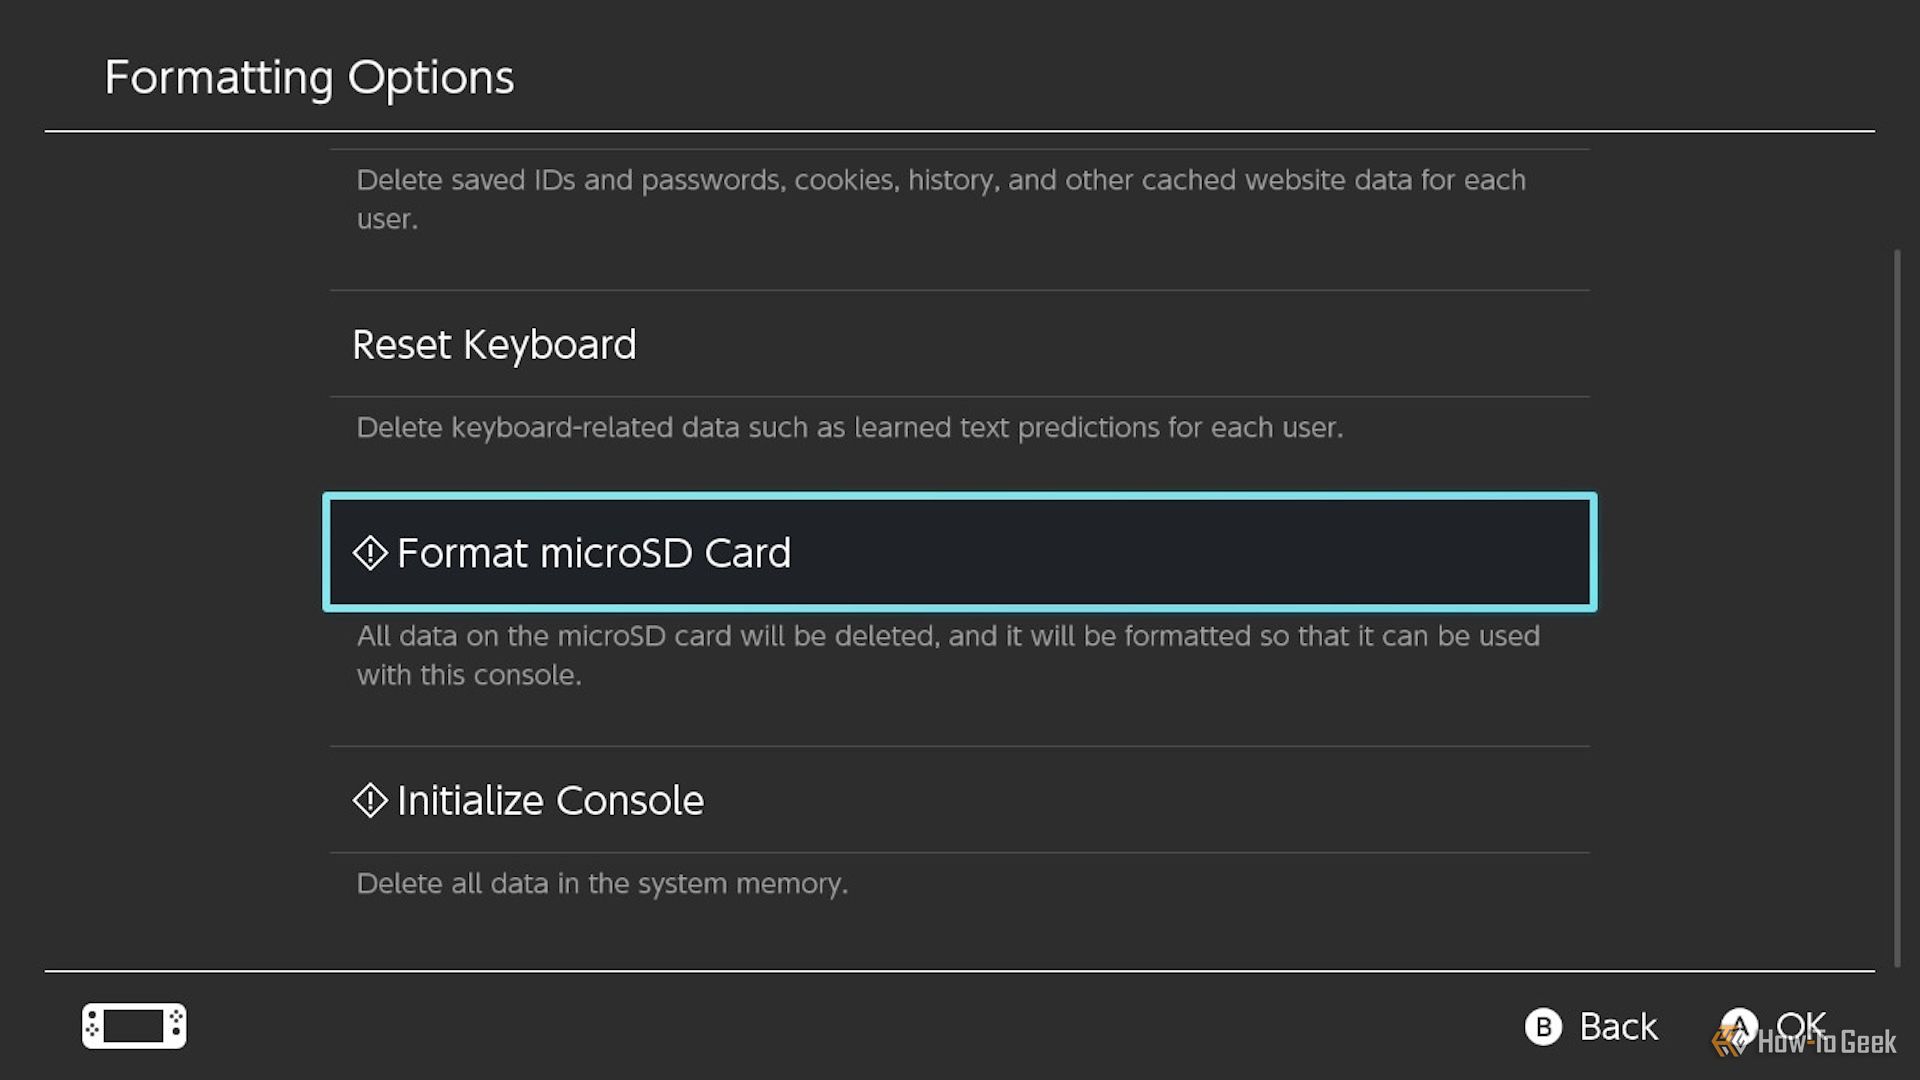
Scroll to the bottom of the menu and select “Formatting Options,” then select “Format microSD Card.” Choose “Continue” when prompted, then “Format.” Wait for the formatting process to finish and for the console to restart.
5
Adjust Your Resolution Settings
Resolution for your Switch’s screen in handheld mode is dependent on the game you’re playing and whether you’re using a regular Switch, Switch Lite, or Switch OLED.
However, you can manually adjust the System Settings for better resolutions when it’s connected to a TV. Though it’s important to note that only the Switch and Switch OLED support TV connections while the Switch Lite does not.
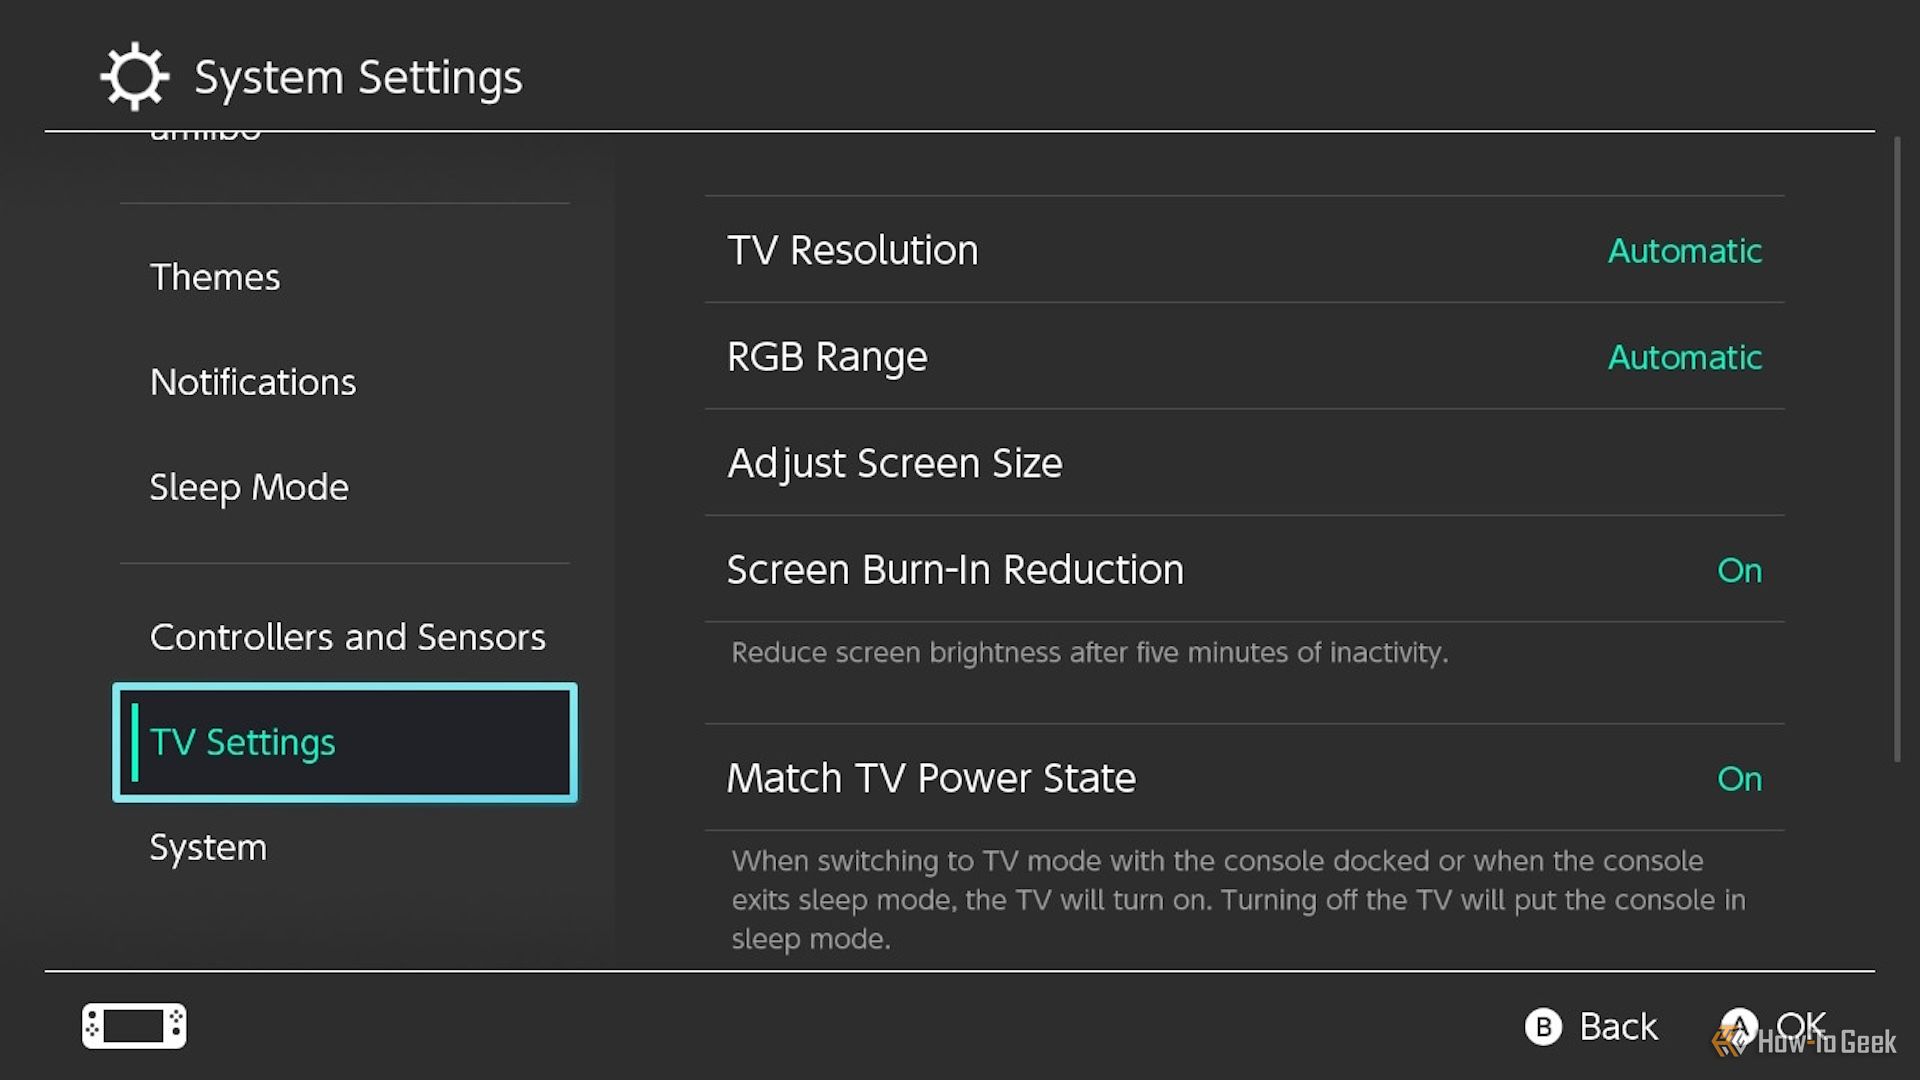
Connect your Switch to your TV, either via the dock or HDMI. From the home screen, open “System Settings” and then scroll down to “TV Settings.”
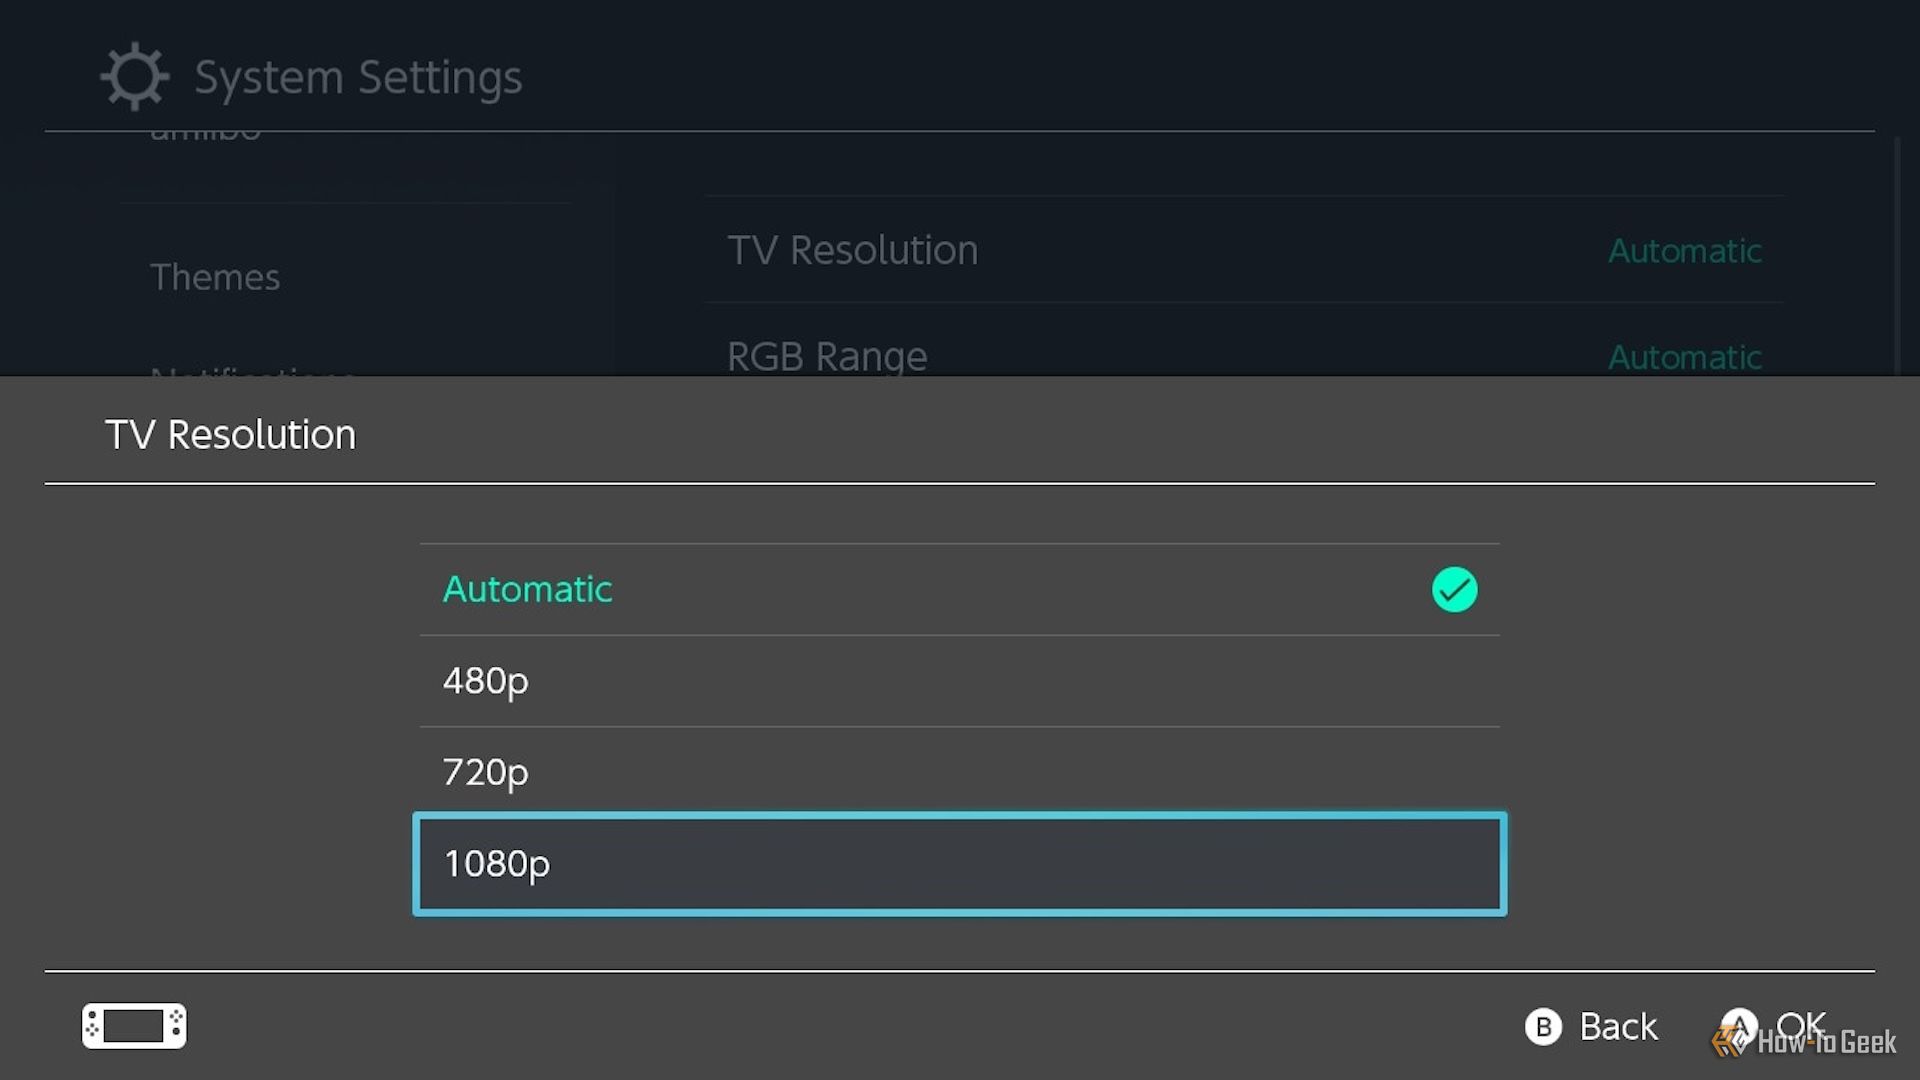
Select “TV Resolution,” then select the highest resolution option that your TV supports—options include 480p, 720p, and 1080p.
6
Be Mindful of Overheating
Heat can have a fairly noticeable impact on a console’s performance, with high temperatures often leading to a number of problems such as lower frame rates, delayed controller inputs (or the appearance of such), and even physical damage to the device itself.
There are no settings you can change to improve your Switch’s ability to dissipate heat. However, it’s in your best interest to avoid blocking the intakes on the back or the vent at the top of the system. Whether it’s on and running or in Sleep Mode.
So do your best to avoid draping anything on top of the Switch when it’s docked, and don’t lay it down on a blanket or cushion when in use, as softer materials could “squish” close enough to the intakes to muffle or completely block them.
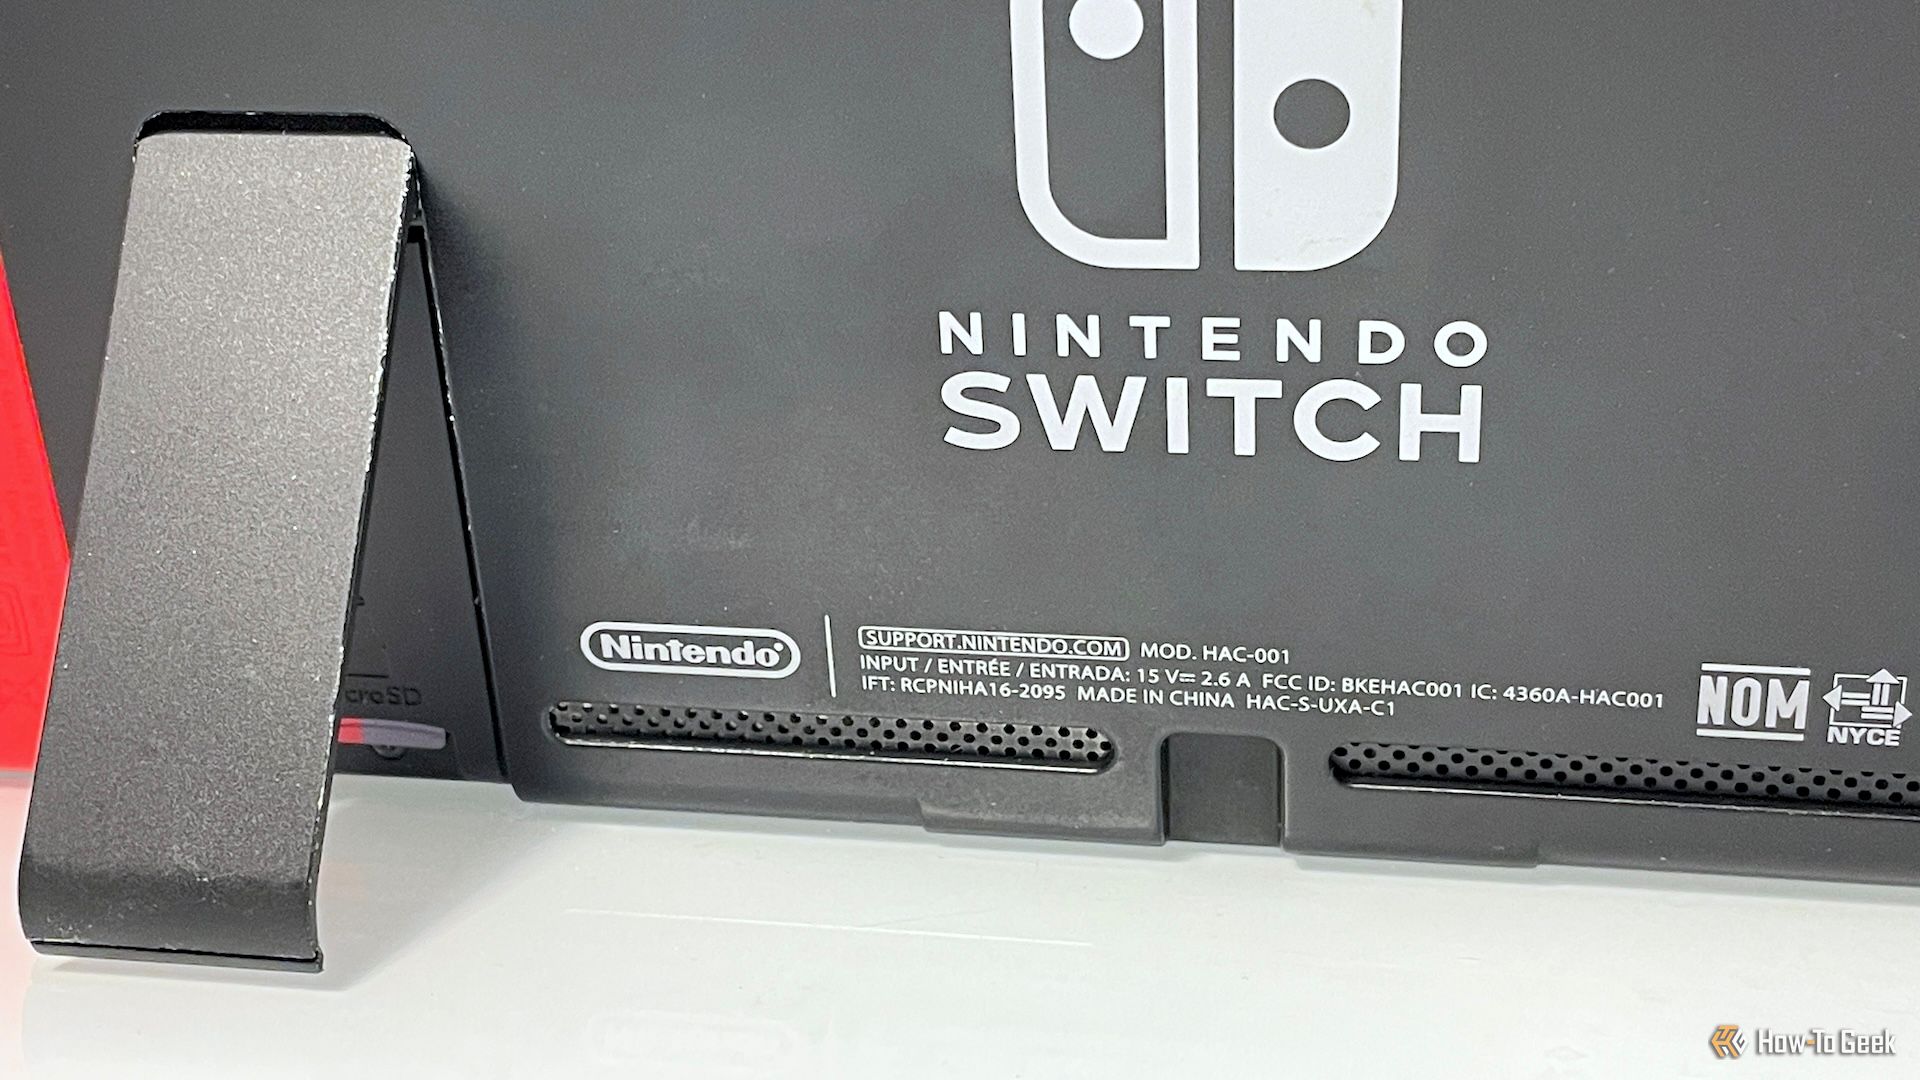
If you must lay the central Switch console (the part with the screen in it) down on a separate surface, either place it on something smooth like a table or countertop, or fold out the little stand in the back that doubles as the door for the microSD card and prop it up.
Nintendo also recommends not using your Switch in high temperature situations (over 95ºf or 35ºc).
7
Turn Off HD Rumble and Wi-Fi
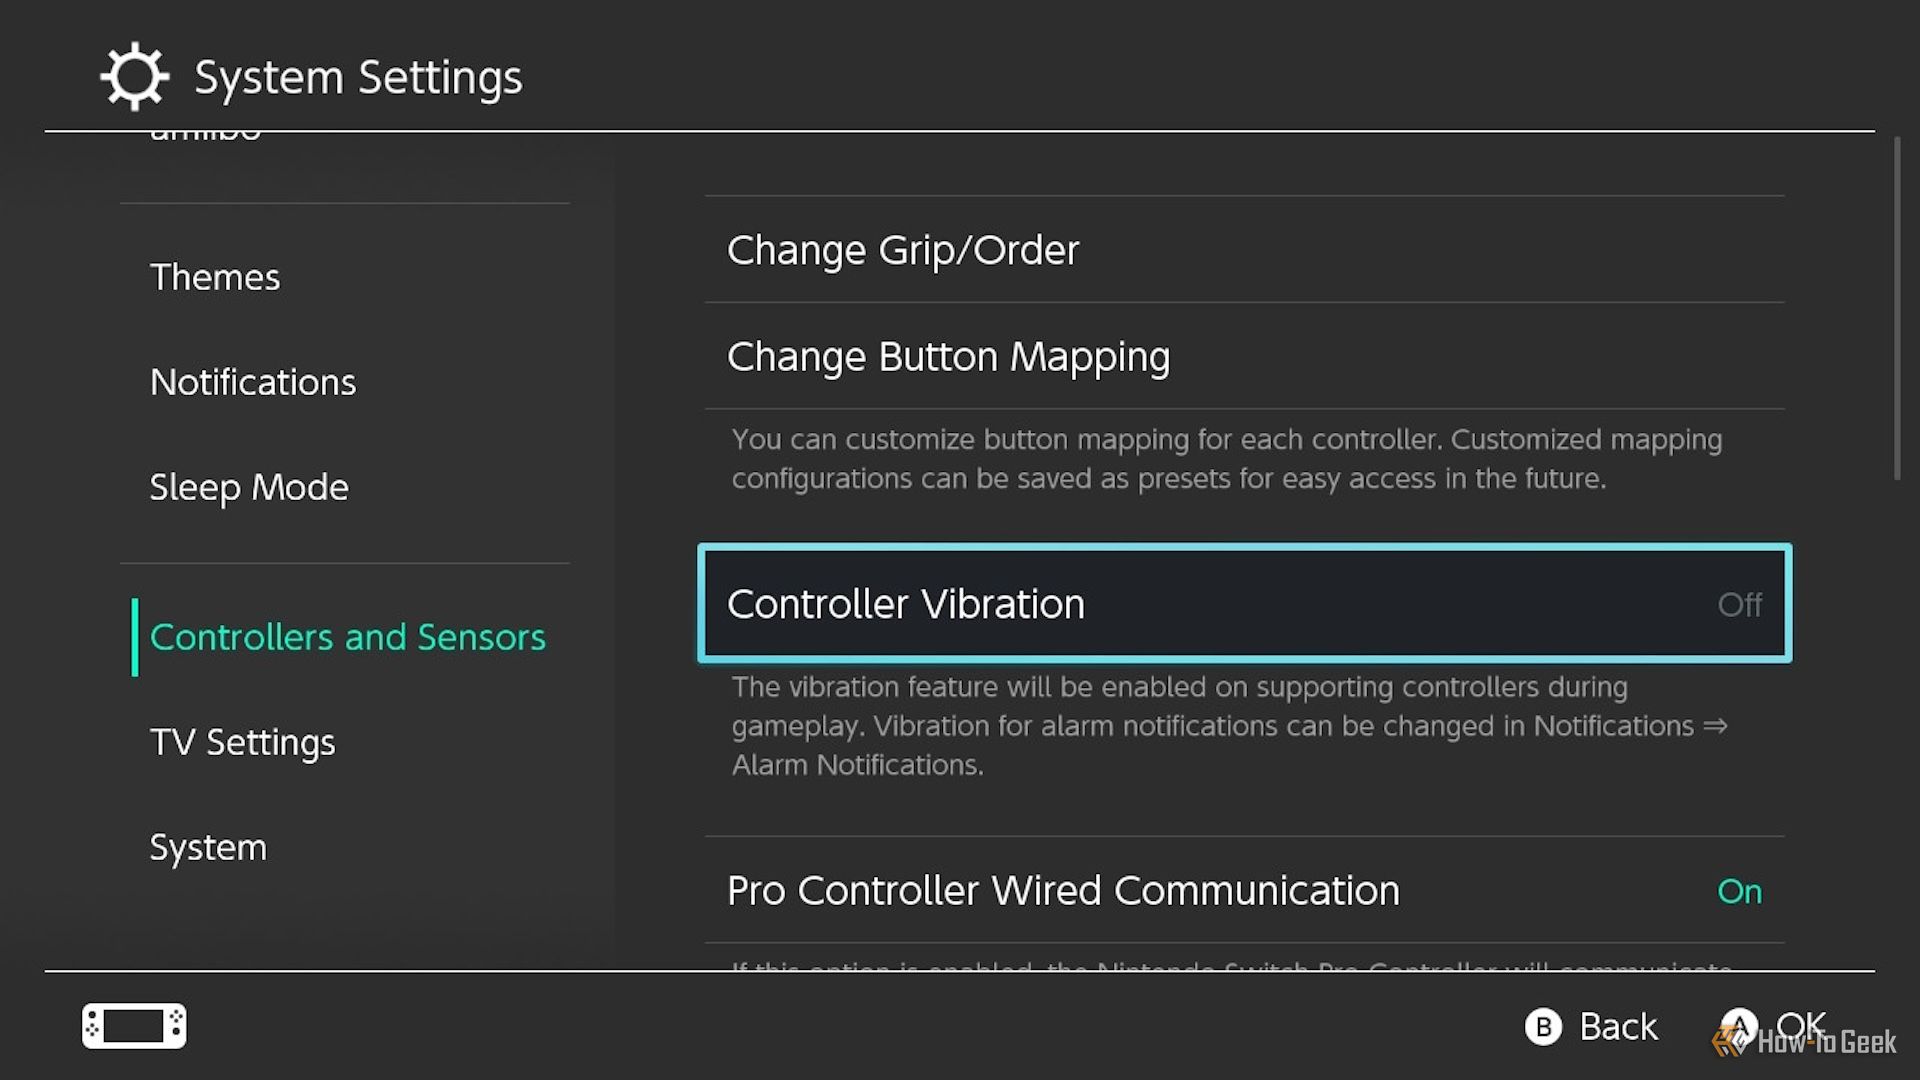
This one seems a bit odd, sure, but pretty much all the Switch’s functions impact battery life. Running games, browsing the eShop, maintaining an always-on Wi-Fi connection, and yes, even Joy-Con HD Rumble. If you want to get as much time out of your Switch as possible in handheld mode, consider turning the rumble feature off.
From the home screen, open “System Settings” and scroll down to “Controllers and Sensors,” then highlight “Controller Vibration” and select it to turn the function off (or back on).
Unfortunately, there’s no option to only turn off vibration when in handheld mode, so if you want to bring the rumble back when playing on a TV, you’ll need to go back into your Switch’s settings and turn it back on manually.
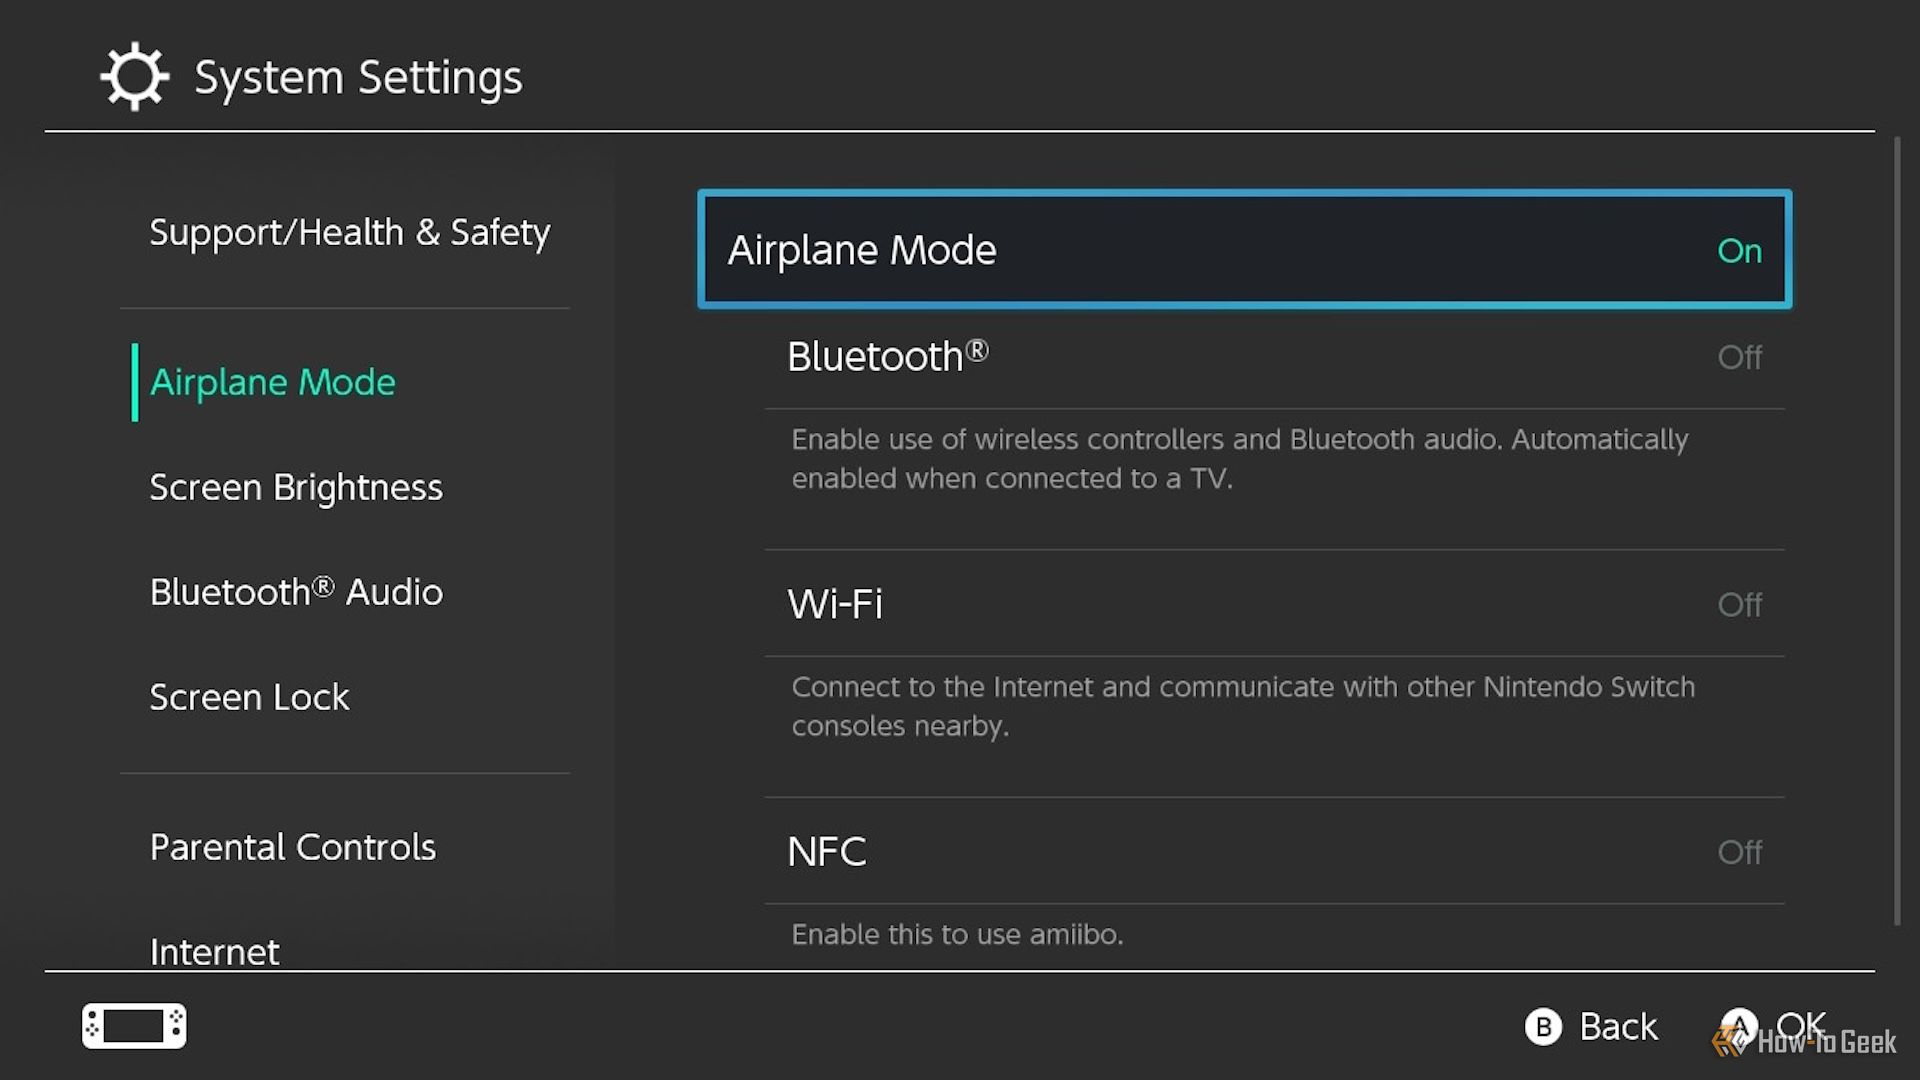
To turn off the Switch’s constant Wi-Fi connection, open “System Settings” and highlight “Airplane Mode.” Then select “Airplane Mode” from the menu to turn it on—and thus, turn off the Wi-Fi connection.
Individual connections can be left on once Airplane Mode is active, however. Scroll down and select “Bluetooth,” “Wi-Fi,” or “NFC” to keep them on in Airplane Mode. If you plan to use Airplane Mode with wireless controllers, definitely turn Bluetooth on, otherwise the wireless connection won’t work.
There’s no way to boost a Switch’s performance up to the same level of a PlayStation 5 or Xbox Series console due to the limitations of the hardware—even modding a Switch doesn’t measure up, and also risks ruining the system. However, you can still squeeze a little more out of it when you know what settings to change.


