If you work from different time zones or interact with people working at different locations, it makes sense to add those time zones to your Windows 11 PC. This makes checking out the date and current time in those locations easier.
5
Add Additional Clocks to the Windows System Tray
If you need to check the current time in a different time zone, add a clock for that time zone to your Windows system tray. You can add up to two additional clocks.
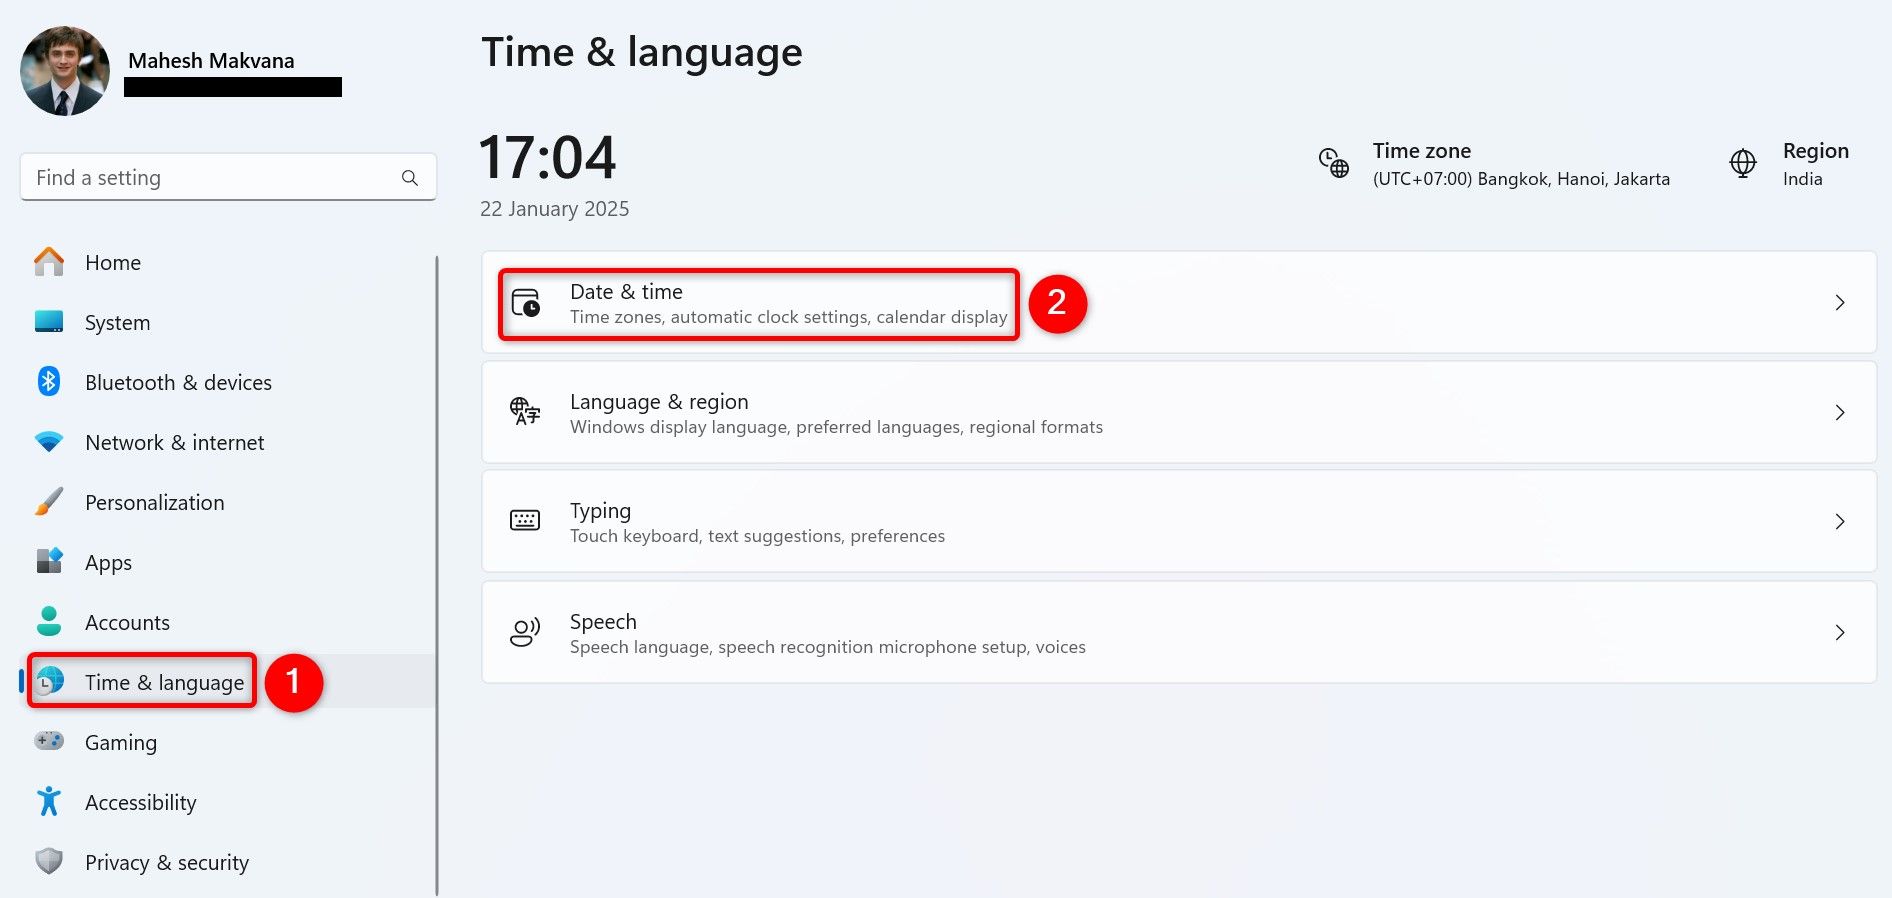
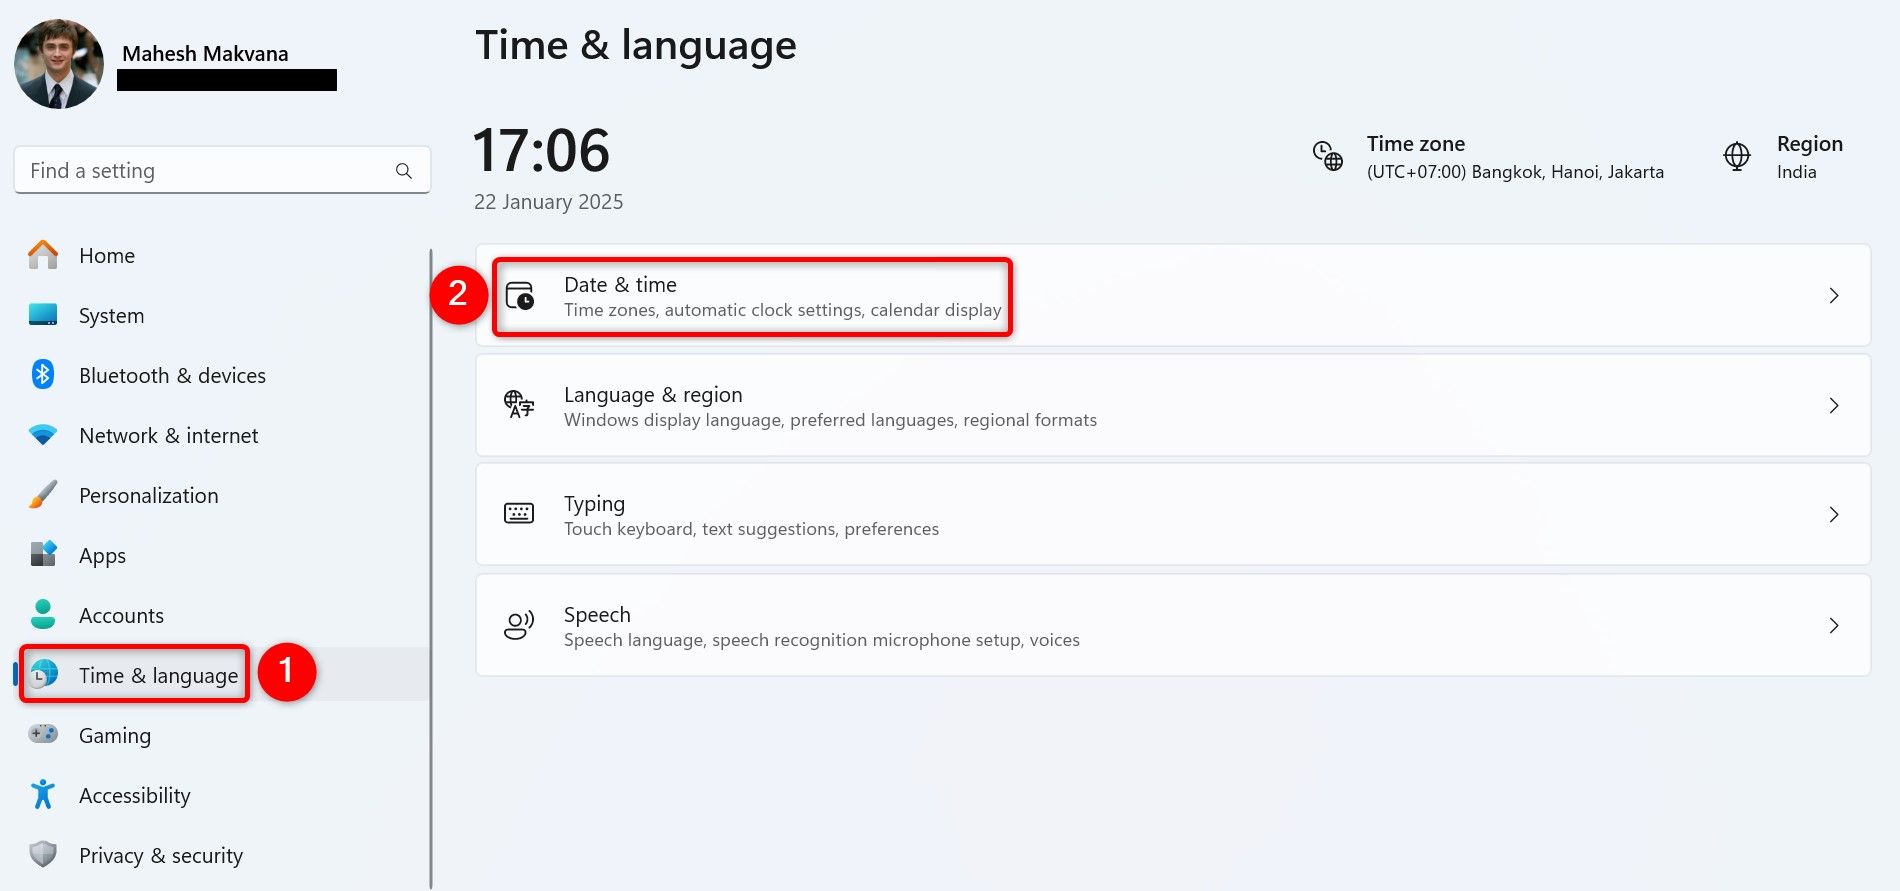
To do that, launch Settings (press Windows+i) on your PC. From the left sidebar, select “Time & Language.” On the right pane, choose “Date & Time.”
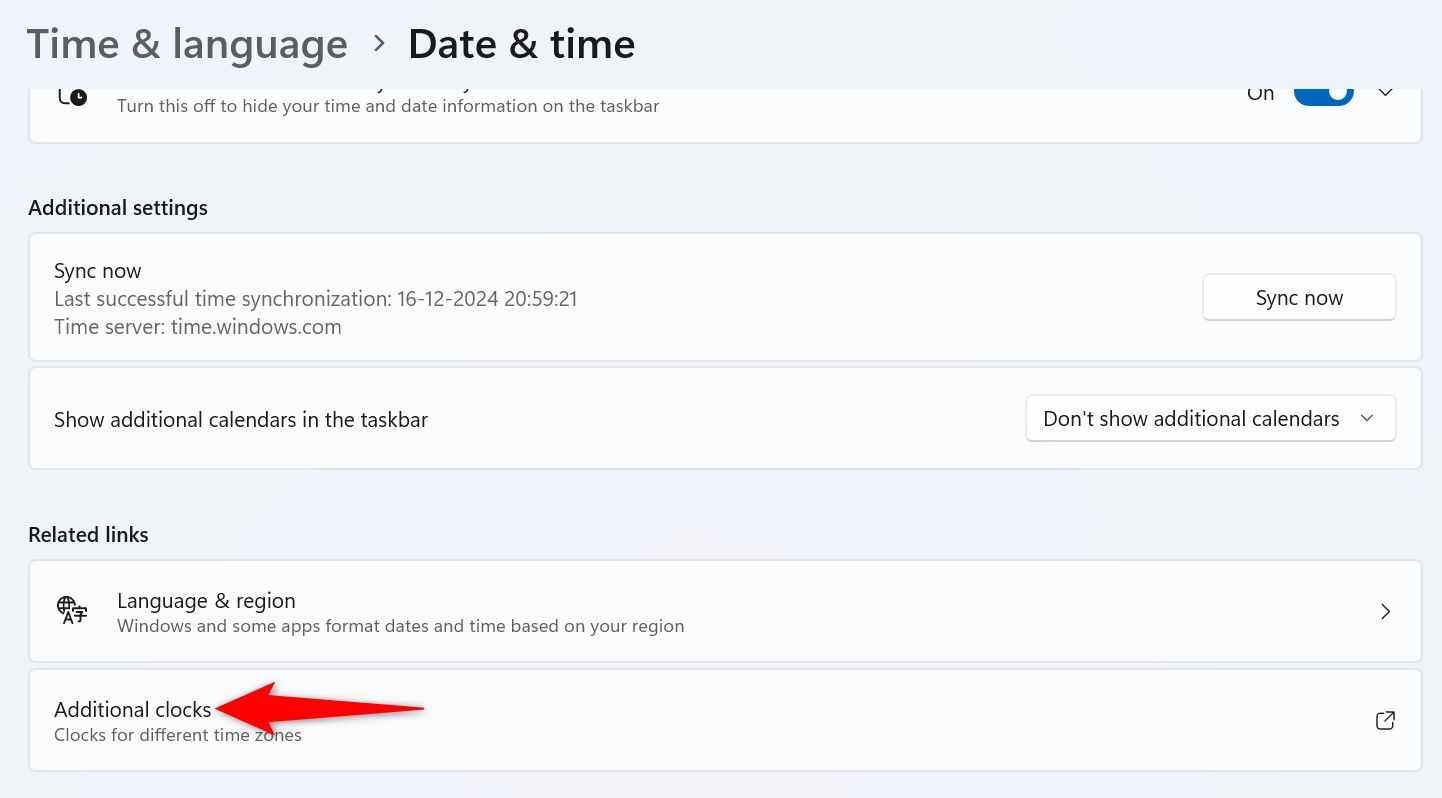
Scroll to the bottom and choose “Additional Clocks.”
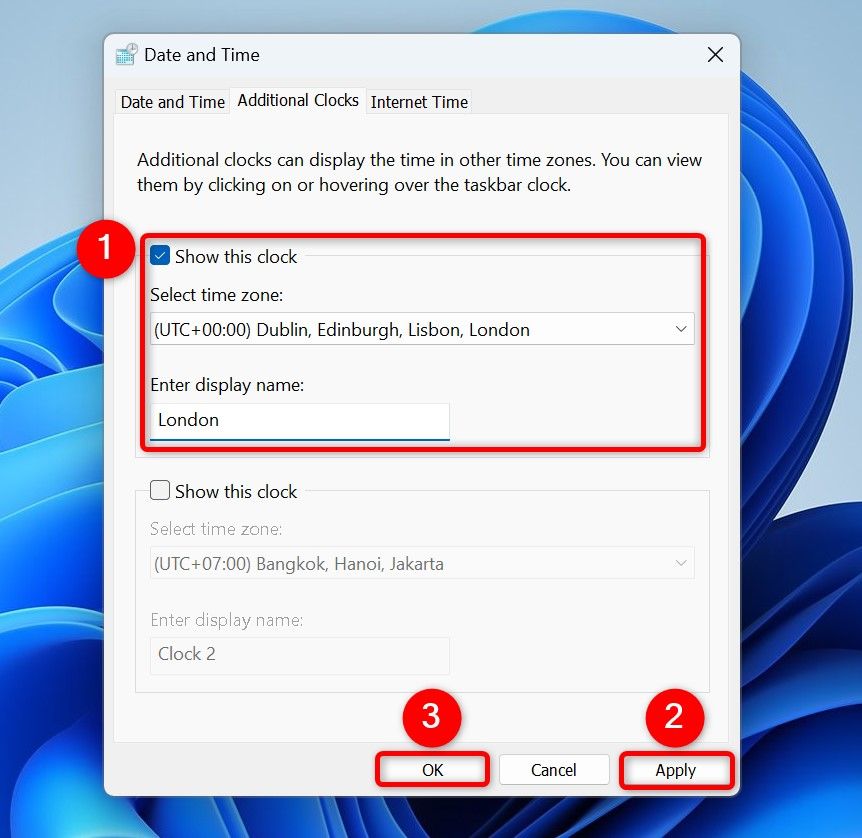
You’ll land on the Date and Time window. Here, turn on the first option that says “Show This Clock.” Click the “Select Time Zone” drop-down menu and choose the preferred time zone. Select the “Enter Display Name” field and type the name you want Windows to display next to this clock.
Optionally, enable the second “Show This Clock” option and configure the time zone and the display name for it.
Then, choose “Apply” followed by “OK.”
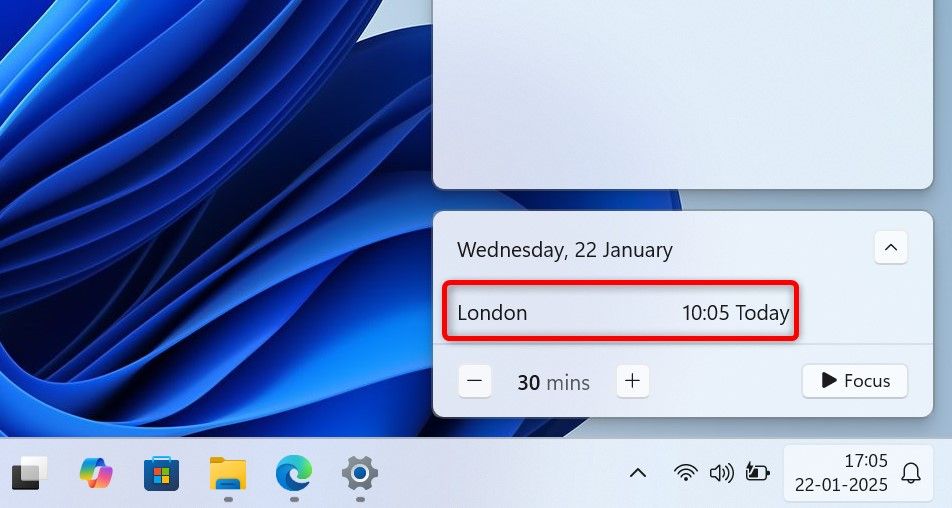
To view the additional clocks you’ve added, in Windows’ bottom-right corner, click the current time. You’ll see your added clocks, displaying the current time of the chosen time zones.
4
Force Windows 11 to Use a Different Time Zone
If you’ve moved to a different time zone and would like your system to use that time zone from now onwards, make a change in the Settings app as follows.
Launch Settings by pressing Windows+i. From the left sidebar, choose “Time & Language.” On the right pane, select “Date & Time.”
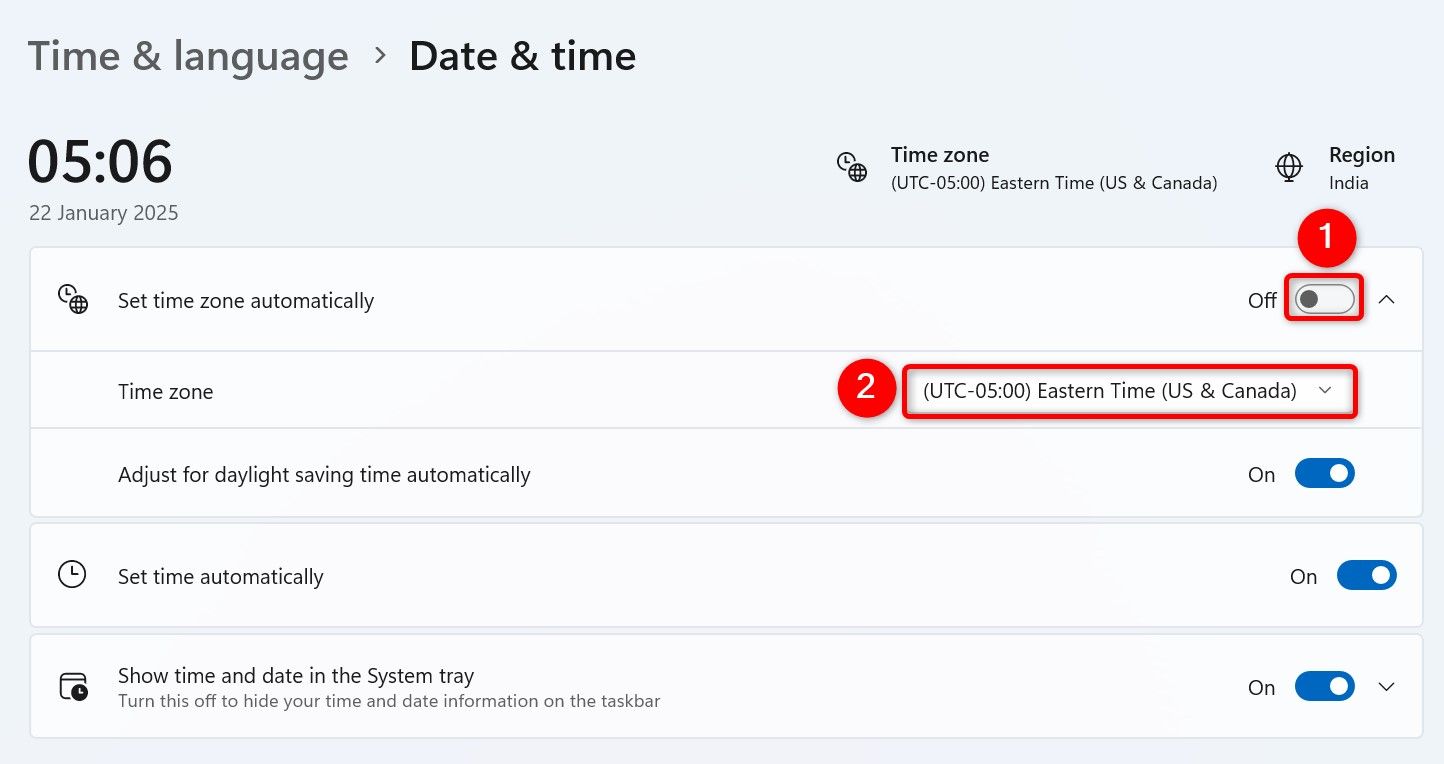
Turn off “Set Time Zone Automatically.” Click the “Time Zone” drop-down menu and choose the time zone you want your PC to use.
Windows 11 will automatically apply the chosen time zone to the entire system.
3
View Multiple Time Zone Clocks Using the Clocks App
Windows 11’s built-in Clock app allows you to add and view multiple time zone clocks at once. This is a handy option to see the current time of several time zones at once.
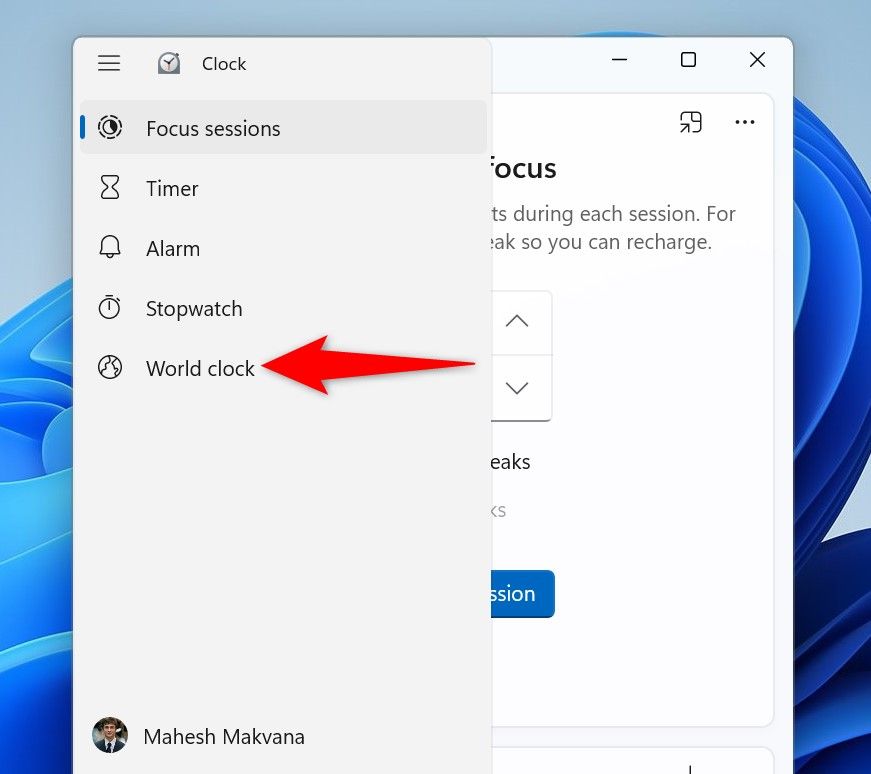
To do that, launch Windows Search (press Windows+S), type Clock, and open the app. In the app’s top-left corner, click the hamburger menu (three horizontal lines) and choose “World Clock.”
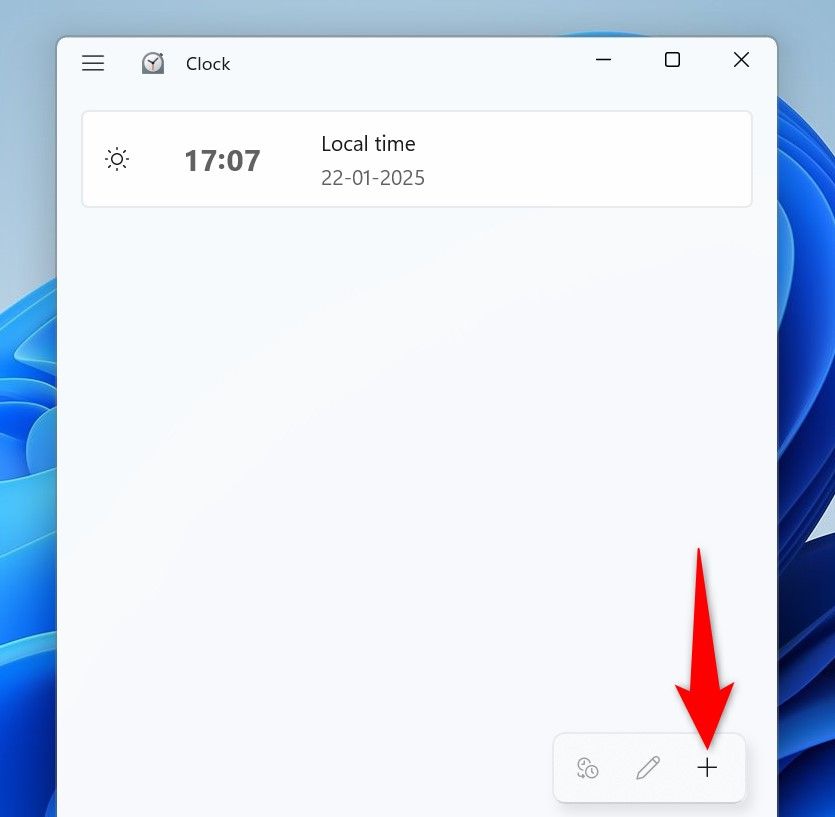
At the bottom, click “Add a New City” (the plus sign).
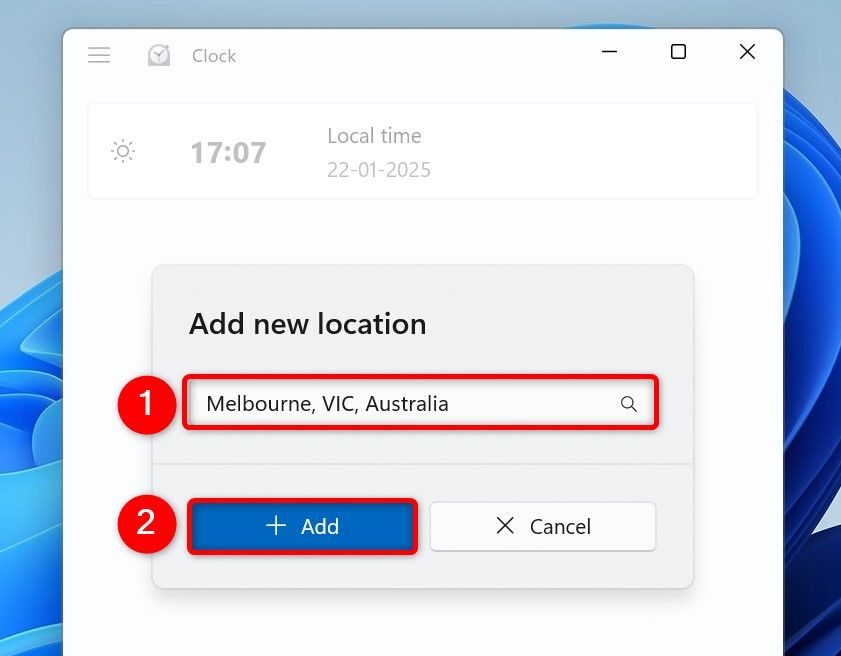
On the Add New Location window, click the “Enter a Location” field and type the name of the city you want to add. Select that city from the suggestion list and click “Add.”
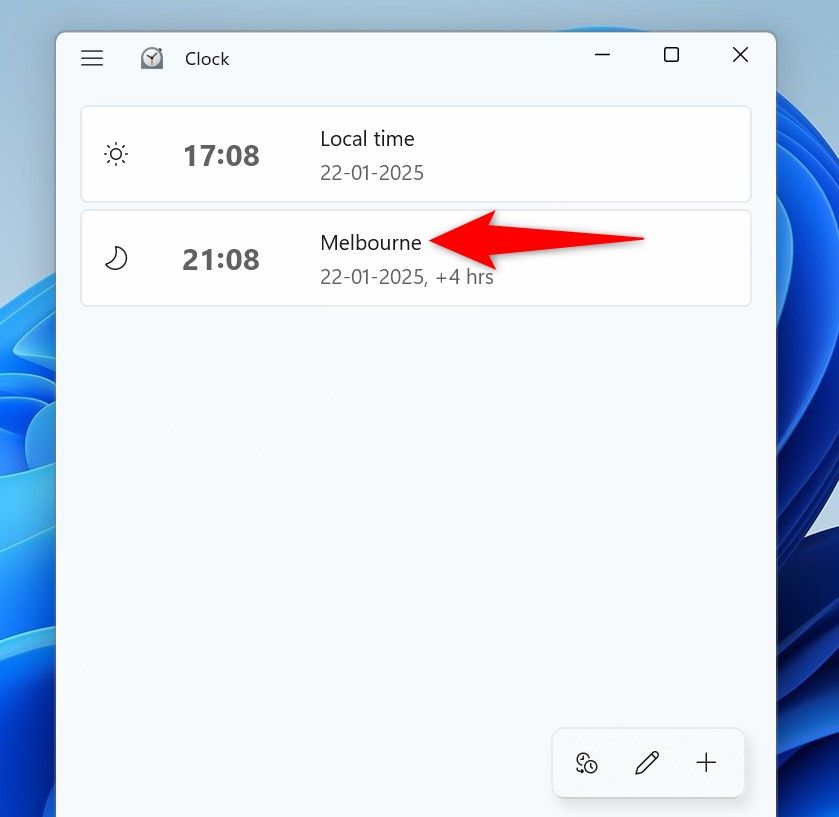
You’ll see your additional city’s clock in the app. To add more cities, click “Add a New City” (the plus sign). To remove a city, right-click that item on the list and choose “Delete.”
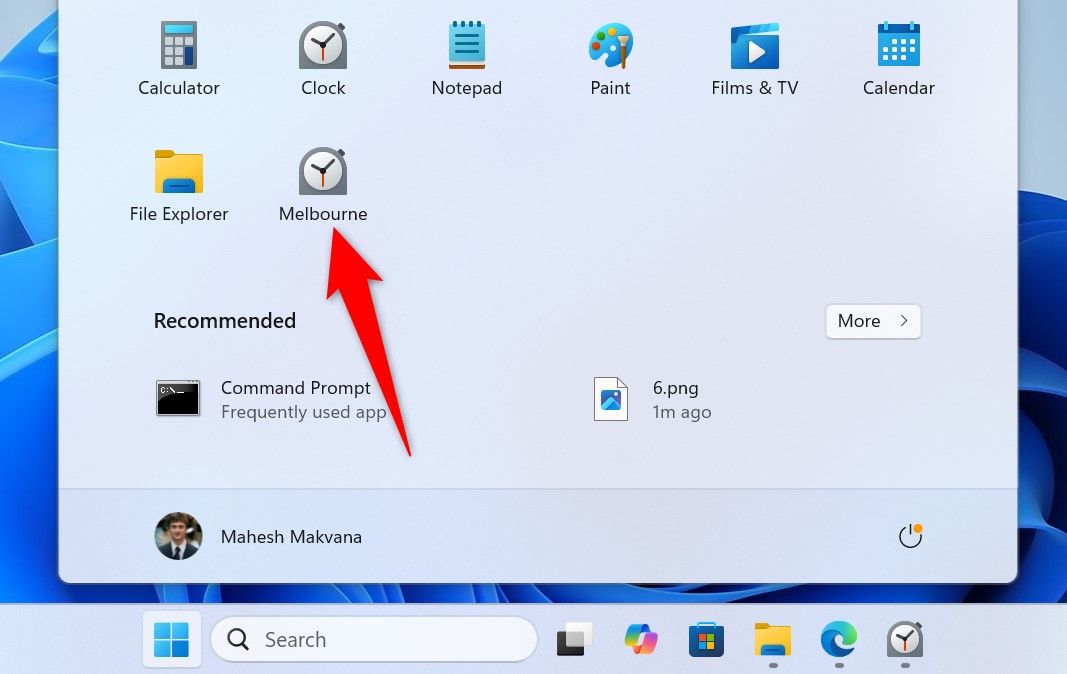
You can pin a city to Windows 11’s Start Menu and access that city’s time with a single click. To do that, right-click your city on the list and choose “Pin to Start.” In the open prompt, select “Yes.” Then, open the Start Menu and you’ll see your city’s name. Click it to open the World Clock section in the Clock app, displaying your city’s current time.
Later, to remove a city from the Start Menu, open Clock > World Clock, right-click the city, and choose “Unpin From Start.”
2
Make Outlook Display a Secondary Time Zone
If you use Outlook new or Outlook classic, you can make these apps display a secondary time zone, making working with multiple time zones easier.
For Outlook New
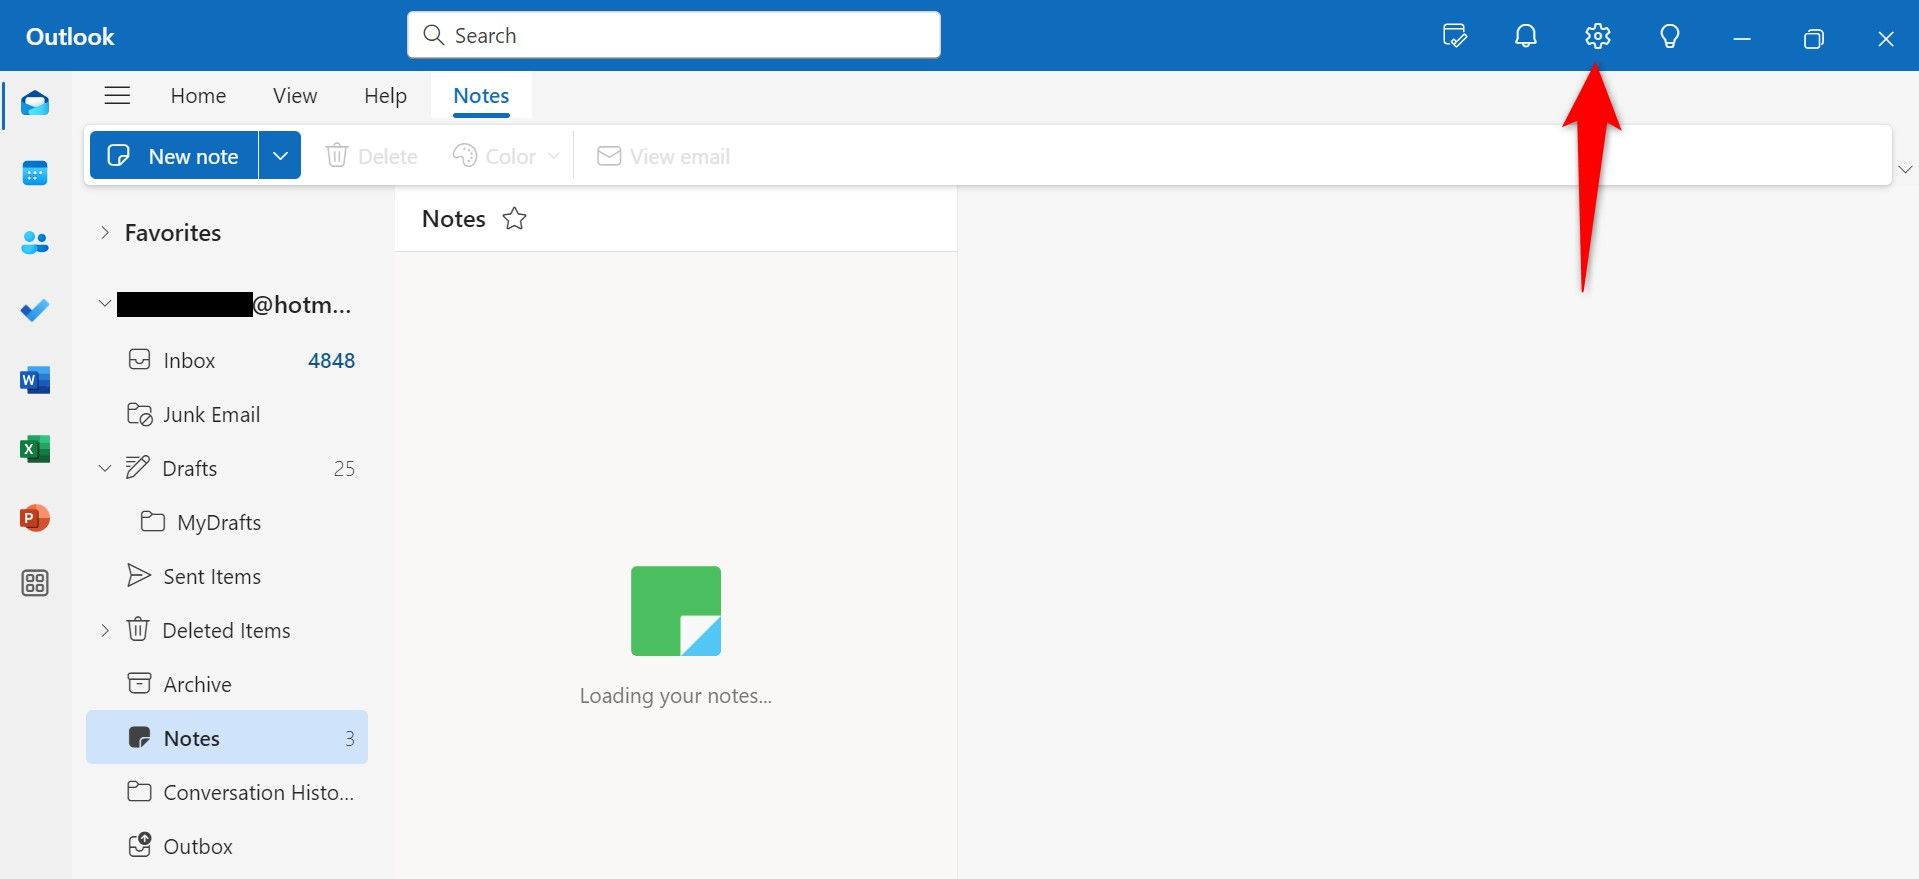
Launch the Outlook app and select “Settings” (the gear icon) at the top.
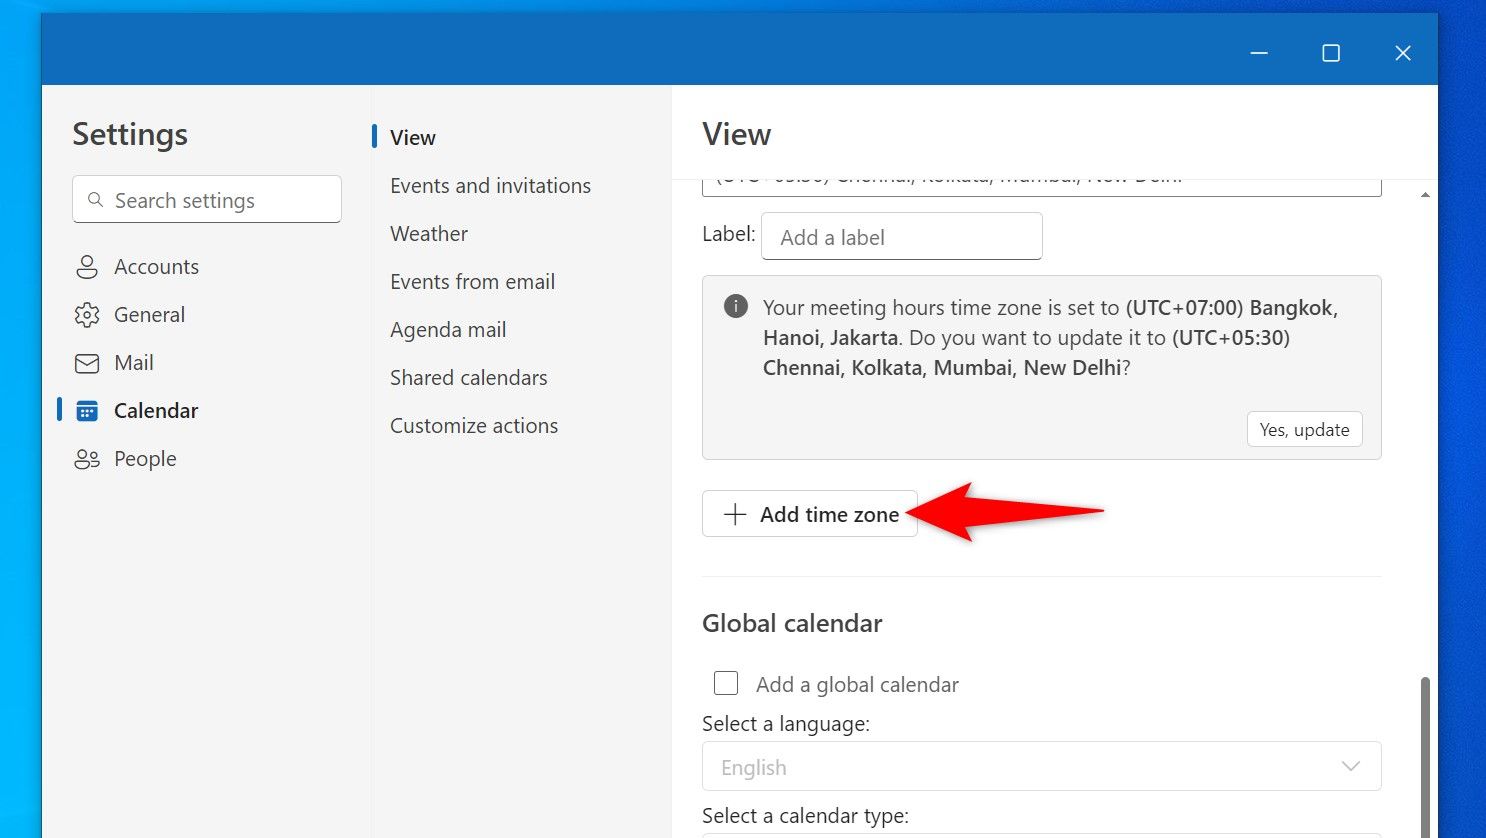
On the left, choose Calendar > View. On the right pane, scroll down to the Time Zones section. Choose “Add Time Zone.”
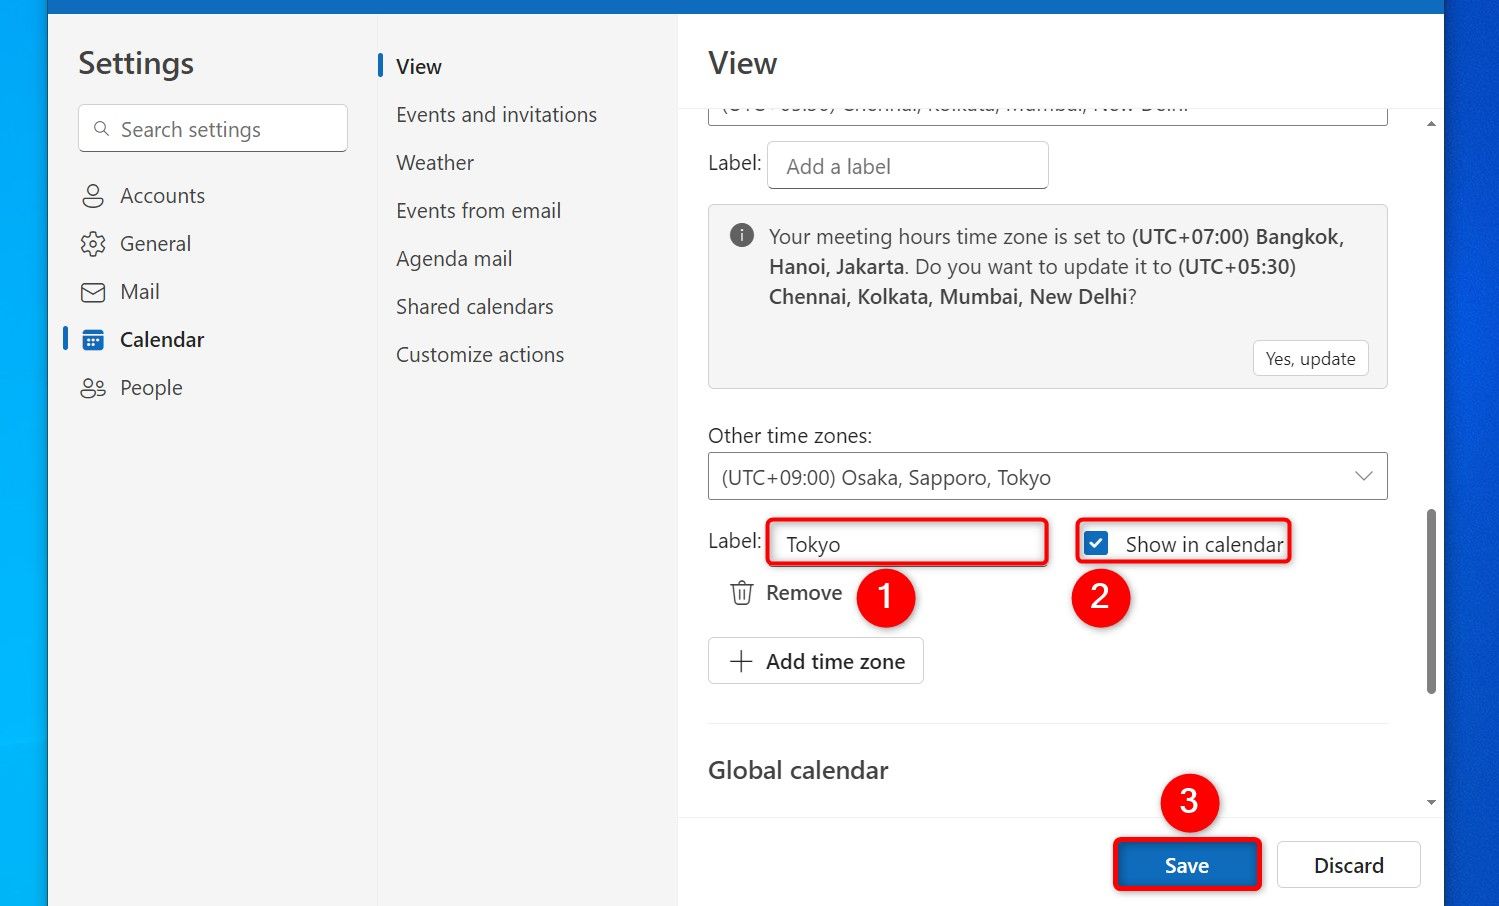
Select the “Search For a City” field and type the name of the city to add. Choose the “Label” field and type the name you want Outlook to display for this time zone. Enable the “Show in Calendar” option, and choose “Save.”
Like that, add more time zones by choosing “Add Time Zone” again. You can then arrange your time zones’ order on the list. To delete a time zone, select “Remove” for it.
For Outlook Classic
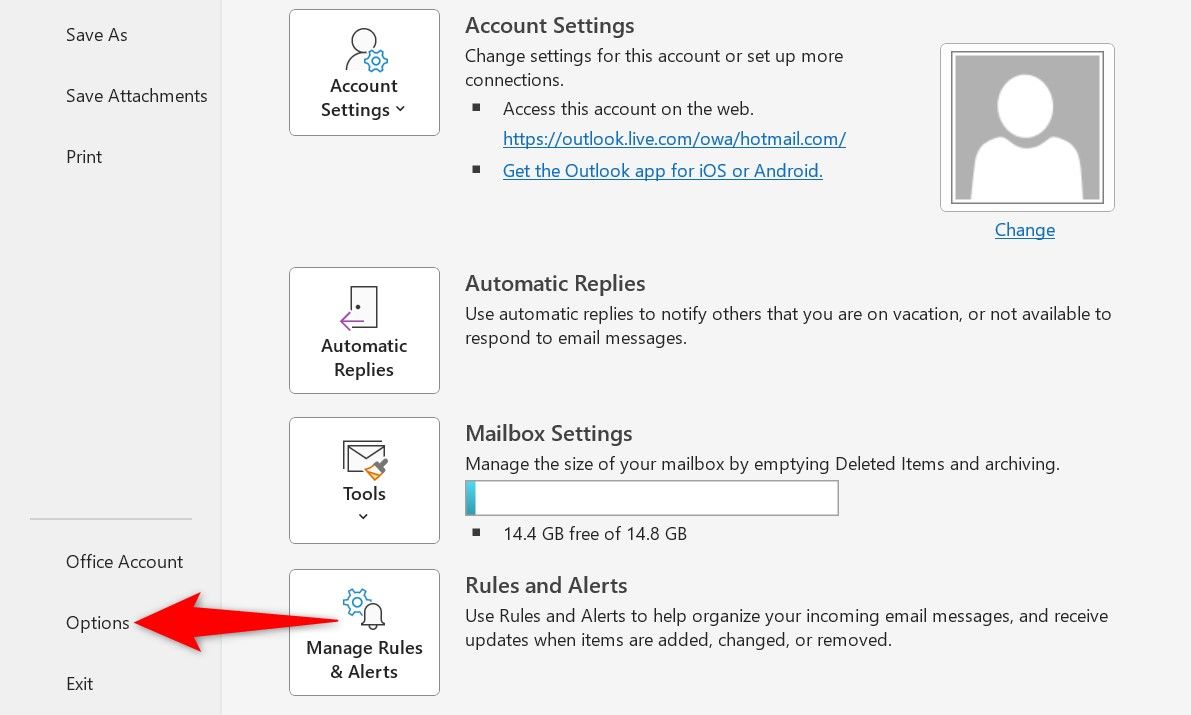
Open Outlook, select “File” in the top-left corner, and choose “Options” from the left sidebar.
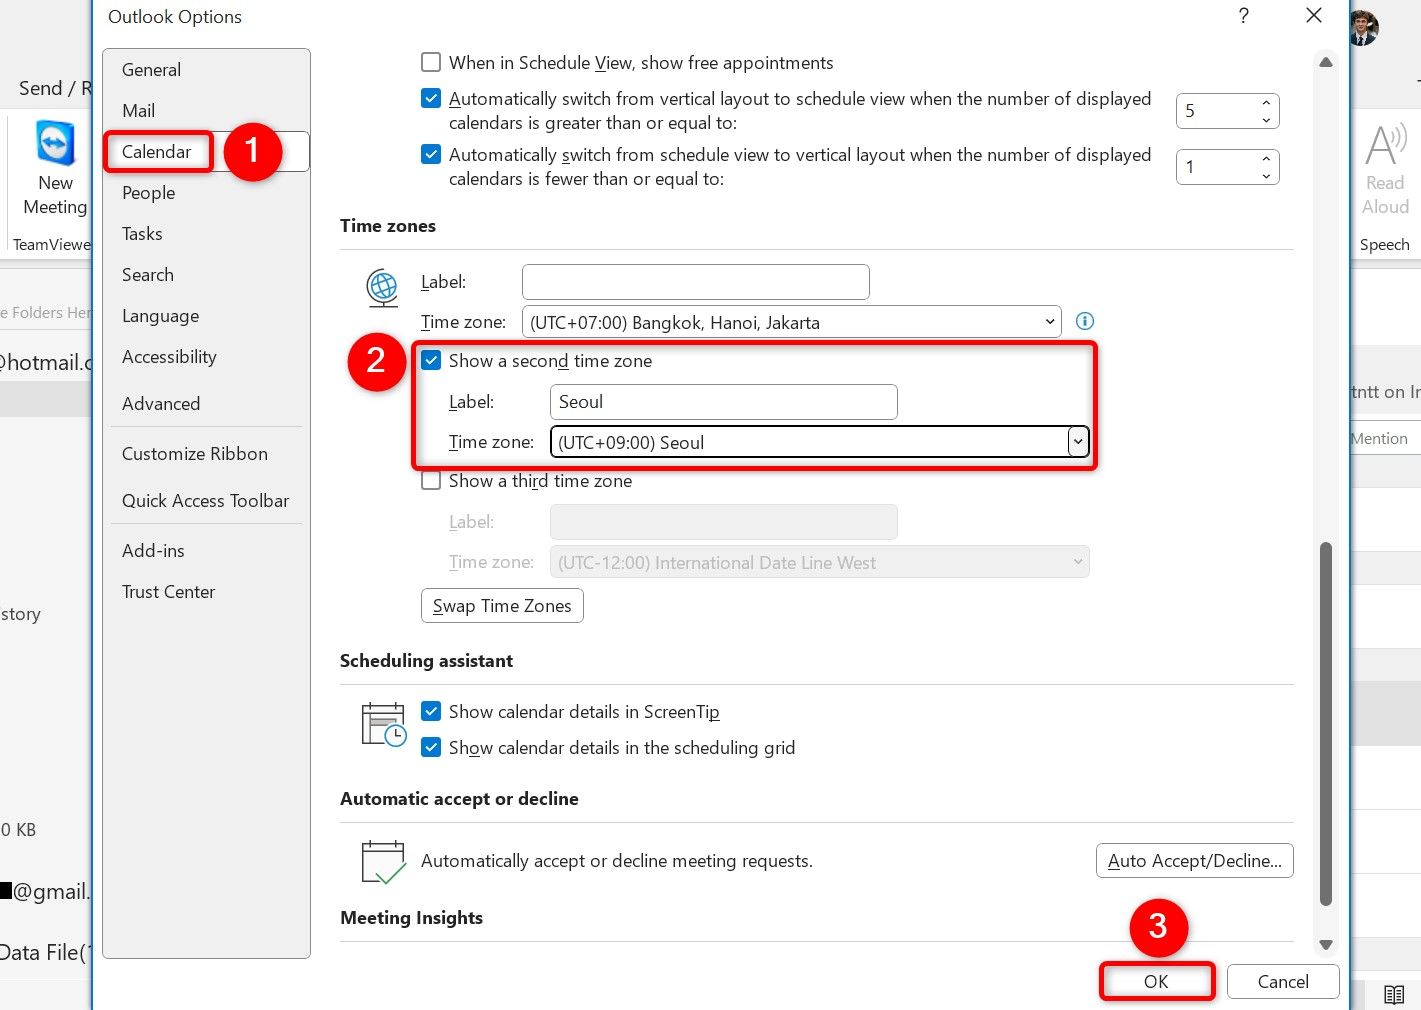
On the Outlook Options window, in the left sidebar, click “Calendar.” On the right pane, in the Time Zones section, turn on “Show a Second Time Zone.” Specify the label and the time zone. Optionally, add a third time zone by enabling “Show a Third Time Zone” option and configuring its label and time zone.
Then, at the bottom of the window, click “OK.”
1
Change Time Zones Using PowerShell
If you like command-line methods, you can run a command (called a cmdlet) in PowerShell to change your system’s time zone. PowerShell lets you view your system’s current time zone, check the available time zones, and switch to any time zone you want.
To do that, open Windows Search (press Windows+S), type PowerShell, and select “Run as Administrator.” Choose “Yes” in the User Account Control prompt.
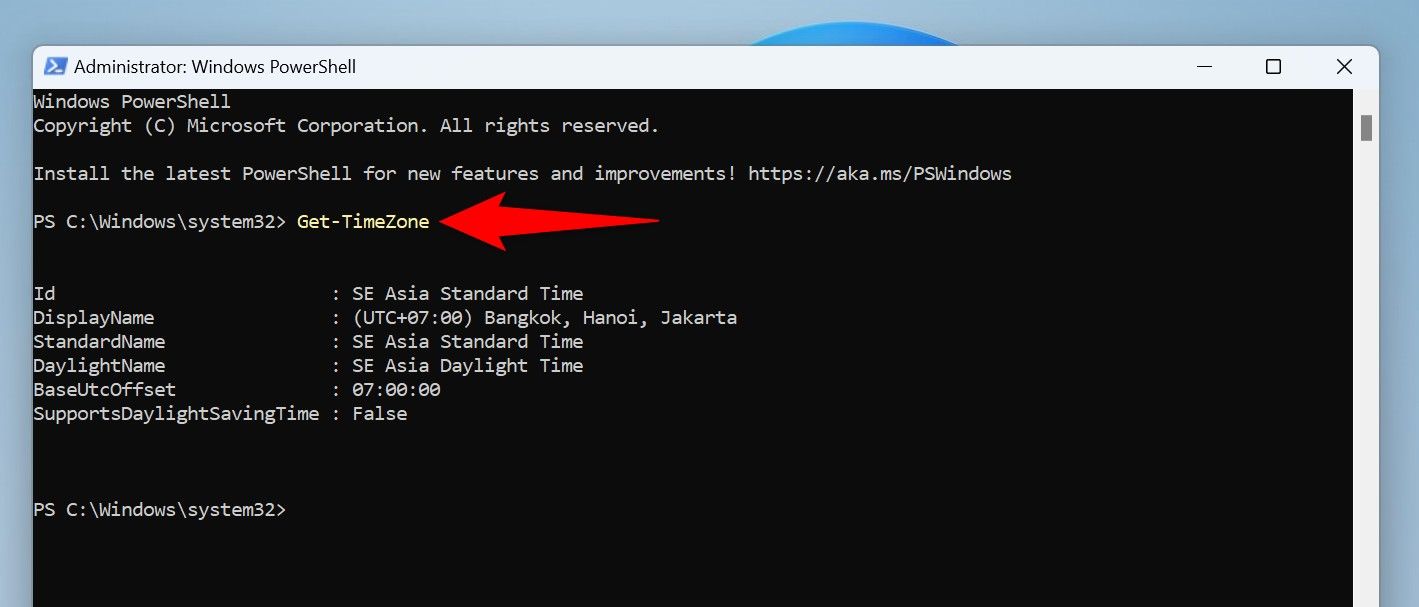
On the PowerShell window, to check your system’s current time zone, type the following cmdlet and press Enter:
Get-TimeZone
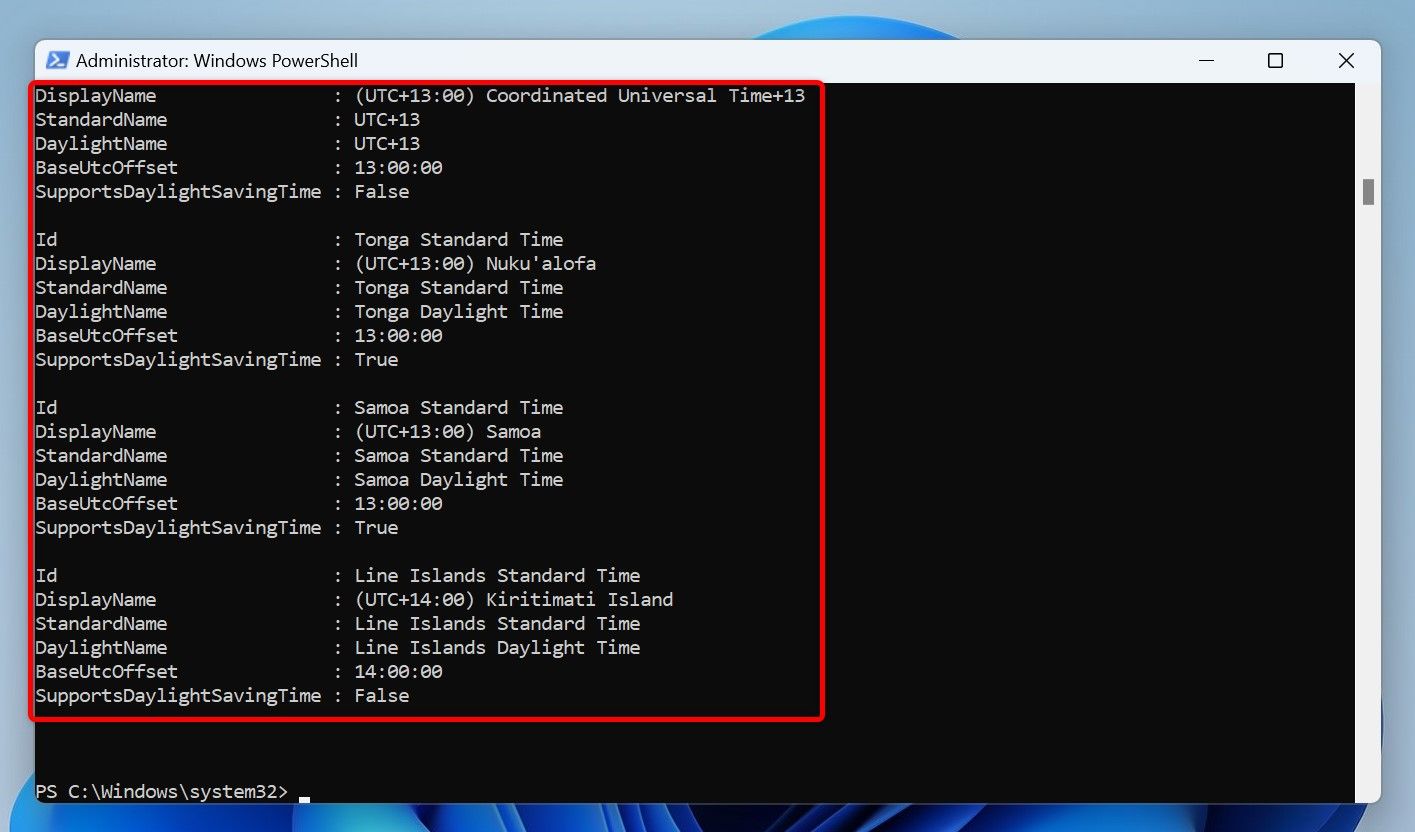
To view the available time zones that you can use, type the following cmdlet and press Enter. Note that this cmdlet will produce a lengthy list of time zones.
Get-TimeZone -ListAvailable
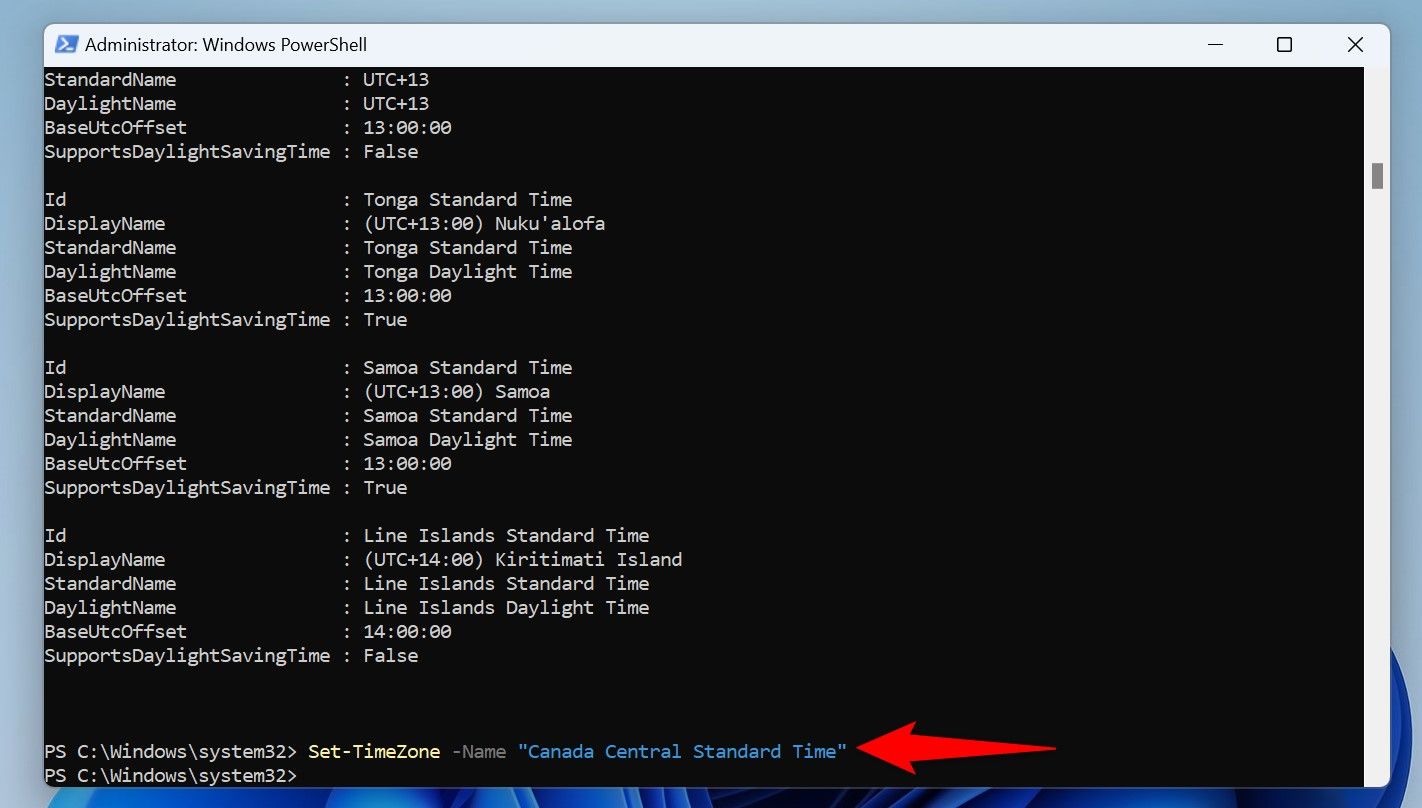
To change your system’s time zone, type the following command. Replace “Time Zone ID” with the time zone you want to switch to, but include the quotemarks. Then, press Enter.
Set-TimeZone -Name "Time Zone ID"
PowerShell has changed your system’s time zone. If you’d like to revert back to the original time zone, run the above command replacing “Time Zone ID” with the time zone you want to go back to.
And that’s how you make your Windows 11 PC global-friendly by having multiple time zones on it. Like this, your PC has multiple tools you can use to make remote working more convenient.


