

What is the GPT protective partition? Why is my disk showing as GPT protective partition in Disk Management? How to fix a GPT protective partition without losing data and regain access to it? In this article, EaseUS Software explains what this means and offers two ways to repair a GPT protective partition.
Before fixing GPT protective partition, it is necessary to understand what it is and what causes this error.
What is GPT protective partition?
A GPT protective partition is a partition protected by a GUID partition table. It is primarily used on servers to restrict users from manipulating sensitive data or to provide redundancy for critical files.
This is different from a regular partition:
- GPT protective partitions are not assigned unique drive numbers.
- GPT protective partitions typically can’t be deleted or reformatted in Disk Management.
- MBR-based operating systems can’t read GPT protective partitions and users can’t access them.
So what causes a GPT protective partition? It usually happens when the operating system or hardware does not properly recognize or support GPT disks. See the table below for more possible explanations:
| ⚙️ Causes | ⚒️ Details |
| Incompatible with older versions of Windows | 32-bit Windows (such as Windows XP) doesn’t support GPT partitions. Systems with traditional BIOS firmware may not support GPT partitions. |
| GPT disk errors | Corrupted or damaged GPT partition table may cause GPT protective partitions. |
| Manual creation | Some users or administrators might manually create GPT protective partitions to shield sensitive data or to maximize partition size. |
GPT protective partitions are usually caused by compatibility issues or intentional configuration to protect data. Although they prevent normal users from accessing certain partitions, they may also waste memory and affect overall system performance. With that in mind, let’s learn how to fix a GPT protective partition.
How to fix GPT protective partition without losing data
If you disk suddenly turned into a GPT protective partition, do not worry. Follow the instructions below to remove it.
Stage 1. Recover data from the GPT protective partition
When the HDD or SSD turns into GPT protective partition, the most important thing is to use a data recovery software (such as EaseUS Data Recovery Wizard) to restore the data from the GPT protective partition to another partition to avoid data loss.
Stage 2. Fix GPT protective partition error
The two methods provided in this section are suitable for removing a GPT protective partition from Windows 11/10/8/7/XP/Vista and reaccessing it.
- 💡EaseUS Partition Master is relatively easy to use due to its simple and friendly interface.
- 💡Diskpart is more complicated because of the command line input, but it still can be a quick fix.
Fix 1. Use EaseUS Partition Master
After recovering the data, the simplest, most direct way to fix a GPT protective partition is to format it to NTFS or another file system. Disk Management doesn’t allow you to directly format a GPT protective partition, but EaseUS Partition Master can help. You can use this tool to format a GPT protective partition without needing to type in any command lines.
Key features of EaseUS Partition Master:
- Compatibility: Works smoothly on Windows 11/10/8/7/XP/Vista
- Operational difficulty: Easy to use with a well-organized interface
- File systems supported: NTFS/FAT32/exFAT/ext2/ext3/ext4
Here’s how to format the GPT protective partition and restore it to normal status:
Step 1. Run EaseUS Partition Master on your PC and navigate to the Partition Manager section.
Step 2. Right click the GPT protective partition and select Format.
Step 3. Set the Partition label, File system, and Cluster size and check the Quick format box–or leave them at their default settings if you are happy with things as they are.
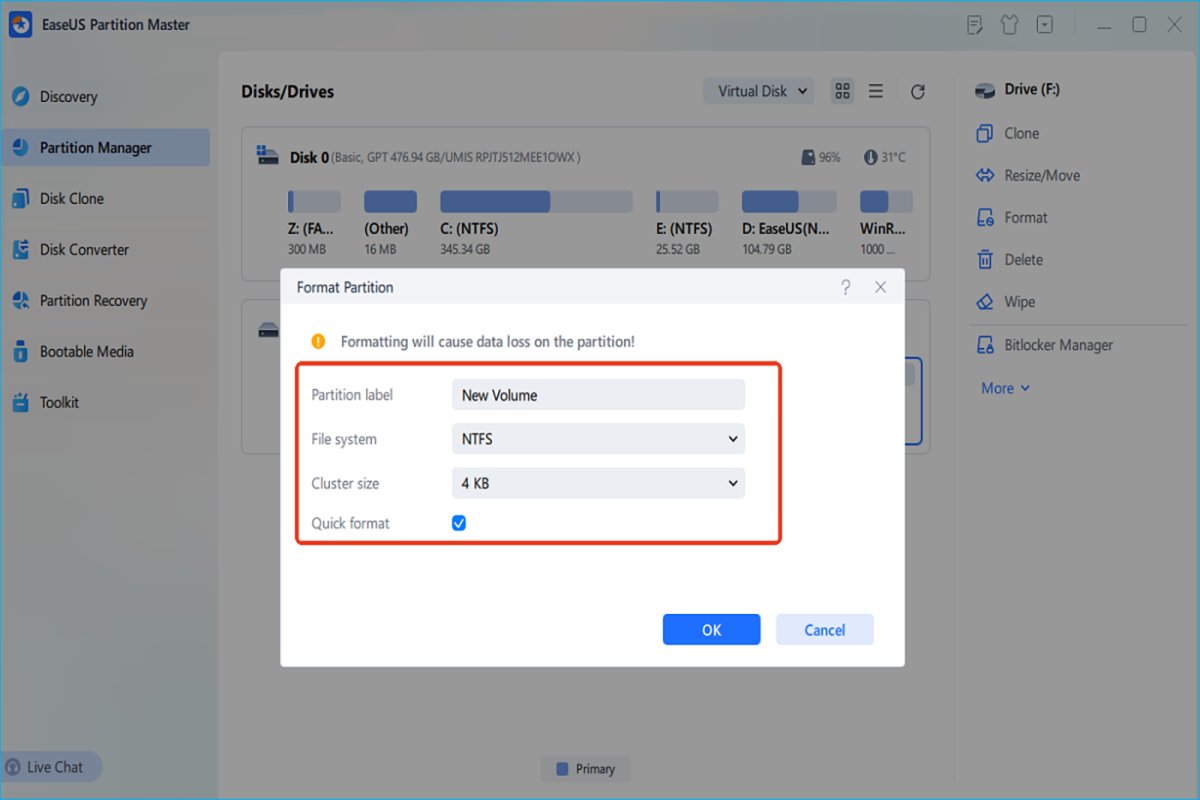
EaseUS
Step 4. Click OK to continue, then click Yes when you a warning about data loss pops up. Finally click Execute Task.
Fix 2. Use Diskpart
You can also use Diskpart to restore the GPT protective to a normal partition. Back up the data on any other disks you are using before you begin in order to avoid unnecessary data loss that might happen if you accidentally enter an incorrect command.
Here is how to gain access to the GPT protective partition:
Step 1. Press Windows + R, type cmd in the Run box, and press Ctrl + Shift + Enter to run Command Prompt as administrator.
Step 2. Then, type diskpart in Command Prompt and press Enter to launch Diskpart.exe.
Step 3. In Diskpart window, type the following command lines in turn, and press Enter to confirm after each:
- list disk
- select disk 1 (Replace 1 with the number of the disk where the GPT protective partition is)
- clean
- convert mbr
- exit
After this, Diskpart will successfully convert the GPT disk into MBR. In Disk Management, you can see the disk is shown as “Unallocated”. You will need to create partitions to use the disk.
Here’s a quick guide on how to create partitions:
Step 1. Open Disk Management > Right click the unallocated disk > Select “New Simple Volume”.
Step 2. Click Next to continue in the New Simple Volume Wizard. Type the volume size (in MB) and click Next.
Step 3. Assign the drive letter, select the file system, allocation unit size, and volume label. Make sure you check the “Perform a quick format” box. Then, click Next and Finish.
Conclusion
In this article, we have discussed two effective methods for repairing the GPT protective partition error. However, before attempting any repairs, it is crucial to recover data to prevent potential data loss. Additionally, when connecting a GPT disk to another computer, ensure that the target system supports GPT disks to avoid compatibility issues.


