The Everything app makes file searching effortless, but if you only use it for basic searches, you’re missing out. Recently, I began using filters, excluding folders and bookmarking searches, which completely transformed how I find files. Here’s how to use this powerful app the right way.
5
Exclude Unwanted Folders From Results
By default, Everything indexes all drives and folders, meaning every search returns results from your whole storage. This has two drawbacks: it can make finding specific files harder due to unnecessary clutter, and while Everything is fast, indexing too many locations can slightly slow down search results.
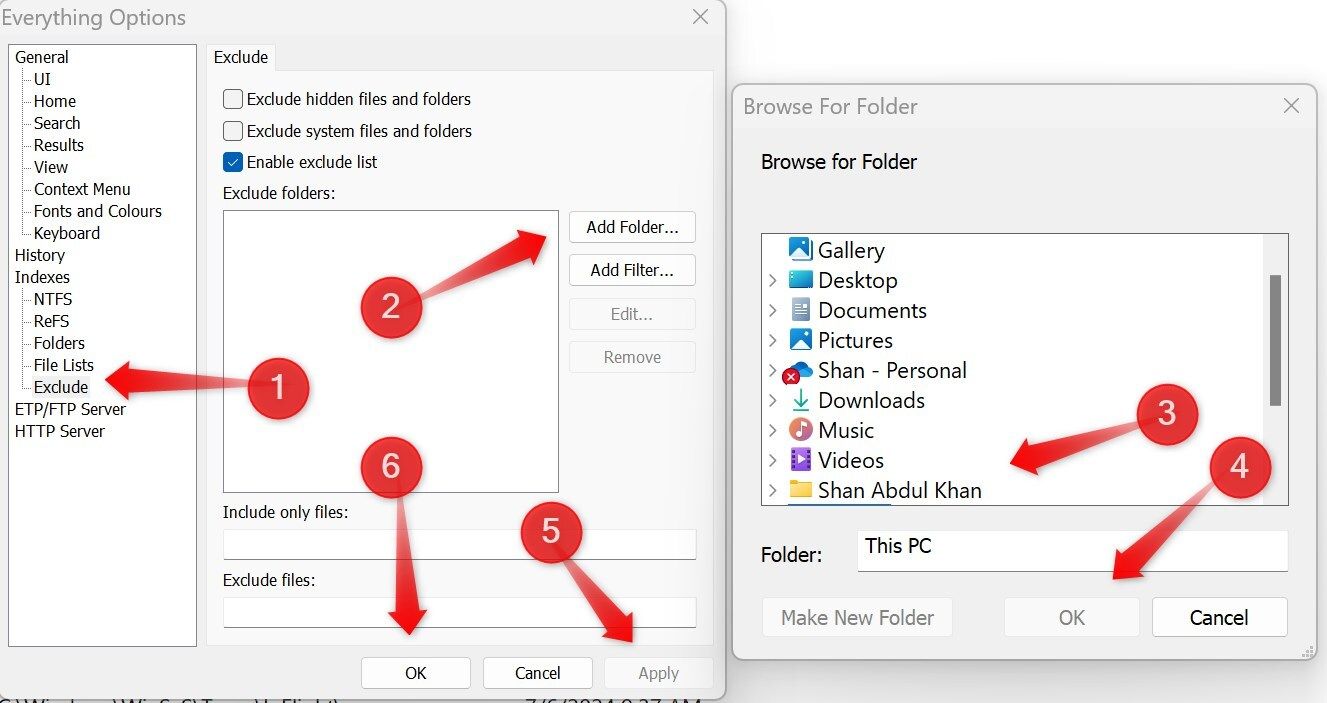
That’s why the first thing I do after installing Everything is exclude folders where I know I won’t be looking for the data. To do this, open the Everything app, click on the “Tools” menu, go to “Options,” and then navigate to the “Exclude” section. Then, click “Add Folder” and select the directories you want to exclude.
To exclude hidden or system files, check the relevant boxes under Exclude. Finally, click “Apply” and “OK” to save your changes.
When you launch the Everything app for the first time, it requires administrator permission to work. I always run it as an administrator by right-clicking the app and selecting “Run as Administrator.”
4
Save Time by Avoiding Repeated Searches
I often need to find the same files or folders, but I used to waste time repeatedly typing the same search query. Then, I discovered that Everything allows us to create bookmarks for frequently searched items, making it possible to run a search with a single click. If you’re tired of performing the exact searches repeatedly, this feature can be a game-changer.
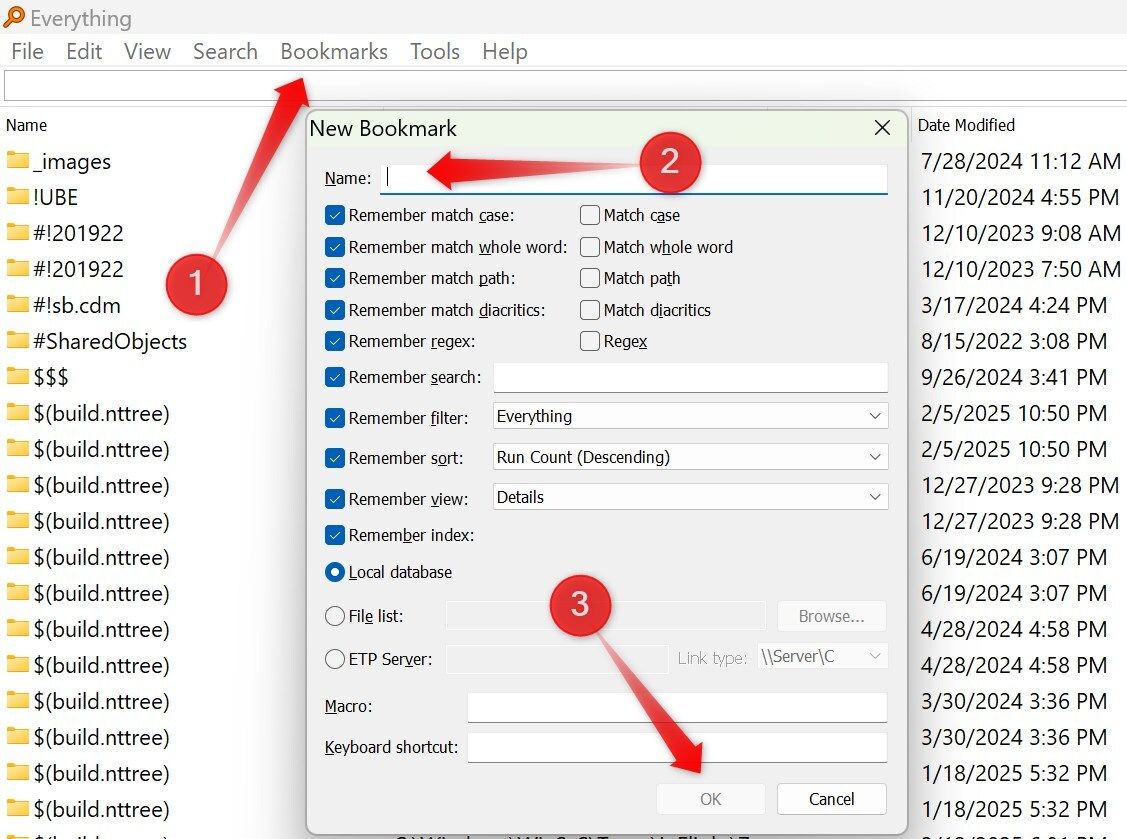
To use this feature, open the Everything app and perform your search as usual. Once the results appear, go to the “Bookmarks” menu at the top and click “Add to Bookmarks.” You can also use the shortcut Ctrl+D to open the bookmark creation window. In this window, you can refine your search before saving the bookmark.
To access a saved search, open the “Bookmarks” menu and select your bookmark—the results will appear instantly.

Related
I Can’t Imagine Using Windows Without the Everything App
Right after a Windows installation, this is the first app I install.
3
Refine Your Search Using Filters and Operators
Everything supports search filters and operators to refine your searches. By default, typing two terms like Project Files will show results containing both words. If you’re unsure about one of the terms, use Project | Files to find items containing either. To exclude a specific term, type !Project to filter out files with Project in their name.
You can also use filters to narrow down results. For example:
- size:>10mb – Finds files larger than 10 MB.
- ext:pdf – Displays only PDF files.
- dm:yesterday – Shows files modified yesterday.
- b*m – Uses a wildcard to find files that start with b and end with m, which helps handle typos.

These filters and operators make searching faster and more precise, but incorrect use may cause you to miss the file you’re looking for.
2
Refine Your Search With Advanced Search
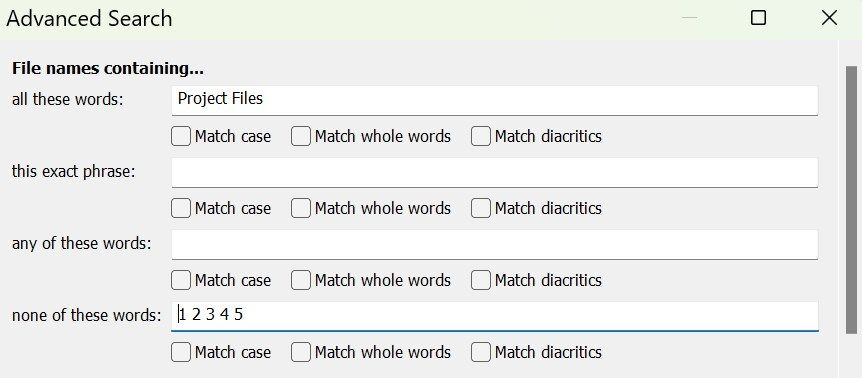
While search operators and filters help refine your results, Everything’s Advanced Search feature makes it even easier to locate files precisely. You can search based on:
- All words – Find files containing every word in your query.
- Exact phrase – Searches for an exact match if you remember it correctly.
- Any word – Displays results that contain at least one of the words.
- None – Excludes files with specific words.
Additionally, you can enable options to match cases, whole words, or diacritics if the file you’re searching for includes them. You can also search for files based on words or phrases within the file itself. To use Advanced Search, open the Everything app, go to the “Search” menu, and click “Advanced Search.”
Adjust the available filters, fill in the relevant fields, and click “OK” to get refined results. This will make finding what you’re looking for much more straightforward.

Related
1
Find Files Containing Specific Text
By default, Everything searches for terms only in file names. But did you know you can also make it search within documents, spreadsheets, and text files to find specific words or phrases? This powerful feature helps you pinpoint files that contain the exact data you need, making the Everything app even more helpful.
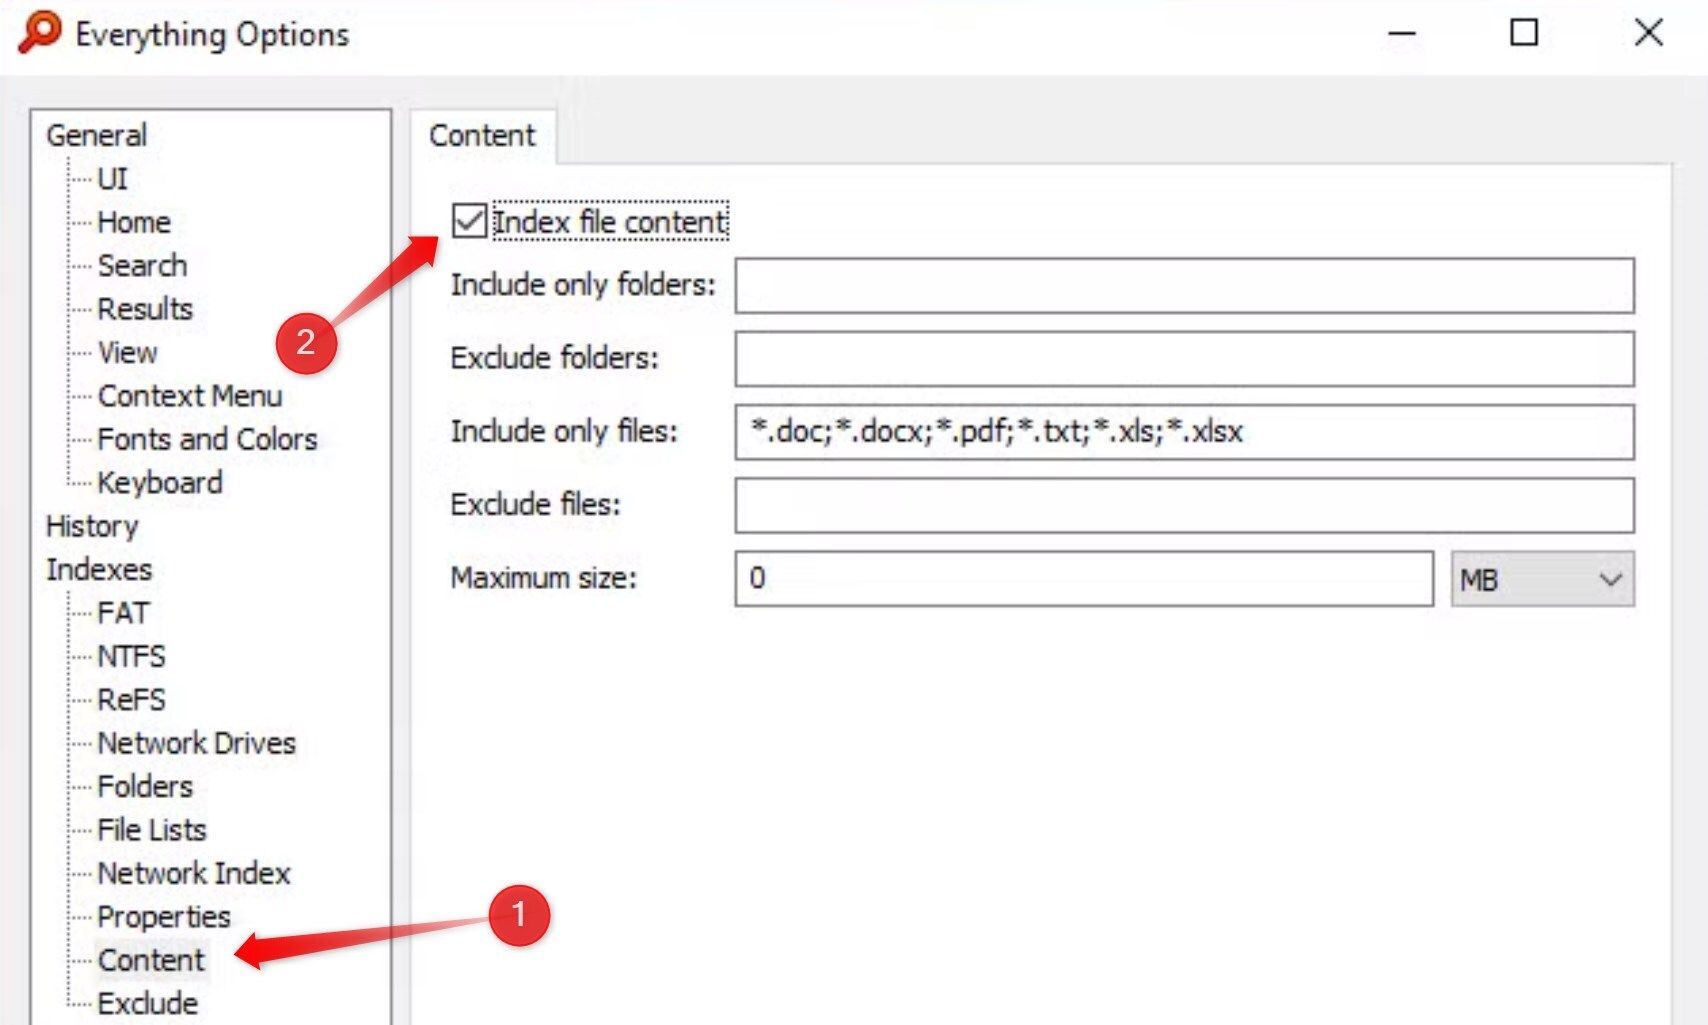
To enable this feature, you must first turn on content indexing, which is turned off by default. Open the Everything app, go to Tools > Options, select the “Indexes” tab, and navigate to “Content.” Check the box next to “Index File Content,” then click “OK.” You can also choose specific folders to include or exclude from indexing.
Once enabled, simply type content: your phrase in the search bar, and Everything will display files containing the exact phrase. Ensure the file isn’t encrypted, which may prevent the app from accessing it.
Everything is already a powerful tool; with the tips above, searching for files becomes even easier. By refining your searches, you can cut through the clutter and quickly locate the files you need.


