By default, iCloud data is secure while in transit. This data is stored in an encrypted format, while the encryption keys are housed in Apple data centers. 15 particularly sensitive data types, like passwords, Health data, and Journal data, use end-to-end encryption as standard. This sensitive data is encrypted with keys derived from your devices and device passcode, which are only accessible by the end user, and thus this data remains secure even in the case of a data breach in the cloud.
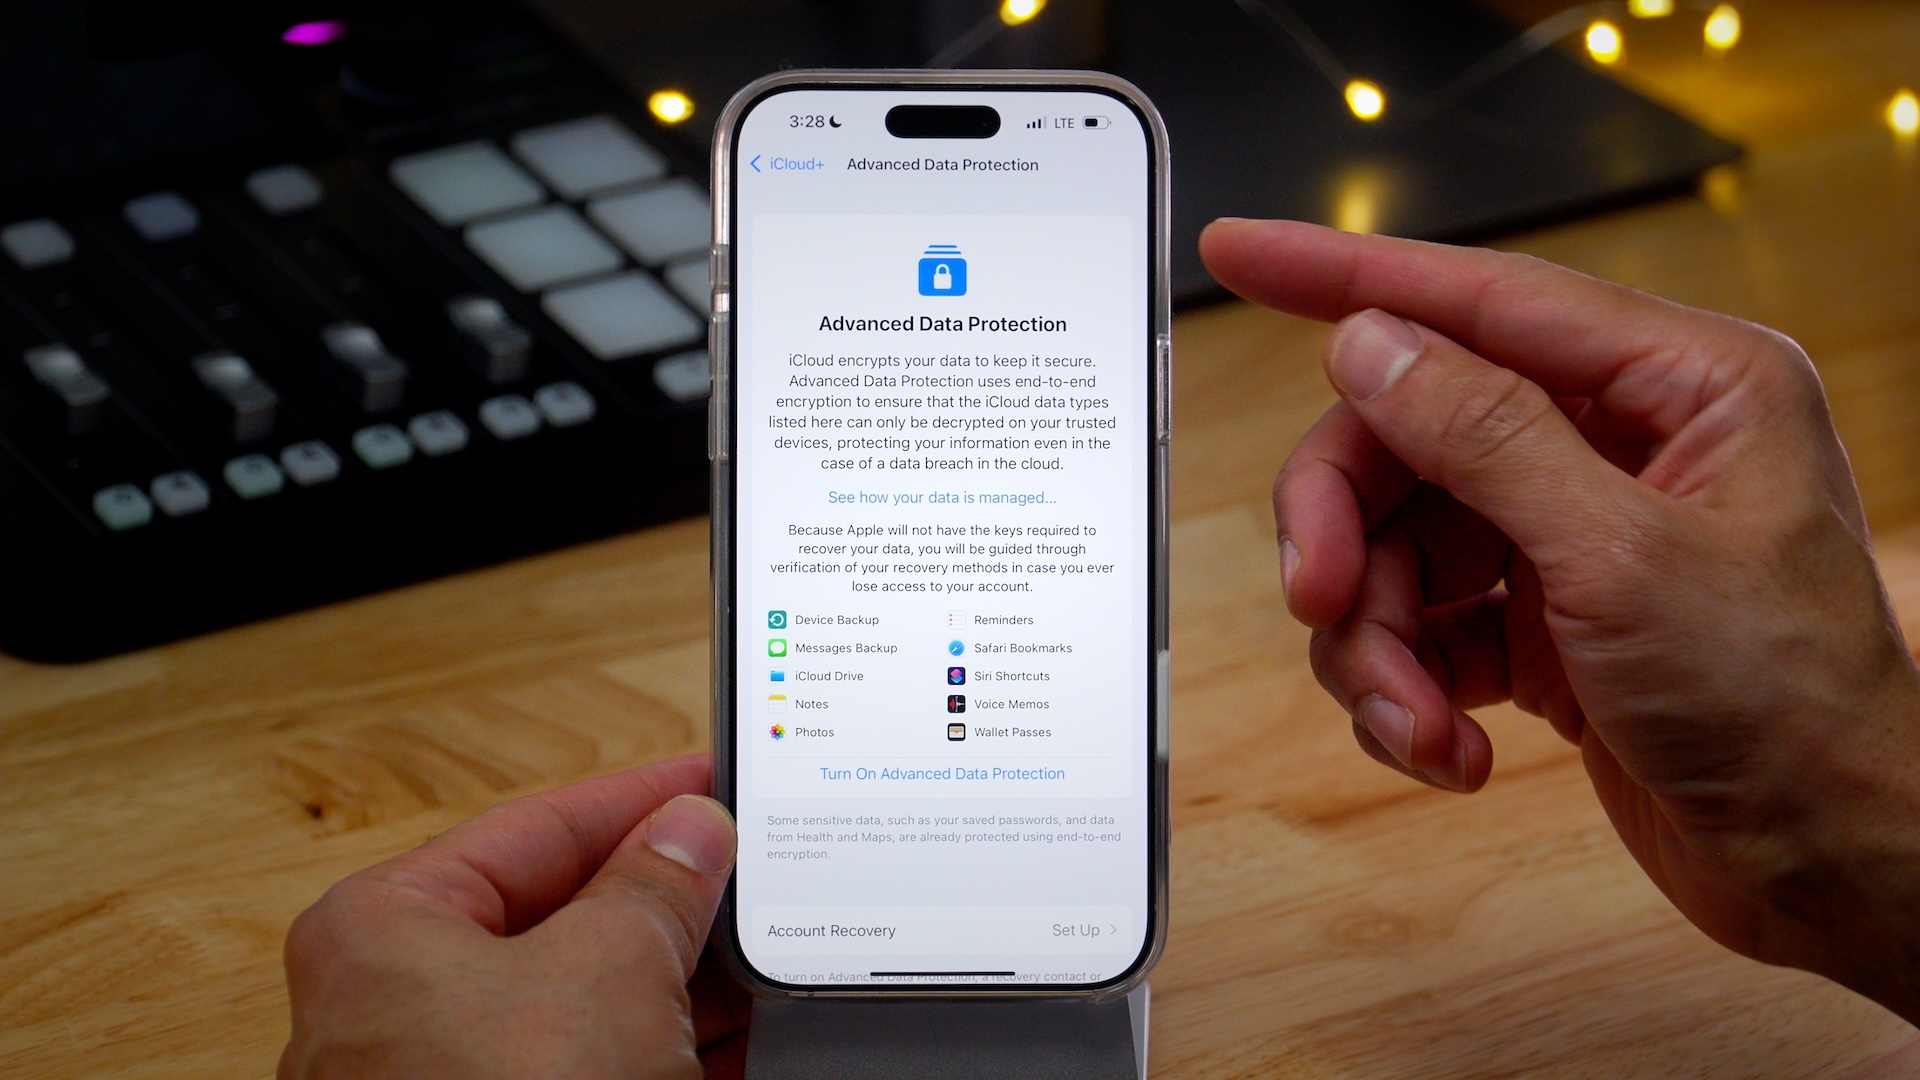
Advanced Data Protection, which is opt-in, provides end-to-end encryption for 10 additional iCloud data categories like Photos, Notes, and Reminders, meaning that Apple no longer possesses the keys to decrypt these categories as well.
It’s been couple of years since Advanced Data Protection rolled out. Are you using it? If not, should you consider using it? In this full tutorial and video walkthrough, I discuss what Advanced Data Protection is, how to enable it, and best practices for protecting your precious data. Be sure to subscribe to 9to5Mac on YouTube for more in-depth video walkthroughs.
Video: iOS Advanced Data Protection for iCloud explained
Subscribe to 9to5Mac on YouTube for more videos
What is Advanced Data Protection?
Standard Data Protection includes end-to-end encryption for 15 data types, including Passwords and Keychain data, Health data, Home data, etc. Advanced Data Protection offers this same type of protection for an additional 10 data types stored in iCloud, bringing the total to 25 end-to-end encrypted iCloud data categories. Here’s a look at what both Standard and Advance Data Protection include:
| Standard Data Protection includes… | Advanced Data Protection adds… |
|---|---|
| Passwords and Keychain | iCloud Backups (Device and Messages) |
| Health data | iCloud Drive |
| Journal data | Photos |
| Home data | Notes |
| Messages in iCloud | Reminders |
| Payment information | Safari Bookmarks |
| Apple Card transactions | Siri Shortcuts |
| Maps | Voice Memo |
| QuickType Keyboard learned vocabulary | Wallet Passes |
| Safari | Freeform |
| Screen Time | |
| Siri information | |
| Wi-Fi passwords | |
| W1 and H1 Bluetooth keys | |
| Memoji |
Of course, there exist categories that cannot be protected using end-to-end encryption due to the nature of the data. For example, iCloud Mail must communicate and interoperate with the global email system as a whole, and Contacts and Calendars are built on standards that do not support end-to-end encryption.
One of the most notable new changes that Advanced Data Protection brings to the table is the end-to-end encryption of iCloud Backups. This is notable because, prior to Advanced Data Protection, Apple could access your data, in the case of a court ordered subpoena, via the iCloud backups stored on its servers.
This was particularly useful for law enforcement investigations, because although iMessage on the iPhone has long been protected end-to-end via Standard Data Protection, messages data stored in iCloud Backups served as a workaround or loophole. With Advanced Data Protection enabled, even Messages data stored in iCloud Backups and via Messages Backups are now inaccessible by Apple, because the iCloud Backup itself is now end-to-end encrypted.
You are responsible for data recovery…
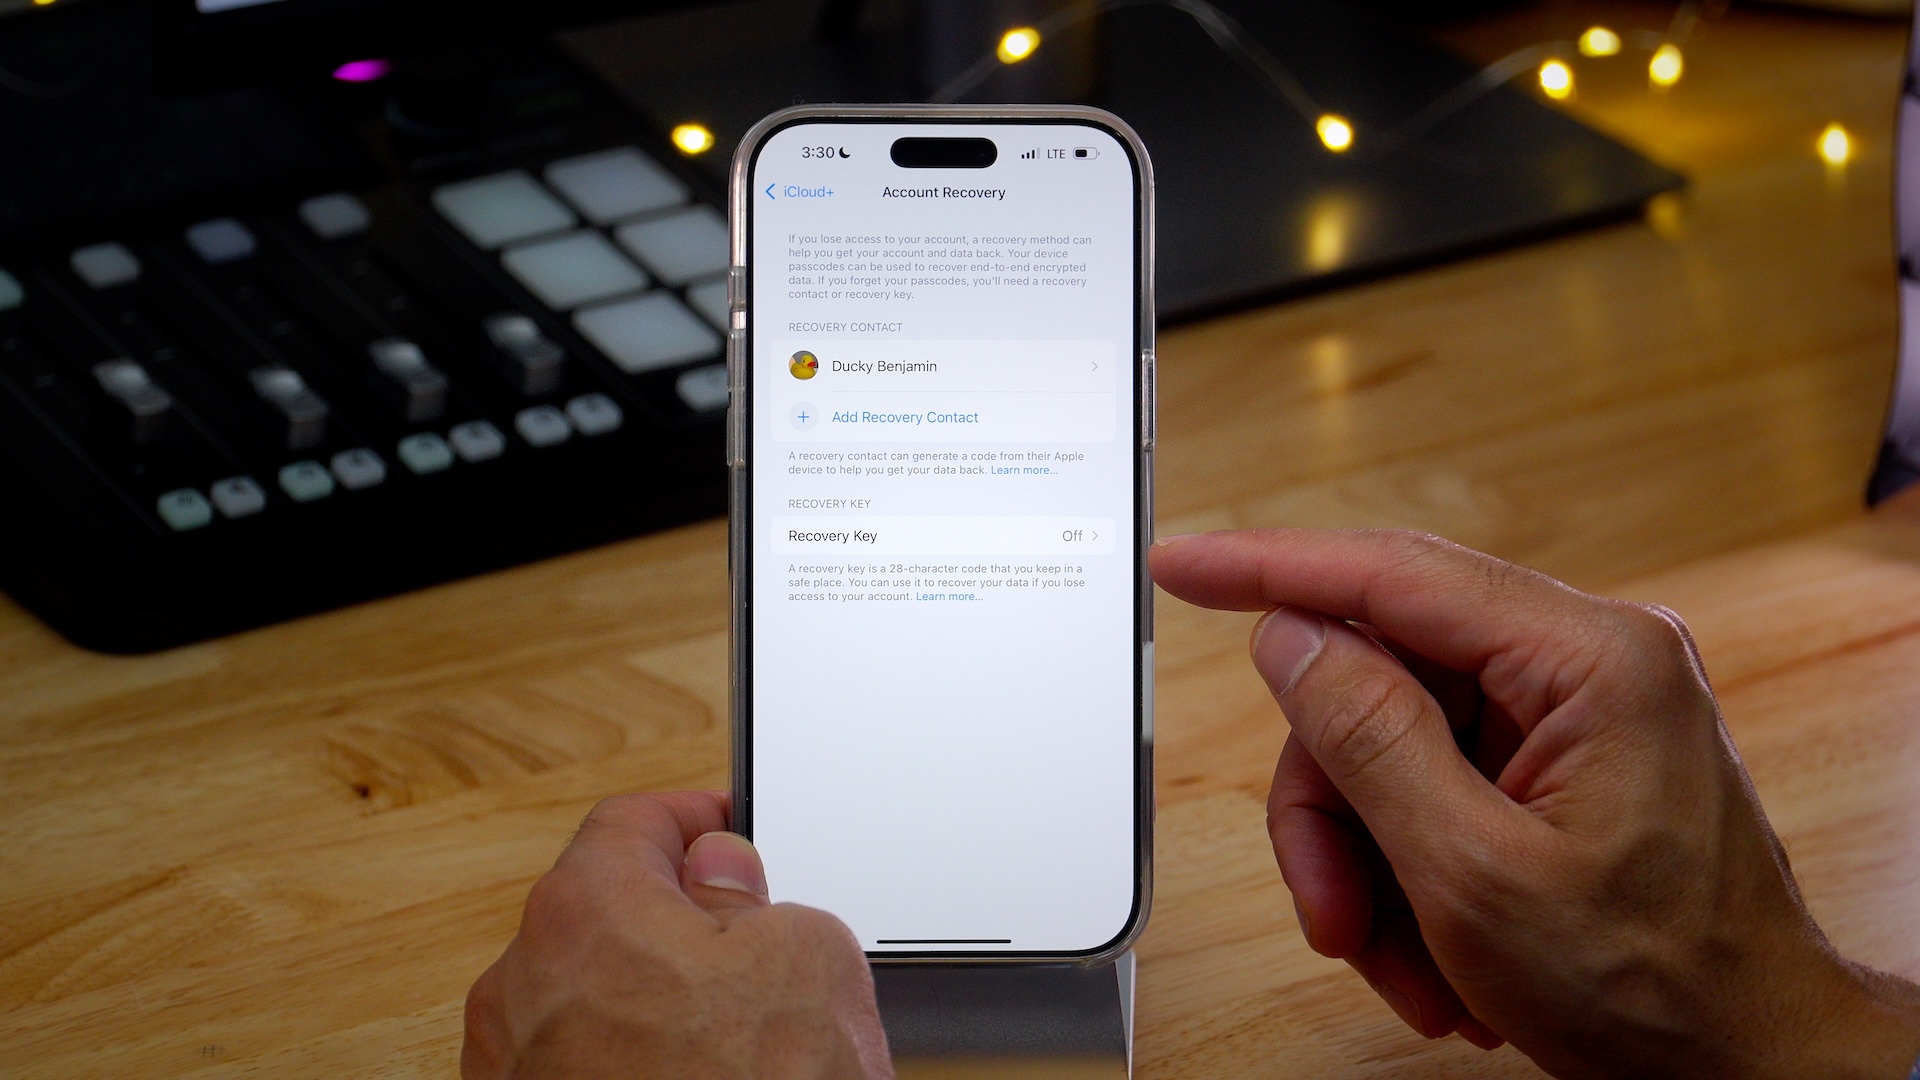
With Advanced Data Protection enabled, Apple no longer has access to decryption keys for your Photos, Notes, Reminders, iCloud Backups, etc. Hence, If you lose access to your account, only you can recover this data by using your device passcode or password, a recovery contact, or a recovery key. Along with setting up one or more trusted recovery contacts, it’s important that you print your 28-character recovery key on something like a physical hardware wallet that can be engraved with your recovery key and can’t be easily damaged or lost.


Before enabling Advanced Data Protection, you’ll be prompted to remove any devices from your iCloud account running older versions of software (anything below iOS 16.2 and macOS 13.1). While Advanced Data Protection is enabled for your iCloud account, you won’t be able to sign in to your account using your Apple ID for devices running older software versions. You’ll need to update the software on those devices first, or disable Advanced Data Protection, before they’re able to be used with your iCloud account.
Once Advanced Data Protection is enabled, it is enabled for all devices linked to your iCloud account.
Advanced Data Protection prerequisites
Before enabling Advanced Data Protection for iCloud, ensure all of the following are true:
- Your Apple ID has two-factor authentication enabled.
- A passcode/password is enabled for your device.
- You’re running the latest version of software on all of your devices:
- iPhone with iOS 16.2 or later
- iPad with iPadOS 16.2 or later
- Mac with macOS 13.1 or later
- Apple Watch with watchOS 9.2 or later
- Apple TV with tvOS 16.2 or later
- HomePod with software version 16.2 or later
- Windows computer with iCloud for Windows 14.1 or later
- You have at least one account recovery key and/or recovery contact set. The Advanced Data Protection setup will prompt you to do this if you have not.
- You cannot enable Advanced Data Protection on new device until a time threshold elapses. You’ll need to setup Advanced Data Protection on an older device instead.

Setting up Account Recovery
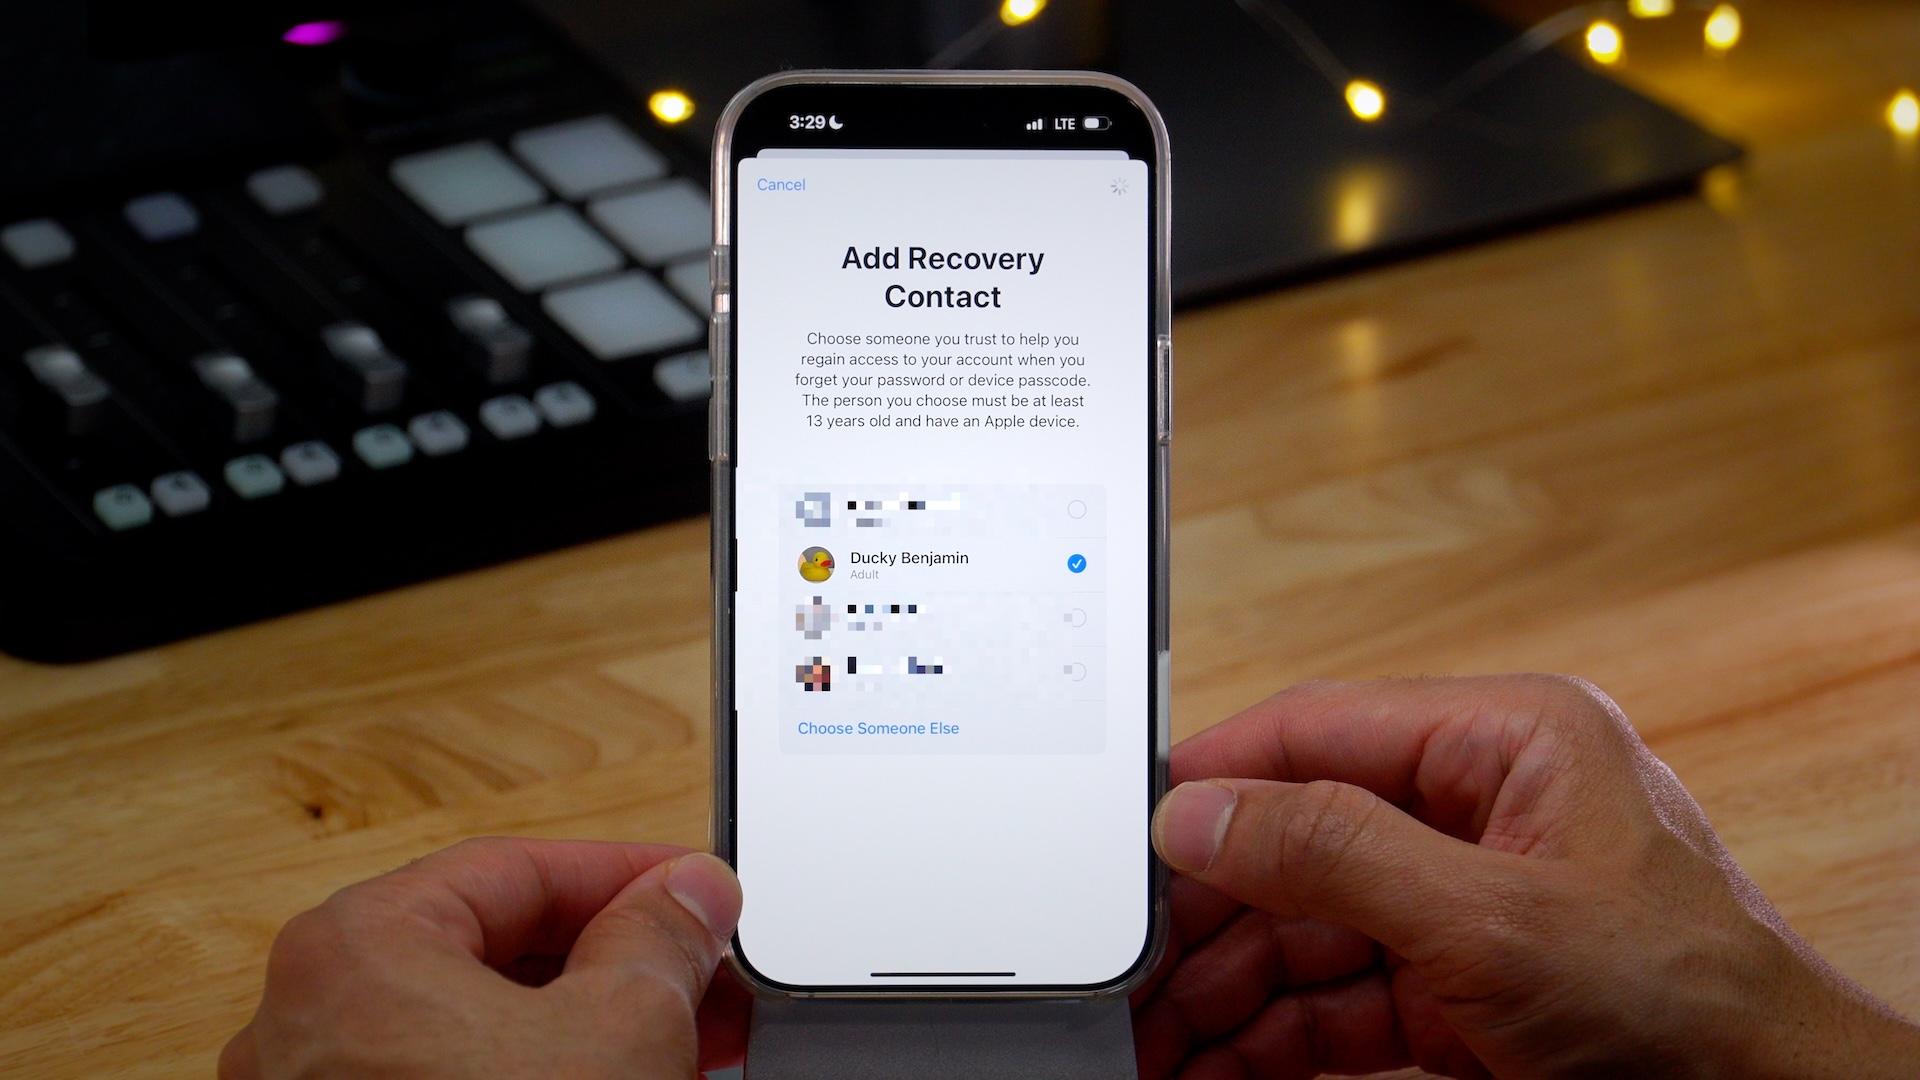
Add Recovery Contact
Your recovery contact will never be able to access your data, but will be able to generate a code from their Apple device to help you regain access to your data.
A recovery contact should be a friend or family member over the age of 13 that you trust. Your recovery contact must have an Apple Device. If you forget your password or passcode, you can contact your recovery contact in person or by phone to help.

Step 1: Go to Settings →
Step 2: Tap Add Recovery Contact and you’ll be asked to verify with Face ID or device passcode.
Step 3: iOS will suggest contacts from your family sharing list if applicable, but you can choose someone else from your contacts as well. Select a contact and then tap the Next button in the upper right-hand corner.
Step 4: You’ll next be prompted to let your contact know that you’ve added them as a recovery contact. You can send the canned message that Apple provides by tapping the Send button at the bottom of the screen, or customize the message by tapping Edit Message before sending.
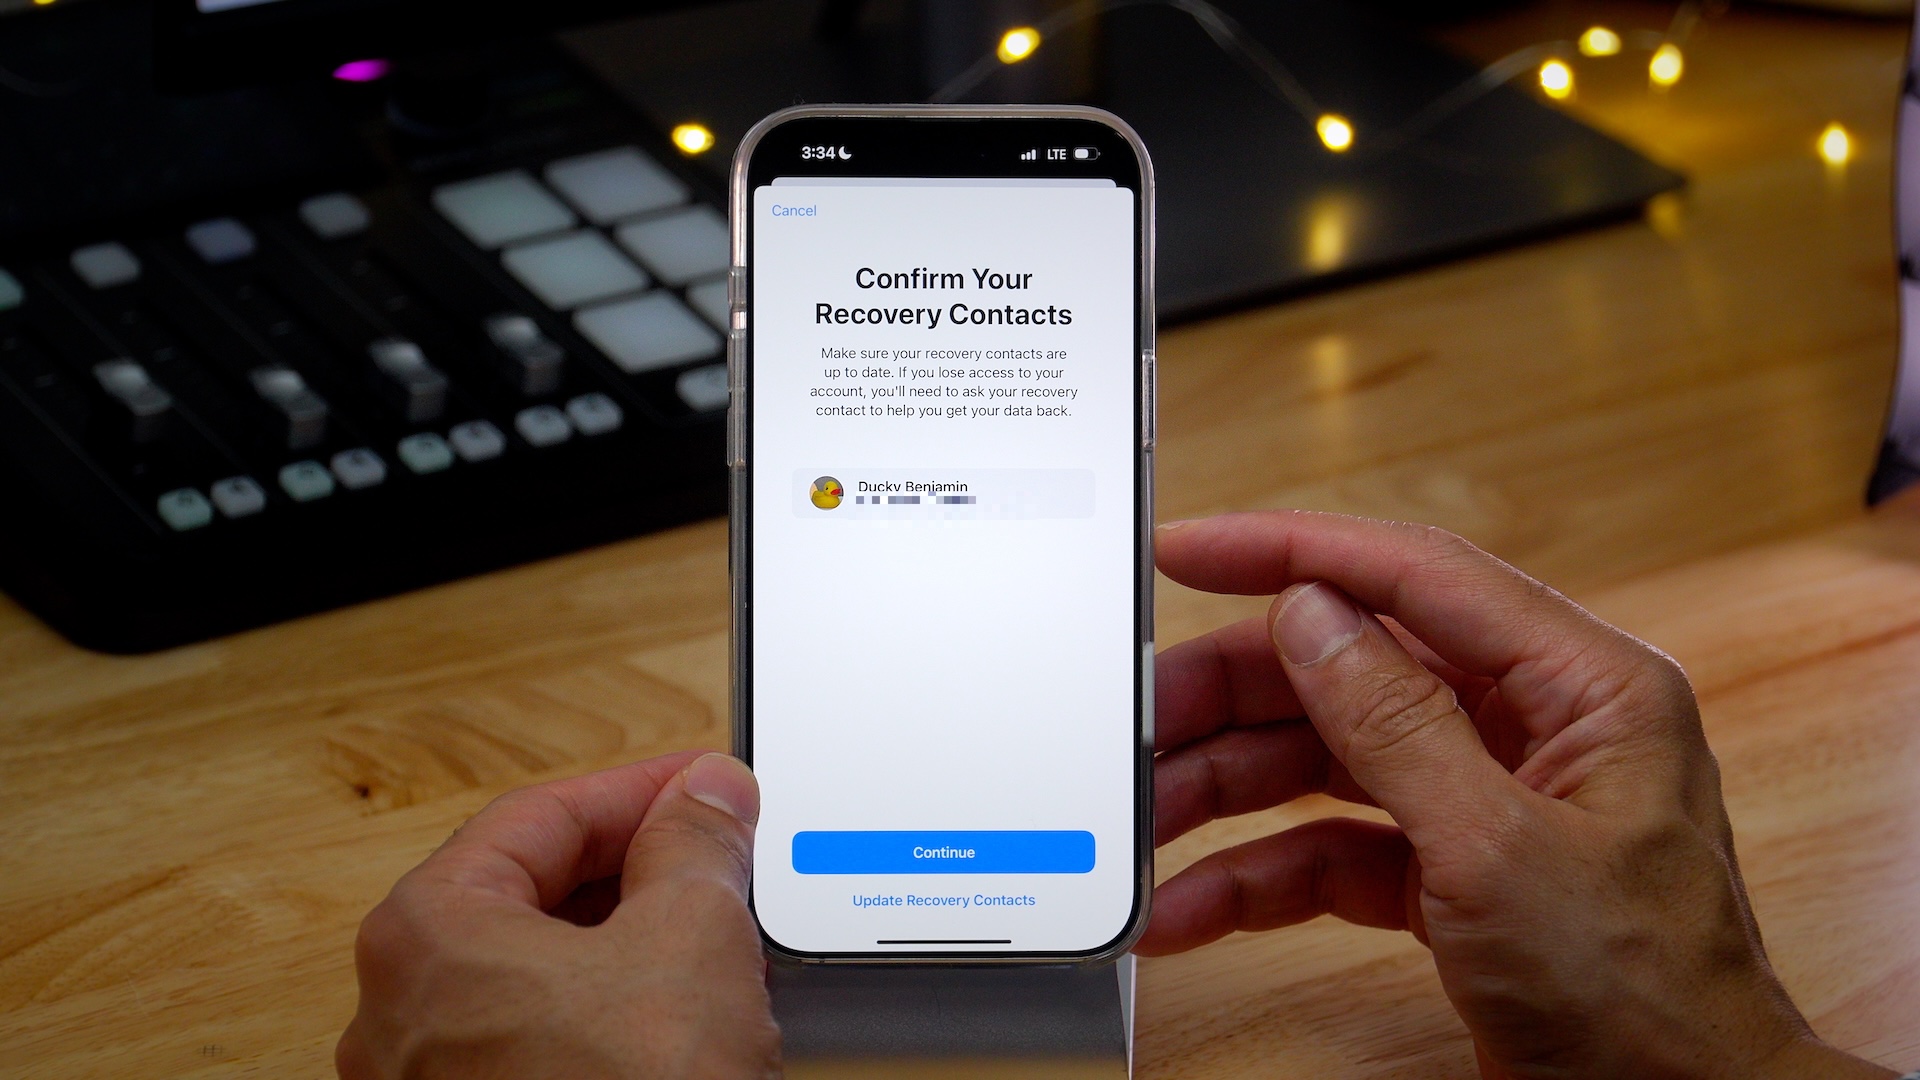
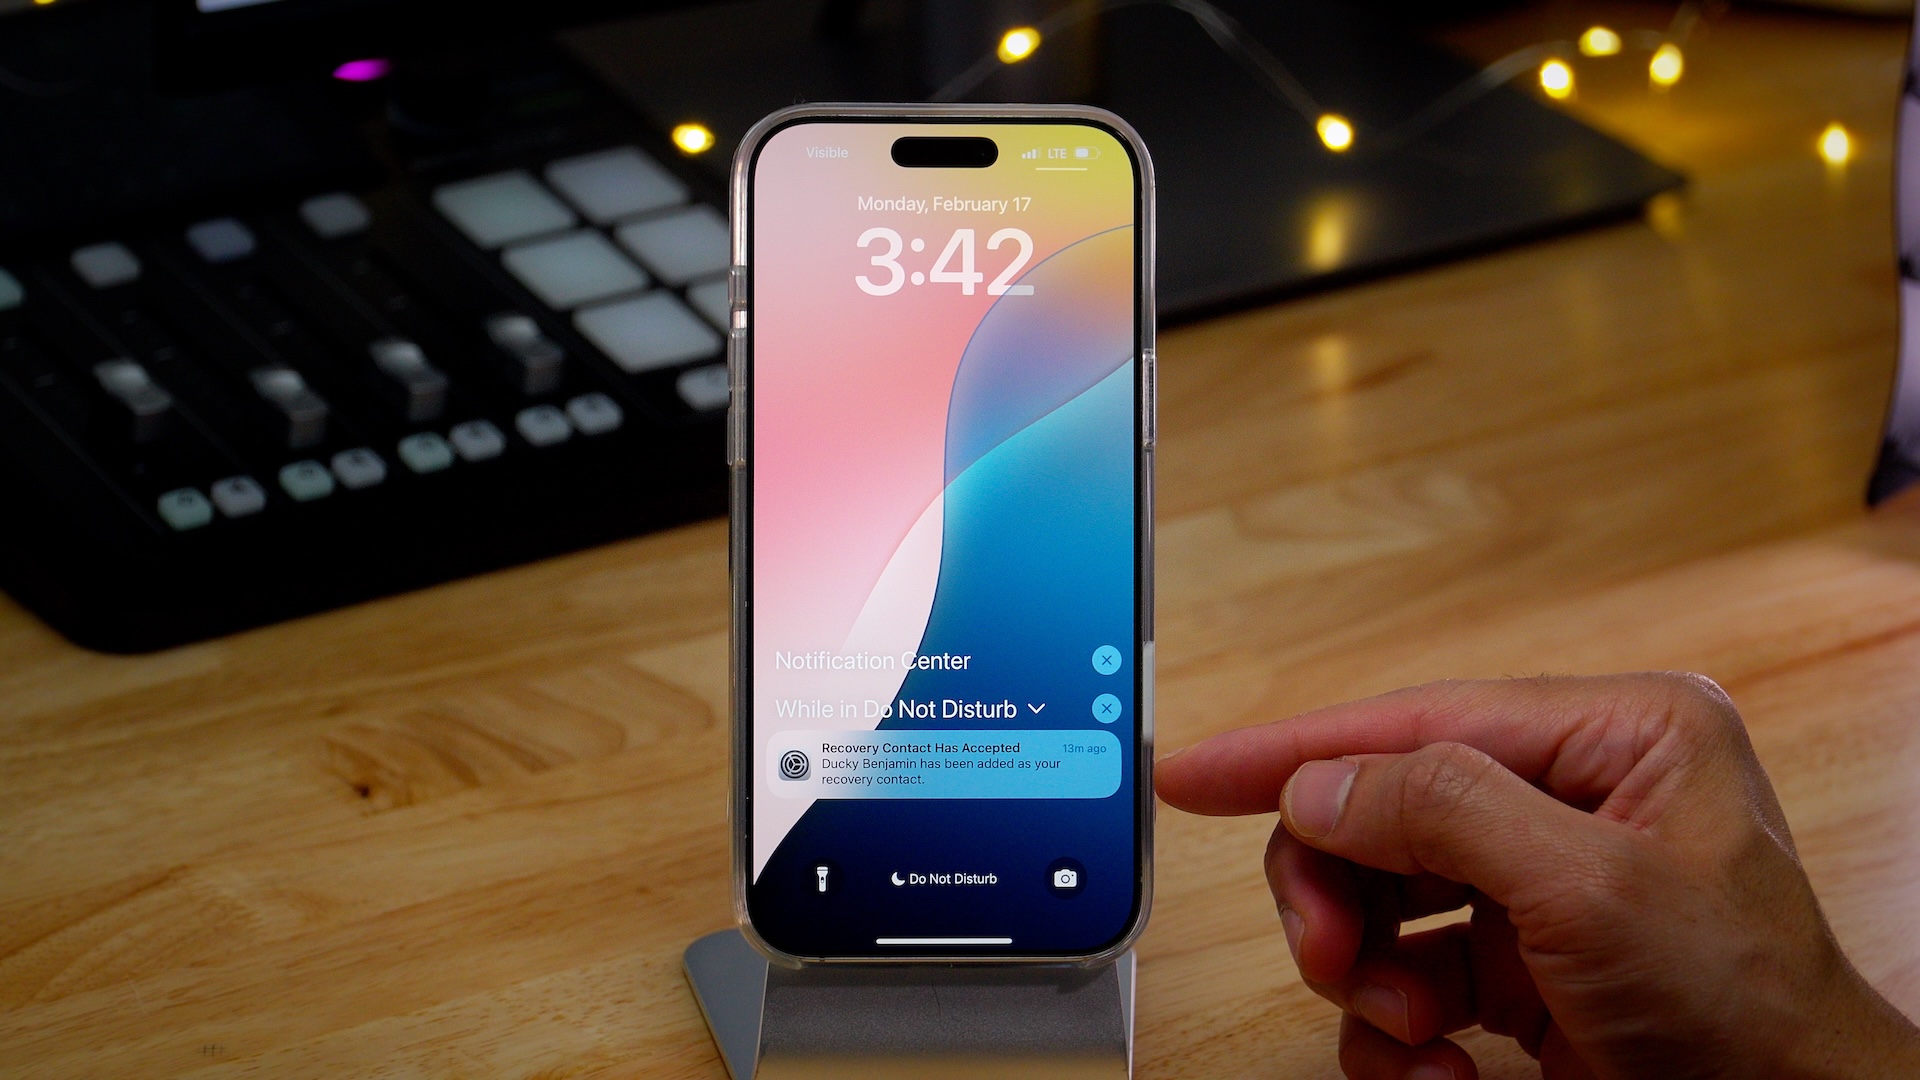
Step 5: After the recipient receives the message, they’ll need to tap the Account Recovery Contact link and tap the Accept button to confirm. Whether or not the user accepts or declines, the requester will be notified.
Add Recovery Key
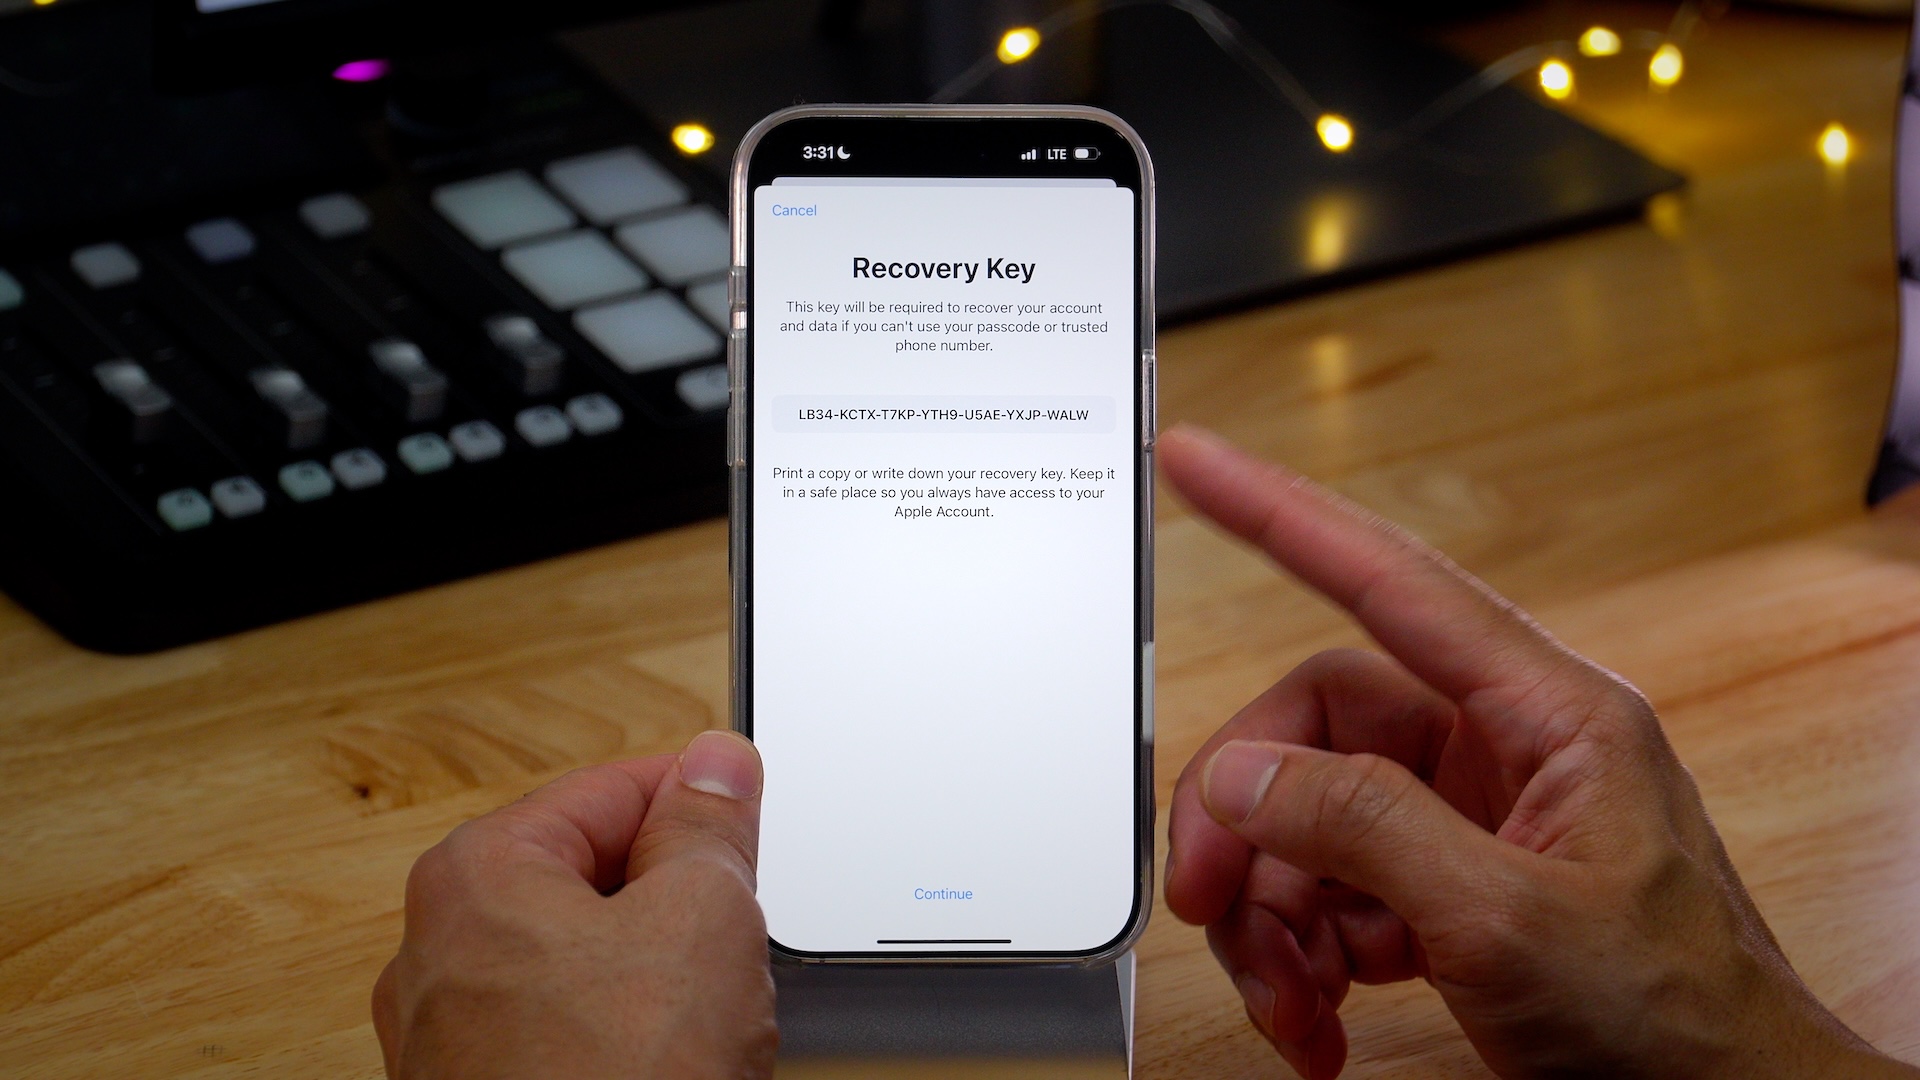
Step 1: Go to Settings →
Step 2: Tap Recovery Key → Turn On Recovery Key → Use Recovery Key.
Step 3: Enter your iPhone’s passcode to turn on the recovery key.
Step 4: Your 28-alphanumeric recovery key will now be displayed. Print a copy or write down your recovery key. I suggest employing a cold storage solution for more secure and permanent safekeeping.
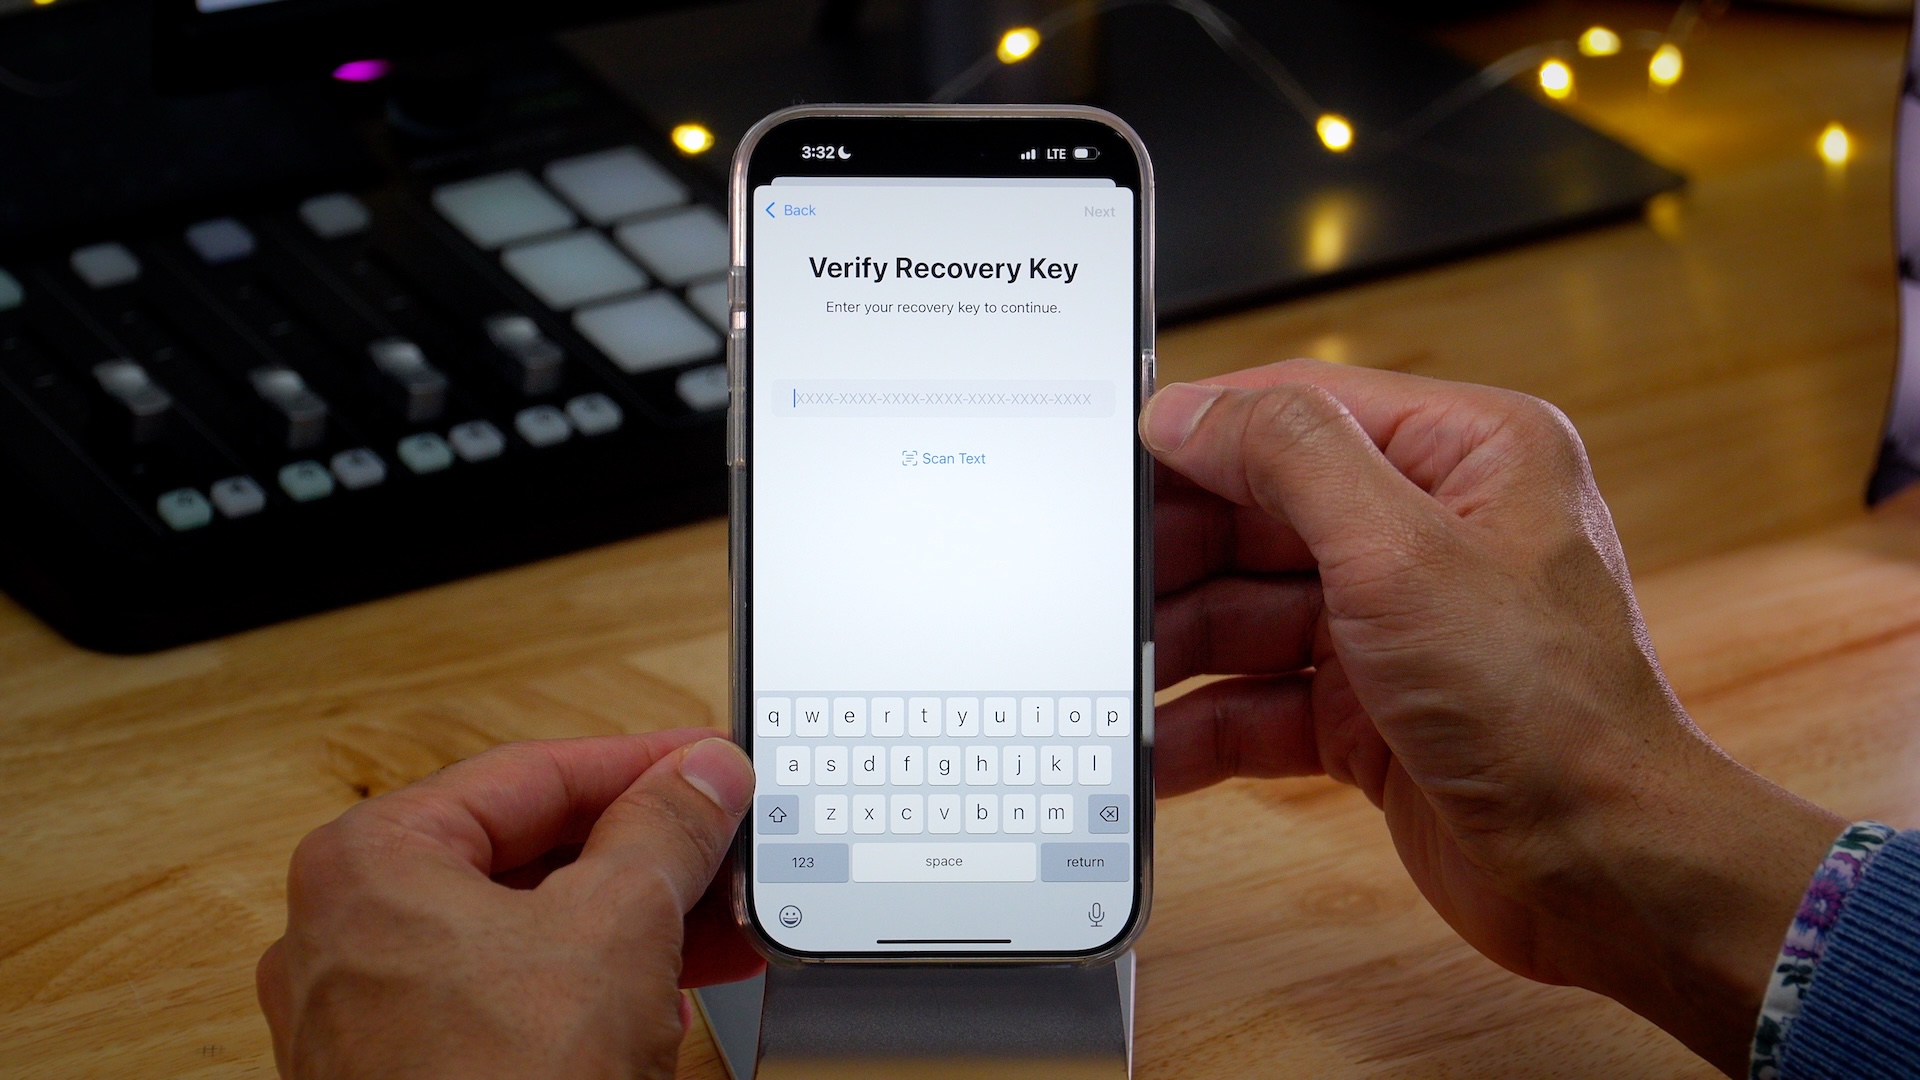
Step 5: Tap Continue, and you’ll be prompted to enter the 28-digit recovery key to prove that you wrote it down correctly. Tap Next once the key is entered.
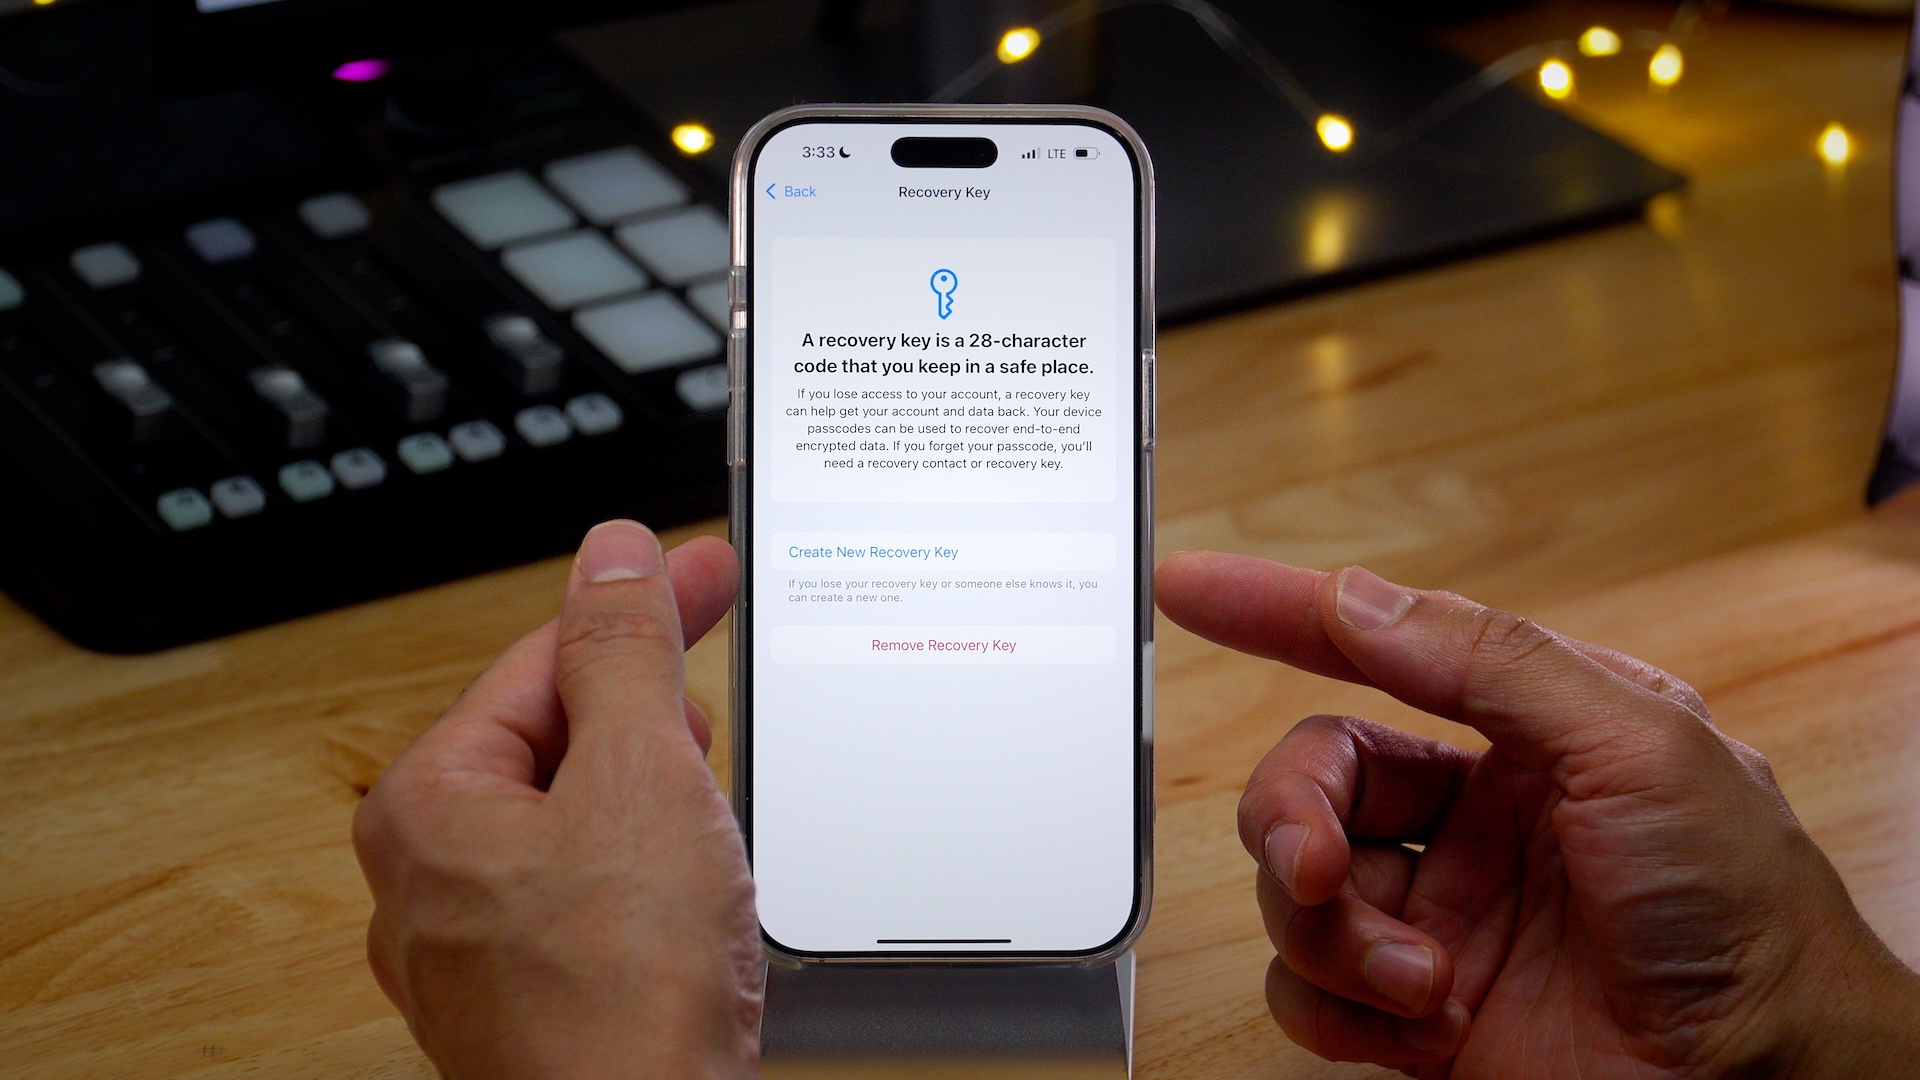
Step 6: If the recovery key was entered correctly, you’ll be taken back to the Sign-In & Security page with the Recovery key parameter set to On. If you choose to ever create a new recovery key because you lost it or someone else knows it, the new key will replace the old key.
How to enable Advanced Data Protection
Step 1: On your iPhone or iPad go to Settings →
Step 2: Scroll down and tap the Advanced Data Protection panel, then tap Turn on Advanced Data Protection.
Step 3: You’ll see a splash screen indicating that you will be responsible for data recovery. Tap the Review Recovery Methods button to review the recovery options you’ve established, otherwise tap Set Up Account Recovery if you’ve yet to establish recovery options and refer to the Setting up Account Recovery section above.
Step 4: If you have a recovery contact established, and you’re satisfied with it, tap the Contacts Up to Date button to proceed. Otherwise, you can tap Update Recovery Contacts.
Step 5: Next, assuming you have one set up as instructed above, you’ll be asked to verify your 28-character recovery key to continue. Enter your recovery key and tap the Next button in the upper right-hand corner.
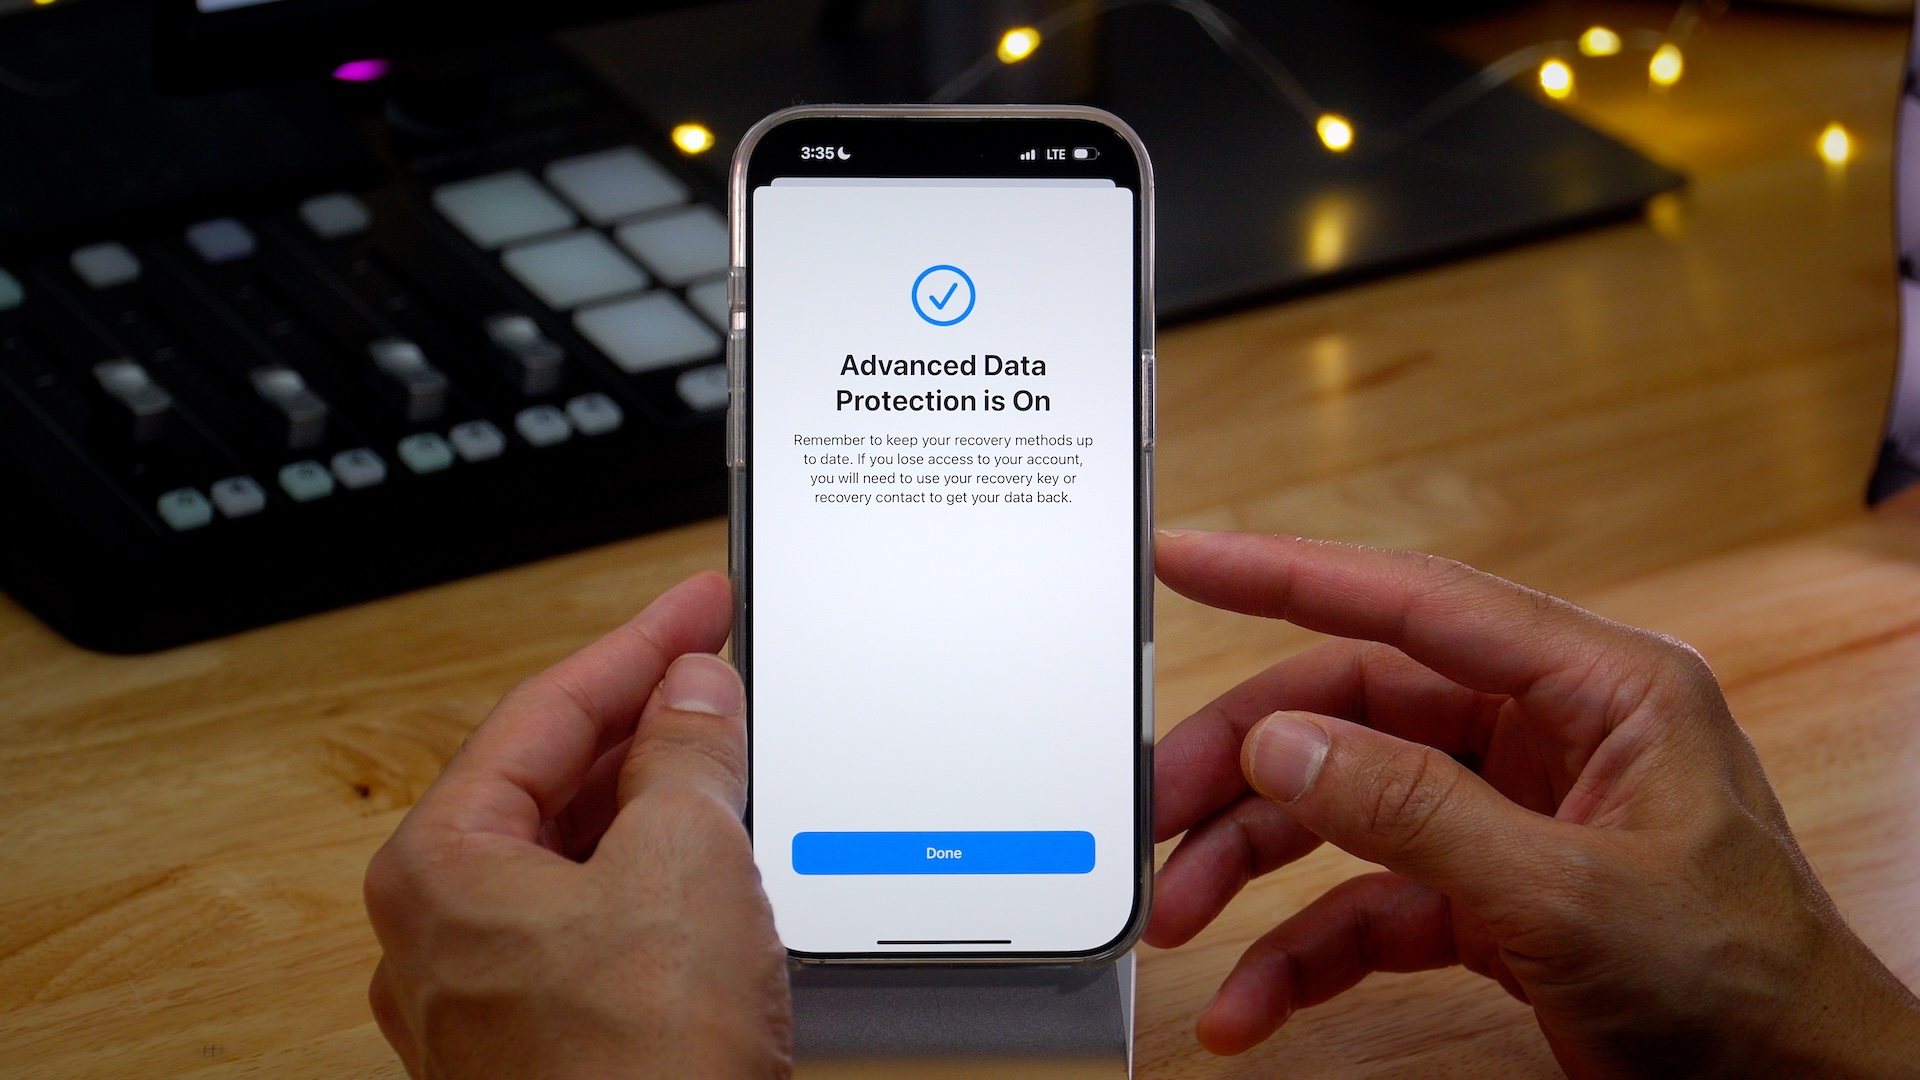
Step 6: Enter your device’s passcode to enable Advanced Data Protection. Tap the Done button once you get the Advanced Data Protection is On confirmation page.


How to disable Advanced Data Protection
Step 1: On your iPhone or iPad go to Settings →
Step 2: Scroll down and tap the Advanced Data Protection panel, then tap Turn Off Advanced Data Protection.
Step 3: Tap Turn Off and then enter your iPhone’s passcode to verify.
Your device will securely upload the needed encryption keys to Apple’s servers and Advanced Data Protection will be disabled. Your Account Recovery options will be maintained, unless modified.
9to5Mac’s Take
Advanced Data Protection is simply a way to enable end-to-end encryption across more iCloud data types, bringing the total number of data types to 25. If you’re looking for a way to increase the security of the data stored in your iCloud account this is a great free way to do it. Just remember that you take on additional responsibility for your data, since Apple no longer houses the decryption keys when Advanced Data Protection enabled. For many people, that’s a small price to pay for the added security of end-to-end encryption.
Are you currently using advanced data protection? Why or why not? Sound off down below in the comments with your thoughts.
FTC: We use income earning auto affiliate links. More.