Back in June 2022, Apple teased Freeform, its new whiteboard app. During the WWDC22 main keynote, the company highlighted some of its features and mentioned that it would ship by the end of the year as part of iOS 16, iPadOS 16, and macOS Ventura.
For those unfamiliar, think of it as a canvas to jumpstart your creative juices and plan ahead. It supports text, doodling, and media and file insertion. However, there’s so much more you can do to brainstorm. This is a complete guide for this built-in app across your great iPhone, versatile iPad, or powerful Mac.
The Freeform app works similarly and syncs across all three operating systems. Therefore, we’ll only demonstrate it on the iPad since it makes the most sense the most on this device. Those who are using iPhones or Macs instead can enjoy the same set of features, minus Apple Pencil support. Let’s get started!
Freeform Requirements
To use the Apple Freeform app, you will need at least one device that meets the following criteria:
- An iPhone running iOS 16.2 or later.
- An iPad running iPadOS 16.2 or later. Using an Apple Pencil is encouraged but not required.
- A Mac running macOS Ventura 13.1 or later.
The different app sections
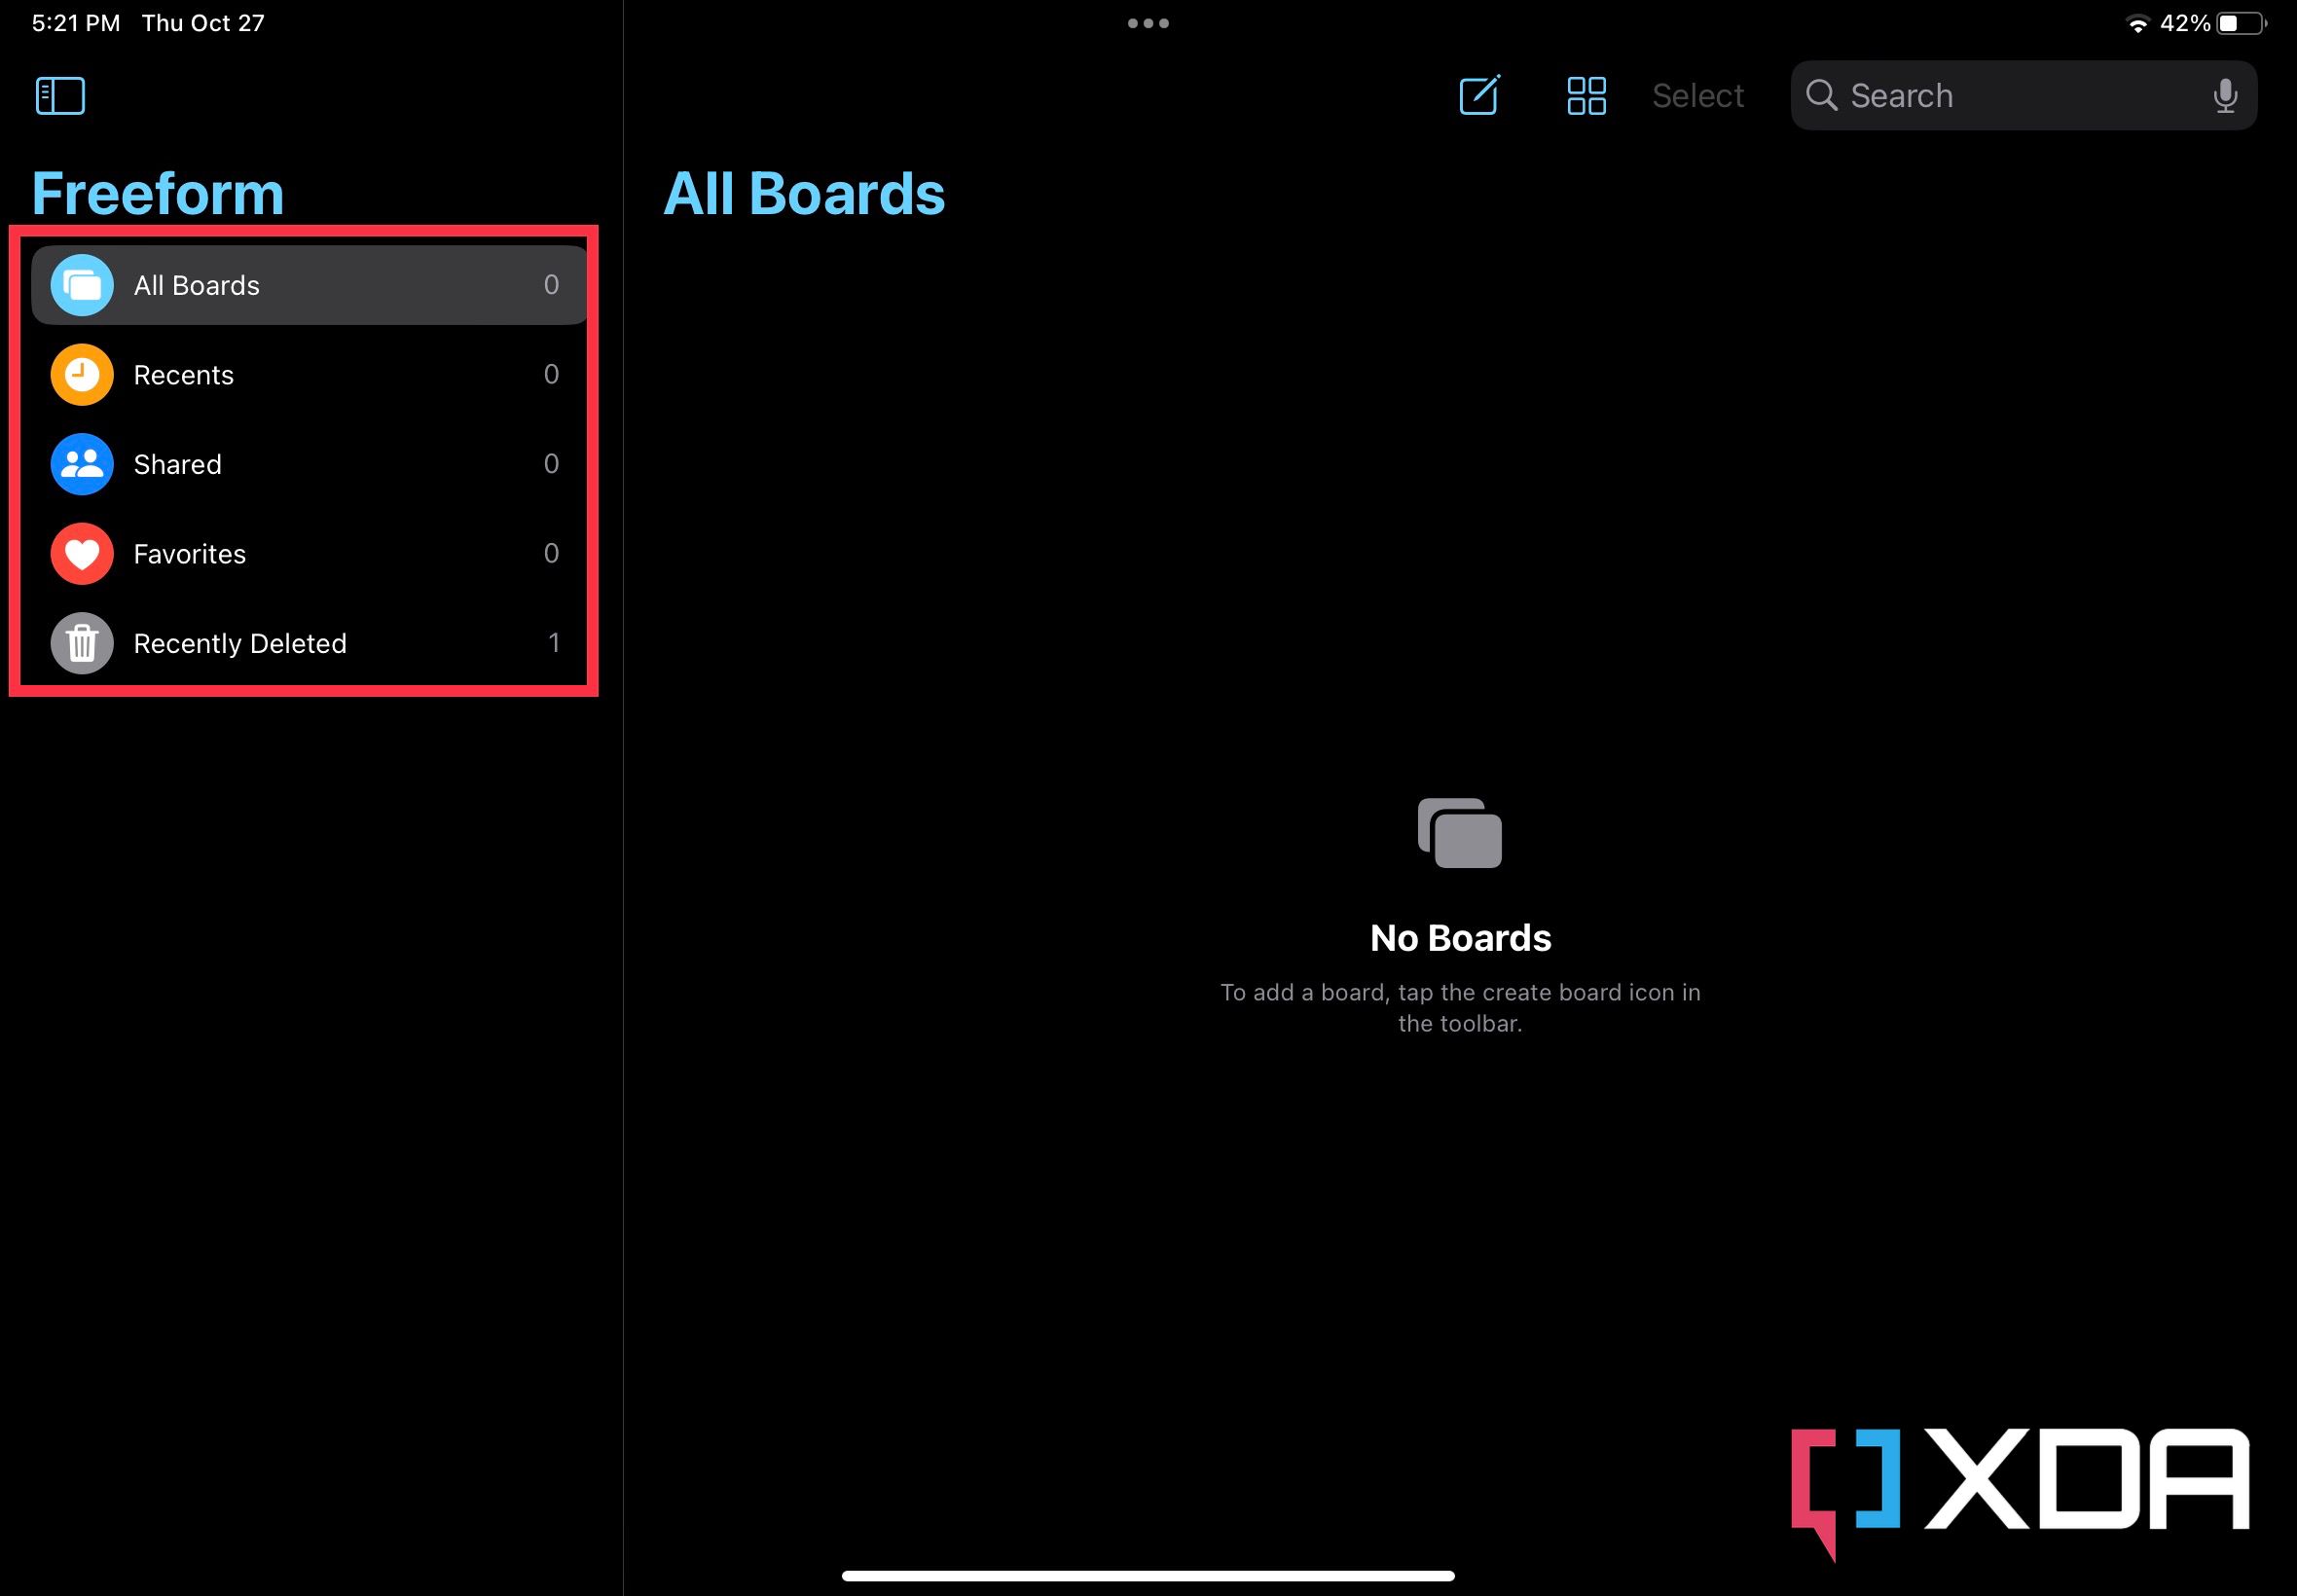
By default, the Freeform app has four sections: All Boards, Recents, Shared, and Favorites. In the app though they’re called boards, and they can just be an infinite white space for expressing yourself. If you delete a board, you get a fifth Recently Deleted section. You can also create as many boards as you need.
- All Boards: As its name suggests, this section displays every single board you’ve created on the Freeform app. You get to view the boards as icons or in a list. You also get to sort them by name, date, etc.
- Recents: This section includes a list of boards you’ve recently created or modified. You similarly get to choose between icons or a list and sort them depending on your preferences.
- Shared: Considering that many people use Freeform to collaborate with others, Apple has included a Shared section. Here, you can view all the boards other users participate in. You can also change the view type and sorting.
- Favorites: If you have plenty of boards and want to highlight specific ones you frequently use, favoriting a board will add it to this section. This section supports sorting and changing the view type.
- Recently Deleted: As you may have guessed, when you delete a board, the Freeform app moves it to this section for 30 days. After 30 days, the app permanently deleted it. From Recently Deleted: you get to recover or immediately delete a certain board if you would rather not wait for a month.
These five sections are available across Freeform on iOS, iPadOS, and macOS. If you enable iCloud sync for Freeform through the Settings app, your boards will remain up to date across all sections on your compatible Apple devices.
Freeform Settings
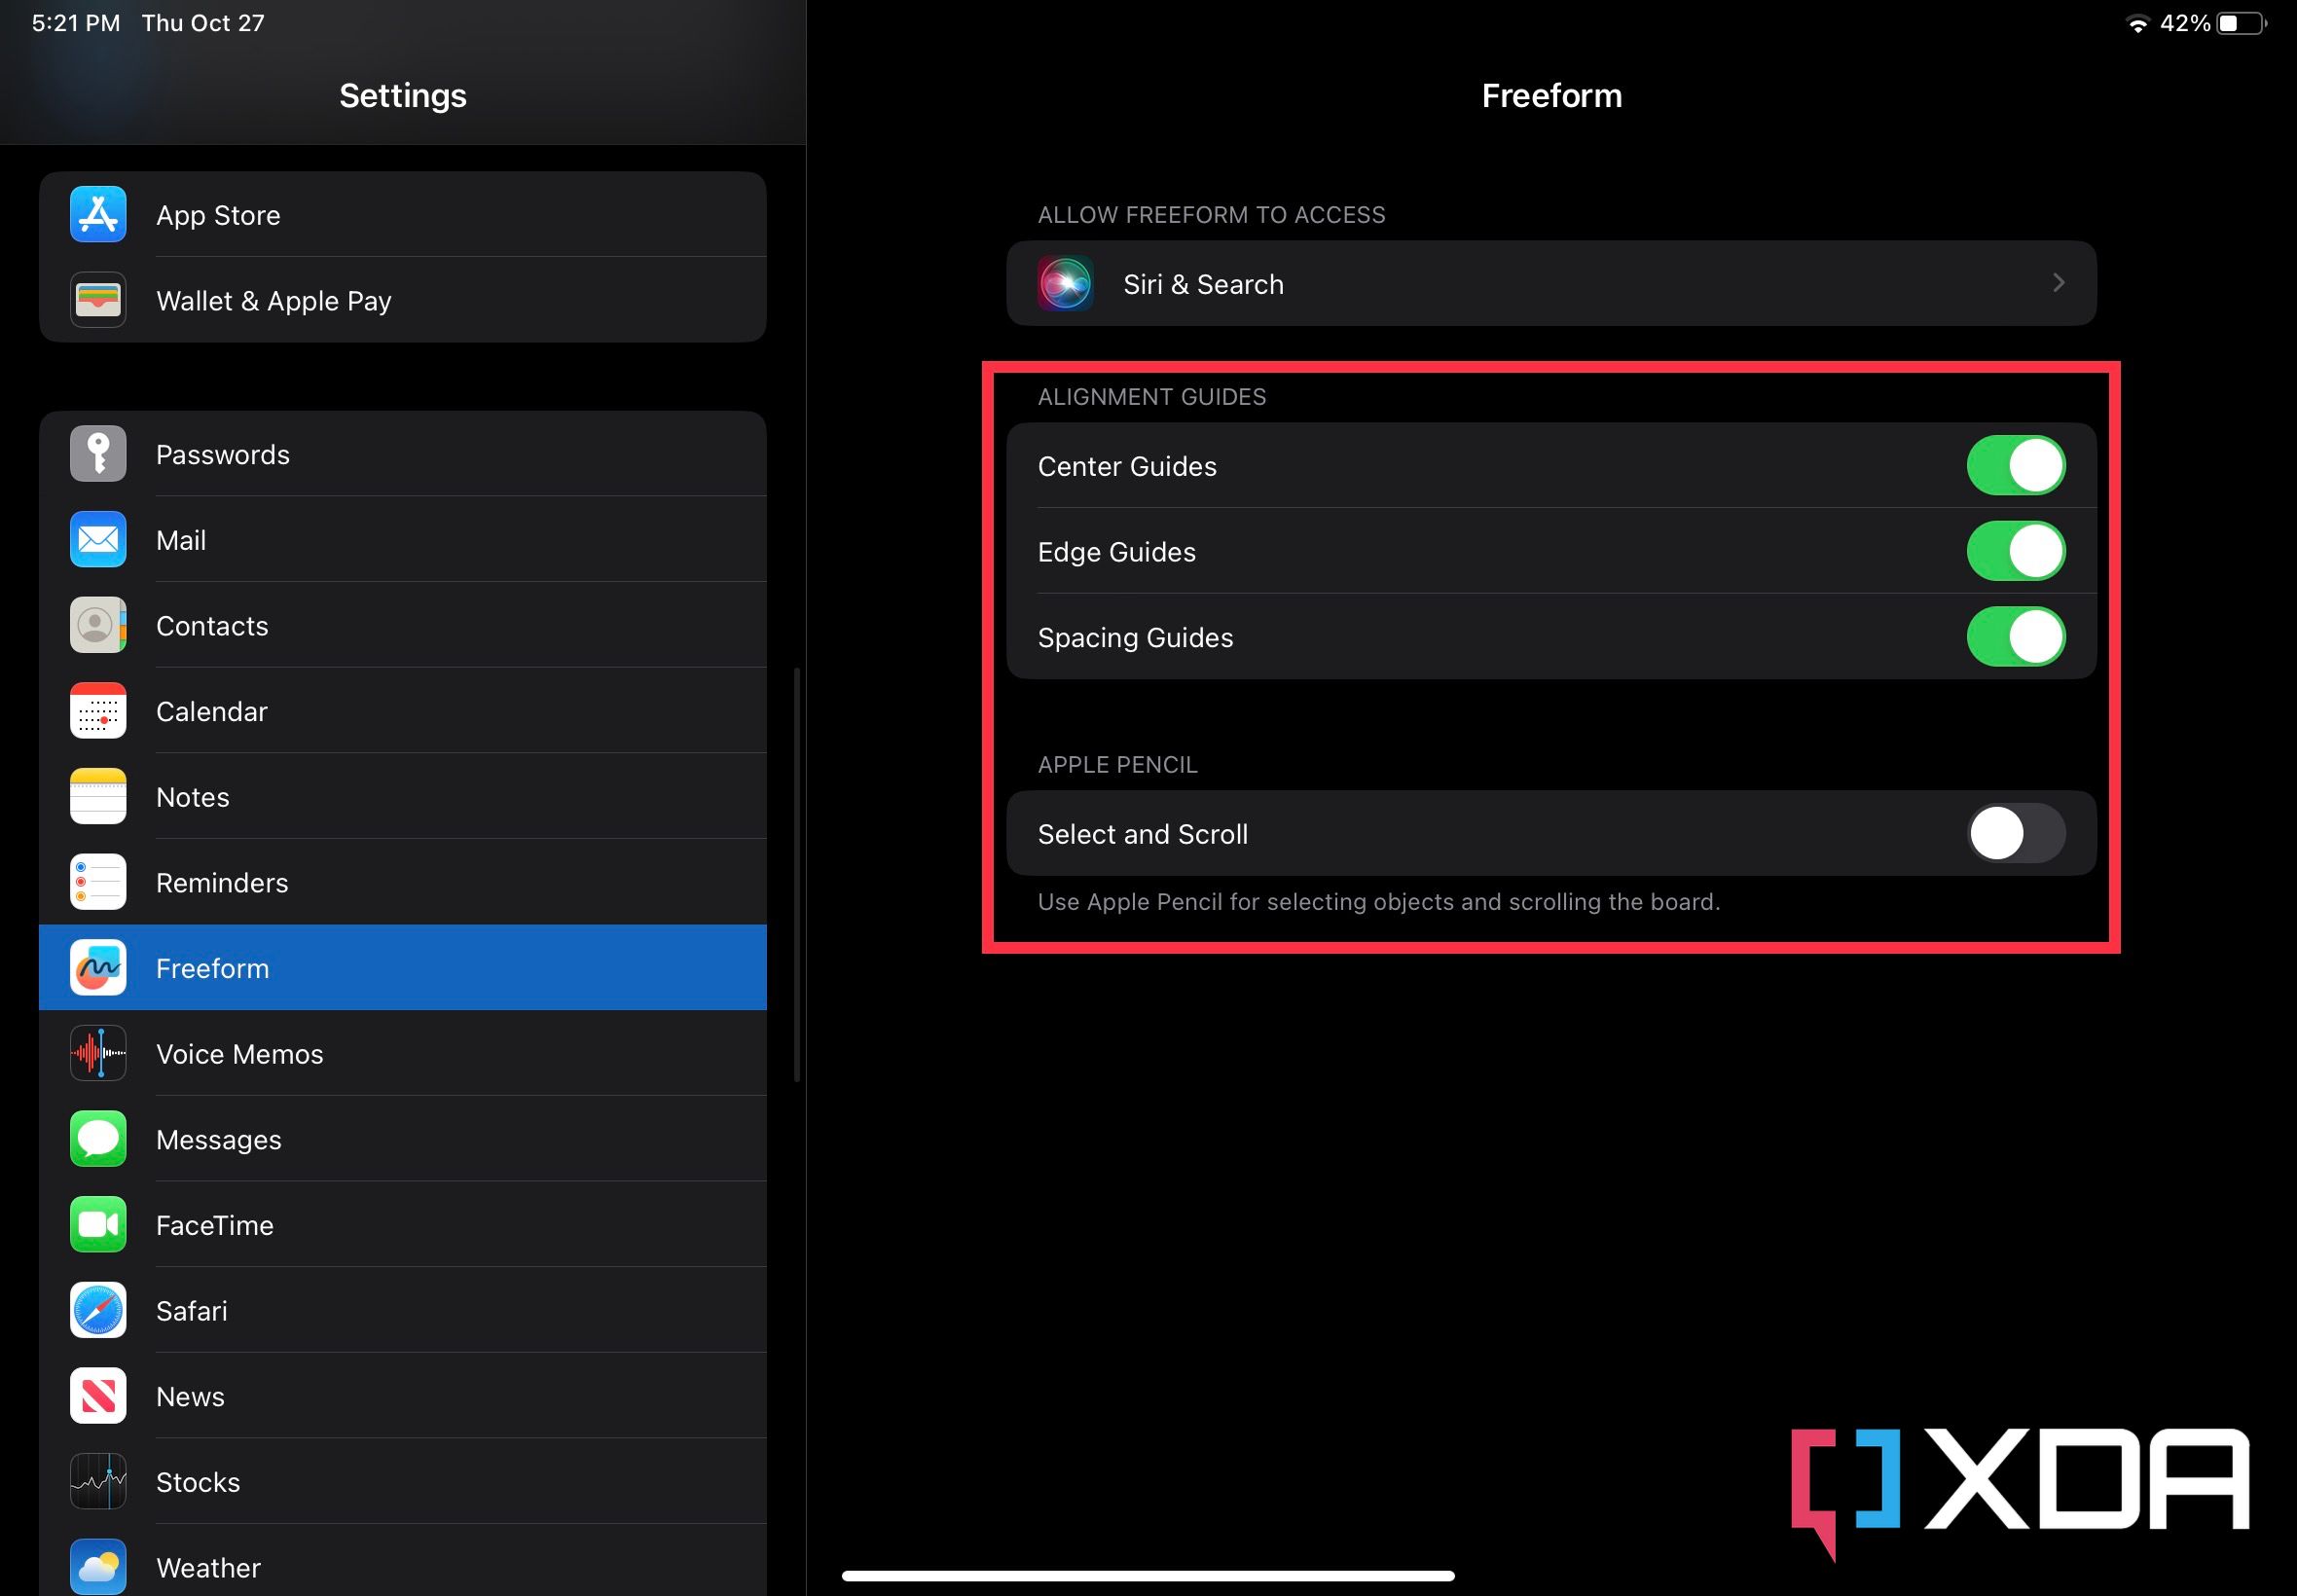
Before getting to the actual board creation, let us just address the settings of the Freeform app real quick. By heading to the Freeform section of the Settings app, you’ll see three toggles: Center Guides, Edge Guides, and Spacing Guides. There’s a fourth, too, if you’re an iPad user who relies on an Apple Pencil, called Select and Scroll.
The three guides are for alignment purposes, optionally helping you place the different elements across a board. The fourth gives you the option to use the Apple Pencil for selecting objects and scrolling on the board. If you disable it, you can still use your finger to execute these tasks.
Board creation and sharing
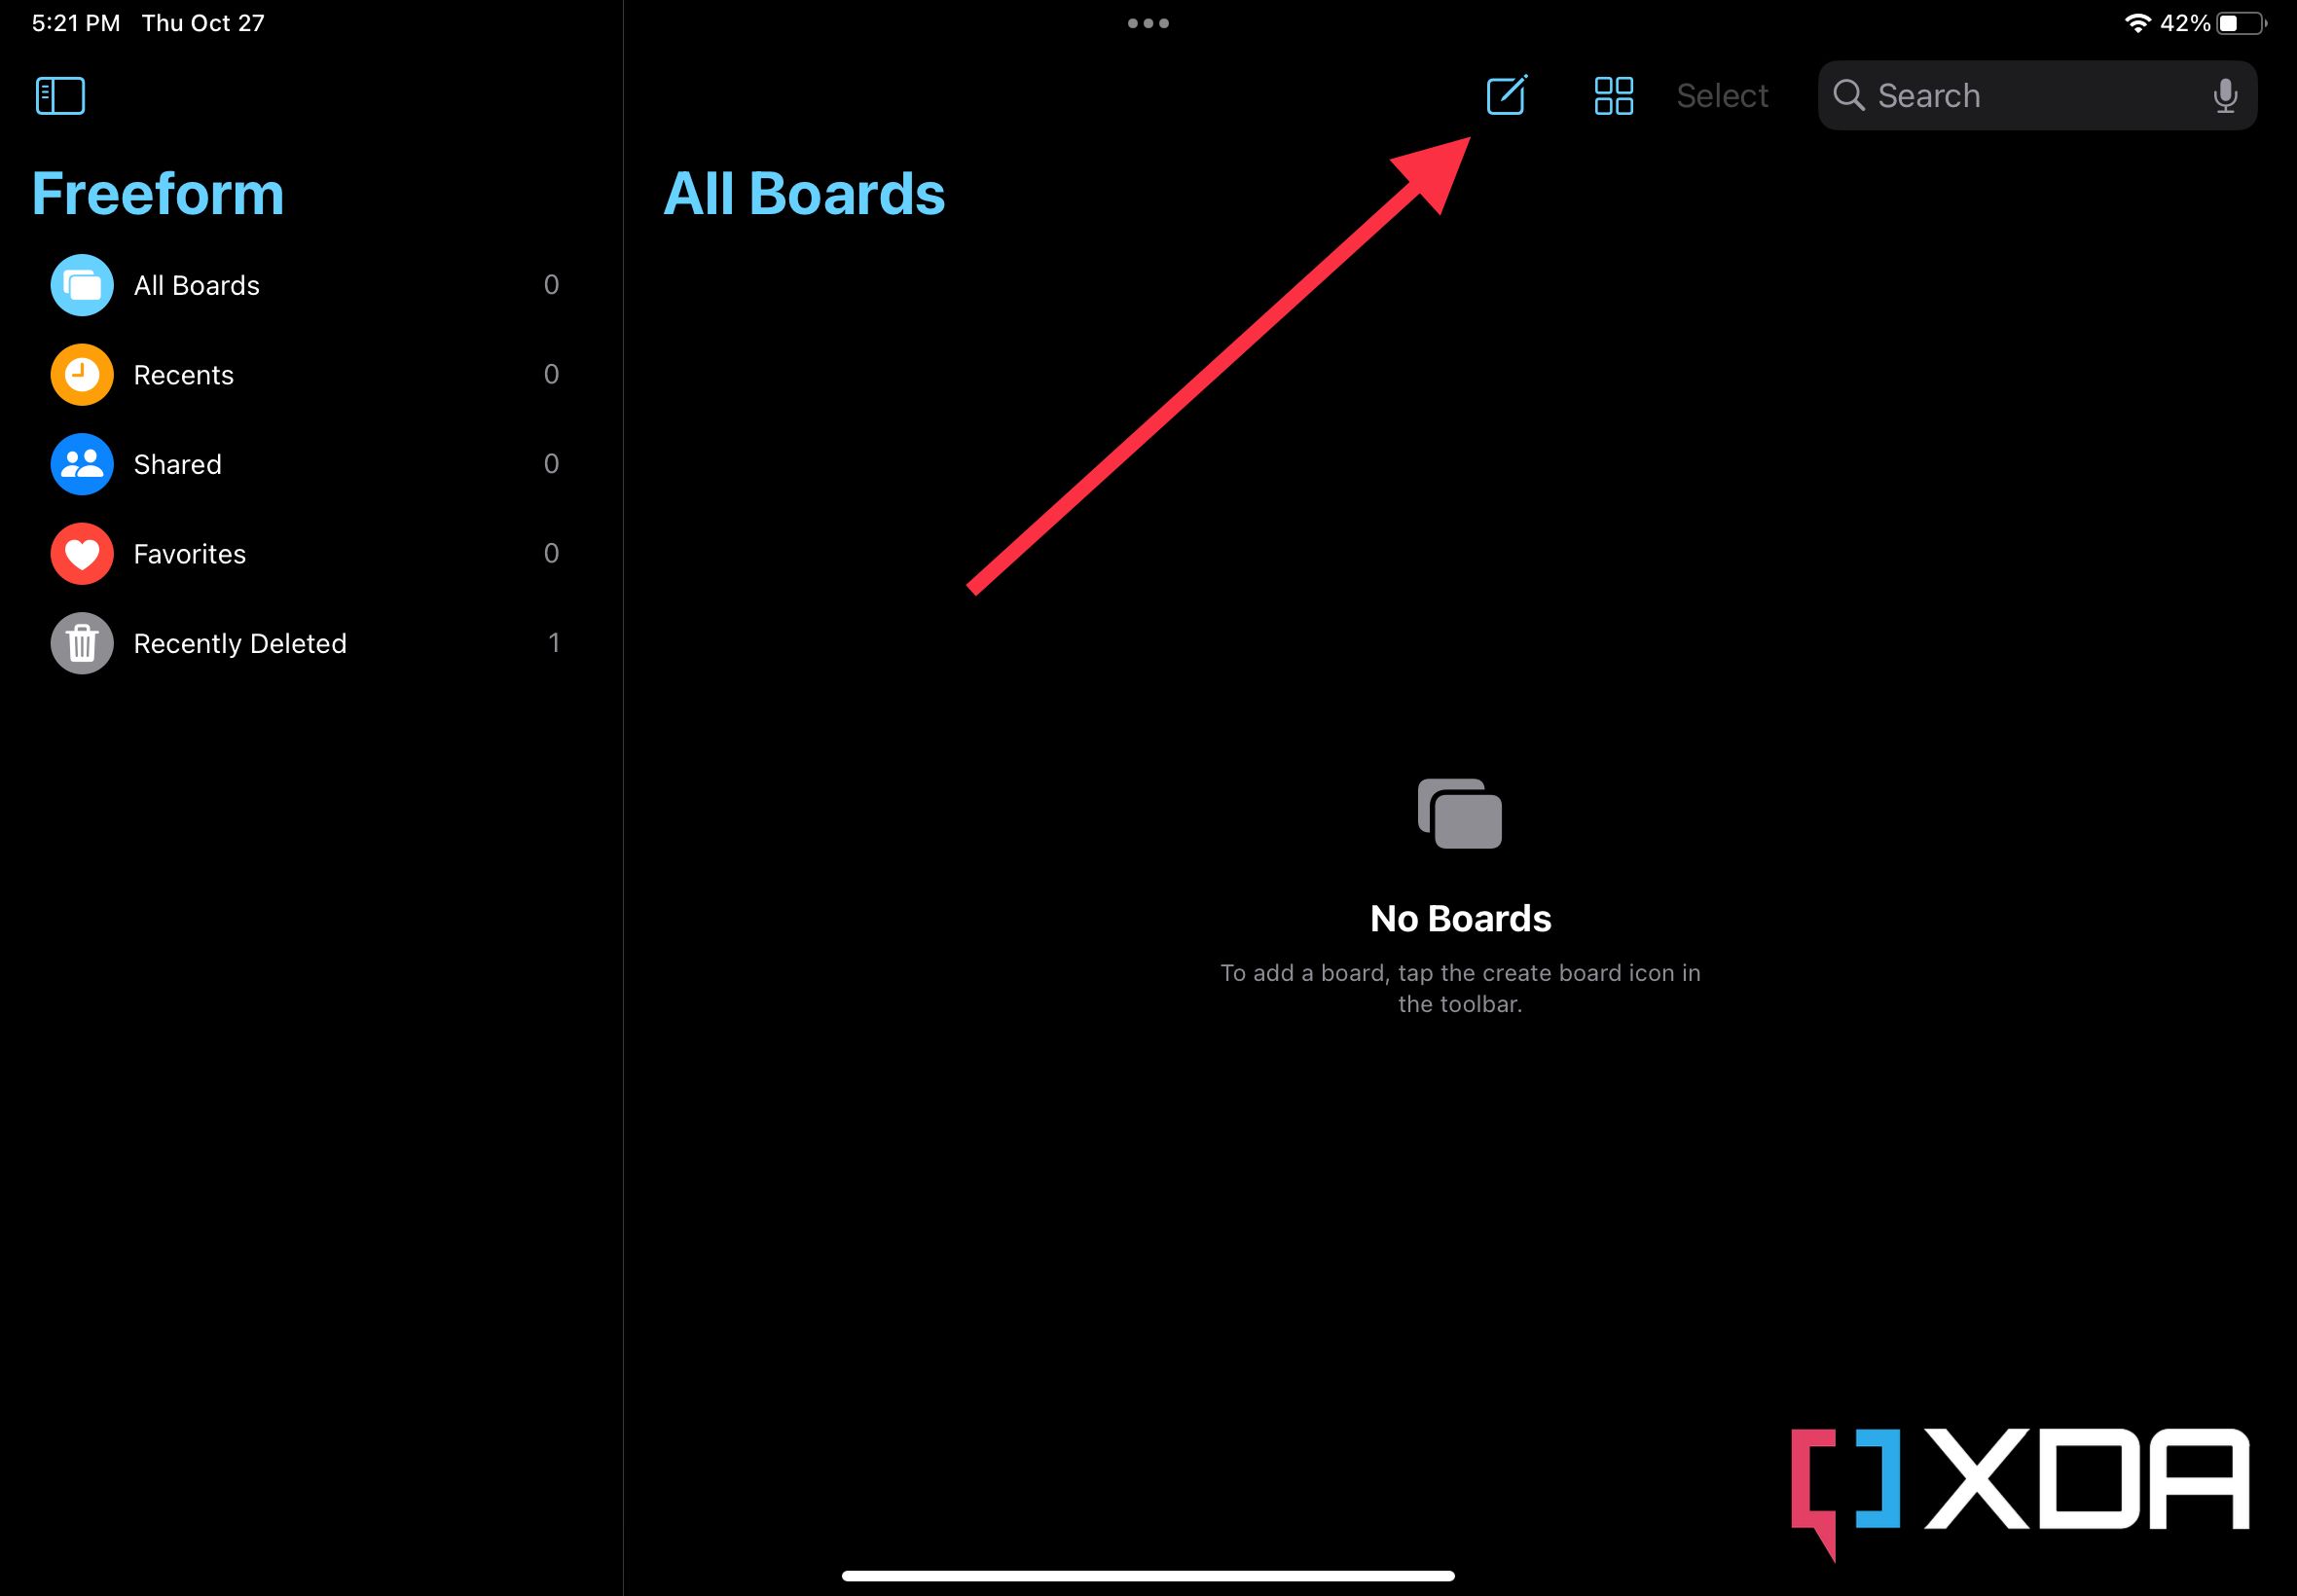
Now, let’s head back to the Apple Freeform app. The first step is creating a new board. To do that, click on the Pencil icon highlighted in the screenshot. Voilà! You’ve created your very first board. Feel free to play around with it. When you’re done, click the Back button in the top left corner. This will take you back to the main All Boards section.
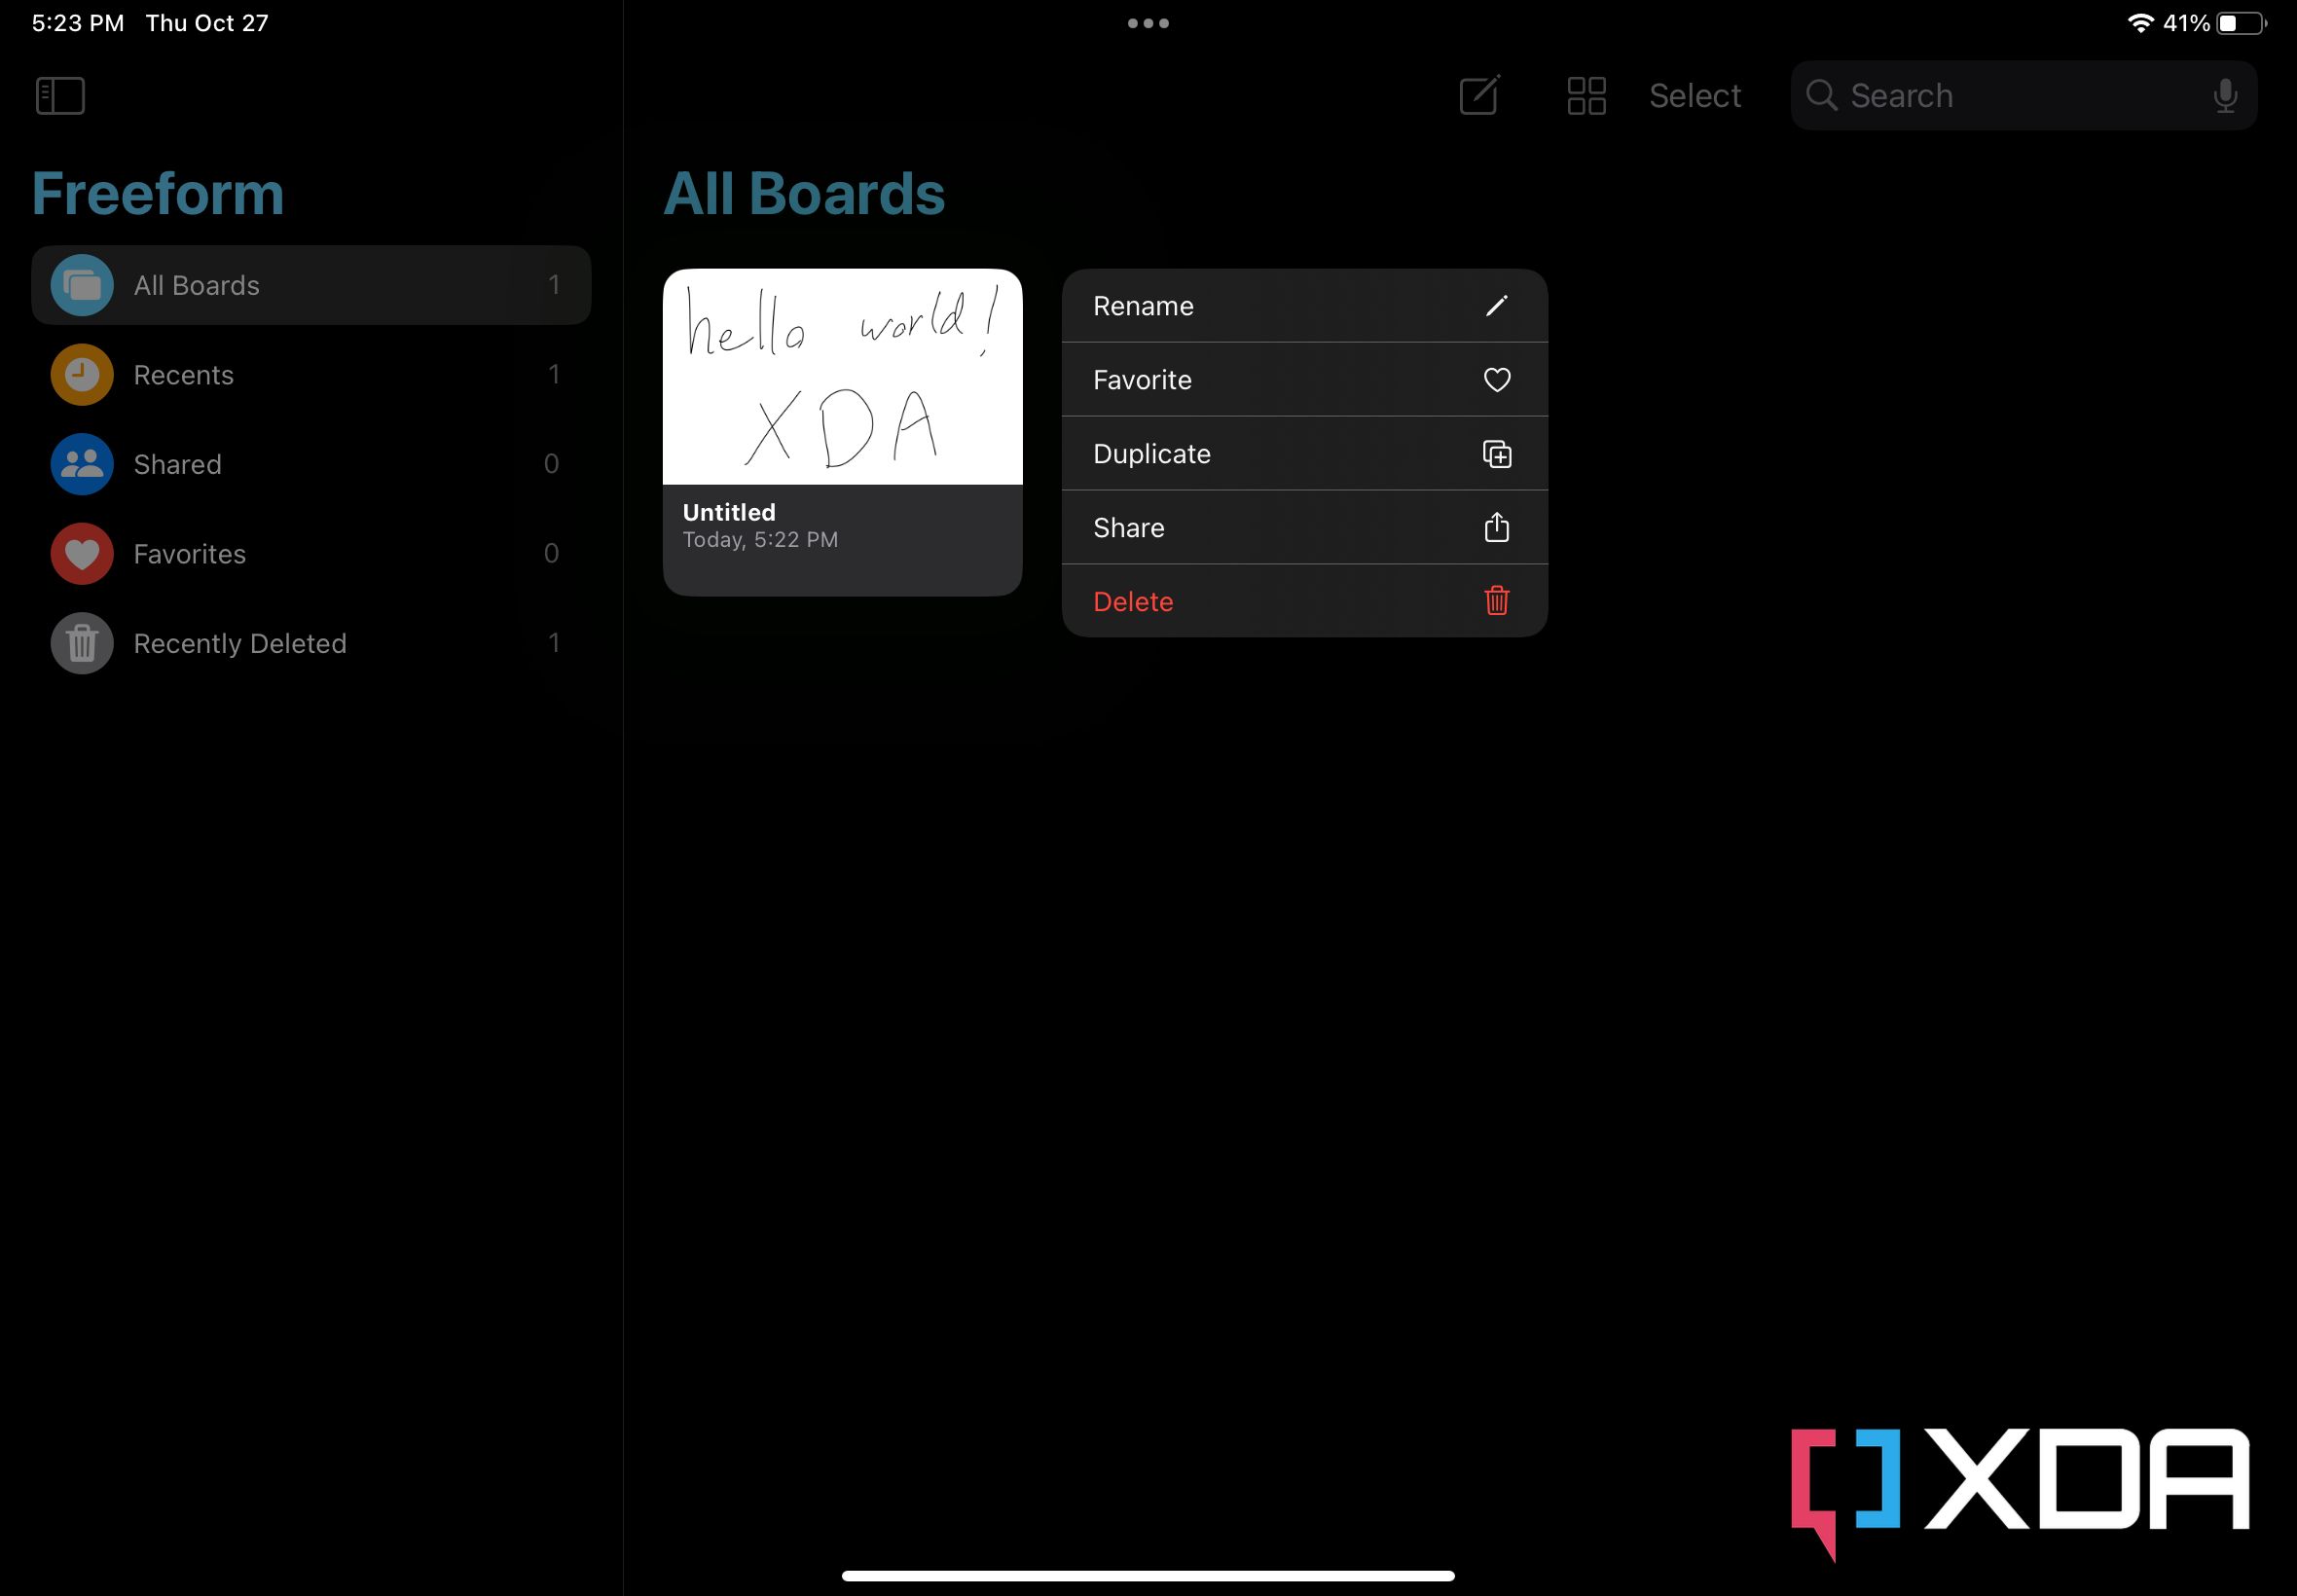
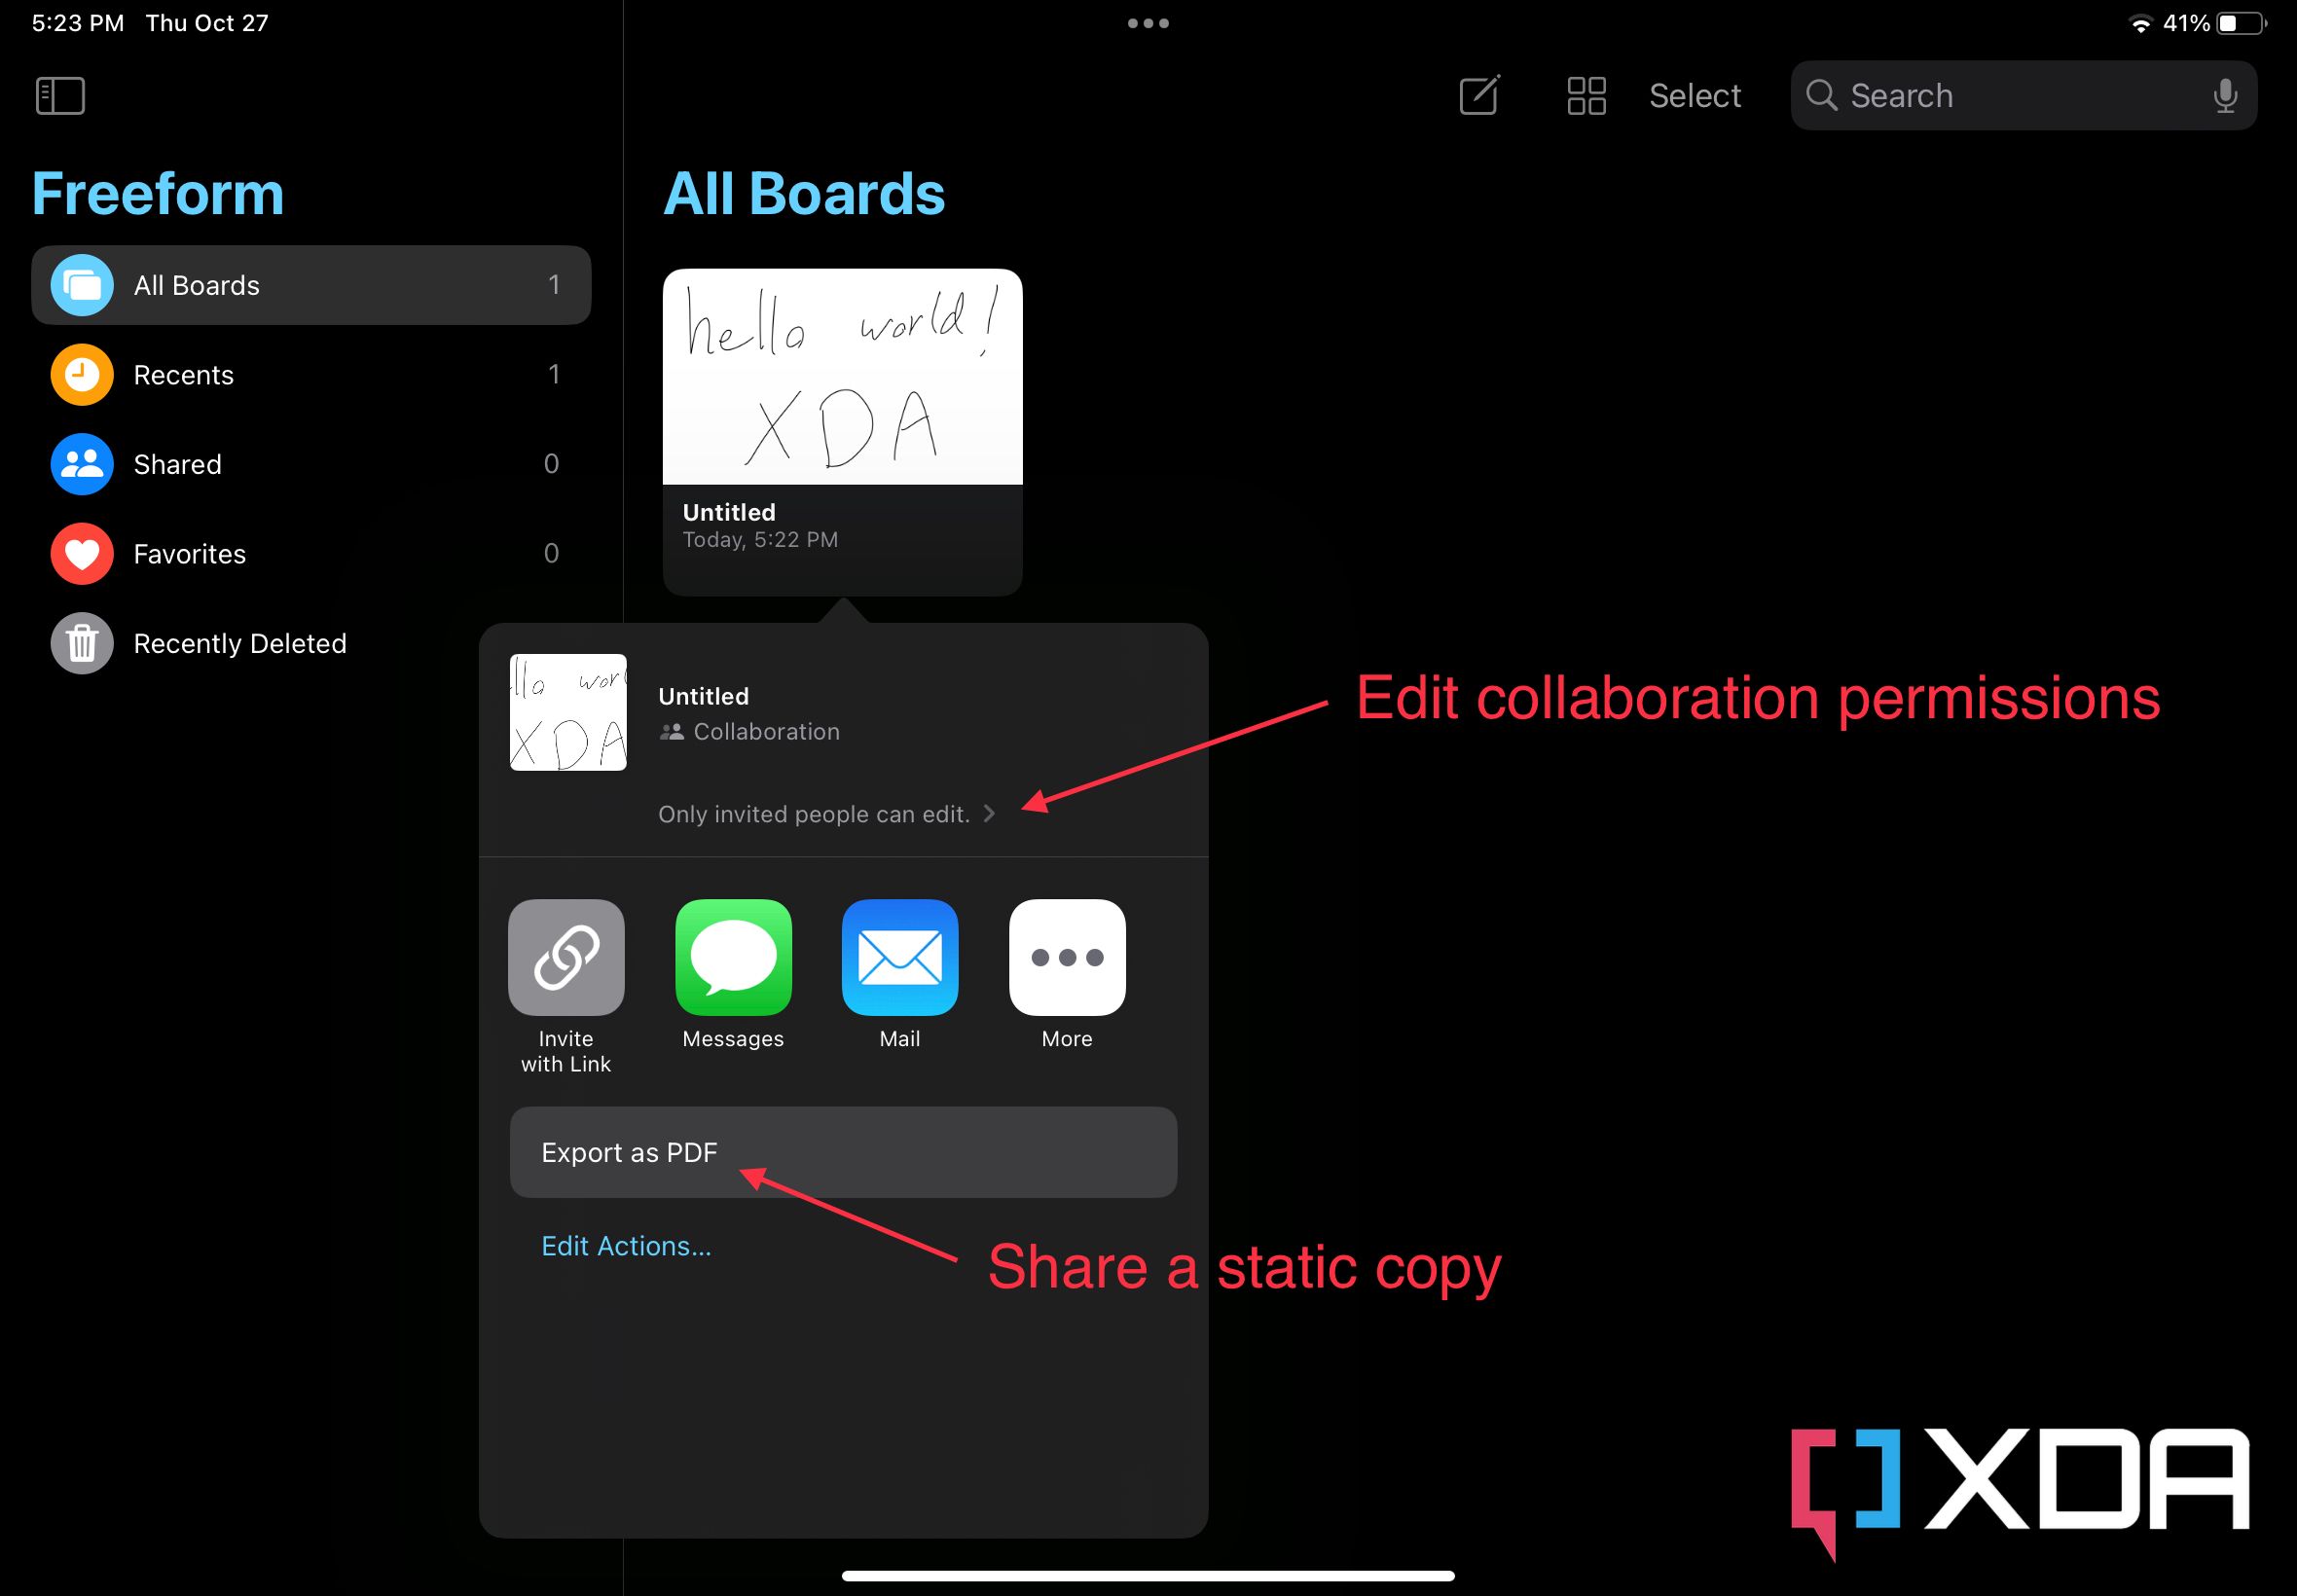
From here, you can hold on the board you’ve just created to Rename, Favorite, Duplicate, Share, or Delete it. These options are all self-explanatory, but I will be diving into the Share option to clarify a point.
When you tap on Share, you get to invite other Apple users to collaborate on the selected board. You can edit the type of access and permissions through the option right above the app list. If you would rather to share the board as a static file, then click on Export as PDF at the very bottom, then choose the sharing app of your choice. This way you share the actual board, and not an invitation to view or edit it.
Now that we’ve covered all the basics, we can go ahead and see what we can actually do inside a board.
Unleashing your creativity in a Freeform board
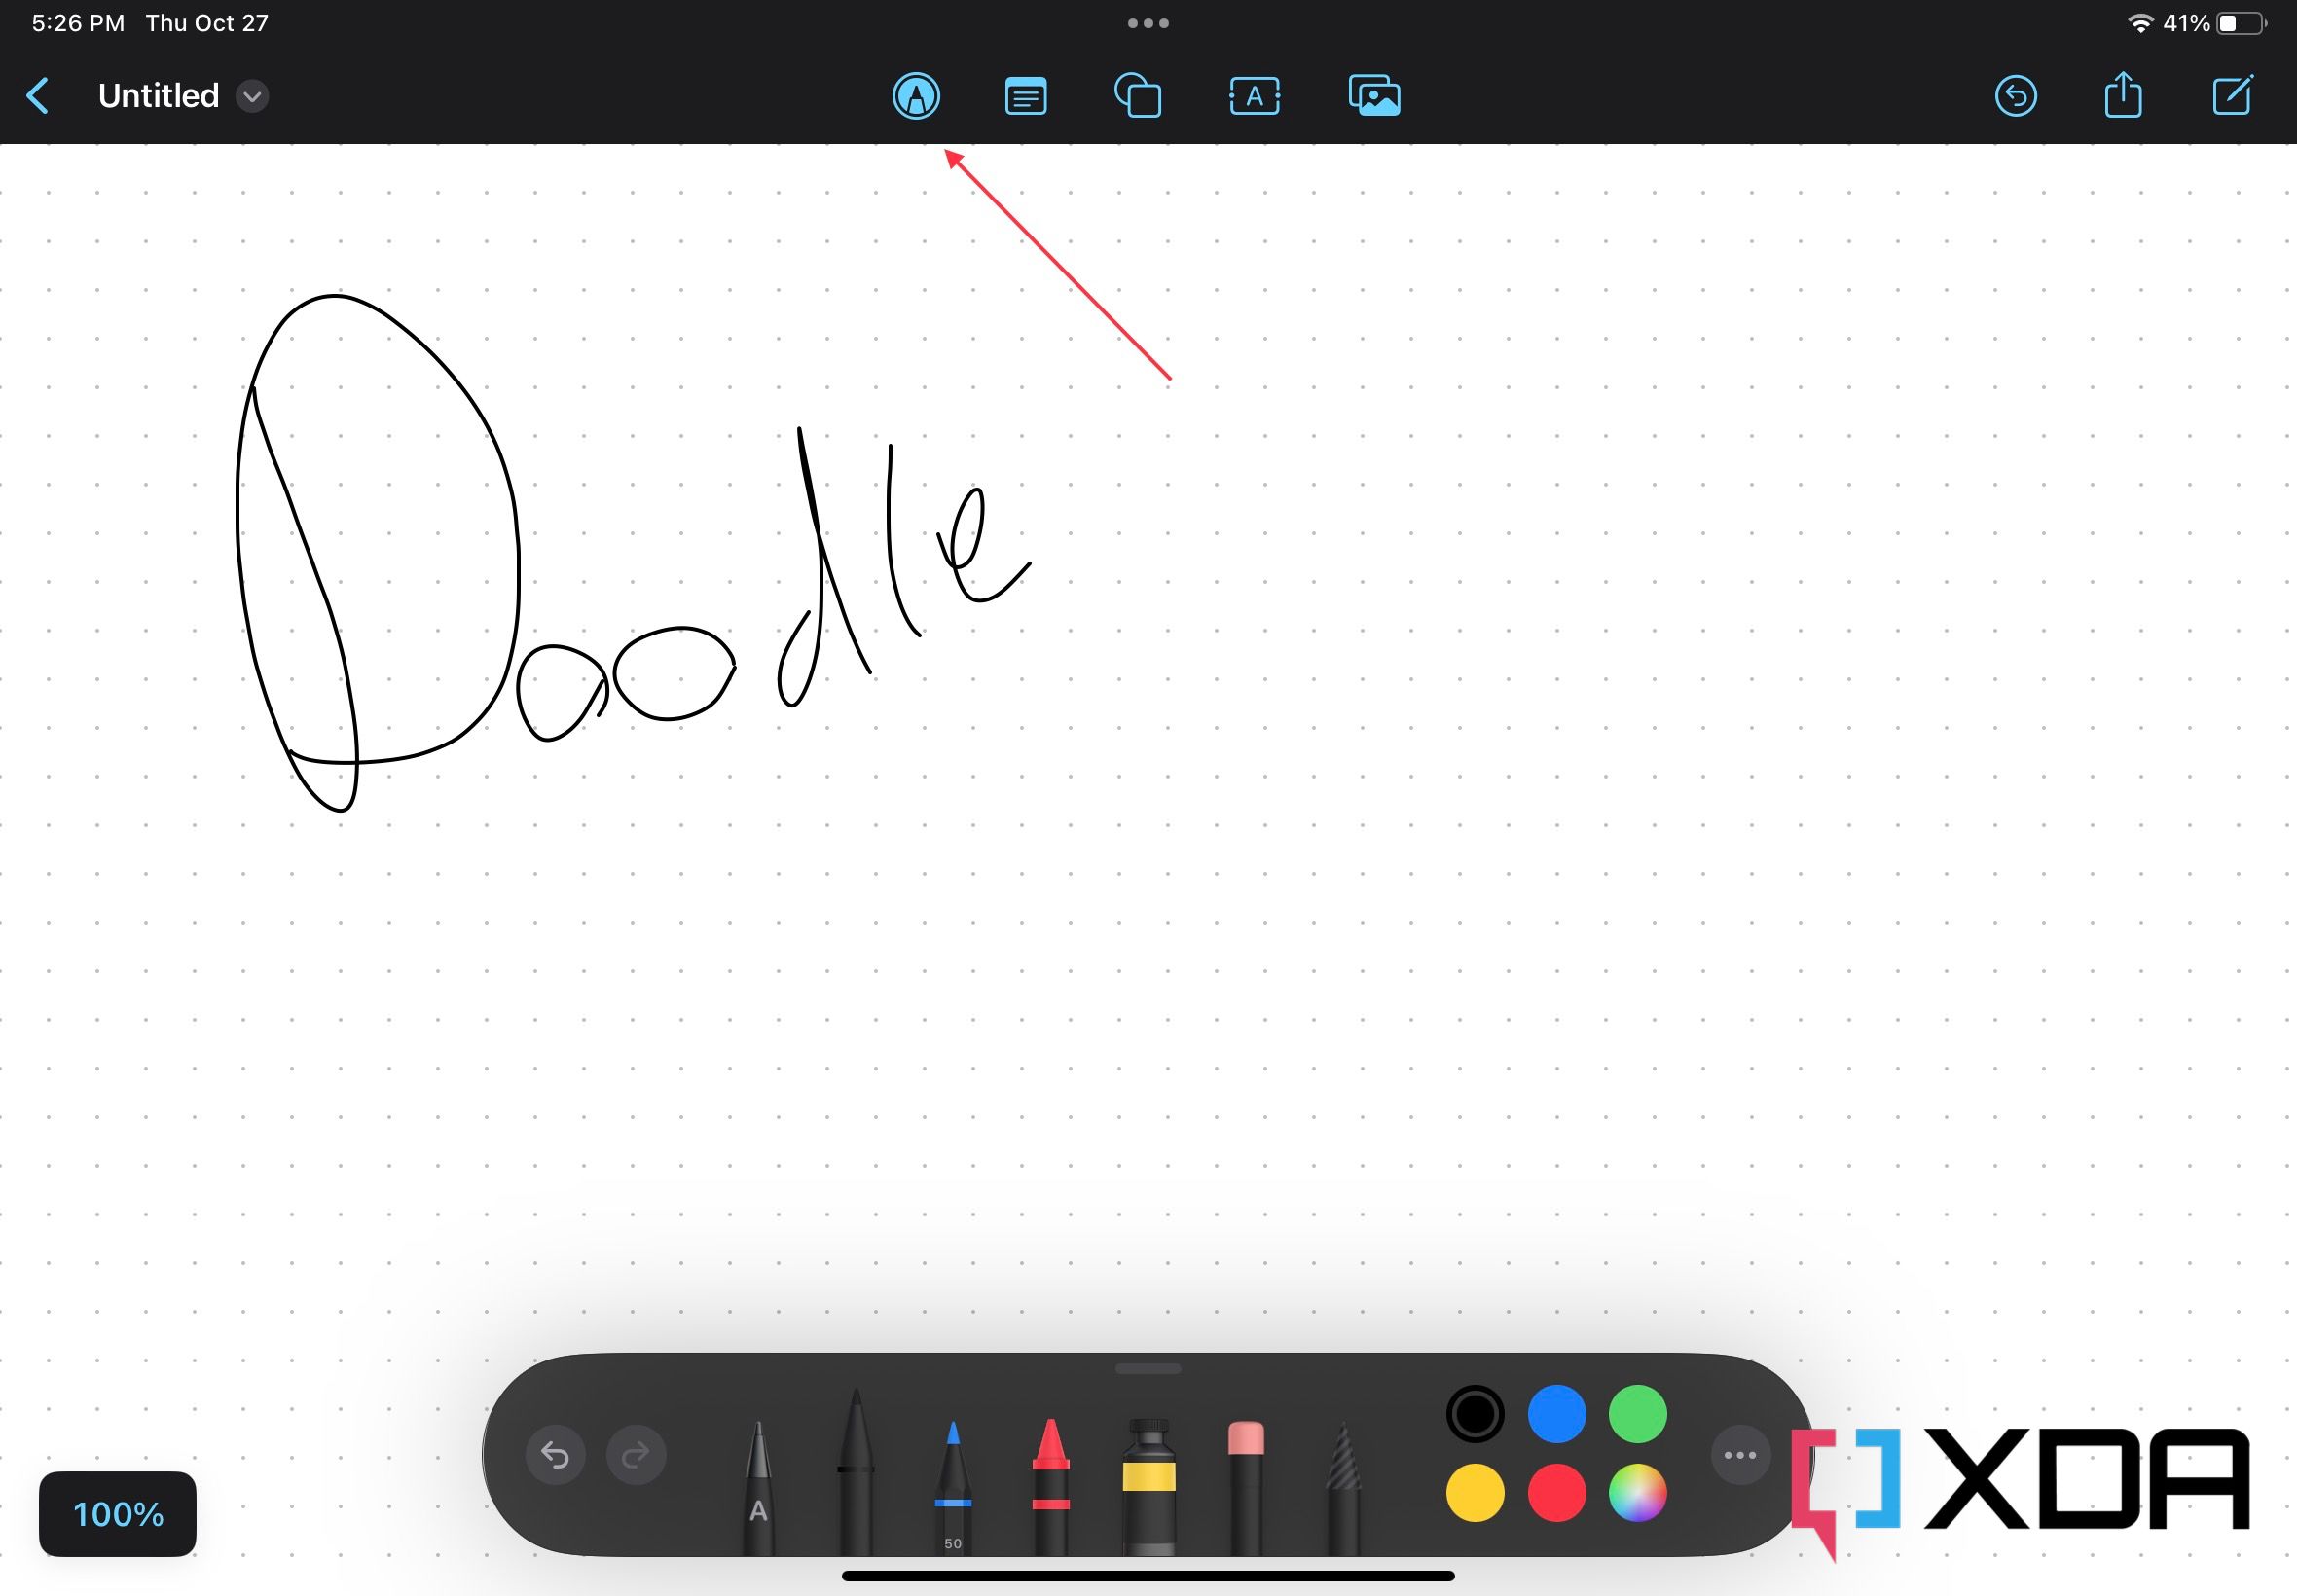
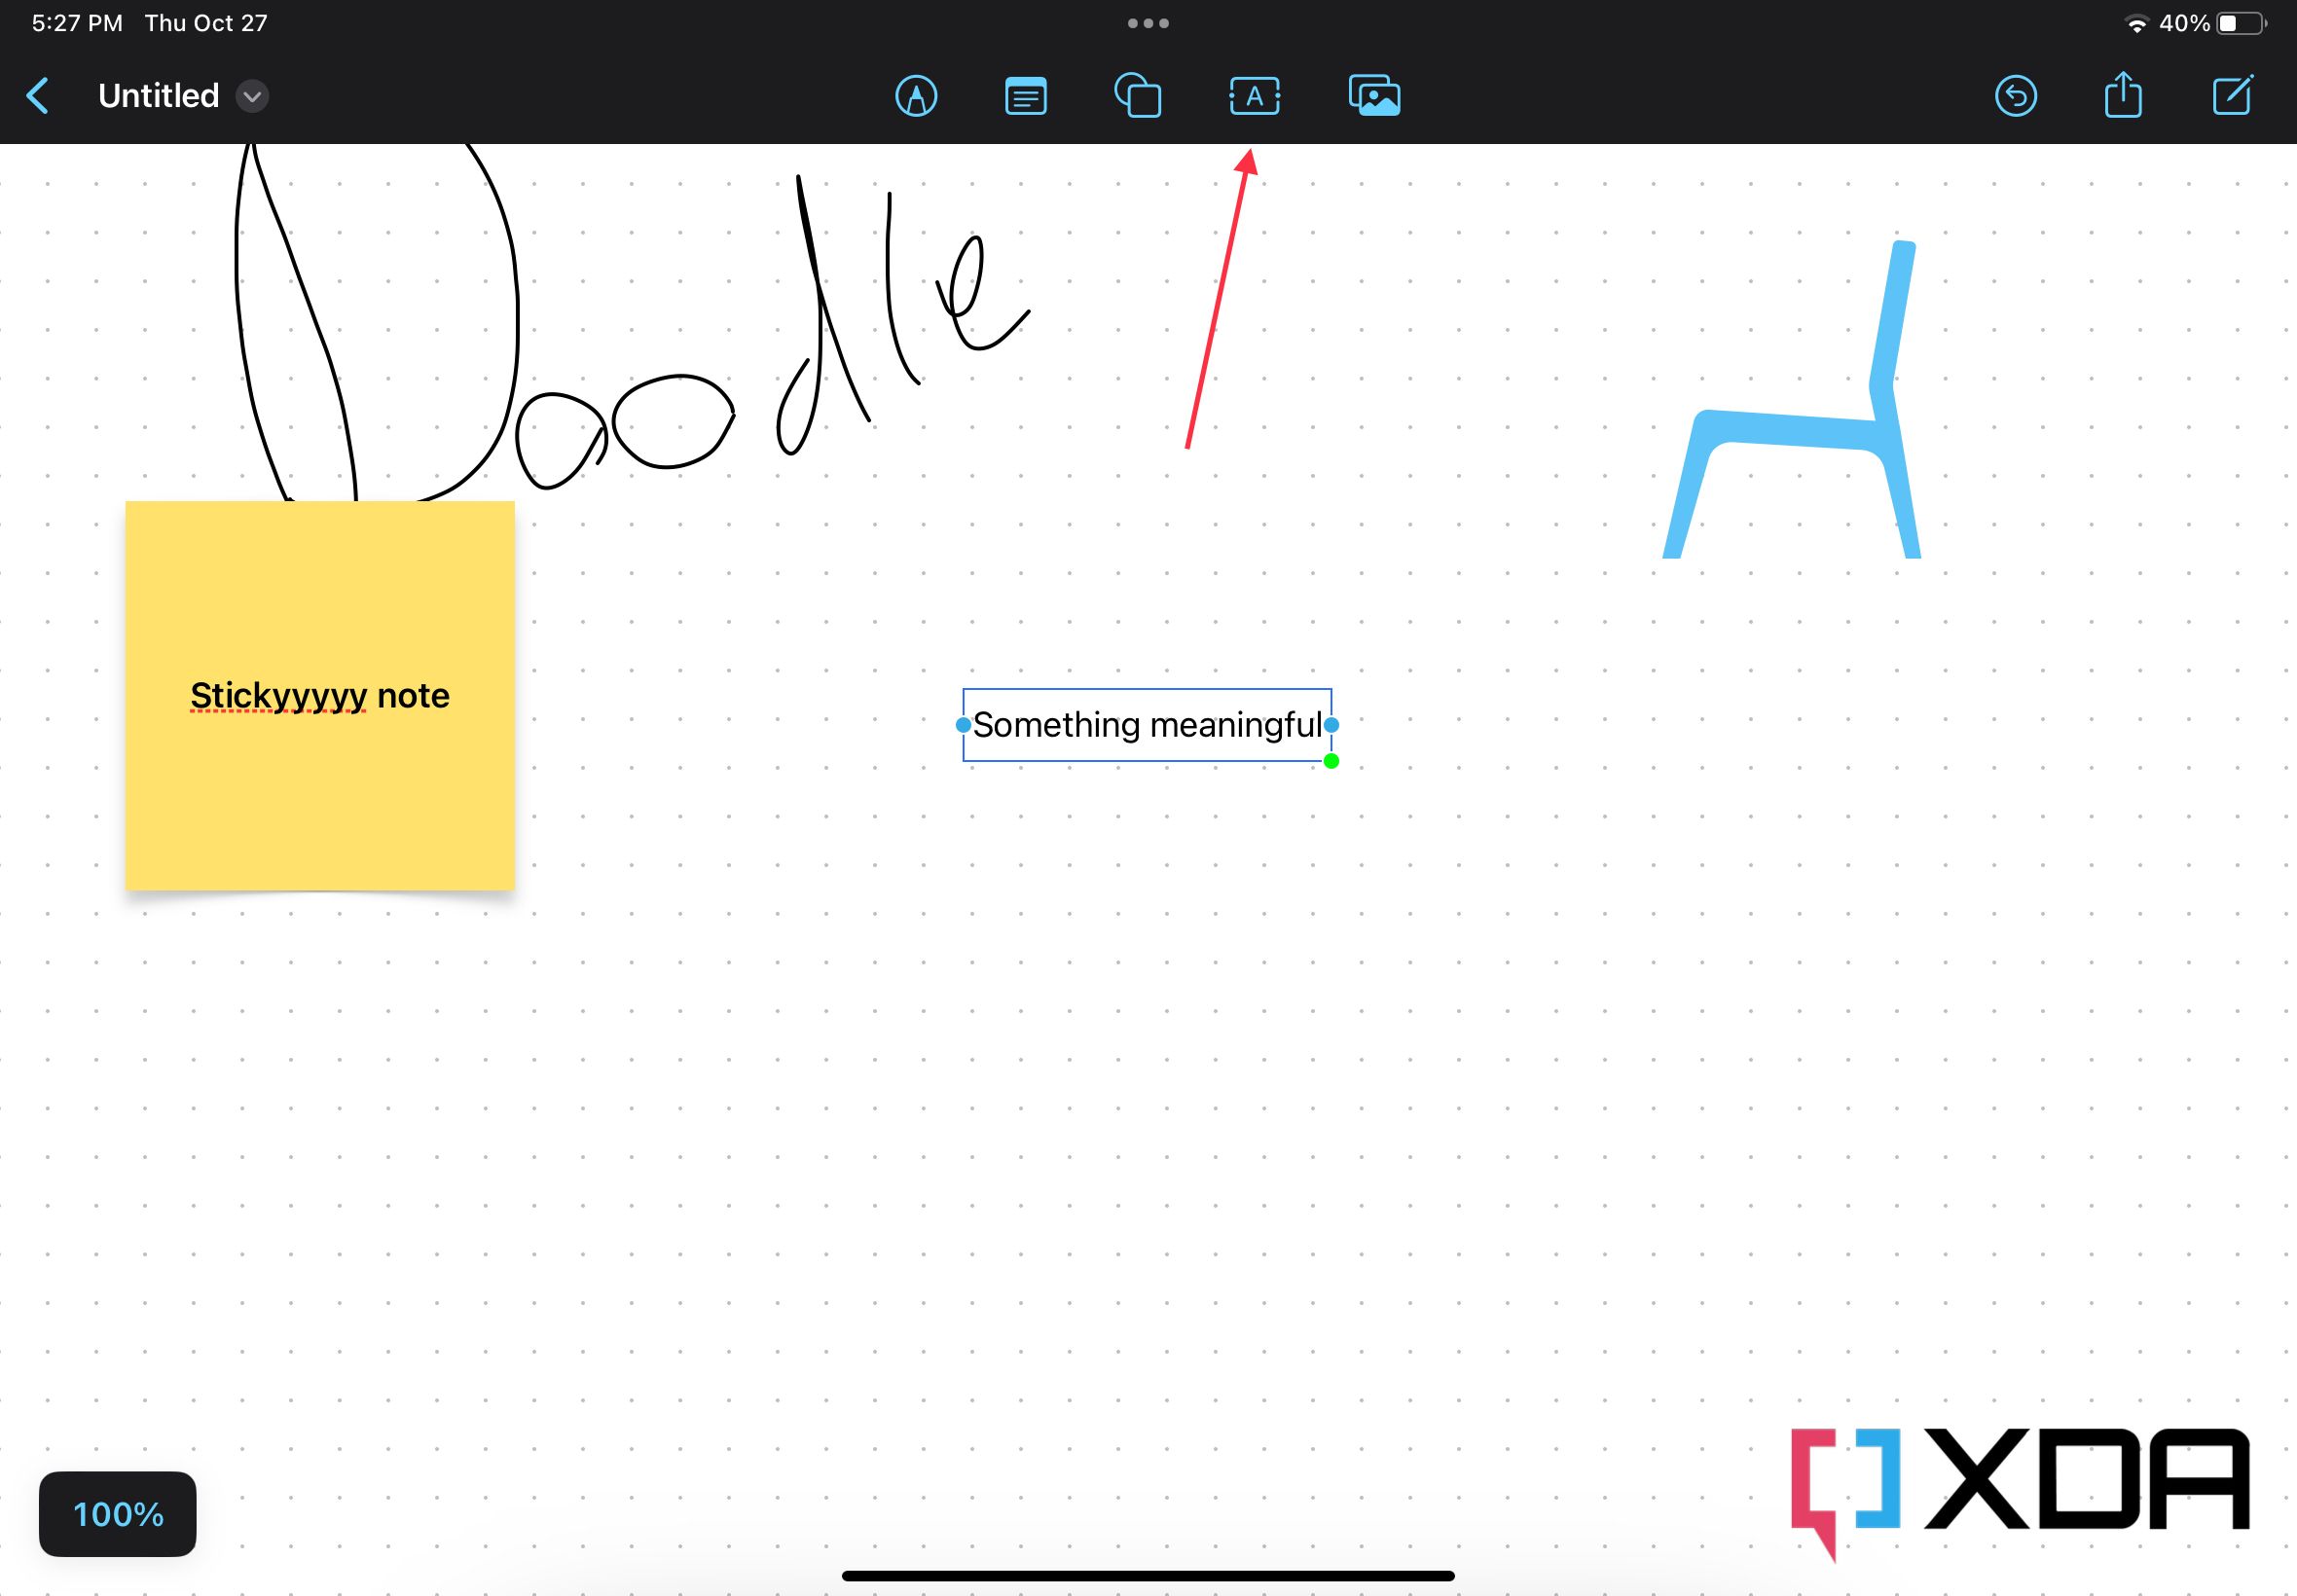
When you enter or create a board, you’ll see a plain white space with (optional) guidance dots all over it. This is where your next big life project might begin. The first tool has a Pen icon. When you click it, Apple’s wide variety of brushes and pens appear. You can then select the brush kind, color, and more for freestyle drawing. You can use it to connect two notes, doodle, illustrate, and more.
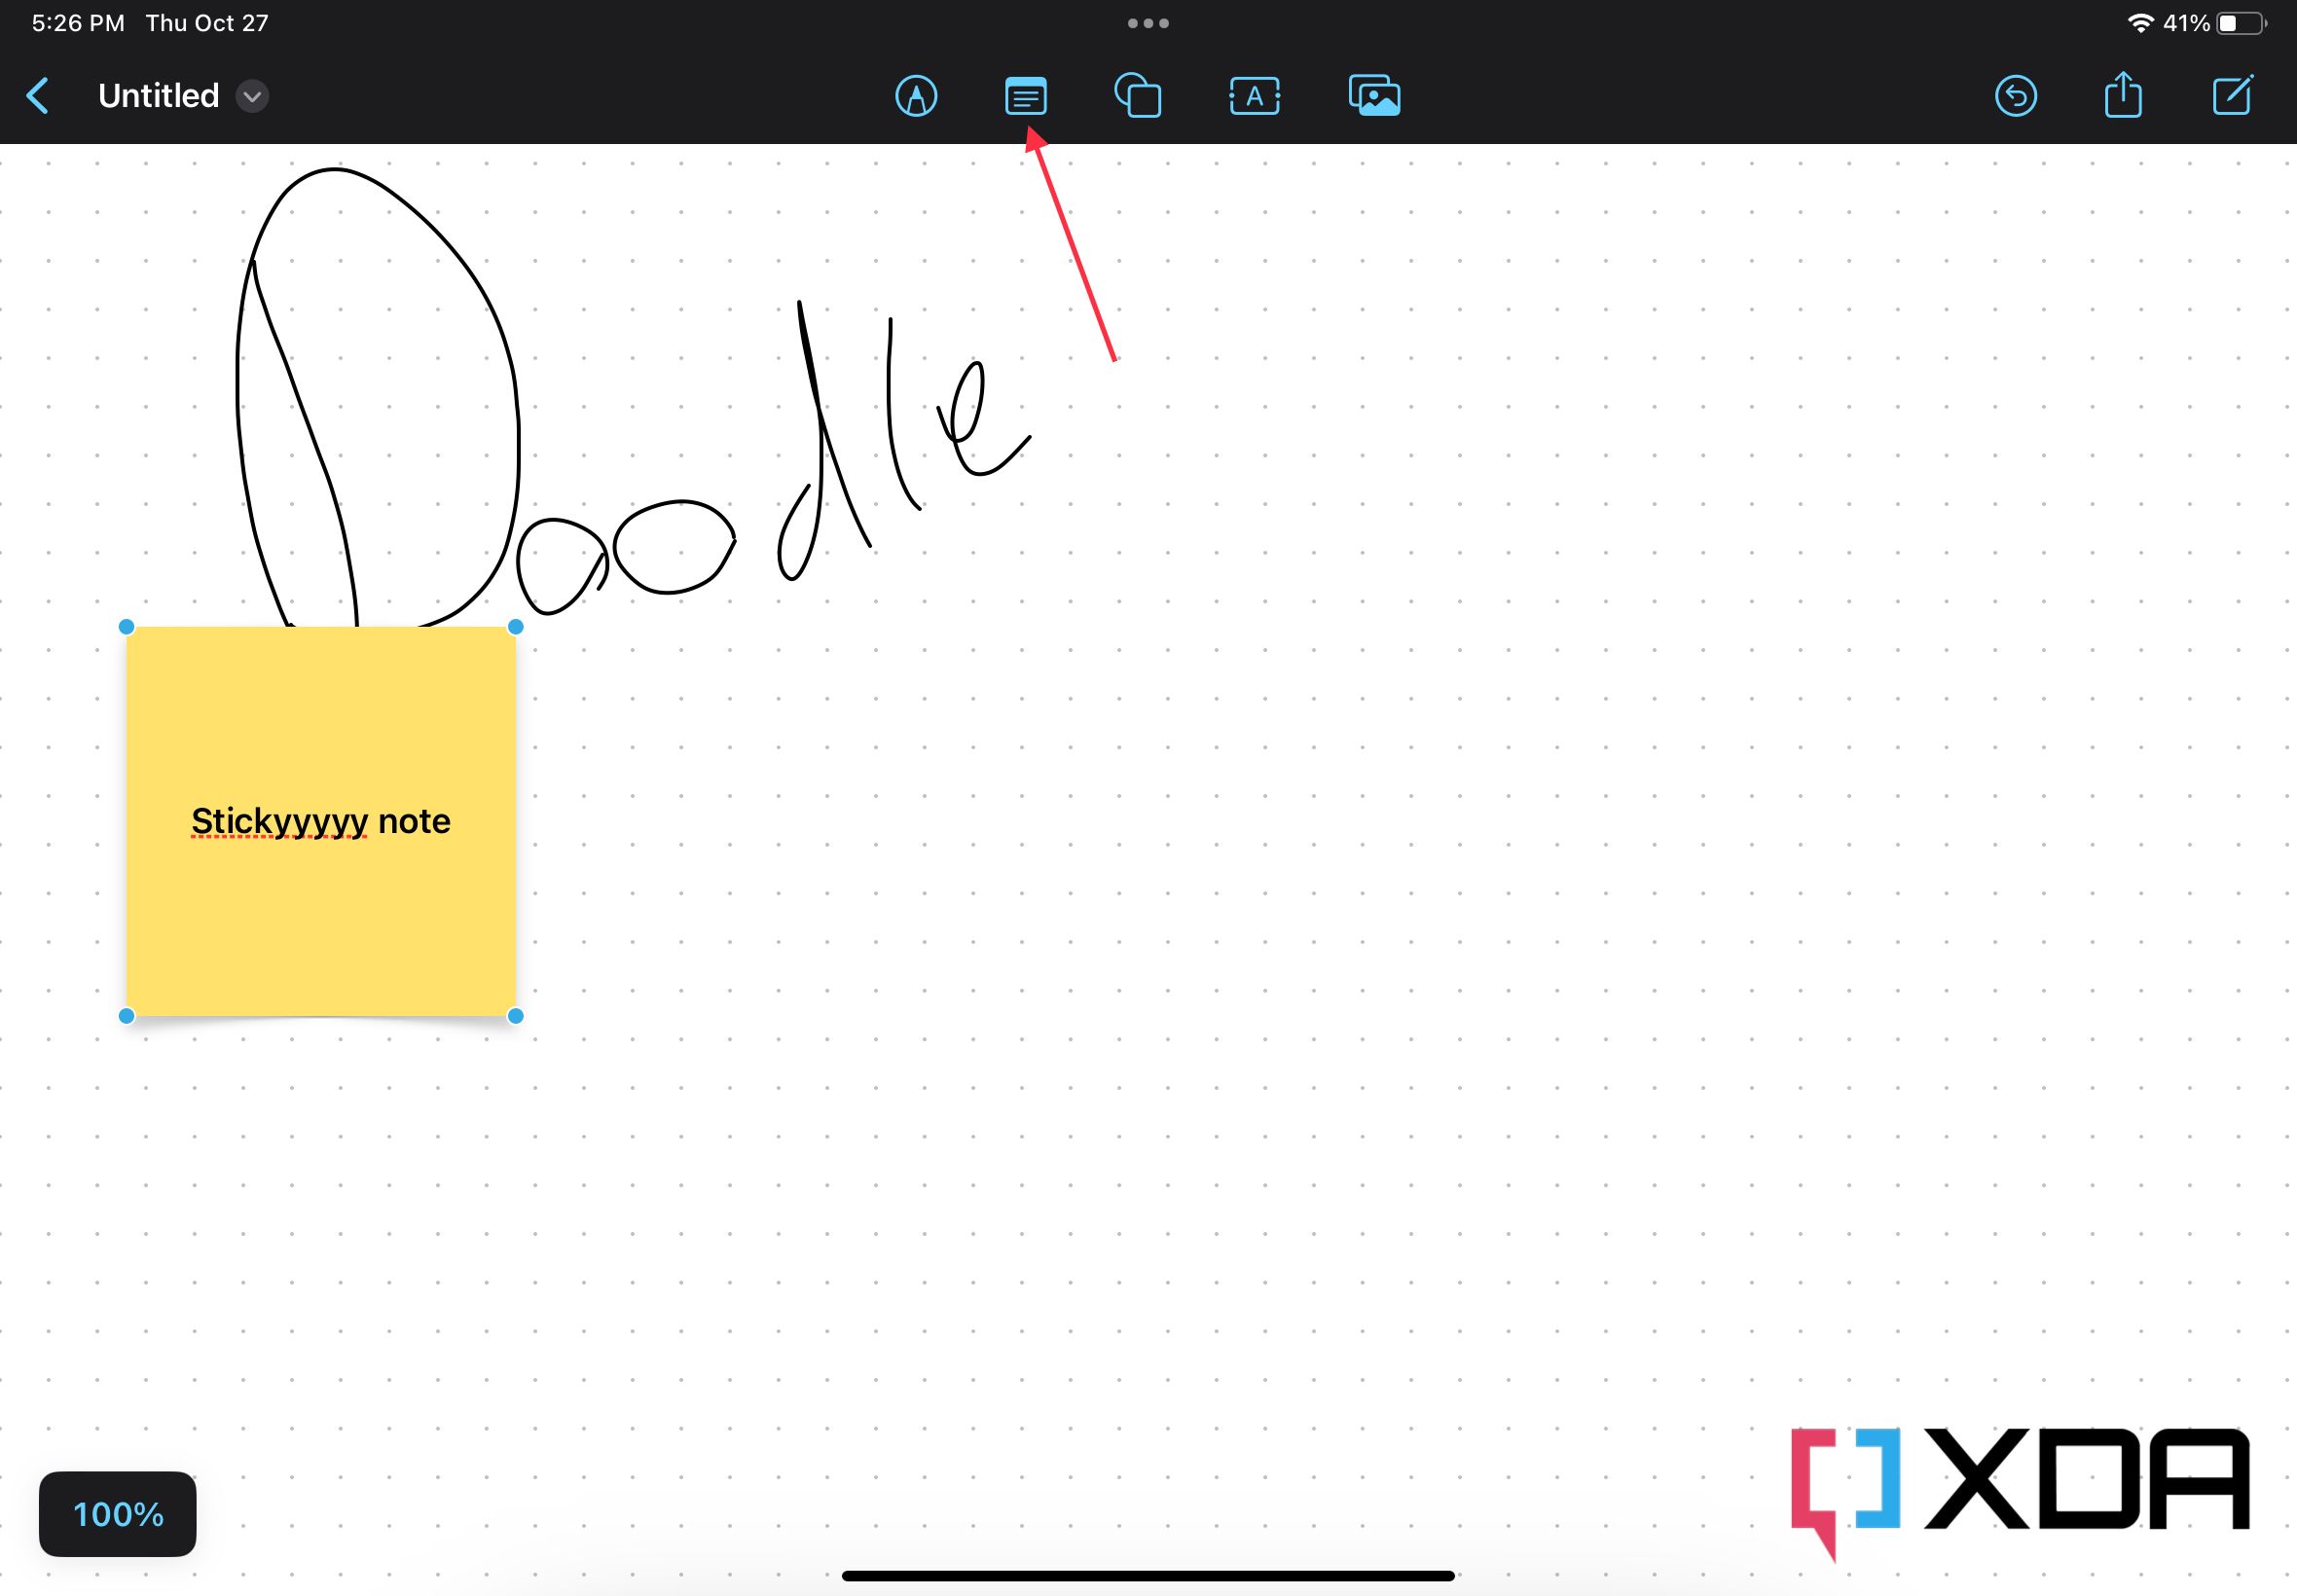
Next to that, you’ll find a Note icon. Clicking it will insert a yellow sticky note that you can type text into and drag around. It’s ideal for those who want to highlight a certain point next to a different element on a board. It’s catchy, simple, and handy.
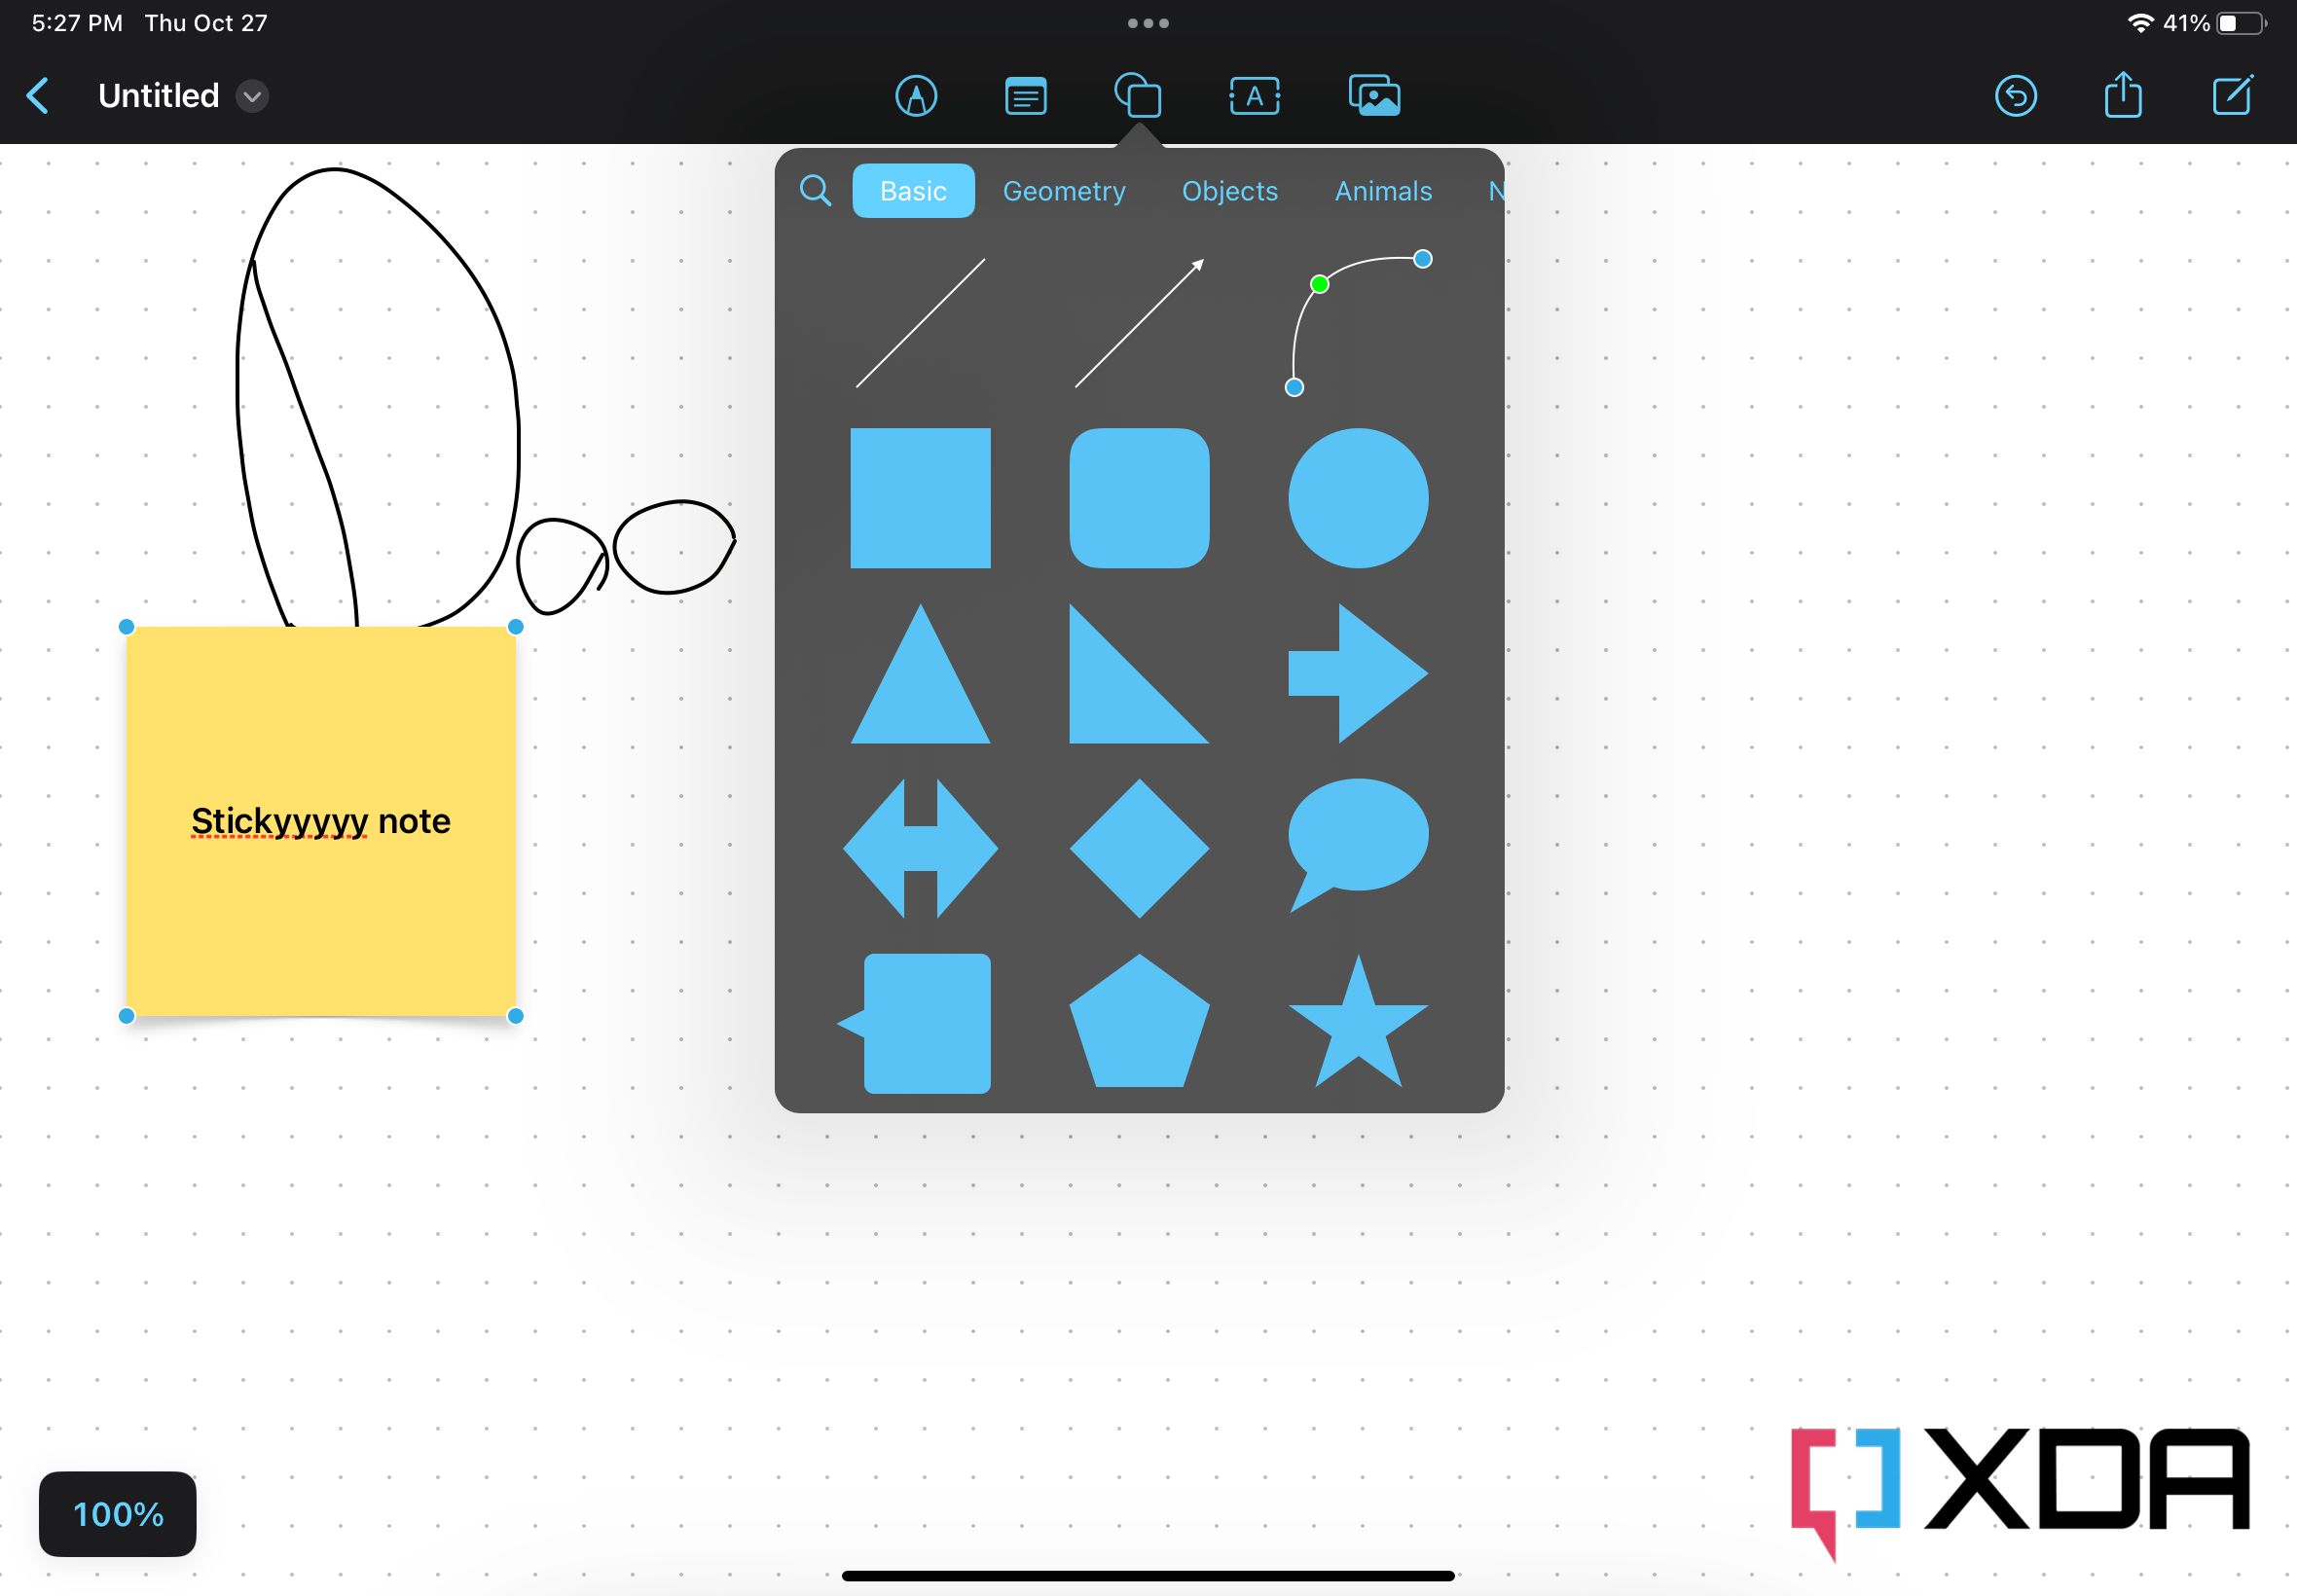
Moving on, you find the Shapes icon. Through it, you can insert circles, arrows, lines, 3D objects, animals, food, etc. Shapes are divided into 16 categories: Basic, Geometry, Objects, Animals, Nature, Food, Symbols, Education, Arts, Science, People, Places, Activities, Transportation, Work, and Ornaments. There’s also a Search button to help you find something specific without going through the endless lists. Once you insert a shape, you can edit its color, size, position, and more.
After that is a Text icon. Clicking it inserts a text box with flexible fonts, styles, colors, and sizes. This tool is ideal for typing descriptions or titles across a board, rather than a note you’ll want to delete later on. In the latter case, I’d recommend using the aforementioned sticky note feature for better visibility and easier deletion/editing.
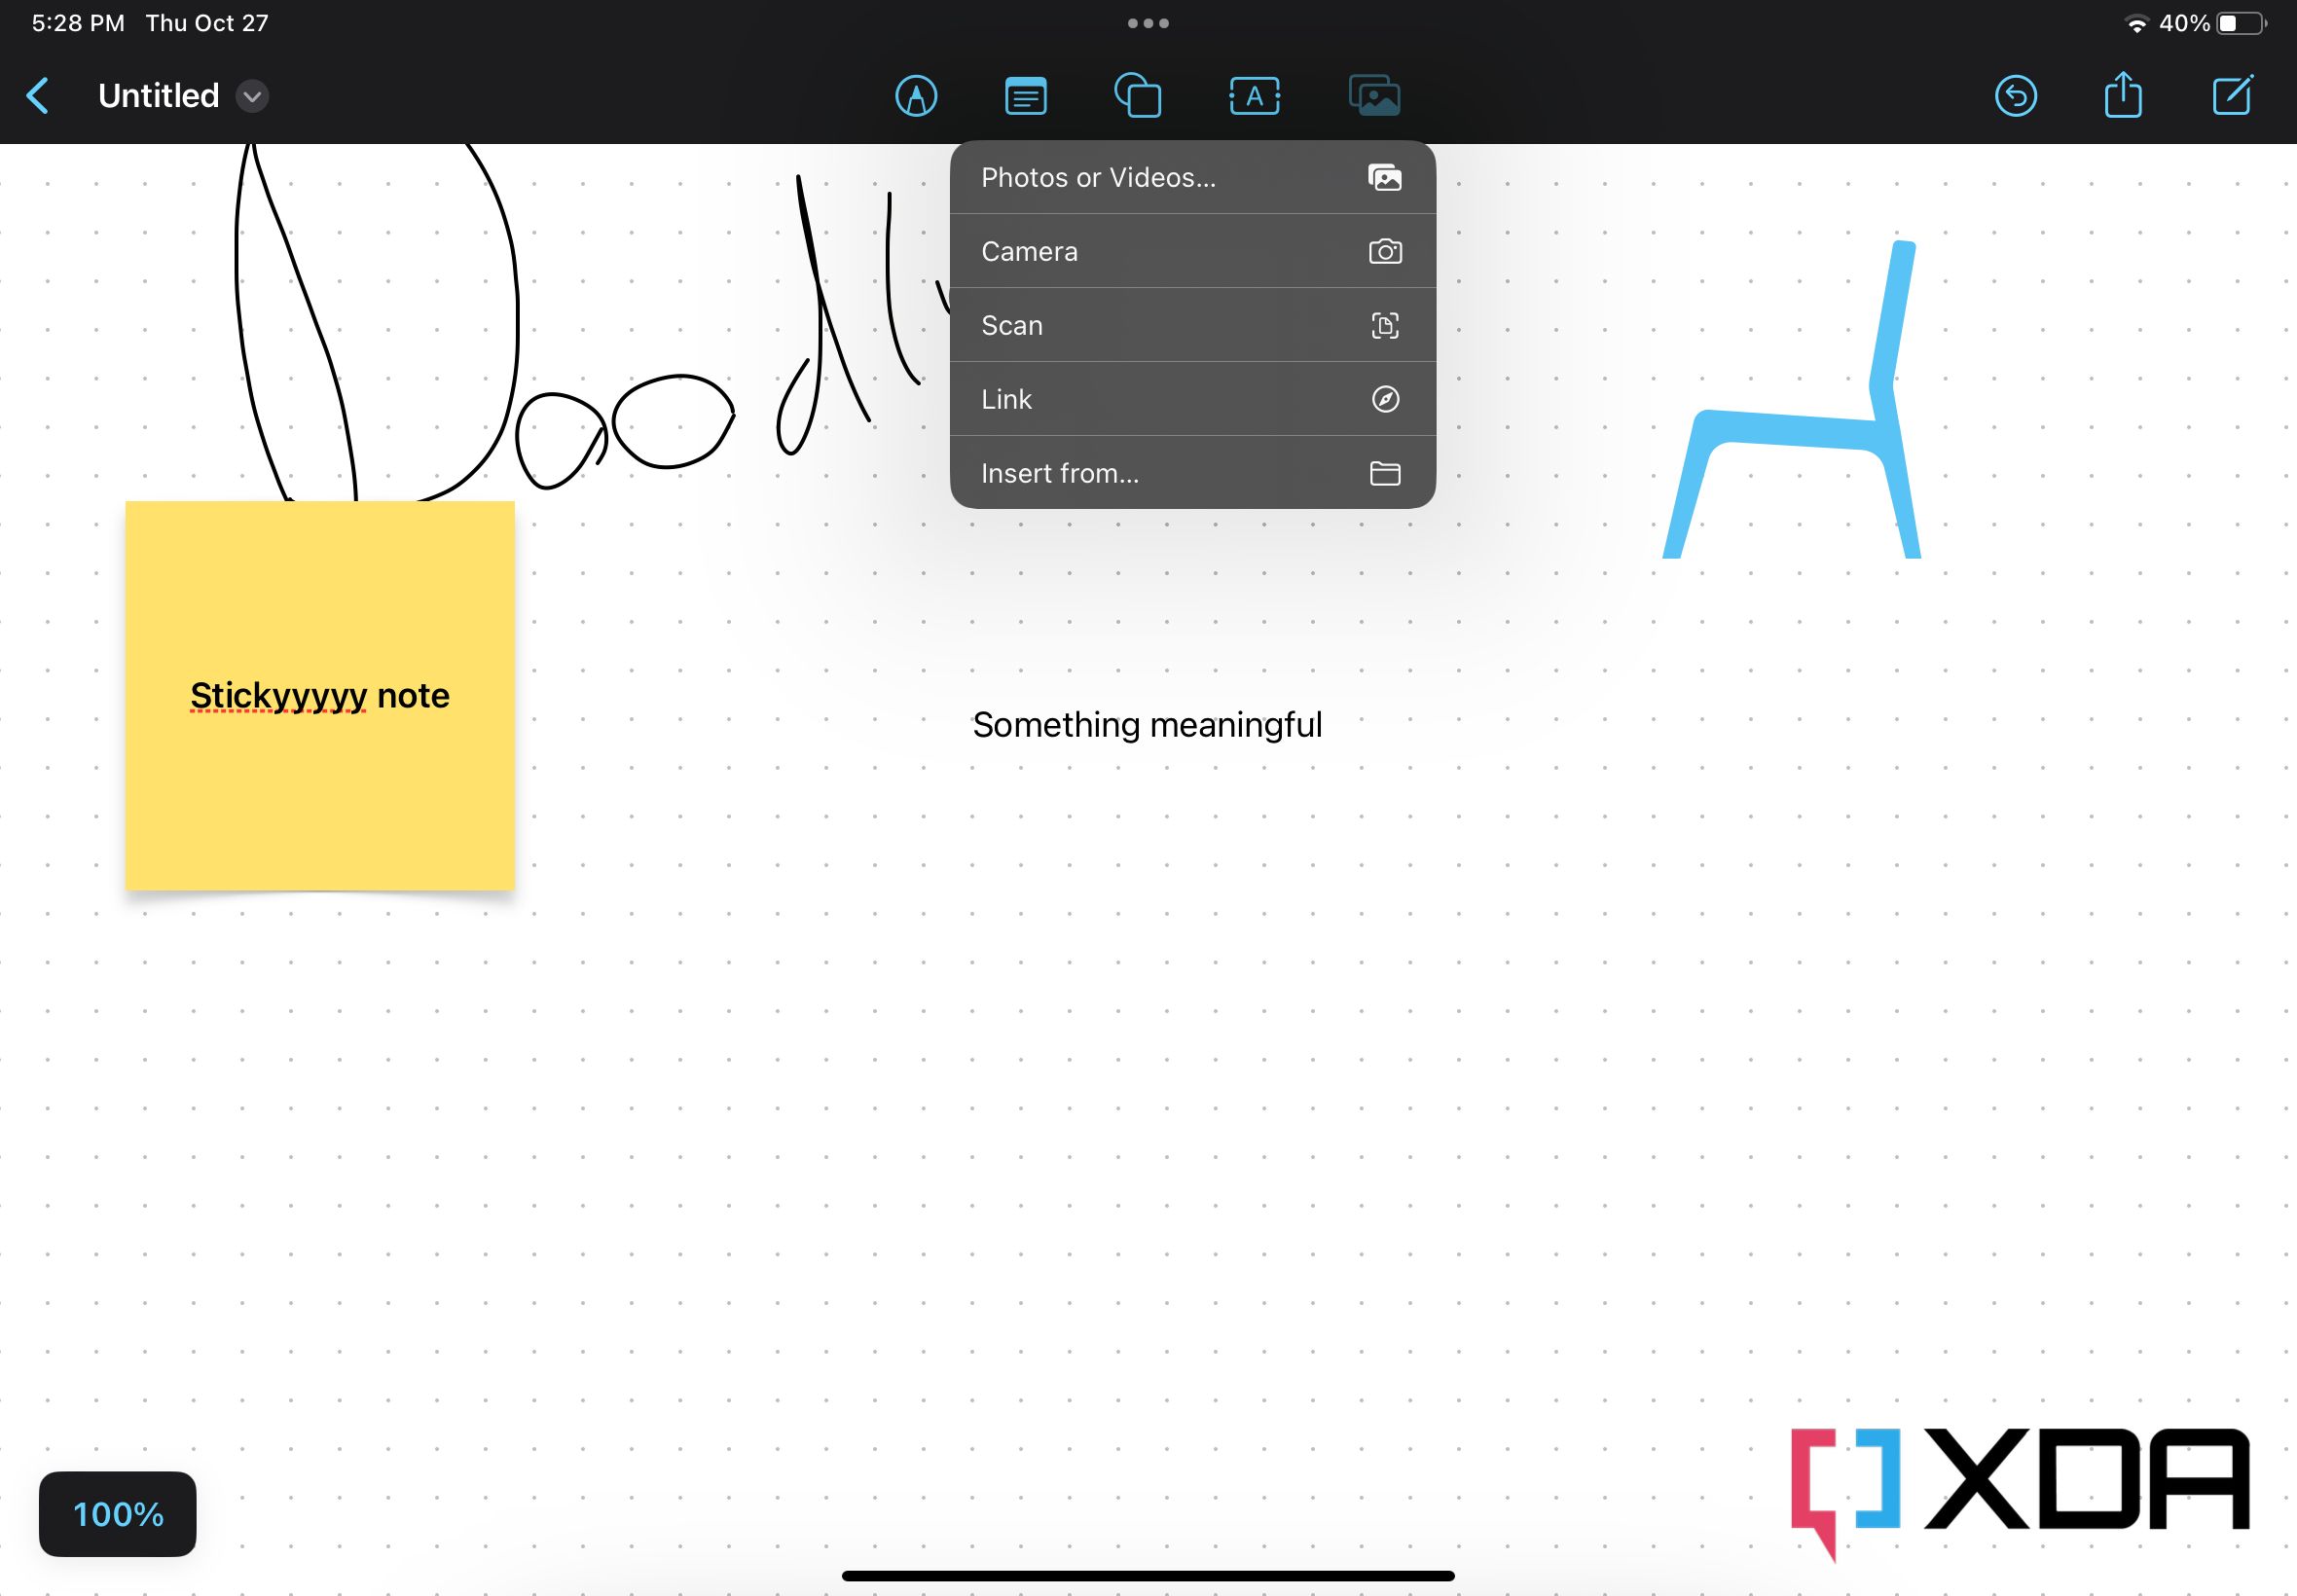
Lastly, in terms of insertable elements, there’s an Attachment icon. Clicking it allows you to insert photos, videos, fresh media and document scans through the camera, web links, and pretty much any file format. This means you can quite literally insert any object on a Freeform board.
Apart from the insertion buttons, you will find an Undo button (psst, hold on it to reveal the Redo menu), a Share button, and a button to create a new board. By default, the board is at 100% zoom. You can zoom in up to 400% and zoom out up to 10%. A board is also borderless, so no matter how much your ideas expand, you can still move around and cover new white space. The mentioned zooming percentages are the only technical limits that could make viewing all elements on a very large board challenging.
That’s it! This is everything you need to know about the Freeform app on iOS, iPadOS, and macOS. You can use it to plan ahead, share ideas with colleagues or friends, or maybe just for artistic reasons. In Freeform you decide what you want the app to be, not the other way around.
What will you be using the Apple Freeform app for? Let us know in the comments section below.


