Summary
- git-who provides comprehensive author-based insights instead of just line-by-line authorship.
- You can use git-who to identify top contributors, view project hierarchy, and track contributions over time.
- git-who offers options to customize its output, filter its results, and exclude merge commits for accurate statistics.
Git blame is useful, but it only tells you about line-by-line authorship. When you want a comprehensive author-based overview of your open-source projects, try this tool instead.
What Is git-who and How Is It Different From git blame?
git-who is a custom git command that shows useful, interesting information about the authors of commits in a repository. You can use it to discover who has updated the code most recently, which authors have contributed the most overall, and who works on specific subcomponents.
While the built-in git command git blame can tell you about the authors of individual lines of code, git-who gives details about files, directories, and entire projects.

Related
How to View Commit History With Git Log
Git tracks commits over time, allowing you to follow the progression and history of your code.
git-who is terminal-based, but it produces attractive, readable output by displaying its data in tables and highlighting it with colors.
How to Install and Use git-who
The easiest way to install git-who is with the Homebrew package manager:
brew install git-who
The software is also easy to install from source or you can download a precompiled binary from the project’s releases page.
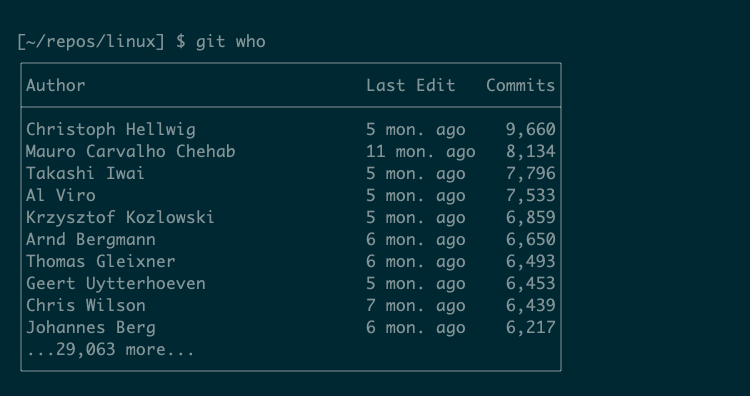
Once installed, you can run it using git-who or git who in a git repository directory:
Ensure that the git-who binary is in your PATH, especially if you built it from source. Doing so will allow you to use the git who form of the command.
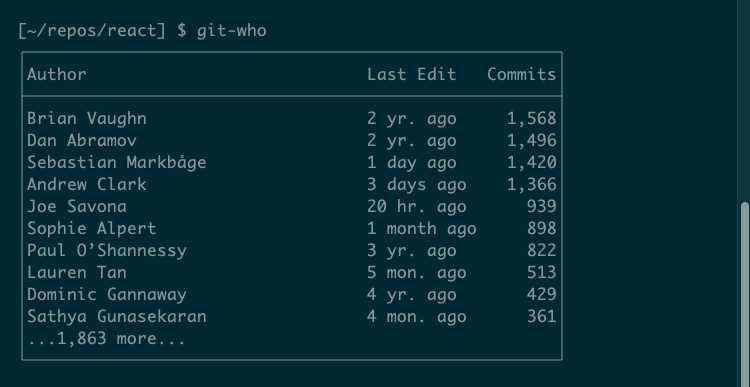
This default view is the table subcommand. This shows a nice summary of the top contributors, alongside their last edit and total number of commits. git-who supports two other commands: tree and hist.
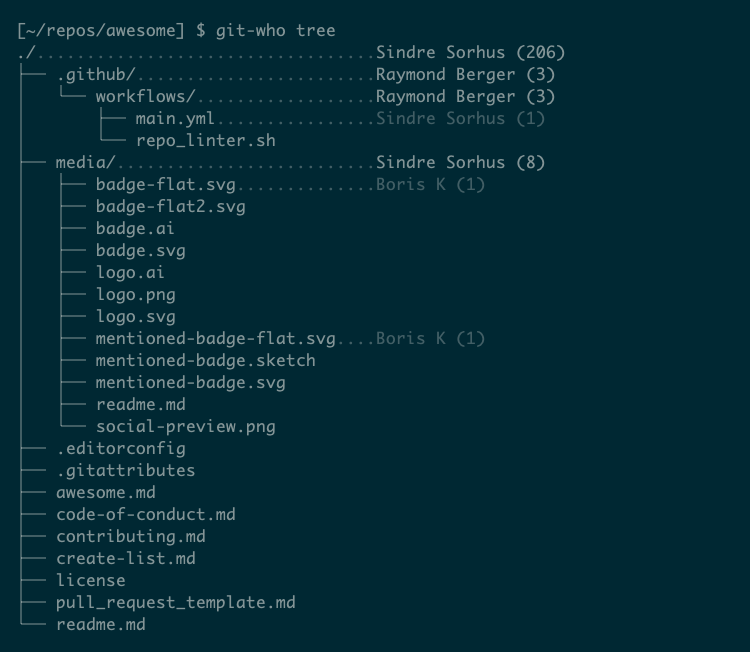
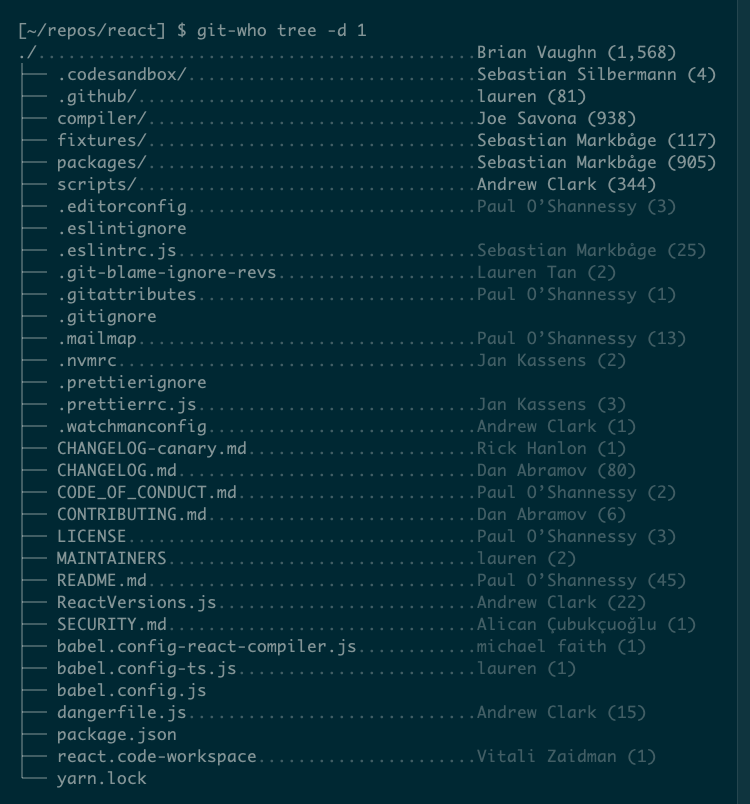
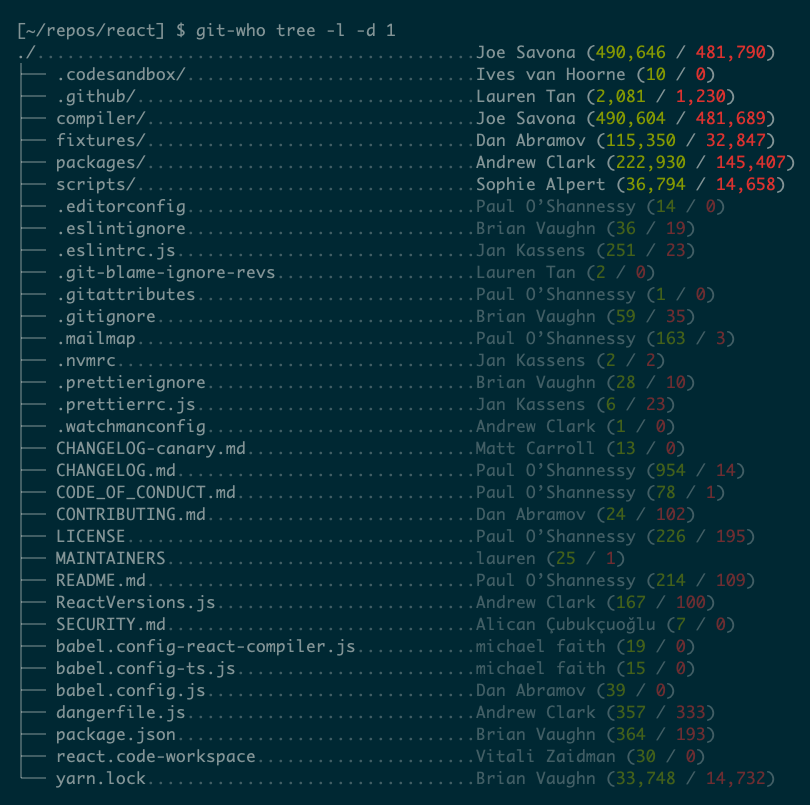
The tree subcommand shows the repository’s full hierarchy, with the top contributor alongside each directory, followed by their total commits.
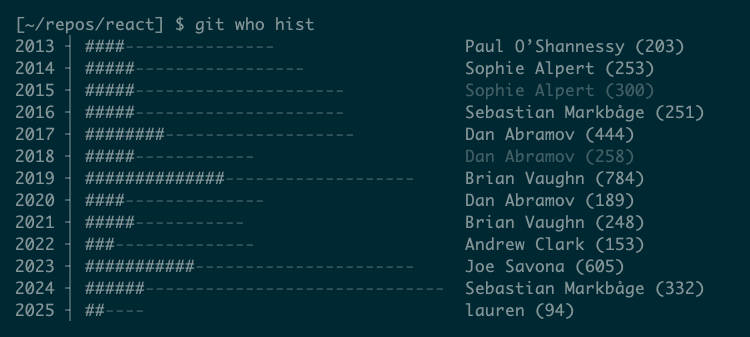
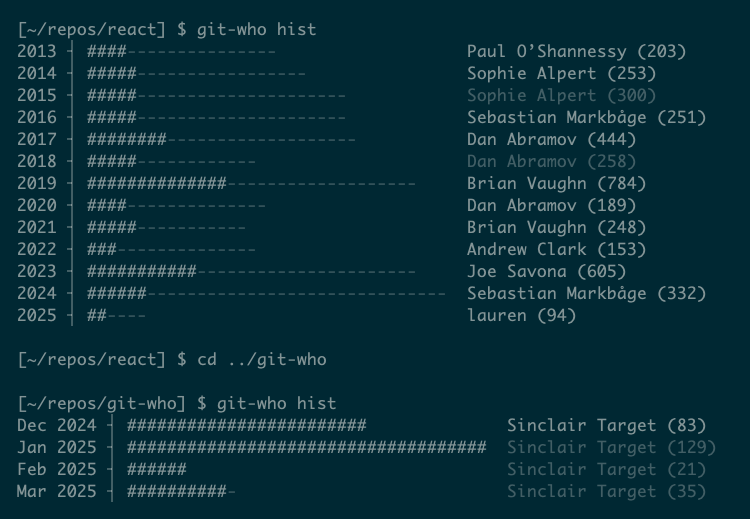
The third subcommand is hist, for “history.” This view shows a timeline of contributions by date, letting you track the project’s contributors over time:
This is also a histogram, so you can quickly spot the periods with the most commits.
Some commands may take a long time to complete, particularly on a large repository like the Linux kernel. To speed them up, try filtering the results using git-who’s advanced options.
Advanced Features of git-who
Each of git-who’s subcommands has sensible defaults, but you’ll see very different results depending on the size and structure of your repository. For example, running git-who tree in a huge repository will produce many lines of output.
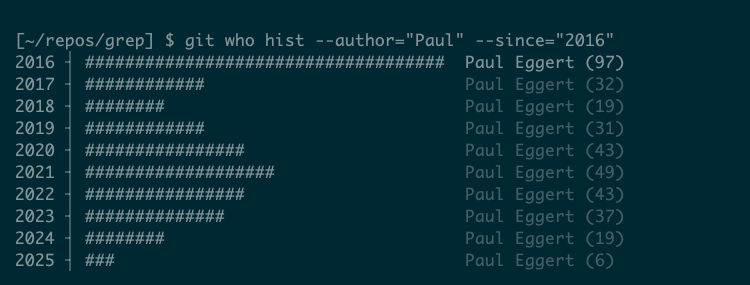
The git-who program supports several options to help you tweak its behavior and output. All subcommands let you use –author to include only specific authors and –nauthor to exclude them. They also accept –since and –until options to limit the output by date:
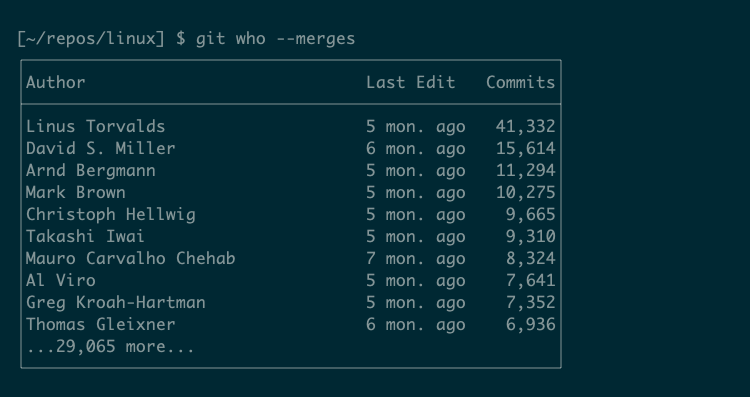
It’s important to note that git-who’s statistics do not include merge commits by default. This can make a lot of difference, depending on how the repository is managed. For example, Linus Torvalds is conspicuously missing from the stats of his own Linux repository:
But, as overall maintainer, Torvalds handles a huge number of merges, and is by far the biggest contributor when merges are taken into account, using the –merges option:
Customizing git-who table
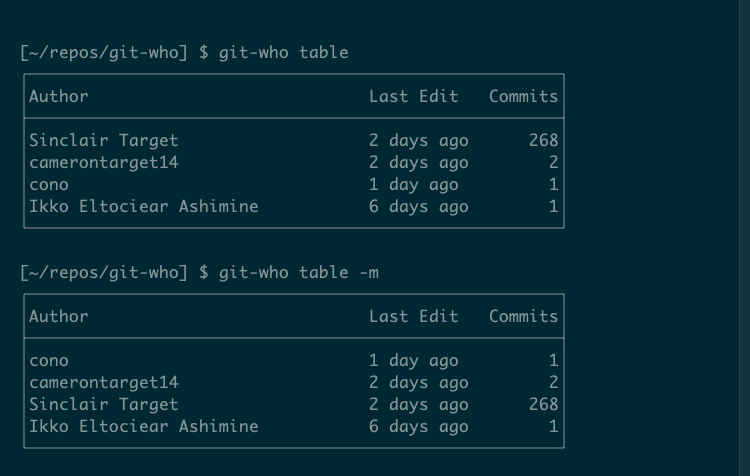
The default table sorts by total commits. You can change this to sort authors by their most recent commit using the -m option:
The -l option focuses on lines changed rather than commits. It sorts by lines changed and shows the number of files changed, the number of lines added, and lines deleted:
You can also sort the output by files changed using -f or by the first change with -c.
Customizing git-who tree
The first thing you might want to do with tree is limit its depth. If your repository contains many files and directories, the default tree command will generate a lot of output. The -d option lets you specify depth, so you can view author info just for top-level directories, for example:
The -l option will select the author with the most lines changed instead of the one with the most commits. It annotates each file and directory with the number of lines each author has added and removed at that point:
Customizing git-who hist
The hist subcommand already has a neat built-in feature, automatically choosing a day, month, or year view based on the age of the repository:
The –since and –until options work well with hist, to restrict the period it reports on.
These options are quite flexible in the format they accept, so try experimenting. For example, all these should work:
- –since=2010
- –since=”2010-09-01 12:00:00″
- –since=yesterday
- –since=”3 weeks ago”
- –since=”february 24″


