Adding horizontal lines to your Microsoft Word document can be a great way to separate sections, improve the layout, and make your work easier to follow. There are various ways to do this, but some are better than others.
Why You Should Avoid Drawing Horizontal Separator Lines Manually
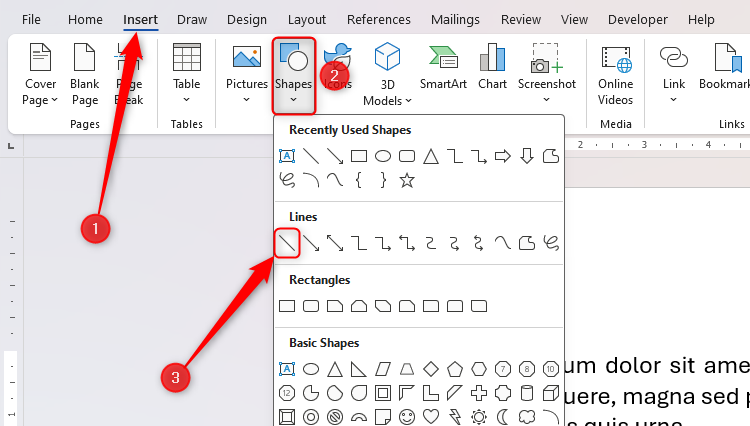
You might be tempted to draw a separator line manually in Microsoft Word by clicking “Insert” on the ribbon, opening the “Shapes” drop-down menu, and selecting “Line.”
However, this method can create issues that cause frustration and need unnecessary extra work to rectify.
The main downside relates to consistency, which is something you should always aim to achieve when creating a Word document. First, there’s no guarantee that the left and right ends of each line will align each time you add a new one, and if you adjust your margin widths, you’ll also need to adjust the horizontal lines to match. Also, you can’t guarantee that the spaces between the text and the lines are the same.
Manually drawn lines are also not secured to the text in your Word document. This means that if you make changes to what you have typed, like adding more content or adjusting the font size, the lines won’t react to those amendments, resulting in random lines being dotted in strange places throughout your document.
Finally, compared to the method I outline below, drawing lines manually takes time and reduces your creative efficiency.
A much more efficient, tidier, and structurally secure way to add horizontal separator lines to your Word document is to use the program’s built-in text border. This method attaches the horizontal lines to text, meaning they’re more adaptable to any text changes you make. It also ensures that the lines span the width of your page (running from the inside of your left margin to the inside of the right margin) consistently, even if you change your document’s margin widths.
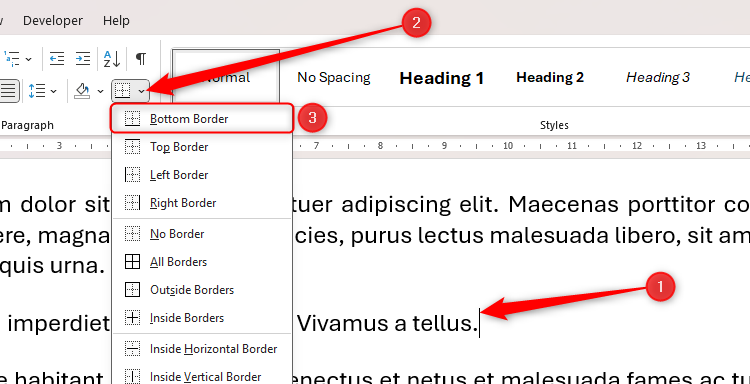
First, place your cursor in the paragraph under which you want your horizontal line to be. Then, click the “Borders” drop-down arrow in the Paragraph group of the Home tab, and click “Bottom Border.”
If you don’t see the Bottom Border option in this drop-down menu, click “Borders And Shading” (the final option in this menu), and use the Borders And Shading dialog box to add the bottom border. This is also where you can customize the border’s properties.
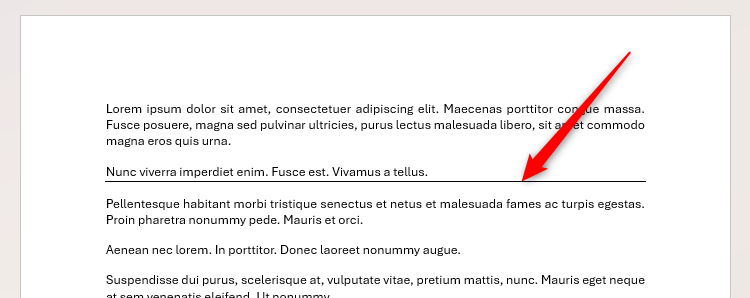
This will create a horizontal line that spans the width of the document’s text area and adjusts to any other structural changes you make.
How to Add Horizontal Lines Using Keyboard Shortcuts
You can also add structurally sound border lines without taking your fingers off your keyboard. Since border lines are linked to the text directly above them, after typing the last line of text in a paragraph, press Enter, and then use the following Microsoft Word keyboard shortcuts. After typing the shortcut, press Enter again to finish the process.
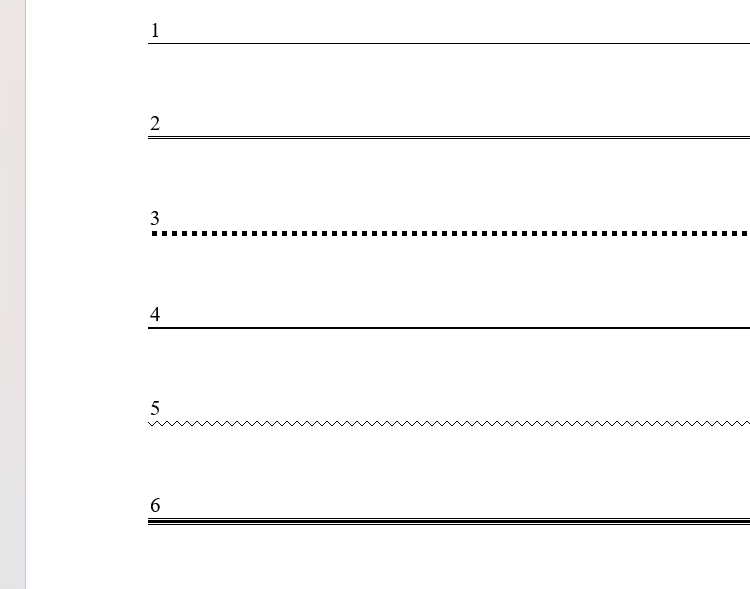
- Type — (three hyphens) for a single, narrow line.
- Type === (three equals signs) for a double line.
- Type *** (three asterisks) for a broken line.
- Type _ _ _ (three underscores) for a bold line.
- Type ~~~ (three tilde symbols) for a wavy line. This only works on the Word desktop app, not Word for the web.
- Type ### (three hashtags) for a triple line with a thick center. This also only works on the desktop app.
If these keyboard shortcuts do not create horizontal lines when you press Enter, press Alt > F > T to open the Word Options window, click “AutoCorrect Options” in the Proofing section, and check “Border Lines” in the AutoFormat As You Type tab.
How to Add Horizontal Lines Under Headings
To add stylistic horizontal lines under each heading, rather than applying the formatting directly to the text on the Word document canvas, use Microsoft Word’s styles tool.
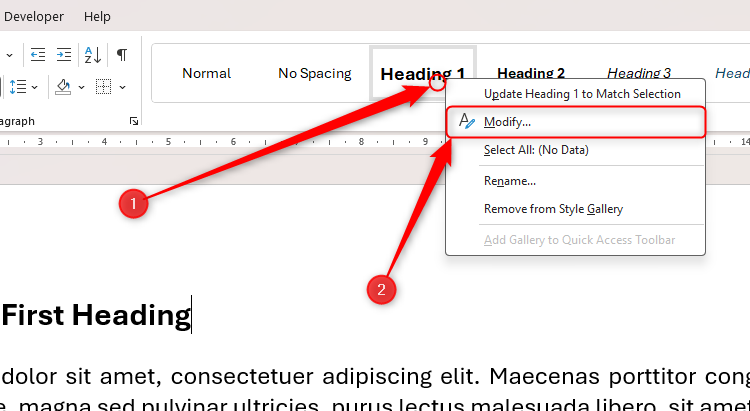
Right-click the relevant heading in the Style Gallery in the Home tab on the ribbon, and click “Modify.”
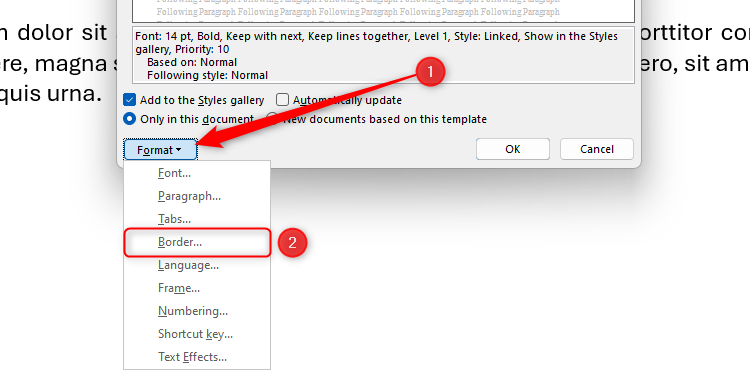
Then, expand the “Format” drop-down menu, and click “Border.”
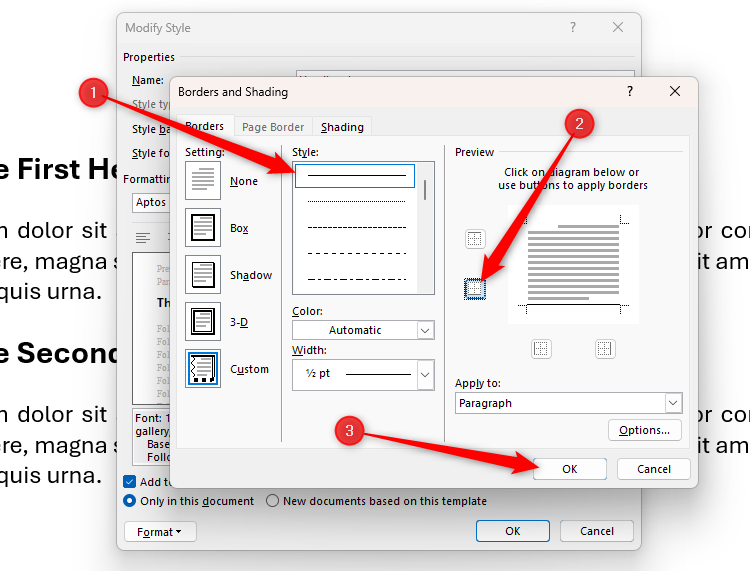
Finally, choose a border style, apply the bottom border, and click “OK.”
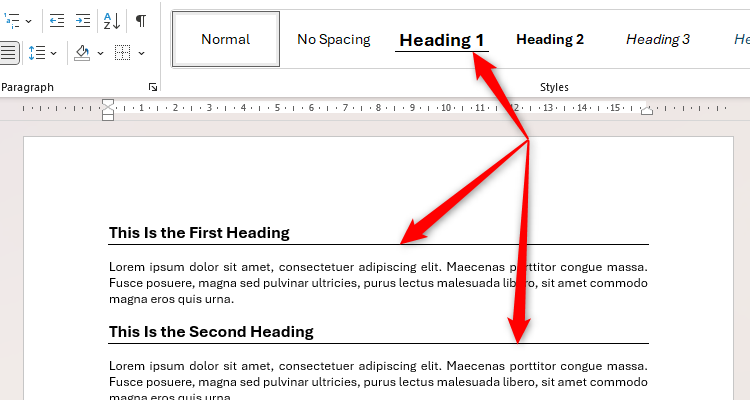
Word then adds a horizontal line underneath any text with this heading style applied to it, and you can see this change reflected in the Style Gallery in the Home tab.
How to Remove a Horizontal Border Line
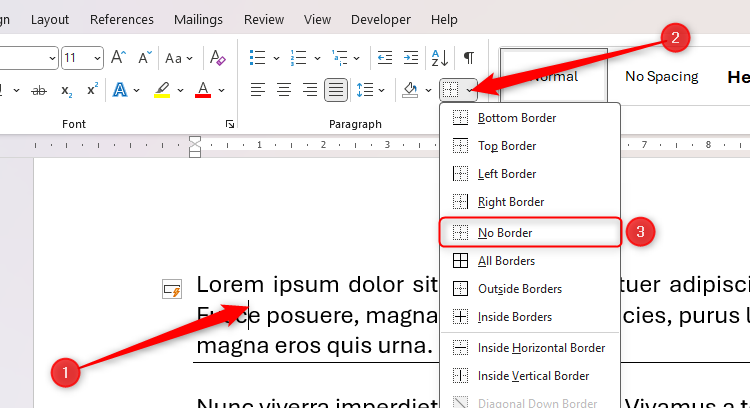
To remove a horizontal border line you added through direct formatting, place your cursor in the paragraph before the border, and click “No Border” in the Borders drop-down menu of the Home tab. Alternatively, if you prefer to use your keyboard only, press Alt>H>B>N.
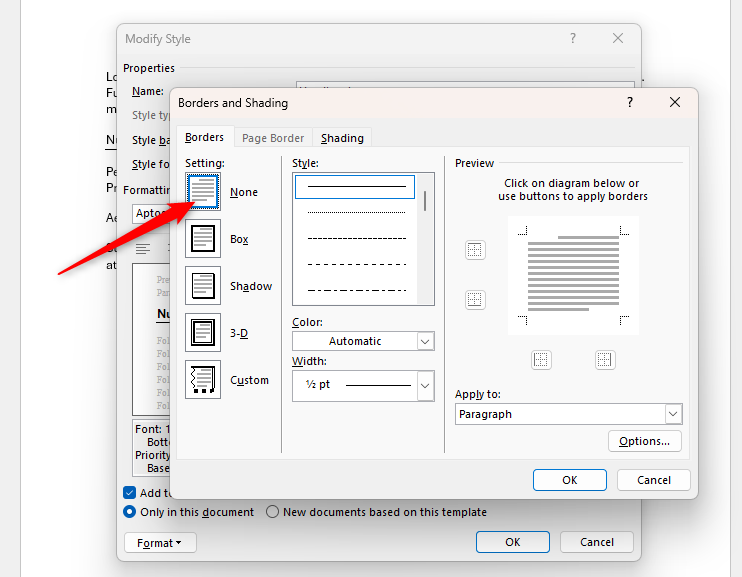
To remove a line you added through a style, head back to the Borders And Shading dialog box via the Modify Style window, and click “None”.
As well as using borders to visually partition different segments of your work, use page and section breaks to insert structural cutoffs, such as at the end of a chapter or before a bibliography.


