Taking screenshots is a simple yet essential task. Whether you’re saving important information, sharing something cool, or troubleshooting an issue, knowing how to capture your screen efficiently and in various ways on Ubuntu is a valuable skill.
Basic Screenshot Method
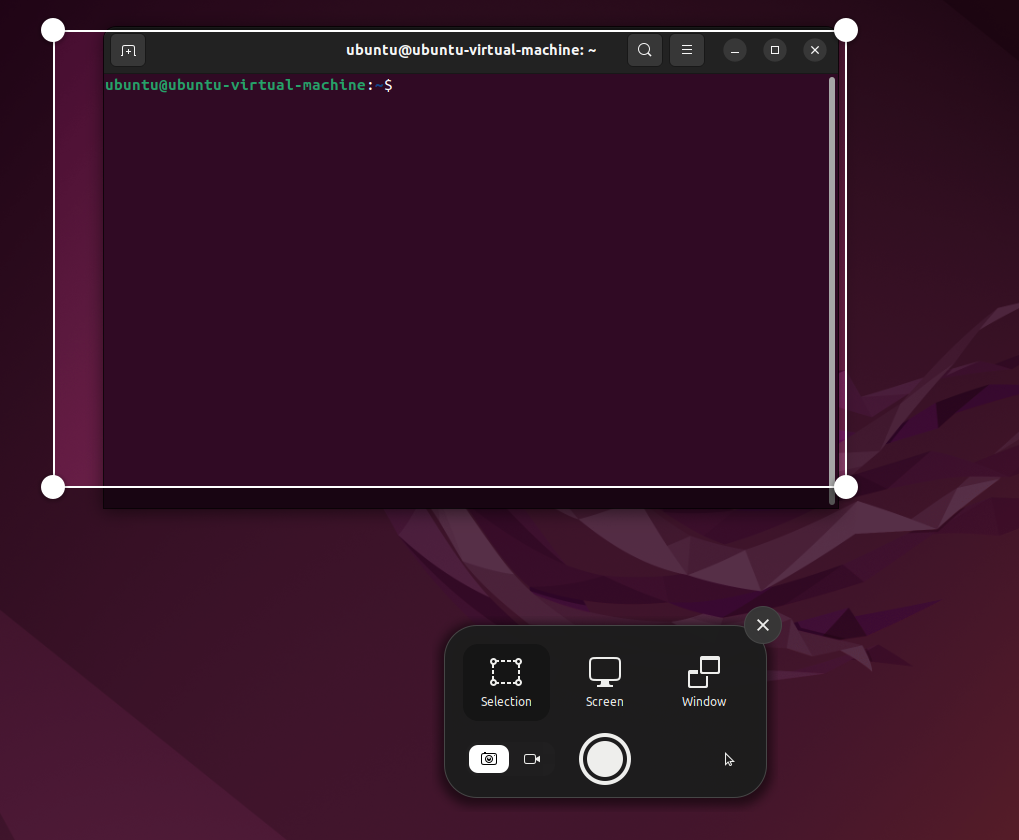
One of the easiest ways to take a screenshot in Ubuntu is to use the Print Screen (PrintScr or PrtSc) key. When you press it, a handy little menu pops up at the bottom of your screen, offering three simple options.
- Selection: Use this to capture a specific part of the screen by dragging to select.
- Screen: This captures your entire screen.
- Window: Only the active window will be captured.
By default, your screenshots will be saved in a Screenshots folder inside the Pictures directory. You can also access the screenshot tool by searching for “Screenshot” in the Applications menu, where it’s called “Take a Screenshot.” The functionality is exactly the same as hitting PrintScr.
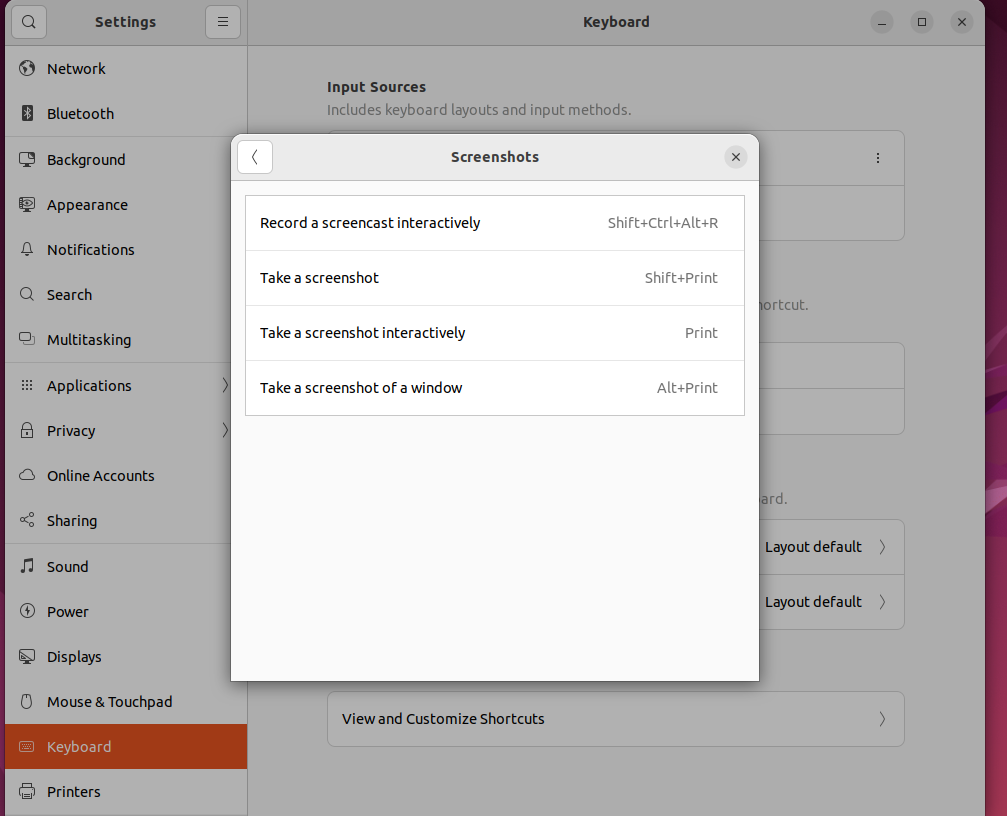
If you’re like me and prefer shortcuts, no problem! You can change the shortcut to take a screenshot by going to Settings > Keyboard > Shortcuts and setting it up just the way you like.
Using the Terminal to Take Screenshots
If you’re more comfortable with the terminal (or just want more control), there’s the gnome-screenshot tool. It’s not installed by default, but you can easily add it by typing this command.
sudo apt install gnome-screenshot
Once it’s installed, here are some useful commands to know.
Capture the Entire Screen
gnome-screenshot
This captures everything on your screen.
Capture the Active Window
gnome-screenshot -w
Want just the active window? This is the command you’re looking for.
Capture a Selected Area
gnome-screenshot -a
If you only need a portion of the screen, this command lets you select an area using a crosshair.
Save to a Specific Location
Normally, your screenshots go straight to the Pictures folder, but what if you want to save them elsewhere? You can use the -f option to choose a different location. Combine this with other commands like -w or -a.
gnome-screenshot -w -f ~/Documents/window_screenshot.pnggnome-screenshot -a -f ~/Documents/area_screenshot.png
Delay Option
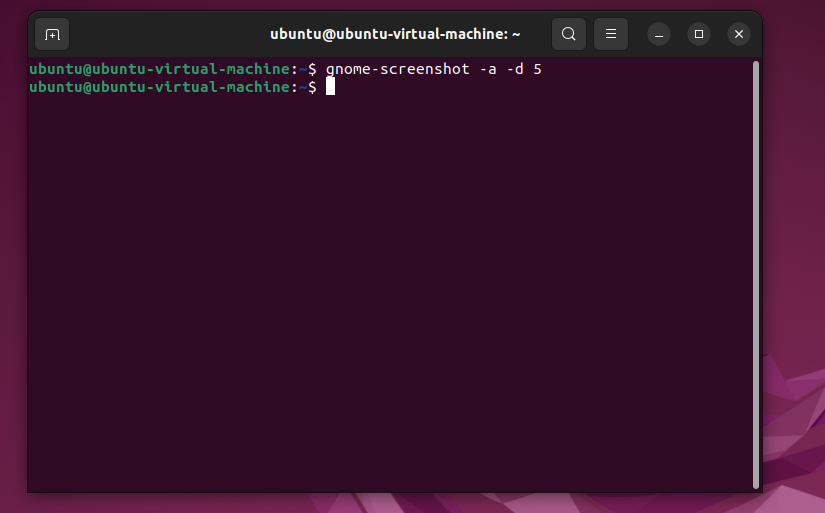
Do you ever need a little extra time before the screenshot is taken? The -d option allows you to add a delay. This is especially handy if you’re setting up a screen and need a few seconds before the capture. You can also use it with any of the other options.
Delay for Window:
gnome-screenshot -w -d 5
Delay for Selected Area:
gnome-screenshot -a -d 5
I find the delay option useful when arranging something specific on my screen before capturing it.
If you’re looking for more advanced tools that allow you to annotate your screenshots, Shutter and Flameshot are great options. These tools offer more flexibility and make editing your screenshots easy.
Shutter
Shutter is one of my go-to tools when I need to both capture and annotate screenshots. With Shutter, you can add arrows, text, and shapes right after taking your screenshot, making it perfect for creating tutorials or highlighting important details. To install Shutter, run the command.
sudo apt install shutter
After you take your screenshot, you can open the built-in editor to add those visual elements. It’s super user-friendly and makes your screenshots look polished.
Flameshot
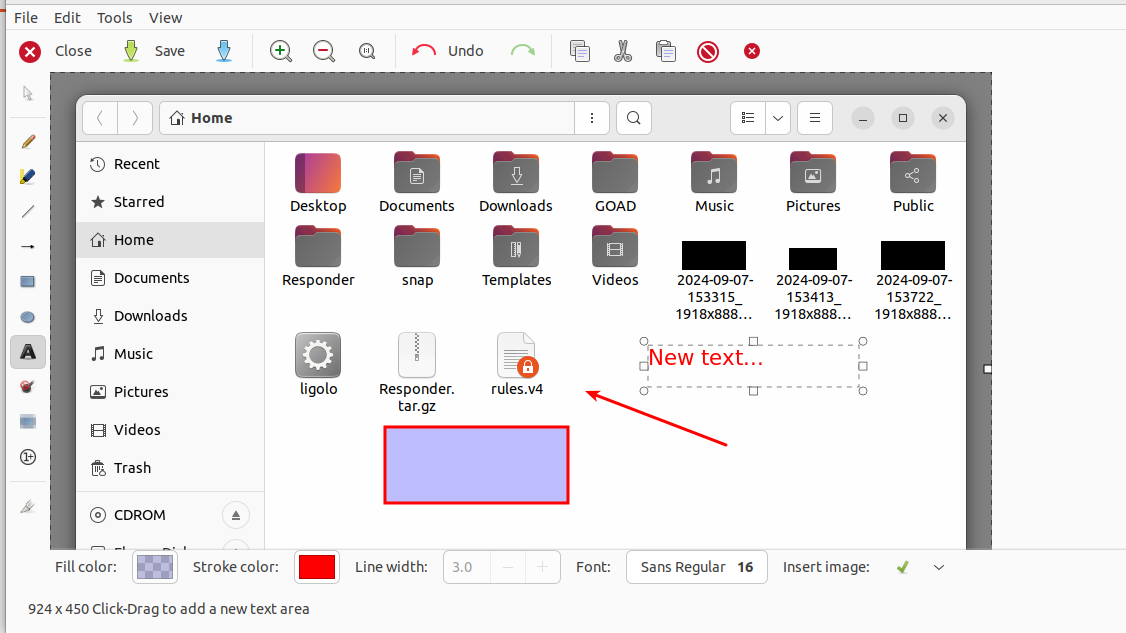
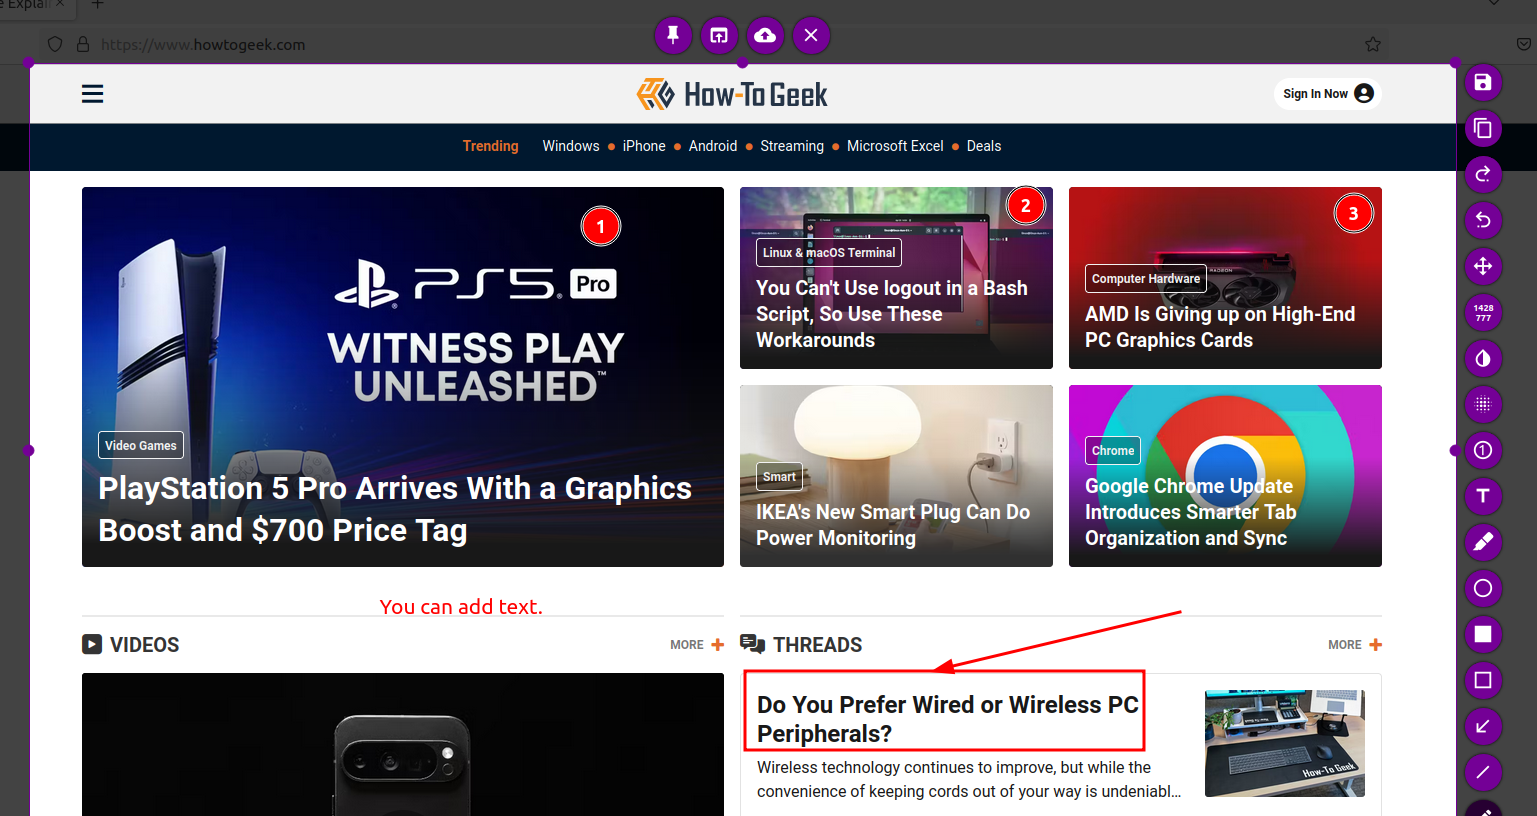
Flameshot is another fantastic tool that lets you capture and annotate on the fly. As soon as you take a screenshot, you’ll see a set of tools that enables you to add arrows, text, and shapes—everything you need to mark up your screenshot. Here’s what the Flameshot interface looks like after taking a screenshot.
The toolbar on the side makes it really easy to select the tool you want, whether it’s drawing, highlighting, or adding text. If you want to give Flameshot a try, install it with:
sudo apt install flameshot
I love using Flameshot when I need to mark something up quickly. It’s fast, intuitive, and makes the whole process so much easier.
As you can see, there are many ways to take screenshots in Ubuntu. Whether you’re using a simple keyboard shortcut, going the command-line route, or trying out third-party tools like Shutter or Flameshot, there’s a method for every need. Personally, I find that combining these methods gives me the most flexibility, so don’t hesitate to try them all and see what works best for you!


