PowerPoint’s animations and transitions can help you grab your audience’s attention, present information in bite-sized chunks, and—when used sparingly—deliver a more professional presentation. In this article, we’ll run through the nuts and bolts of these useful PowerPoint tools.
What Are Animations?
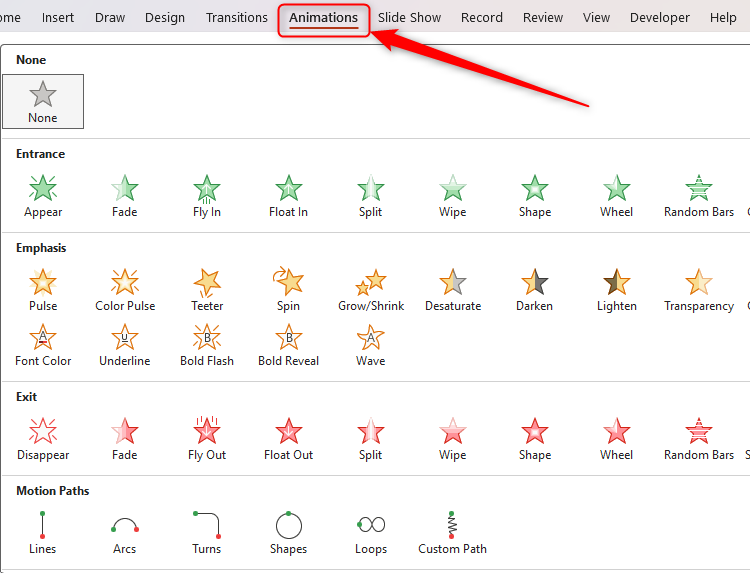
Animations are effects you can add to your slides’ text, pictures, shapes, graphics, tables, and other elements. There are four different types of animations:
- Entrance animations—These are the effects you can add to make an object appear on your slide in different ways.
- Emphasis animations—You can add an emphasis animation to an object already visible on your slide, such as changing its size or color.
- Exit animations—The opposite to entrance animations, exit animations make objects disappear from your slide through different effects.
- Motion paths animations—You can make an element on your slide move to a different place, with your audience seeing this movement from where it started to where it ends up.
You can use more than one animation on a single object. For example, you can apply an entrance animation to some text, followed by an emphasis animation.
What Are Transitions?
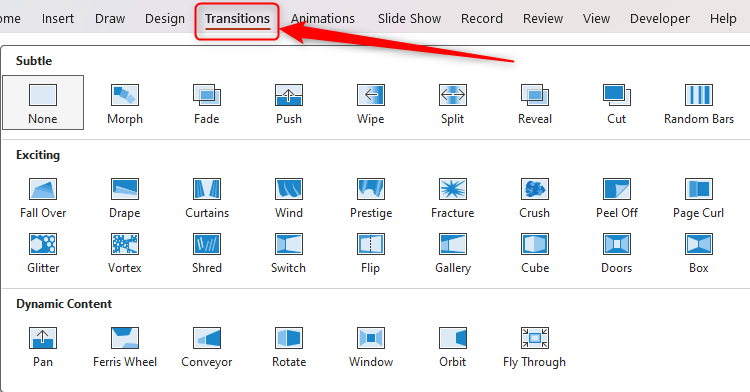
A transition effect dictates how your presentation progresses from one slide to the next, and you can choose from three different levels of complexity:
- Subtle—These are the most basic types of transitions in PowerPoint, aiding speed and slickness as you jump from one slide to the next.
- Exciting—You can make your transitions more visually entertaining.
- Dynamic—A dynamic transition applies to all parts of a slide, except for the background, giving the illusion that the content is rolling through on a single page.
Only one transition effect can be added to each slide, and it’s important that you apply the transition to the slide that will be visible once the transition is complete. For example, if you have two slides and want to create a transition effect as you move from slide 1 to slide 2, you will need to apply the transition to slide 2.
Things to Note Before You Begin
Before you add animation and transition effects to your PowerPoint presentation, bear in mind the following tips:
- Don’t add too many animations and transitions. Overusing these features can distract your audiences in ways you didn’t intend to, and they can also look tacky and unprofessional. Ask yourself, “Does this make my presentation better?” If the answer is no, don’t add it.
- Another issue with using too many animations and transitions is that it could significantly slow down your PowerPoint file’s processing speed, as it adds volume to your file size.
- Keep things professional in the right contexts. For example, if you’re presenting a formal business plan, you don’t want to add funky transitions that take ten seconds to complete. Try sticking to slick effects that last less than a second.
- Use the same transition effect for each slide and, if you can, the same animation for each item.
How to Add, Amend, and Remove an Animation
It’s a widely shared opinion that Microsoft 365’s desktop apps offer more flexibility and functionality than their web-based counterparts. However, the exact opposite can be said for adding animations, which is significantly easier to do on PowerPoint for the web than via the subscription-only app. So, to create the animations for screenshots in this section, we have used PowerPoint online, rather than the desktop app, and we recommend that you do the same.
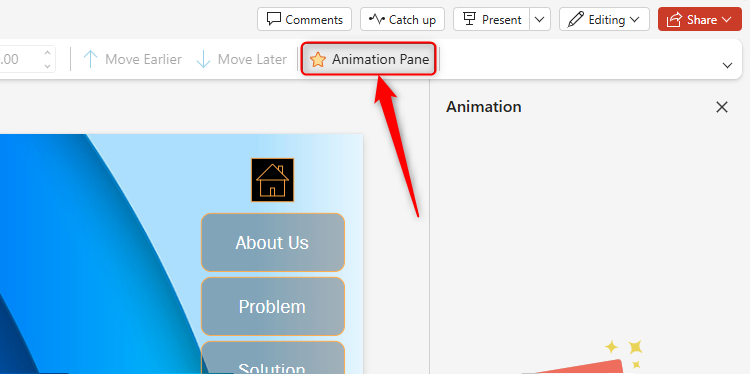
Before you add any animations, click “Animation Pane” in the Animations tab on the ribbon. This will open a pane on the right side of your window, which will make seeing and managing your animations much easier.
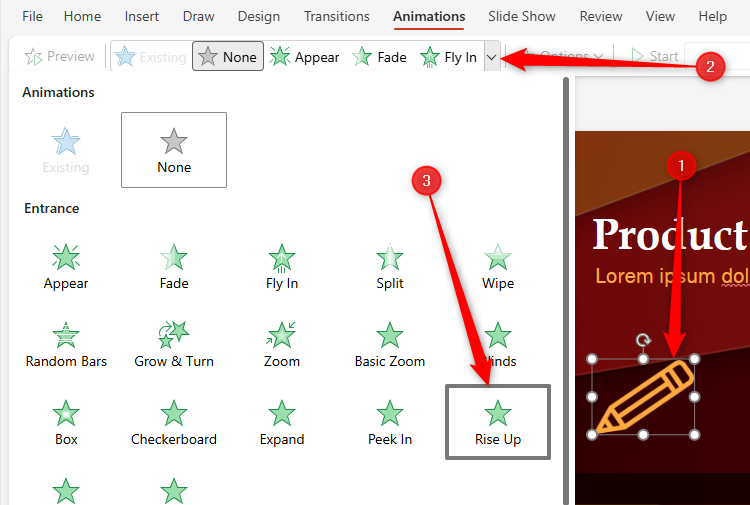
Now, select the item you want to animate. If you want several items on a slide to animate in the same way at the same time, hold Ctrl while clicking them all. Then, click the down arrow in the Animations tab, and choose the appropriate effect.
You will then see an animation card in the Animation Pane for the effect you just added. Here, you can change the animation type, how it is activated (whether via a click, with the previous animation, or after the previous animation), and the duration and delay.
If you have more than one animation on a slide and want to reorder them, click and drag the six dots next to the relevant animation card upwards or downwards.
Finally, to remove an animation, click the trash icon on the appropriate animation card.
You can also animate paragraphs of text within a text box. To do so, select the relevant text, and follow the same process.
How to Add, Amend, and Remove a Transition
Whether you’re using PowerPoint’s desktop app or the online version of the program, adding transitions involves a very similar process.
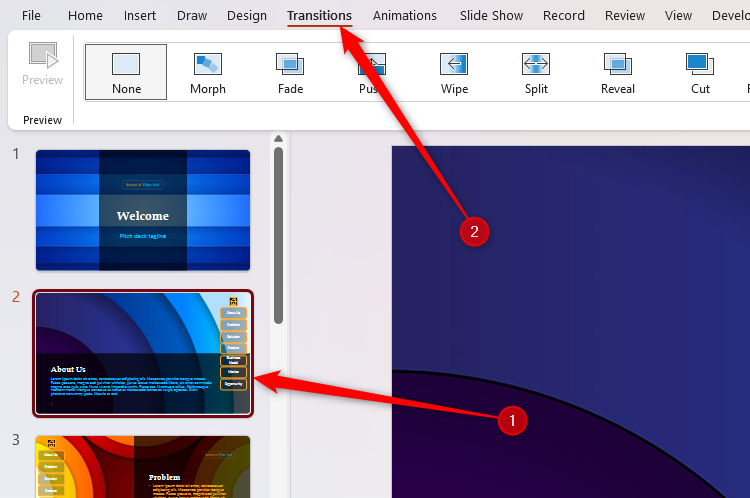
First, select the slide you want to transition to (for example, you’ll select slide 2 if you want to create a transition from slide 1 to slide 2) in the slide thumbnail pane, and then click the “Transitions” tab on the ribbon.
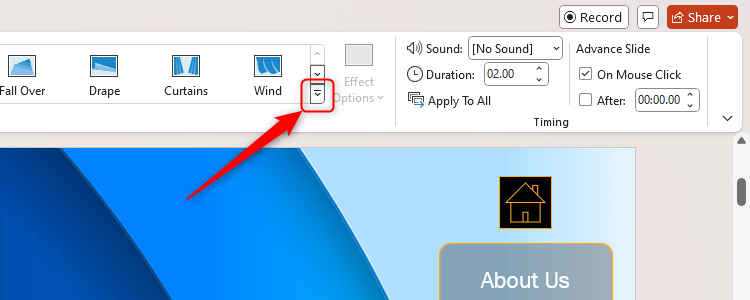
To see more transitions, click the down arrow on the right-hand side of the Transition To This Slide group.
Clicking any of the transition effects on display will do two things—first, it will show you a preview of what that transition will look like, and second, it will apply that transition to that slide.
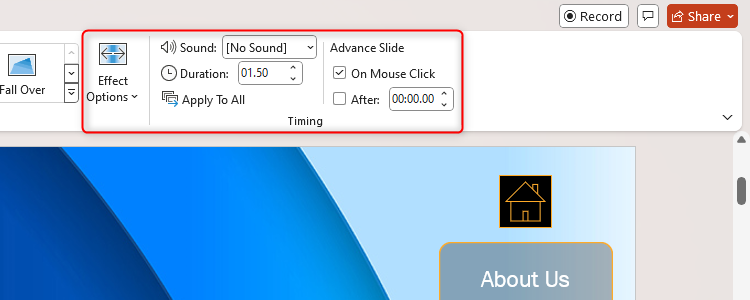
You can then amend the options (such as the direction of the transition) and timing of the transition using the settings on the right side of the Transitions tab. This is where you can also add a sound effect to the transition, or decide whether the transition effect occurs when you click your mouse or automatically after a given length of time.
If you want to apply the same transition effect and options to all slides, click “Apply To All” in the Timing group of the Transition tab when you have finished setting up your transition’s parameters. You can then select individual slides to make further adjustments if needed.
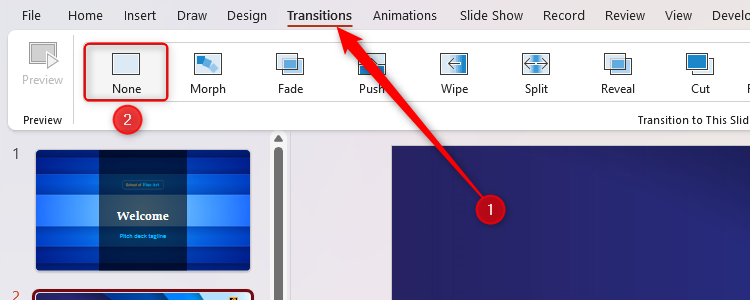
To remove a transition, select the slide in the slide thumbnail pane, and click “None” in the Transitions tab.
Using the Morph Transition
PowerPoint’s Morph is a transition effect that recognizes differences between the same items on two slides, and smoothly transitions between them when you proceed from one slide to the next. For example, you might have an image on slide 1, and the same image in a different position on slide 2. The morph transition gives your audience the impression that you’re still on the same slide, but the objects are merely moving and resizing.
This is different to the motion path animation, which you can set for different items and activate at different times on your slide. The morph transition, however, moves all items together as you move from one slide to the next, saving you from having to apply motion path animations to individual objects. Any objects on the first slide but not the second will simply fade away during the morph transition. Similarly, any new items on the second slide will appear gradually.
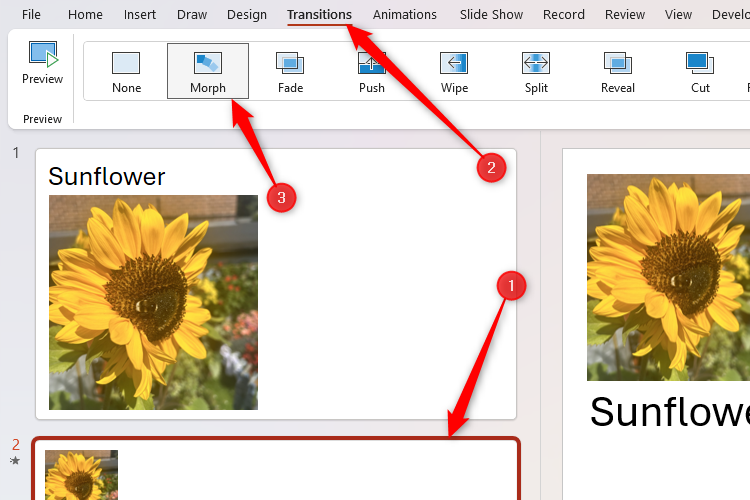
In this example, we have a title and an image on slide 1, and the same objects on slide 2 but in different places and different sizes. We created this scenario by copying and pasting the whole of slide 1, and then changing the text and image on slide 2. However, you can also create a blank slide, and then copy and paste the different elements you want to morph.
Then, we need to select slide 2, and click “Morph” in the Transitions tab on the ribbon.
Then, press F5 to see your presentation, and witness the smooth morph transition from one slide to the next. You can also use this transition effect to zoom into an image or fade an image into the background. Just ensure that you copy and paste from one slide to the next before you create the transition, so that PowerPoint recognizes them as the same.
If animations and transitions are new to you, check out these other tips that you should also know before you design your next presentation.


