My friends used to get upset with me because I always forgot to wish them happy birthday exactly at midnight. It’s not that I don’t care about wishing them a happy birthday, but I always get caught up in something else. To avoid this and prevent missing other events, I’ve started scheduling messages on WhatsApp.
Schedule WhatsApp Messages on Android
No, WhatsApp hasn’t released an official way to schedule messages. However, many third-party apps on the Play Store can help you schedule WhatsApp messages on your Android smartphone. SKEDit is one of the best options available.
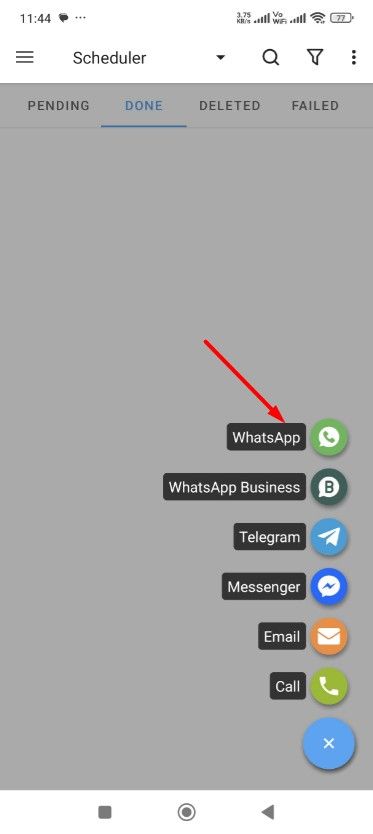
To use SKEDit, first download it from the Play Store and grant it the necessary permissions, which includes permission to disable the smart lock on your Android smartphone so the app can send the message without your intervention. After that, tap the plus icon and select “WhatsApp.” Then, choose the person you want to send the scheduled message to by selecting the “Recipients” option.
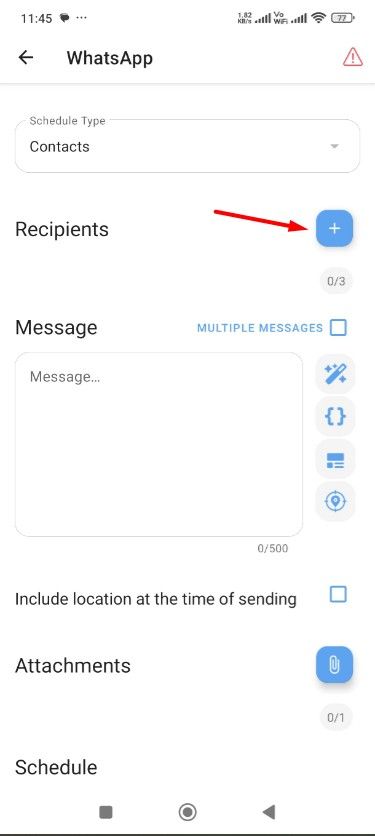
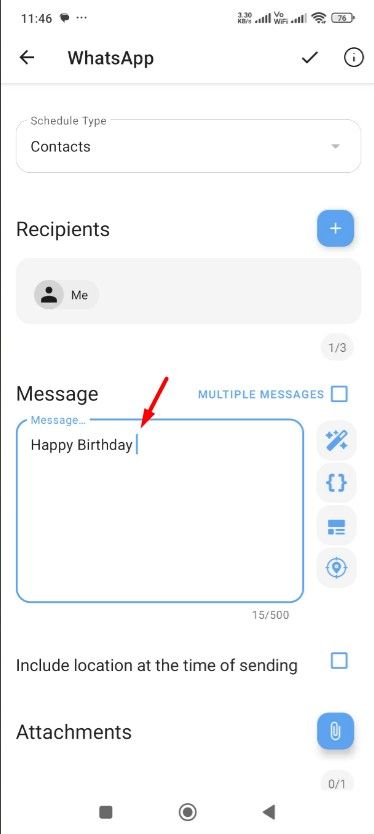
Type your message in the message field and add any attachments if needed. Next, select the date and time for the scheduled message and tap the check icon at the top.
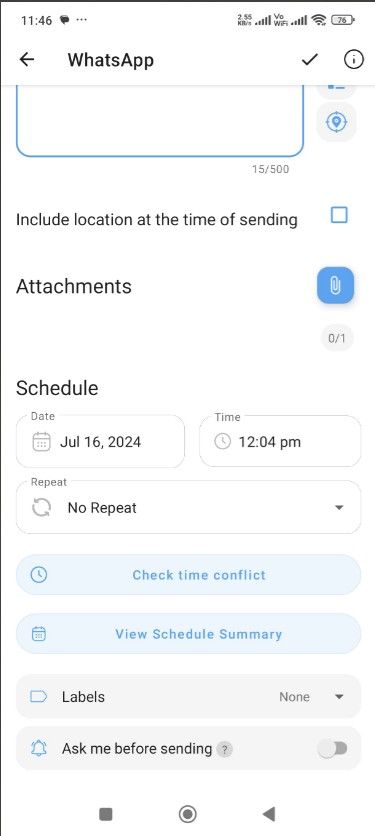
That’s it! The app will automatically send the scheduled message without requiring any further input from you.
Schedule WhatsApp Messages on iPhone
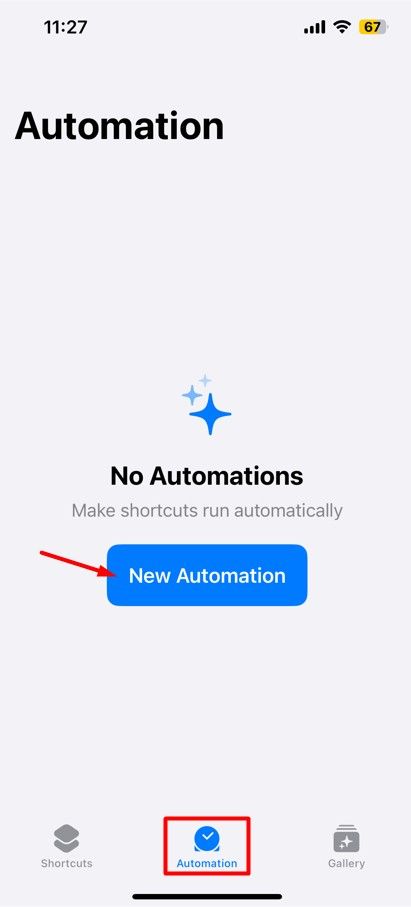
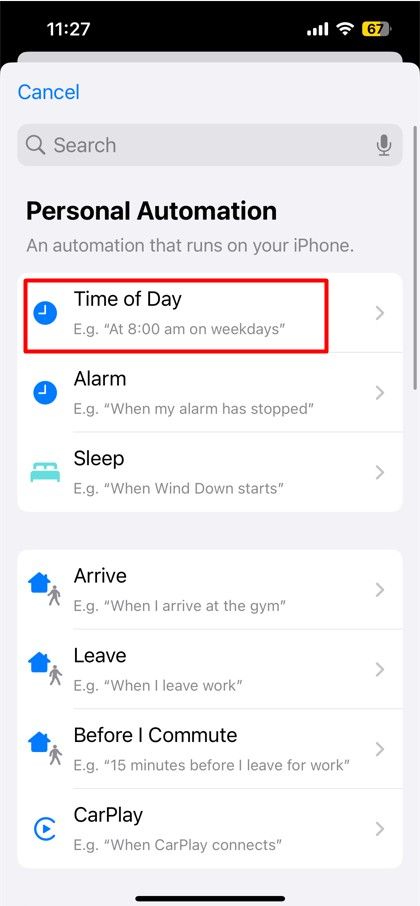
On your iPhone, you can use the Shortcuts app to schedule a WhatsApp or any other text message. If you don’t have the app installed on your iPhone, download it from the App Store and then open it. Tap “Automation” at the bottom and choose “New Automation.” Then, select “Time of Day.”
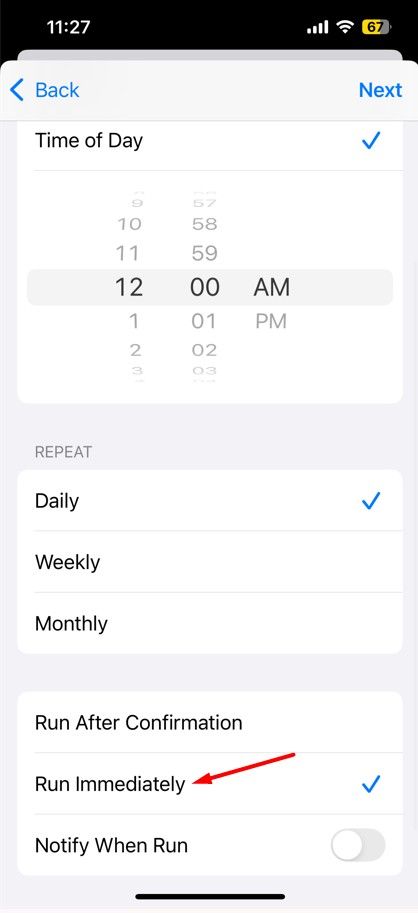
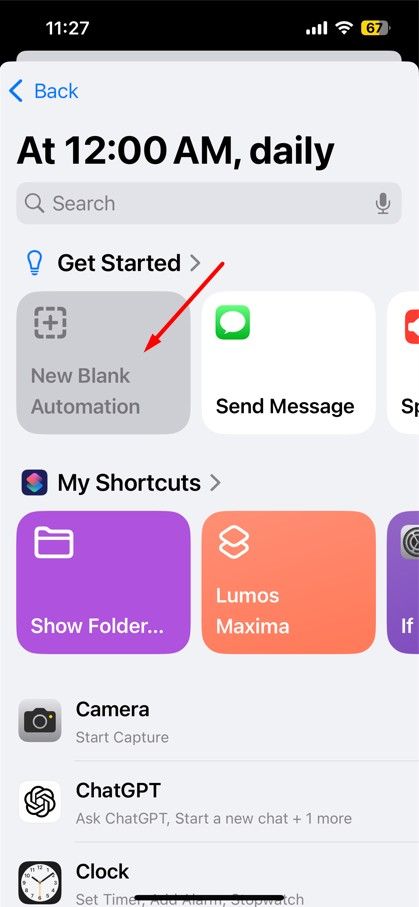
Next, select the date and time for which you want to schedule the WhatsApp message, choose the “Run Immediately” option, and tap “Next.” Then, choose the “New Blank Automation” box.
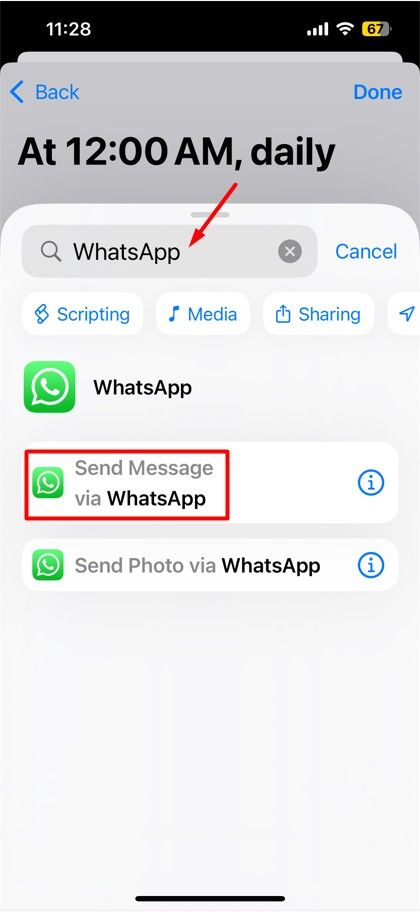
Next, type WhatsApp in the Search Actions field and choose “Send Message via WhatsApp” from the options that appear. Type the message in the message field and select the person to whom you want to send the message in the Recipient field. After that, tap the “Done” button.
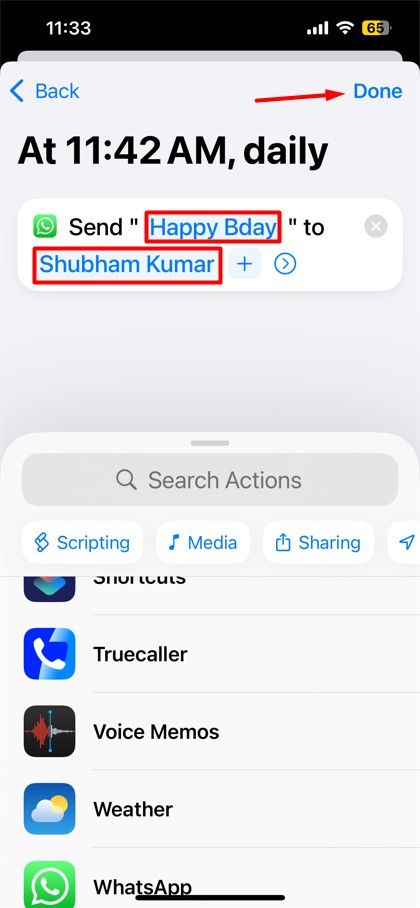
That’s about it. The WhatsApp message will be sent automatically at the scheduled time. Make sure to delete the automation task once you no longer need the scheduled message.
Schedule WhatsApp Messages on WhatsApp Web
Similar to your iPhone and Android smartphone, you can also schedule WhatsApp messages on WhatsApp Web. All you need to do is get the Blueticks extension from the Chrome Web Store. To begin, open Google Chrome and visit the Chrome Web Store. Then, select the “Extensions” option in the top bar, type “Blueticks” in the search bar, and hit Enter.
Next, click the “Add to Chrome” button on the Blueticks page.
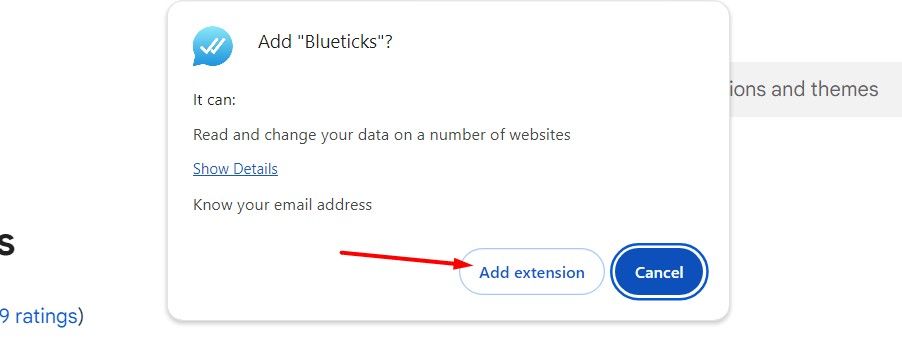
Click “Add Extension” when the pop-up window appears.
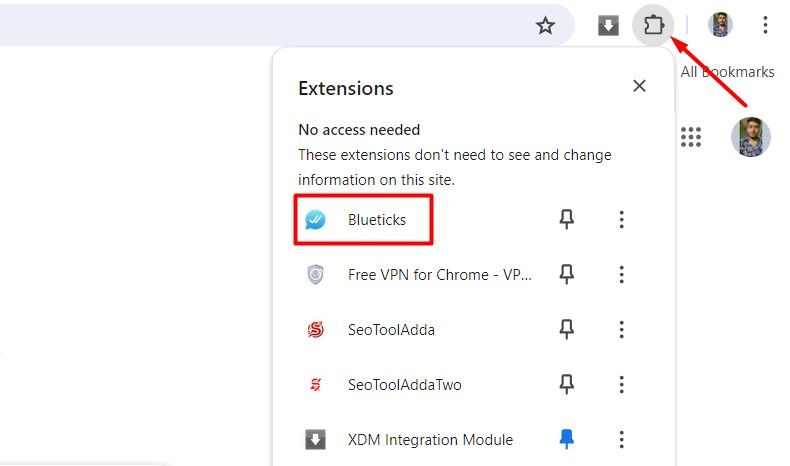
Once the extension is installed, click the extensions icon in the Chrome toolbar and then click “Blueticks.” Create a Blueticks account and log in.
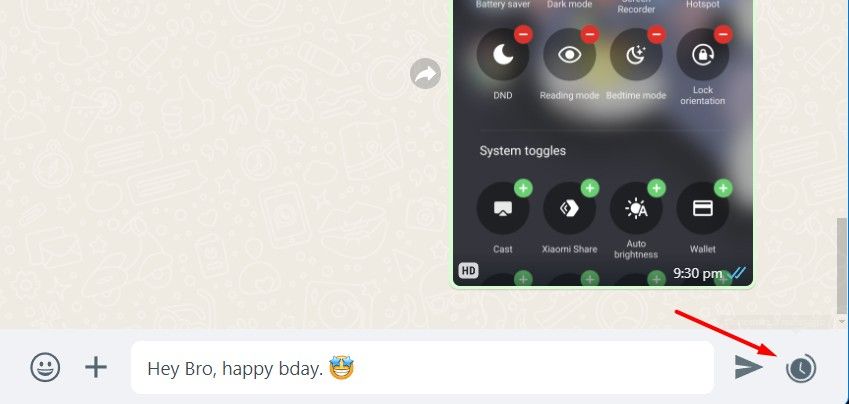
After that, open WhatsApp Web on Chrome and launch the conversation of the person you want to schedule a message for, type the message in the message field, then click the clock icon next to it.
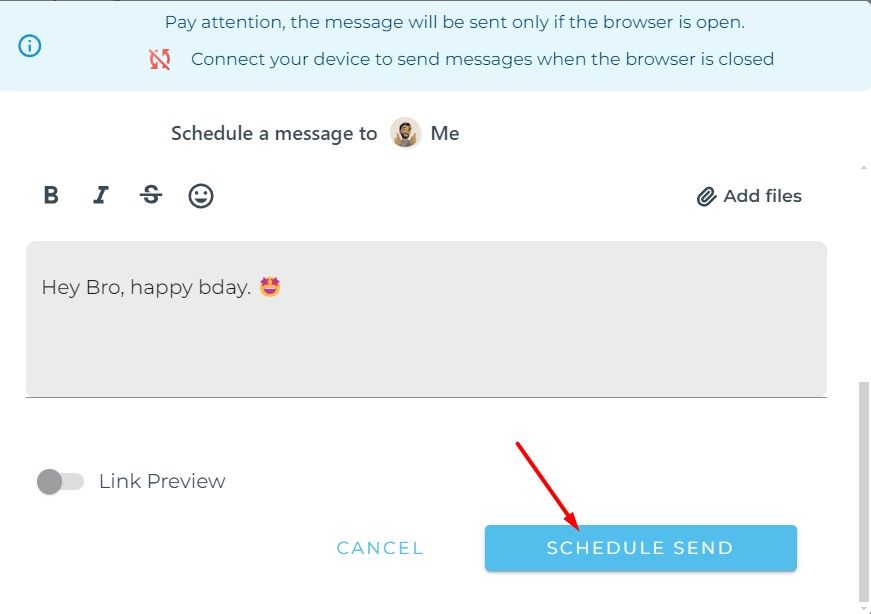
In the Blueticks window that opens, select the date and time for your scheduled message. You can also configure other options that Blueticks offers, like adding files, sending recurring messages, and more. Finally, click the “Schedule Send” option, and your message will be sent at the scheduled time.
WhatsApp competitor Telegram has had the message scheduling feature for a while. So, it’s very likely that this feature will eventually be added to WhatsApp. Until then, you can use the workarounds discussed above to schedule messages on WhatsApp.


