Whether you want to use page numbers to distinguish between a novel’s preface and main body, a dissertation’s introduction and chapters, or a textbook’s content and index, using Microsoft Word’s Section Breaks tool is the way to go.
All the screenshots in this article show non-printing characters, as activating these makes understanding the document’s structure much easier. To create the same setup in your Word document, press Ctrl+Shift+8, or click the pilcrow icon (“¶”) in the Paragraph group of the Home tab on the ribbon.
Let’s say you’ve finished writing an academic paper, and you want to add different page numbering systems to each of the three sections:
- For the introduction (section 1), you want your page numbers to be capitalized Roman numerals (I, II, III…).
- For the main body (section 2), you want the pages to be numbered with Arabic numbers (1, 2, 3…).
- For the conclusion (section 3), you want to use lowercase Roman numerals (i, ii, iii…).
What’s more, at the start of each section, you want the page numbering to restart at 1.

Related
Here’s how you can do this.
Step 1: Insert Section Breaks
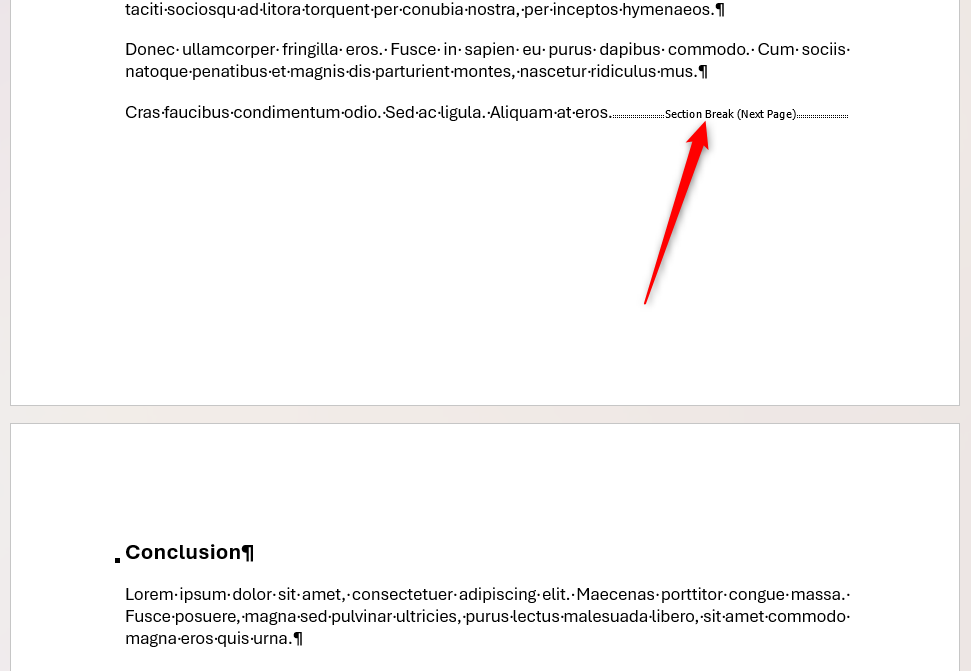
First, there needs to be a Section Break between each section. If you don’t already have these in place, move your cursor to the end of the introduction, and in the Layout tab on the ribbon, click Breaks > Next Page.
This creates a hard barrier between the introduction and the main body, and moves the start of the main body onto the next page.
This process may place an extra empty line at the start of your main body, which you can remove by pressing Delete.
Now, repeat this process at the end of the main body to separate it from the conclusion.
Step 2: Unlink the Sections
At the moment, even though you’ve added Section Breaks between each part of your work, their headers and footers are still linked. This means that if you insert page numbers now, each section’s page numbers will continue from the previous section’s page numbers. So, the next step involves breaking this connection.
In this guide, I’m using the page headers for my page numbers. However, if you want the page numbers to go in the footers, follow the same steps, but any time you see me doing something in the header, do it in the footer instead.
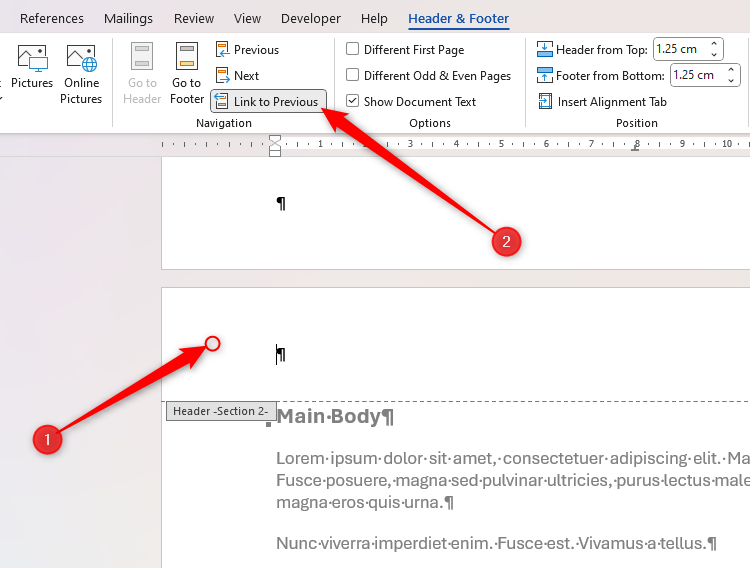
First, double-click the header area of the main body’s first page to activate it, and in the Header And Footer tab on the ribbon, click “Link To Previous” to deselect it.
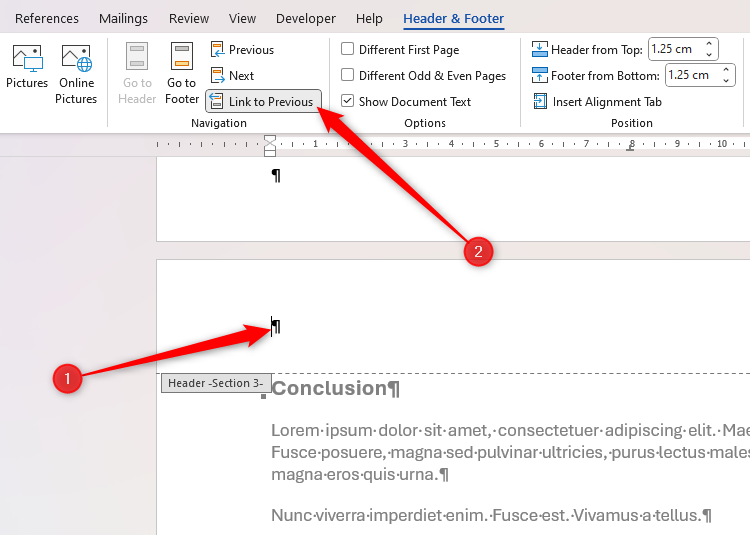
Next, do the same in the header of the first page of the conclusion.
Step 3: Add and Format the Page Numbers
Now that you’ve unlinked each section’s header, it’s time to insert and modify the page numbers.

Related
How to Work with Page Numbers in Microsoft Word
Microsoft Word offers an easy way to add different styles of page numbers to your document.
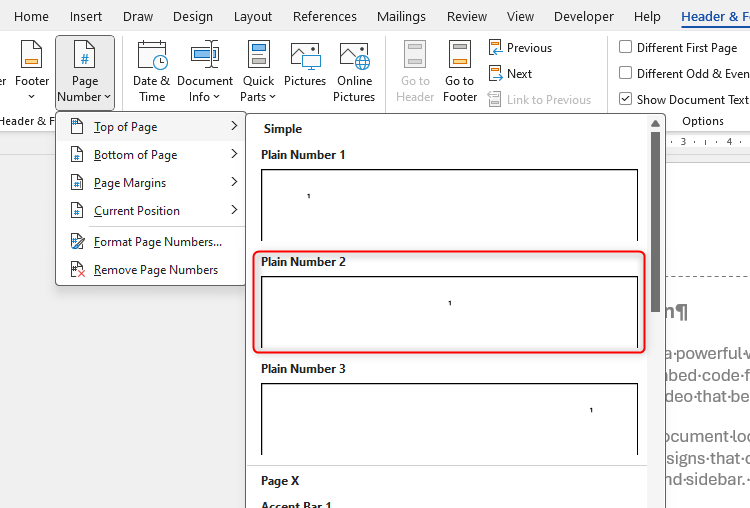
Head back to the start of your document, and double-click the header of the first page of your introduction. Then, in the Header And Footer tab on the ribbon, click “Page Number,” and hover over “Top Of Page” (or “Bottom Of Page” if you’re putting the page numbers in the footer).
There, select the numbering style. Personally, I prefer using the plain, centrally-aligned style.
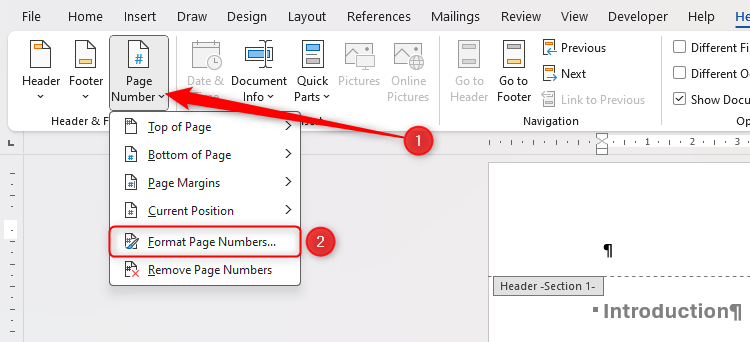
Because you want the introduction’s page numbering to be capitalized Roman numerals, expand the “Page Number” drop-down menu again, but this time, click “Format Page Numbers.”
Then, in the Number Format field of the Page Number Format dialog box, choose “I, II, III…” and click “OK.”
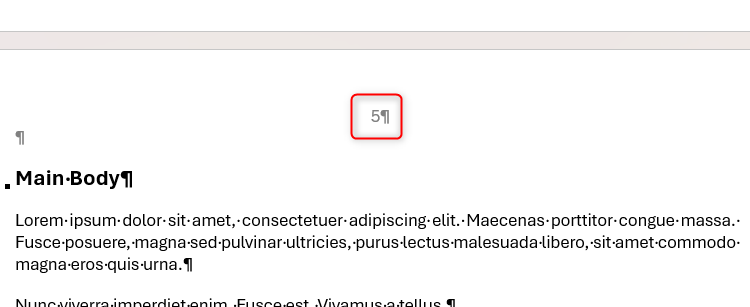
Now, scroll through your introduction to see that each page in this section follows this new numbering format. When you reach the main body, you’ll notice that those pages aren’t numbered, because you unlinked the sections earlier.
So, to add page numbers to this section, follow the same process as when you added page numbers to the previous section:
- Double-click the header of the main body’s first page.
- Click “Page Number” in the Headers And Footers tab.
- Hover over “Top Of Page.”
- Select the number style.
By default, Word uses the Arabic numbering style, which matches what you want to use for the main body of your dissertation. However, you still need to change the settings so that the count restarts at 1.
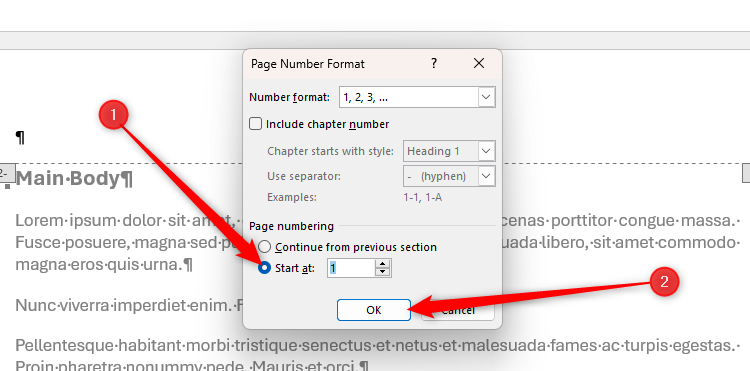
To achieve this, double-click the header of the main body’s first page, and reopen the Page Number Format dialog box via Page Number > Format Page Numbers. Then, in the dialog box, check “Start At” to automatically add the number 1 to the Start At field, and click “OK.”
Now, even though the introduction is numbered using capitalized Roman numerals, the main body (section 2) is numbered with Arabic digits, and restarts at 1.
Finally, you need to change the conclusion’s page numbering to lowercase Roman numerals, and start the count from 1 once again:
- Double-click the header of the conclusion’s first page.
- Click “Page Number” in the Headers And Footers tab.
- Hover over “Top Of Page.”
- Select the number style.
- Click “Page Number” in the Headers And Footers tab again, but this time, choose “Format Page Numbers.”
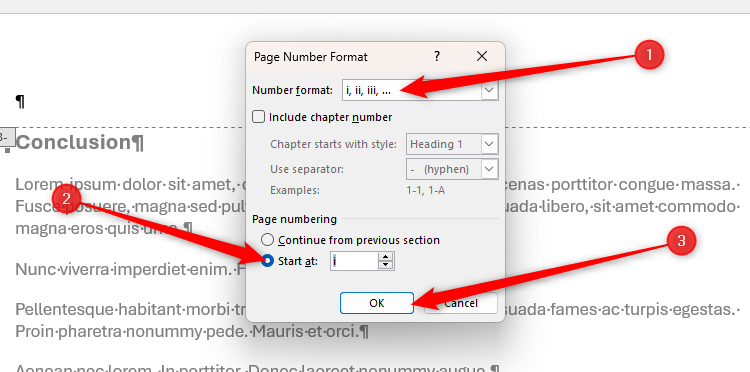
In the Page Number Format dialog box, change the Number Format option to “i, ii, iii,” and check the “Start At” radio button. Then, click “OK.”
Now, the introduction’s pages are numbered I, II, III, and so on, the main body’s pages are numbered 1, 2, 3, and so on, and the conclusion’s pages are numbered i, ii, iii, and so on.
See the page numbers at a glance in Word’s Navigation Pane, which you can display by checking “Navigation Pane” in the View tab on the ribbon, and then clicking “Pages” in the pane itself.


