Margins are the unused areas between the edge of the document and the starting or ending position of the content. Depending on what type of paper you’re using or document you’re creating, you’ll want to adjust the margins accordingly. There are two ways to get this done in Google Docs.
Change margins using the ruler
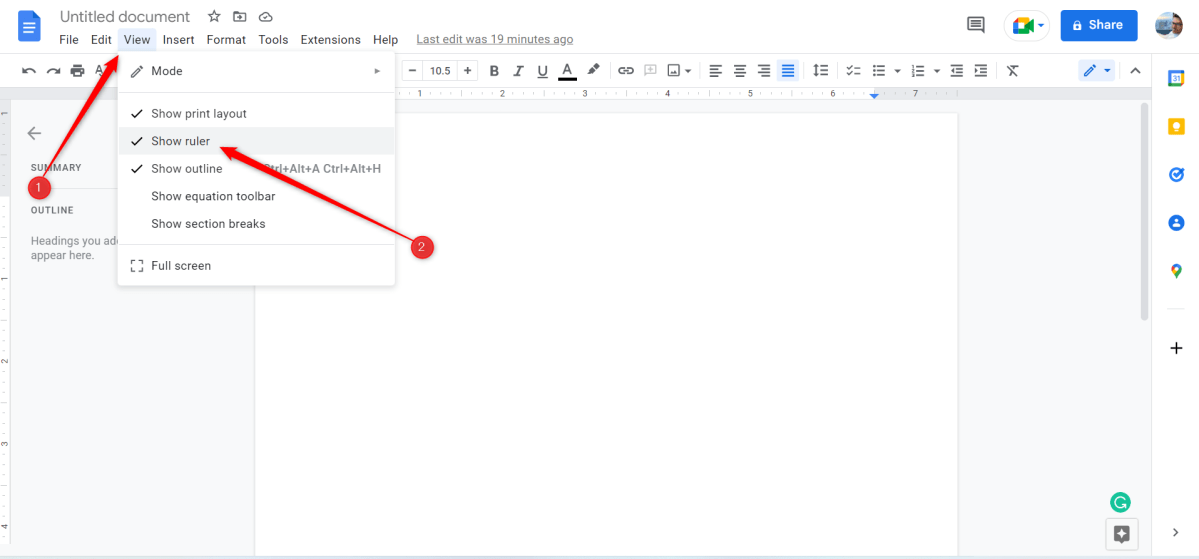
The quickest and easiest way to adjust the margins in Google Docs is by using the ruler below the menu bar. If you don’t see the ruler, you can display it by clicking “View” in the menu bar and then selecting “Show Ruler” from the drop-down menu.

You can show the ruler by selecting it in the drop-down menu.
Brad Chacos
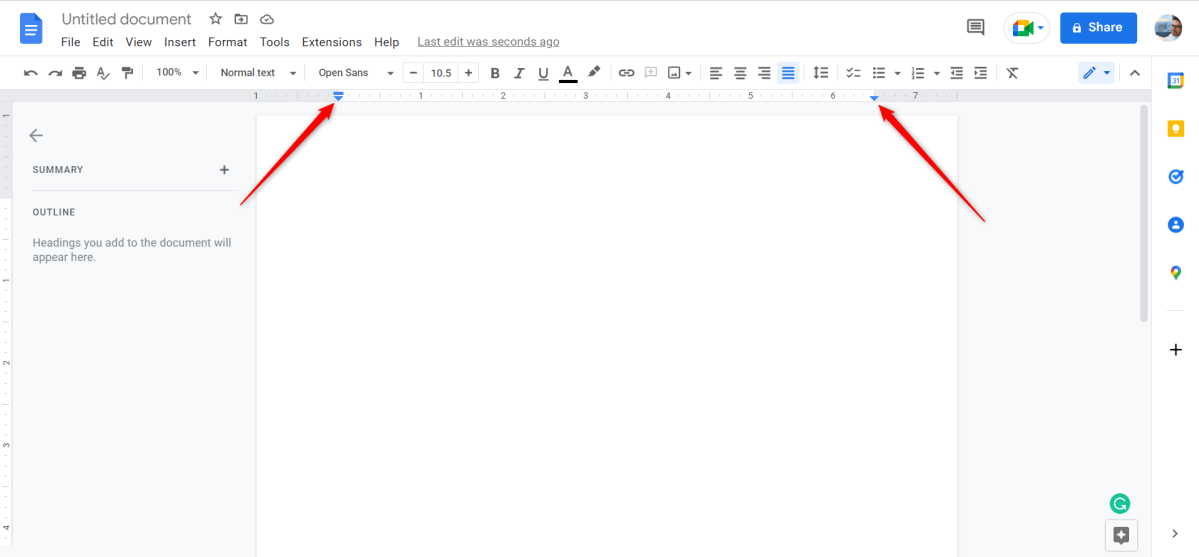
To the left of the ruler, you’ll see a blue line with a blue triangle underneath. To the right, you’ll only see a blue triangle. The blue line is the first line indent, which is used for things such as creating a hanging indent. You won’t be using the blue line to adjust the margins.
The blue arrows are the left page indent and the right page indent. To adjust the page indent, just click and drag the blue triangle to the desired position.

You can adjust the page indent by clicking and dragging the blue triangle.
Brad Chacos
That’s all there is to it.
Change margins using page setup
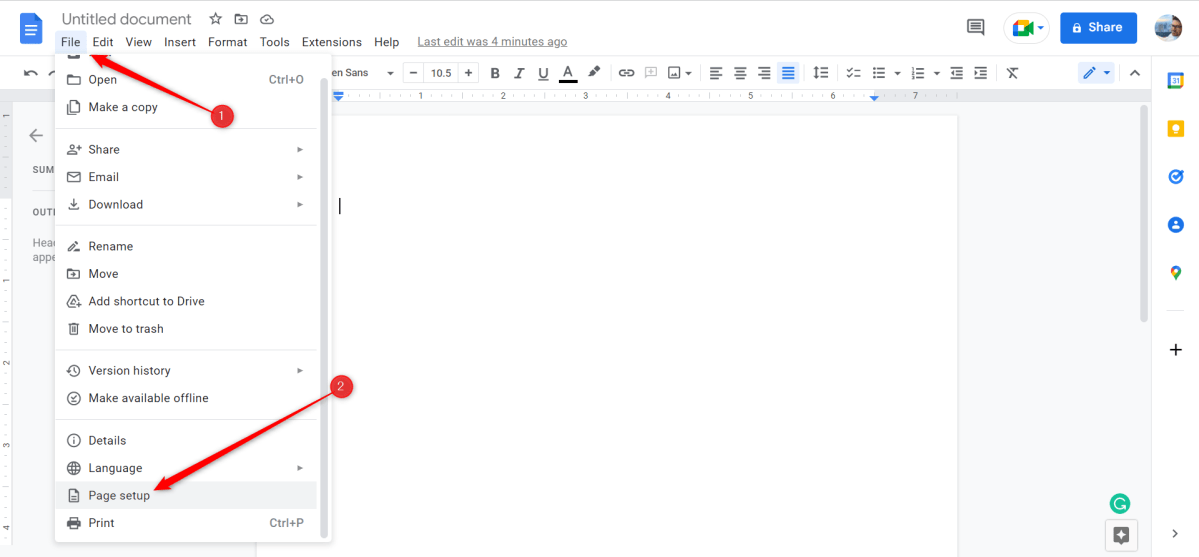
If you require a bit more fine-tuning than what the ruler offers, you can adjust your margins using Page Setup. To access this feature, click “File” in the menu bar and then select “Page Setup” near the bottom of the drop-down menu.

You can open the “Page Setup” options under “File” in the menu bar.
Brad Chacos
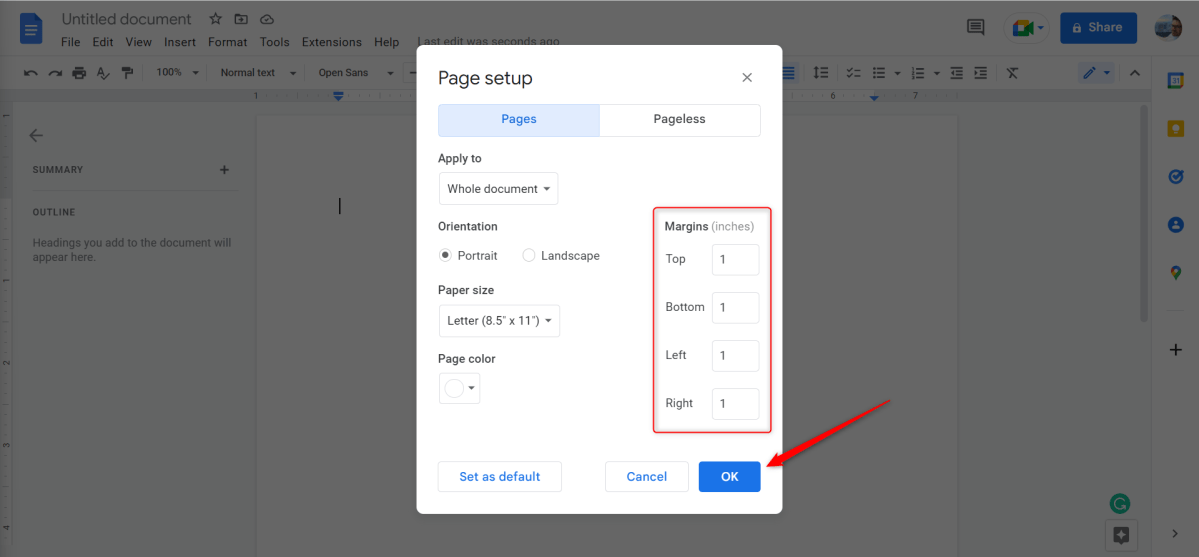
The Page Setup window will appear. You’ll see the “Margins” group to the right. Change the page margins by adjusting the numbers in the boxes. Press “OK” once done.

Page Setup allows for more fine tuning of margins.
Brad Chacos
Your page margins are now set.


